
My first real tool organization moment was when I pulled a tangled bin of cables out of a closet and realized I could not find a single screwdriver when I needed one. I built a pegboard that weekend and suddenly fixing not-fancy-but-necessary things felt possible again. Those small wins add up and make a house feel like it works for you.
These ideas lean practical-meets-friendly, mostly budget conscious with a few splurge pieces around $75 to $150. They work for garages, mudrooms, laundry rooms, small apartments, and the awkward corner of a home office.
Rustic Garage Pegboard For Easy Access

The moment I hung a framed pegboard in my garage everything felt within reach. A framed pegboard reads tidy because the wood trim makes it look built-in, not slapped on. It works in a rustic or farmhouse garage and costs under $50 for the board and trim. I like to group wrenches by size and keep an 80/20 rule, meaning 80 percent of daily tools take up 20 percent of the space nearest the bench. Common mistake is overcrowding the board. Leave negative space so you can see gaps and know what is missing. Try a wall pegboard kit with a wooden frame for a finished look.
Mudroom Mason Jar Station For Small Parts
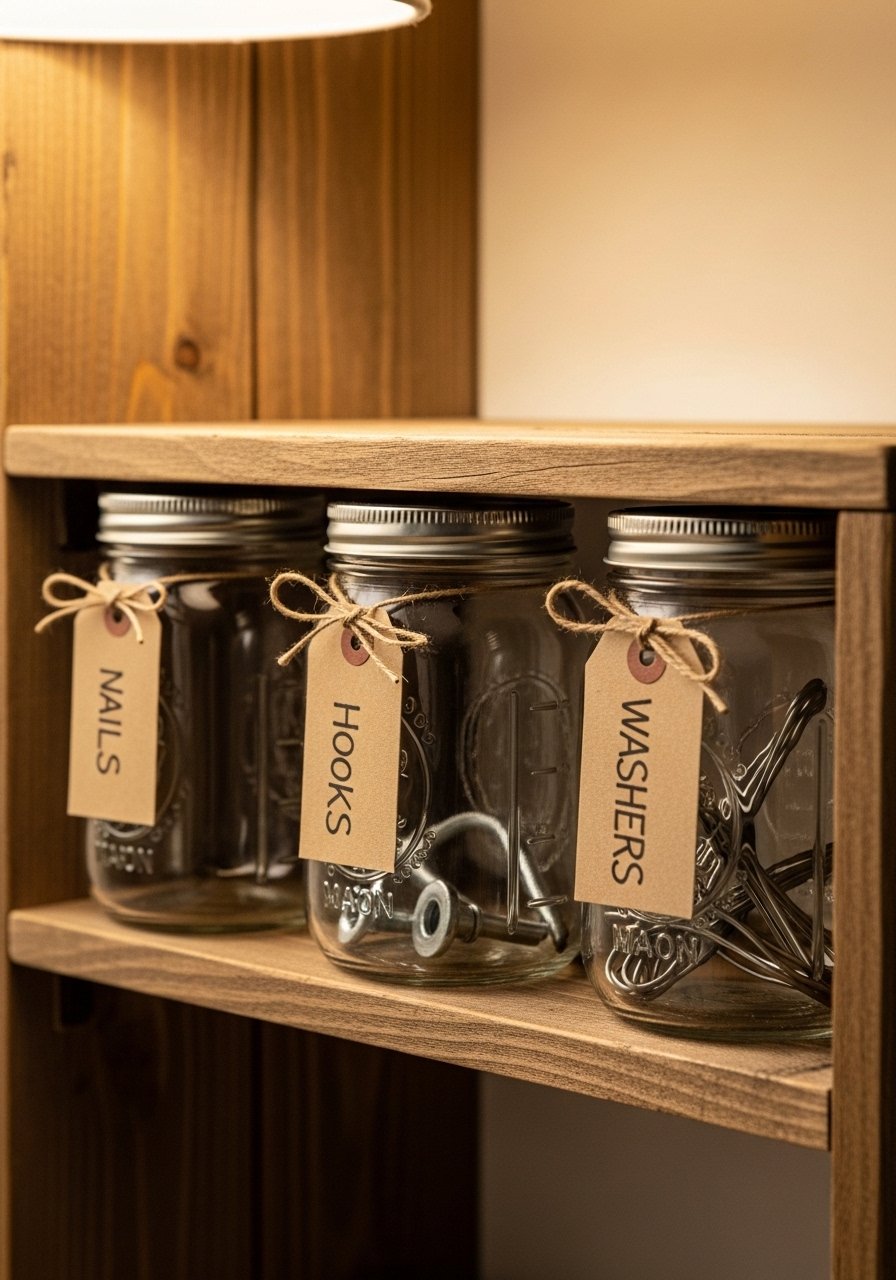
I use mason jars on a painted slat in our mudroom for nails, hooks, and tiny bits. It reads homey and makes small parts visible, so you stop dumping everything into one drawer. Budget is under $25 if you already have jars. Drill the lid with a 1-inch hole, screw it to the board, and twist jars on and off. A rookie mistake is using clear tape labels that peel; instead write on kraft tags or use a label maker for durability. A practical measurement: space jars every 3 inches for standard 8-ounce mason jars. Grab wide-mouth mason jars set if you do not have them.
Minimalist Magnetic Tool Strip By Workbench

Magnetic strips are the lazy genius of tool storage. They keep flat tools visible and off the bench so you can clear your workspace in 30 seconds. The look is modern-minimalist and works for a built-in bench or a small apartment corner. Budget is $15 to $40. One common mistake is relying on a single weak strip for bulky items. Use multiple strips or a heavy-duty magnetic bar rated for at least 10 pounds. I put the strip 4 to 6 inches above the bench top so tools sit at my hands, not over my head. Try a heavy-duty magnetic tool bar.
Vertical PVC Pipe Holders For Long Tools
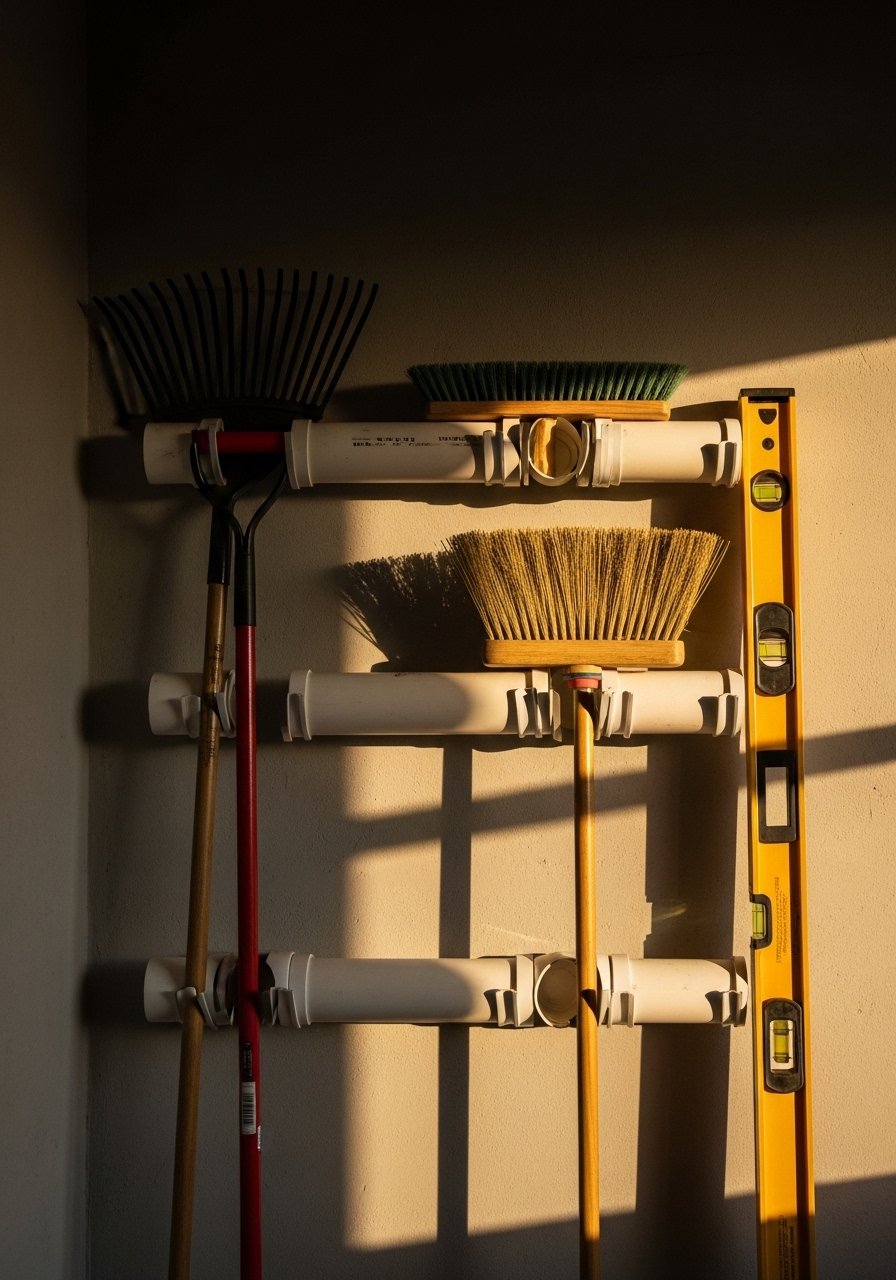
Long-handled tools love vertical storage. I cut 4-inch PVC pipe into 6-inch lengths and glued them to a painted board. Each pipe holds one handle, and the result is pleasingly uniform and cheap. This works in a garage, shed, or porch and costs under $20 for materials. People cram multiple handles into one holder and then everything slips out. Use one pipe per tool, spaced about 4 inches apart. A small detail I learned is to bevel the top inch of each pipe so handles slide in smoothly. 1.5-inch PVC pipe is what I used for light garden tools.
Upcycled Pallet Tool Wall For Rustic Shed
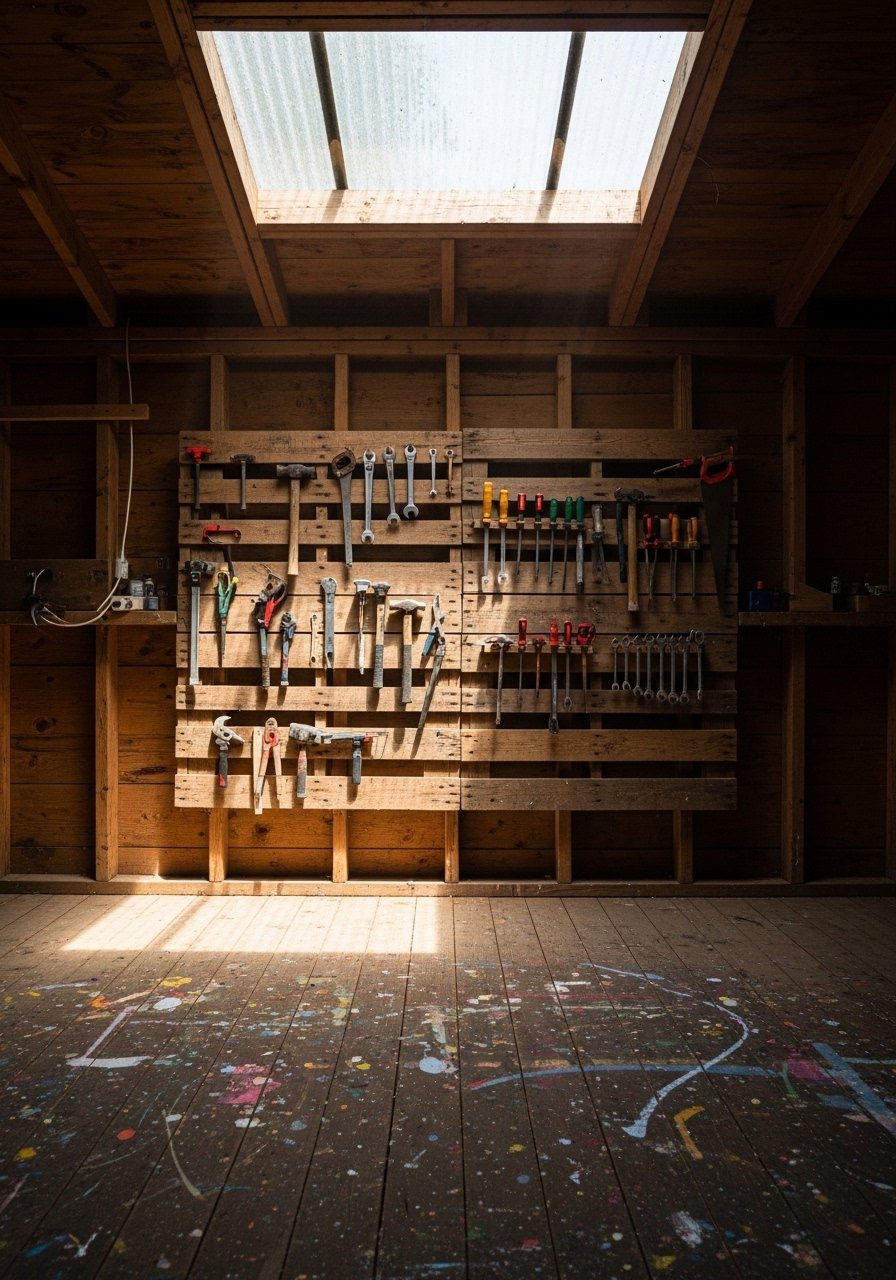
I love upcycling and a pallet becomes an excellent rustic tool wall with minimal work. Sand it, nail on a few hooks, and you have an instant visual statement that holds hammers, hand saws, and clamps. The vibe is vintage and casual, perfect for a backyard shed and very budget friendly. Mistake to avoid is leaving rough splinters. Sand and seal the pallet, then add rubber feet to hanging hooks to protect tool handles. Plan hook spacing at roughly 6 to 8 inches for medium tools. Pair this with industrial wall hooks set.
Rolling IKEA Hack Cart For Compact Storage
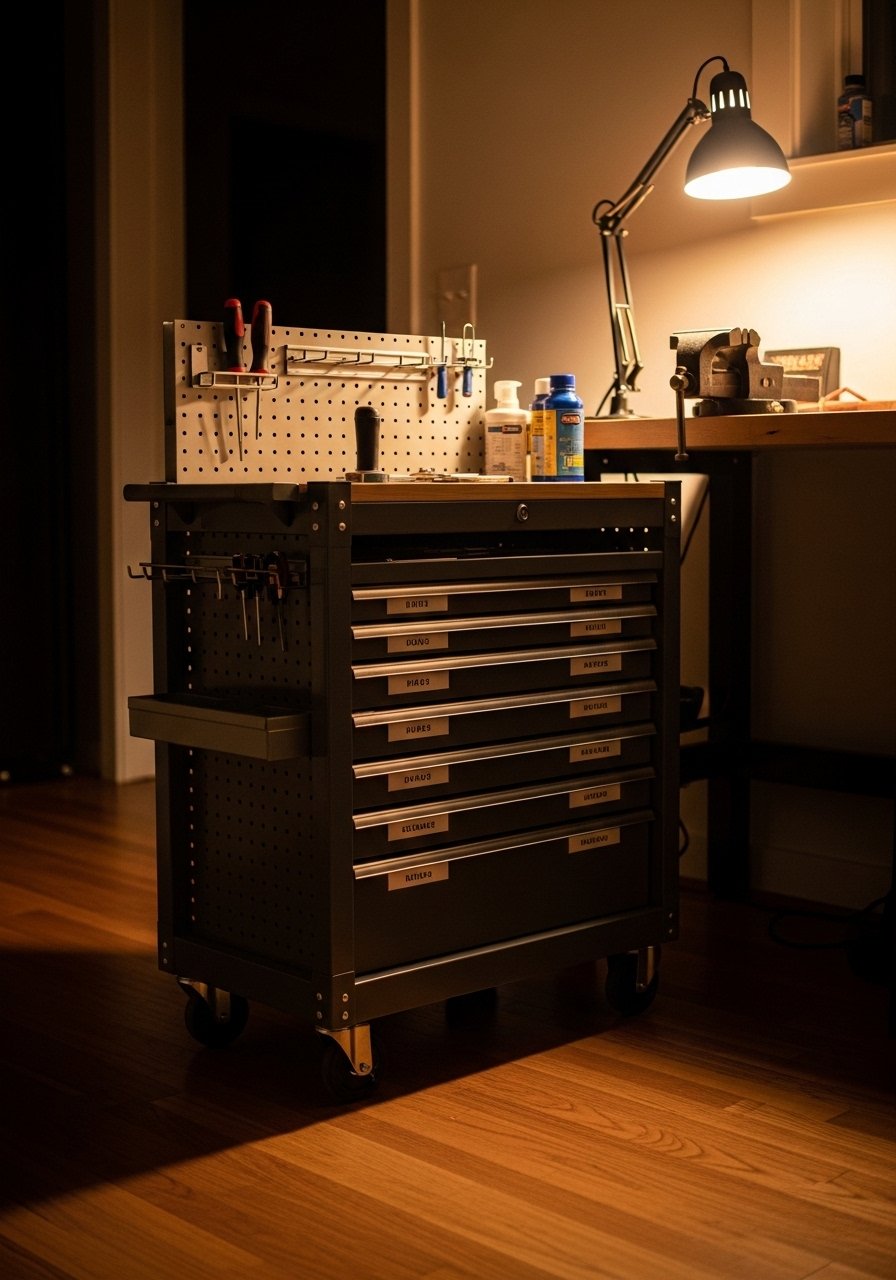
If you do not have a dedicated garage, a rolling cart saves space and looks intentional. I hacked a simple cart with pegboard sides and added magnetic strips inside the top drawer. It works in a home office, laundry room, or closet and runs about $60 to $120 depending on the cart. Mistake is adding too many tools to a cart and making it top-heavy. Keep heavier items on the bottom shelf and add caster brakes. I recommend locking casters and dividing the top tray into thirds for quick sorting. Start with a three-tier utility cart.
Floating Shelf With Labeled Bins In Laundry Room
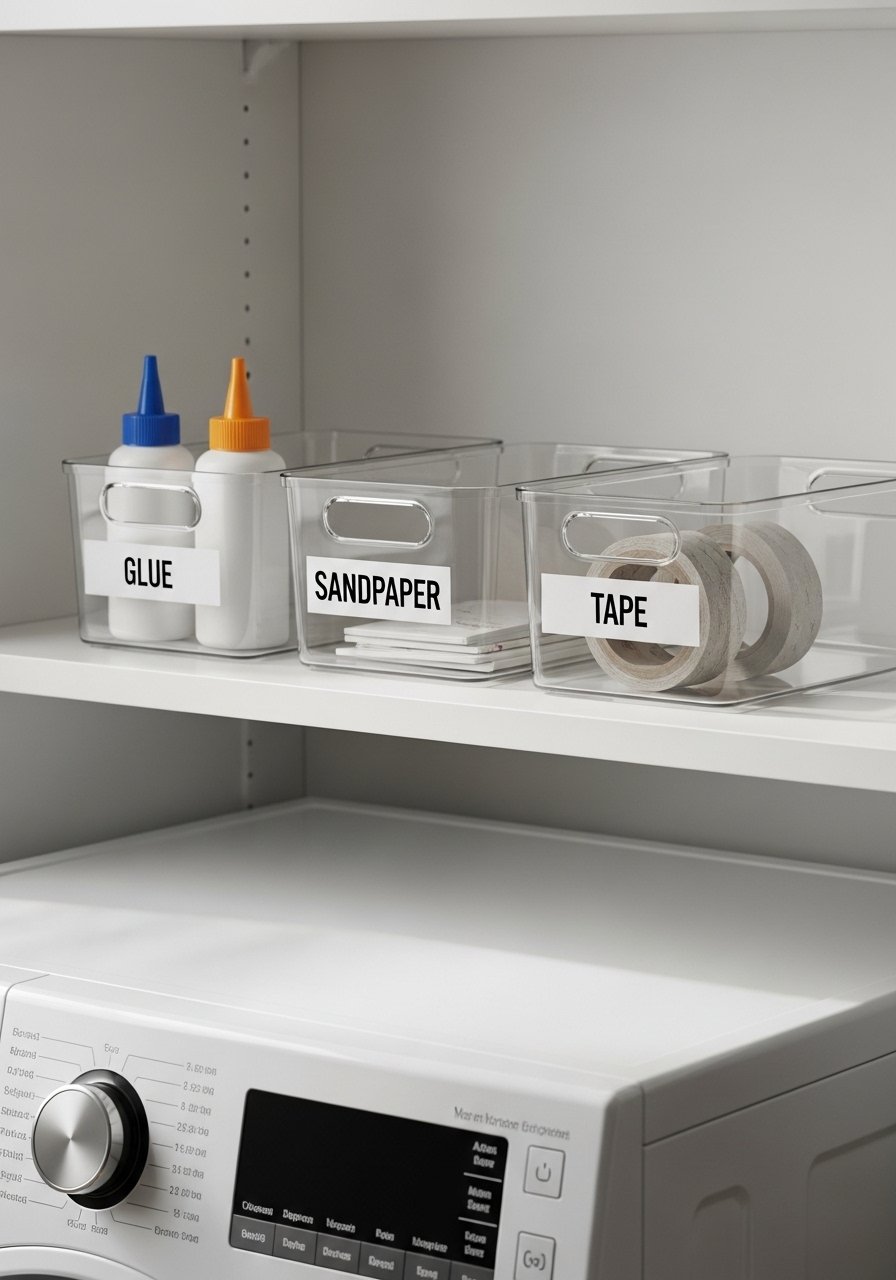
A floating shelf with clear bins keeps project supplies near the washer for quick fixes. It sounds domestic but it is surprisingly handy for DIY bits. Works well in a laundry room or small hallway and costs around $30 to $60. People shove random small tools into open baskets so nothing is visible. Use clear bins and label the lid edge so you can scan contents at a glance. A useful rule is to use bin sizes of 6×8 inches for small hardware and 12×8 inches for paint primers and glues. I like clear stackable storage bins.
Pegboard Picture-Ledged Display In Home Office
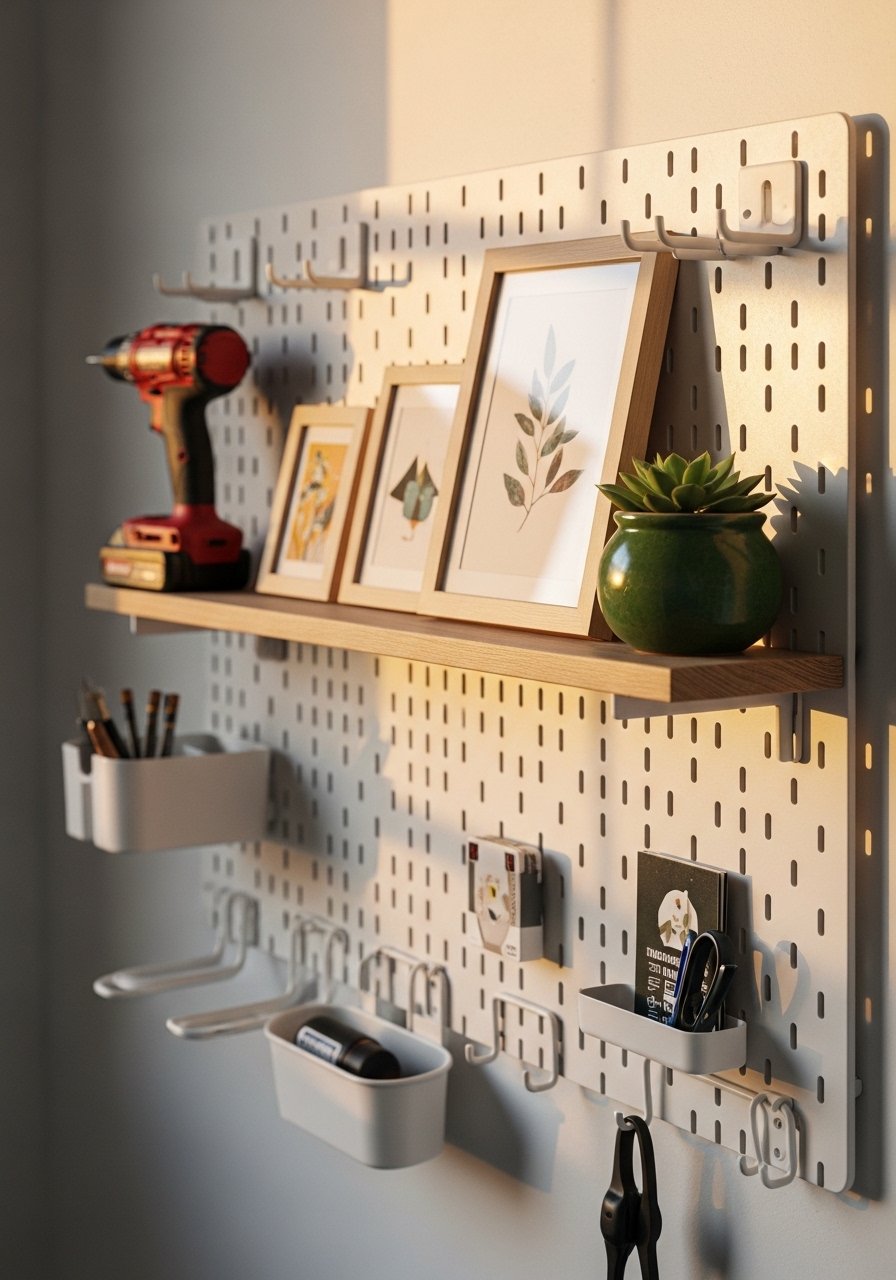
I built a pegboard in my home office and used picture ledges to hold small framed instructions, a compact drill, and a plant. It keeps tools styled rather than industrial. The look is modern-rustic and fits that awkward corner where I sometimes fix things between Zoom calls. Budget is $40 to $80 depending on frame choices. A mistake is making the ledge too narrow. Aim for at least 3 inches depth so small tools do not tip. If you want the drill visible but out of the way, mount a 5-inch shelf and secure with a bungee cord. Try small picture ledges.
Hanging Garden Tool Rack For Porch
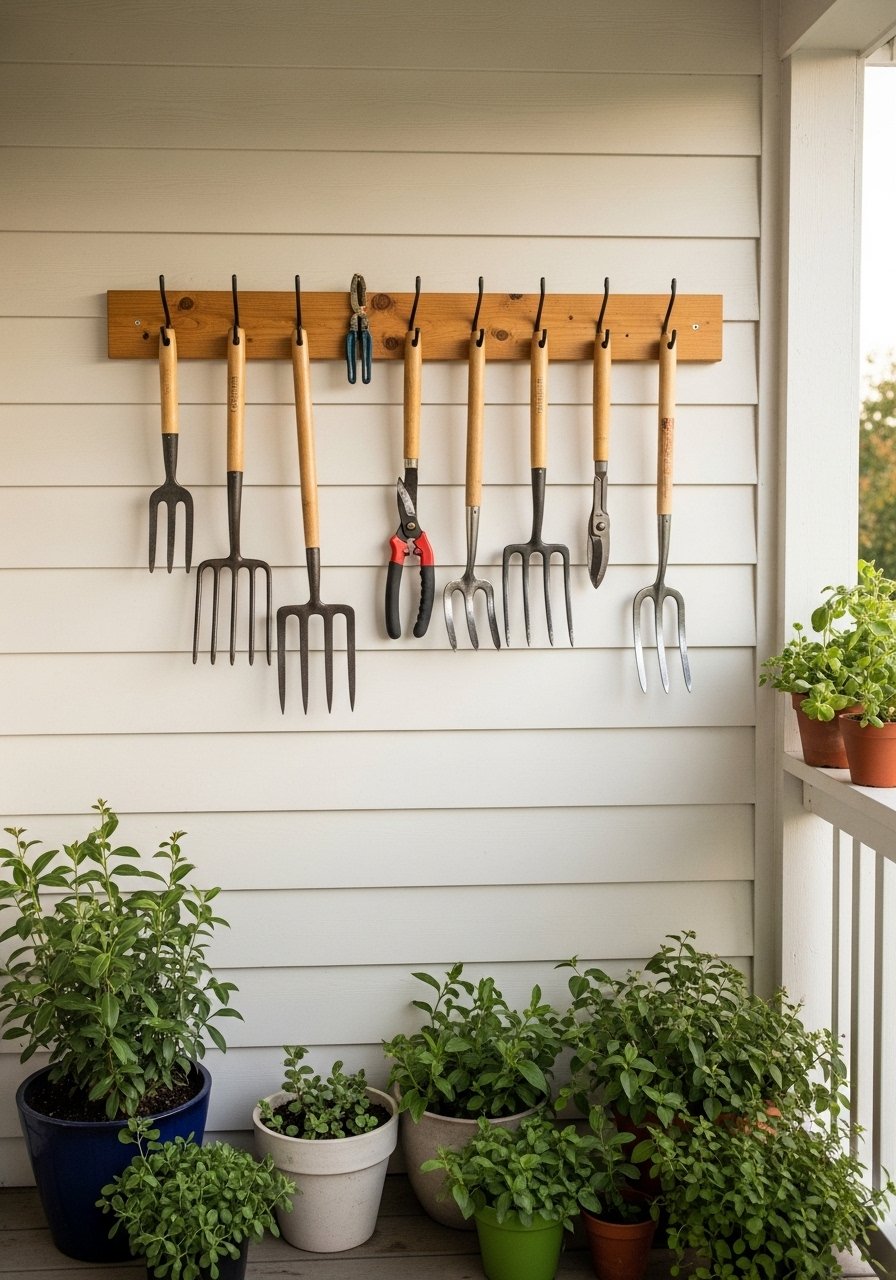
Garden tools are a pain when they live in a pile. A horizontal rack with S-hooks keeps them off the floor, dries them faster, and looks tidy. This is ideal for a porch or potting bench and costs under $40. People position the rack too low and tools scrape the floor. Mount it so the bottoms hang 6 inches above the ground. A trick is to stagger hook heights by 3 inches to make handles sit without colliding. A galvanized S-hook pack is my go-to.
Repurposed Cabinet Door Organizer For Screwdrivers
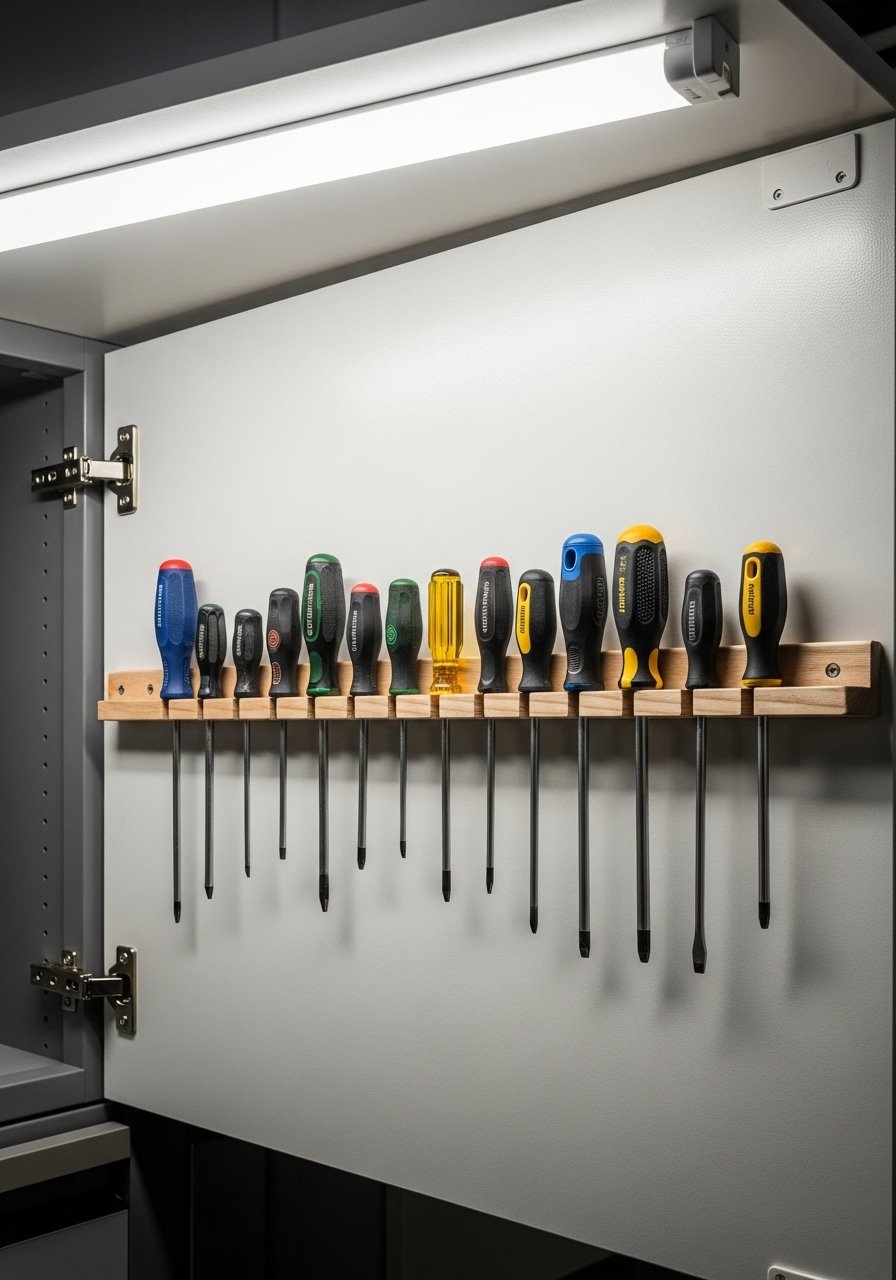
Cabinet doors hide things well. I salvaged an old cabinet door and drilled holes at an angle to store screwdrivers and small chisels. It keeps tools accessible and out of sight, which is great for a shared living space. Cost is minimal if you reuse materials. Mistake is drilling vertical holes straight through the door without angle; tools fall out. Drill at roughly a 10-degree angle so handles peg in. Spacing of 1.5 inches between holes fits standard screwdriver shafts. For a polished touch try wood drill bit set.
Wall-Mounted Power Tool Cradles For Clean Storage
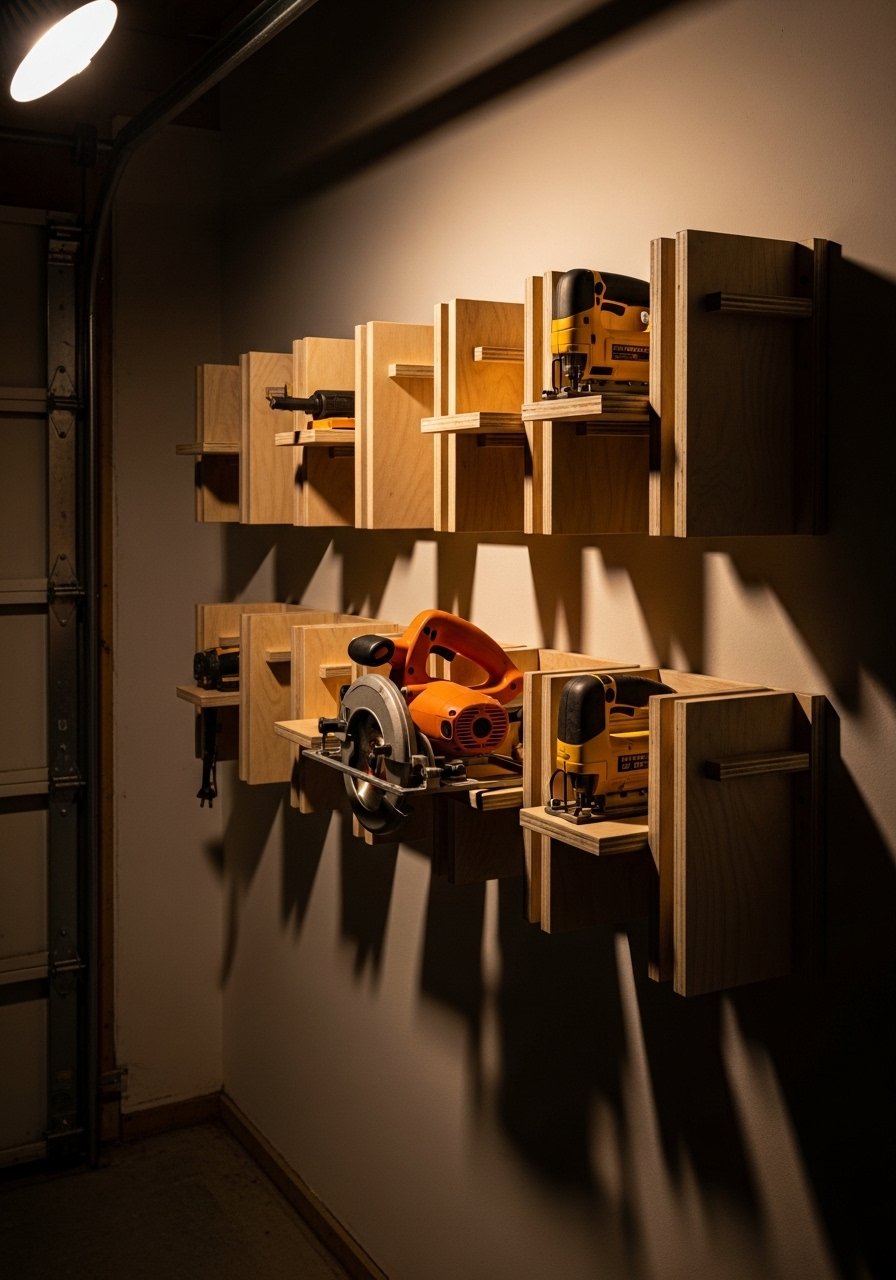
Power tools need sturdy homes. I cut plywood cradles shaped to each tool and screwed them to the wall. It keeps weight off shelves and the tools sit at a safe angle. This feels professional and works in a garage or basement shop. Budget is $10 to $30 for plywood and screws. Do not hang heavy tools on small nails. Use 2.5-inch screws into studs and add foam strips where blades might contact wood. Measure cradle depth to match each tool's base, usually 4 to 6 inches. A 3/4-inch plywood sheet was what I used.
Ceiling Storage Grid For Seasonal Tools
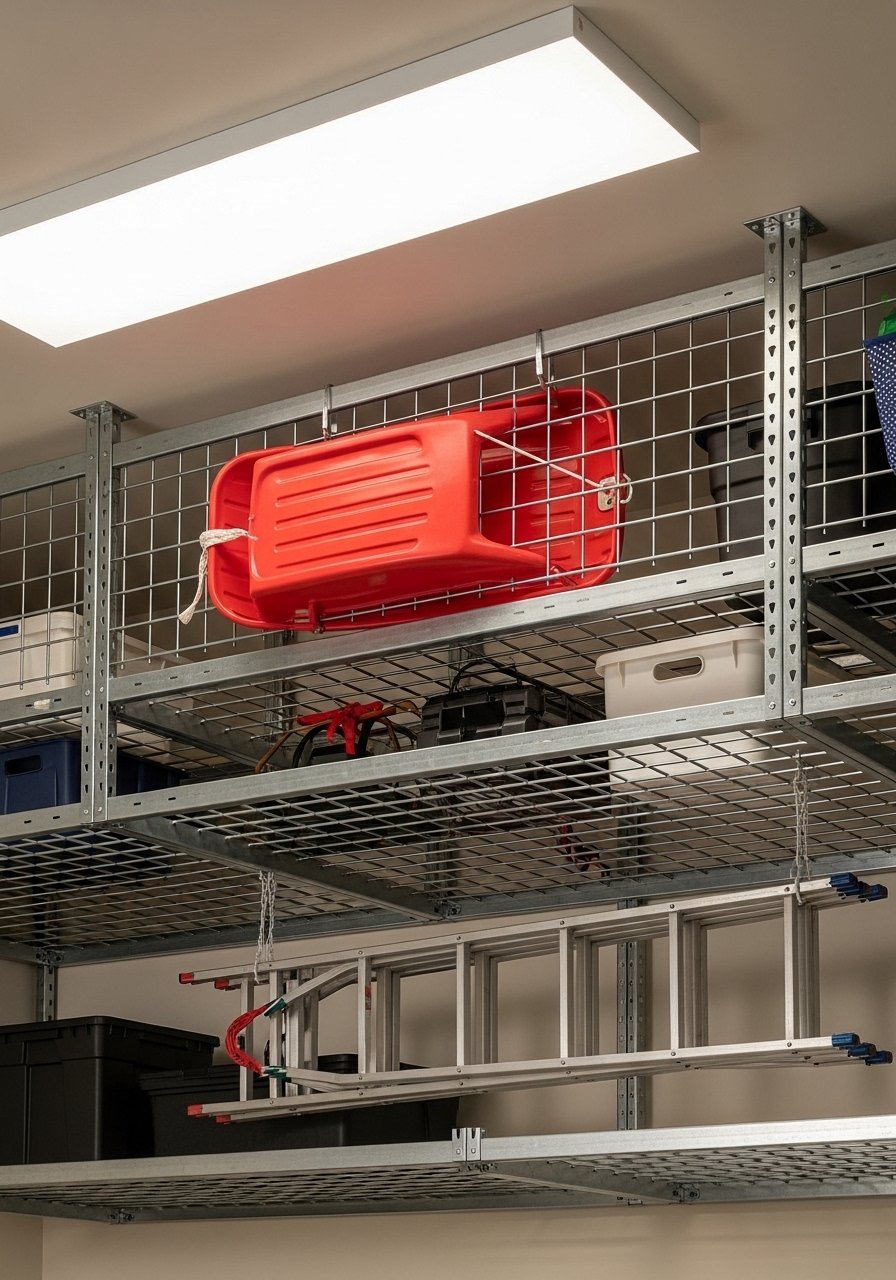
If floor space is precious, look up. I installed a ceiling grid for rarely used items like snow shovels and ladders. It keeps clutter out of the way without making the floor feel crowded. This is slightly more advanced and budget ranges $40 to $120. A mistake is overloading the grid. Keep total weight under the rated load and distribute items evenly. A simple guideline is to keep boxes under 30 pounds each and use two attachment points. Overhead storage racks are available for different ceiling joist patterns.
Magnetic Socket Tray Under Workbench Drawer
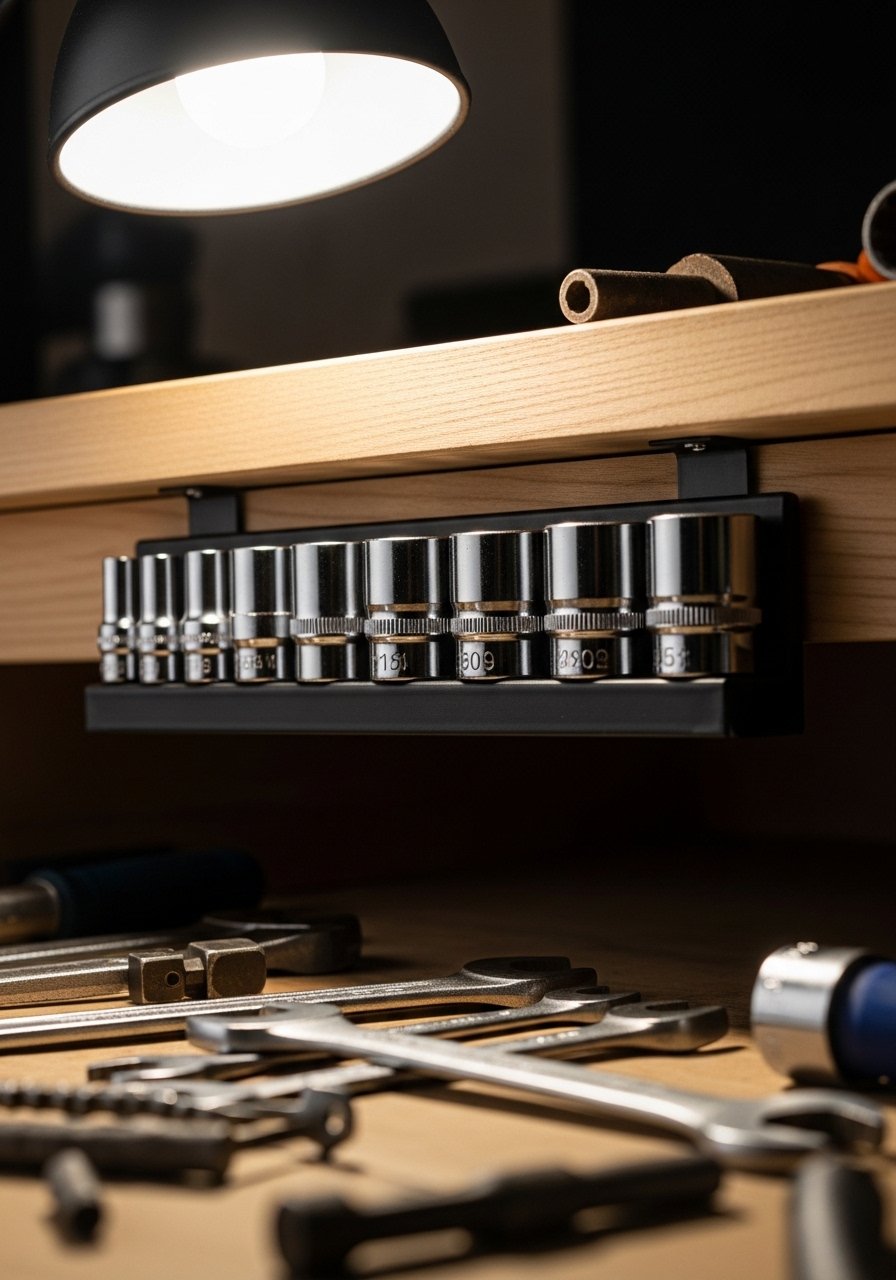
I stuck a thin magnetic tray under my drawer to keep sockets from rolling into a black hole. It is a tiny change that saves ten minutes of hunting per project. This trick is cheap, about $10 to $25, and perfect for a workshop drawer. Mistake to avoid is using a weak magnet that loses grip. Pick one rated for tool storage and test with the heaviest socket you own. A detail I use is lining the drawer bottom with non-slip rubber and mounting the tray 2 inches from the drawer front for easy reach. Try thin magnetic trays.
Slatwall Small-Parts Organizer For Hobby Room
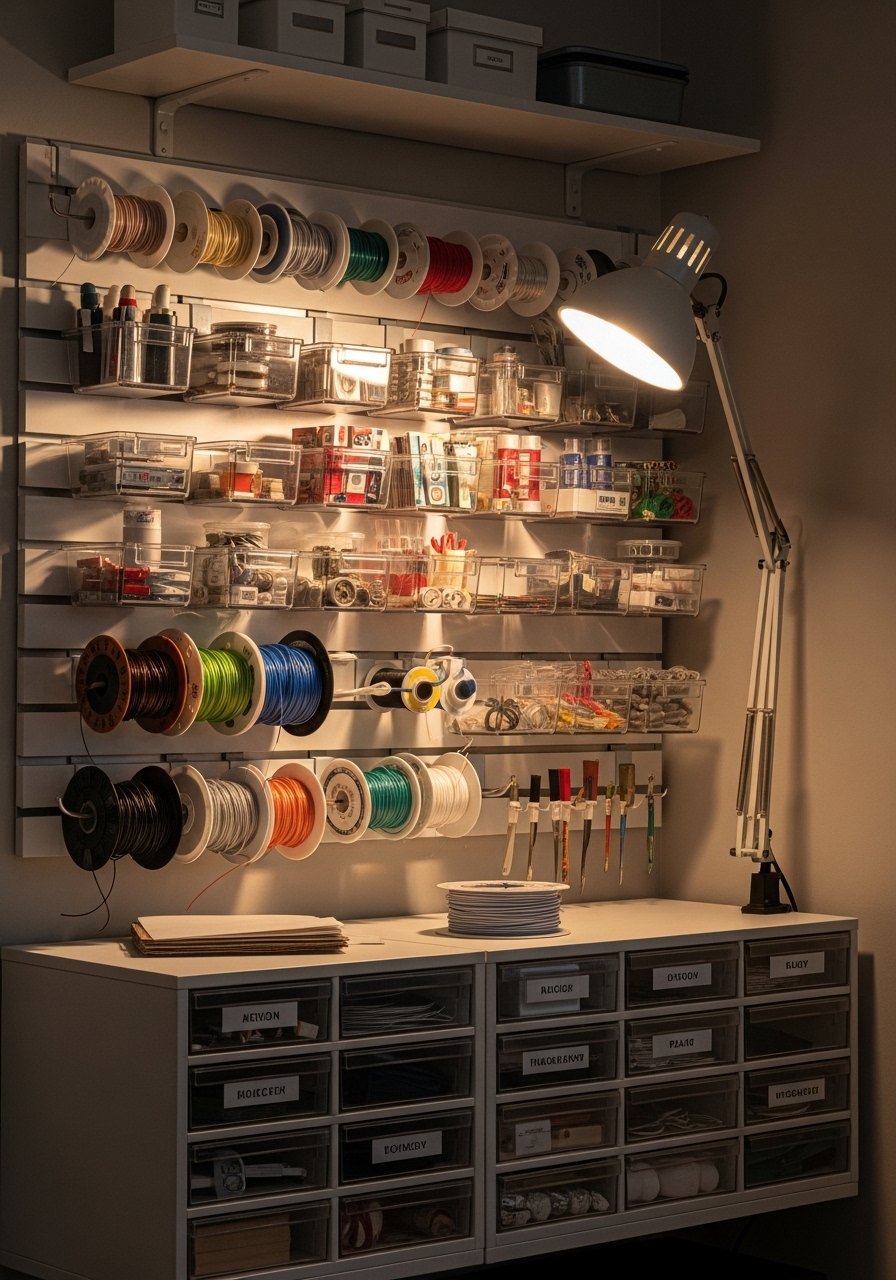
Slatwall panels are underrated for hobbyists. Clear bins slide into the slats and you can see beads, screws, or paint tubes at a glance. It works in craft rooms or model shops and costs $40 to $120 depending on panel size. A common mistake is overstuffing clear bins until nothing is visible. Keep each bin to one category and use a thin ruler to keep labels aligned. A spacing tip is to use 2-inch deep bins for tiny parts and 6-inch bins for medium tools. I recommend slatwall panel kits.
DIY Foam Tool Inserts For Drawer Organization
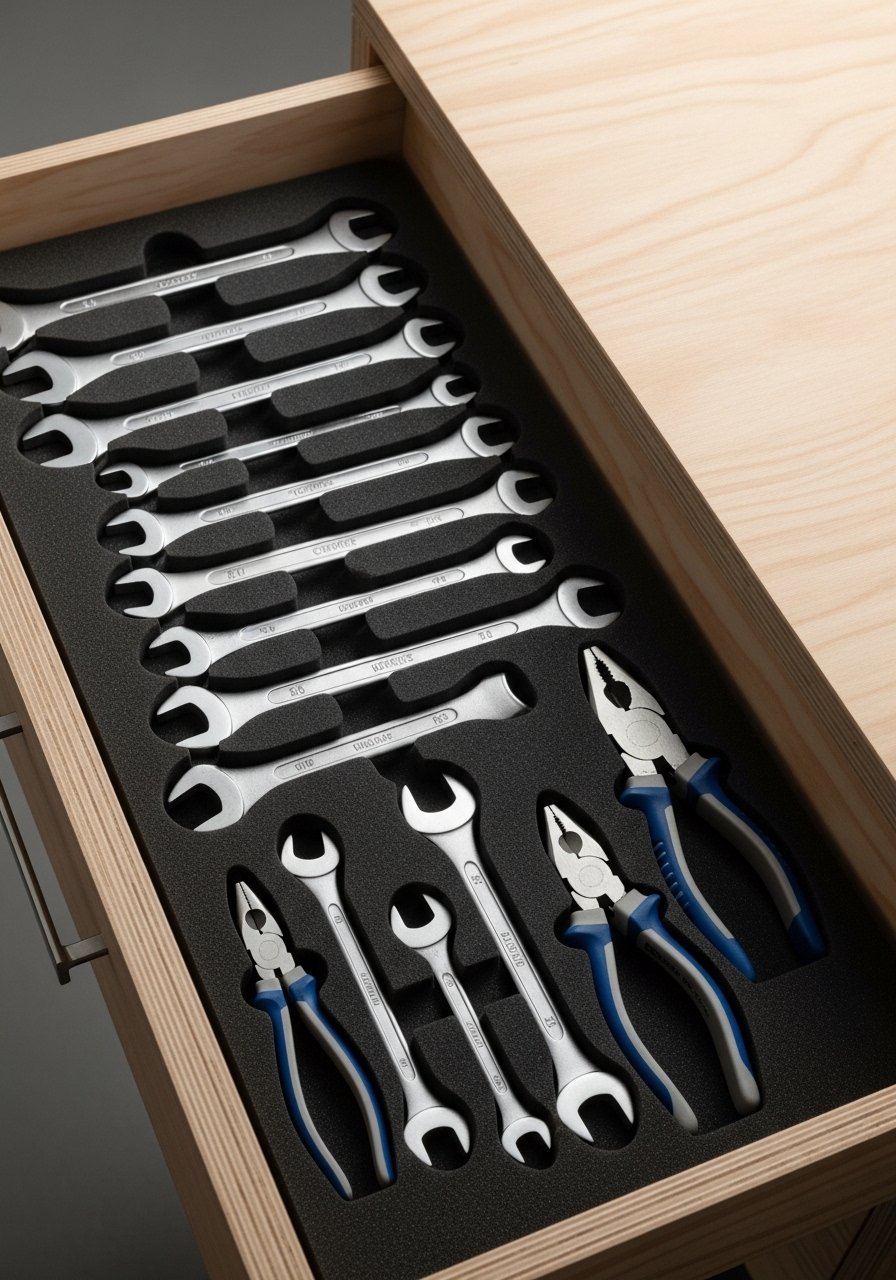
Custom foam inserts make drawers feel like a pro mechanic's and they protect delicate tools. I traced each tool on craft foam and cut inserts with a serrated blade. It fits in a kitchen drawer or a small workbench and costs $15 to $40. The usual mistake is using foam that is too thin. Use at least 1-inch thick foam for hand tools. A specific detail: cut 1/8-inch spacing between items so they seat easily but do not rub. High-density foam sheets are ideal.
Pegboard Tool Map For Visual Inventory
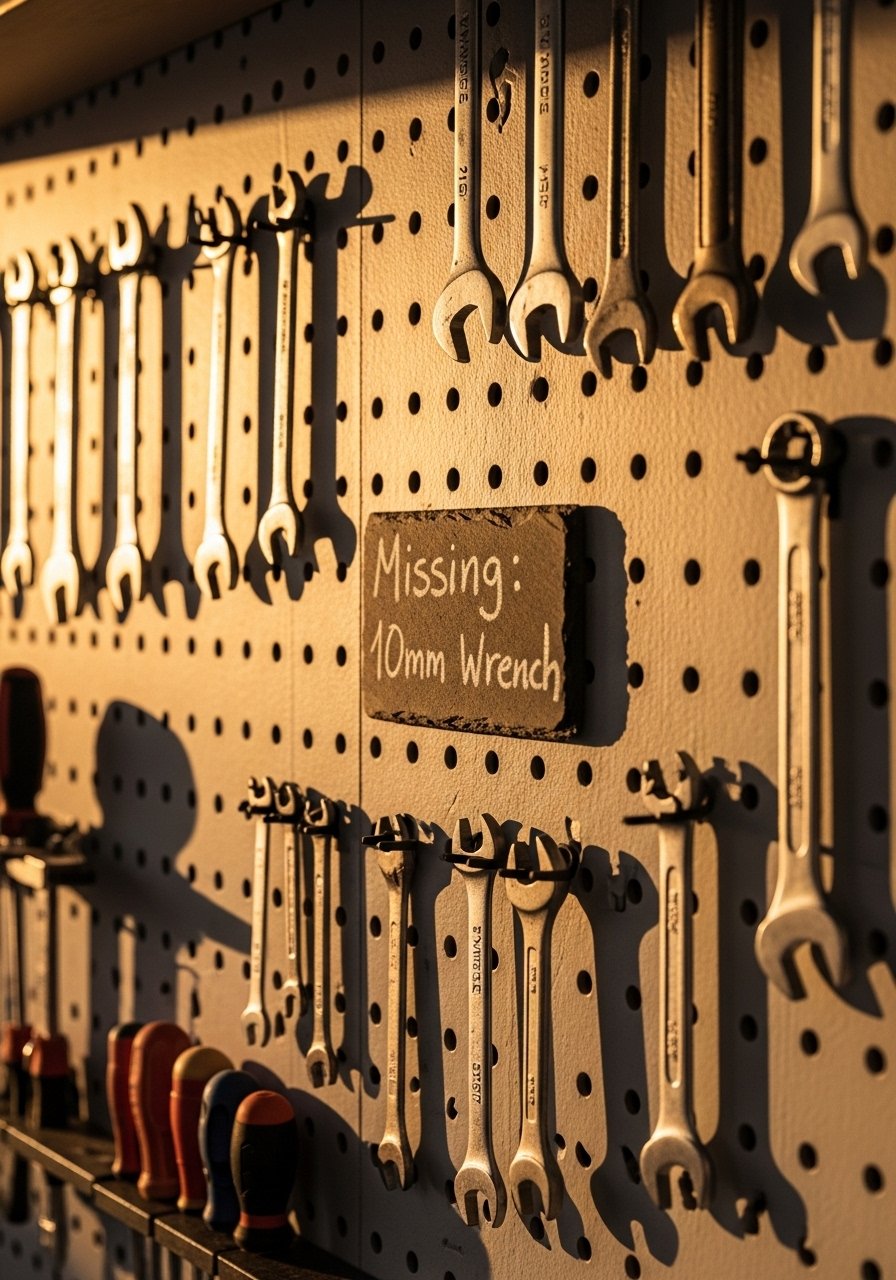
I outline each tool on the pegboard with a paint pen so I always know what is missing. It makes your tool wall a visual inventory and stops the "where did that go" game. It reads organized and is helpful in shared workshops. Budget is minimal, under $20 for a paint pen and tape. Mistake is outlining with the wrong color that fades. Use a high-contrast permanent paint marker and label the outline with tool sizes if relevant. A detail I use is drawing the outline 1/4 inch away from the hook so you can lift without rubbing the paint. Try a permanent paint marker set.
Copper Pipe Hanging System For Vintage Vibe
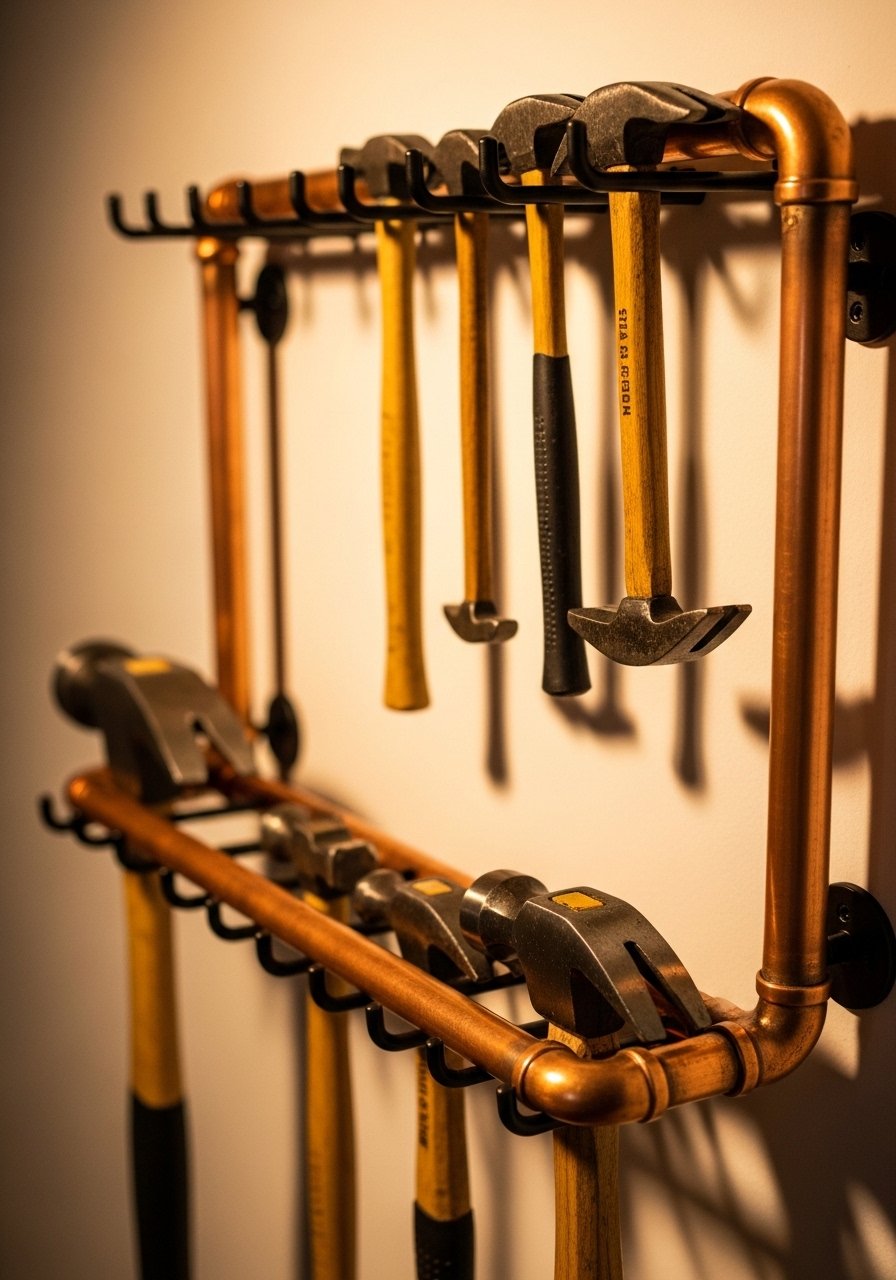
Copper piping offers a stylish, industrial look while being functional. I cut and flanged short sections to hang hammers and small saws. It gives a vintage-modern vibe in a basement workshop or entry mudroom. Expect about $40 to $80 for pipe and mounting. People make the rack too shallow so tools fall forward. Make the pipe depth at least 3 inches for hand tools. I like to polish the copper lightly and seal it so fingerprints do not show. 1/2-inch copper pipe fittings fit this idea.
Compact Folding Workbench For Small Apartments
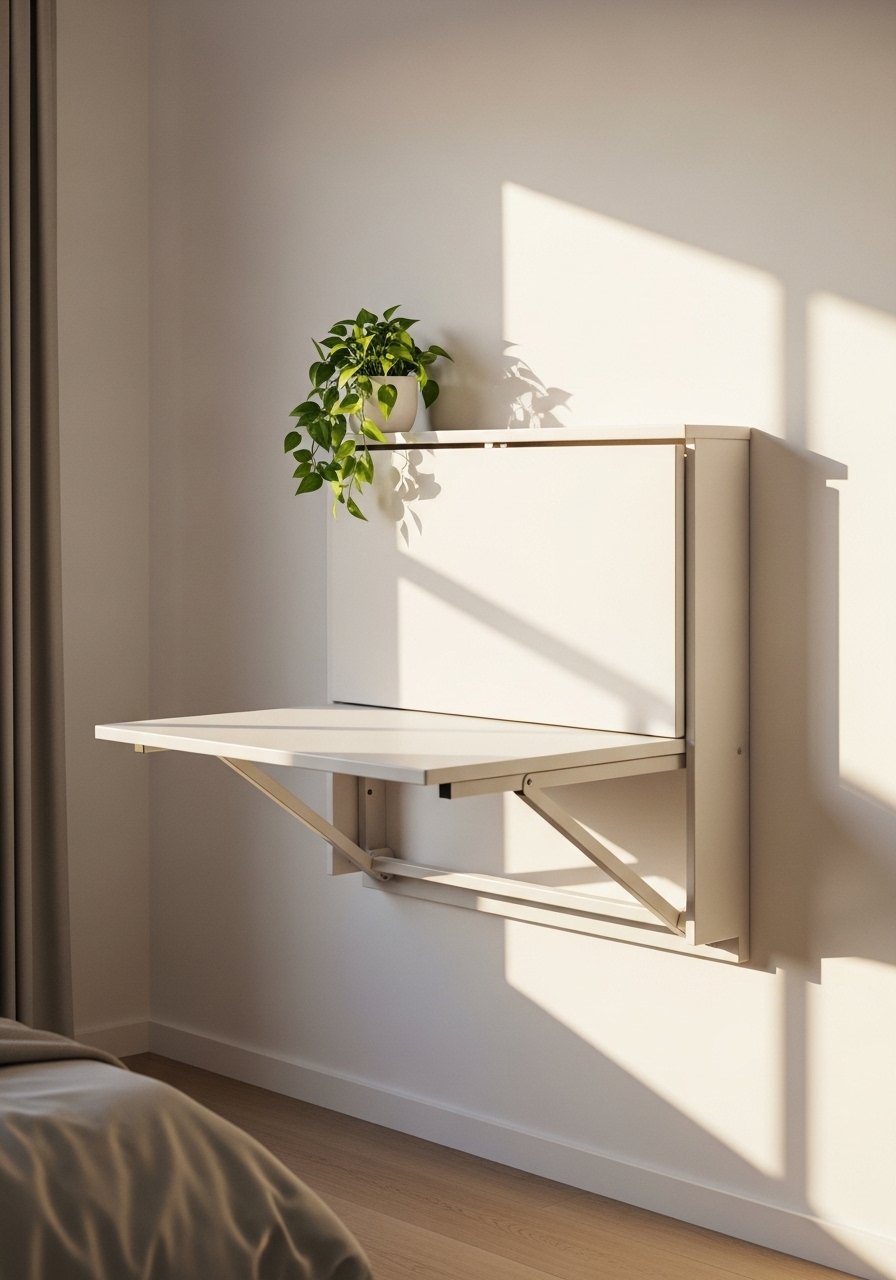
For apartment dwellers I built a folding bench that drops down for a project and hides when not in use. It saved floor space and made quick repairs much easier. Budget varies from $30 to $150 based on hardware. Common mistake is using cheap hinges that wobble. Use locking folding brackets rated for at least 150 pounds. Mount the bench at standard counter height, 36 inches, for comfortable work. I store small hand tools in a slim tray attached to the underside when the bench is up. Locking folding brackets are what I recommend.
Ladder Shelf With Tool Baskets For Entryway
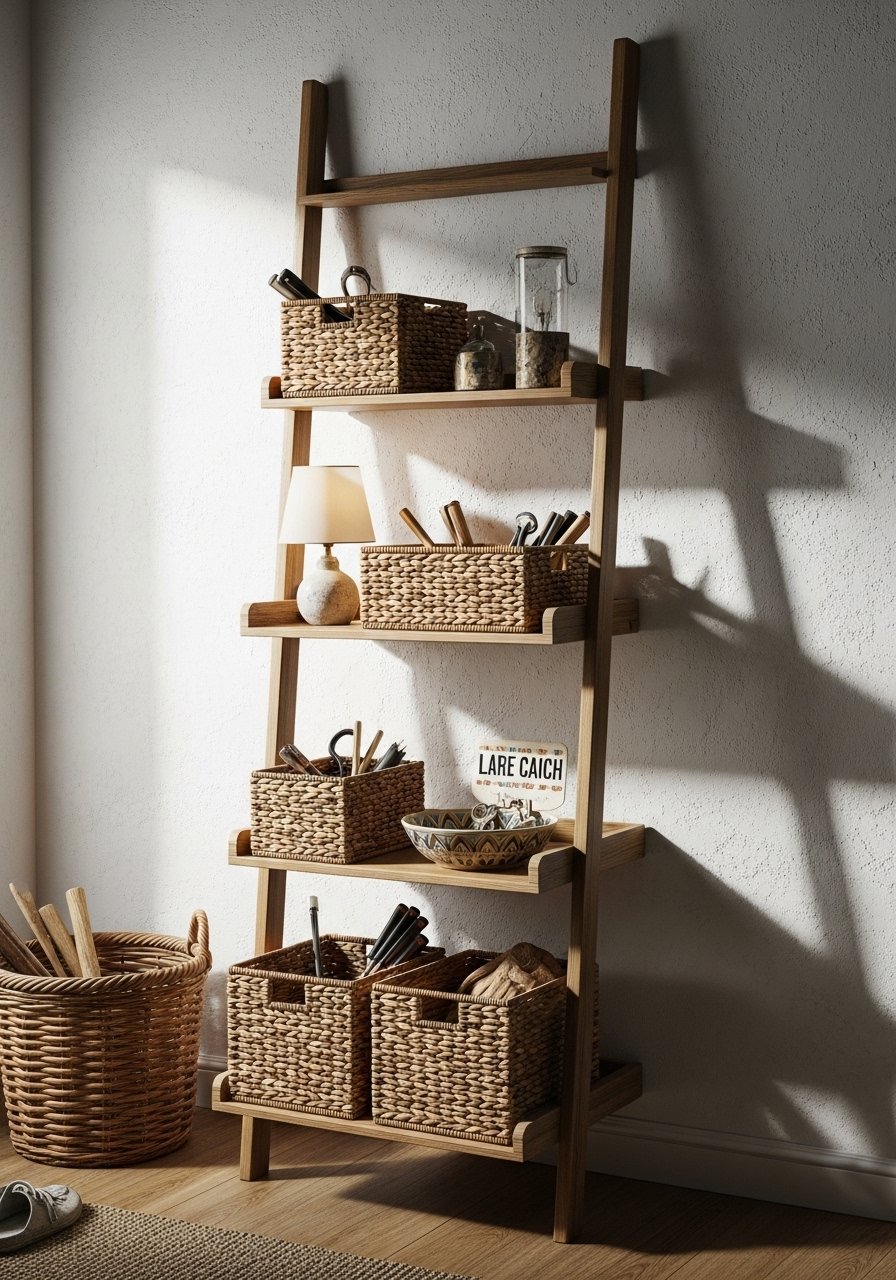
If you want tools accessible but disguised, a ladder shelf with baskets does the trick. It fits in an entryway or garage and looks decorative while holding cords, chargers, and small tool sets. Budget is $40 to $120. People overfill baskets so they become a junk trap. Limit each basket to one category and leave the top shelf for display items to keep it looking tidy. I use 10×12-inch baskets for chargers and 12×16-inch for larger kits. Try wicker storage baskets set.
Painted Tool Chest Facelift For Stylish Garage
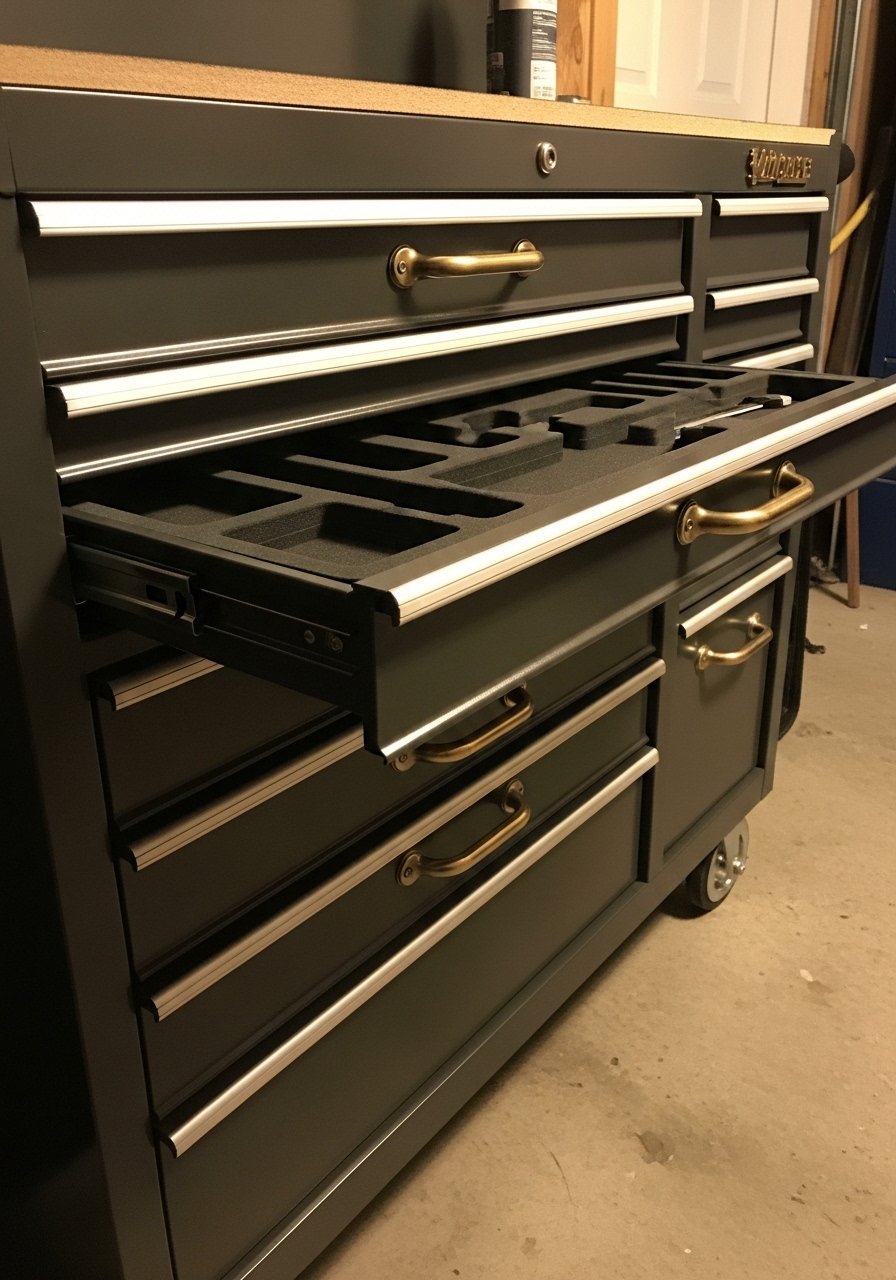
A painted tool chest upgrades a functional piece into something you want to leave open. I gave mine a matte paint and replaced drawer pulls with brass knobs. It looks intentional and organizes by drawer function. Expect $30 to $100 depending on paint and hardware. Common mistake is painting without cleaning; degrease before you sand. Paint in two thin coats and allow 24 hours between coats. A detail is to line drawers in a 1/8-inch non-slip liner so tools do not shift. I used metal primer spray and matte spray paint.
Your Decor Shopping List
Textiles
- Honestly the best $40 I have spent. Rubber drawer liners, 18×24 inches for non-slip protection. Similar at Target.
- Chunky knit throw, cream, 50×60 inches (~$35). Great to soften a workbench stool.
Wall Decor
- Wall pegboard kit with wooden frame, 24×36 inches (~$45).
- Small picture ledges, 12-inch set of 2 (~$22).
Lighting
- LED clamp work light (~$28) for targeted bench lighting.
Storage Bins & Hardware
- Clear stackable storage bins, 6×8 inches set of 12 (~$25).
- Wicker storage baskets, 12×16 inches set of 3 (~$45).
- Heavy-duty magnetic tool bar, 12 inches (~$20).
- Overhead storage rack, 4×8 foot capacity kit (~$110).
Tools & Materials
Shopping Tips
White oak beats dark wood in 2026. Design feeds have shifted completely. White oak floating shelves look current, not dated.
Grab these velvet pillow covers for $12 each. Swap them seasonally to change the feel without spending much.
Curtains should puddle or kiss the floor, never hang halfway up. 96-inch linen panels are right for 9-foot ceilings.
Lead with the link when pacing purchases. I buy three-tier utility carts first and add accessories later.
Everyone buys five small succulents. One single artificial fiddle leaf fig 6ft has ten times the visual impact.
Frequently Asked Questions
Q: How do I choose between pegboard and slatwall?
A: Pick pegboard if you want an affordable, easy-to-modify option and slatwall if you want a sleeker, modular look with sliding bins. Pegboard is great for hobbyists because hooks are cheap and reconfiguring takes minutes.
Q: Can renters use these ideas without drilling permanent holes?
A: Yes. Use tension rods, adhesive hooks rated for weight, and free-standing carts. For heavier items, mount a slim plywood board and hang it with removable picture-hanging strips on rental-allowed walls.
Q: What is the best way to keep small hardware from getting mixed up?
A: Clear stackable bins with labeled lids work best. I also use mason jars on a screwed slat for quick visibility. A tip is to keep like items together and write the box contents on the lid edge for fast scanning.
Q: How high should I mount a pegboard above a workbench?
A: Mount it 4 to 6 inches above the bench surface so tools do not hit the wall when you grab them. If you are installing multiple rows allow 12 to 14 inches between centers for taller tools.
Q: Will magnetic strips hold heavy metal tools safely?
A: Heavy-duty magnetic bars rated for 10 pounds or more will hold most hand tools. For bulky power tools use cradles anchored into studs. Paint matching tech gets you about 90% there on the first try.
Q: How do I keep a tool chest from looking messy after I paint it?
A: Clean and degrease first, sand lightly, prime, then use two thin coats of matte paint. Line drawers with non-slip rubber and add foam inserts for a finished look. Most stores keep rival color recipes ready to go so you can match a tone if you want to coordinate.
Q: Are there storage tricks for seasonal items like holiday lights or snow shovels?
A: Use ceiling grids or overhead racks and keep loads under 30 pounds per box. Label boxes with season and contents and rotate them to the front in late fall so you do not have to crawl under a pile in an emergency.
Q: How can I make tool storage look intentional in a living area?
A: Hide smaller bits in wicker baskets on a ladder shelf, use a painted tool chest with brass knobs, and style one shelf with a plant and a framed print. Top machines slice color data 31 ways for dead-on results, and the same attention to finish and tone helps tools feel styled.
