
Spent $400 on a new coffee table. Room still looked off. Spent $35 on a throw and three candles. Suddenly everything clicked. That small fix is why I obsess over mirrors now. They bend light, add depth, and are the one thing that can make a tight apartment feel bigger without moving the furniture.
These ideas lean modern with a hint of boho and coastal. Most projects run $0 to $50, with a few that hit $100 if you want real wood or brass. They work in bathrooms, tiny entryways, bedrooms, and compact living rooms where saving floor space matters. Most folks hit Dollar Tree first for mirror projects.
Boho Egg Carton Flower Border for a Small Bathroom
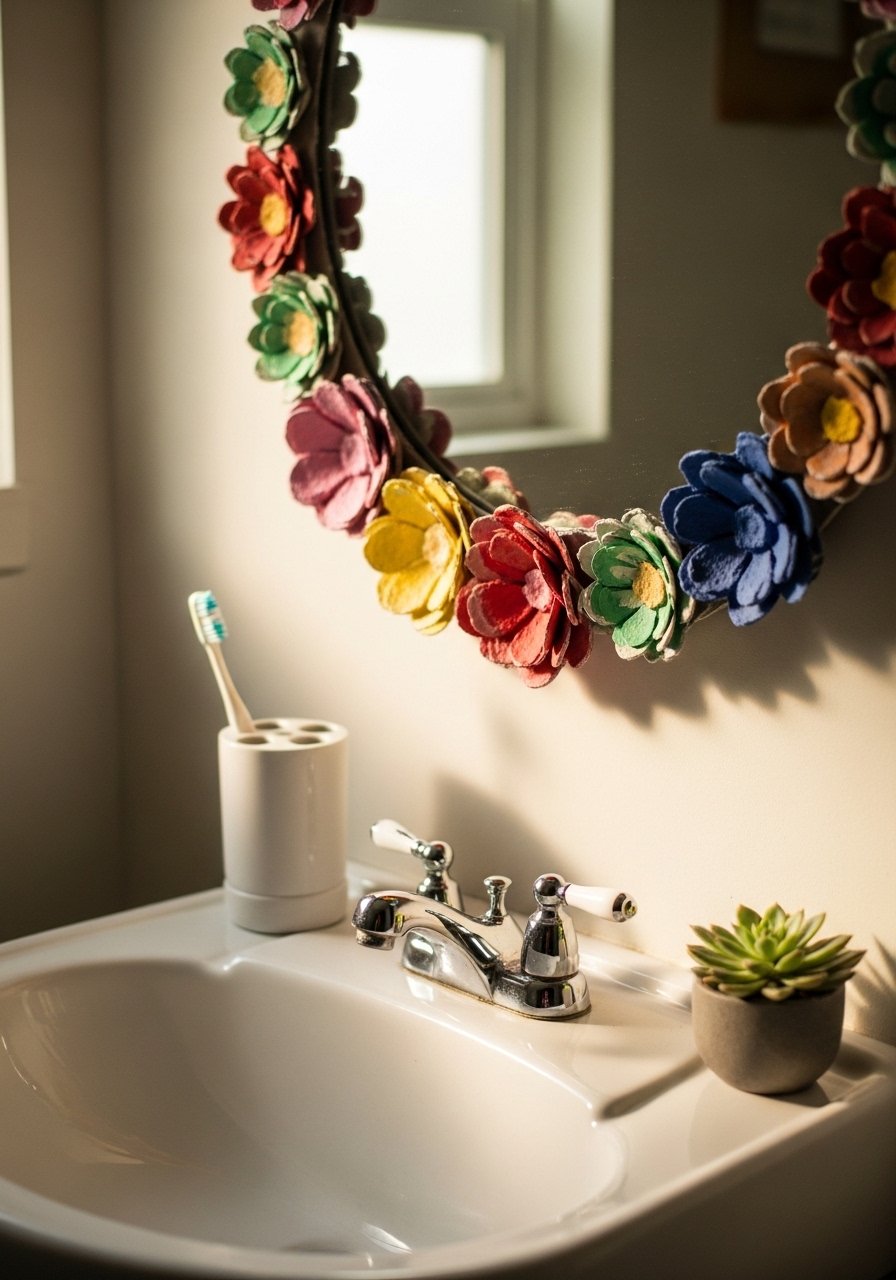
I made this on a no-budget Sunday and it changed my tiny guest bath. Cut egg cartons into 12 petals per bloom and paint in layers of three colors, letting a darker base peek through the petals for depth. Glue with hot glue, then seal with a thin Mod Podge coat so steam does not peel the paint. Most folks hit Dollar Tree first for mirror projects. The trick people miss is odd numbers. Cluster five blooms on the top half, three on each side, and leave the bottom mostly clear so it does not feel heavy. If kids touch it, use an outdoor clear sealer for durability. For supplies try Mod Podge gloss finish and hot glue sticks.
Copper Tape Geometric Overlay for a Modern Entry
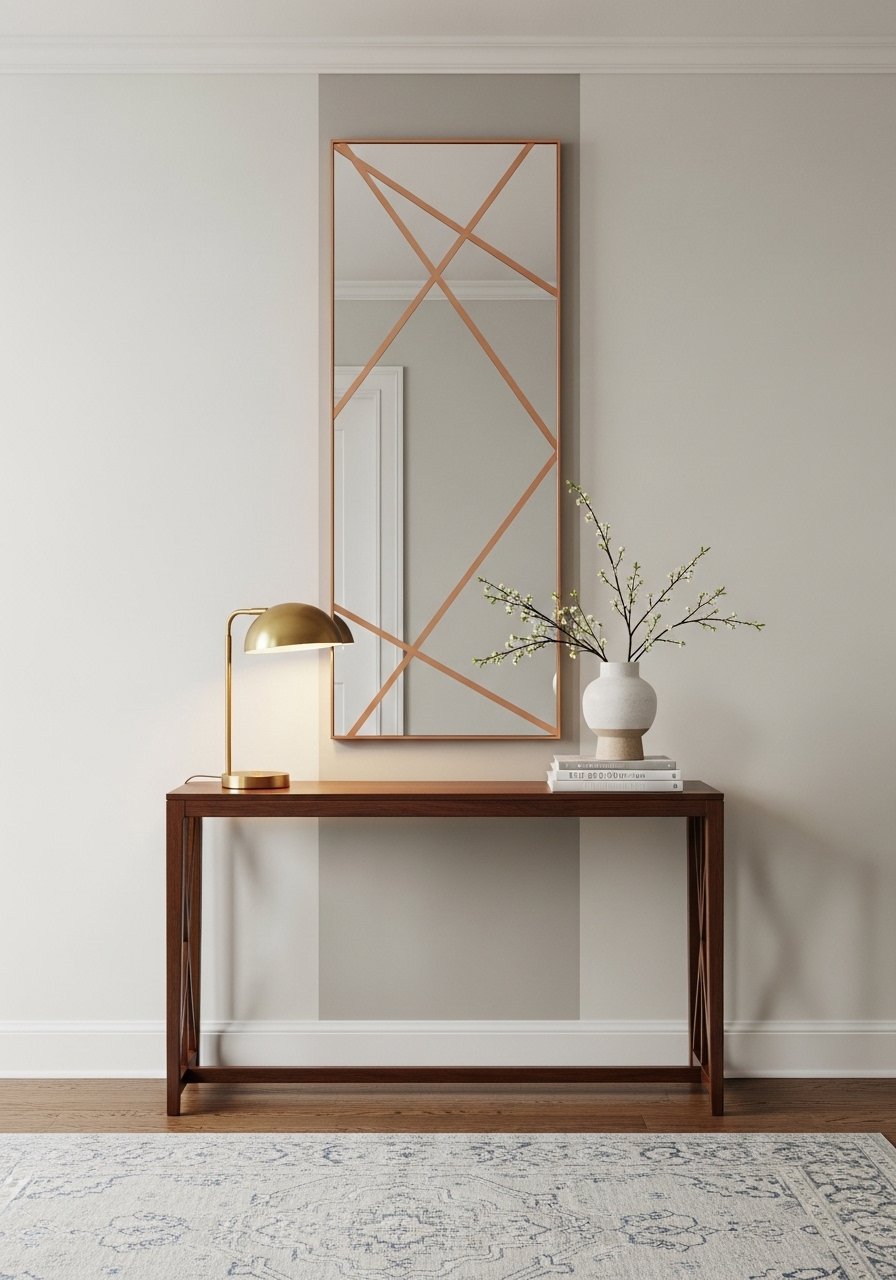
I slapped copper foil tape across a thrifted mirror and got a custom look without carpentry. Use 1/8 inch strips and overlap at 45 degrees for crisp intersections that read like metal in photos. Prime the slick mirror edge with one thin coat of Mod Podge so the tape adheres longer in bathrooms. People often lay strip edges too close; leave a 1/8 inch gap where two strips meet to avoid bubbling. For a renter friendly option pick tape you can peel later. Try copper foil tape and a slim metal ruler.
Foam Core Frame to Level Thrift Mirrors in a Hallway
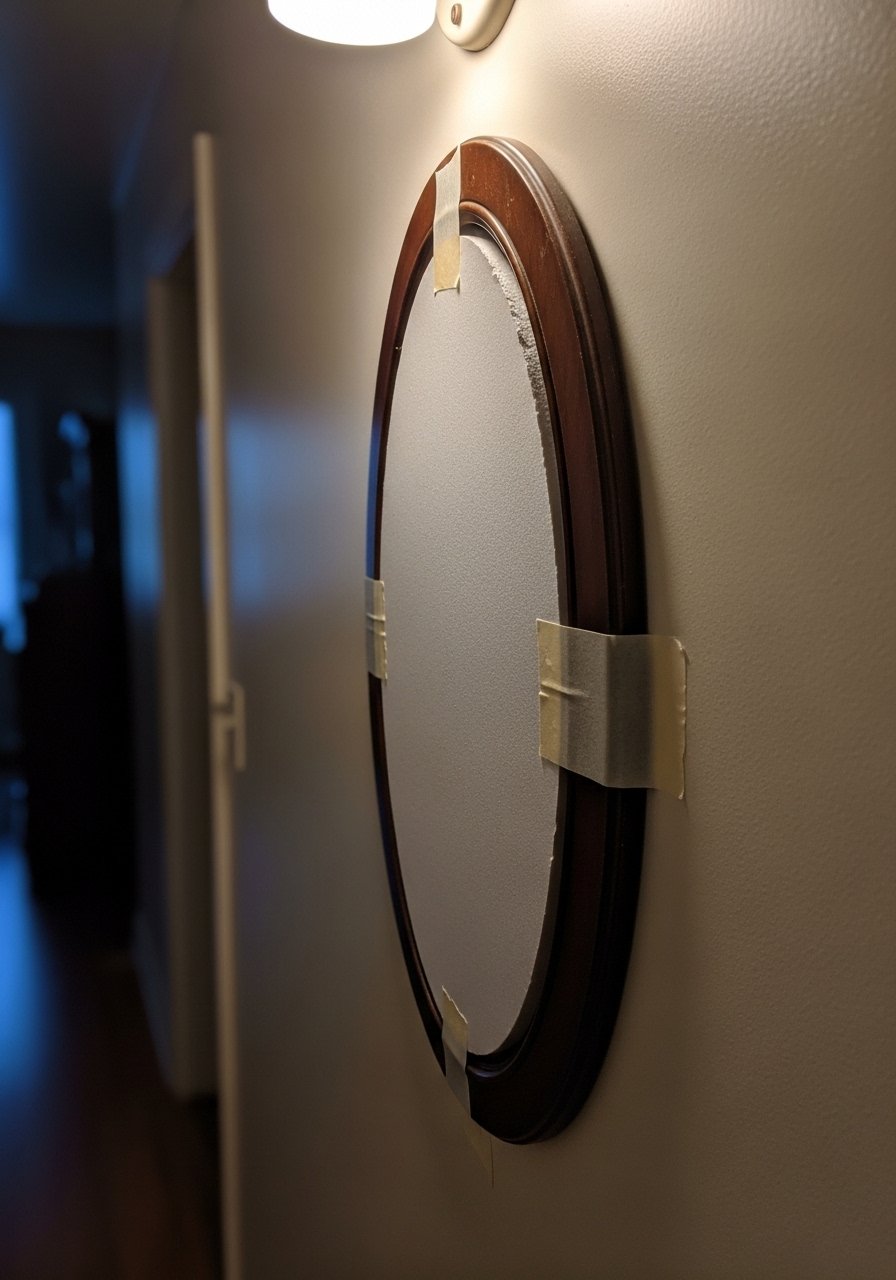
Thrifted mirrors are often warped and hang crooked. I solved this by cutting foam core to the exact frame size and super gluing it behind the glass. It levels the hanging, hides exposed backing, and keeps lightweight mirrors from rattling. Use strong double-sided tape or small velcro strips to hang so you stay renter-friendly. A common mistake is using too-thin foam core. Use 3/16 inch to stop wobble. This tweak makes a cheap mirror read like a thrifted find worth keeping. Grab foam core sheets and heavy-duty double-sided tape.
Dollar Tile Mosaic Center for a Compact Vanity Mirror
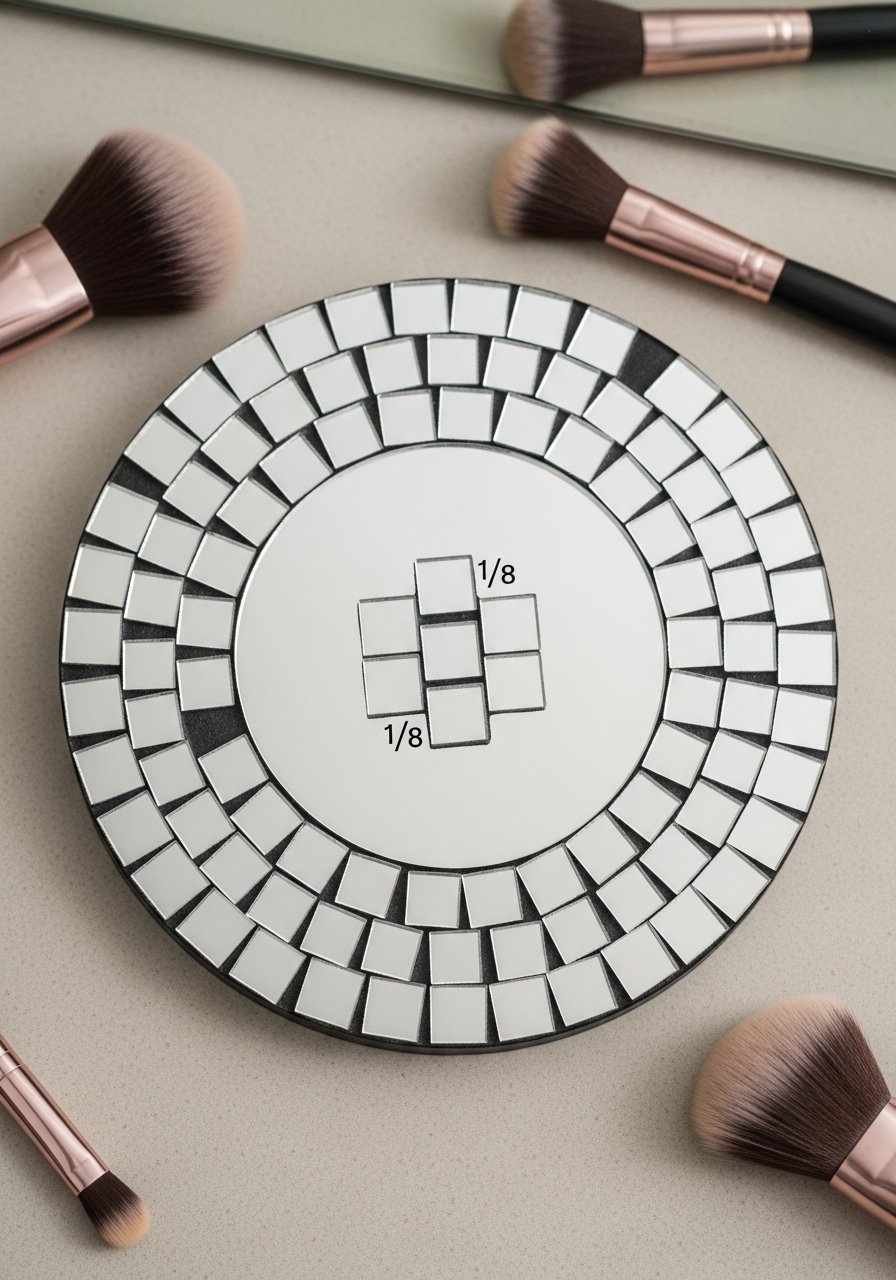
When my medicine cabinet looked tired I glued a mosaic center from Dollar Tree mirror tiles and suddenly the whole bathroom looked custom. Leave 1/8 inch gaps between tiles so the light catches the grout lines like higher-end pieces. E6000 works but cures slow, so use small dots of hot glue to hold tiles while the E6000 sets. A frequent fail is crowding tiles; that makes the piece look busy. For a compact setup this adds depth without eating shelf space. Try Dollar-type mirror tiles and E6000 adhesive.
Chalk Paint Plaster Medallion for a Grandmillennial Ceiling Mirror
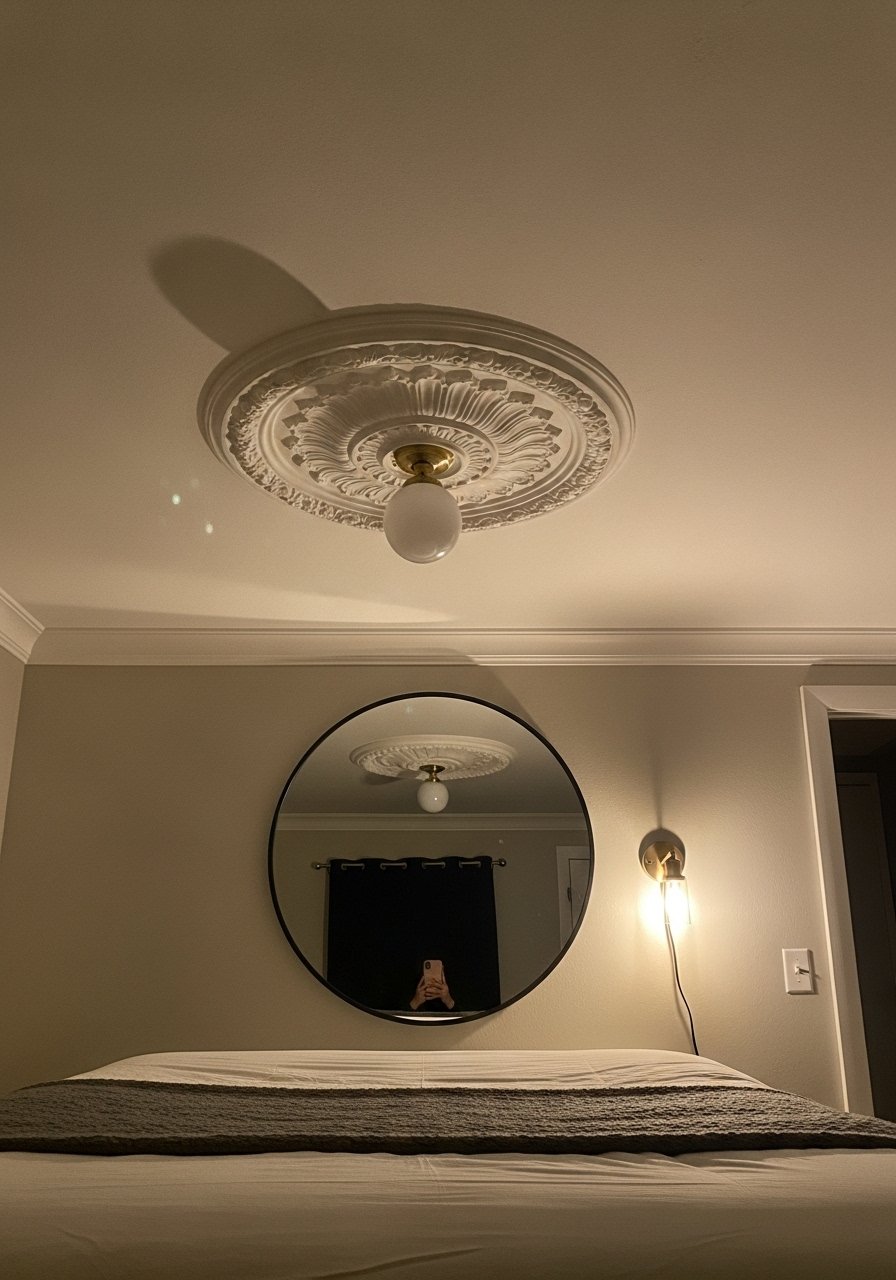
I turned a dollar store round mirror into a faux plaster ceiling medallion with two coats of chalk paint and a dry brush of off-white for dimension. Chalk paint gives the plaster look without sanding. Punch the mirror center slightly and glue it so the mirror sits flush. People usually use one thick coat and end up with brush marks. Go for two thin coats and a soft wax finish for that old plaster depth. Command hooks rated for ceilings will keep this renter-friendly. I used chalk paint small jar and a soft wax finish.
Spackle Star Texture for a Boho Bedroom Mirror
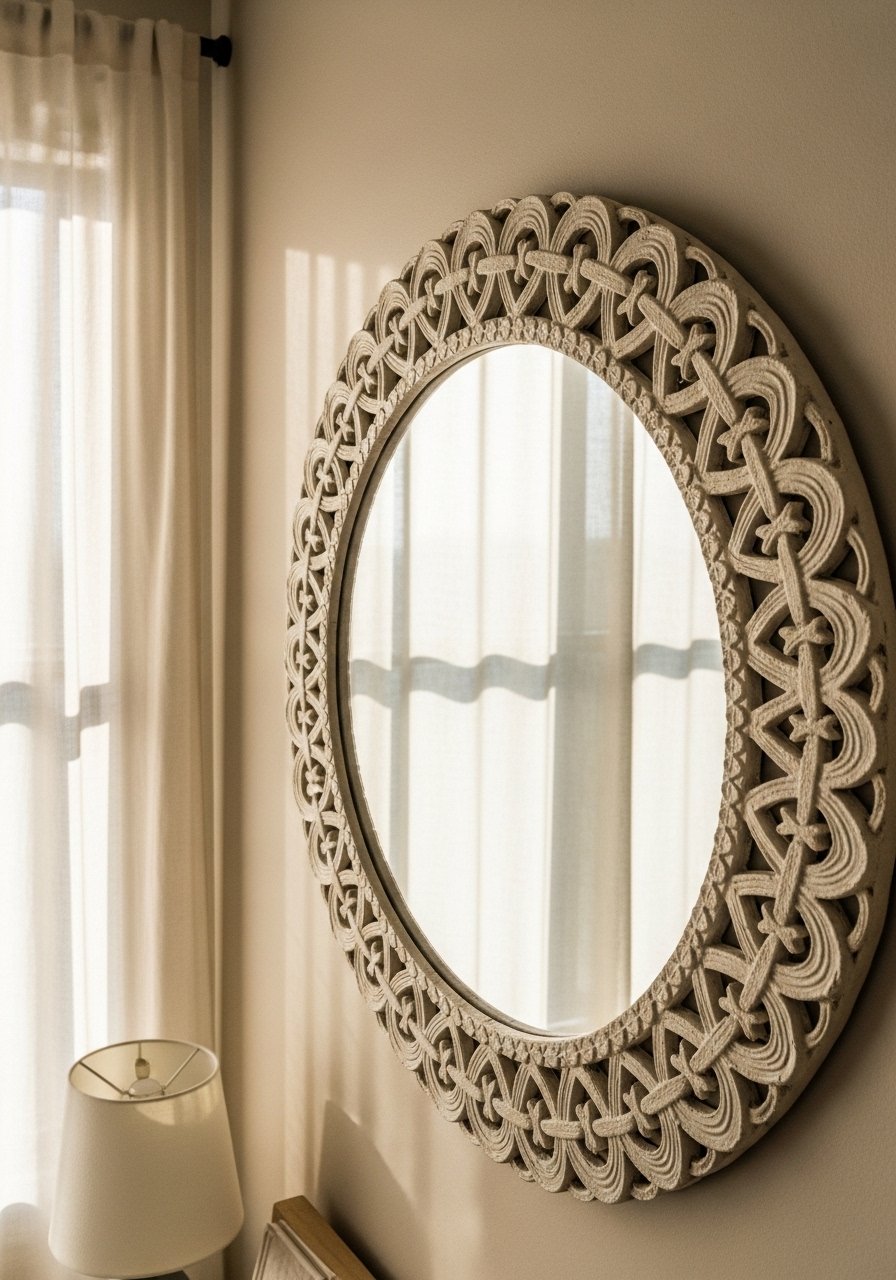
Swirling a little spackle around a mirror edge makes a tactile, starry look that catches light in a bedroom without taking floor space. I used a toothpick to make small swirls, let them dry, and painted two pastel washes to keep the texture subtle. The pro tip most articles skip is to work in small sections and sand between layers to avoid big ridges. Water in the bathroom will make cheap spackle bubble, so seal with a matte sealer if it lives near steam. For tiny rooms the texture reads like a decorative frame without bulk. Try lightweight spackle and a fine-grit sanding pad.
Dyed Wooden Bead Garland for a Coastal Entry Mirror
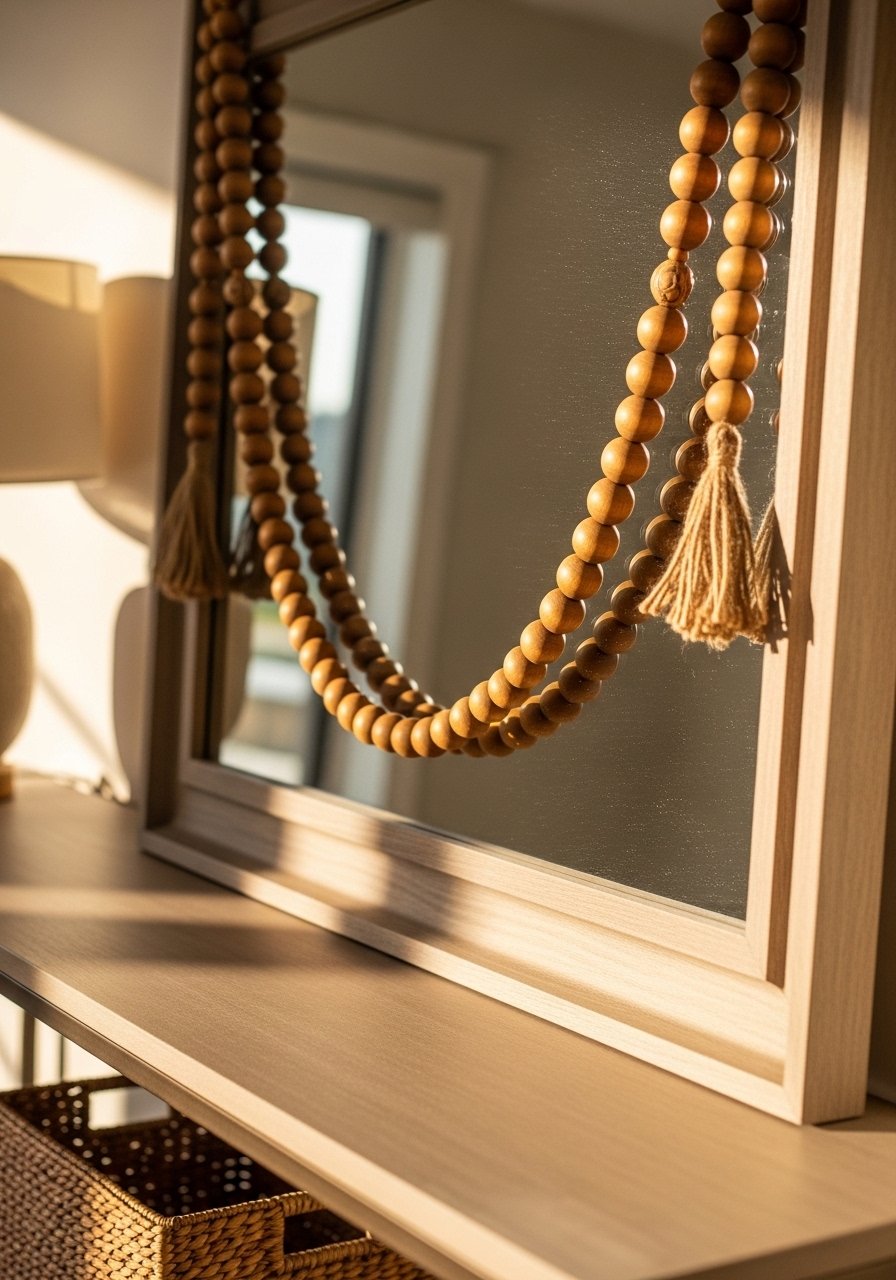
I strung wooden beads into a garland and looped them around an entry mirror to add a soft coastal note without a heavy frame. Dye beads in a tea bath for a subtle, uneven color that feels collected. Use a 3:1 ratio of small to large beads for visual interest. People often staple garlands too close to the glass; leave a 1/2 inch gap so the beads cast a shadow and the mirror still reflects clearly. This is renter-safe and removable. I used wooden craft beads assorted and jute twine.
Mirror Tile Salad Plate Pattern for a Midcentury Vanity
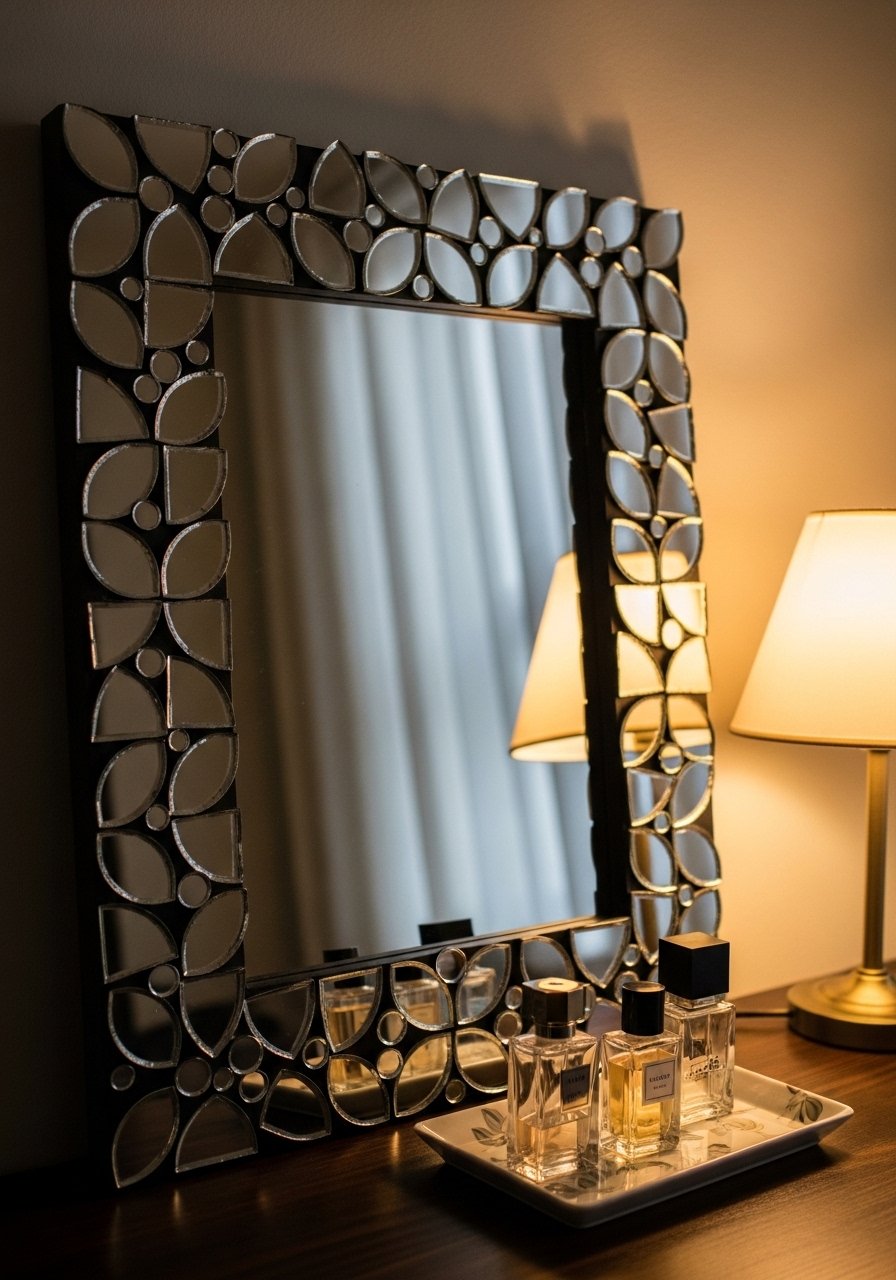
Cutting cheap salad plates and gluing the curved pieces around a mirror gives a midcentury scalloped edge effect that reads custom. Use E6000 for a strong bond and spacing of about 1/8 inch to keep it from looking overcrowded. People expect the curves to match perfectly. Measure once, cut carefully, and test-fit before glue. This trick makes a small vanity mirror feel like a focal point without adding depth. For safer cutting use a glass cutter and wear gloves. Try glass cutter tool and E6000 adhesive.
Distressed Wood Effect Frame for a Living Room Accent Mirror
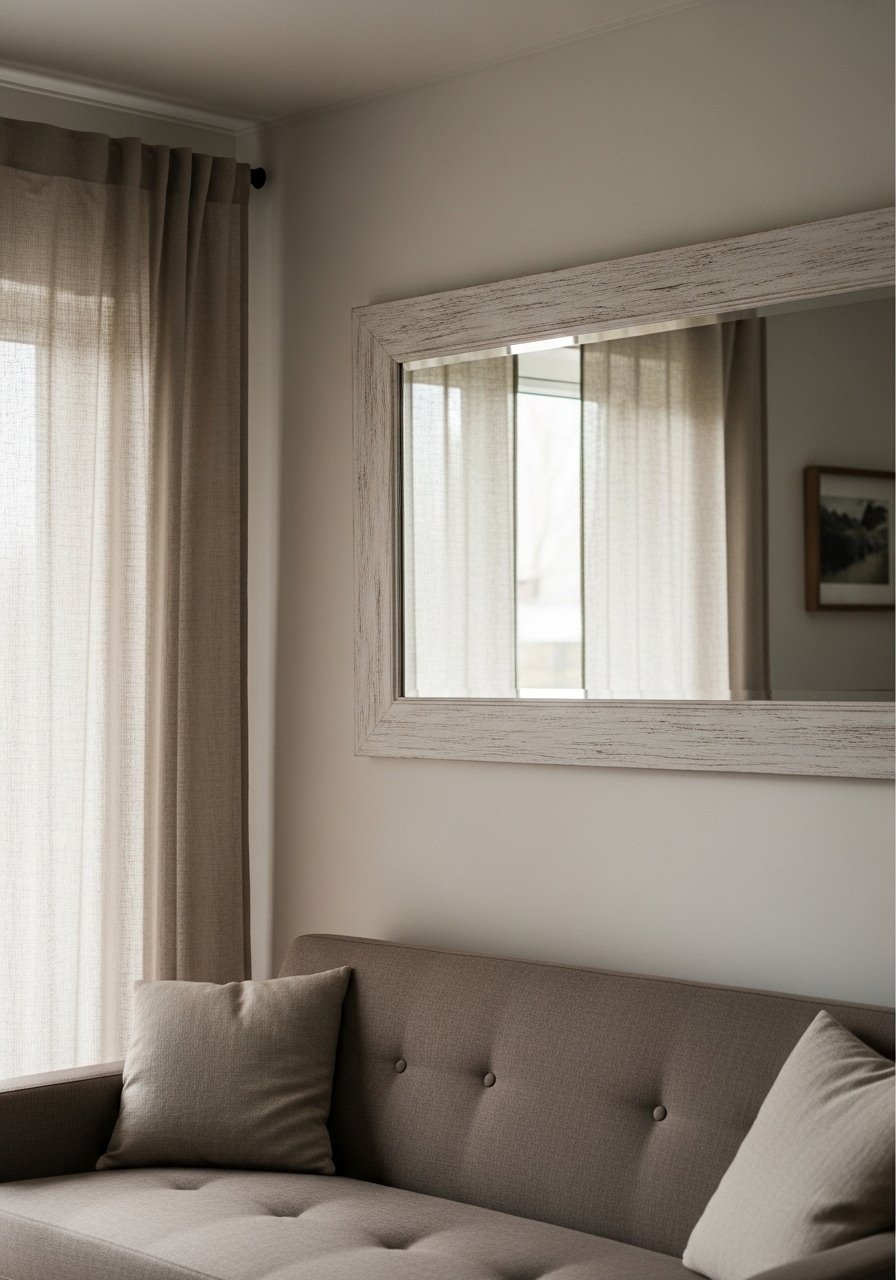
A quick chalk paint base, sanded edges, and a white wax buff make a flat thrift frame read like salvaged wood. I often use two thin coats of chalk paint and a light sanding pattern that follows the frame grain. The detail most DIYs skip is a brown glaze rubbed into nooks before waxing to deepen the age. People usually overdo the distressing so keep it subtle around corners. This frame works in a living room over a console without stealing floor space. For supplies search chalk paint 8oz and antiquing glaze.
Copper Hinge Accent for a Small Dresser Mirror
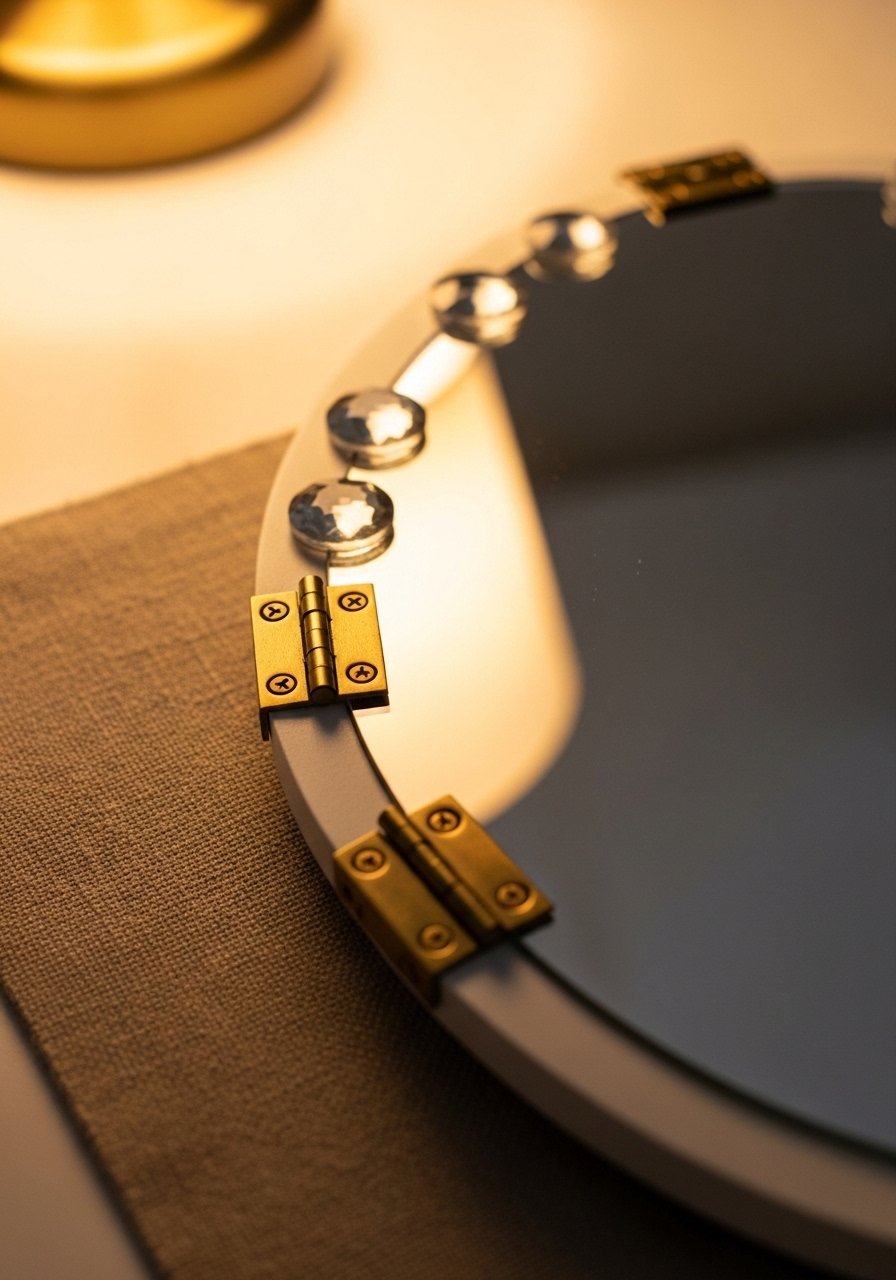
Tiny hardware glued as accents reads like jewelry on a tabletop mirror, and it uses zero floor space. I picked small brass hinges and glued them along the top arc, then added a few faceted gems to catch the light. The detail people miss is to file hinge edges flat before gluing so they don't create bumps under the mirror. E6000 holds things permanently but use removable adhesive if you might change it. This is perfect on a small dresser or bathroom counter. Try brass mini hinges and faceted craft gems.
Recycled Cardboard Stick Frame for a Cozy Powder Room
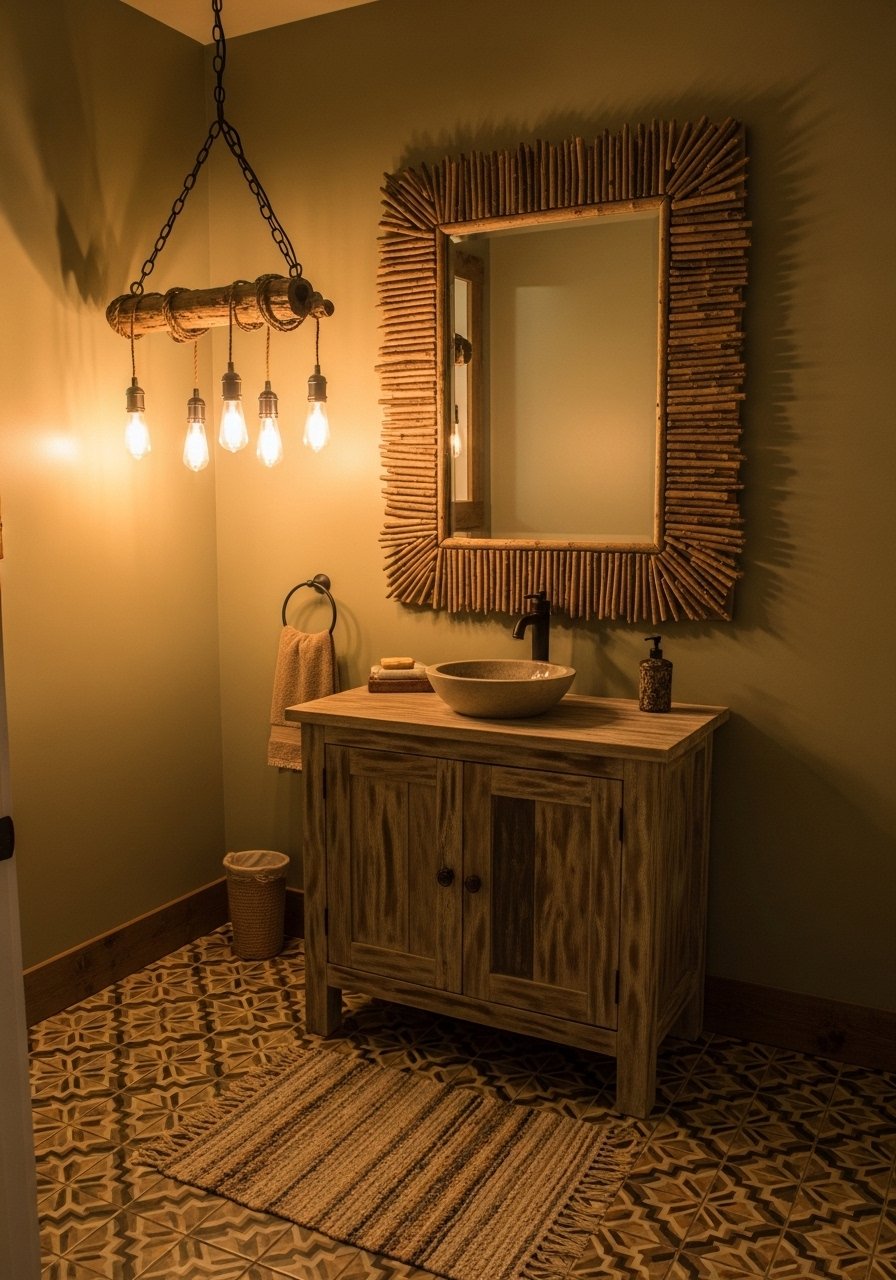
I gathered twigs, split some in half, and glued them to a cardboard base cut slightly larger than the mirror to get a rustic frame on the cheap. Hot glue dots every inch keep sticks from popping off when the kids bump the wall. A tip generic posts miss is to prime the cardboard with Mod Podge so paint does not peel when the wood shifts. This is zero waste and renter friendly. If you want a more finished look, stain the sticks with watered-down acrylic. Use hot glue gun and Mod Podge matte.
Mod Podge Tissue Paper Wrap for an Eclectic Bedroom Mirror
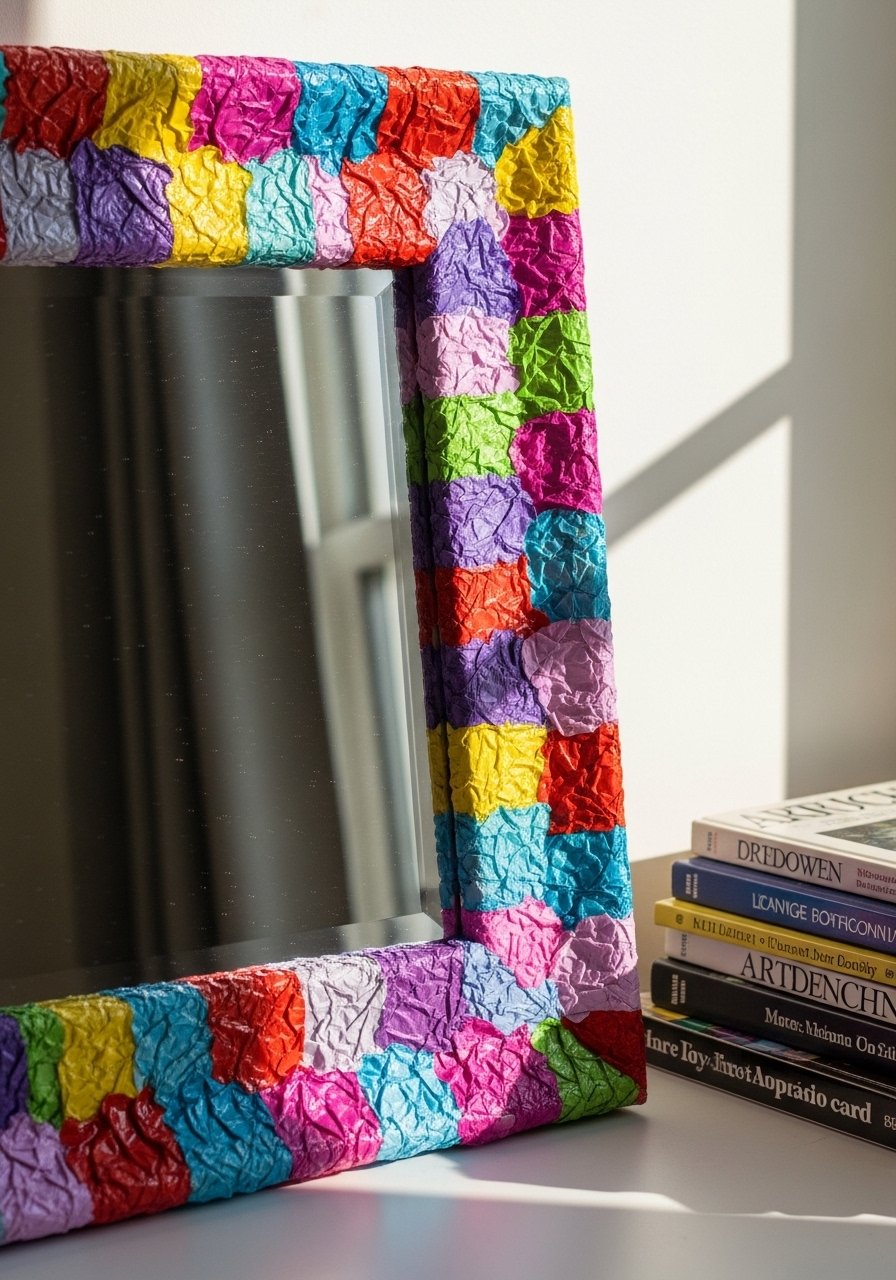
Tissue paper under a coat of Mod Podge gives a marbled translucence that looks layered and expensive from a distance. Crumple the tissue and apply in thin layers. A thin Mod Podge base stops paint from sliding off the mirror edge later. People often skip sealing the final coat and the paper lifts in humid rooms. Use a glossy finish if you want sheen, or matte for a plaster look. I used this treatment on a bedroom mirror and it reads like an art piece. Try craft tissue paper pack and Mod Podge gloss.
Compact Decoupage Mirror for a Small Wall Nook
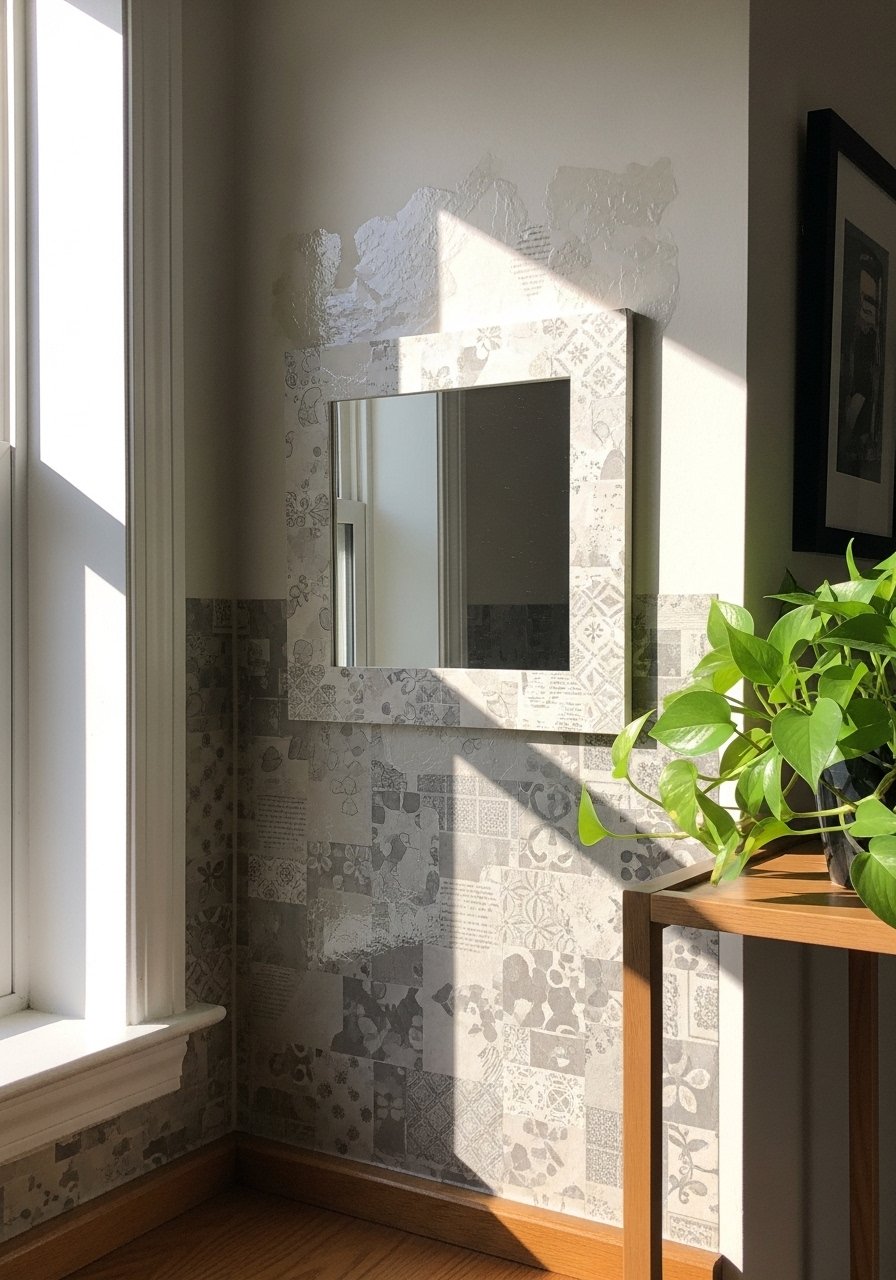
For tiny walls I decoupaged vintage book pages around a compact mirror to add interest without bulk. Cut pages into strips, brush a thin coat of Mod Podge, lay them on, and smooth with a plastic card. The detail most people miss is to stamp the corner with a tiny dark wash to make the paper look naturally aged. If you glue right on the mirror edge first, finish with a thin sealing coat so nothing peels. This is perfect near a kitchen sink where floor space is precious. Try vintage book pages pack and Mod Podge gloss.
Layered Mirrors Gallery for a Narrow Staircase
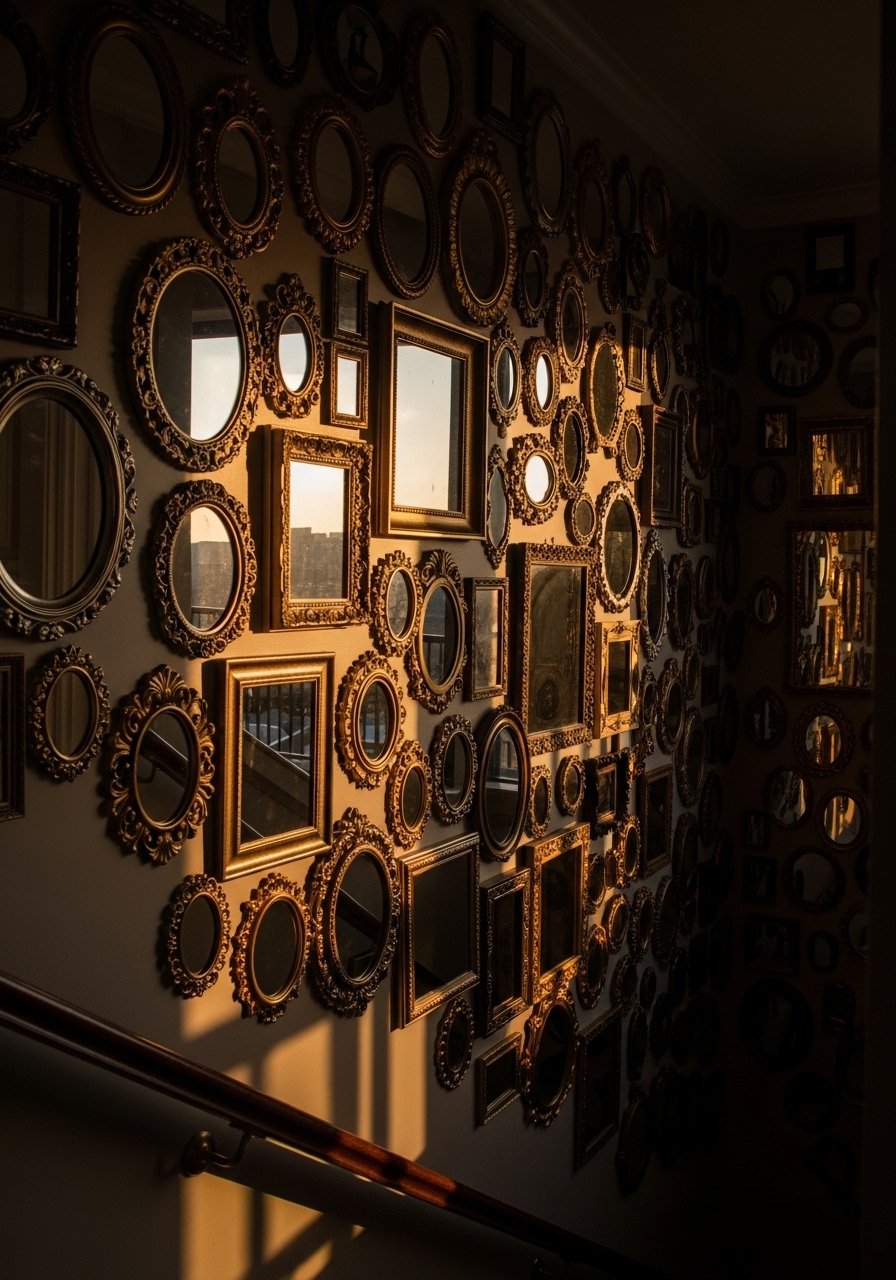
I created depth on a stair wall by mixing three small round mirrors with two framed prints, hung at staggered heights to pull the eye upward. The rule I followed was odd numbers and spacing that increases toward the ceiling. Most people cram pieces tight. Leave at least two inches between items so each reflection reads. Command strips rated for picture hanging keep this renter-friendly. A detail others skip is to offset a reflective piece with a matte print so glare does not dominate. For swap-ready pieces try command picture hanging strips and small round mirrors set.
Peel-and-Stick Frameless Tiles for a Kitchen Splash Mirror
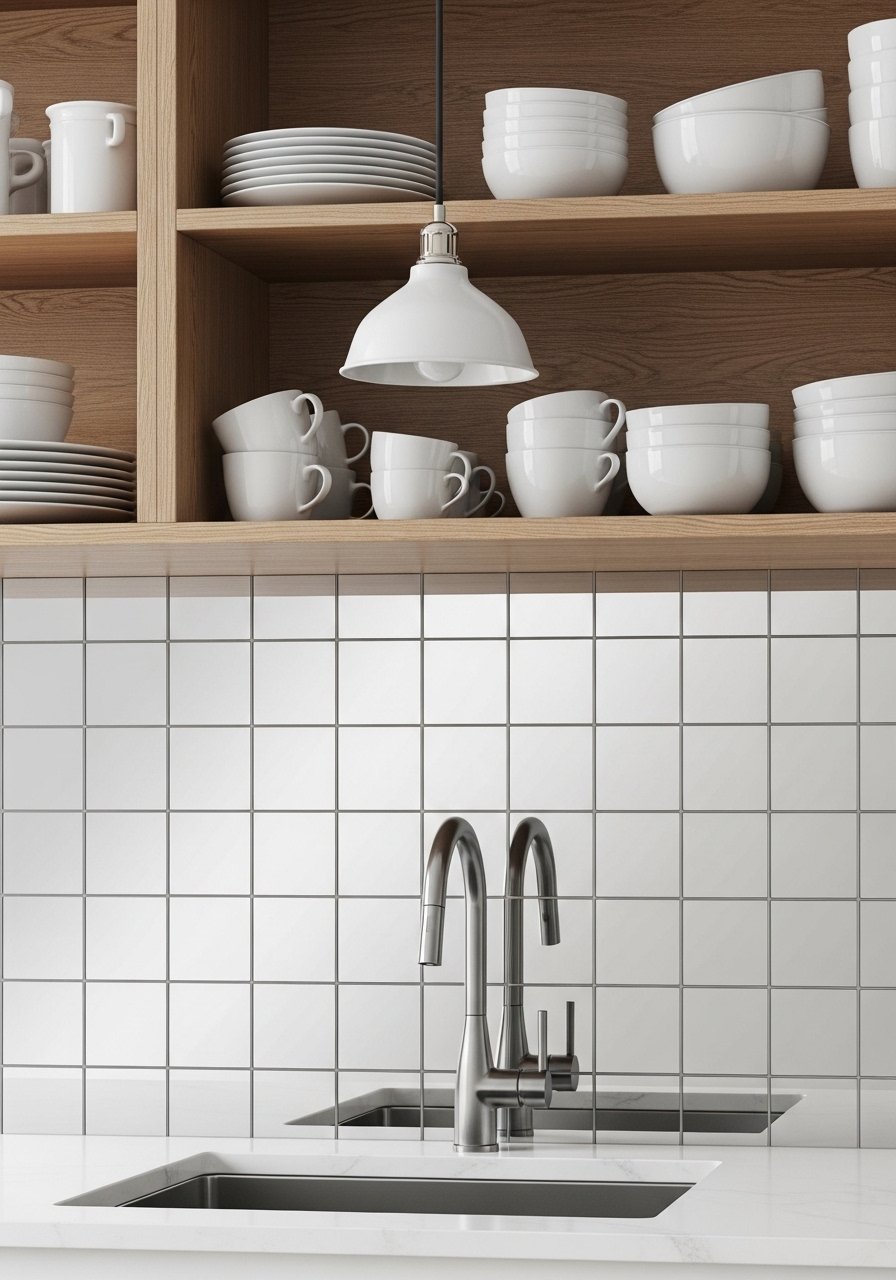
You can fake a full mirrored backsplash with peel-and-stick mirror tiles that reflect light and make a tiny galley kitchen breathe. Space tiles with a 1/8 inch gap to avoid a jumbled look and use a craft blade to trim edges. The common issue is bubbles when applied to wet or greasy walls. Clean and dry the surface really well, then work from the center outward. I used this in a rental chef kitchen and it felt like a splurge without breaking rules. Try peel-and-stick mirror tiles and a utility craft knife.
Frameless Painted Edge for a Minimal Bedroom
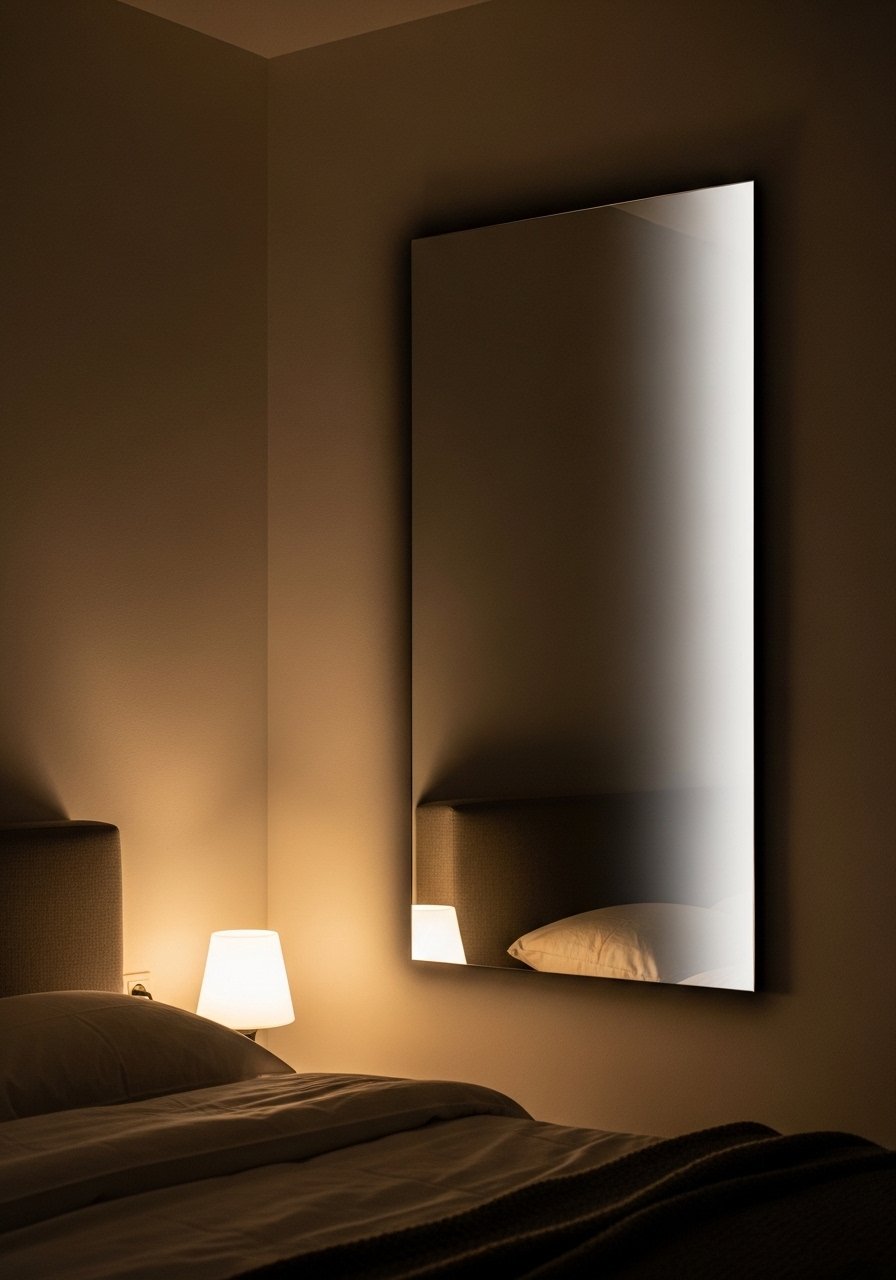
I painted a faint smoky edge around a frameless mirror for a soft, modern look that saves space and stays minimal. Use two thin washes of tinted acrylic paint and seal with Mod Podge so it does not yellow. People often brush too close to the reflective edge and create a halo that catches dust. Keep the paint 1/4 inch away from the true mirror edge for a crisp, floating effect. This works great over a low dresser in a small bedroom. Try acrylic paint set and micro-fiber cloths.
Mirror Peg Rail for a Small Entryway Storage Hack
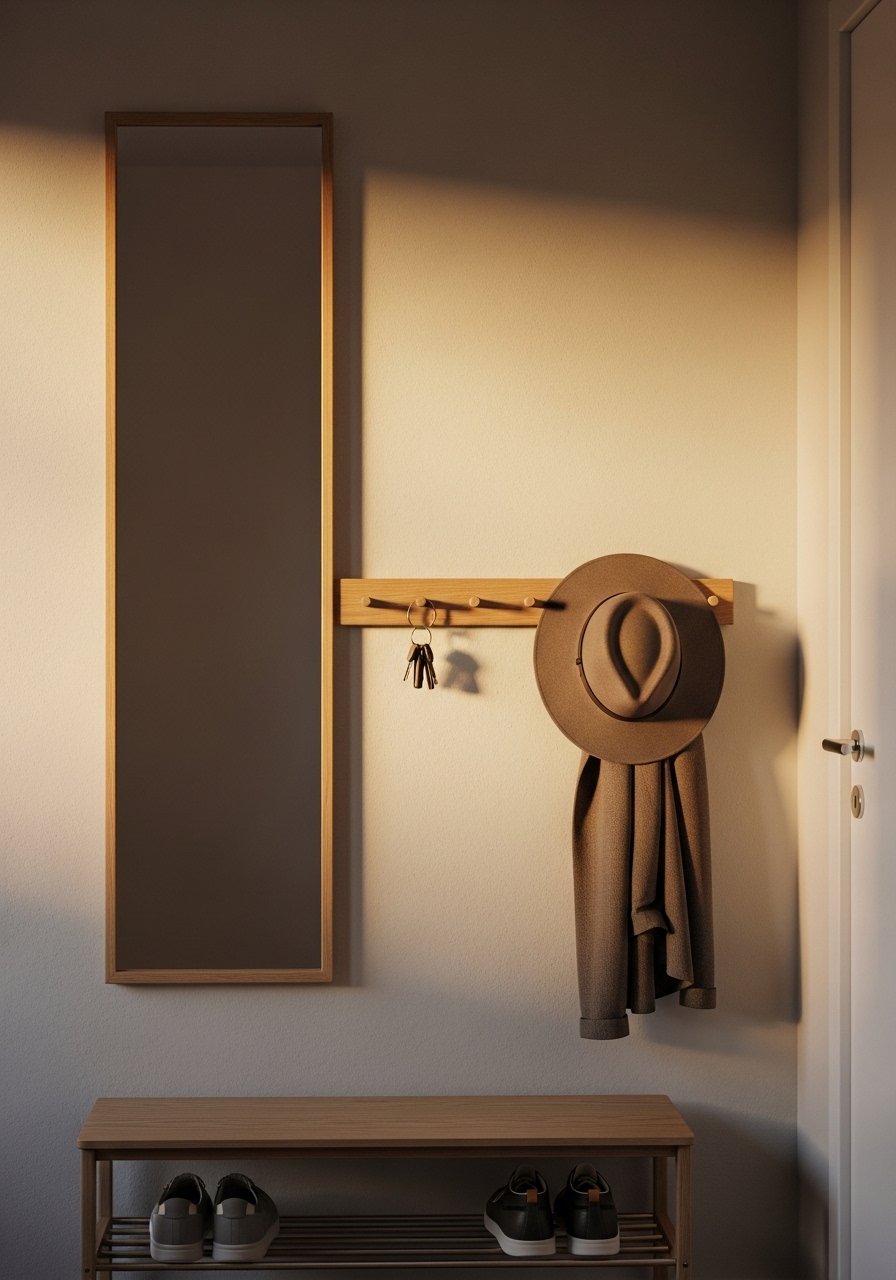
Combining a slim mirror with a peg rail gives a one-two punch in tiny entries. The peg rail provides function and the mirror reflects light so the area reads larger. I used a 24 inch mirror and centered it above a 36 inch peg rail so hooks frame the reflection instead of blocking it. People usually mount mirror and rail at the same height; stagger the rail 4 inches lower so coats do not knock the glass. For renter life use removable mounting hardware. Try slim wall mirror 24-inch and wooden peg rail 36-inch.
Layered Small Mirror with Shelf for Compact Vanity
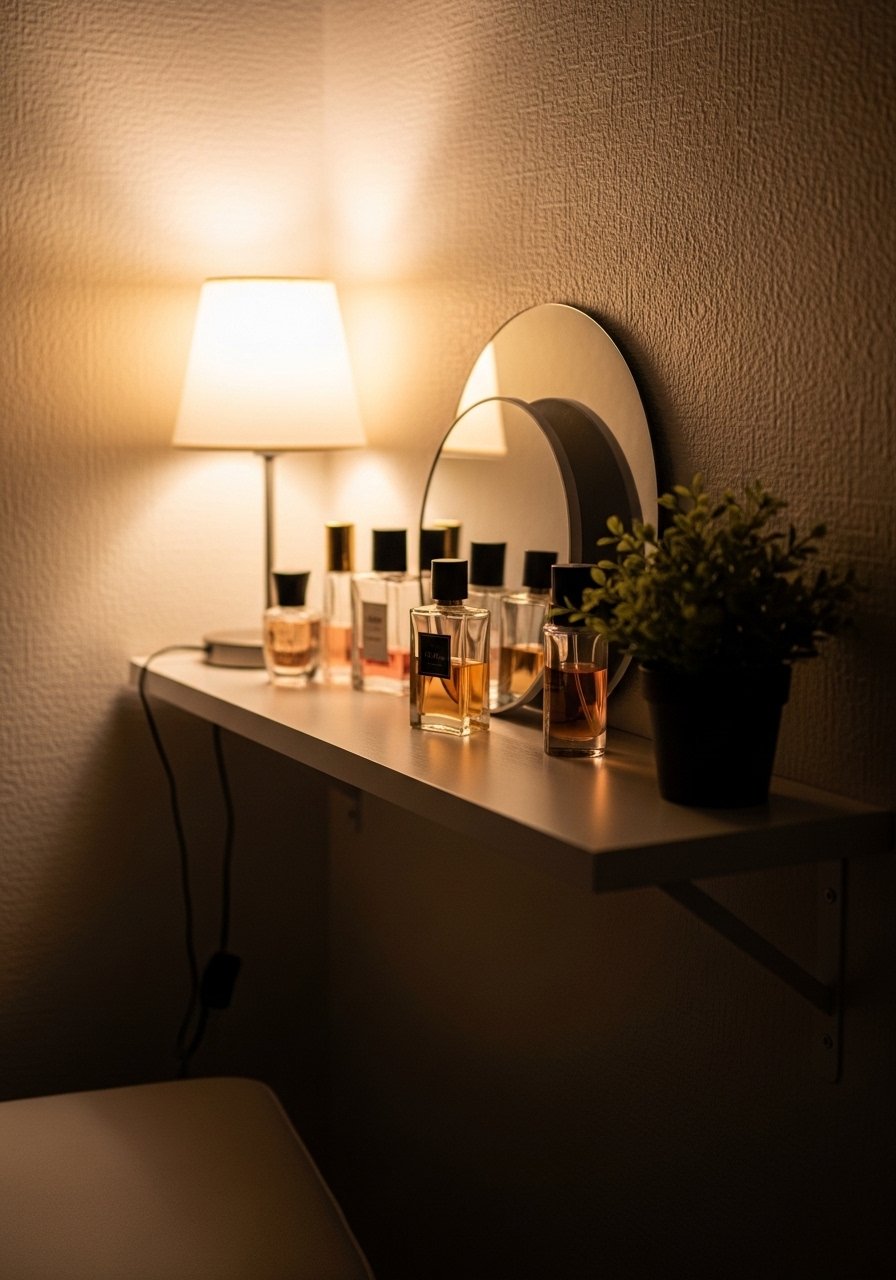
A narrow shelf below a small mirror gives storage without stealing floor space. I used a 3 inch deep floating shelf secured to the wall and layered a 12 inch round mirror above it, leaving 6 inches between shelf top and mirror bottom so items do not bang against the glass. People think shelves must be deep. Shallow works better in tiny zones. Add a small tray to corral bottles and a dimmable plug-in light above the mirror for flattering reflection. For a renter swap use command shelf strips when possible. Try floating shelf 12-inch and small round mirror 12-inch.
Spackle Planets for a Kid's Room Mirror
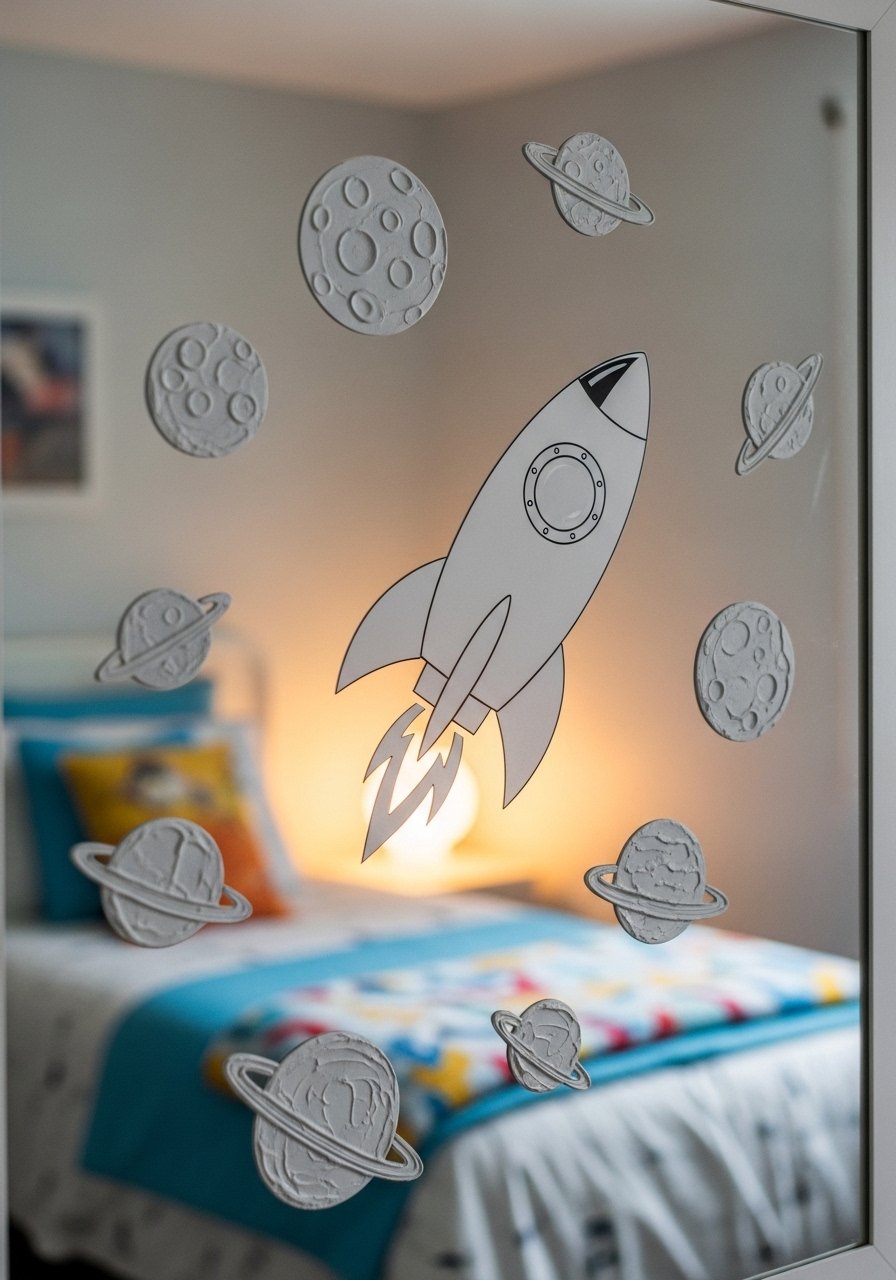
I used spackle blobs and painted them into little planets around a rocket-themed mirror for my niece. Paint three tones per planet for depth and glue tiny glitter accents that survive a toddler's touch once sealed. Parents worry it will peel. The fix is to seal with a durable varnish and use hot glue dots every inch so parts do not come loose. This keeps the wall interesting without adding furniture. Try craft varnish clear and glitter accents pack.
Faux Rattan Wrap for a Cozy Sunroom Mirror
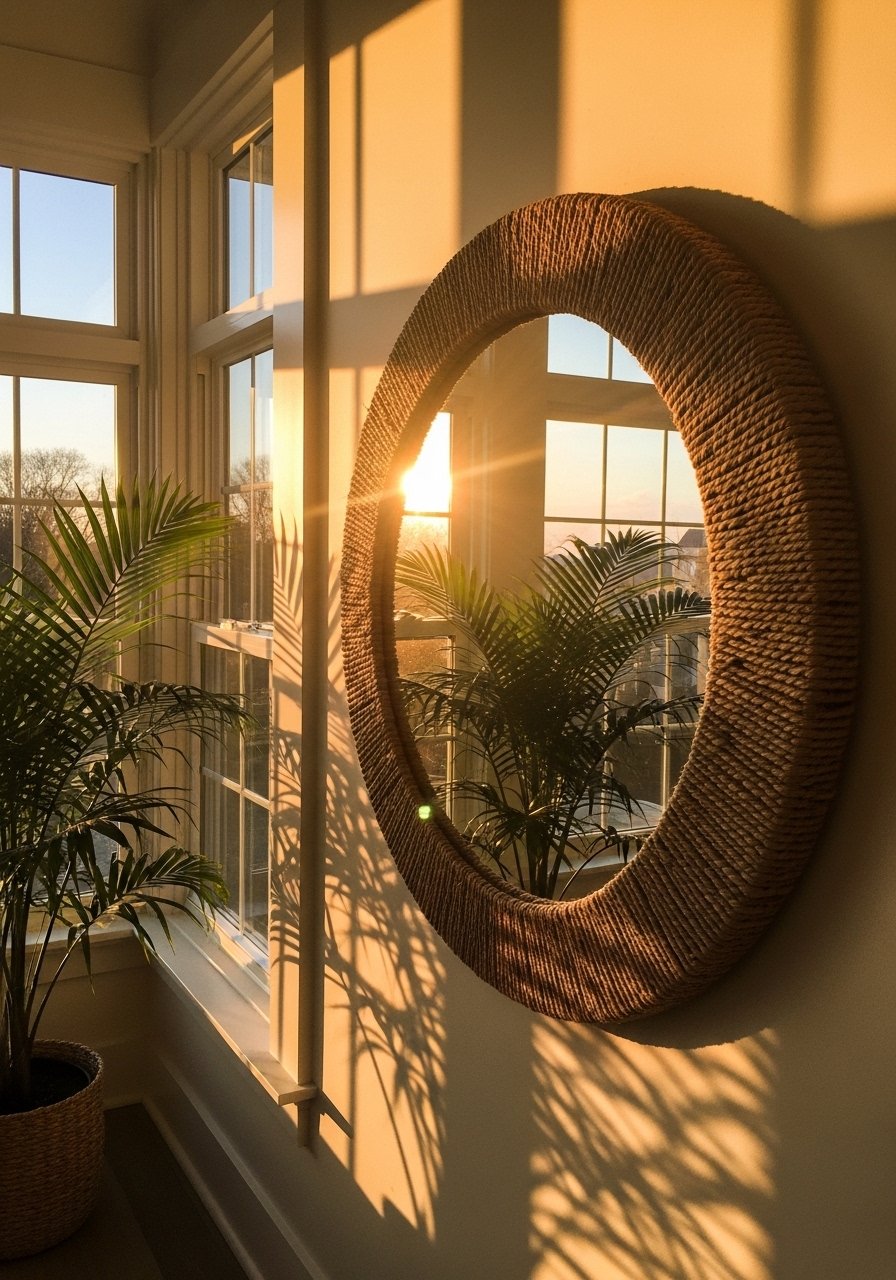
I wrapped a mirror frame in faux rattan braid to get coastal texture without the weight of real wicker. Use a hot glue gun to tack the braid every 2 inches and compress seams so they read seamless. A detail people miss is to primer the frame with a wood tone first, so tiny gaps in the braid disappear. This works well in sunrooms where strong light makes natural textures sing. For a renter look choose lightweight braid you can peel off later. Try faux-rattan-braid and mini-hot-glue-gun.
Most folks hit Dollar Tree first for mirror projects. Over half grab thrift mirrors to start. Mirror crafts pop every spring refresh.
Your Decor Shopping List
- Honestly the best $40 I have spent. Mod Podge gloss finish and Mod Podge matte for priming and sealing.
- For the copper tape overlay, copper-foil-tape 1/8-inch (~$8).
- For grout-like spacing and mosaics, small-mirror-tiles-2×2 (~$5-10).
- For glue work, pick e6000-adhesive and mini-hot-glue-gun.
- For frames and leveling, foam-core-20×30 and heavy-duty-double-sided-tape.
- For paint effects, chalk-paint-8oz and antiquing-glaze.
- For beads and garlands, wooden-beads-assorted and jute-twine-100ft.
- For wall hanging without nails, command-picture-hanging-strips.
- For small tools, glass-cutter-tool and utility-knife-with-replacement-blades.
Shopping Tips
Grab peel-and-stick-mirror-tiles for a rental backsplash. They reflect light and remove cleanly if you prep the wall well.
For paint tricks choose chalk-paint-8oz. Two thin coats beat one thick coat every time.
Curtains should reach the floor. Use linen-curtains-96-inch for standard 9-foot ceilings.
Found these while looking for something else. Mini-hot-glue-gun is the single most useful tool for mirror add-ons.
White oak is cleaner than dark wood this season. White-oak-floating-shelves read current instead of dated on small walls.
Swap a group of small plants for one tall piece. Artificial-fiddle-leaf-fig-6ft gives a natural scale when you lack windowsill space.
Frequently Asked Questions
Q: Can I use Mod Podge on mirrors without peeling later?
A: Yes, if you prime the slick mirror edge with one thin coat first and seal the final layer once everything is dry. For humid spots add a clear exterior sealer to prevent steam bubbles.
Q: What glue won't yellow or fail if my kid touches the frame?
A: E6000 is strong and durable but cures slowly. Hot glue grips fast for temporary holds. For things that see hands often use a clear epoxy or a varnish over glued bits so they resist oils and yellowing.
Q: How do I keep a thrifted mirror from hanging crooked?
A: Cut a foam core sheet to the exact frame size and glue it to the back to flatten any warps. Use heavy-duty double-sided tape or picture-command strips to hang so the mirror sits flush.
Q: Will copper tape peel in a bathroom?
A: It can bubble in steam. Prime the edge with Mod Podge and press firmly, then use a matte or gloss varnish over the tape to lock it down. Recheck after a week and press any lifting spots.
Q: How many egg carton flowers do I need for a 12-inch mirror?
A: Odd numbers look best. For a 12-inch mirror try five blooms at the top, three on each side, leaving the bottom mostly clear so it does not read heavy.
Q: Can I make a mirror look custom without tools?
A: Absolutely. Peel-and-stick tiles, tissue paper with Mod Podge, and bead garlands are all low-tool projects. Most folks hit Dollar Tree first for mirror projects, so you can source cheap parts nearby.
Q: Should I use real plants or faux around mirrors in small spaces?
A: Both work. Real plants like snake plants or pothos tolerate low light, but if you need height without maintenance a faux fiddle leaf fig is a good visual anchor.