
My living room had nice furniture and decent lighting but it still felt like a waiting room. Took me embarrassingly long to figure out it was missing texture and movement. Paper crafts fixed that for the kids and for me. They make corners feel lived in without taking up permanent space, and most projects are cheap enough to test on a whim.
These ideas lean playful-modern with a punch of color, and they work on kitchen tables, playrooms, bedrooms, or a hallway display. Most items are under $20, with craft packs around $30. About two-thirds start with whatever paper's in the house. Most parents stick to crafts that wrap in under 20 minutes or kids bail.
Playful Paper Chain Garland For Playrooms
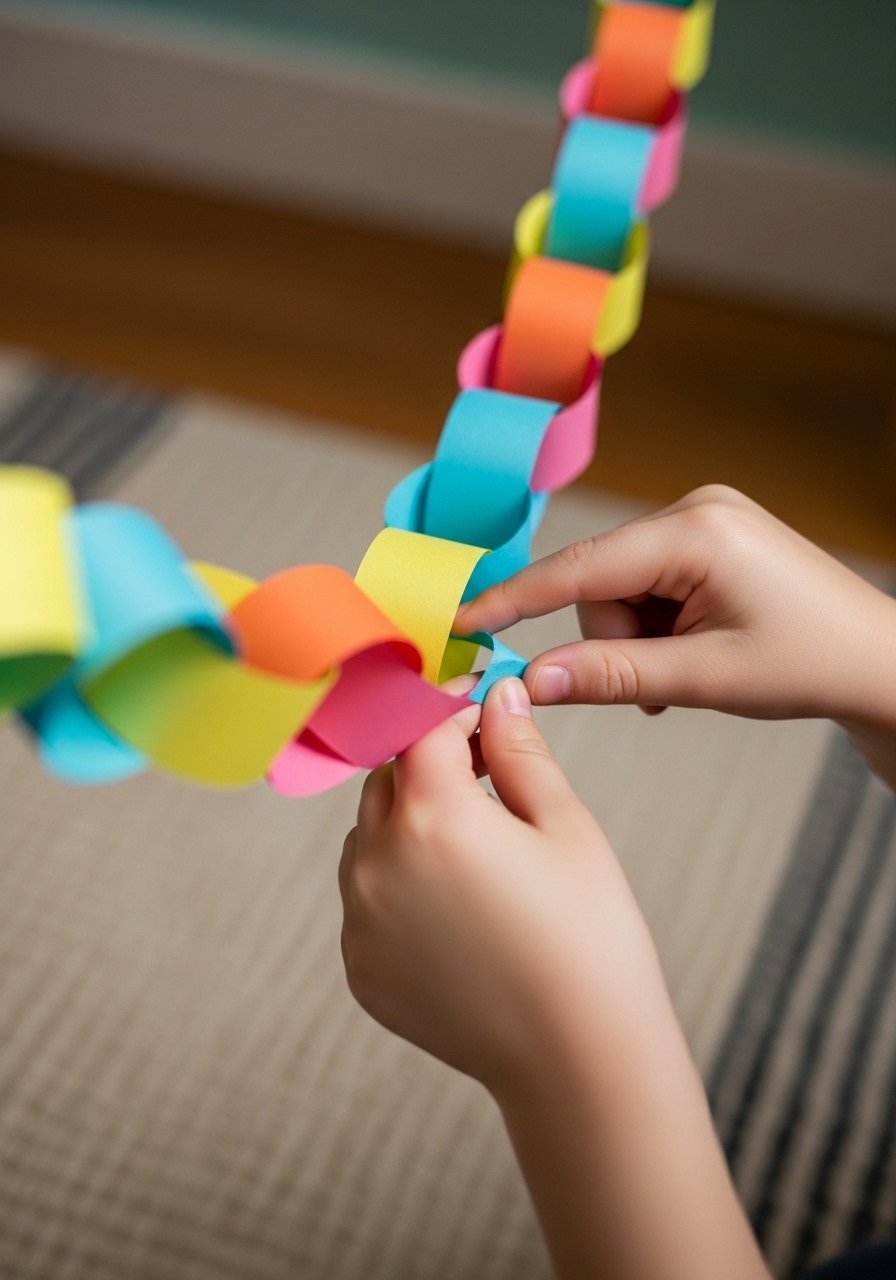
When I made a paper chain with my nephew, he watched the room change as the chain grew. Use 8.5×11 printer paper cut into 1-inch strips for perfect, easy-to-handle loops. Color code stacks with 5 brights + 3 neutrals so it reads playful but not chaotic. Glue dots keep links tidy and stop tears where liquid glue pools. For a sturdier display, double each loop by folding aside a small tab before gluing. Most kid crafts hit the wall for just a month, so this is great for short-term decoration that packs flat when you are done. If you want the pack I used, try Crayola Construction Paper 50-Pack. Common mistake, cut strips too thin and they tear under little hands. Pair this garland with the pom-poms later for a fuller look.
Boho Origami Frog Hopper For Bedrooms
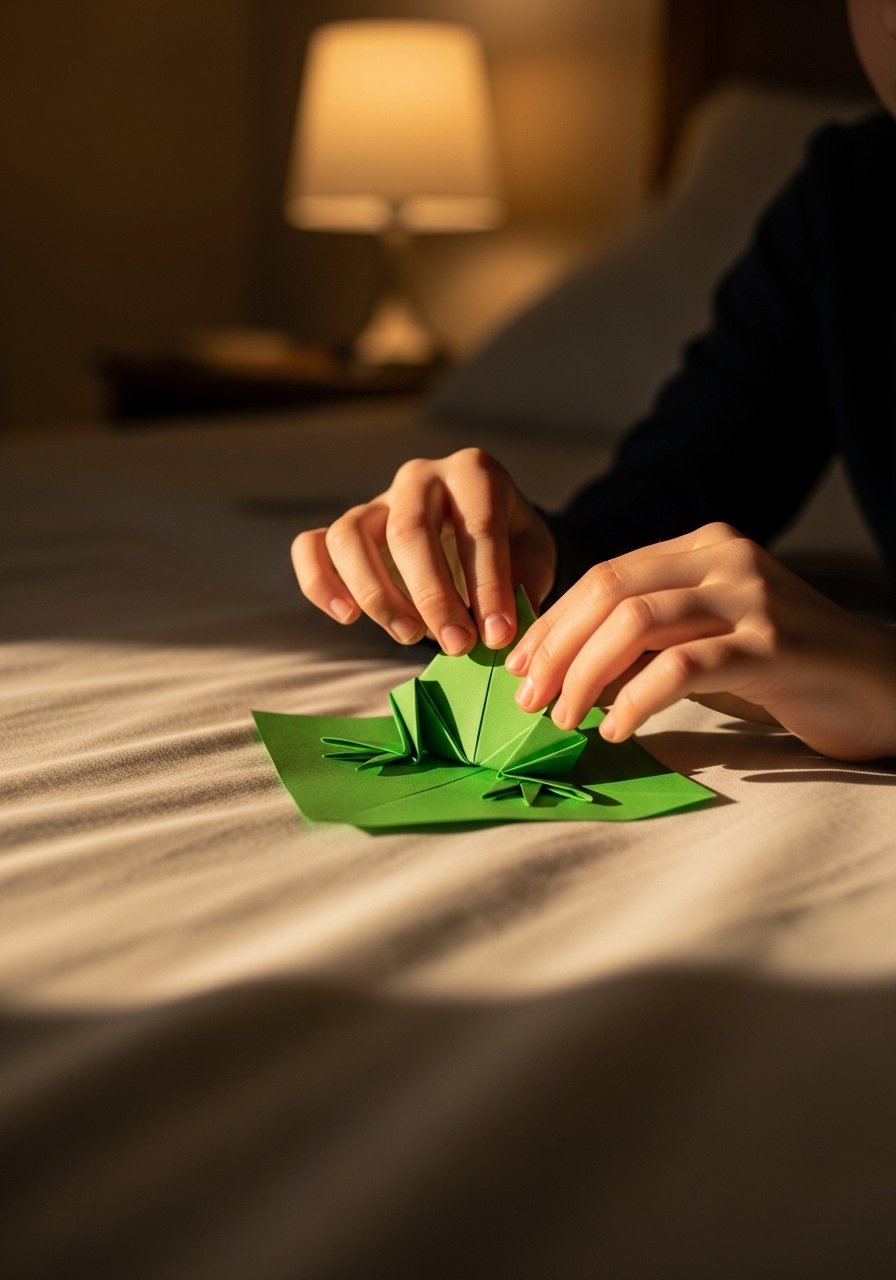
My kid actually tested every frog by making them hop across the bedroom rug. Start with square paper, fold into quarters for symmetry, and use slightly thicker paper if you want the frog to jump farther. Origami paper works, but 8.5×11 cut into perfect squares saves a run to the store. An easy product to keep on hand is Origami Paper Assorted Colors. A typical mistake is using flimsy printer paper and wondering why the frog flops. Teach the kids to crease each fold firmly and test jumps on carpet not hardwood. This is great for bedrooms and quiet play corners, and older kids can decorate frog faces with markers for personality.
Coastal Paper Plate Jellyfish For Windows
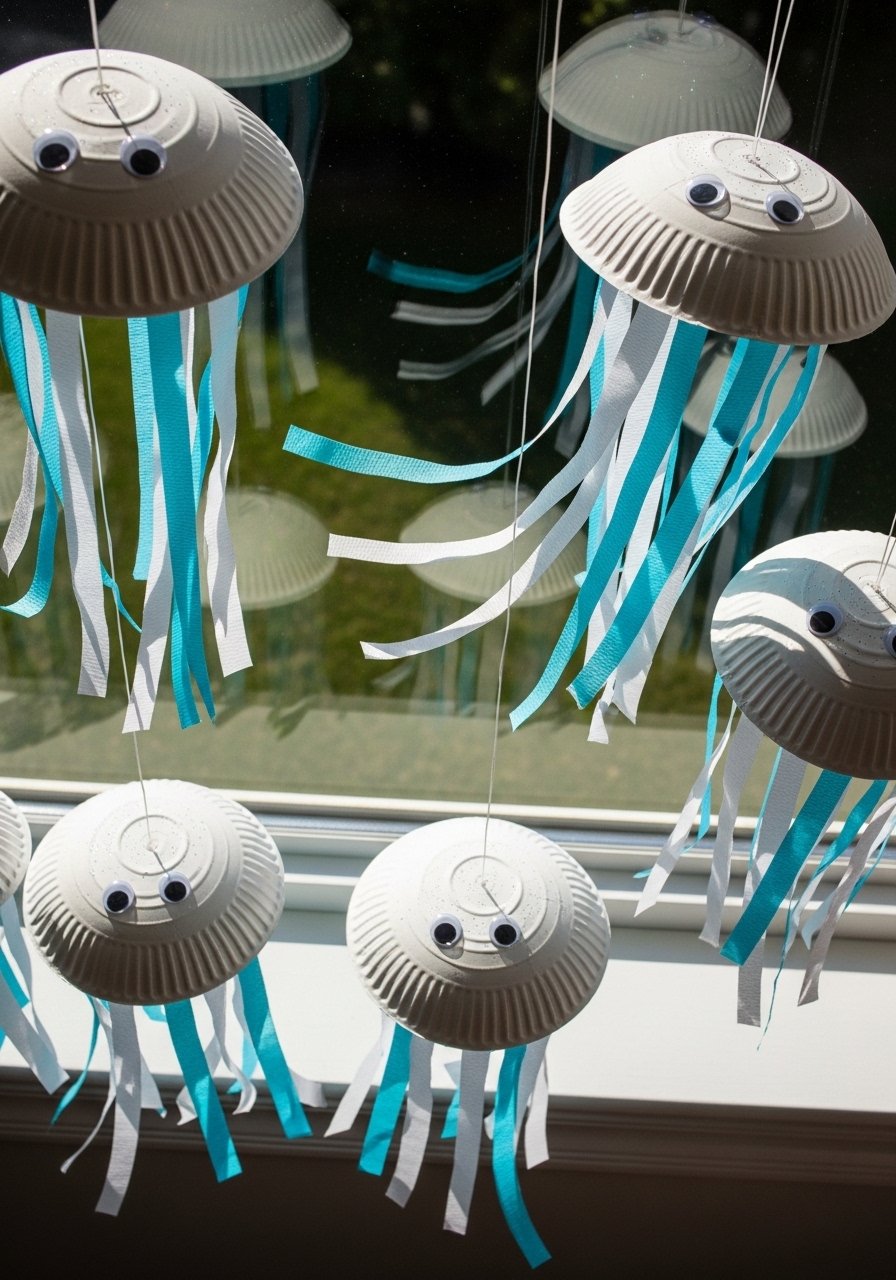
I made one of these with a stack of paper plates and crepe streamers, and it turned a bare windowsill into a little ocean scene. Cut the plate in half for a dome, glue on crepe streamers as tentacles, and attach a loop of monofilament to hang. Use glue dots to avoid a wet mess and set up a wipeable mat so cleanup is fast. A common parent gripe is glue everywhere, so use disposable place mats and an apron. For supplies try Heavyweight Paper Plates Pack and Crepe Streamers Bulk Pack. Tip, add a small battery fairy light inside the dome for soft glow at night. This is a perfect project for window light and matches the jellyfish feel better when you use a pale palette with one neon accent.
Scandinavian Accordion Fan Flowers For Tables

The first time I layered accordion fans in a jar, it looked like a real bouquet. Fold strips into fans, stack 3-5 layers, and glue the centers with glue dots for a neat finish. Cardstock holds shape longer than printer paper. Keep the fans to odd numbers like three or five in an arrangement for balance. I like Cardstock Sheets 8.5×11 Assorted Colors for sturdiness. A mistake I see is using too many layers which makes the bouquet top-heavy. For a cleaner look, pair with a neutral jar and swap fans seasonally.
Fairy 3D Paper Butterfly Mobile For Nurseries
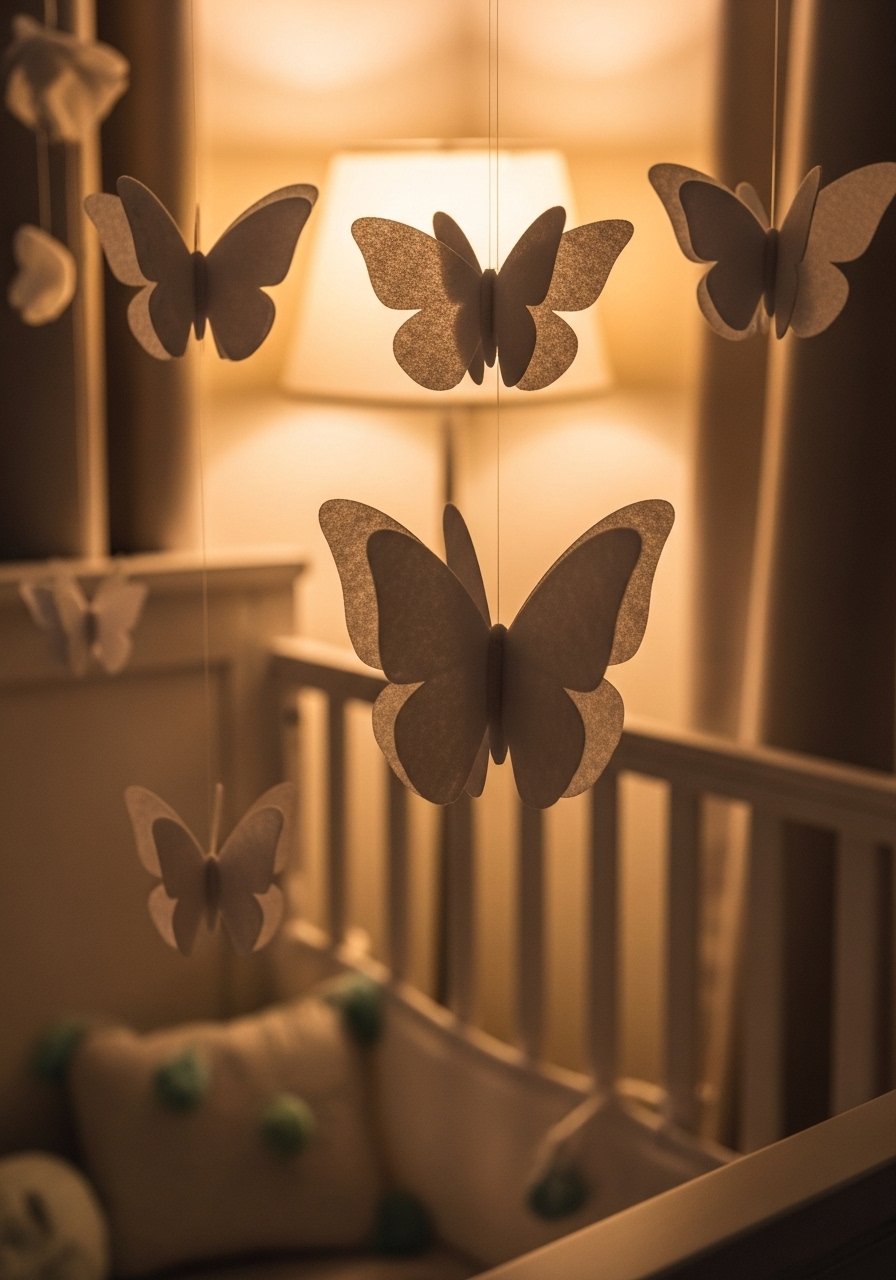
Hanging these in a nursery made bedtime feel softer. Cut butterfly shapes from vellum or translucent paper and bend the wings slightly to create lift. The 3D pop-up effect needs 2 base layers plus 1 pop element to look intentional without collapsing. Balance is key, so hang in odd groups of three or five. Use clear fishing line and a small hoop for structure. If you want vellum, try Vellum Paper 8.5×11 Pack. A common mistake is using heavy cardstock that weighs down the mobile. This pairs nicely with the garland idea earlier for a coordinated bedroom display.
Festive Tissue Paper Pom-Poms For Parties
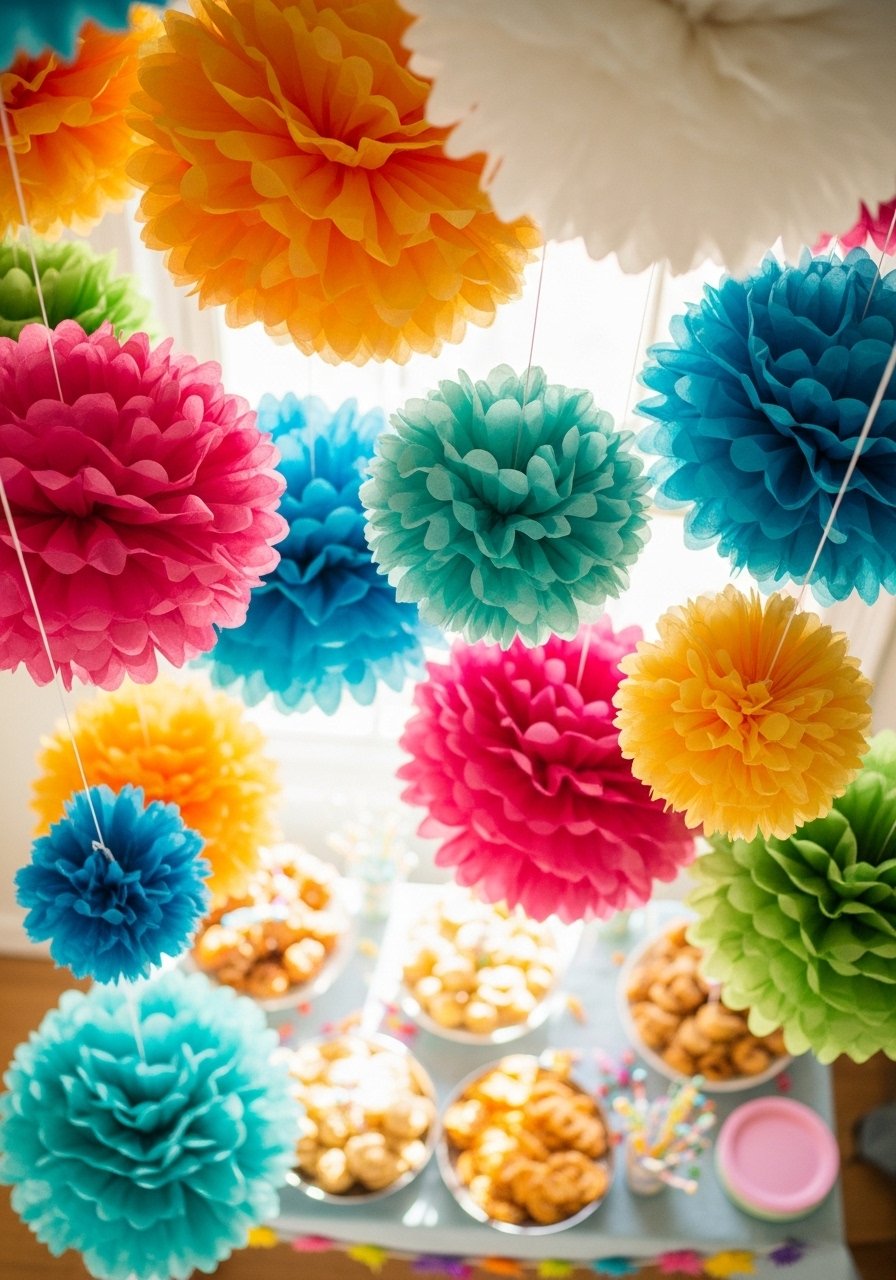
Tissue pom-poms taught me that volume beats precision. Stack 8-10 sheets of tissue, fold accordion style, tie the center, and fluff. Use symmetry in sizes and stick to a palette of 3 main colors for maximum impact. Tissue is cheap so you can make multiples fast. I use Tissue Paper Bulk Pack and keep a bag of plastic craft hooks on hand. The usual problem is underfluffing which makes them look flat. Also, store them folded flat between uses so they stay neat in small apartments. These are ideal for parties or to cheer up a small bedroom corner.
Recycled Paper Roll Stamp Animals For Art Corners
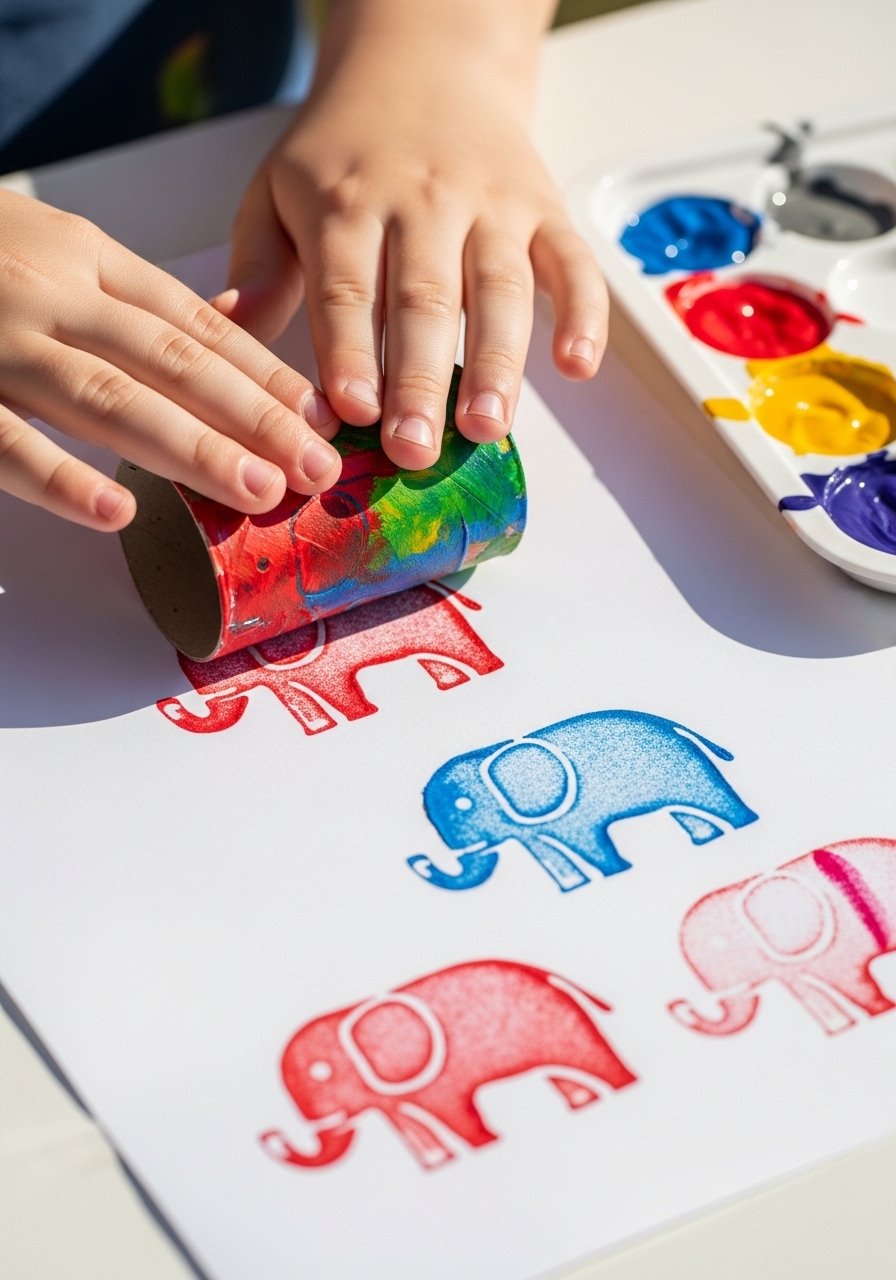
There is something satisfying about turning trash into tools. Cut toilet paper rolls into different shapes and use them as stamps with washable paint. Use a wide brush and a shallow tray so kids do one dip, one stamp. This keeps paint mess down and speeds the activity. A mistake is offering too many colors at once which becomes overwhelm. Keep it to three colors plus black for detail. For paints I recommend Washable Acrylic Paint Set. This project solves the "no supplies" panic because most homes have rolls and leftover paint. Batch-cut rolls if you have two kids so everyone has one and fights over tools stop.
Winter Kirigami Snowflake Ornaments For Mantels
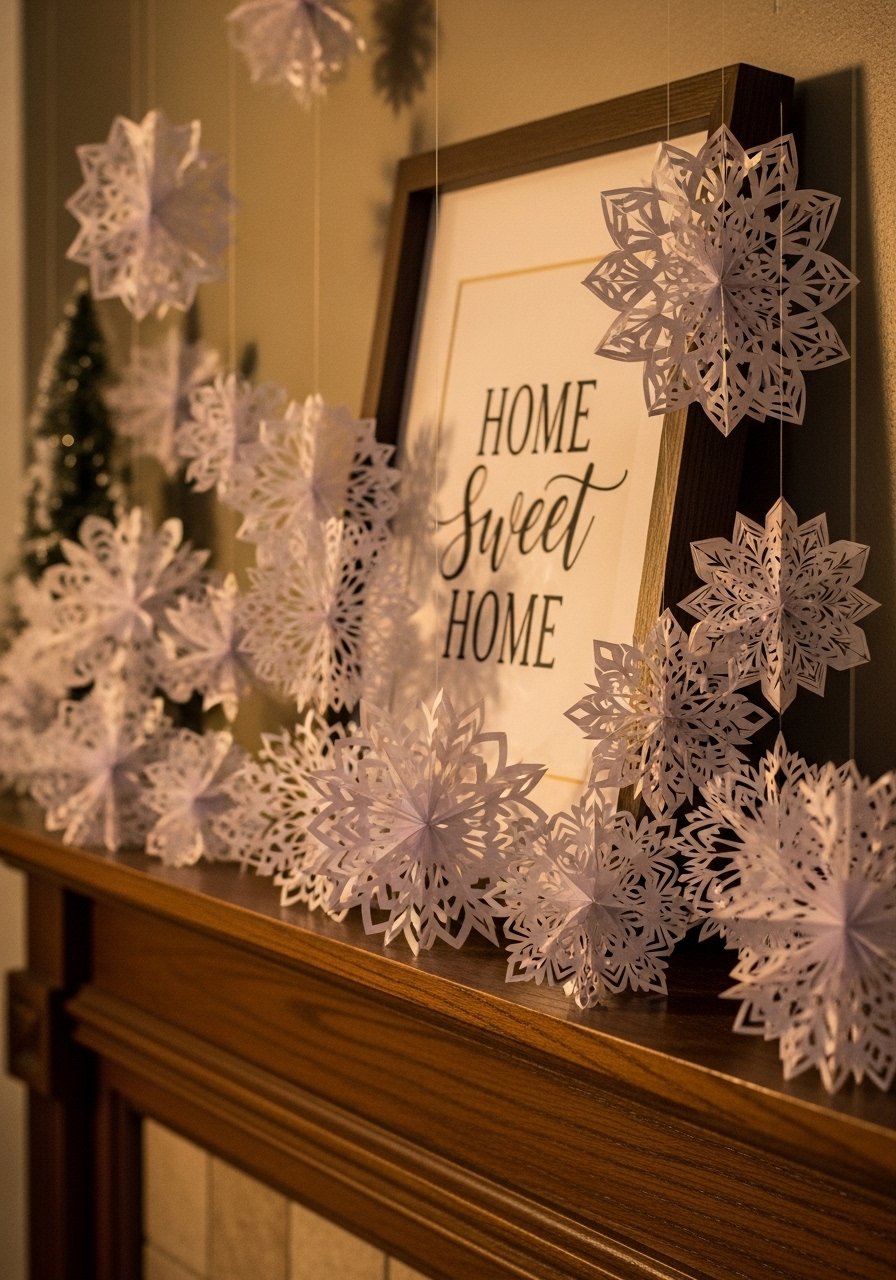
I taught my niece simple kirigami cuts and she walked away proud of a delicate ornament. Fold a square into quarters, trim a few triangles, and unfold to reveal symmetry. Use glitter cardstock for weight and sparkle that photographs well. One sheet makes surprisingly intricate shapes when you plan three to five cuts. A mistake people make is trimming too close to the edge which rips when unfolded. Try Glitter Cardstock 12-Pack for durable snowflakes. These work on mantels or as a window cluster and store flat between seasons.
Boho Paper Bead Bracelets For Dress-Up
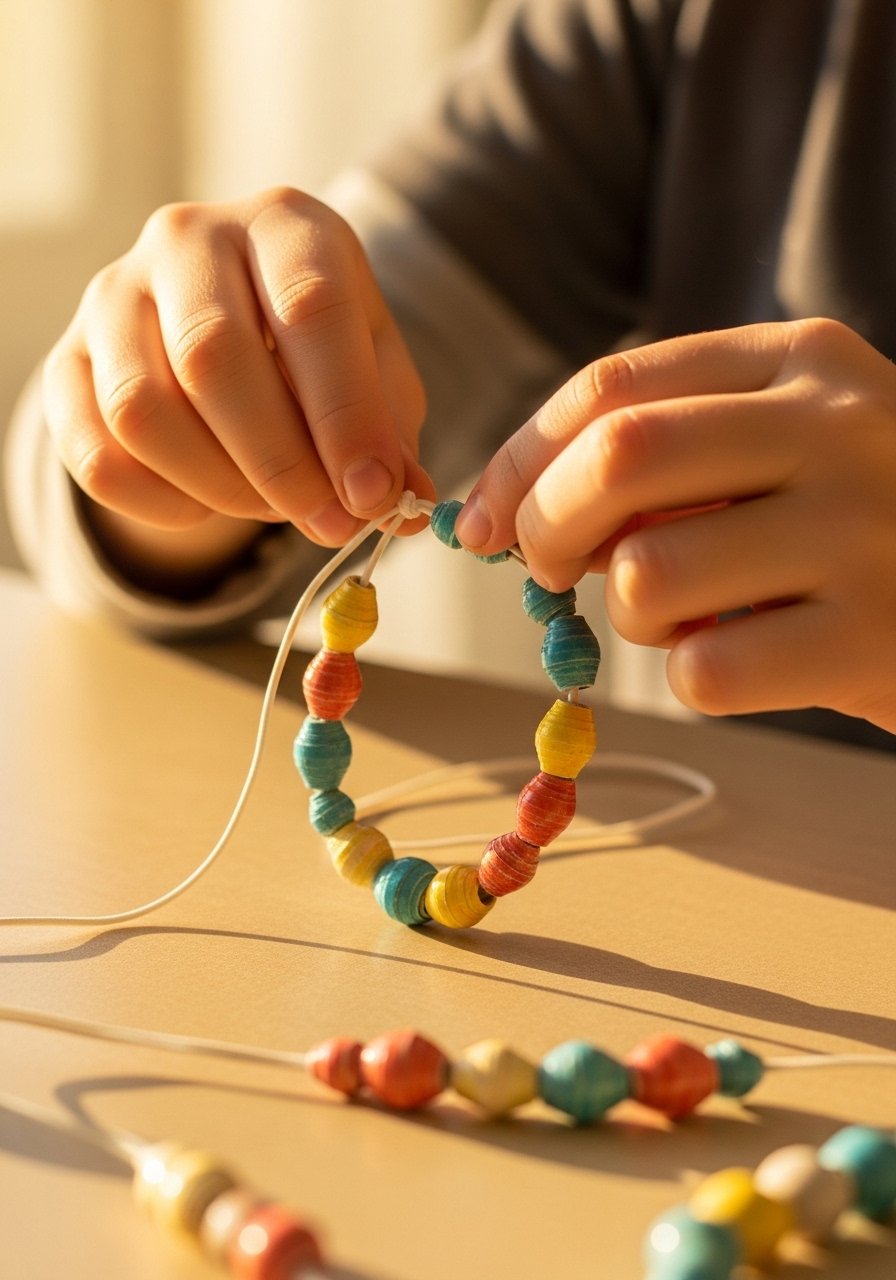
Paper beads feel like real jewelry but are forgiving. Cut 1-inch strips, roll tightly around a skewer with a drop of glue at the end, and seal with a matte varnish for wear. Vary strip widths for bead size, and use odd numbers on a bracelet for visual balance. A common mistake is rolling too loosely which lets beads fall apart. Use a sticker dot or glue dot on the end to secure quickly. I like Elastic Cord 50-Yard Spool for stringing. This is a calm activity for dress-up boxes and teaches fine motor skills.
Nautical Pop-Up Shark Card For Card Tables

We made a whole ocean-themed card set one rainy afternoon. Pop-up cards need two base layers plus one pop element to make the surprise stable. Cut a shark silhouette and glue only at two small tabs so the jaw flips cleanly. Fold the base card carefully and test the pop before final glue. Use cardstock for the base and lighter paper for the pop element. For supplies try Blue Construction Paper Pack. A common frustration is cards that collapse in the mail, so reinforce the spine with washi tape if you plan to send them. Pair these with the stamped animals idea for a whole ocean series.
Your Decor Shopping List
- Honestly the best $12 I have spent. Crayola Construction Paper 50-Pack in mixed colors for garlands and frogs
- For sturdier fans and cards, Cardstock Sheets 8.5×11 Assorted Colors (~$14-20 per pack)
- Found these while looking for something else. Glue Dots Multi-Pack (~$8) stops the wet-glue mess
- Bulk buy so you always have some. Tissue Paper Bulk Pack for pom-poms and jellyfish tentacles
- For marbling and sealing paper beads, Matte Mod Podge 8oz (~$10), similar at craft stores
- For stringing and mobiles, Monofilament Fishing Line 100-Feet (~$7)
- If you need paint that cleans easily, Washable Acrylic Paint Set (~$15), check Target for similar finds
- Small essentials: Elastic Cord 50-Yard Spool for bracelets and hanging ornaments
Shopping Tips
Buy heavier paper for 3D pieces. Cardstock packs will make mobiles and pop-ups hold up better than thin printer paper.
Grab Glue Dots Multi-Pack for quick assembly and almost no cleanup. They work faster and cleaner than liquid glue.
If you live in a small space, store finished crafts on clipboards or a narrow ledge. Magnetic Picture Ledges are great for swapping seasonal work without holes.
Buy a multi-pack of Tissue Paper Bulk Pack. It is cheap and lets you batch projects for siblings so nobody feels left out.
Frequently Asked Questions
Q: How do I keep the mess under control for paint and glue?
A: Work on a wipeable surface and use glue dots where possible. Keep a shallow paint tray and limit colors to three. Disposable placemats or a cheap shower curtain under the table cut cleanup time in half.
Q: Can these projects work for kids of different ages at the same time?
A: Yes. Batch simple steps like cutting strips or pre-folding squares for younger kids, while older kids handle detailed cuts and sealing. Batch-making avoids the "one craft, three kids, one meltdown" scenario.
Q: What paper should I always keep on hand?
A: Keep a stack of 8.5×11 printer paper and a pack of cardstock. About two-thirds start with whatever paper's in the house. Those two basics cover most projects from hopping frogs to pop-up cards.
Q: How long will these crafts last on display?
A: Most kid crafts hit the wall for just a month. If you want something longer, mount pieces on a small ledge or frame lightweight items behind glass to preserve them.
Q: Are any of these projects pet-safe?
A: Avoid glitter and small beads on items pets can reach. Use non-toxic washable paints and hang mobiles out of paw range. For longer-term displays, consider framing delicate paper pieces behind glass.
Q: What is the best glue for quick projects with kids?
A: Glue dots for speed, and a tacky craft glue for anything needing a stronger bond. Glue dots solve the most common complaint, which is glue everywhere and long drying time.
