
My blank wall felt like a mistake for months. I bought a few decals and slapped them on. They looked small, childish, and off-center. I kept moving them and nothing clicked.
I learned the hard way that decals are about scale and anchor points, not just pretty art. This guide shows the simple choices that make decals look deliberate and grown-up, so a bedroom reads calm and balanced.
I've noticed decals are everywhere I look this year, from organic modern bedrooms to quiet luxury schemes. I use this method when a wall feels empty. It works in an hour. You will end up with a single, calm focal area that feels lived-in.
What You'll Need
- Removable botanical decal set in muted greens ($12-30). Pick a scale that roughly matches your headboard width
- Linen duvet cover in sage, queen (I prefer the lived-in texture) linen duvet cover in sage, queen ($70-110)
- Set of 3 ceramic vases, matte white ($25-40). Use them on ledges or a nightstand
- Brass picture ledges, 24-inch ($18-30). Perfect for leaning small frames and vases
- Command small picture hanging strips, 16-pack ($6-15). For renter-friendly repositioning
- Jute area rug, 8×10 jute area rug, 8×10 ($90-160). Adds ground and texture
- Chunky knit throw in oatmeal, 50×60 chunky knit throw in oatmeal, 50×60 ($40-65). Tossed casually it reads intentional
- Washi tape sample rolls for temporary layout testing washi tape set sample rolls ($5-12). Use low-stress marking before placing decals
Step 1: Measure the wall and choose decal scale
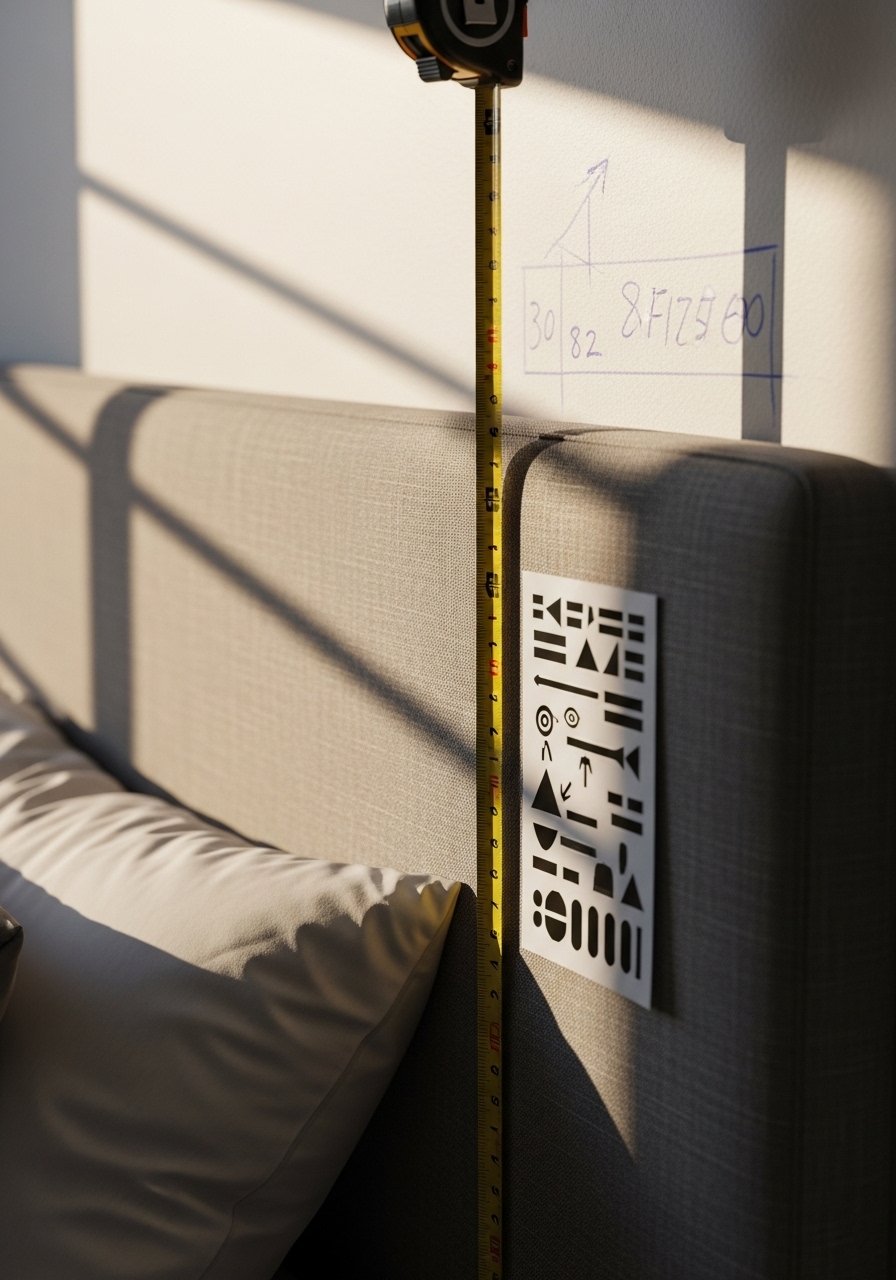
Pull out a tape measure before you peel anything. Measure the headboard width or the main furniture below the wall. I aim for the decal composition to span about two-thirds of that width. That proportion reads intentional. Too small and the decal looks like an afterthought. Too big and it overwhelms the room.
Most people skip this and guess. The result is decals that float alone on the wall. A simple rule helps. Mark the perimeter with washi tape first so you can step back and approve the size. Avoid guessing placement from the ladder.
Step 2: Establish the anchor point, then build around it

Start by picking the anchor, usually the center of the bed or the top edge of the headboard. I place the lowest part of a decal cluster 4 to 6 inches above the headboard for a low ceiling. In taller rooms I leave 8 to 12 inches. This keeps the wall connected to the furniture visually.
When done right the wall reads like one object above the bed. When wrong the decal drifts left or right of the bed. A mistake I made often was centering the decal on the room rather than the bed. Center on furniture, not the room.
Step 3: Layer textures and color to make decals feel integrated
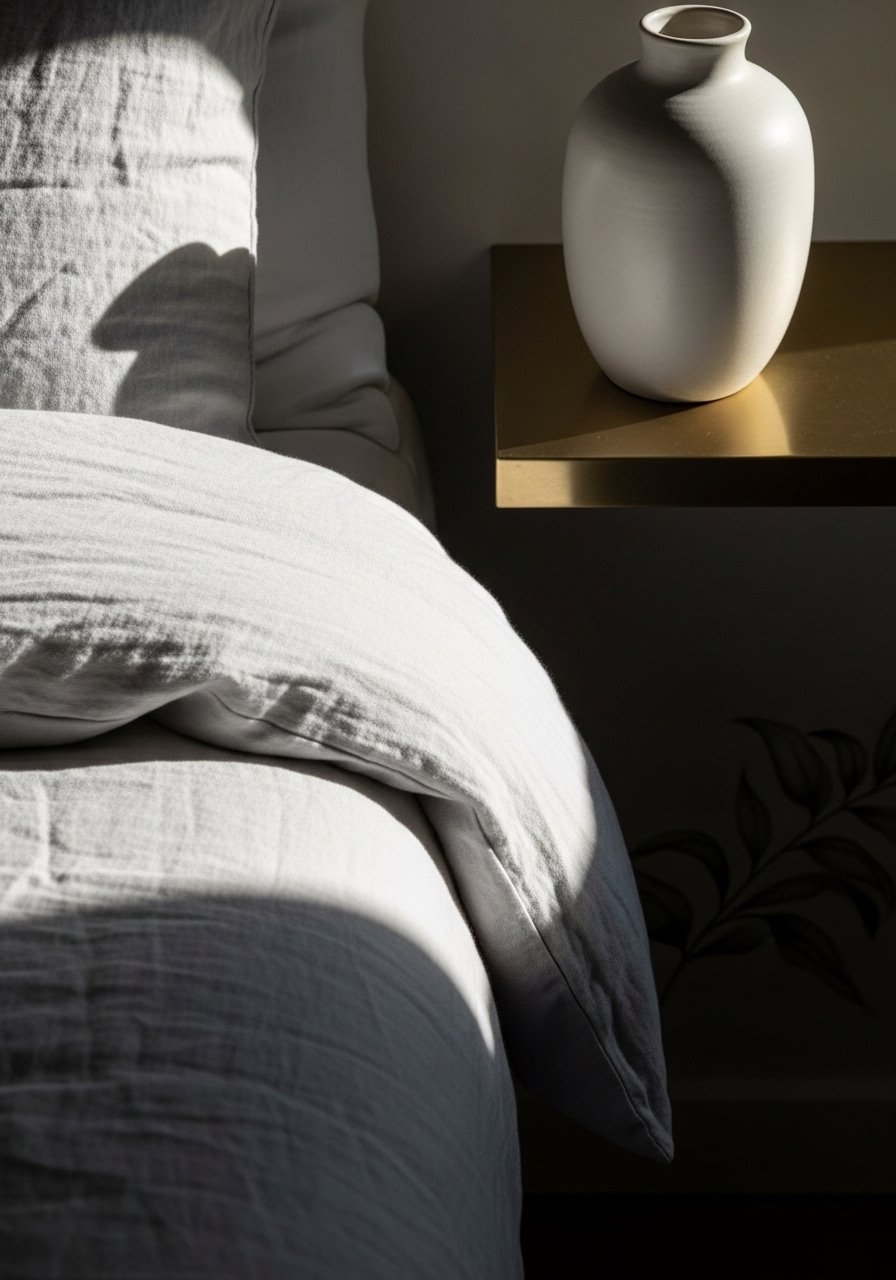
Once decals are up, layer in soft furnishings so the wall reads tied to the room. I swap to a linen duvet in sage and add a chunky throw. The color palette should echo one or two tones from the decals. That repetition makes the wall feel planned, not pasted on.
People often treat decals like standalone art. They forget to adjust textiles. A small change like matching a pillow color to a decal leaf pulls everything together. Avoid matching every item exactly. Use related tones and textures for balance.
Step 4: Edit by grouping in odds and watching spacing

I clear the surfaces and add three anchor objects, not four. Odd numbers read natural. On ledges I leave around 2 to 3 inches between items in a small group. That breathing room keeps each piece visible and prevents visual mush.
Most people squeeze items together or spread them too widely. Both flatten the composition. You will be tempted to fill every inch. Resist that urge. Edit with ruthless patience and step back often. If a cluster looks heavy on one side, swap a vase for a lower object to rebalance.
Step 5: Light and longevity, so your decals stay fresh
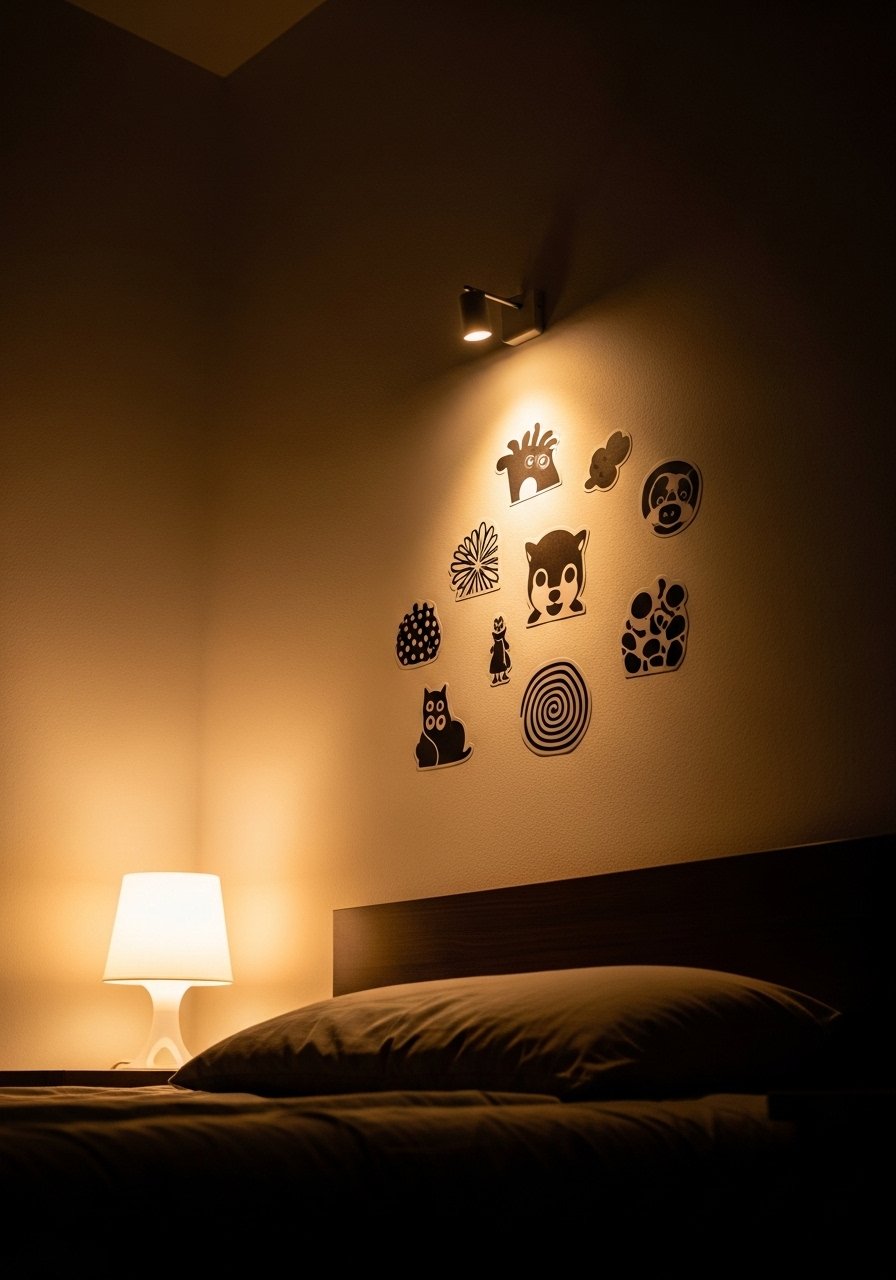
Add soft light to make decals read as part of the room after dark. A small LED picture light or a bedside lamp aimed at the wall creates subtle shadow and depth. I also use Command strips and avoid damp walls. High humidity can reduce stickiness over time.
People assume decals are permanent. Most are removable but not endlessly repositionable. Test a tiny section on your wall before committing. If a decal peels unevenly you will need to press firmly and hold for 30 seconds. Avoid sticky residue by following the product instructions for removal.
Why Decals Can Still Look Random
I've seen this a lot. Decals arrive and the impulse is to place them where they look nicest up close. That causes imbalance. Good placement thinks about the room from three steps back, not just hand-level.
Common mistakes:
- Centering on the wall instead of the furniture below
- Choosing decal scale too small for the wall
- Forgetting to repeat a color or texture from the decal in the bedding or rug
Quick fix: mock the layout with washi tape then add one textile color that echoes the decal. It changes the read immediately.
Making This Work in a Small Bedroom
Small rooms need vertical thinking. I use decals to make the wall feel taller by arranging elements in a loose vertical column above the bed. Leave more breathing room on the sides so the composition does not feel crowded. Use smaller decal motifs and pair them with a light duvet and a single slim ledge.
Practical points:
- Keep the lowest decal 4 inches above a low headboard
- Avoid large floor rugs that shrink visual height
- Use matte finishes to reduce glare in tight spaces
A single, calm focal area keeps a small room from feeling chaotic.
Seasonal Swaps and Low-Commitment Updates
I change decals seasonally without a major overhaul. Swap one decal motif for another and adjust a throw or pillow color. Removable botanical sets are great for spring and summer. For fall I switch to warmer-toned textiles and smaller neutral decals.
Example: Use a neutral decal base with a seasonal removable accent. Keep ledges for small seasonal objects like a candle or a small ceramic pumpkin. The base composition stays the same. Only the accessories change. That keeps the overall room stable and easy to update.
Pick One Wall and Commit
Pick the wall above your bed and focus there. Do the measuring, mock the layout with washi tape, and place the largest decal first. Then add one textile and one ledge or vase to tie it to the room.
Start small. Make one confident placement choice and edit from there. You will be surprised how deliberate a few simple changes feel.
