
A real, lived-in living room showing the final result of tasteful LED accent lighting. Natural daylight, soft shadows, layered textures. The space feels intentional but not staged. No text overlay. Wide angle that shows balance and flow.
I’ve stood in rooms where LED strips felt like an afterthought — bright, garish, or simply in the wrong place. It’s easy to make lights scream for attention instead of settling into the room.
I learned to treat LEDs like textiles: they add warmth, outline shapes, and make corners feel finished. Small changes, calm choices.
How to Decorate a Room With LED Lights Tastefully
This is the method I use when a room feels incomplete. You’ll learn how to choose color, where to hide the source, and how to balance LEDs with existing lamps and textiles. The end result should feel intentional, lived-in, and warm — not like a club or a gadget shelf.
What You'll Need
- Smart RGB LED Strip 16.4ft (5m) (~$20–45)
- Warm white LED Strip 16.4ft (5m), 2700K–3000K (~$15–35)
- Bias lighting kit for 55-inch TV, warm white (~$20–50)
- Smart LED bulbs A19, dimmable warm white (4-pack) (~$25–60)
- LED floor lamp with dimmer, warm light (~$60–150)
- Adhesive cable concealer raceway kit, white (~$8–25)
- LED under-cabinet light bars, 12-inch, warm white (~$15–45)
Step 1: Choose the Right Color and Intensity
I start by deciding the room’s mood. For most living spaces I pick warm white (2700K–3000K) for general ambient washes and reserve RGB for small accent areas. Warm light makes textiles and wood read cozy and lived-in.
People often skip matching color temperature to existing bulbs. That mismatch is jarring. Avoid blasting saturated colors across the whole room — they read gimmicky. Keep intensity low for ambient strips; brighter for task spots.
Step 2: Hide the Source — Let the Light Be the Detail
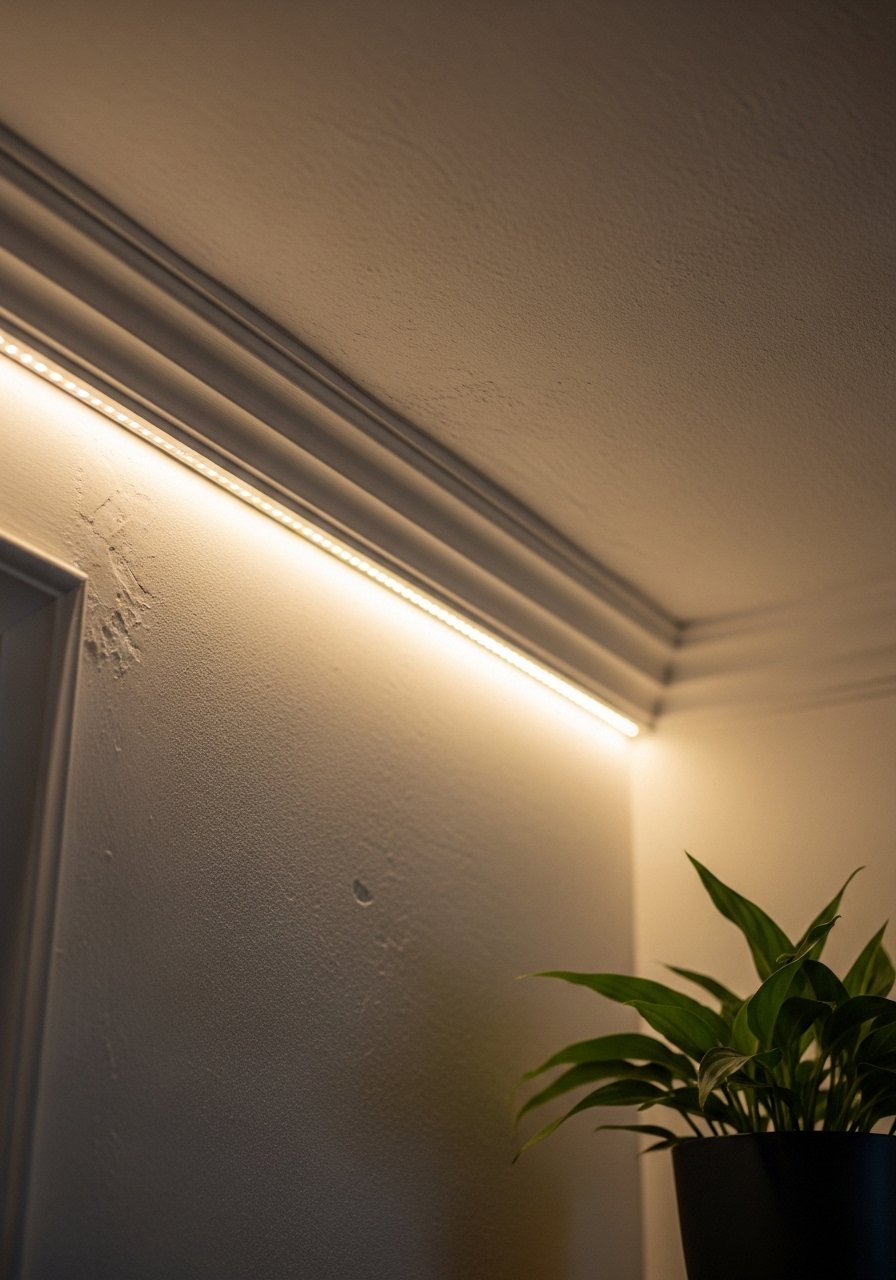
I tuck strips into coves, behind crown moulding, or under shelving so you see the glow, not the diode line. Hidden placement creates a wash that reads as architecture, not gadgetry. In organic modern or Japandi rooms, this makes the lighting feel intentional and quiet.
A common miss is leaving the adhesive edge exposed. That makes the installation obvious. Avoid placing strips where they’ll reflect off glossy surfaces or show the LED dots.
Step 3: Add Bias Lighting to Screens and Art
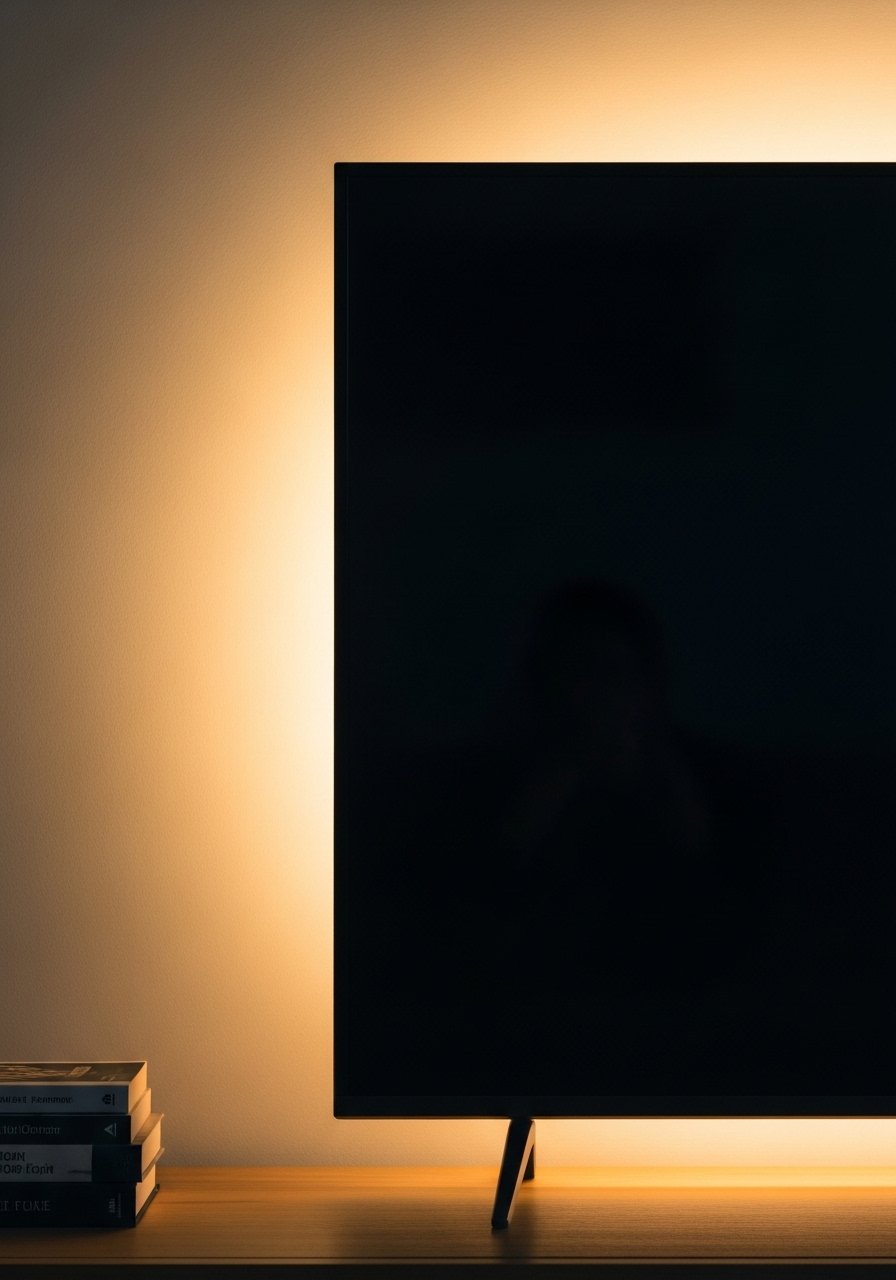
Bias lighting behind a TV reduces eye strain and makes the screen look cleaner. I match the bias temperature to the room’s bulbs so the TV feels anchored. The result is a grown-up, balanced look that doesn’t scream “LED.”
People forget to dim bias lights enough; too-bright halos read like stage lighting. Also don’t use cool blue bias light in a warm-toned room — it fights the rest of your palette.
Step 4: Use Accent and Task LEDs to Highlight, Not Flood
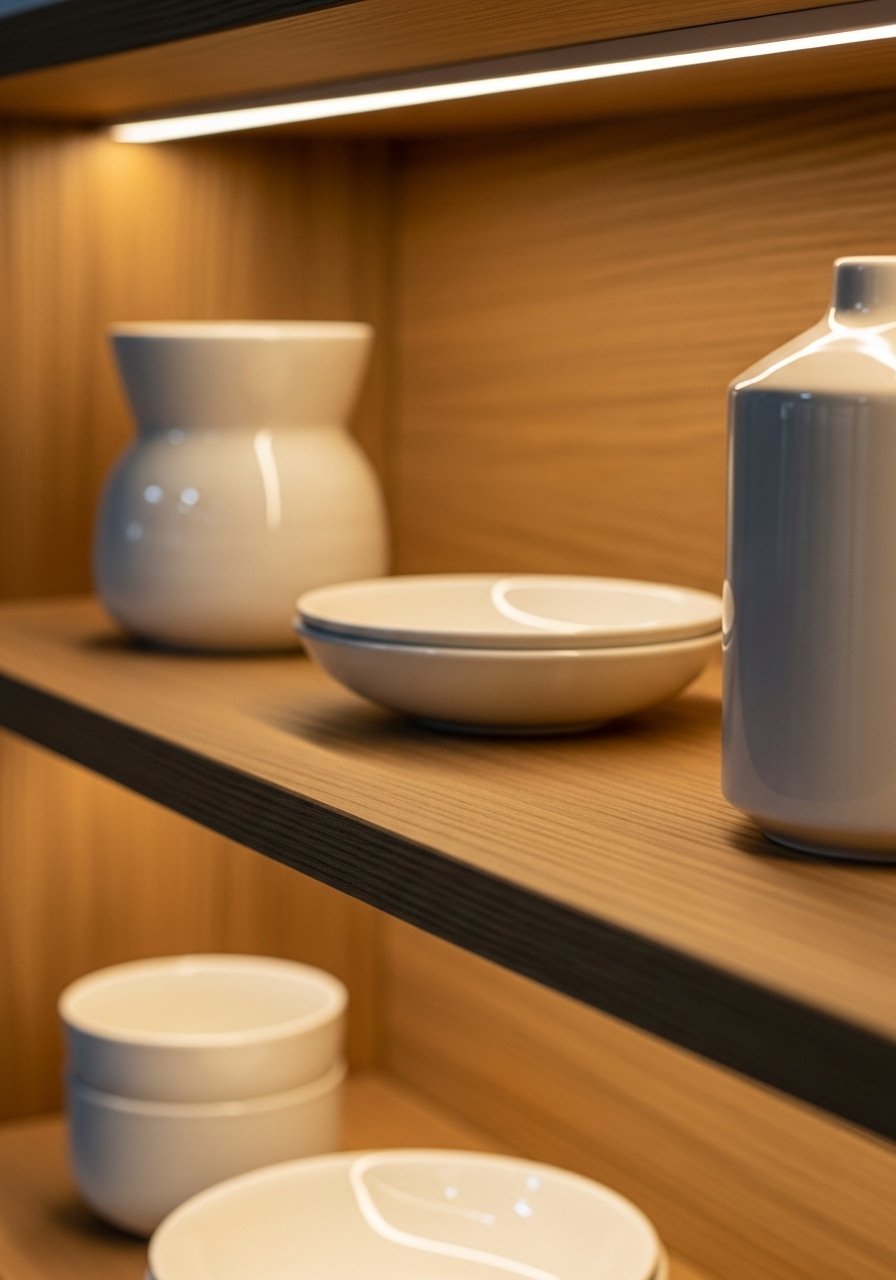
I use short warm light bars under shelves, inside bookcases, or above a desk to spotlight objects. These small pools of light add depth and make the room feel curated. It’s the same idea as putting a small lamp on an empty table.
A mistake I see is lighting the entire shelf evenly. That makes displays flat. Instead, aim narrow beams or short bars for focal points. Keep the output low so the items glow, not glare.
Step 5: Control for Ease and Balance
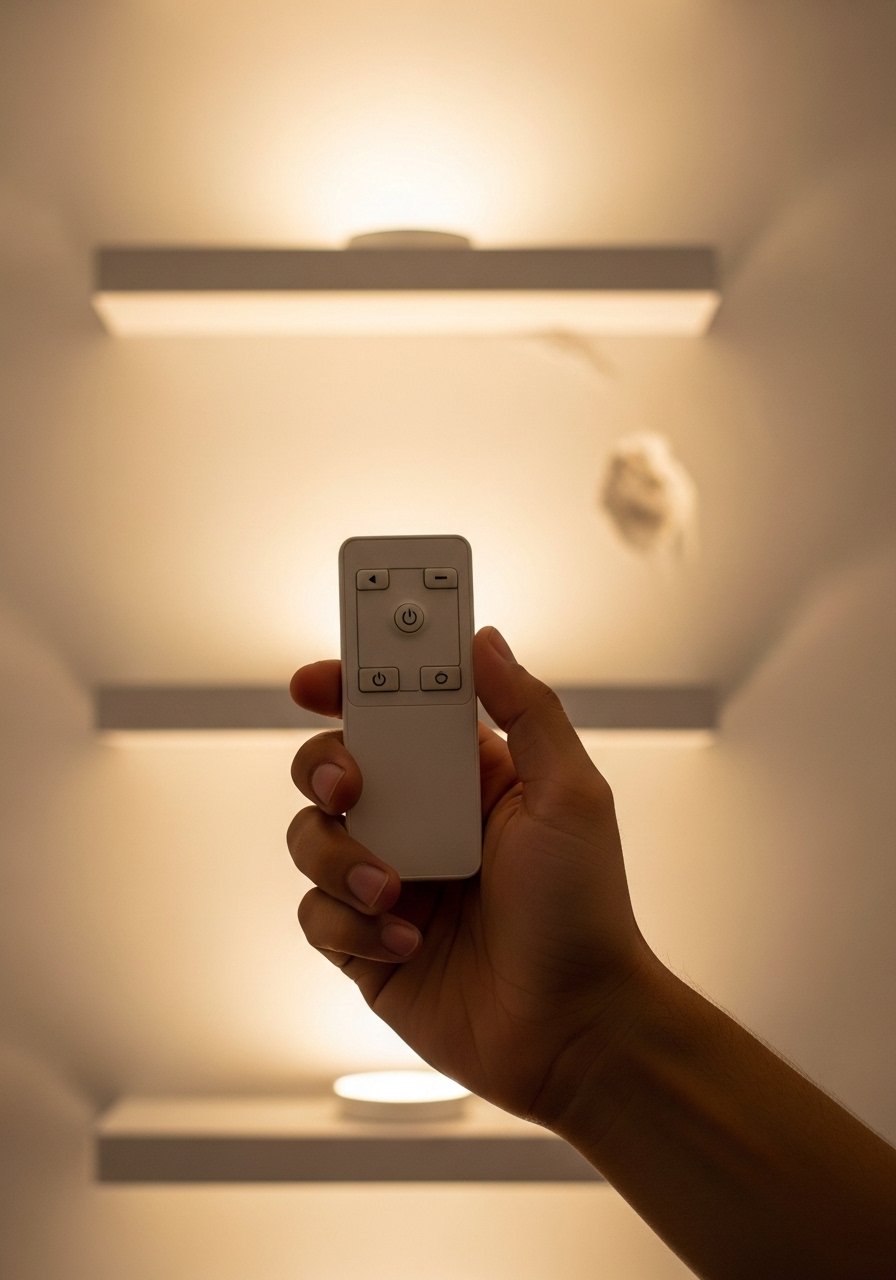
I set default scenes: a dim warm ambient, a slightly brighter reading mode, and a subtle accent mode for evenings. Physical remotes or a simple wall dimmer are the friendliest for guests. I program RGB effects sparingly — usually for a party or seasonal accent.
People rely only on apps and forget the small remote or physical switch. That’s a usability mistake. Also avoid constant color-changing effects; they tire a room and the people in it.
Common Mistakes and How I Fix Them
I see three repeat problems: wrong color temp, visible LED strips, and overuse of saturated colors. I take these steps:
- Match new LEDs to existing bulbs (warm to warm).
- Hide the light source behind moulding or furniture edges.
- Reserve bold color for a single accent, not the whole room.
Fixes are usually inexpensive — swapping to a warm white strip or adding a cable concealer often calms the whole look.
Adapting the Look by Room Size and Budget
Smaller rooms need restraint. I use a single warm strip along the ceiling perimeter or a bias kit behind the TV. In tight budgets I start with a warm white strip (~$15–25) and one dimmable floor lamp.
If you have more room or money, add under-shelf lights and smart bulbs to create scenes. Don’t feel you must do everything at once — layering over time keeps choices thoughtful.
Mixing LEDs with What You Already Own
I never replace all lamps with LEDs. Instead, I layer. A warm LED strip handles ambient wash, a floor lamp offers soft directional light, and smart bulbs in fixtures provide color or warmth.
Tips I use:
- Keep metals and textiles consistent so new light feels cohesive.
- Test new strips near your sofa or art before committing.
- Use cable concealers to keep lines clean; messy cords make even subtle lighting look cheap.
Final Thoughts
Start small. I often begin with a warm white strip or a bias kit behind the TV and live with it for a week. That’s enough to know if the placement and color work with my cushions and rugs.
LEDs should feel like another layer — quiet and intentional. Once you have that, you can add accents or smart scenes without changing the room’s character.
