My kid’s room felt like a cold, blank box. I could see the personality, but everything looked matchy and flat. Teen years change fast, and decorating choices that feel right at 13 can feel dated at 17.
I learned to build a room that grows by anchoring big pieces, swapping small accents, and keeping the palette adaptable. This method makes the room feel lived-in, not staged.
How to Decorate a Teenage Bedroom That Grows With You
This is the method I use when a teen room feels unfinished. You’ll learn how to pick a flexible base, anchor the space with big pieces, layer texture, and add personal touches that are easy to change. The result is a cozy, grown-up room that still feels like them.
What You'll Need
- Linen duvet cover in sage green, queen (~$70–110)
- Low-profile upholstered headboard in linen, full/queen (~$150–400)
- Statement abstract rug 5×8, multi-tone brush-stroke (~$150–350)
- Jute flatweave rug 6×9, natural (~$100–200)
- Chunky knit throw in oatmeal, 50×60 (~$40–65)
- Oversized macramé wall hanging, neutral (~$30–80)
- Warm bedside lamp with fabric shade, 18" height (~$30–80)
- Warm white string lights, 16 ft (~$10–25)
Step 1: Choose a flexible base color that won’t date quickly
I start by picking a base the room can live with for years. For small rooms I often drench in a warm neutral; for bolder teens I’ll do a deep smoky olive or inky blue on walls and trim. The base sets the mood and makes swapping accents simple. One thing people miss: the ceiling or trim drench alone can give the immersive feel without repainting constantly. Avoid the mistake of adding several competing accent colors—one steady base keeps the space cohesive as tastes change.
Step 2: Anchor the space with big pieces — bed and rug placement
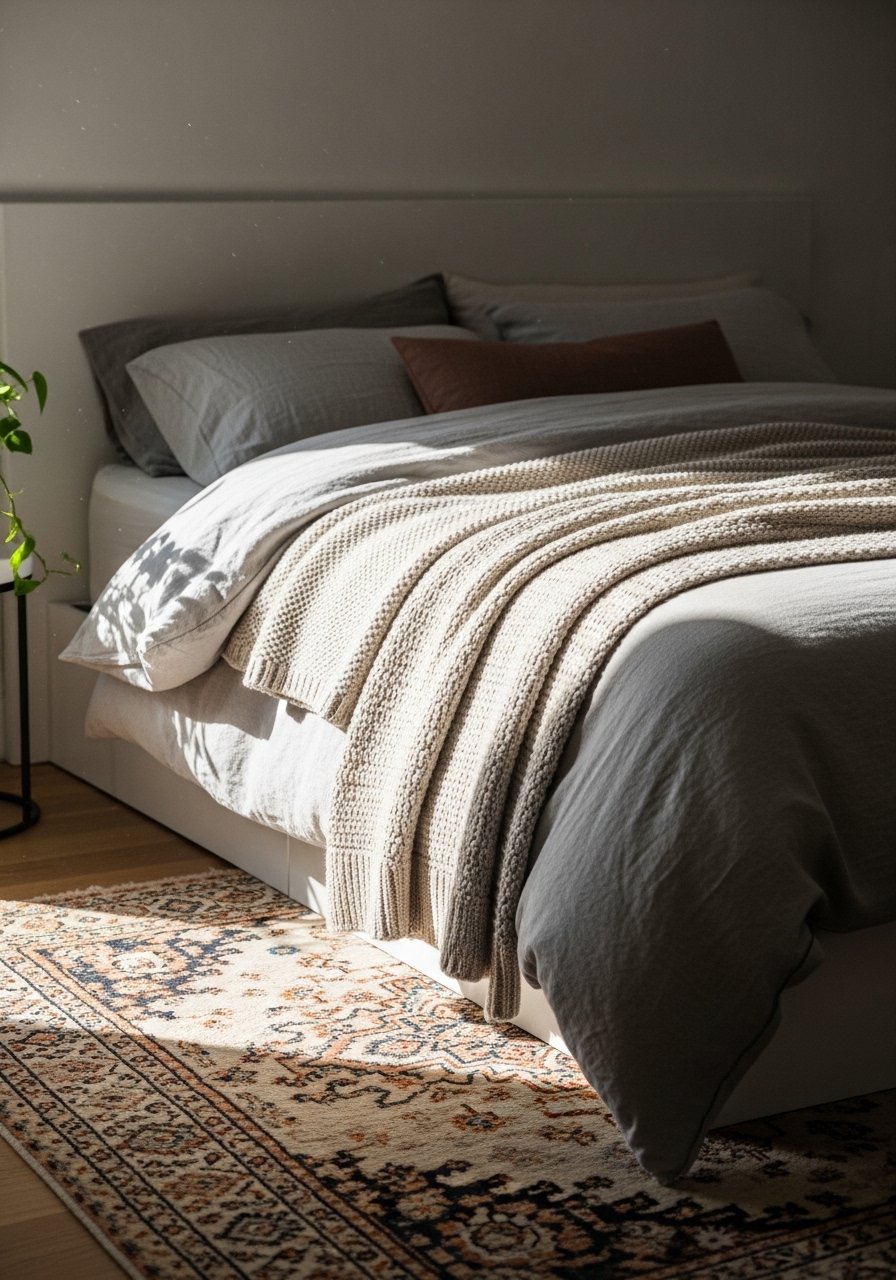
I treat the bed and rug as the room’s anchor. A low-profile upholstered headboard keeps the silhouette calm and lets pillows and throws change the vibe. The statement rug needs to reach past the sides of the bed—aim for at least 18–24 inches—so the room reads as a whole. Most people choose rugs that are too small; that makes the bed feel lost. Don’t center a tiny rug under the foot of the bed. Balance the scale and the room immediately feels intentional and grown-up.
Step 3: Layer textures to add depth without clutter
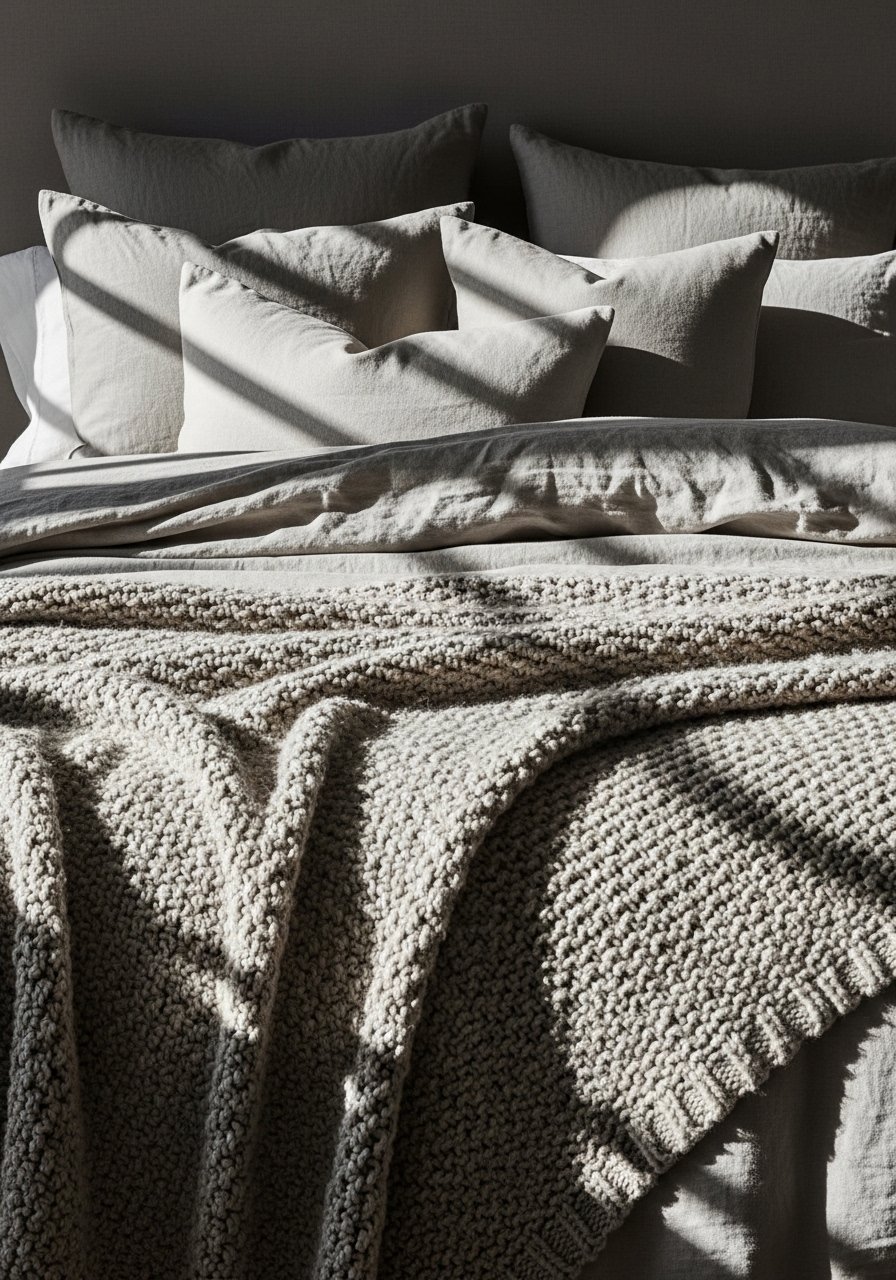
I lean into texture rather than pattern to keep the room versatile. A linen duvet, a chunky knit throw, and a couple of tactile pillows give warmth and depth. I mix scales—coarse jute, soft mohair-look cushions, and a flatweave layer—to avoid flattening the space. A common miss: piling on small, similar textures that read as busy. The small mistake to avoid is using too many bold patterns at once; keep one pattern maximum and let texture do the work.
Step 4: Create separate zones — study, sleep, and hangout
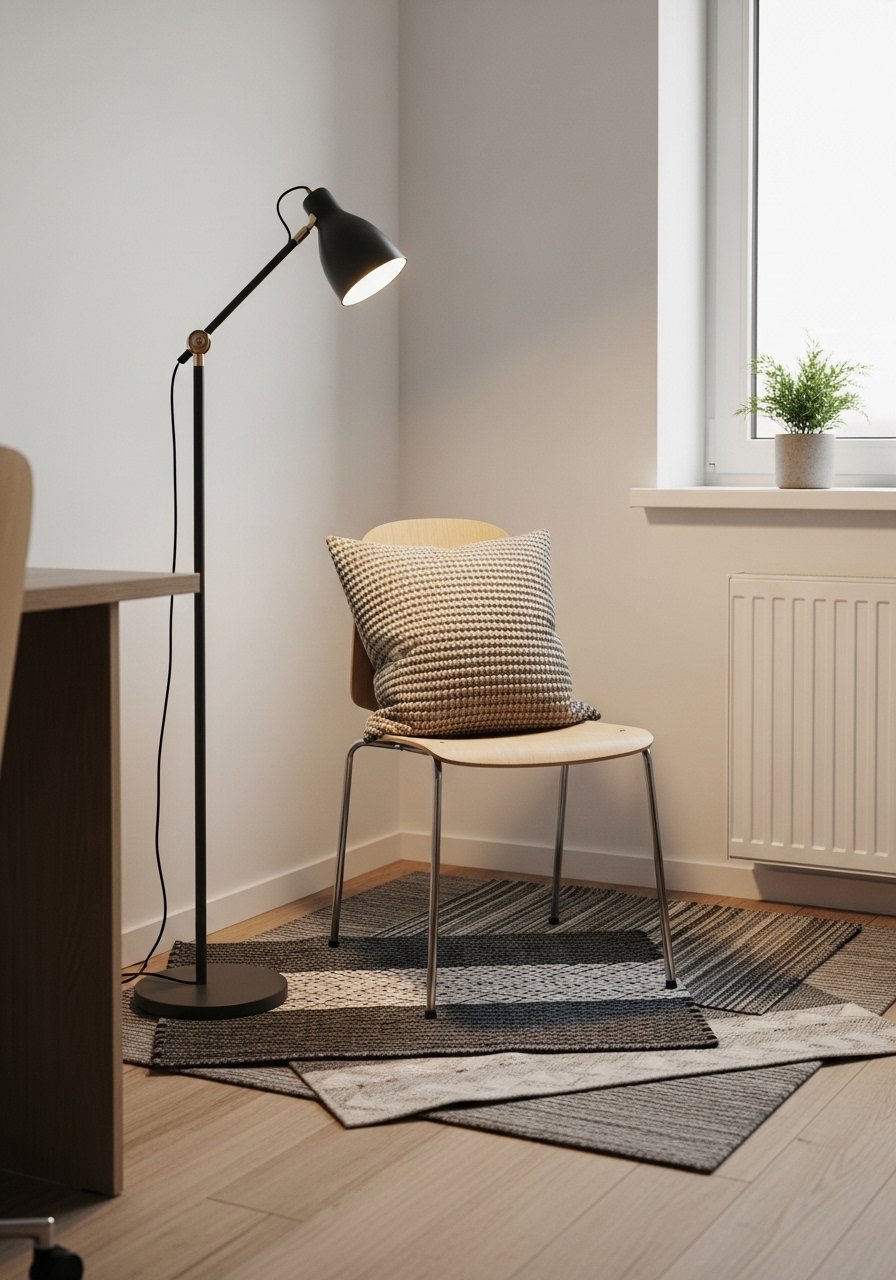
I place a desk where daylight hits, and a small rug or pouf to mark a reading nook. Zones stop the room from feeling like one big bed island. I also use vertical space—shelves above the desk or floating bedside shelves—to keep floor space open. People often shove the desk into a corner without thought; that kills circulation and comfort. The small mistake is making the desk the same scale as bedroom furniture—keep it lighter and movable so the room can shift with needs.
Step 5: Add personality with a curated gallery and gentle lighting
I make a small, story-driven gallery near the bed or desk. I group odd numbers and keep the bottom row at eye level while seated. Fairy lights or a warm bedside lamp add a soft, lived-in glow that photos don’t capture. People often scatter prints haphazardly; instead I keep spacing consistent and mix frame finishes for a collected feel. Avoid crowding the wall—leave breathing room so the pieces feel intentional.
Step 6: Keep big pieces neutral and switch accents easily
I invest in neutral, durable furniture and treat accents as the interchangeable part. Pillows, throws, art prints, and a macramé piece are easy swaps when tastes change. One missed insight: storage is part of the design—open baskets and a neat dresser keep the room cozy, not cluttered. The mistake I see is committing to a bold built-in or painted closet in rentals; instead use removable wallpaper or peelable hooks so the room can evolve.
Budget swaps that still look grown-up
I keep a list of small buys that change the feel without breaking the bank. A new duvet or a statement rug is a mood reset. Chunky throws and a larger pillow can look luxe for little money.
- Swap: new duvet cover (~$70–110) instead of new comforter.
- Layer: add a jute base rug (
$100–200) and top with an affordable statement rug ($150–350). - Accent: macramé or a single oversized print (~$30–80) for personality.
I try one change at a time. Small edits usually give the biggest confidence.
How to adapt this look for small rooms
I favor visual tricks that expand space. A monochromatic drench or a consistent neutral makes walls and ceiling read as one plane. Low furniture keeps sightlines open.
- Use low headboards and floating shelves to free floor space.
- Place the rug so it extends beyond the bed to enlarge the footprint.
- Keep the desk light and movable; avoid chunky, fixed pieces.
These moves keep a small room feeling calm and intentional.
Care and durability for teen life
Practical fabrics and easy-clean finishes matter. I pick removable duvet covers, washable pillow covers, and stain-resistant lampshades where possible.
- Choose linen or cotton covers that withstand frequent washing.
- Use a jute or flatweave underlayer rug for durability and a washable top rug for spills.
- Rotate cushions and throws—fresh sets are cheap and refresh the look.
Durability doesn’t have to look juvenile. It keeps the room feeling lived-in and comfortable.
Final Thoughts
Start small. I often begin with a new duvet or a statement rug and live with it for a month before changing anything else. That one swap shows how the room can grow.
Big pieces should stay neutral. Small, thoughtful accents let the teen steer the style over time. A single textured throw or a new print can be enough to make the room feel like theirs again.
