
My living room had nice furniture and decent lighting but it still felt like a waiting room. Took me embarrassingly long to figure out it was missing texture. Every surface was smooth, every color was flat, and nothing invited you to actually sit down. Adding a peel and stick wood wall fixed that feeling almost overnight. It made the space look like someone lived there, not like a staged photo.
These ideas lean modern rustic with touches of midcentury and cottage style. Most builds run under $150, with a few that hit $250 if you add custom stain or tools. They work great in living rooms, bedrooms, entryways, and even bathrooms when you pick moisture-resistant panels.
Modern Rustic Full Plank Accent Wall For Living Room
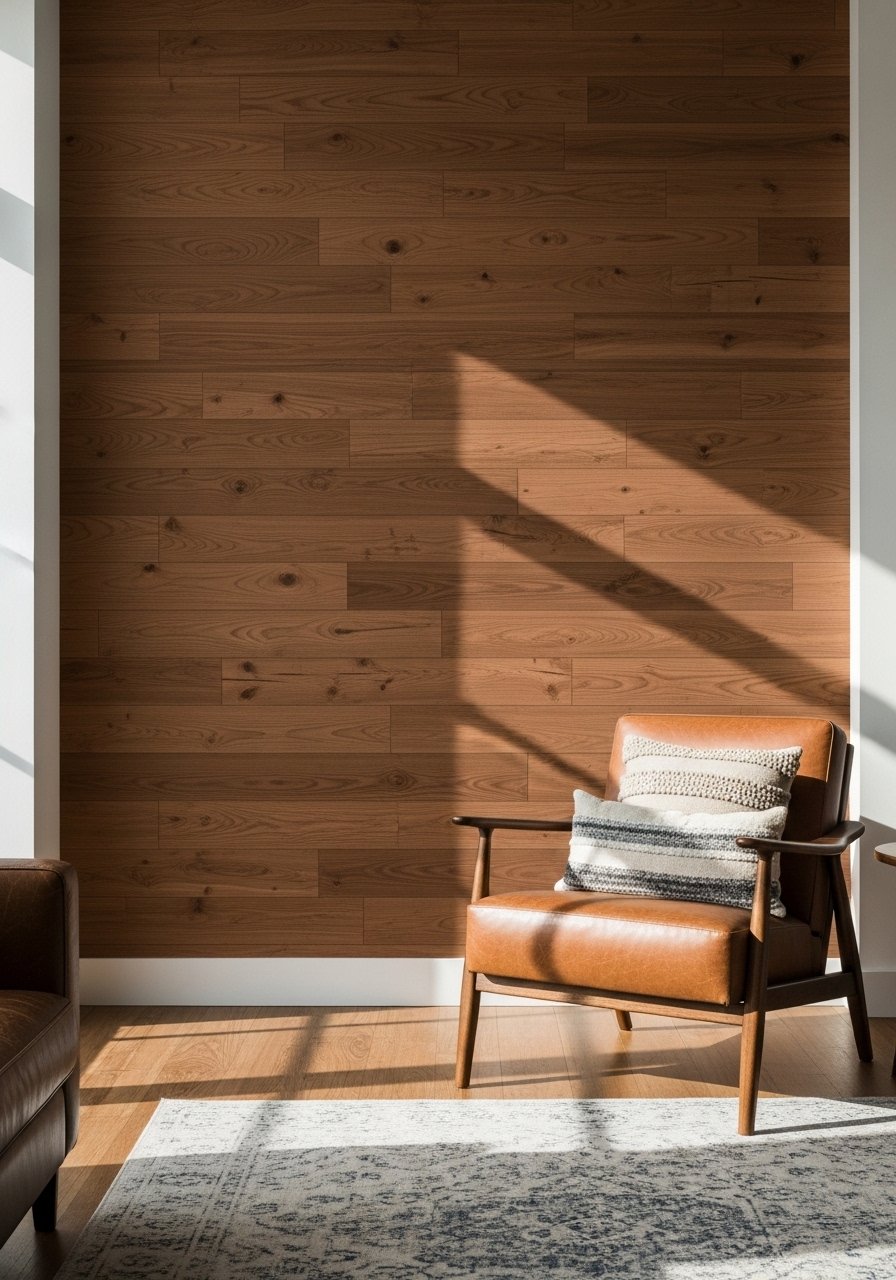
I installed full-width peel and stick planks on one wall and the room stopped feeling flat. What makes this work visually is uniform grain across large horizontal runs, which anchors seating areas and holds heavier furniture. Budget is typically $70 to $150 depending on wall size and whether you stain. I used peel-and-stick-wood-panels and a stain in vintage walnut. A common mistake is trimming panels flush to the floor. Leave a 1/4 inch gap for expansion and finish with a thin quarter round. A real detail to try is staggering end seams at least 12 inches apart to avoid an obvious repeating pattern.
Chevron Pattern With Peel And Stick Planks For Bedroom

When I cut planks into chevrons the headboard suddenly had movement and energy. This is a weekend project that looks boutique but costs under $120 for a queen wall. Use thinner 3/8-inch peel and stick planks for easier cutting and snuggly miters. I recommend wood-look-adhesive-planks that are lightweight so your cuts hold. The mistake people make is trying exact 45-degree cuts without a miter guide. Instead, tape a straightedge to the board and cut in long, supported passes. Try a single darker chevron band across the center to avoid feeling too busy in small bedrooms.
Herringbone Headboard Wall For a Bedroom Nook

I built a herringbone strip behind a queen bed and it functions like a built-in headboard without buying furniture. Herringbone read as elevated and midcentury friendly. Plan on $60 to $120 depending on how much salvage you use. Buy long, narrow peel and stick strips like peel-and-stick-shiplap-boards and cut into shorter pieces. A common error is misaligning the pattern across multiple boards. Snap a chalk line as your baseline and work outward. A trick a generic article skips is to leave one row slightly recessed, about 1/8 inch, to catch light and increase the pattern's depth.
Minimal Vertical Slat Wall For Hallway Height
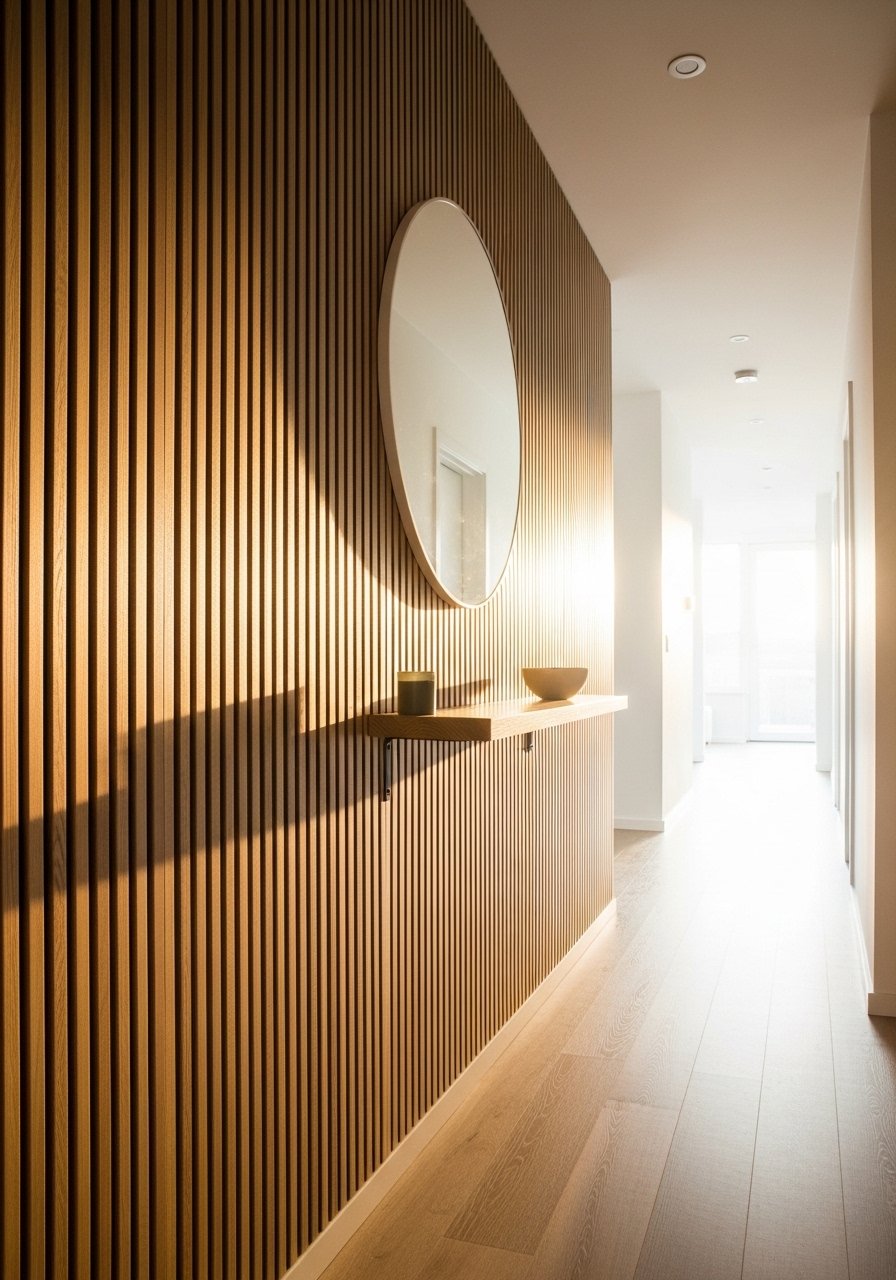
Most people hang artwork too low in hallways. Vertical slats solve that by drawing the eye up and making ceilings feel taller. This trick is budget friendly at around $40 to $90 for a short run. I used peel-and-stick-wood-slats spaced 1 inch apart for rhythm. Don't press them on without spacing guides, you will regret uneven gaps. One detail others ignore is to paint the wall behind the slats in a slightly darker tone for shadow play. If you rent, use thin stick-on slats that remove cleanly and pair them with removable picture hooks.
Floating Shelf Gallery On Peel Stick Panels For Entry
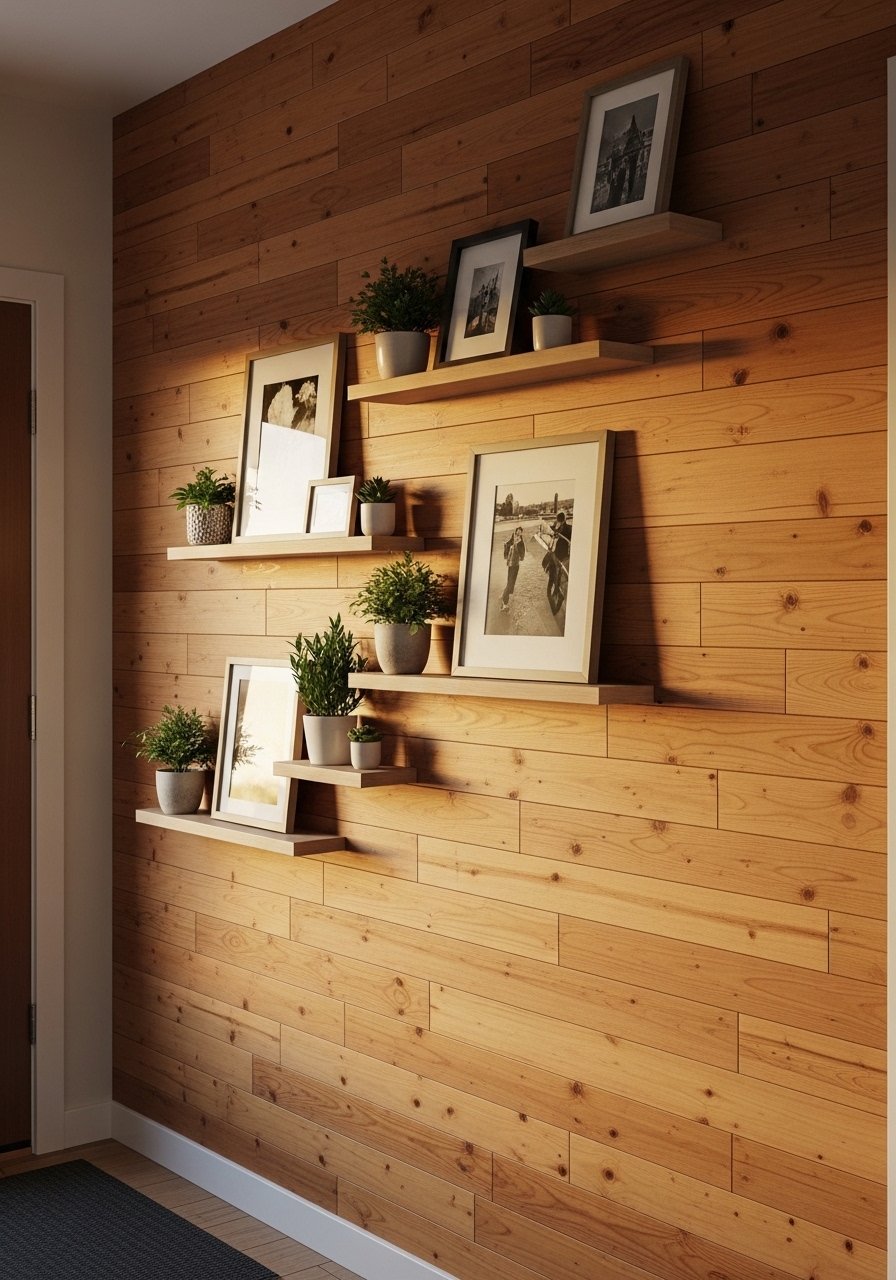
I made a gallery wall feel intentional by mounting floating shelves to a wood panel backdrop. The panels give the shelves something to bite into so everything sits level. This works well in entryways and runs about $60 plus shelf cost. I like brass-picture-ledges paired with the panels. A common mistake is relying on drywall anchors through thin panel veneers. Instead, use 1-1/4 inch screws into studs or toggle anchors behind the panel. Pro tip most articles skip, measure shelf placement relative to furniture top heights, not eye level. That keeps sight lines clean whether you are tall or short.
Half Wall Wainscoting With Peel Stick Wood For Dining
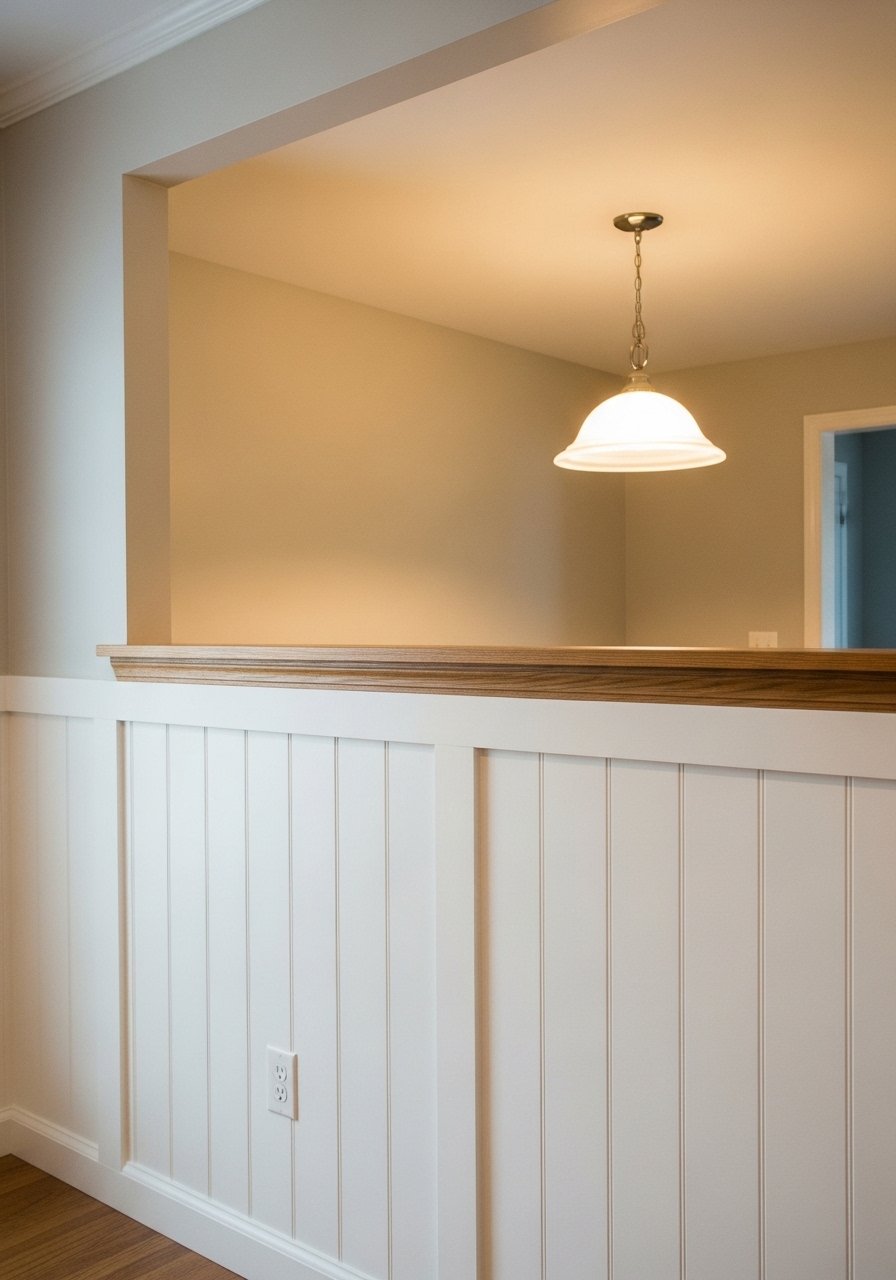
A half wall with horizontal peel and stick boards turned a bland dining room into something that felt custom. It is a renter-friendly upgrade when you use removable panels and a temporary top rail. Budget sits around $50 to $120. I used peel-and-stick-shiplap-boards and added a painted chair rail. Mistakes include skipping primer for painted panels, which leads to blistering. For a detail most people miss, keep the painted panels 2 inches shy of baseboard height so the baseboard can be reused and less touching-up is needed later.
Reclaimed Wood Look For Rental-Friendly Walls

I wanted the reclaimed look without the weight or cost of real salvage. Peel and stick planks in mixed grays give that patina and remove cleanly for renters. Cost is typically $40 to $90 for an accent area. Use reclaimed-look-peel-and-stick-planks for variegated color. A mistake is matching too many boards from one box and getting repeated patterns. Mix boxes and rotate pieces as you lay them. A small but practical detail, mark the back of each piece with which row it came from to keep grain flow natural.
Geometric Stained Wood Panels For an Accent Nook

I stained small triangular wood panels in two tones and arranged them into a large geometric field. It reads modern and handmade at once, and a 3×4 panel area runs about $80 to $140 depending on stain quality. I used thin peel and stick MDF tiles like peel-and-stick-wood-tiles that take stain well. People often try to freehand stain and end with blotches. Sand, condition, then stain for even tone. An extra detail is to use a 1/8-inch spacer between triangles to create a crisp shadow line.
Midcentury Sunburst With Thin Wood Slats For Living Areas

A sunburst made from thin peel and stick slats gives midcentury flair without heavy carpentry. It cost me under $75 to make a 4-foot diameter piece that sits over a sofa. I grabbed thin-wood-slats-pack and sliced them to length. The mistake is not planning the center point and ending with an off-center burst. Use a temporary paper template and mark radiating lines. A detail most guides skip, slightly vary slat lengths in odd increments of 1 inch to avoid a mechanical look.
Low-Profile Media Wall With Peel Stick Wood Behind TV
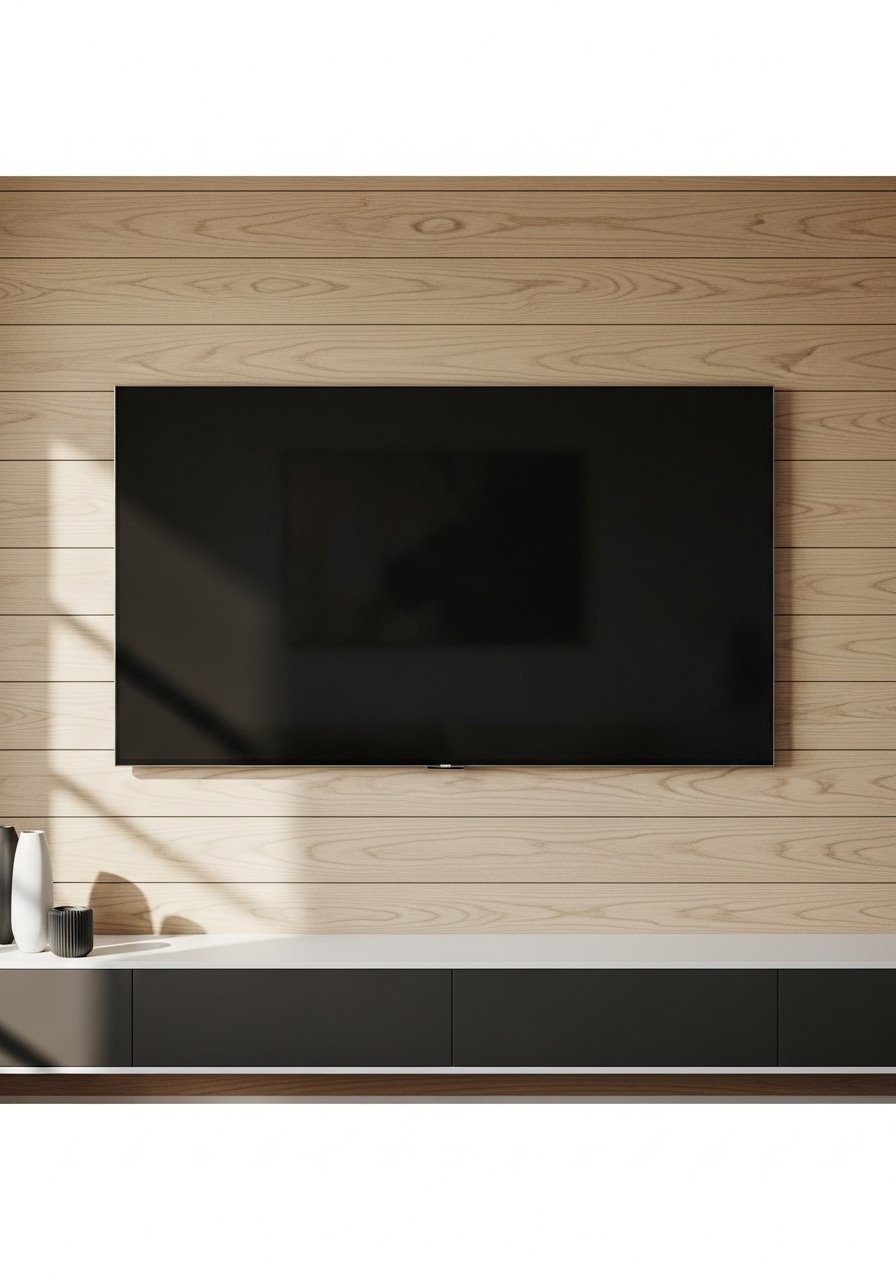
Mounting the TV to a wood-backed panel gives the setup a furniture-like feel. The wood hides cables and reduces glare. Budget depends on wall width, usually $80 to $180. I used peel-and-stick-tv-backdrop-panels that are thin and heat-safe. A common error is attaching panels after the TV is mounted, which is a pain. Do the panels first, then mount the TV into studs through the panel. For a detail others miss, leave a small routed notch behind the TV for airflow if your mount sits close.
Bathroom-Friendly Faux Wood Paneling For Vanity Walls
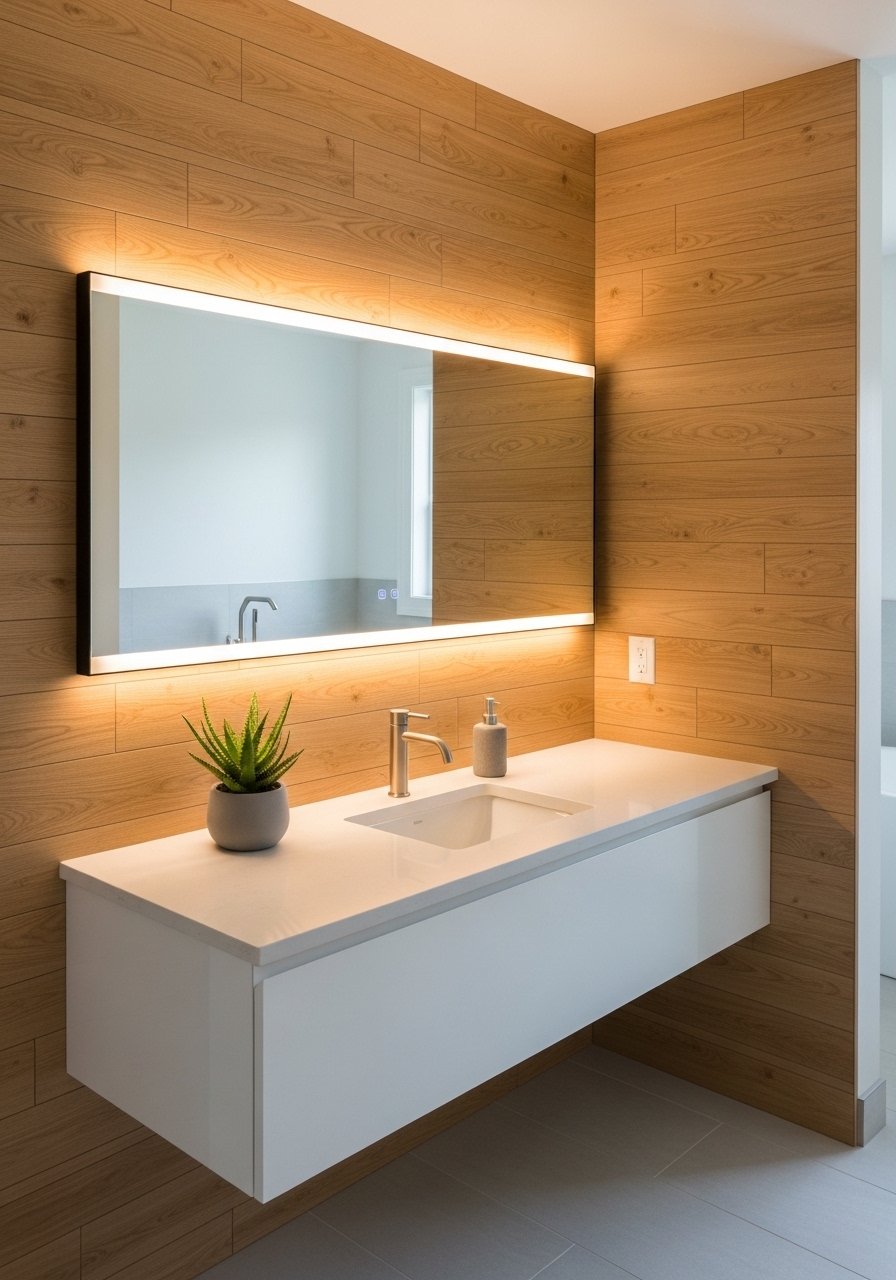
I was nervous about using wood in a bathroom. Choosing marine-grade, moisture-resistant peel and stick panels changed everything. Pick panels rated for high humidity and seal edges with silicone. This project usually costs $60 to $160 depending on coverage. I recommend waterproof-wood-look-panels. A mistake homeowners make is not sealing the bottom edge near the floor, which invites warping. A small pro tip, paint the back wall a mid-tone before applying panels so any gaps read like shadow rather than raw drywall.
Nursery Soft Painted Wood Shapes For Playful Walls
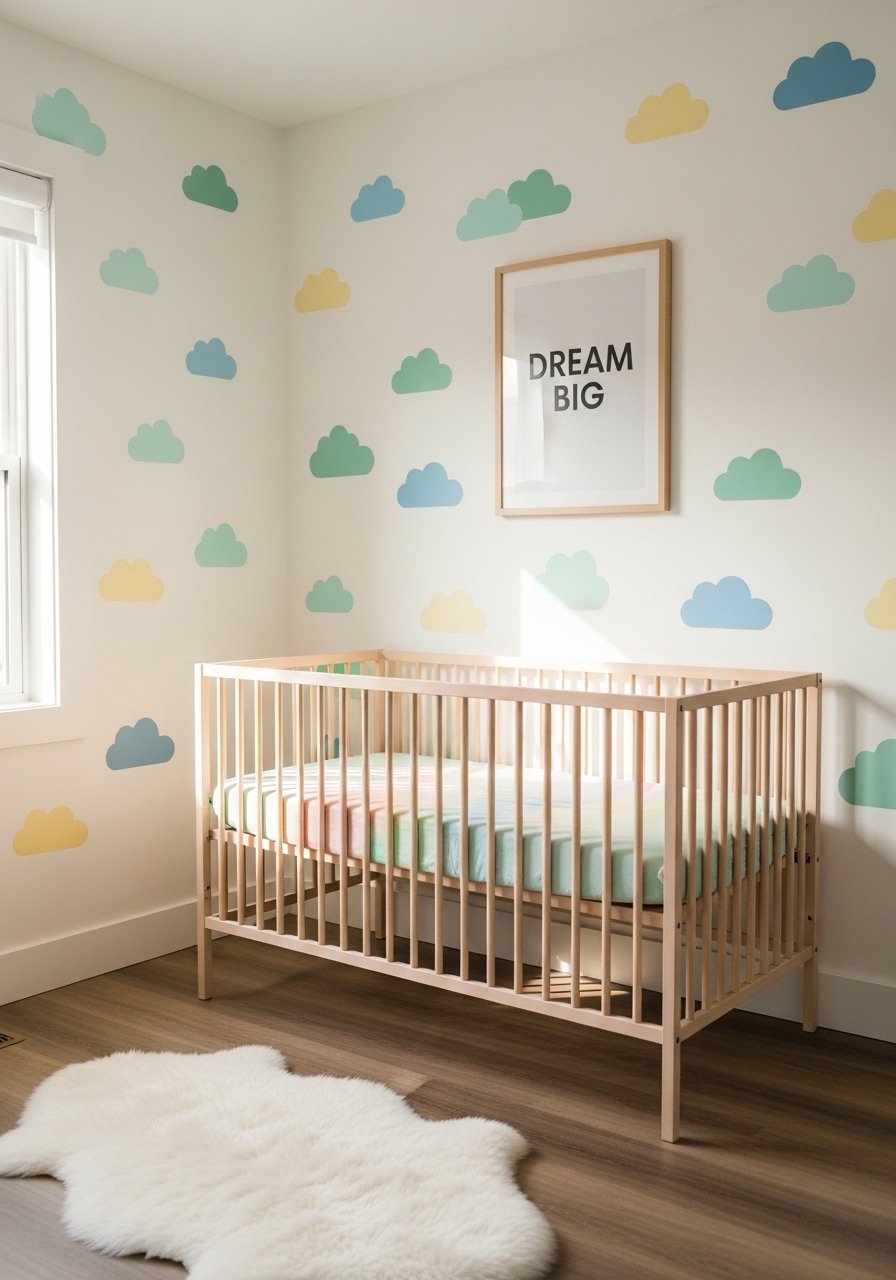
For a nursery I cut peel and stick wood into cloud shapes and painted them in soft pastels. It reads handcrafted and playful but wipes clean. The whole feature was under $50 for a small wall. I used peel-and-stick-wood-shapes and non-toxic paint. People often over-glue and strip paint on removal. Use low-tack adhesive strips if you may remove them. One detail most articles skip is to mix a satin and a matte paint finish on adjacent clouds to catch light differently so babies get a subtly stimulating texture.
Framed Wood Panels To Create Art Walls In Any Room

Instead of one big wood wall, I framed smaller wood panels and hung them as art. You get the warmth of wood without committing to a full wall. I spent about $25 per framed panel with reclaimed-look adhesive boards. I used wood-panel-art-tiles. A frequent mistake is centering frames at eye-level only. Instead, align the bottom edge with furniture tops for a grounded look. A detail to try that I rarely see suggested is alternating grain direction in the trio to give each frame a different energy.
Layered Textures With Wood And Grasscloth For a Living Room Corner
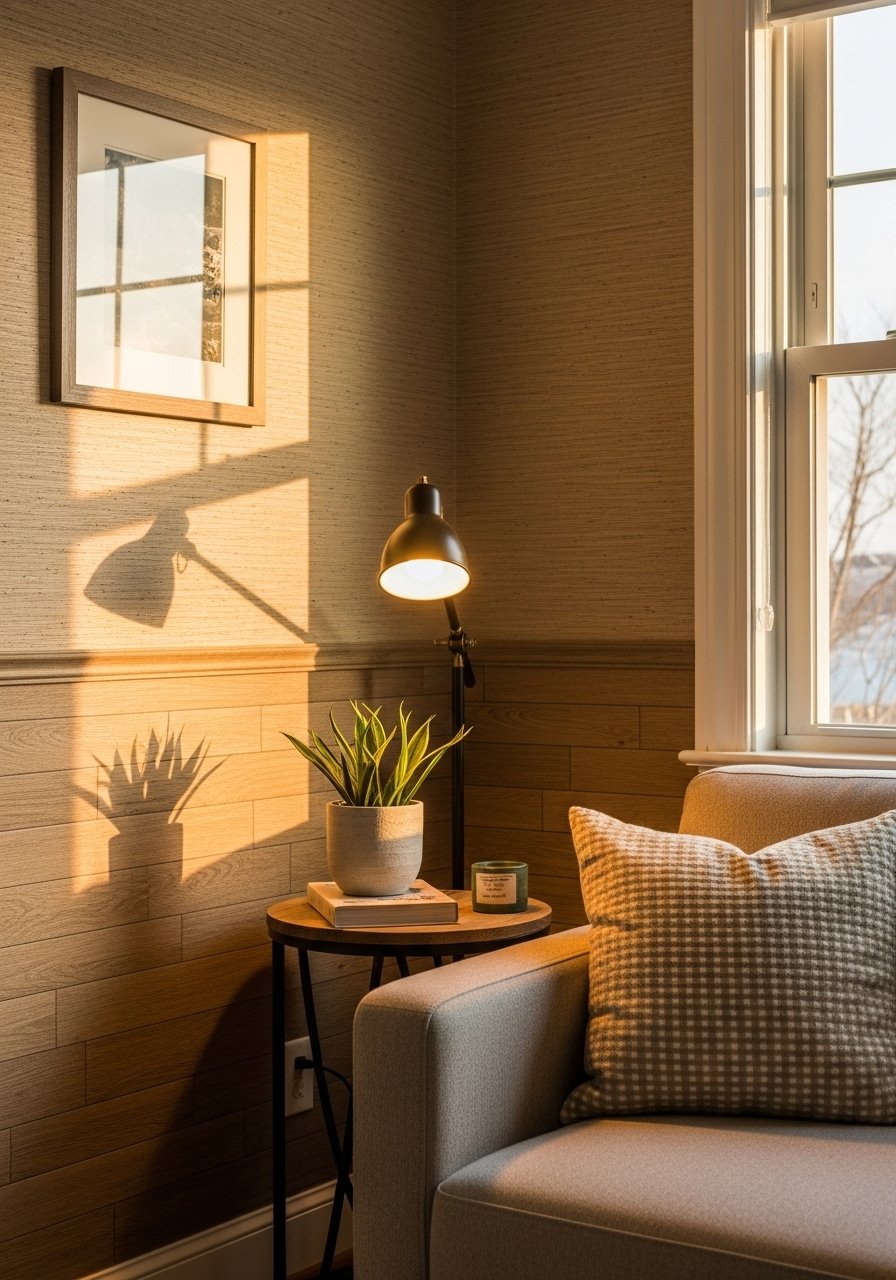
I layered wood panels on the lower wall and grasscloth above to stop flat walls from swallowing light. The wood provides tactile depth while the grasscloth brings a soft, tactile field up high. Expect $120 to $250 for a small wall depending on paper quality. I used peel-and-stick-wood-wainscot with paste-free grasscloth. A common error is matching grain direction to the wallpaper pattern, which can read busy. For a pro touch, pick a grasscloth with a subtle vertical weave and align slats horizontally for contrast.
Painted Stripes Over Wood Panels For Modern Contrast

Adding painted stripes across wood panels gives clean geometry and a modern feel. I painted thin black bands over warm oak-look planks and the office felt intentional without being fussy. This project can be done for $50 to $120. Use peel-and-stick-wood-planks and painter's tape. Most people rush the tape and get bleed. Press tape edges firmly and pull up before paint fully cures for crisp lines. For a detail people miss, paint the stripes in a 70/30 width ratio so the eye reads one dominant band and a thinner accent.
Industrial Steel And Wood Slat Combo For Home Office
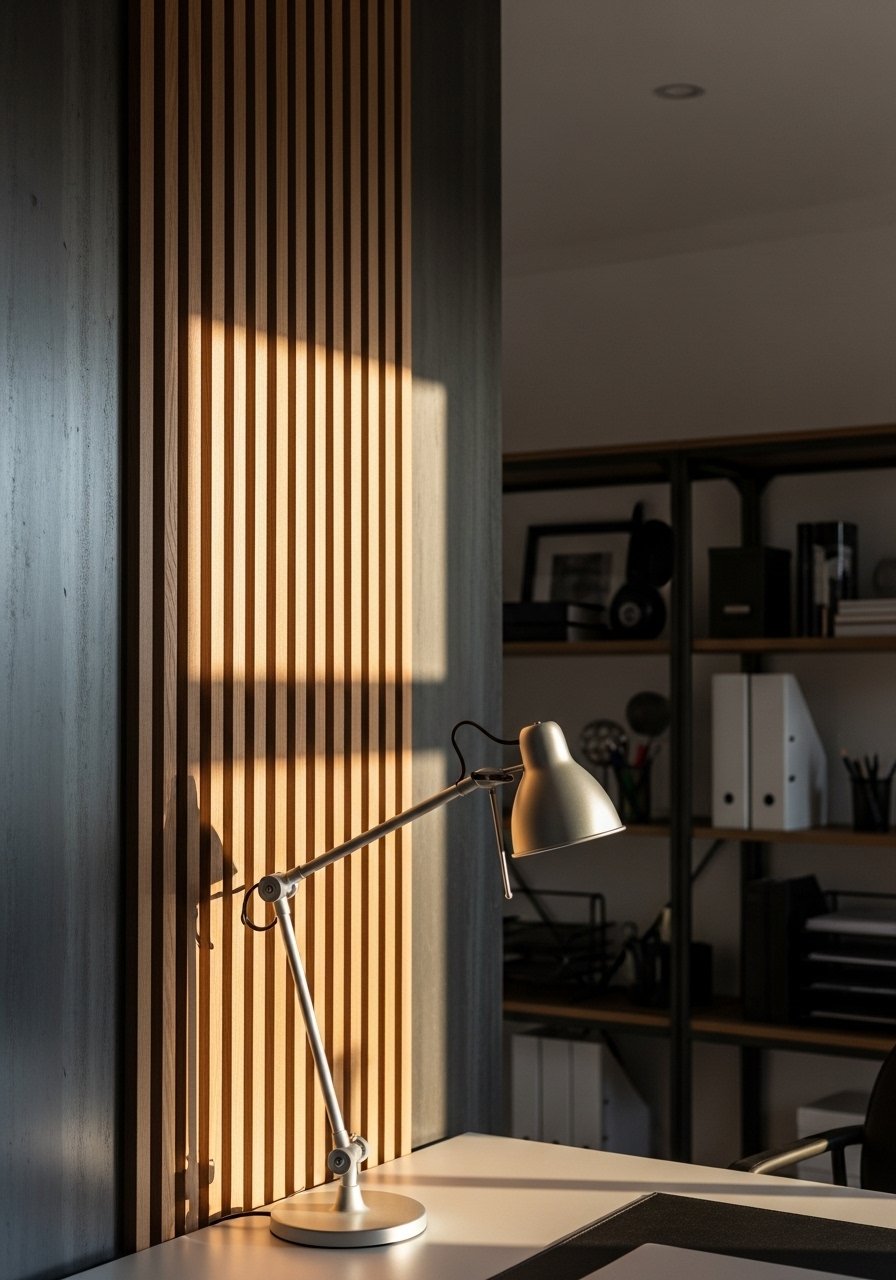
I paired peel and stick wood slats with a steel backer to make an industrial feature that hides wires. It looks high end and costs about $150 if you source a thin metal sheet. I used magnetic-wood-slats that attach to the metal. A common mistake is underestimating weight and using weak anchors. Use heavy-duty anchors and screw through the metal into studs where possible. A detail often left out is to leave 1/8 inch between slats and metal so the wood can breathe and the metal peeks through for a layered effect.
Staircase Runner Wall With Horizontal Planks
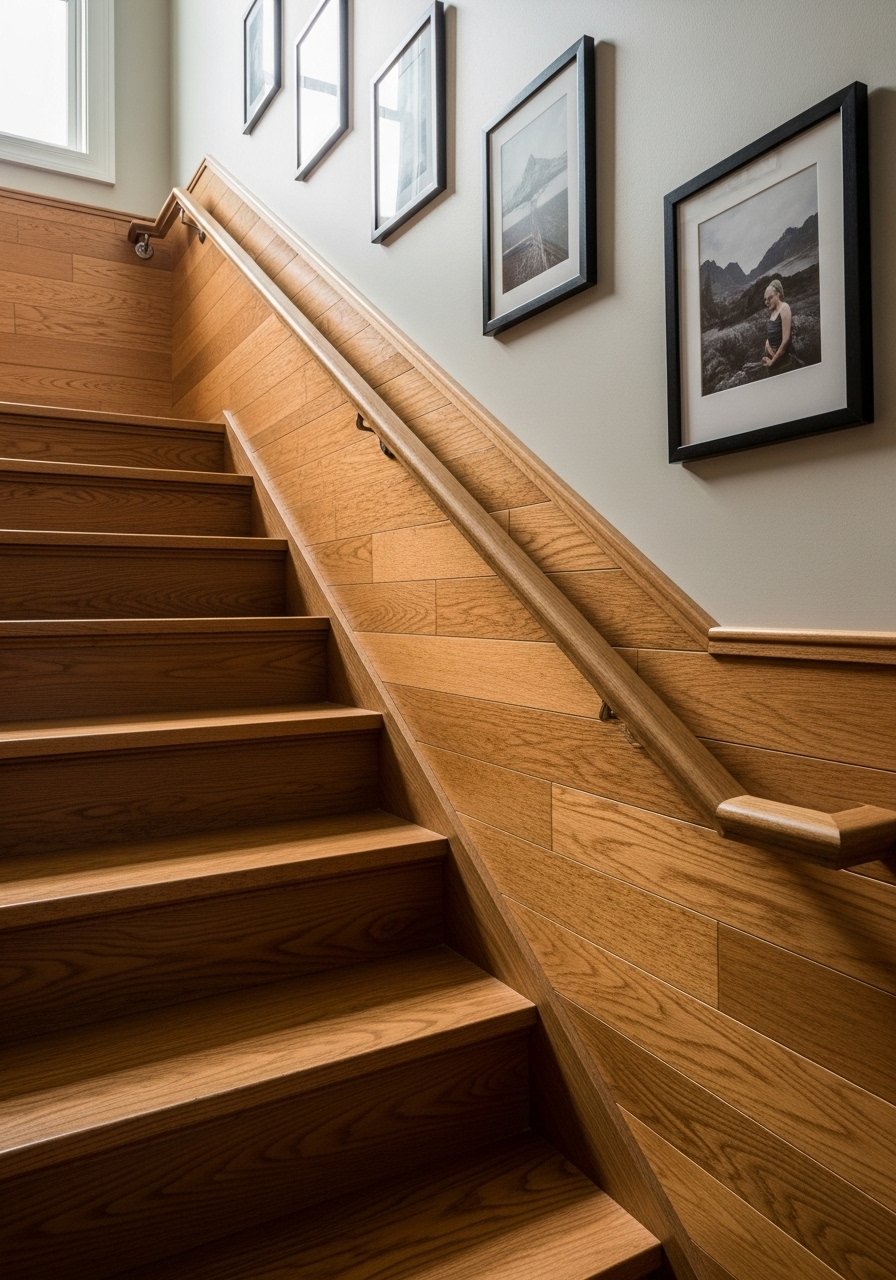
I ran horizontal planks along the staircase wall following the rise and run. It visually ties the stair to the rest of the house and protects the wall from scuffs. The cost depends on stair length, usually $80 to $180. I used peel-and-stick-horizontal-planks. Mistakes include not scribing the bottom of each plank to the stair profile, which leaves visible gaps. A practical detail is to stop planks 2 inches short of the handrail posts so the handrail hardware mounts cleanly.
Small-Space Vertical Tongue-And-Groove For Height Illusion
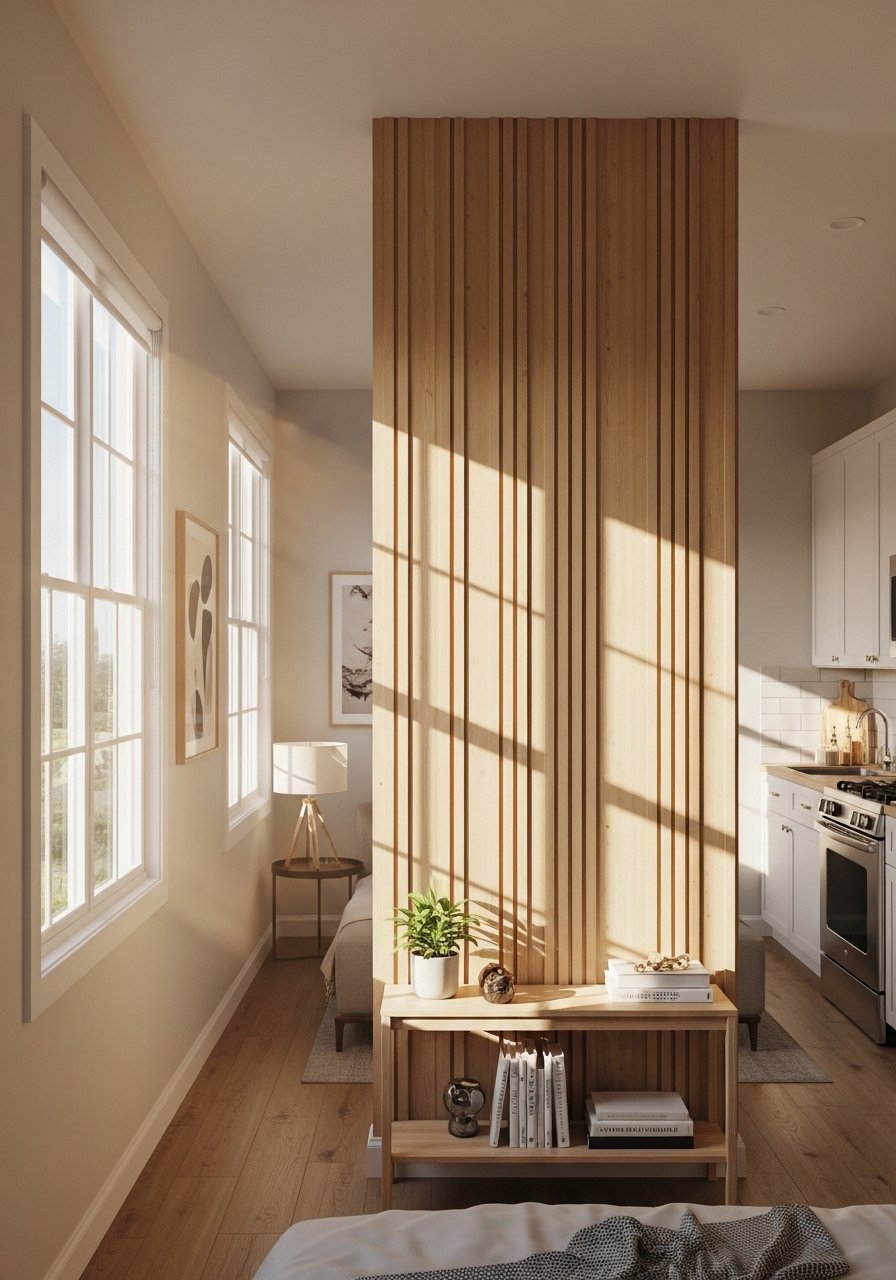
In a studio I installed narrow vertical tongue-and-groove panels on one short wall and the room felt taller instantly. Vertical lines are cheap height boosters and cost about $40 to $90. I recommend vertical-tongue-and-groove-panels. A common error is aligning panels to baseboard profiles which makes the top look chopped. Instead, plan panels with a floating top edge so you can finish with molding. For a tiny detail, keep vertical gaps to 1/16 inch so they read uniform but still allow expansion.
Fireplace Surround With Peel Stick Wood Tiles
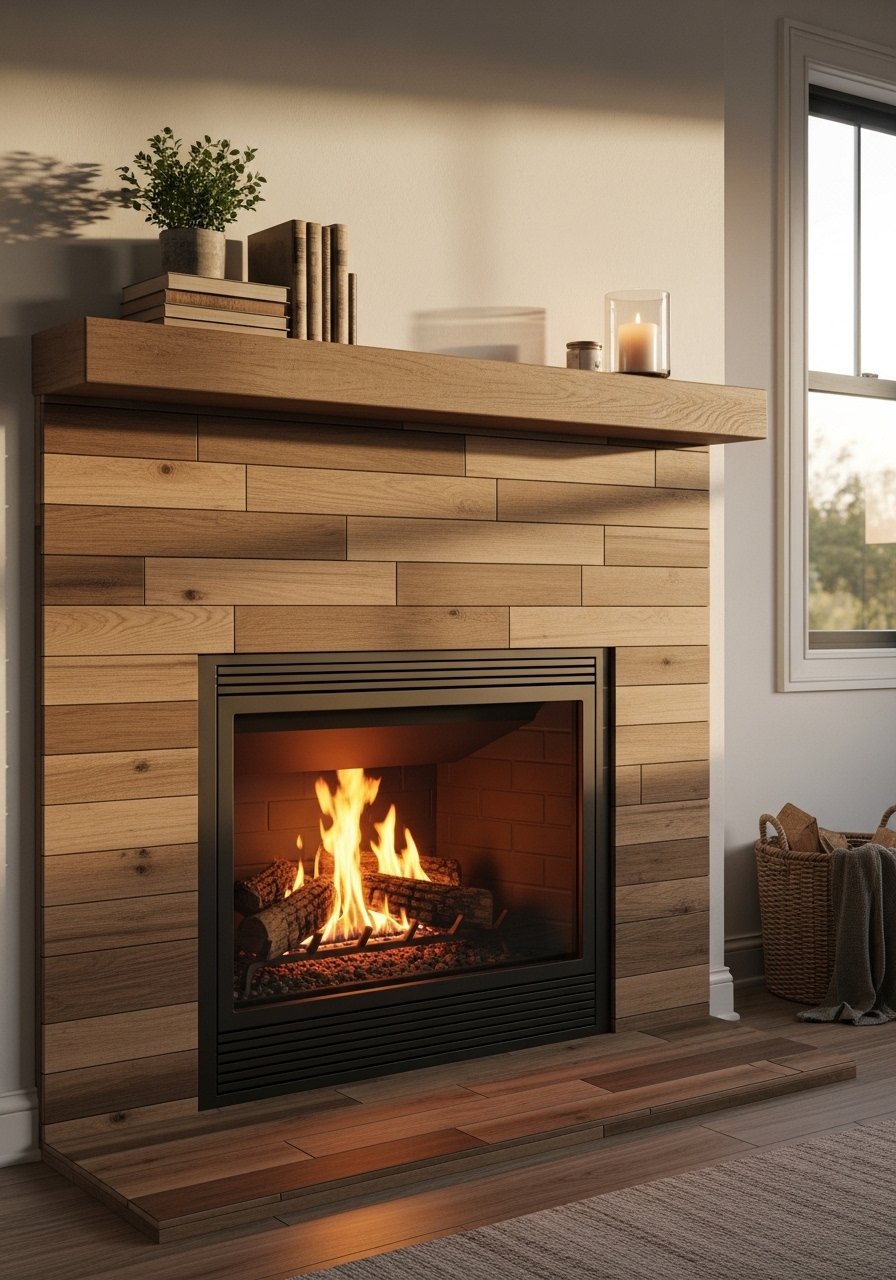
I wrapped my fireplace surround with peel and stick wood tiles to add warmth to a cold hearth. The tiles stand up to occasional heat when installed with a thermal adhesive and a 1-inch air gap behind. Expect $100 to $220 depending on tile type. I used heat-resistant-wood-tiles. Mistakes include letting adhesive contact direct flame or flue openings. A detail most people skip, leave a narrow reveal line at the mantel where smoke can settle without staining the wood tile.
Entryway Command Center Backed With Wood Panels

I used peel and stick panels as the backdrop for hooks, a small shelf, and a message board and it made the entry functional and handsome. This costs about $40 to $120 depending on panel quality and bench additions. I used peel-and-stick-entryway-panels and mounted hooks into studs through the panel. People often anchor hooks only to the panel which fails under heavy bags. A detail many guides miss is to run panels down behind the bench to prevent scuff marks and make clean-up simple.
Your Decor Shopping List
- Honestly the best $40 I have spent. Peel and stick wood panels, mixed oak finish in 4-pack for accent walls
- For slatted looks, I use vertical wood slat strips, 1×4 pack (~$35). Great for narrow walls
- Found these while hunting for floating shelf hardware. Floating shelf brackets, heavy duty (~$18)
- Waterproof wood-look panels (~$60) for bathrooms and humid spaces
- Brass picture ledges, 36-inch set (~$25). Similar at Target
- Thin wood slats pack for sunburst projects (~$20)
- Painter's tape, 3-pack (~$8). Use it for stripe and chevron work
- Heat-resistant wood tiles (~$90) for fireplace surrounds
- Removable low-tack adhesive strips large (~$12) for renter-friendly installs
- Water-based stain kit, small (~$22) for custom tones
Shopping Tips
White oak beats dark wood in 2026. Design feeds have shifted completely. These white oak floating shelves look current, not dated.
Grab peel-and-stick-wood-panels for under $50 a box and test a square foot before committing to a whole wall. Paint or stain one sample tile to see how it reads in your room.
Curtains should puddle or kiss the floor, never hang halfway up. 96-inch linen panels are right for 9-foot ceilings.
Lead with the hardware. Buy heavy-duty anchors when you plan to hang shelves or hooks on top of panels so you do not regret it later.
Everyone buys five small succulents. One single 6-foot fiddle leaf fig has ten times the visual impact. Use a large plant to offset a bold wood wall.
Frequently Asked Questions
Q: Can I install peel and stick wood in a rental without losing my deposit?
A: Yes, if you pick low-tack products and install them on bedroom or living room walls away from trim. Use removable low-tack adhesive strips and keep panels 1/4 inch from baseboards so removal is cleaner. Test one panel first.
Q: How do I avoid repeating patterns in peel and stick sheets?
A: Mix boxes and rotate pieces. It helps to cut longer runs and stagger seams at least 12 inches apart. That avoids the obvious repeated motif that cheap panels sometimes have.
Q: Can I paint or stain peel and stick wood after installation?
A: Many panels take paint or water-based stain but always sand and prime first for adhesion. Paint matches land about 90% spot-on if you use the right machine. Test a painted patch in your lighting both day and night.
Q: What about using wood panels near a fireplace or heat source?
A: Use heat-resistant tiles and leave a small air gap behind them. Mount them with thermal-rated adhesive and keep them away from direct flames or open flues. If in doubt, consult the tile manufacturer for temperature limits.
Q: How do I pick the right sheen so a touch-up does not stand out?
A: Match both color and sheen, because sheen changes how a surface reads. Sheen mismatch is often the real culprit when touch-ups look off. For panels, satin or matte usually hides small imperfections well.
Q: My store matched a paint chip but it looked different at home. Why?
A: Top machines slice light into 31 bits for dead-on shades. Even with that tech, you must test patches under your room lights. Test in both daytime and with your lamps to see any shifts.
Q: Can I mix wood slats with wallpaper or paint without it looking messy?
A: Yes, but keep the wood direction opposite the wallpaper pattern for contrast. For example, pair horizontal slats with vertical grasscloth. That contrast reads intentional rather than cluttered.
