
My living room had nice furniture and decent lighting but it still felt like a waiting room. Took me embarrassingly long to figure out it was missing texture. Every surface was smooth, every color was flat, and nothing invited you to actually sit down. The easy printable crafts below fixed that in tiny steps, most under $20, and worked in my studio, my friend’s one-bedroom, and a short hallway that always felt cramped.
These projects lean modern-farmhouse with a few boho and minimalist twists. Most crafts cost $0-30 if you print at home, with a few small purchases under $50 for tools or frames. They work in bedrooms, tiny living rooms, home offices, and even small kitchens or entryways where every inch counts.
Mini Gallery Wall for Narrow Walls in Small Living Rooms
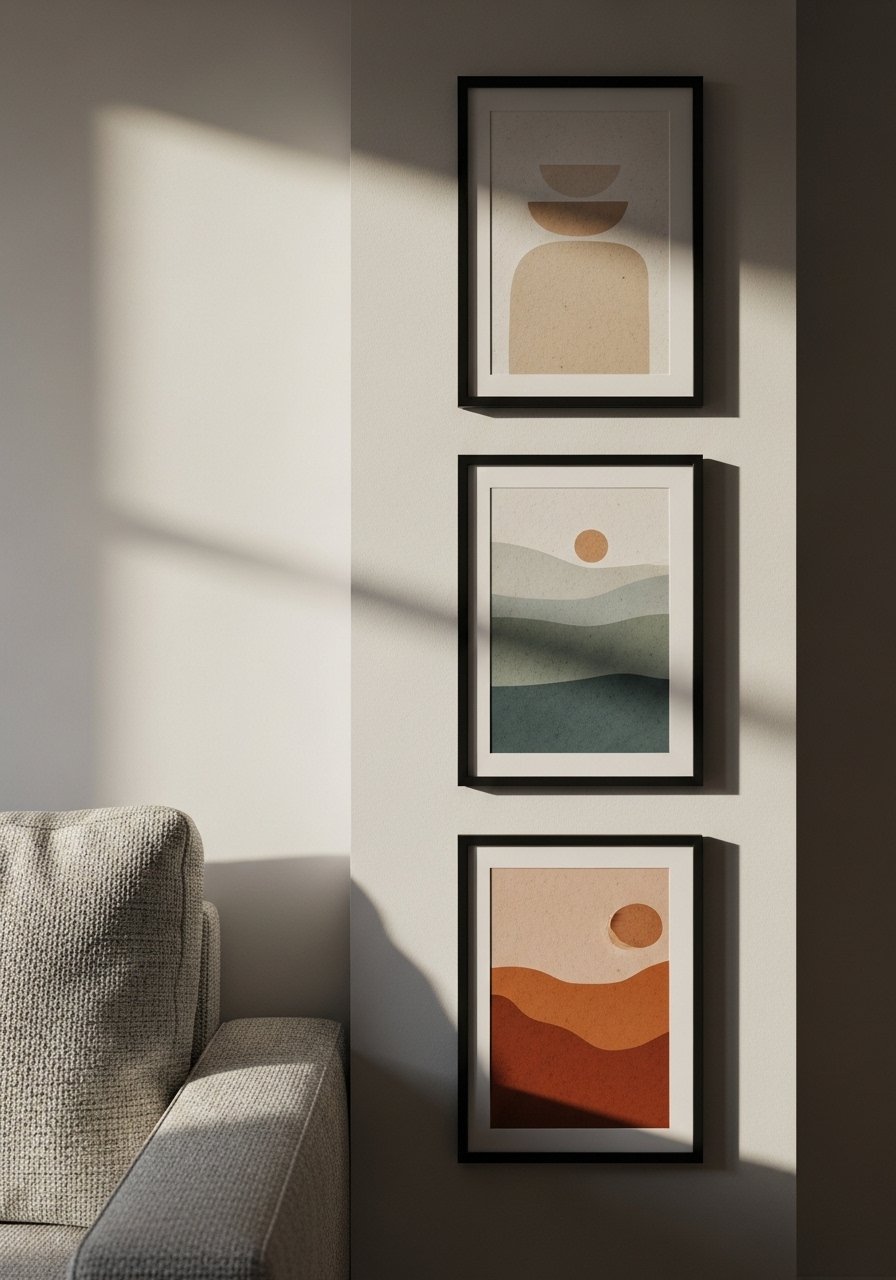
The trick with a narrow gallery is portrait prints stacked vertically, not a chaotic grid. Use three printable 8×10 prints, each matted to 11×14, and hang them so the center of the middle frame sits about 57 inches from the floor. That gives the eye a clear vertical line and makes a tall ceiling feel taller. I used slim black frames I bought for under $25 and swapped the art with printable botanicals I edited to match my sofa color. Common mistake is spacing them too far apart. Keep a 2.5 to 3 inch gap between frames for cohesion. If you want to swap themes seasonally, use picture-frames that open from the front.
Layered Printable Mats for Budget Gallery Depth
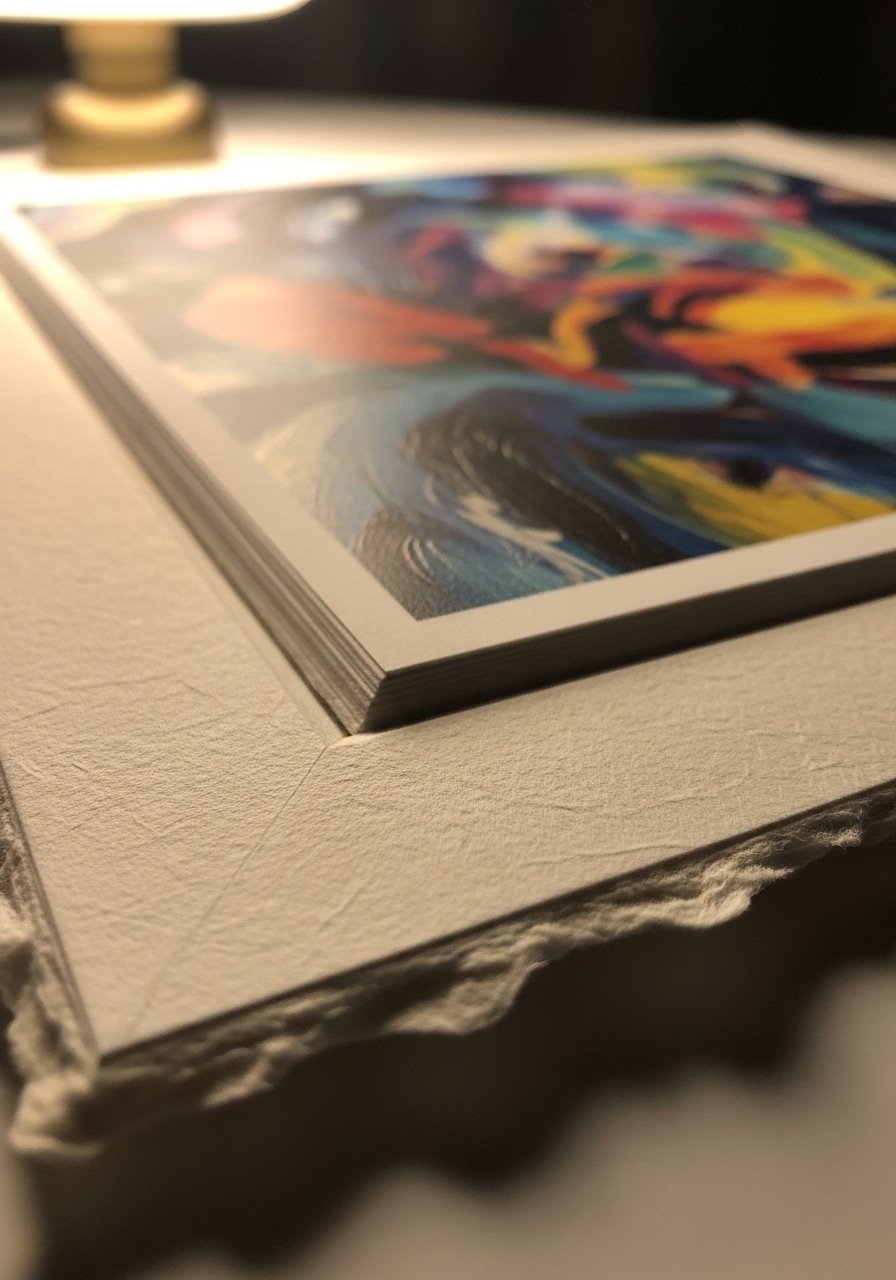
You can fake depth without custom framing by printing a mat template on heavy cardstock and layering it under a standard 8×10 print. I cut mats from 110 lb cardstock using a craft knife and a ruler. The visual result reads like a $60 frame even when the outer frame is $15. For best proportion use a 2.5-inch outer mat border and a 1/4-inch gap between mat edge and print. One mistake is using thin paper, which buckles under glass. Grab a small pack of heavyweight cardstock and a straight-edge cutter like precision-paper-cutters so edges are crisp.
Peel-and-Stick Printable Wallpaper Accent for Tiny Bedrooms
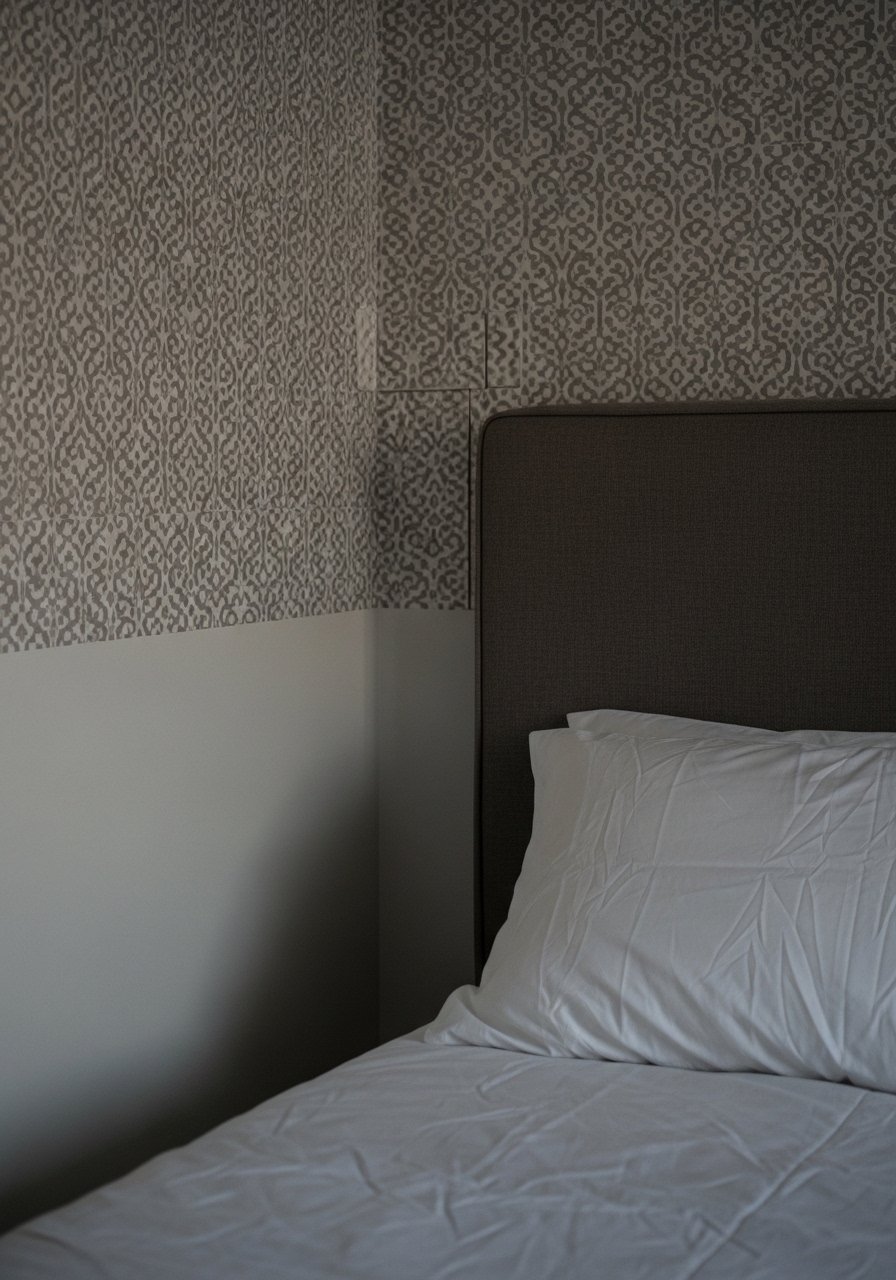
A single 24-36 inch strip of printable peel-and-stick wallpaper behind a headboard makes a micro bedroom feel intentional. I used a geometric printable pattern and matched the motif to the bedding color. Measure your wall width and print panels with a 1/8 inch overlap to hide imperfect cuts. The common mistake is centering the pattern too high. Start the print 6 inches above the headboard for balance. For materials, choose adhesive vinyl or removable wallpaper sheets and a smoothing tool like peel-and-stick-squeegee to avoid bubbles.
Printable Plant Pot Wraps to Brighten Windowsills
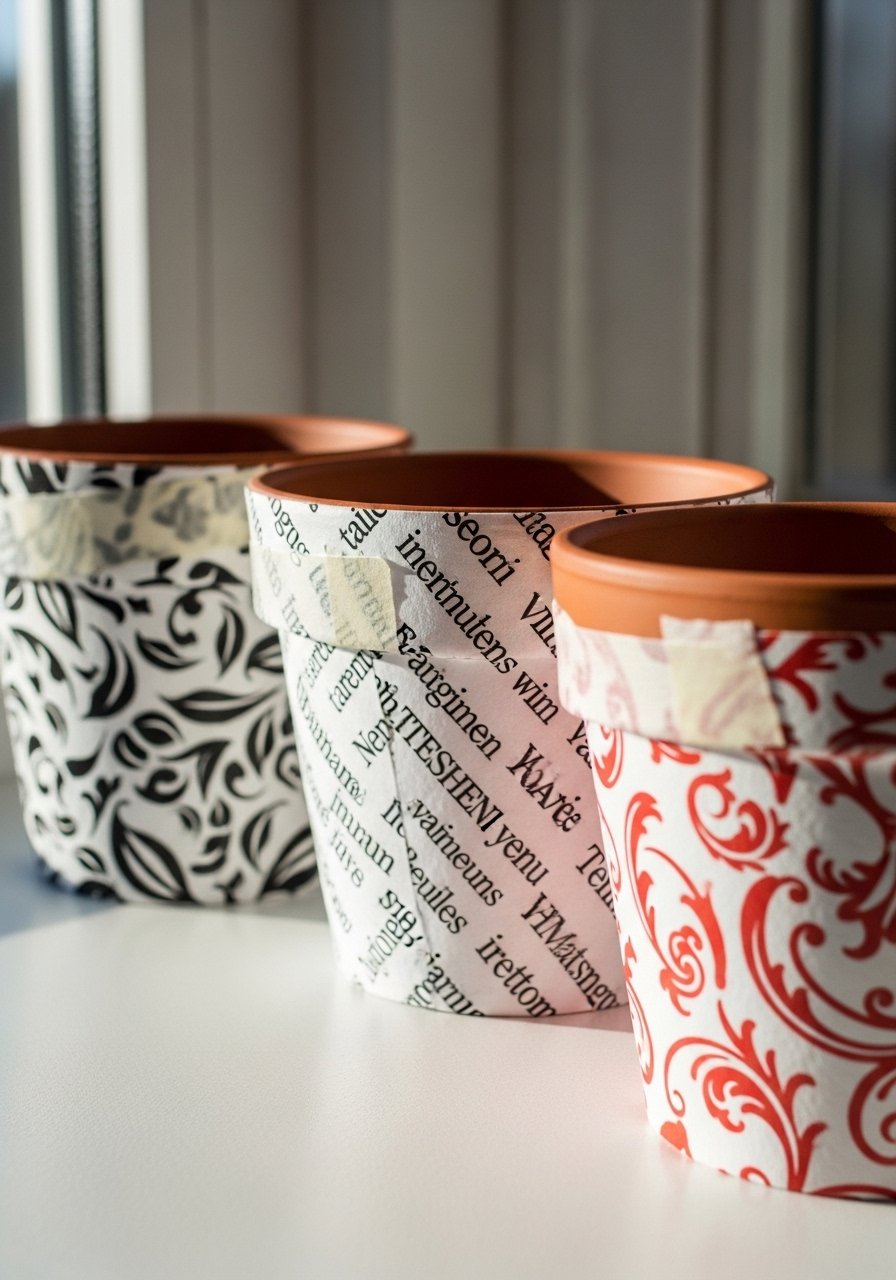
If you have a tiny windowsill that looks cluttered with mismatched pots, printable pot wraps unify the scene. Cut printable waterproof labels or heavy-duty craft paper to 3-inch heights for 3-4 inch pots. I switched my mismatched terracotta to a coordinated set with a subtle stripe pattern and suddenly the sill looked styled. Don’t tape them flush to the pot rim. Leave a 1/4 inch gap at the top so water overflow doesn’t ruin the paper. For water resistance, try printable vinyl sheets and a roll of clear craft tape like waterproof-adhesive-film.
Printable Lampshade Pattern for Cozy Reading Nooks
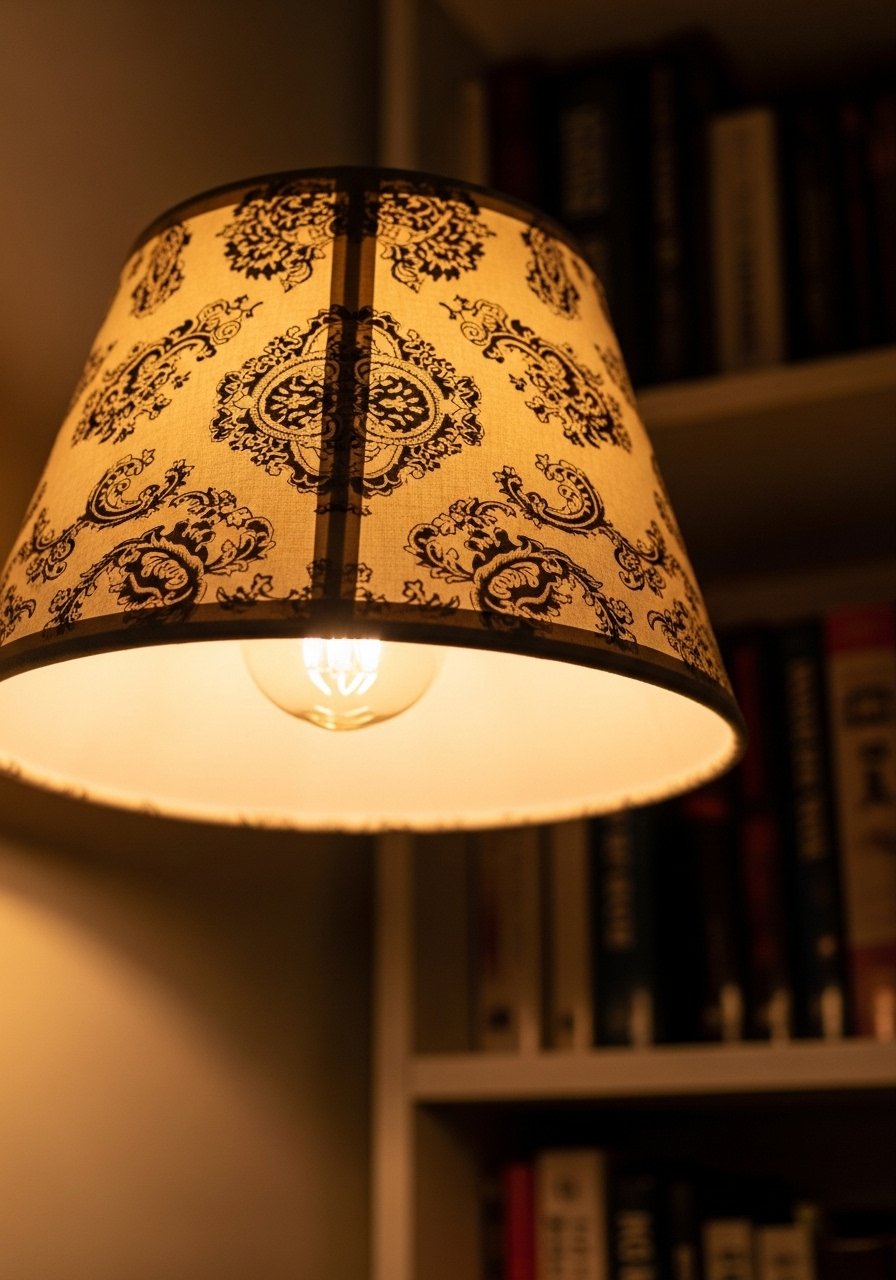
Lighting makes a small room feel lived-in. I made a replacement fabric lampshade using a printable pattern, then stretched printable cotton over a thrifted frame. The pattern scale matters. For a 12-inch diameter drum, use a repeat no larger than 6 inches. People often print patterns too small and the shade reads busy from across the room. I used heat-bond adhesive and a low-watt LED for safety. If you prefer no-sew, printable lampshade kits and adhesive like lamp-shade-adhesive make it faster.
Magnetic Printable Command Center for Tiny Home Offices
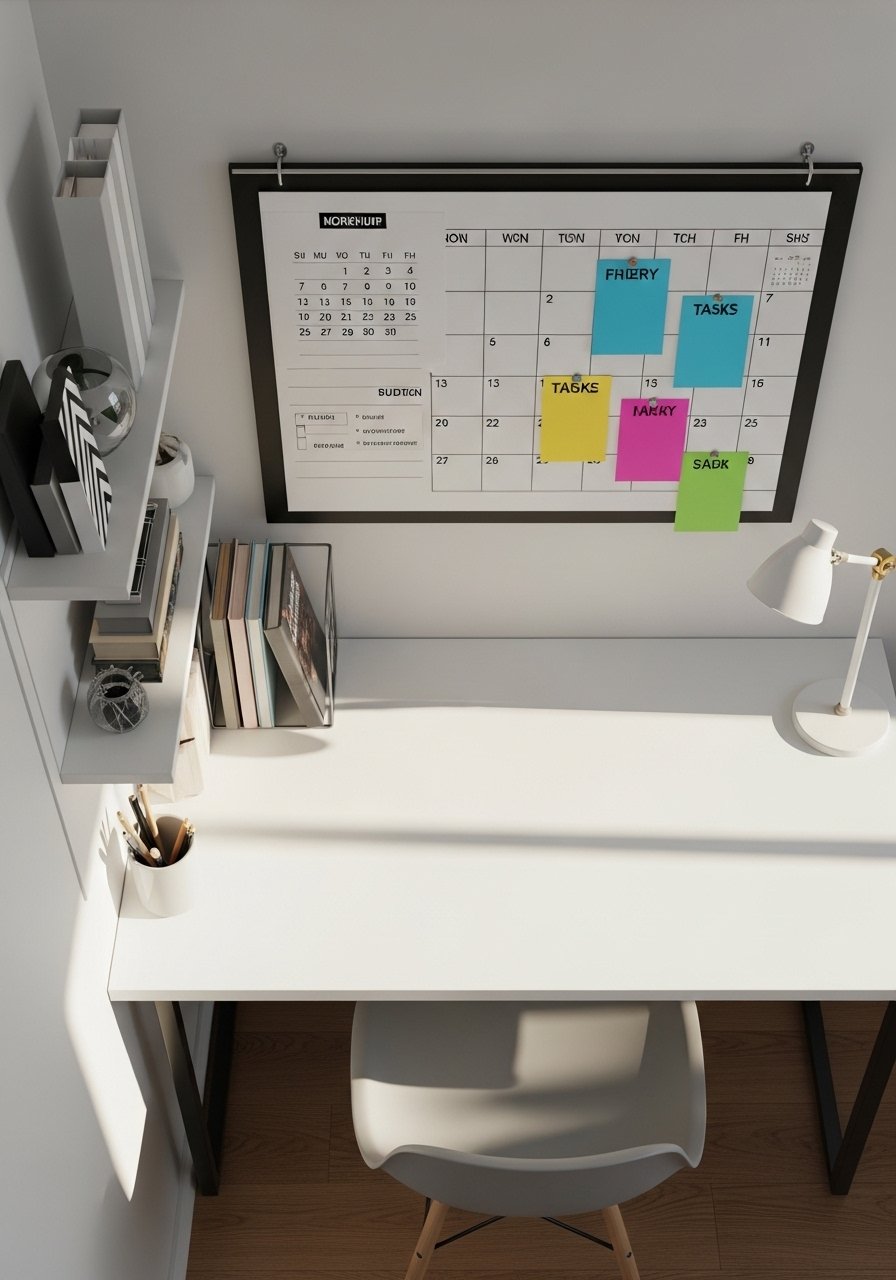
When your desk is a corner in a living room, a printable magnetic command center keeps clutter off the surface. I printed a monthly grid, habit trackers, and tiny card checklists on magnetic sheets and stuck them to a metal board. The visual system makes it easier to keep mail sorted. Tip: print the monthly grid at 11×14 and keep the habit tracker at half that size so the board follows the 60/40 visual rule. If you skip laminating, the sheets wrinkle with handling. I used a magnetic-photo-sheet-8×11 pack to make swapping quick.
Printable Fabric Drawer Liners for Closet Refresh
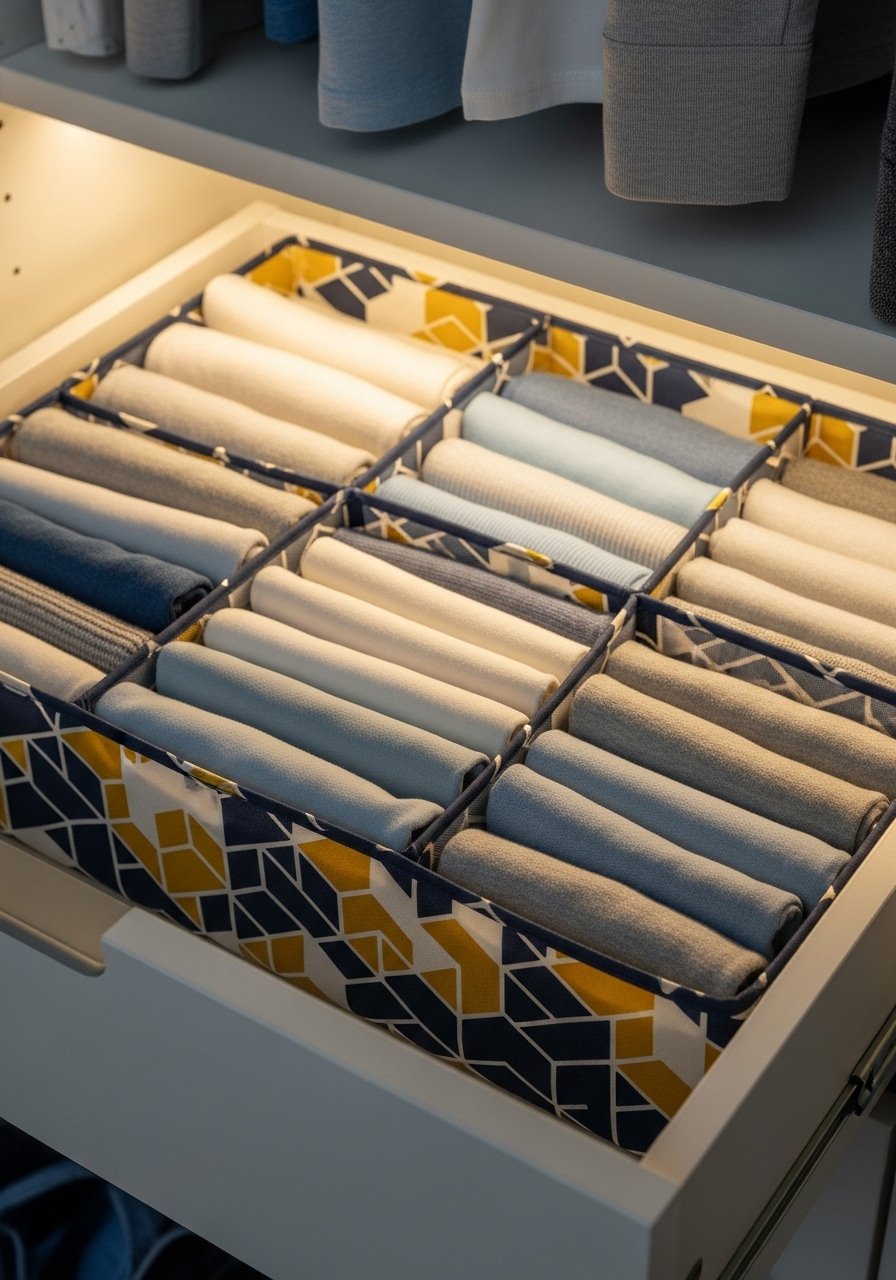
Lining drawers with printable cotton or canvas gives small closets a custom look without redoing the built-ins. Cut liners to fit, add a 1/2 inch hem, and use fabric glue or iron-on hem tape for no-sew durability. I measured the drawer base and left a 1/2 inch tolerance on all sides so the liner lays flat when sliding in. A common mistake is using slippery fabric that shifts. Choose medium-weight cotton or canvas printable fabric and secure corners with double-sided fabric tape. For supplies, printable cotton sheets and a small pack of iron-on-hem-tape are useful.
Printable Hanging Pocket Organizer for Overdoor Storage

If your small room has no floor for a basket, hang a printable pocket organizer on the door. I printed labels on stiff card to make each pocket feel intentional. For a tidy look use 3 rows of pockets at 6-inch spacing so everything remains reachable. The mistake is overstuffing pockets, which makes the door hard to close. Keep pocket depth shallow, about 3 inches, and anchor the top with a slim command hook or a tension rod. Printable label sheets and a simple over-the-door hook like over-the-door-hooks made my system stay put.
Printable Iron-On Pillow Transfers for Small Sofas

I bought plain pillow covers and upgraded them with printable iron-on transfers. For a small sofa, stick to 18×18 inch pillows and use a single graphic across both cushions for continuity. Print transfers on light fabric sheets for the best color pop. Avoid overscaling designs. A 10-12 inch wide transfer reads clean on an 18-inch pillow. Many people try a busy repeat and the couch ends up looking cluttered. Use a household iron with firm pressure and a protective sheet. I used iron-on-transfer-paper to make mine.
Printable Faux Headboard Template for Tiny Bedrooms
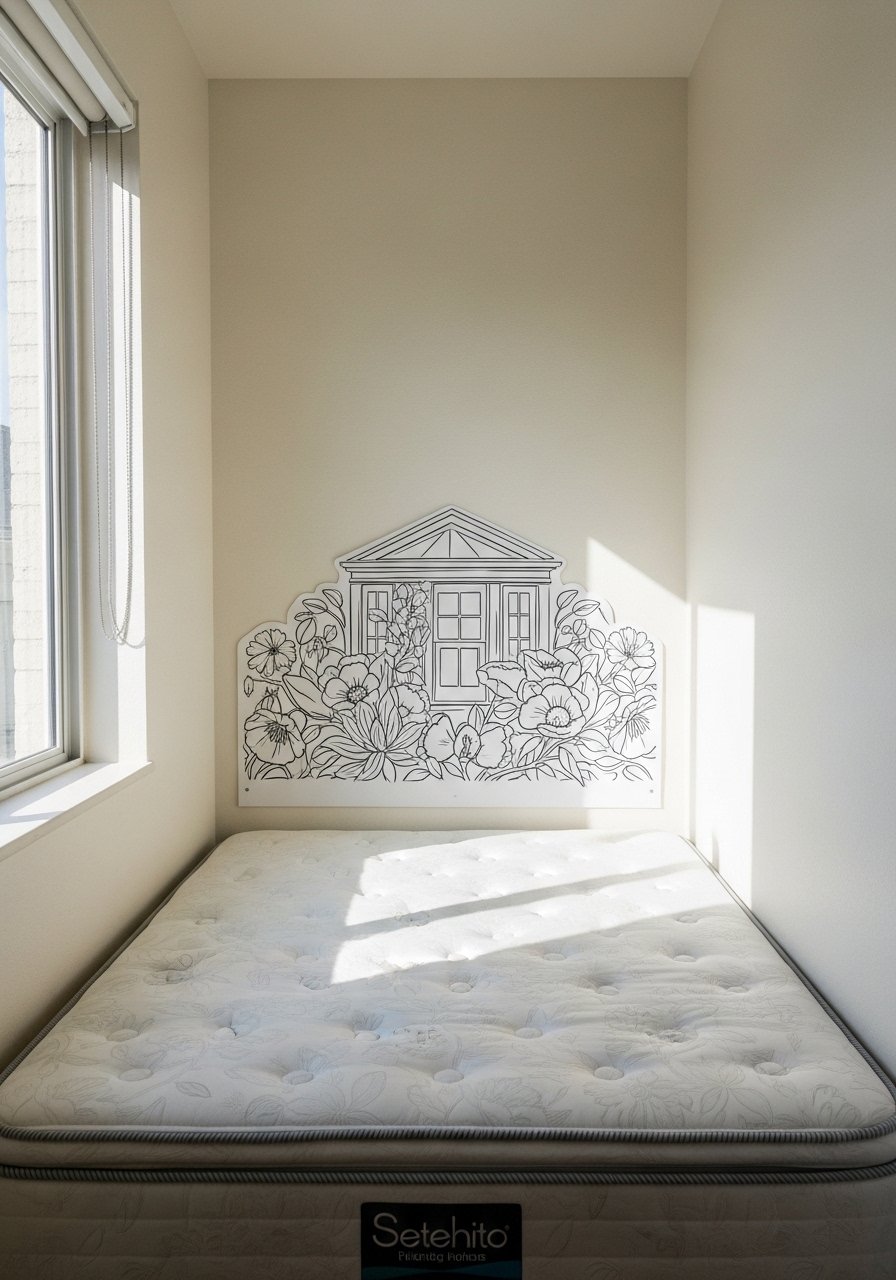
Not enough room for a full headboard? Print a headboard template on wide-format paper or tile smaller prints together, then adhere to foam board. Hang so the base of the faux headboard sits 2 inches above the mattress top to avoid it looking suspended. I chose a 36-inch height for my queen and it reads proportional without overwhelming the small wall. Mistake to avoid is going too tall, which makes the ceiling feel lower. Lightweight foam board and double-sided-mounting-tape keep it safe for renters.
Printable Basket and Shelf Labels for Open Storage
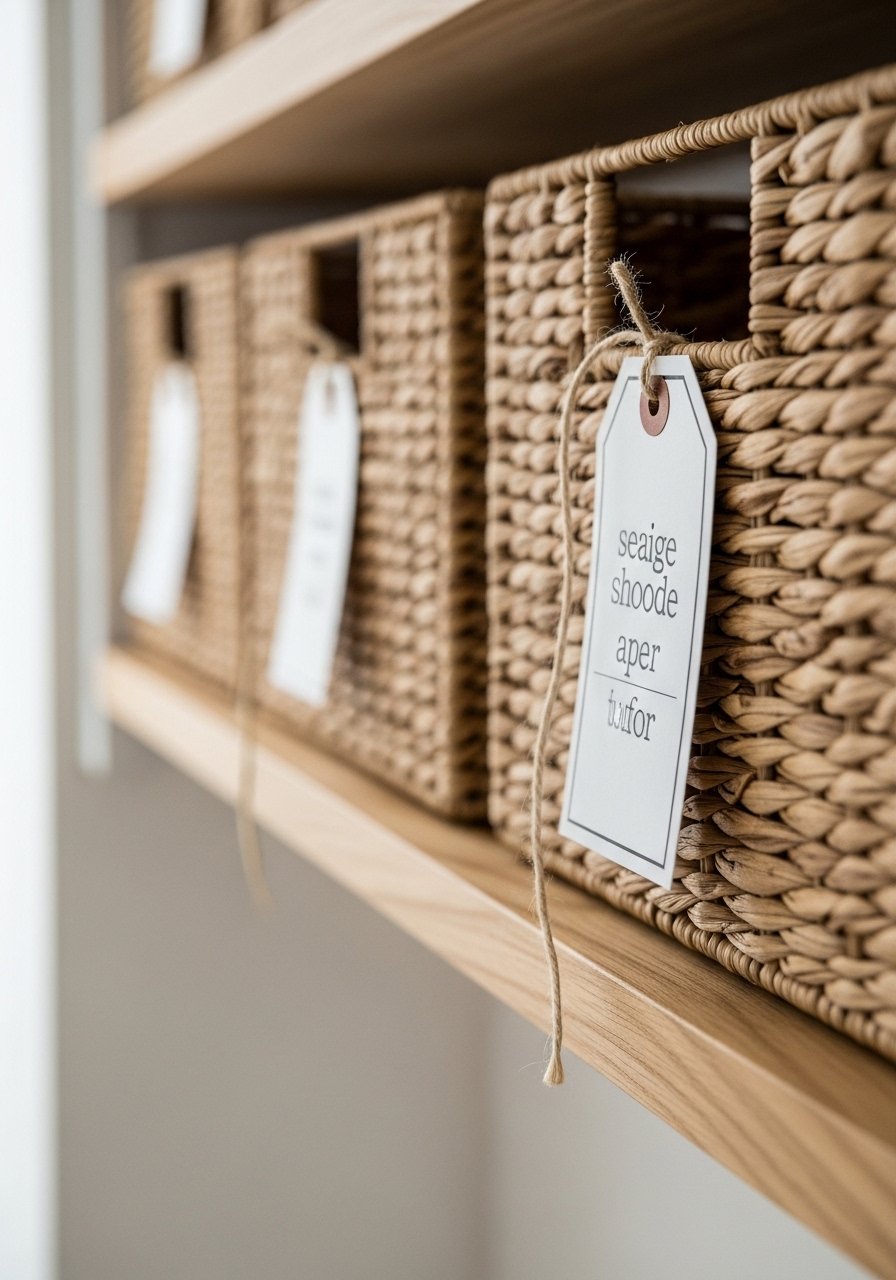
Open storage looks intentional with consistent printable tags. I used a clean sans-serif font, printed on cardstock, and hole-punched tags with 4-inch strings. For scale, tags on medium baskets should be 2.5 by 4 inches. A common misstep is using tiny labels that disappear from a distance. If you want a soft look, choose cream cardstock and kraft string. For quick swaps, hole reinforcements and label-string-twine made mine last through daily handling.
Printable Peel-and-Stick Backsplash Decals for Kitchenettes
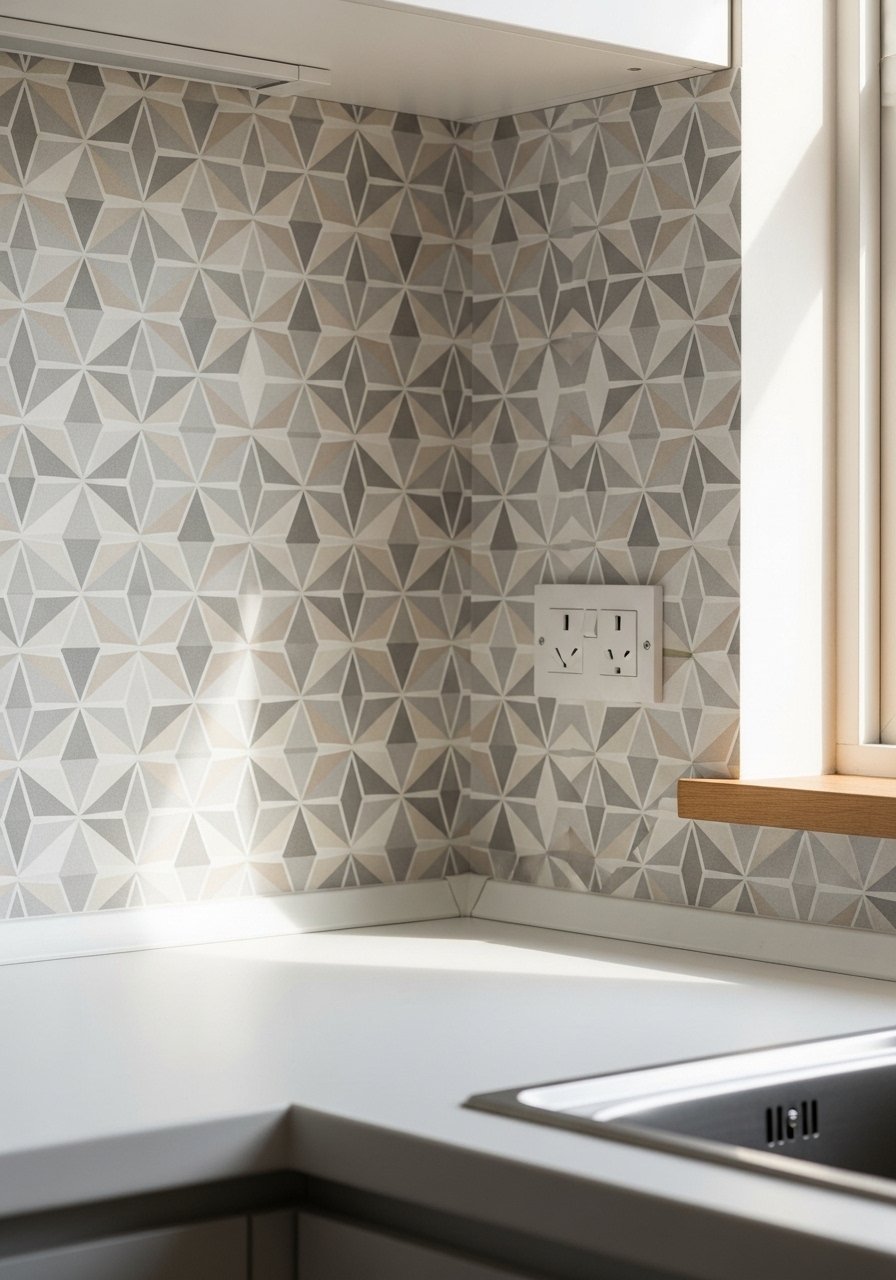
If your rental has a bland backsplash, printable peel-and-stick decals update the space overnight. Measure tile width and print panels slightly larger, trimming a 1/16 inch for ease of alignment. I used a high-contrast hex pattern and matched grout lines visually with thin white vinyl strips. People often skip sealing around the sink. Use waterproof edge tape and a low-profile caulk for protection. For materials, removable vinyl sheets and a small utility-knife-for-vinyl work well for clean edges.
Printable Photo Garland for Small Hallways
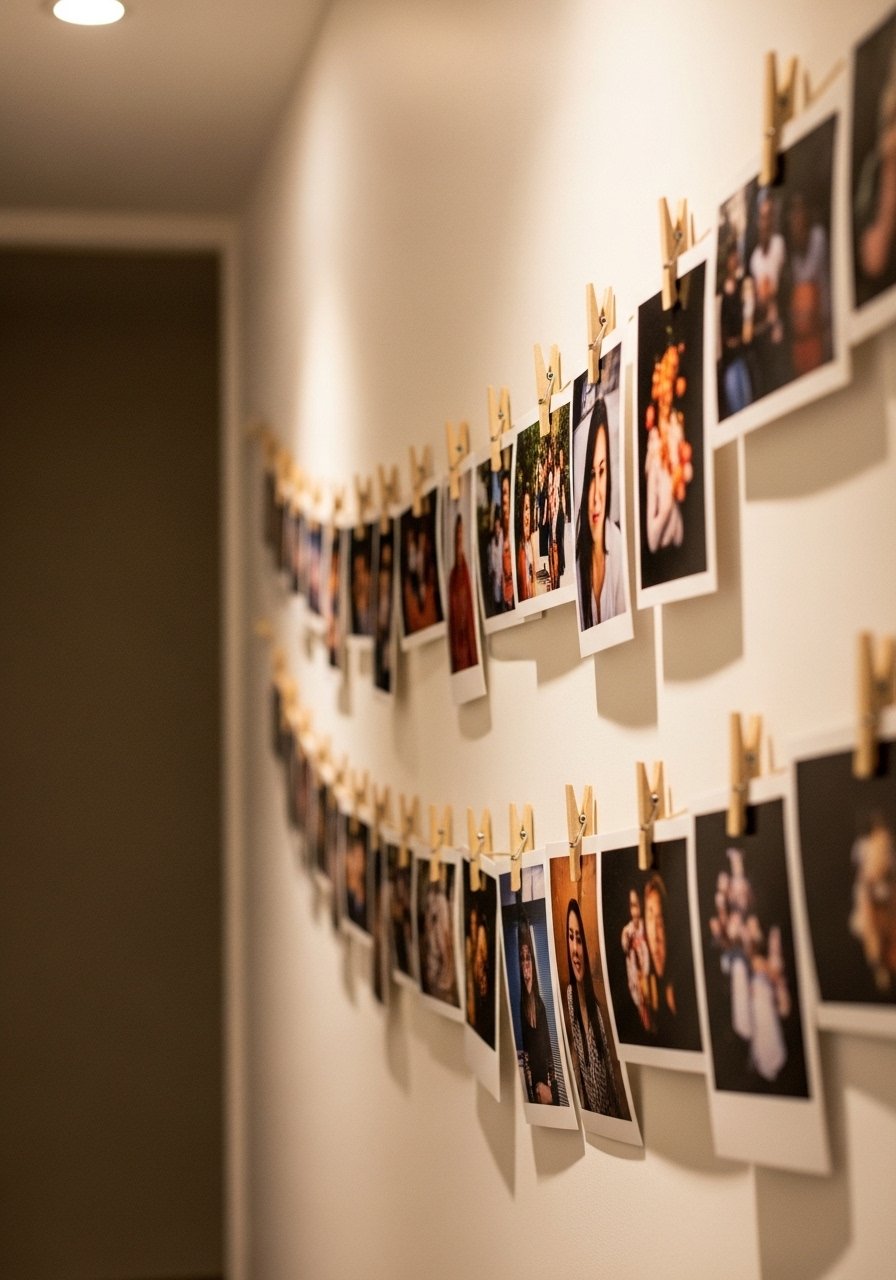
A string of printable photos hung low creates horizontal movement that visually widens a narrow hallway. I printed photos on 4×6 cardstock and left a 2-inch margin for binder clips. Hang the string between two hooks at about 54 inches above the floor and let the garland dip 3-4 inches in the center. Mistake to avoid is using glossy paper, which reflects glare under hall lights. Matte cardstock looks professional and lasts longer. For clipping, grab small brass binder clips like mini-binder-clips.
Printable Book Spine Labels to Style Open Shelves
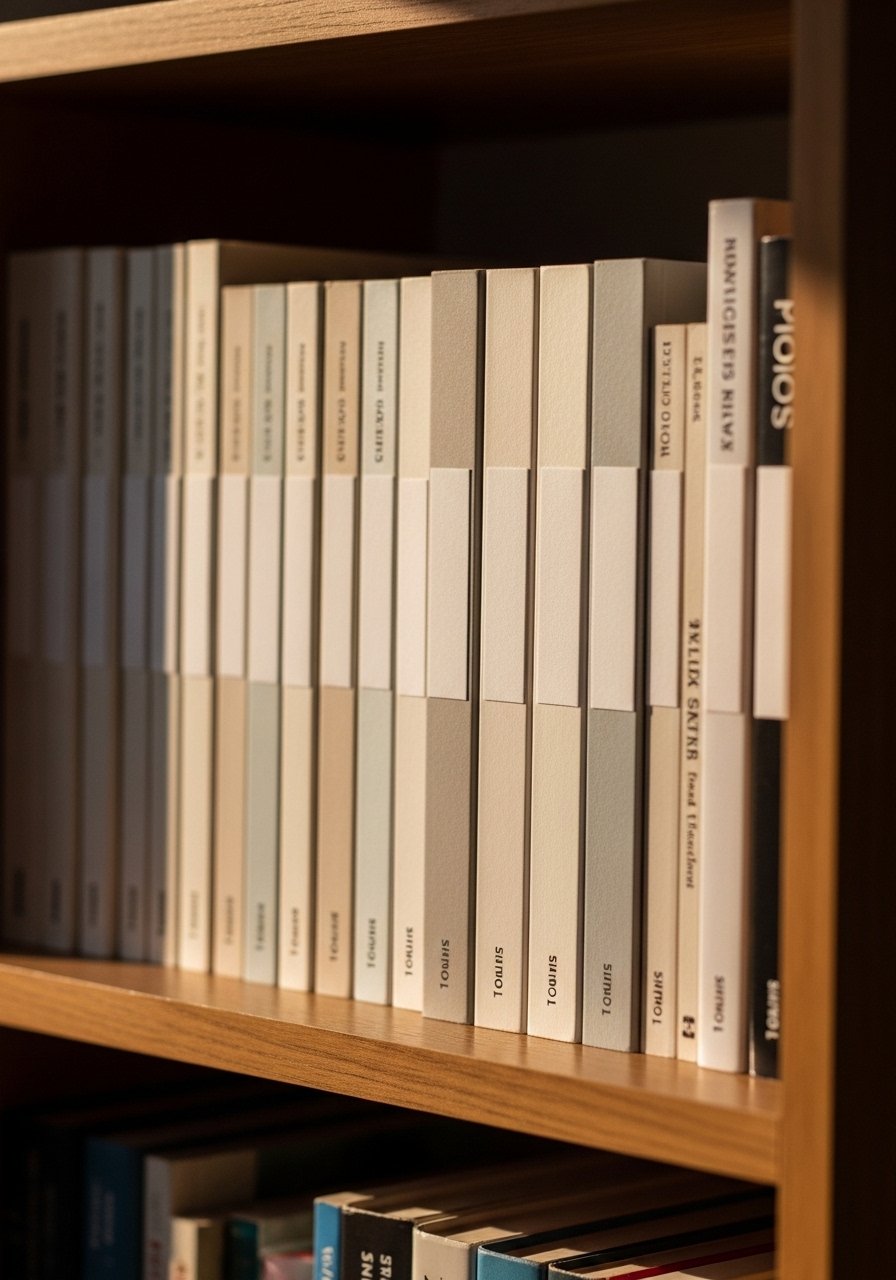
Open bookshelves can look chaotic in a small room. I wrapped paperback spines with printable labels in a single neutral color to create an 80/20 color ratio where 80 percent is neutral and 20 percent is an accent. That gives visual calm while still showing variety. Cut labels to 1.5 by 8 inches for most trade paperbacks. Don’t cover titles you need to find often. Keep functional volumes in the middle and style books on the sides. Printable label sheets and a paper trimmer like paper-trimmer-12-inch make this faster.
Printable Rug Corner Protectors for Small Entryways
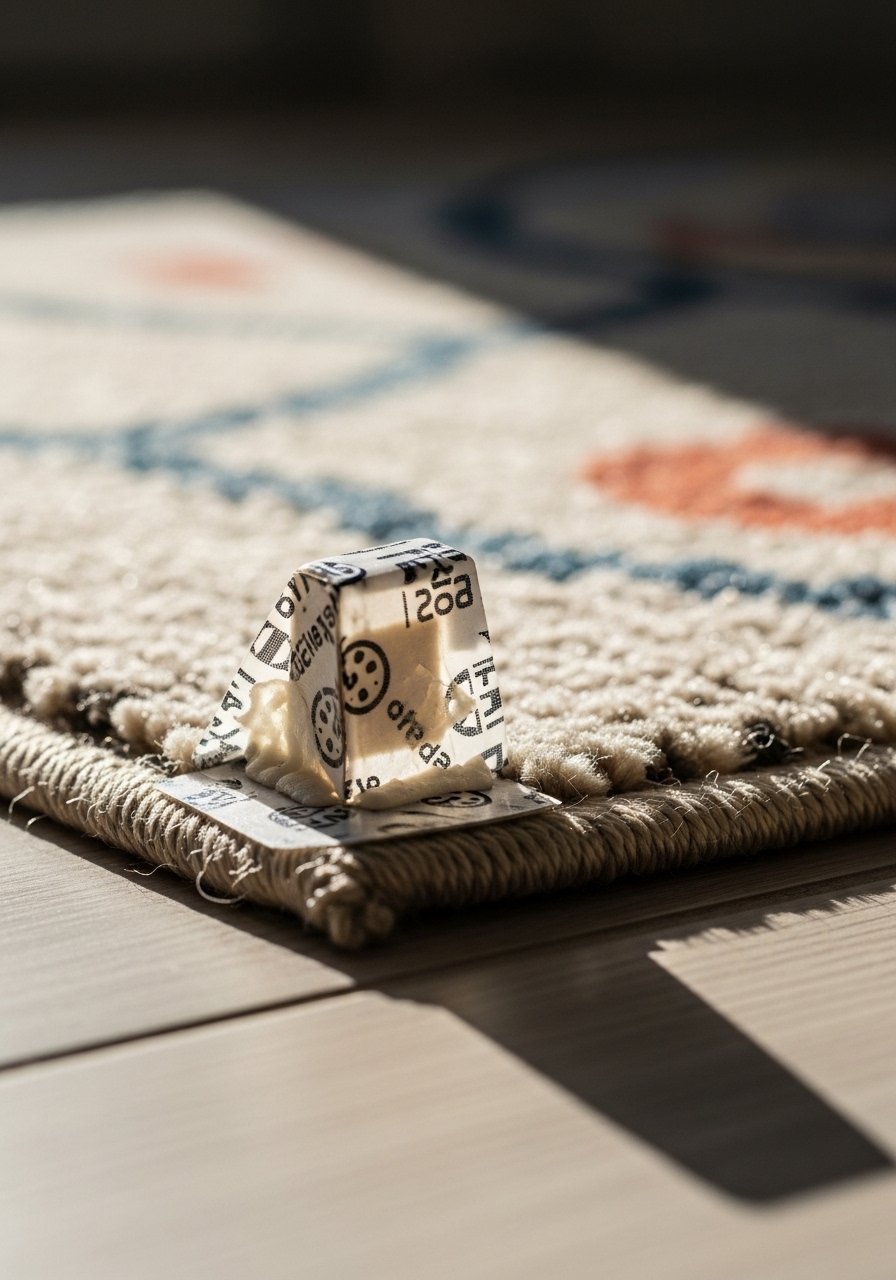
Rugs in small spaces shift constantly. I printed corner protector templates on clear adhesive vinyl and stuck them under the rug corners to hold them in place without visible hardware. For a 2×3 rug, cut protectors to 4×4 inches and attach under each corner. The oversight most people make is using full rug tape that peels at the edge. Small corner protectors are less visible and still secure. For materials try printable clear vinyl sheets and a small roll of non-slip-rug-grip.
Printable Switch Plate Decals for Subtle Color
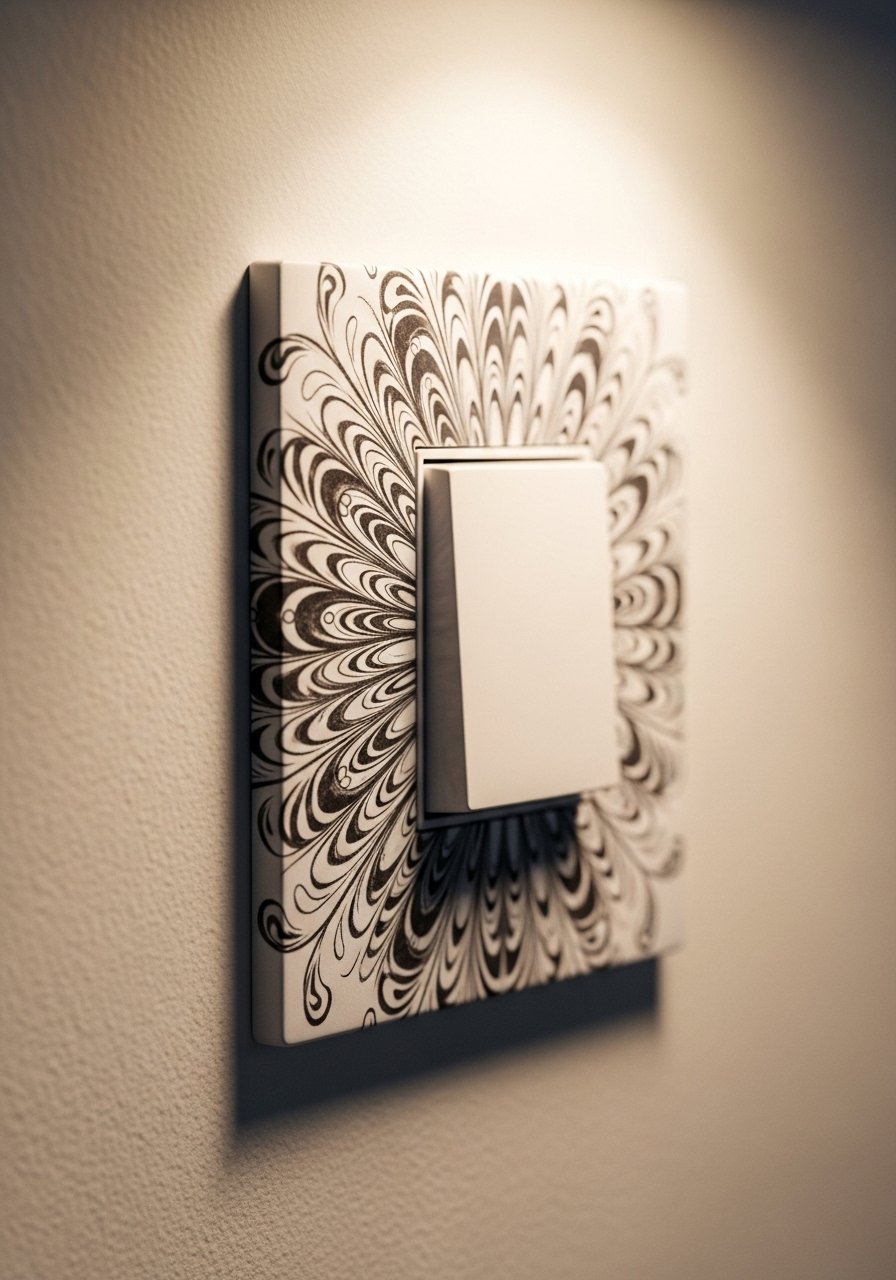
I used printable decals to cover plain switch plates and tie them to a wall accent color. Cut decals to leave 1/8 inch of plate showing so they do not interfere with the switch toggle. The detail that makes them read high-end is matching the decal finish to nearby trim, either matte or satin. Avoid thick paper that will curl at the edges. Printable vinyl decal sheets and a micro-squeegee like vinyl-application-squeegee made application smooth.
Printable Wall Pocket Nightstand for Studio Bedrooms
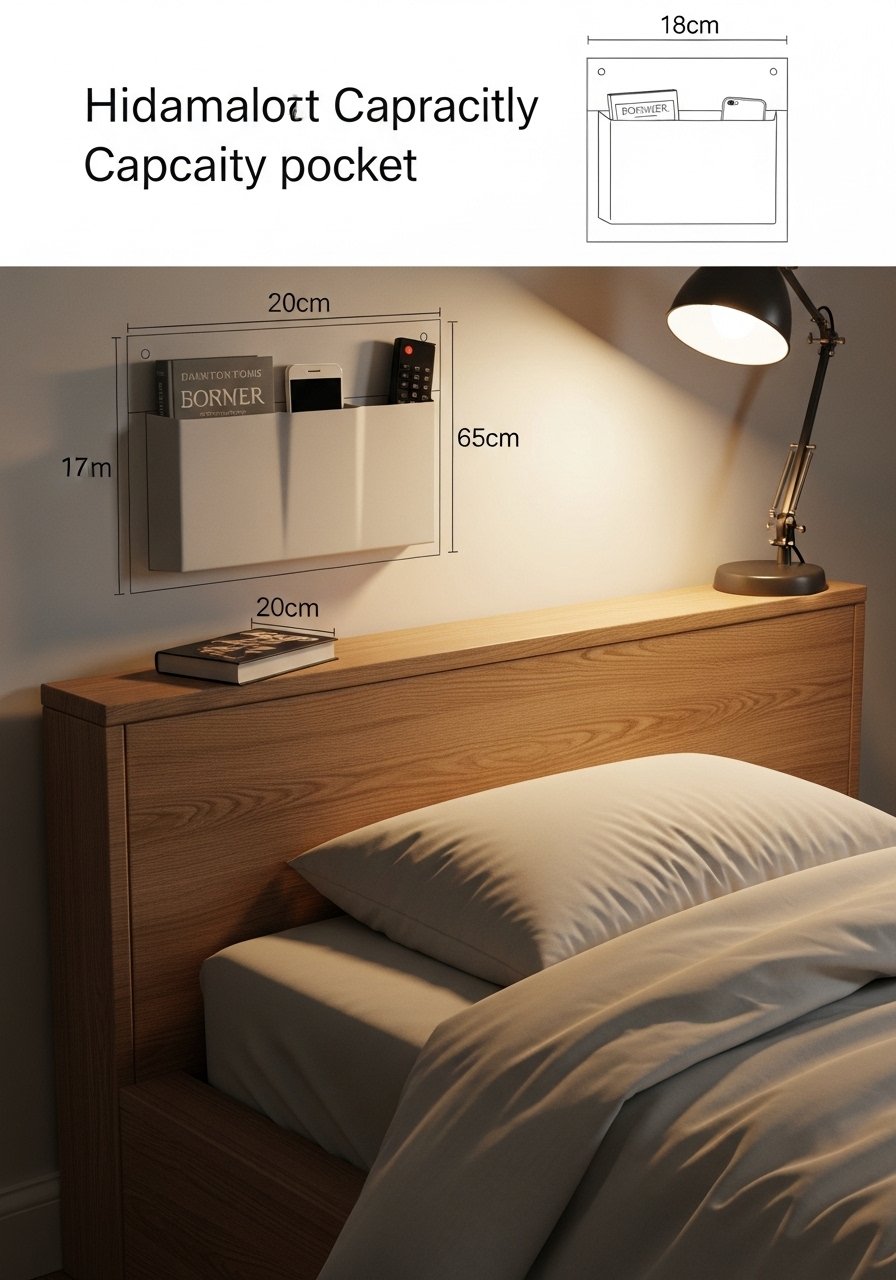
No space for a nightstand? A printable wall pocket mounted 6 inches above the mattress holds a book, phone, and glasses. I printed a reinforced pattern and attached it to corkboard backing for stability. Use a 10 inch wide pocket that extends 5 inches from the wall so items sit securely. The mistake is mounting it too high. Keep the top edge within a hand’s reach when seated. For durability, print on heavyweight canvas paper and use heavy-duty-velcro-strips to anchor the pocket.
Printable Curtain Tieback Templates for Petite Windows
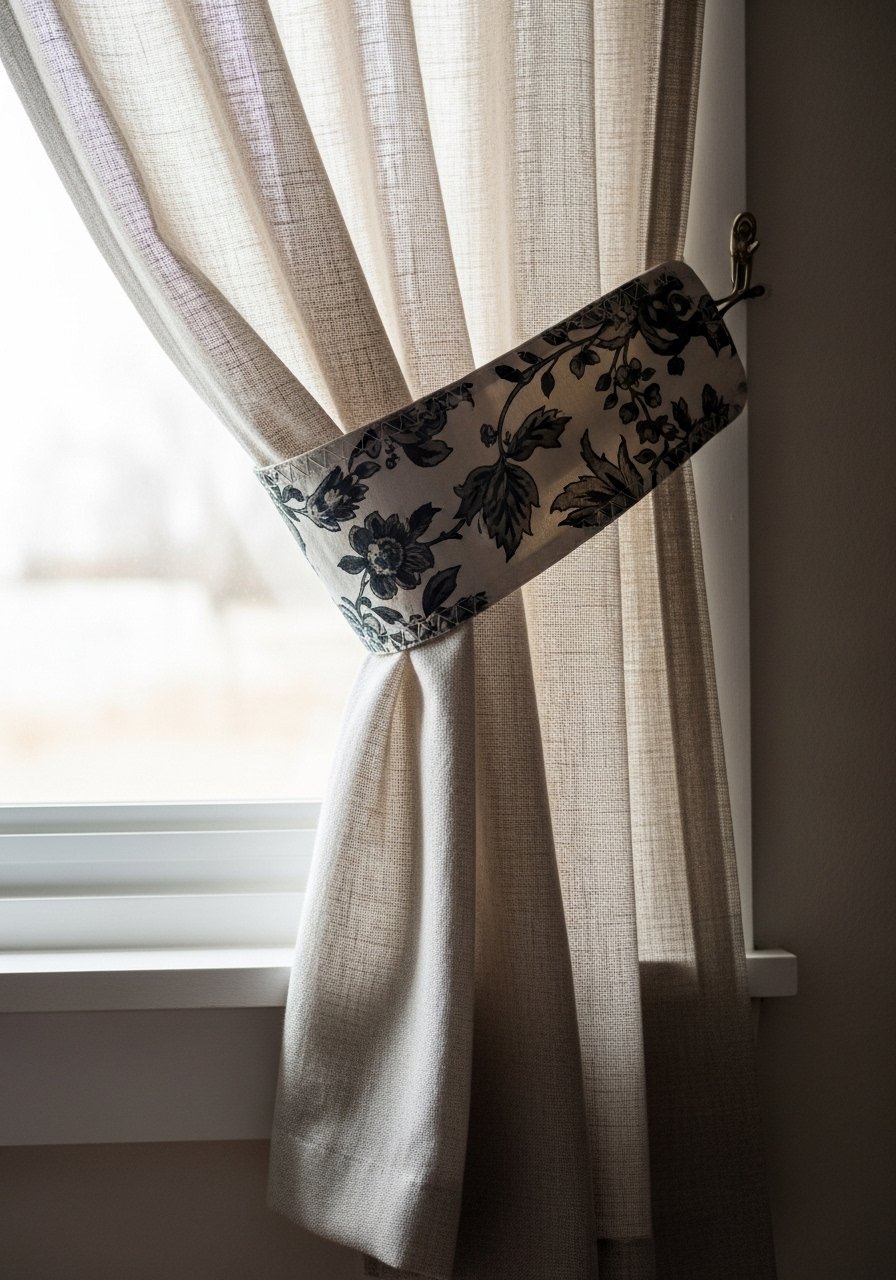
Tiny windows benefit from printable tieback templates that bring curtain fabric into the room visually. I made 6-inch wide tiebacks with a 1.5 inch gap from the window frame, which made the curtains feel intentional and the window feel larger. People often place tiebacks too low, which shortens the perceived window height. Use a soft foam core inside the tieback for structure and match thread color to the curtain. For supplies, printable cotton and a small sewing-needle-kit were all I needed.
Printable Seasonal Switchable Art Panels for Small Dining Corners
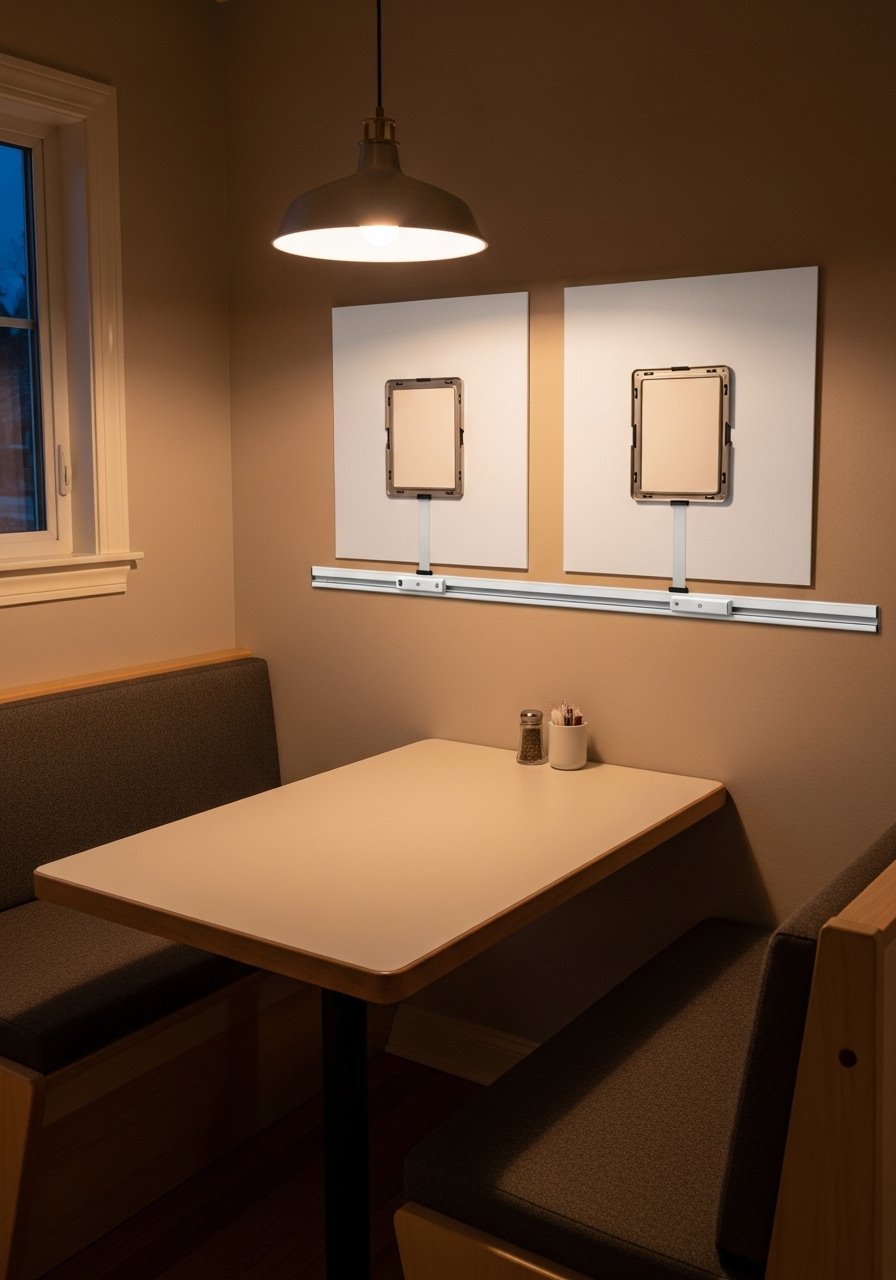
I built a tiny art rail with printable panels that swap seasonally. Panels are 12×16 inches and slide on a 1-inch rail, so rotation is effortless and storage is simple. Keep the rail eye-level for your seating, about 60 inches from the floor. A common mistake is making panels too heavy. Use foam-core mounts and a light frame. For ease, pick up a slim picture rail like slim-picture-rail and lightweight foam boards to mount prints.
Printable Cable Wraps and Label System for Media Corners
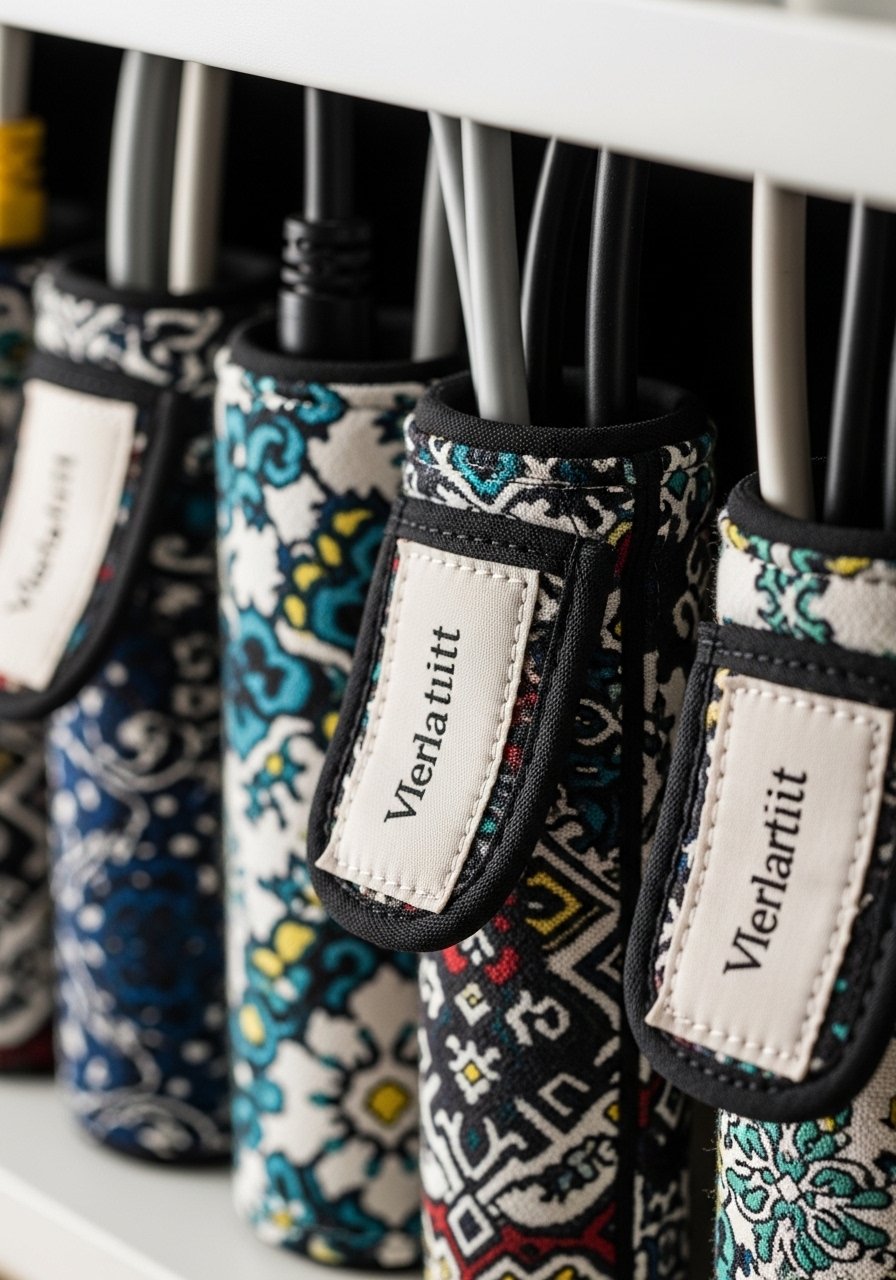
Cables make small entertainment corners look messy. I created printable fabric wraps and matching labels for each cord. Make wraps 1.5 inches wide and long enough to loop twice around common cables. Label both ends with a small printed tag so unplugging is painless. The mistake most people make is binding cords too tightly, which stresses connectors. Use a soft closure like hook and loop. Printable fabric sheets and a pack of hook-and-loop-cable-ties keep everything flexible.
Printable Fold-Out Welcome Sign for Guest Corners
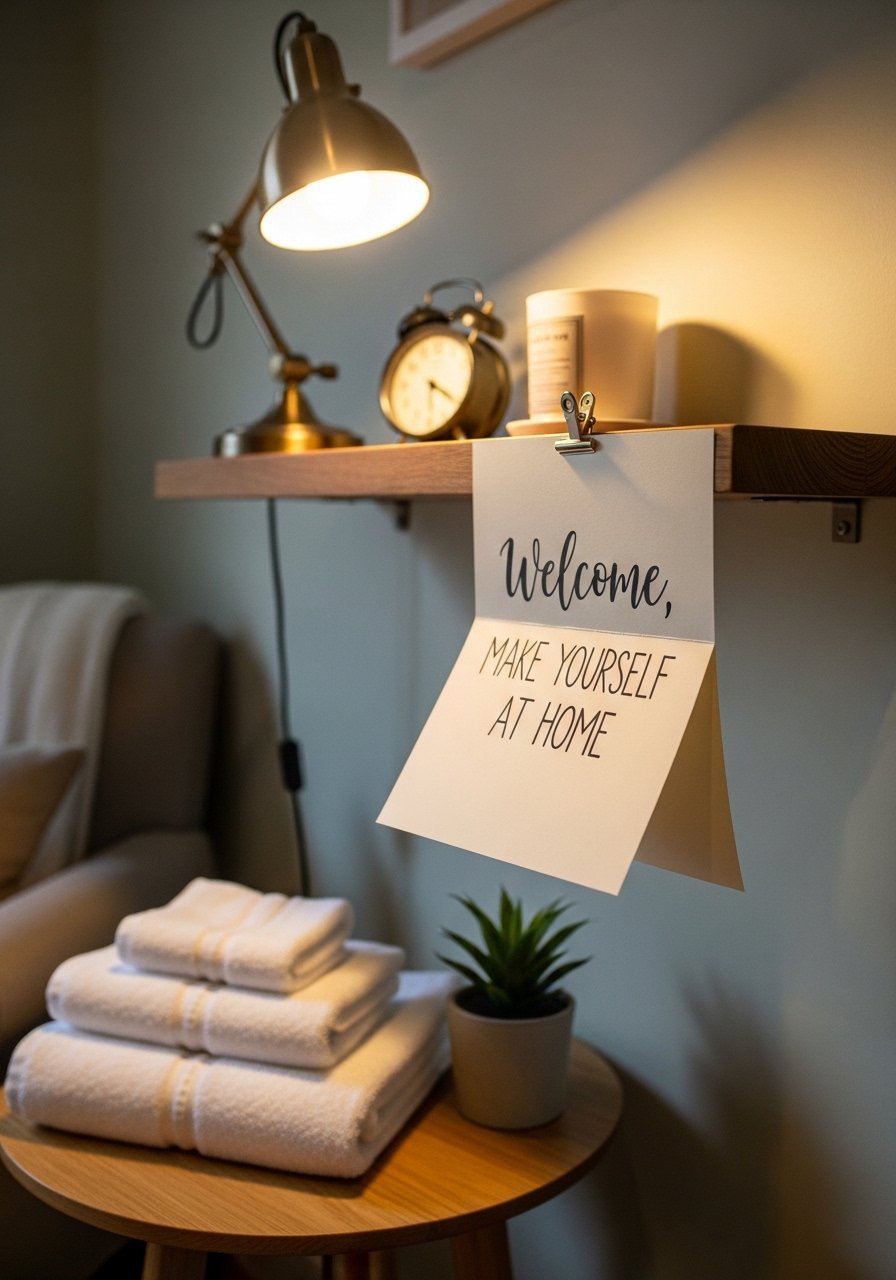
If guests use your sofa bed or a corner for sleeping, a printable fold-out welcome sign adds warmth and useful info. I printed a tri-fold with check-in details, Wi-Fi, and a simple map of the apartment, folded to 4×6 for shelf display. Use durable cardstock and a light protective laminate so it survives multiple guests. Don’t cram too much text. Keep contact details bold and in 14 point type for readability. For laminating at home, a small thermal-laminator-9inch is worth it.
Your Decor Shopping List
Textiles
- Honestly the best $40 I have spent. Chunky knit throw in cream (50×60 inches).
- 18×18 inch linen pillow covers, set of 2 in warm gray, 22-inch inserts for fullness similar at Target.
Wall Decor
- Picture frames, slim black set (8×10 and 11×14).
- Peel-and-stick removable wallpaper sheets for small accent walls.
Lighting and Tools
- Lamp shade adhesive kit for DIY shades.
- Precision paper cutter 12-inch.
Plants and Storage
- Mini faux fiddle leaf fig 4ft for tricky light spots.
- Woven storage baskets set with printable tags.
Budget Finds
Shopping Tips
White oak beats dark wood in 2026. Design feeds have shifted completely. These white oak floating shelves look current, not dated.
Grab velvet pillow covers for $12 each. Swap them every season and the whole room feels different.
Curtains should puddle or kiss the floor, never hang halfway up. These 96-inch linen panels are right for standard 9-foot ceilings.
Lead with texture. If you only buy one thing, buy a textured throw like chunky-knit-throw-blanket-cream for instant softness.
Everyone buys five small succulents. One single 6-foot fiddle leaf fig has ten times the visual impact.
When in doubt, match the finish of small hardware to one dominant metal in the room. Mixed metal picture ledges help you layer frames without everything clashing.
Frequently Asked Questions
Q: Can printable art look high quality or will it always feel cheap?
A: Printable art can look very high quality if you print on the right stock and frame it correctly. Use 110 to 130 lb matte cardstock for most art and leave a 2.5 inch mat border if you are using a small frame. Crisp edges and consistent spacing make a big difference.
Q: What tools do I actually need for these projects?
A: You only need a few basics to start, like a precision cutter, heavyweight cardstock, and removable adhesive. For some projects a small laminator or a pack of printable vinyl sheets helps. Start with one tool and a single craft that solves a visible problem, like a gallery wall or drawer liner.
Q: How do I stop a small rug from slipping when I add printable corner protectors?
A: Make protectors slightly larger than the rug corner and use non-slip grippers under the rug as well. Leave a small gap at the edge so the protector does not show, and avoid taping across the rug surface.
Q: Can I mix a printable modern art style with vintage furniture without it looking messy?
A: Yes. Use the rule of three for grouping, keep an 80/20 color ratio where 80 percent is neutral, and let one or two small vintage pieces remain visually dominant. Printable art in neutral tones ties things together.
Q: What size should I print for layered mats and frames?
A: For standard frames print 8×10 and mat to 11×14, or print 11×14 and mat to 16×20. For a small sofa use 18×24 for a single focal print, or three 8×10 portraits stacked vertically for narrow walls.
Q: Are removable wallpapers and decals really renter-friendly?
A: Yes when you use products labeled removable and follow the manufacturer instructions for clean walls and seam trimming. Test a small patch first. For kitchens and near sinks, add waterproof edge tape to protect edges.
Q: How should I store seasonal printable panels to avoid damage?
A: Store flat in a shallow portfolio or between cardboard sheets in a slim under-bed box. Laminate panels for durability and label the storage edge with a printable inventory tag so you can rotate them fast.
