
My living room had nice furniture and decent lighting but it still felt like a waiting room. Took me embarrassingly long to figure out it was missing texture. Every surface was smooth, every color was flat, and nothing invited you to actually sit down. Rock art fixed part of that problem. Small, cheap, and oddly satisfying to make, painted river stones added the tactile detail the space needed.
These ideas lean boho to coastal with a few minimal options. Most projects cost under $50, with a couple around $75 if you buy nicer paints. They work on shelves, entry tables, window sills, or in the bathroom where kitchens and baths eat up most painted stone spots. Pack a snack and some patience, and you will have little art that feels like yours.
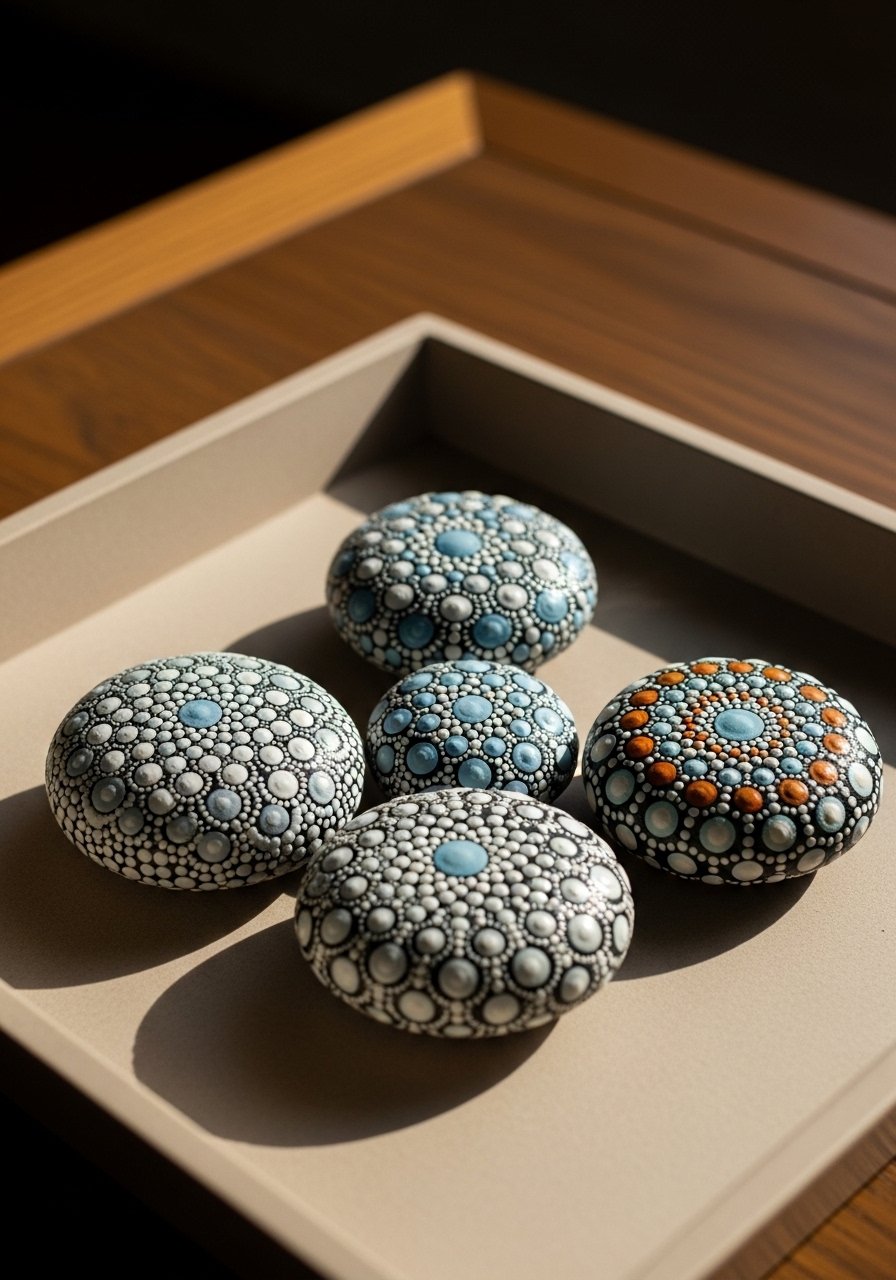
Boho Mandala Stones for Living Rooms
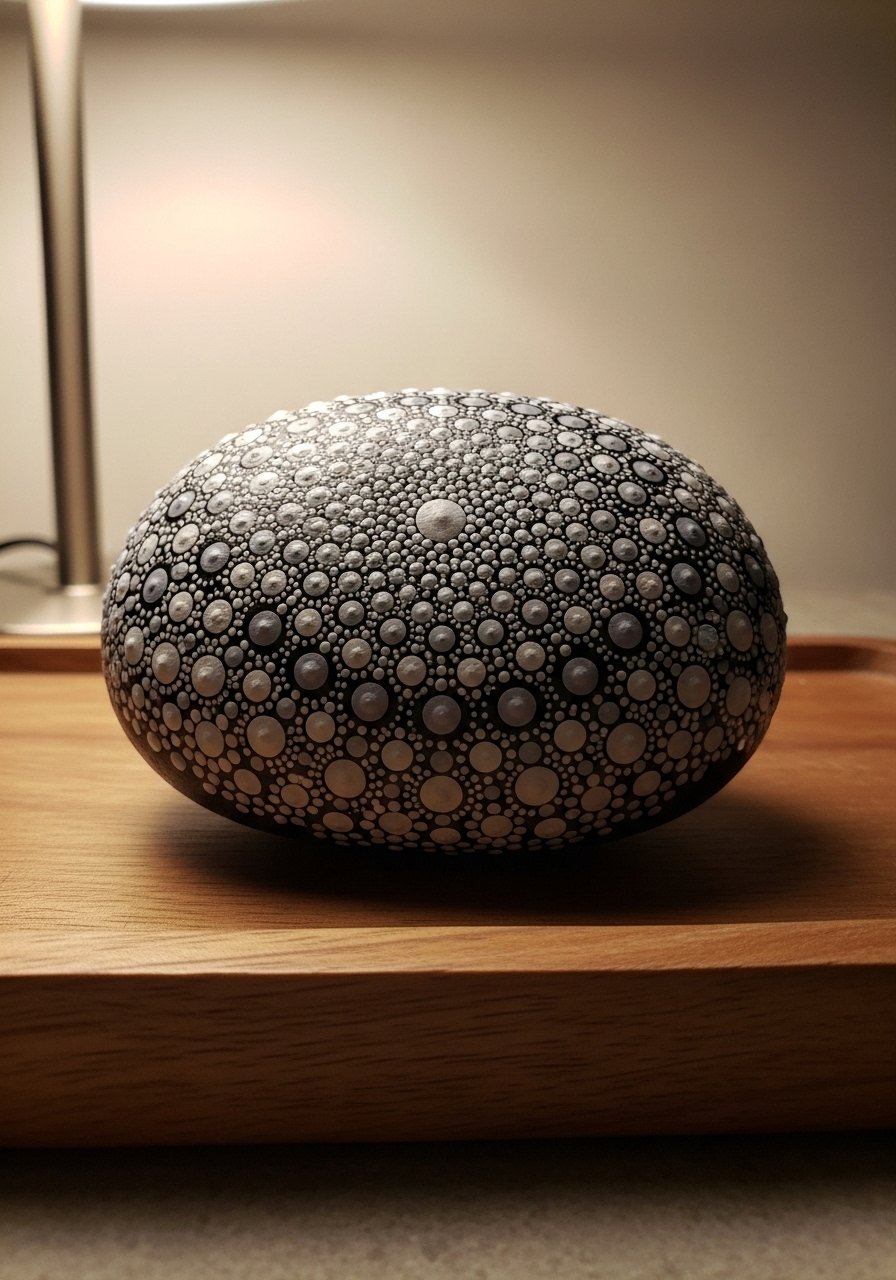
What makes mandalas work on river rocks is the rhythm of dots going out from the center. Start with stones 3-5 inches across so your dots have room. I paint a neutral base coat, let it dry, then do a center dot and build rings outward. Acrylics stand up to this, so grab a few tiny tubes and a dotting tool to get perfect rows. Try FolkArt multi-surface acrylics and a dotting tool kit. Most folks grab pebbles that fit in your hand, nothing huge. The common mistake is skipping a base coat, which makes colors bleed. Seal with two thin coats of Mod Podge or an acrylic sealer so the dots do not chip if people handle them.
Cute Turtle Pebbles for Kids Corners
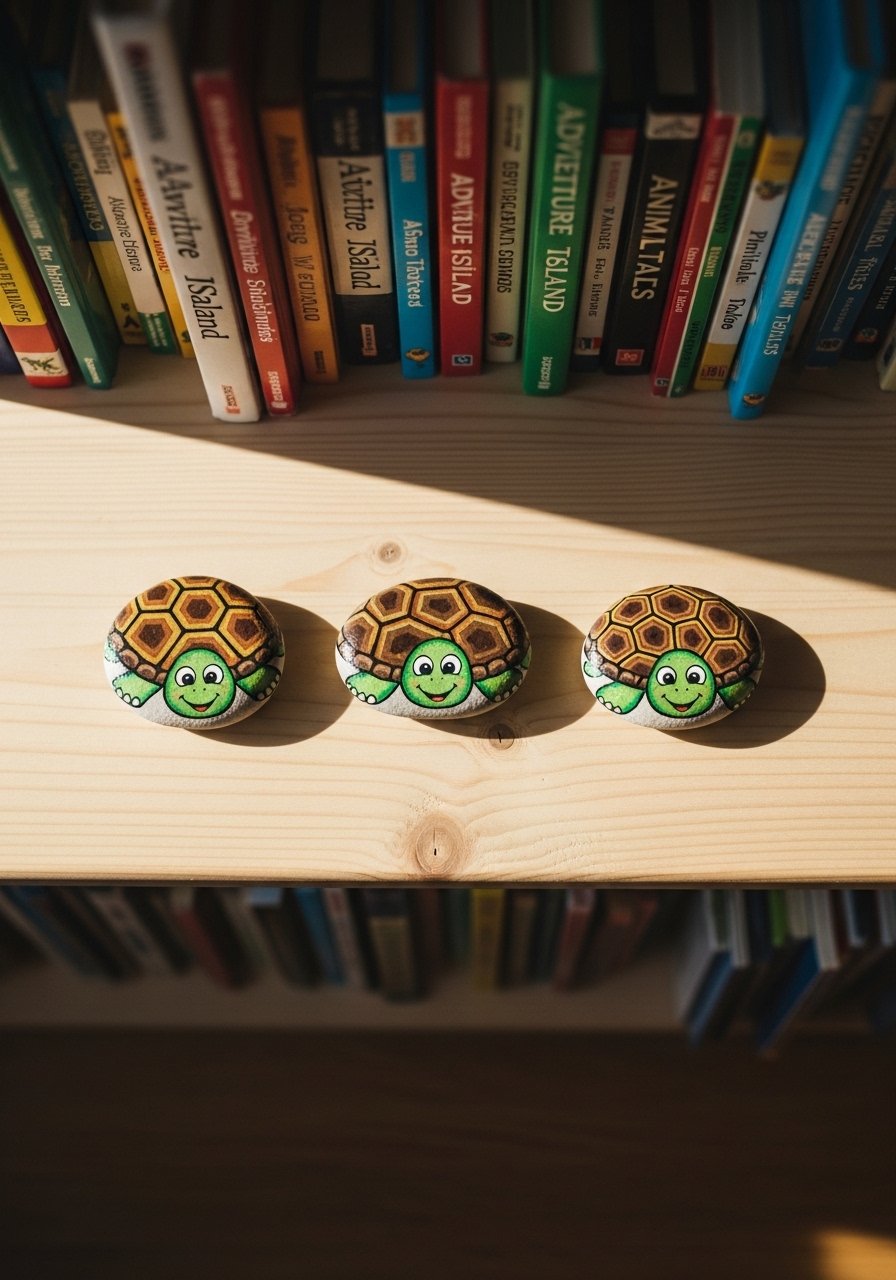
My niece got into these and so did her friends. Turtle pebbles are forgiving because simple shapes read well on curved surfaces. Sketch eyes lightly first, paint shell patterns with 2-3 colors, and finish with a glossy topcoat for a shell-like shine. I used Apple Barrel acrylics and a fine-tip brush. A common fail is painting details before the base has fully dried. Let each layer dry and your lines will stay crisp. These are cheap to make and sit nicely on a bath ledge, which is handy since kitchens and baths eat up most painted stone spots. If you want them kid-safe, add an extra coat of clear sealant designed to resist moisture.
Minimalist Black and White Swirls for Shelves
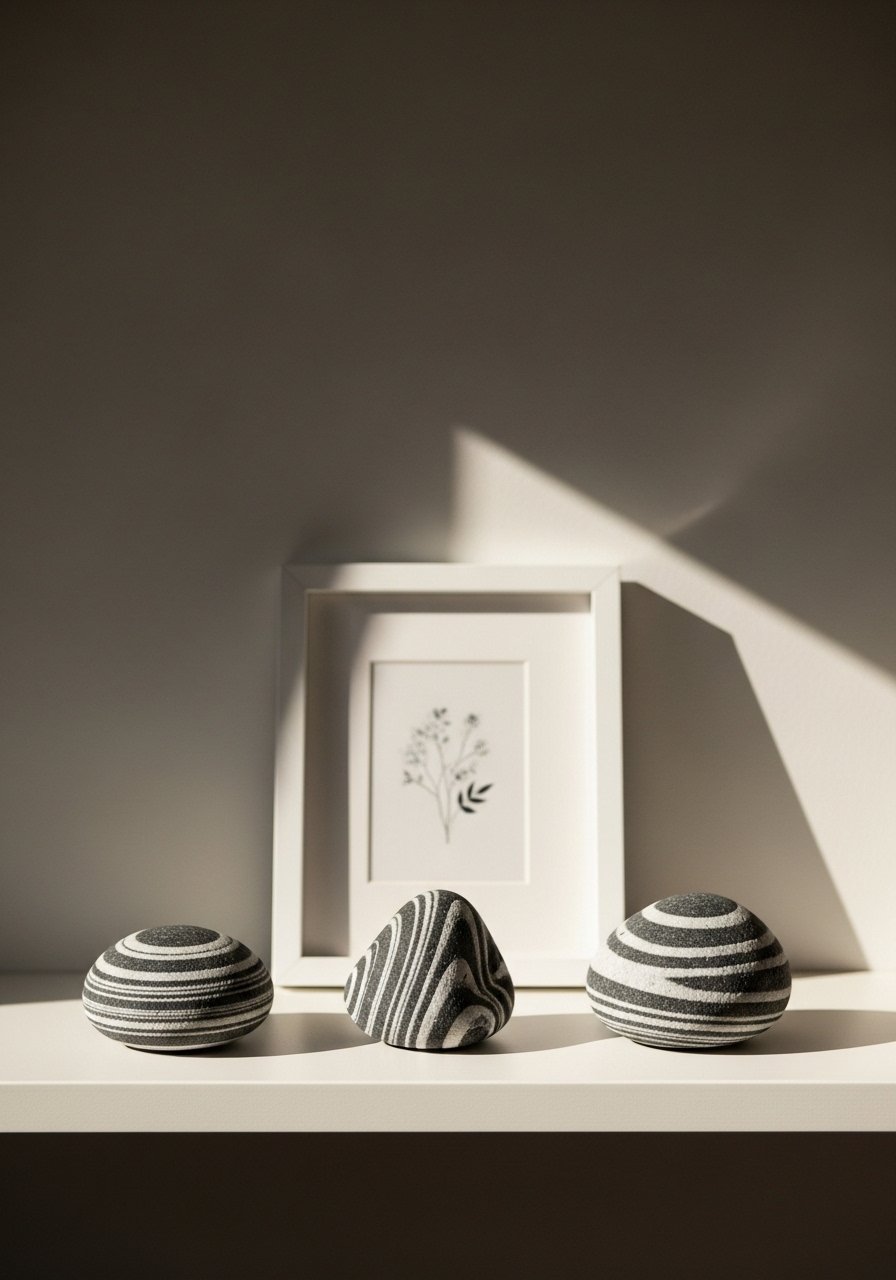
Swirls in black and white are a small investment that reads grown-up immediately. I tape a stone lightly to hold it still and use a Posca-style paint pen for steady lines. Keep to 2 colors and leave negative space, then arrange an odd number like three on a shelf for balance. Acrylics win for almost everyone painting rocks. If your stone is bumpy, pick the flattest side and sketch with pencil first. A trap is trying too many colors on these small canvases, which makes the design look juvenile. Pair these with a narrow black frame and a tiny brass tray for contrast.
Pebble Family Silhouettes for an Entry Table
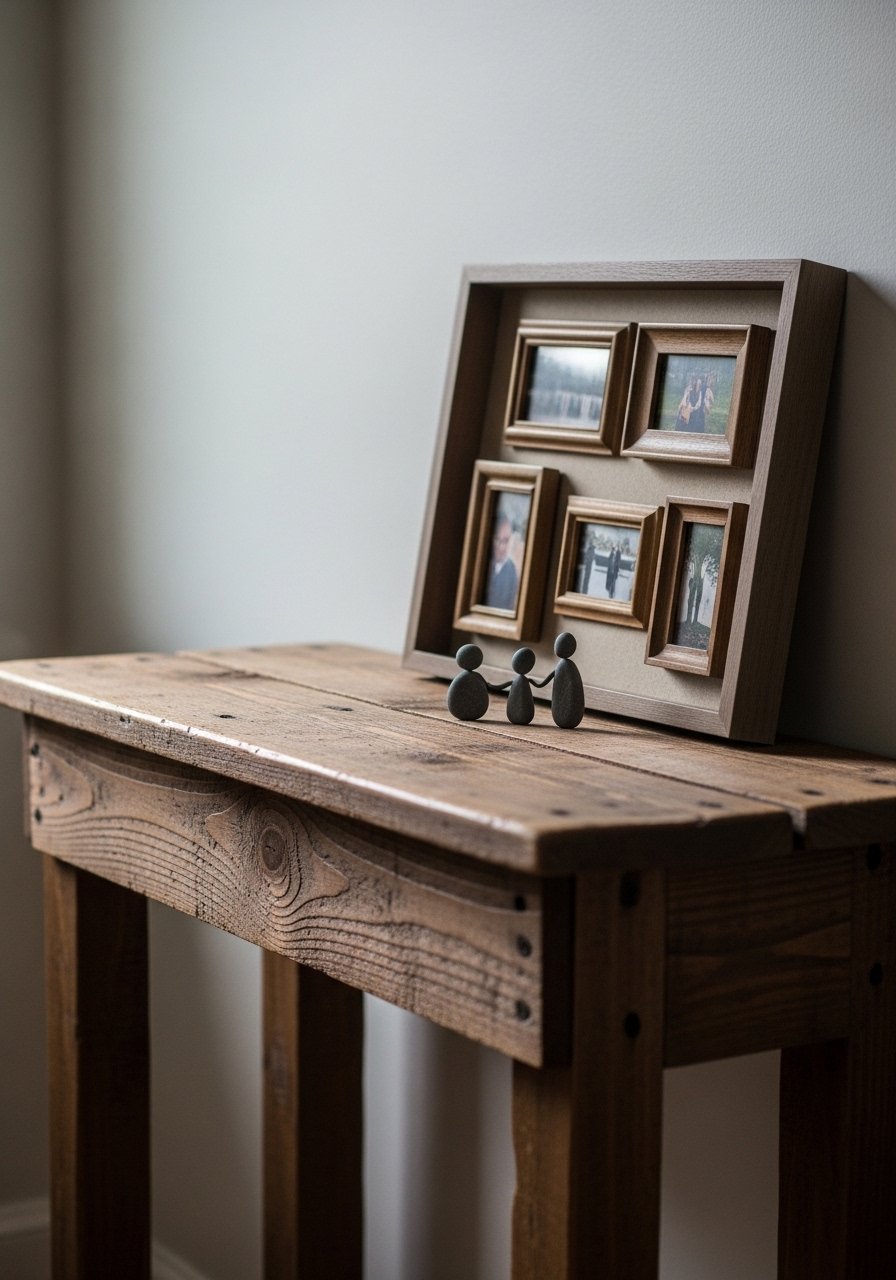
I made a pebble family after a friend asked for a non-photo keepsake. Use three to five stones of graduated sizes, glue smaller white filler pebbles behind for depth, and outline simple silhouettes with a fine black pen. The trick that most tutorials skip is mounting them on a thin wood plaque so they do not roll. Try smooth river stones and a fine-tip black paint pen. Budget depends on the plaque, but you can do this under $30. People often fret about perfect proportions. Use a pencil sketch and step back between outlines for better balance.
Ocean Wave Pebbles for Coastal Counters
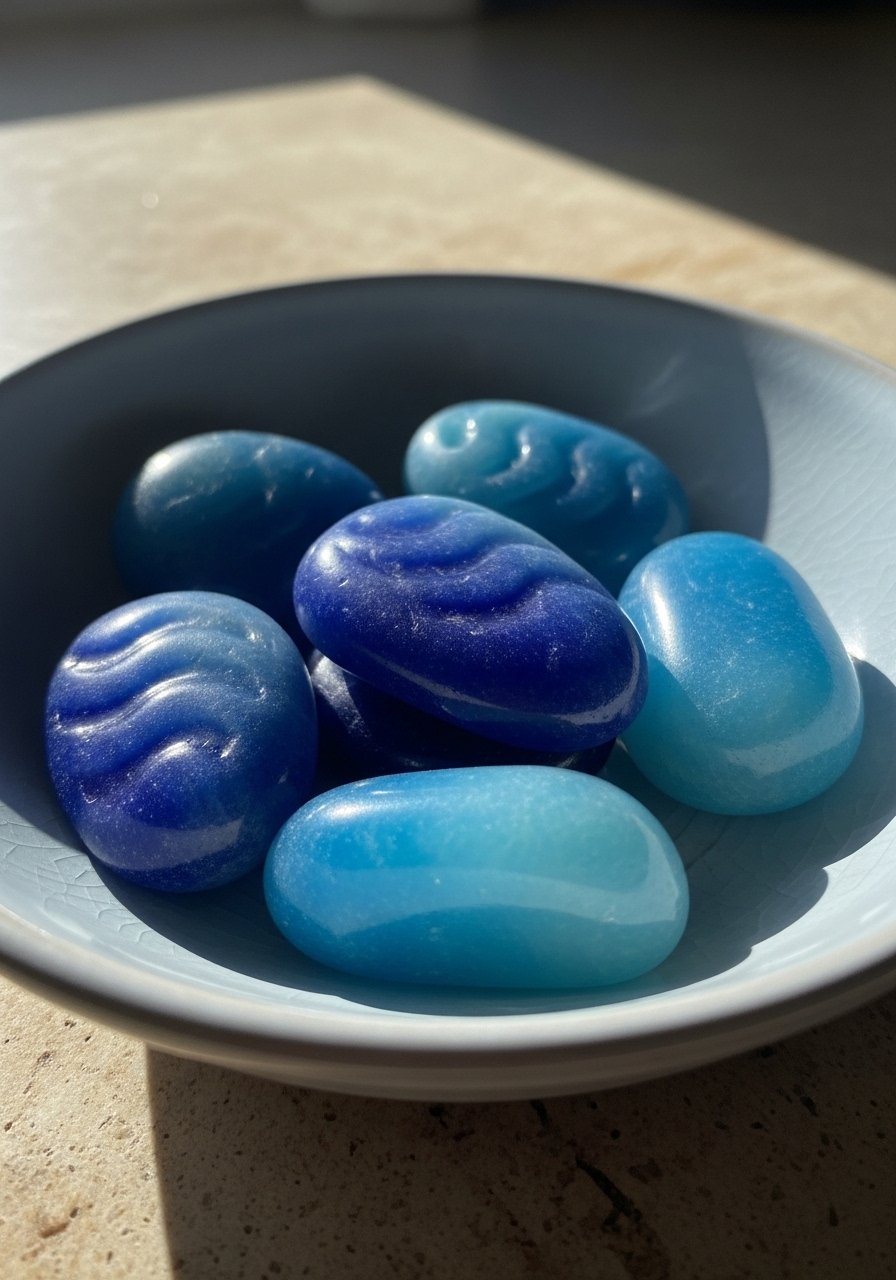
I love these in a sunny kitchen window. Layer aqua, teal, and white in thin strokes to build wave depth. Tape off a crisp horizon line for a modern look or blend wet-on-dry for softer waves. A cheap trick that is rarely mentioned is to paint the back of a stone a darker blue to make the front colors pop more. For paints try ocean-acrylic-paint-set. Kitchens and baths eat up most painted stone spots, so these live happily by the sink. Seal in two to three thin coats of clear spray. Avoid thick globs of paint that crack as the stone temperature changes.
Leaf Motif Stones for Plant Shelves
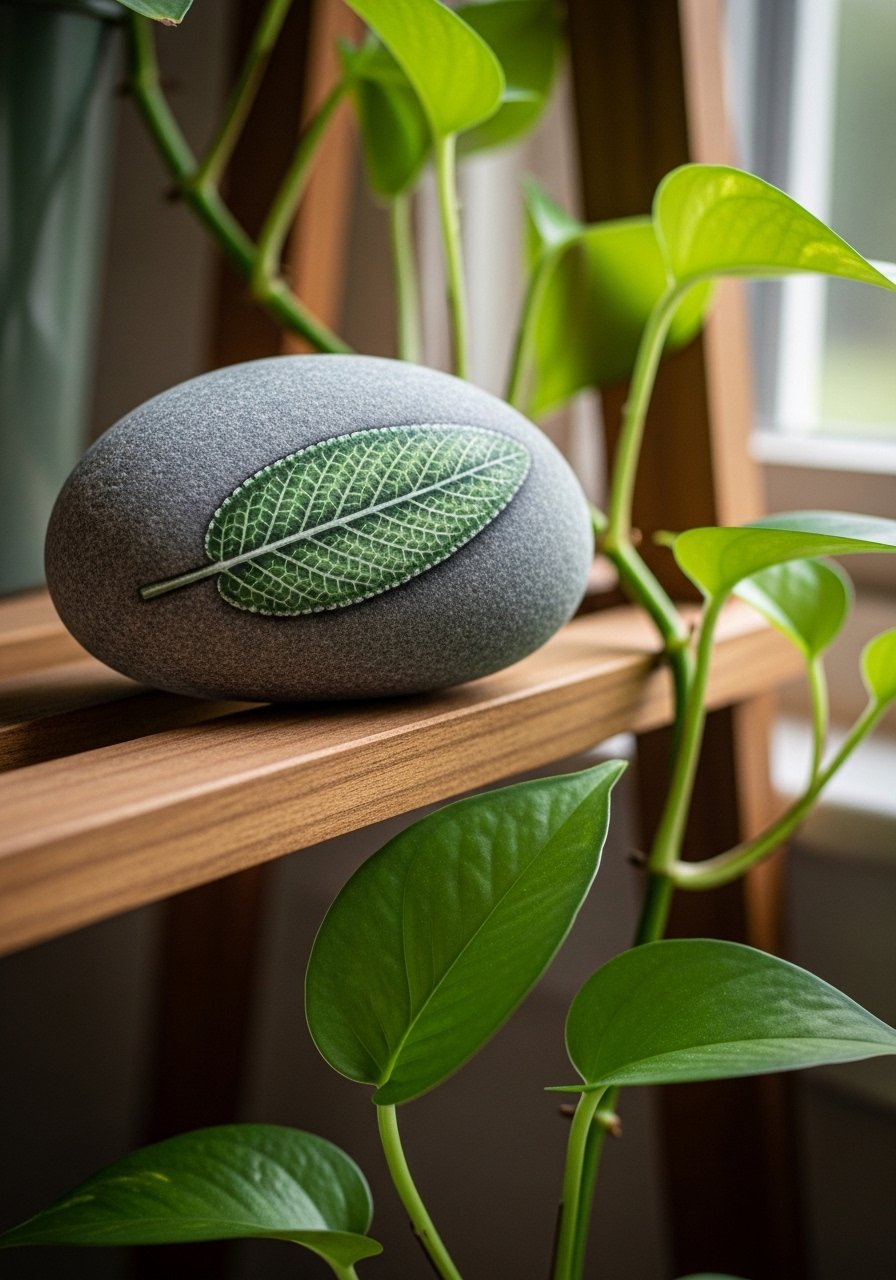
Nature motifs sit naturally next to real plants. I paint a warm base, then use a tiny brush or toothpick to add leaf veins. A real-life detail people miss is matching leaf tone to nearby plants. Hold your stone next to the plant while mixing paint so it reads as part of the shelf, not a separate object. Most folks grab pebbles that fit in your hand, nothing huge. Use Winsor & Newton acrylics and a set of fine detail brushes. The common mistake is painting veins too thick. Thin lines look more natural and hold up better on curved stone surfaces.
Geometric Minimal Stones for Modern Mantels
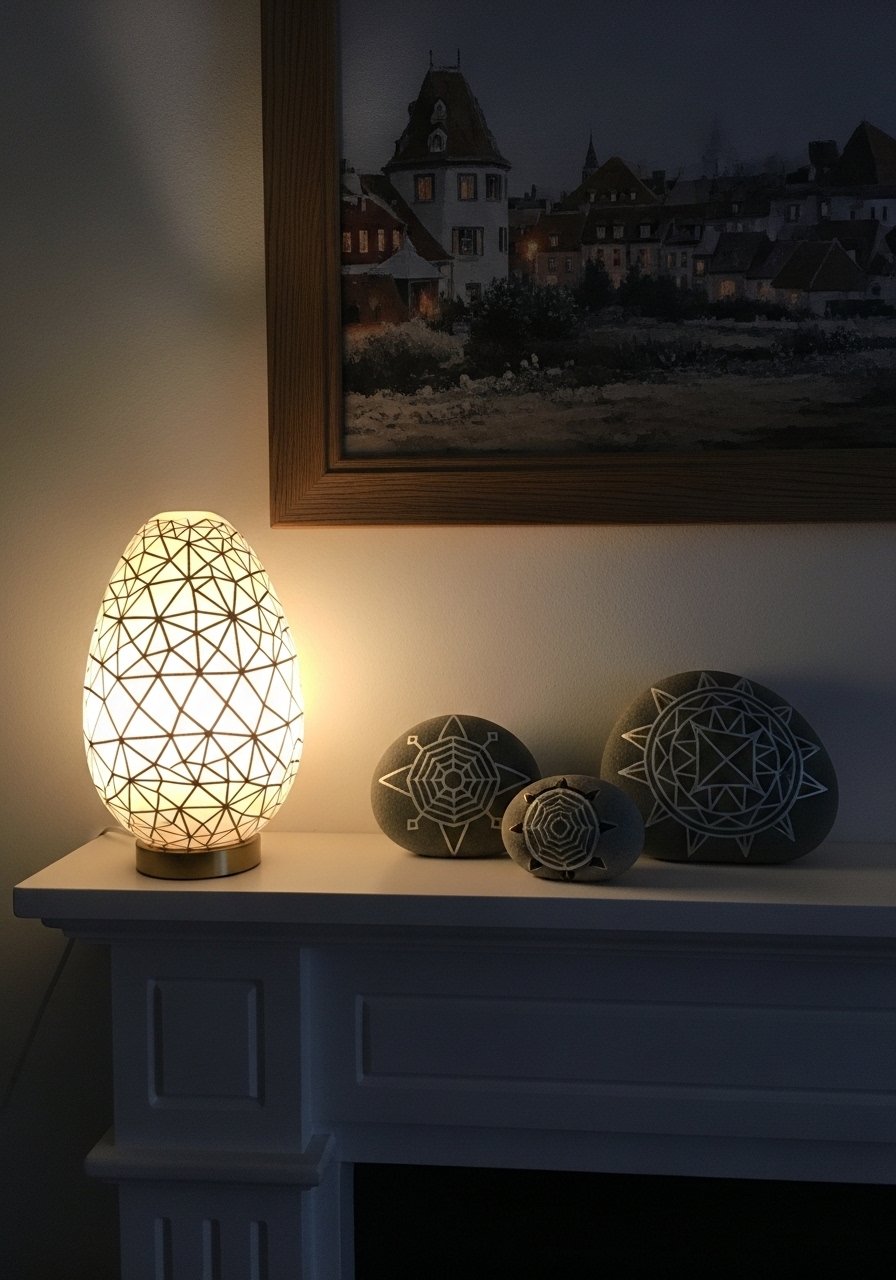
Sharp lines modernize a cluttered mantel. Use painter's tape for clean edges and metallic accents sparingly. I keep to three or four colors and a maximum of three stones for a bold statement. Tape works best if you press it down along the stone contour then paint in short strokes. People forget to sand the stone gently if the paint needs to stick, which can lead to flaking. Try painter’s-tape-narrow-roll and a metallic-acrylic-set. A small real-life ratio to follow is 3-4 colors max per stone to avoid muddiness.
Inspirational Word Rocks for Nightstands
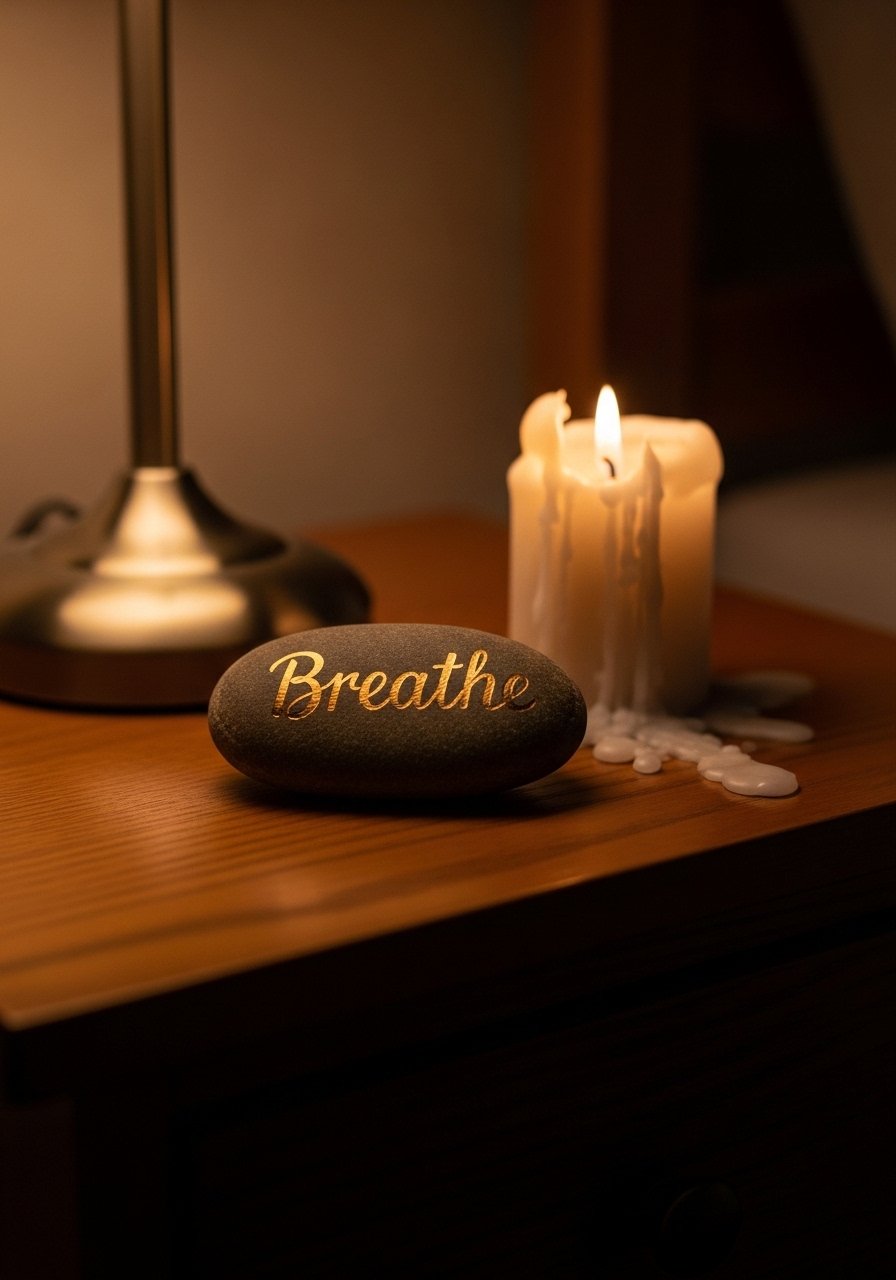
A single word on a stone can change how a bedside vignette reads. Pick short words and use a Posca-style gold pen or a tiny script brush. I recommend sketching the word in pencil first and keeping letters about half the stone height so it reads from across the room. A frequent mistake is trying to write too small. Use stones at least 3 inches wide. Try posca-paint-pens-set. These are inexpensive to make and sit well on a nightstand tray so they do not roll into book stacks.
Butterfly Wing Stones for Window Sills
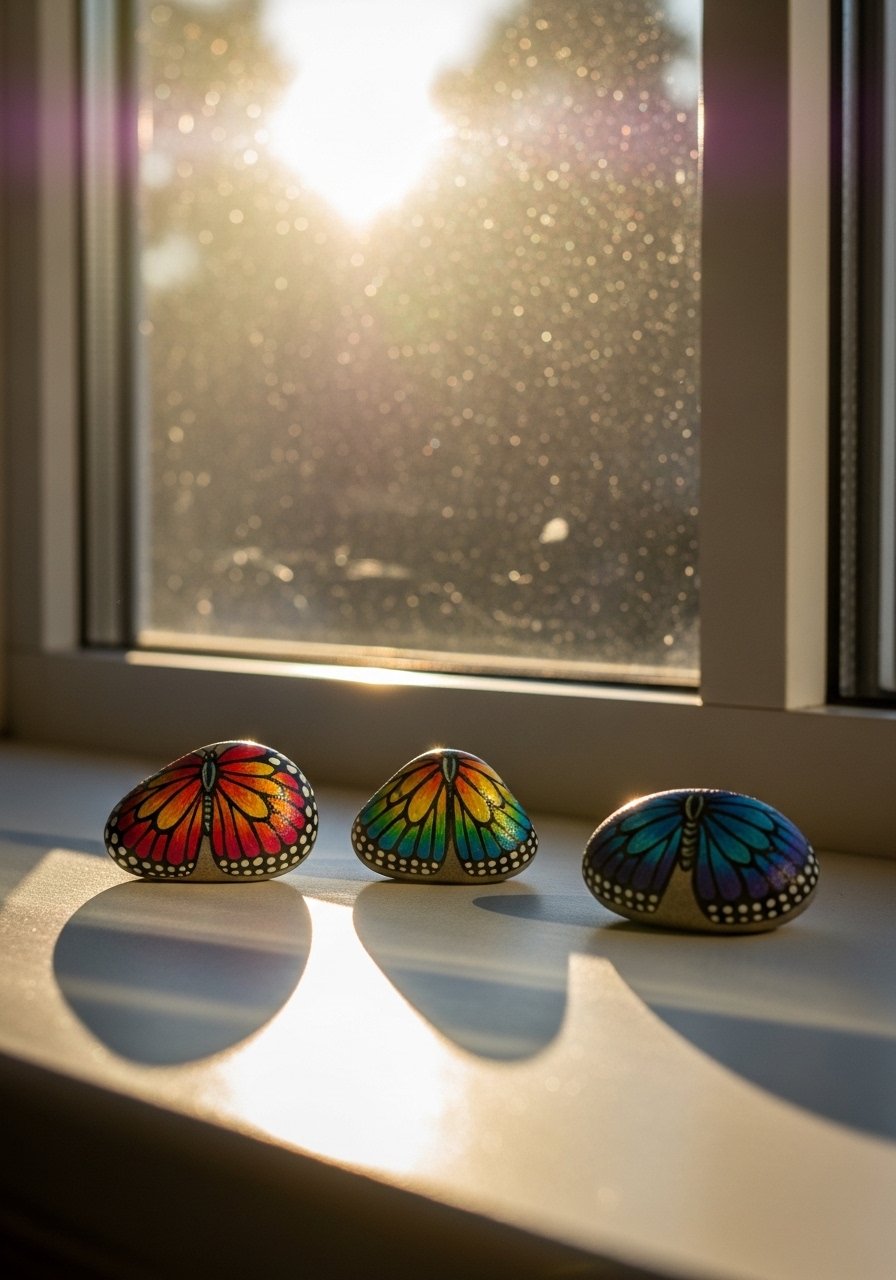
Painting butterfly wings gives your sill a flutter without live insects. Mix pearl powders into paint for shimmer and paint mirror-image wings on paired stones so they feel like a set. A pro tip I rarely see in guides is to prime the stone with gesso to avoid the color getting lost on dark stone backgrounds. Use pearl-ex-powder and a small-multi-pack-brush-set. Most people try to wash these and the finish peels. Seal with a UV-resistant topcoat if the sill gets direct sun.
Zen Dot Clusters for Coffee Table Trays
Dots forgive shaky hands and look great in odd-numbered clusters. I do three to five stones in a shallow tray, mix base neutrals with one accent color, and follow the center-out dot rule for symmetry. A useful detail is to glue the largest stone to the tray bottom so the cluster does not slide during cleaning. Acrylics win for almost everyone painting rocks. Use a dotting-tool-kit and a matte-acrylic-sealer if you prefer less shine. Many people try to overdecorate one stone. Keep each stone focused and group them for impact.
Your Decor Shopping List
- Honestly the best $12 I have spent. Dotting tool kit for mandalas and tiny details
- For solid color bases use folkart-multi-surface-acrylics in small tubes, pick 4 coordinating shades
- Smooth river stones, 3-5 inch bag, choose the flattest side for symmetry
- Posca paint pens set for lettering and black-white designs, handy for small work
- Fine-tip brush set, includes a 0 and 2 for veins and scripts
- Matte acrylic sealer spray, use 2-3 thin coats for durability, pet and kid friendly if labeled so
- Small wooden display tray for apartment-friendly groupings, alternative at Target or HomeGoods
- Painter’s tape narrow roll for geometric edges and crisp lines
- Pearl pigment powder to make butterfly wings and shimmery highlights
Shopping Tips
Grab smooth river stones with a variety of flat surfaces. Most projects look better when you pick the flattest side as your canvas.
Lead with a tool. Dotting tool kits are cheap and change what you can do. They make mandalas and zen dots look professional in minutes.
Think about sealers. Use a matte acrylic sealer spray if you want a natural finish that lasts in sunlight. UV-resistant options stop colors from fading.
If you rent, mount stones to a small plaque and hang it with Command strips. Small wooden display plaques are under $10 and save you holes.
Buy extra Posca pens like this multi-color set. They are useful across projects and travel well for gifting.
Frequently Asked Questions
Q: How do I stop paint from peeling off my stones?
A: Prime with gesso or a thin base coat and let it dry fully before details. Seal with two to three thin coats of an acrylic sealer. A common mistake is applying thick layers that crack.
Q: What size stones should I pick for detailed work?
A: Pick stones 3-5 inches across for painting. Most folks grab pebbles that fit in your hand, nothing huge. Those sizes give room for lettering and mandalas without crowded details.
Q: Can I leave painted stones outdoors on a porch?
A: You can, but use a UV-resistant clear coat and consider a matte seal to reduce glare. Direct sun will fade colors over time so rotate them back inside occasionally.
Q: I have pets, are these safe around chewers?
A: Keep them out of reach. Even sealed stones can chip if a dog or cat mouths them. For high-traffic pet homes glue stones to a tray or use heavier plaques so they do not become toys.
Q: Which paints are best for beginners?
A: Acrylics win for almost everyone painting rocks. They dry quickly, come in many colors, and are easy to seal. A small set of multi-surface acrylics plus one Posca pen covers most projects.
