
My living room had nice furniture and decent lighting but it still felt like a waiting room. Took me embarrassingly long to figure out it was missing texture. Every surface was smooth, every color was flat, and nothing invited you to actually sit down.
These mirror frame ideas lean modern farmhouse with plenty of casual, lived-in moments. Most projects are under $50, with a few splurges around $100. Works for entryways, bathrooms, bedrooms, or any wall that needs a little personality without costing a fortune.
Rustic Wood Frame For An Entryway
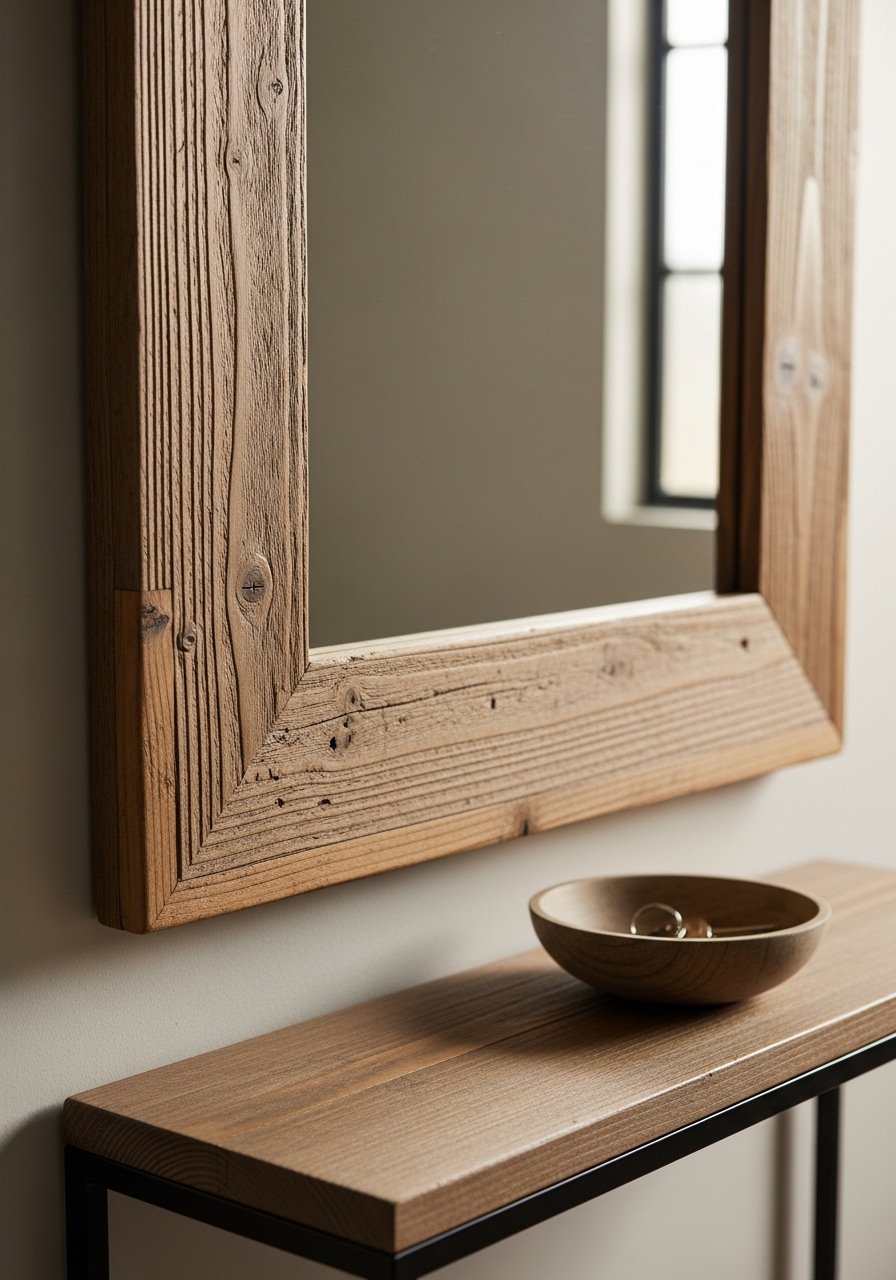
If your entry feels cold, a simple pine or pallet wood frame warms it up fast. Cut four 1.5-inch-wide strips and nail them to the mirror back, miter the corners at 45 degrees for a polished look. I like a 2:1 width-to-mirror-height ratio, which means a 2-inch frame suits a 20-inch mirror, but I usually go a touch wider for character. A common mistake is using pressure-sensitive adhesive alone. Use construction adhesive plus finishing nails for a secure fit. For supplies I grabbed a wood mirror frame kit and a small pack of 8d finishing nails.
Painted Color-Blocked Frame For A Bathroom
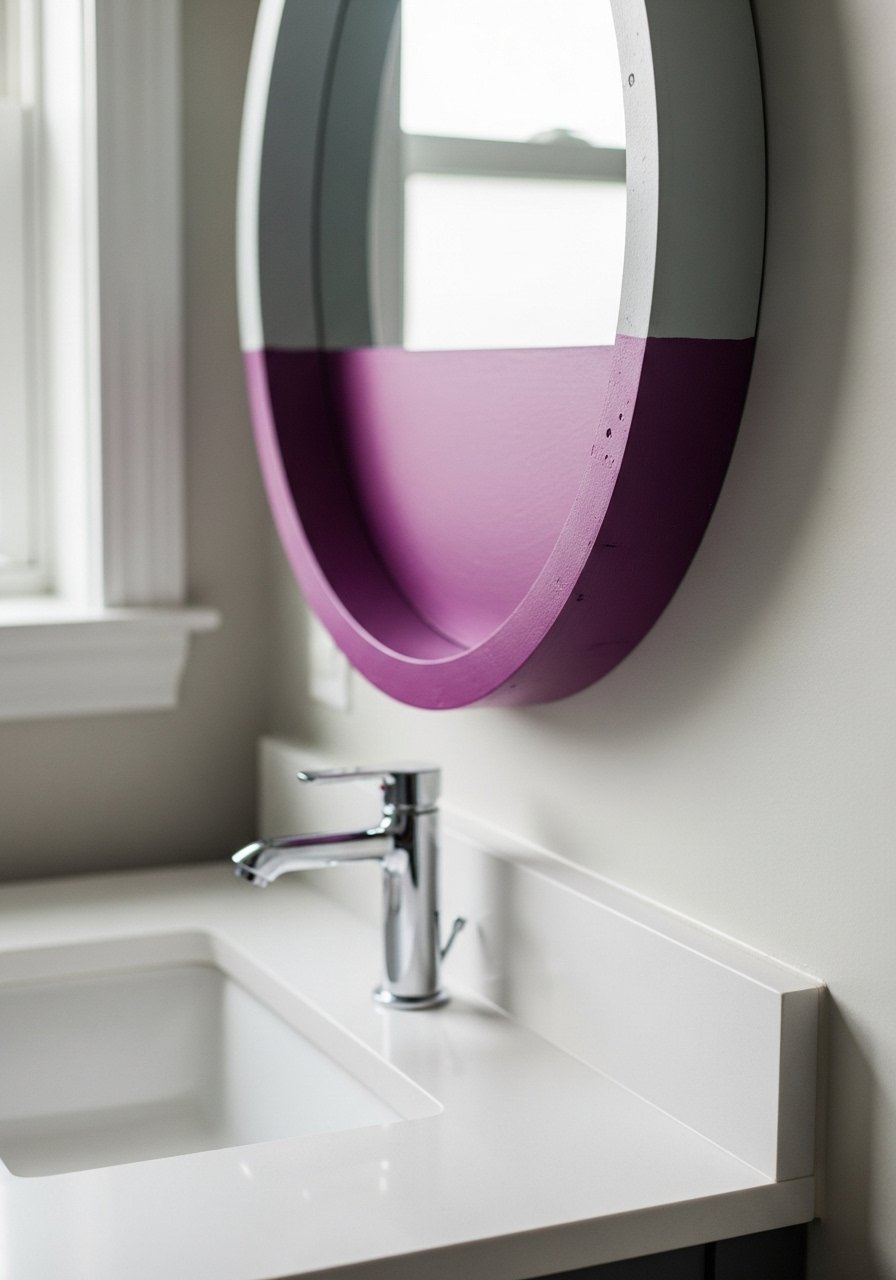
If your bathroom tiles are neutral, painting the frame is an inexpensive way to snap the room into focus. I taped off thirds and used a 60/40 brightness ratio so the darker hue reads as an accent, not a border fight. Use water-resistant paint and prime raw wood first. A mistake I made once was painting the mirror edge and leaving brush strokes visible. Lightly sand between coats for a factory finish. I used a satin enamel paint and a dense angled brush to keep edges crisp.
Distressed Vintage Frame For A Bedroom
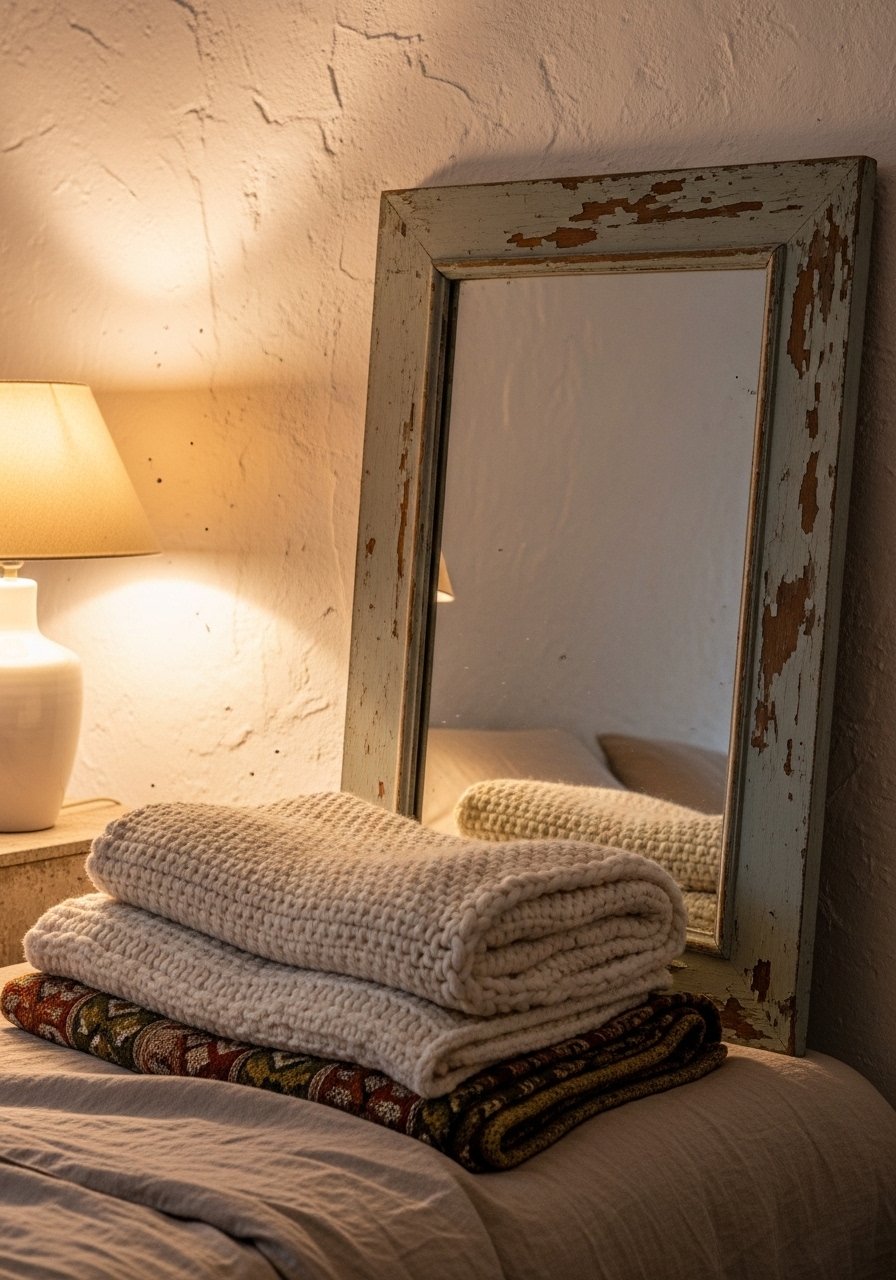
I like a rubbed-back, vintage look for a layered bedroom. Paint, sand through to wood in spots, then glaze the recesses to make the details pop. The key is light-handed sanding, about 120 grit, so the distress feels lived-in instead of fake. People often sand too much in one area. Work evenly and step back every three minutes. For the glaze I used a small jar of antique glaze medium and a cheap stain rag pack. This pairs well with rattan or brass accents in the room.
Minimalist Thin Metal Frame For A Hallway
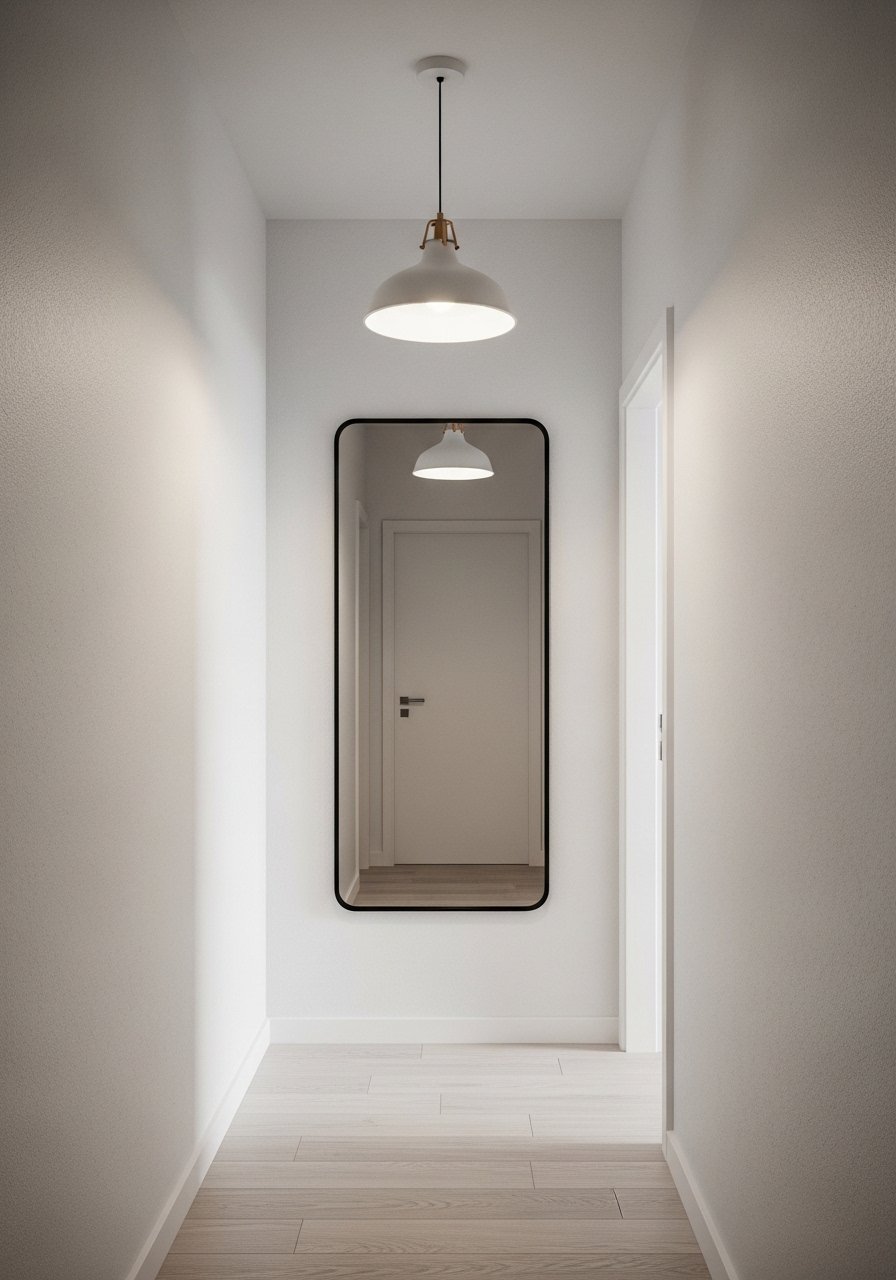
Thin metal frames read modern and won’t overwhelm a tight hallway. I used 3/8-inch flat metal trim folded over the mirror edge. It gives a crisp line and reflects less than a thick heavy frame. Common mistake is hanging it too high. Hang so the mirror center is about 60 inches from the floor unless your ceiling is low. For supplies, I ordered a black metal mirror trim kit and used mirror mounting clips for security.
Rope-Wrapped Nautical Frame For A Beachy Vibe
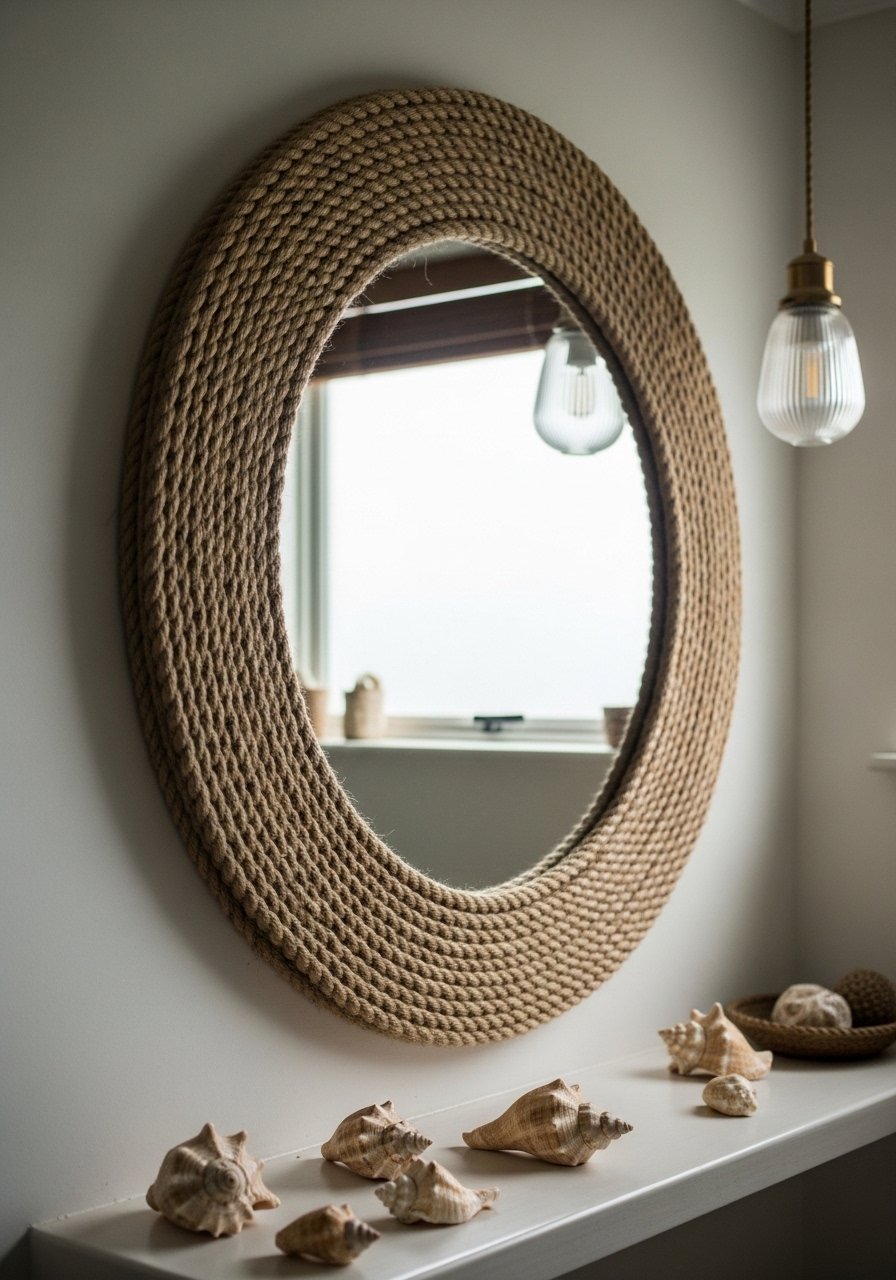
Rope makes a frame feel relaxed and cost nothing but time. Use 1/2-inch natural jute rope and hot glue it in overlapping coils. I leave a 1-inch reveal of the original mirror edge so it doesn’t read bulky. People often overwrap and make the mirror look heavy. The sweet spot is 1.5 to 3 inches of total rope thickness depending on mirror size. I picked up a natural jute rope roll and a mini hot glue gun.
Mosaic Tile Frame For A Statement Mirror
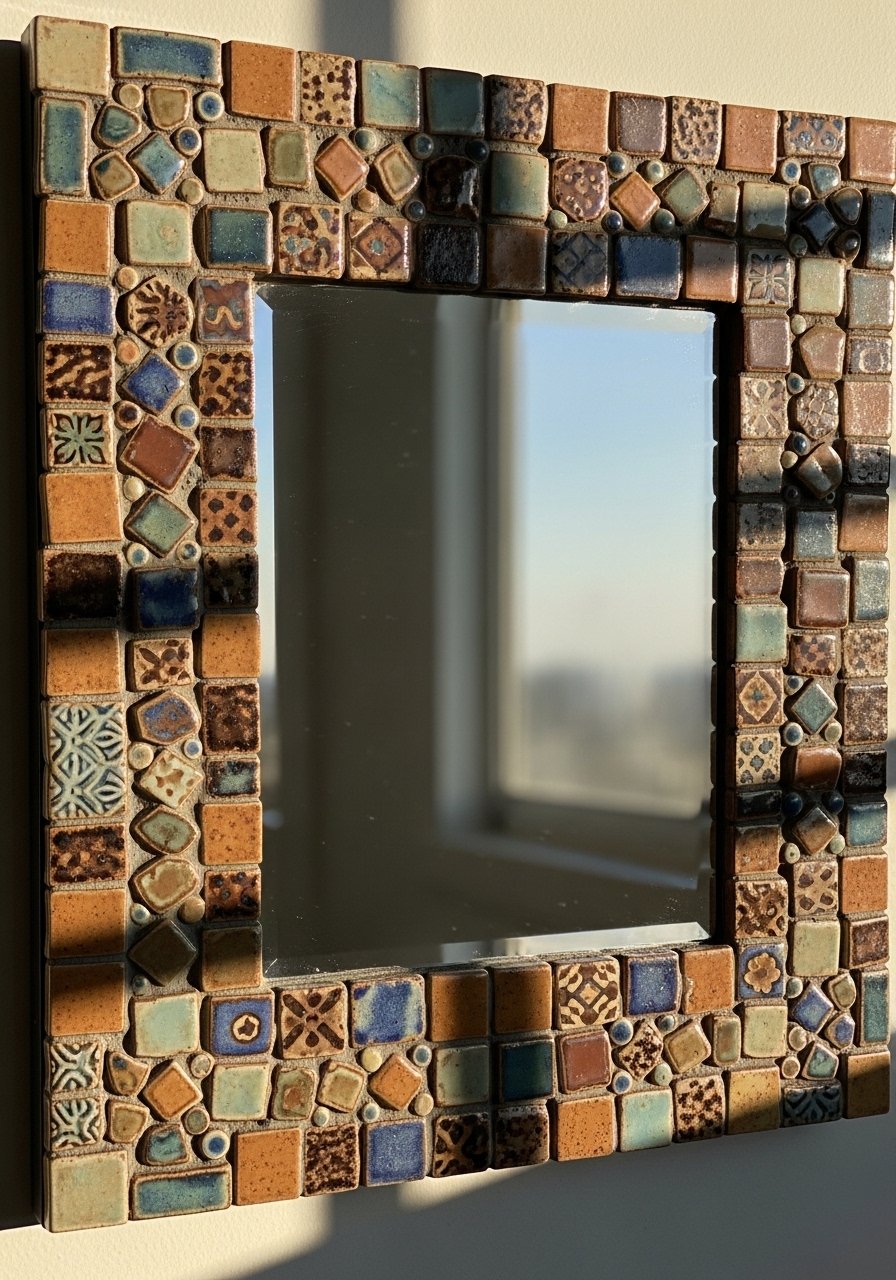
Cutting small ceramic tiles into a border feels fancy without spending for a bespoke mirror. Use 1-inch tiles in a repeating pattern and grout with a neutral sand color so the frame reads textured not busy. I recommend a 1:4 grout-to-tile-size visual rule. A common mistake is using mismatched grout colors that make the frame look patchy. Buy tiny tile nippers and a tile trim piece for the inner edge. I used a penny tile sheet pack and a small grout float.
Beadboard Frame For A Farmhouse Kitchen
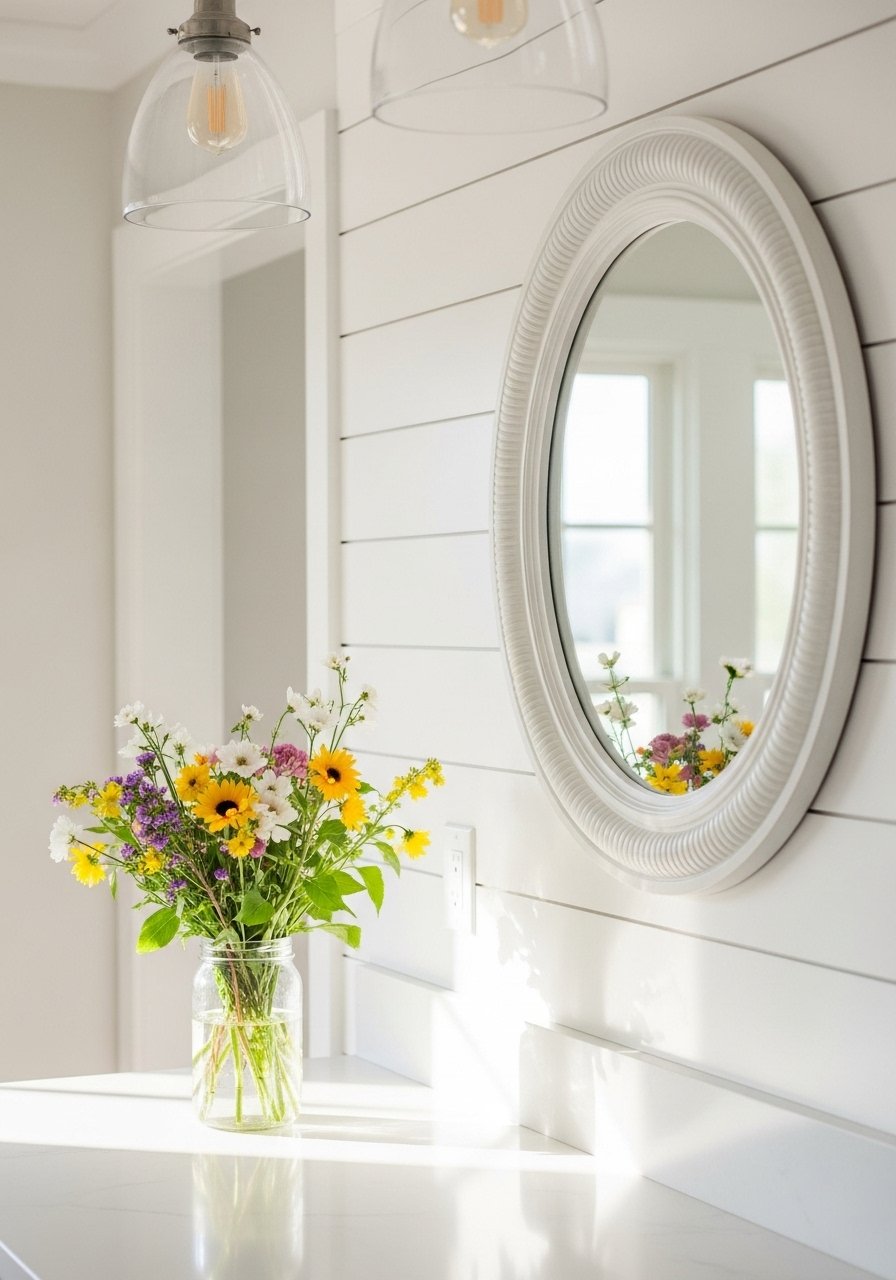
Beadboard trim creates instant farmhouse charm at thrift store prices. I cut four strips to fit around my round mirror and painted them in semi-gloss for easy cleaning. Use 1/4-inch beadboard for a subtle profile. The mistake people make is picking beadboard that is too thick, which reads heavy in small kitchens. When hanging above a sink, keep the bottom edge at least 6 inches above the backsplash for water safety. I used pre-primed beadboard panels and a pack of small mirror adhesive squares.
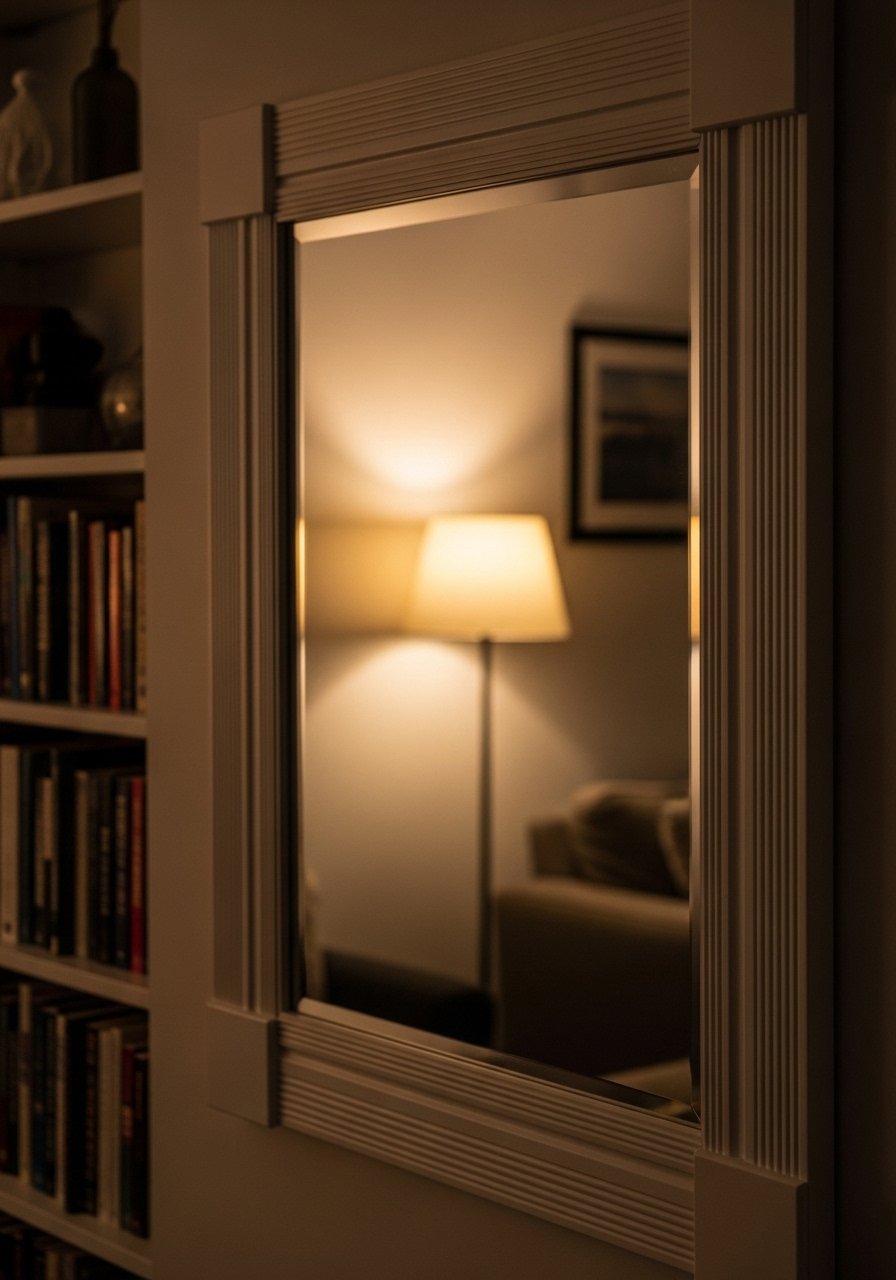
Picture-Ledge Frame For Swappable Art
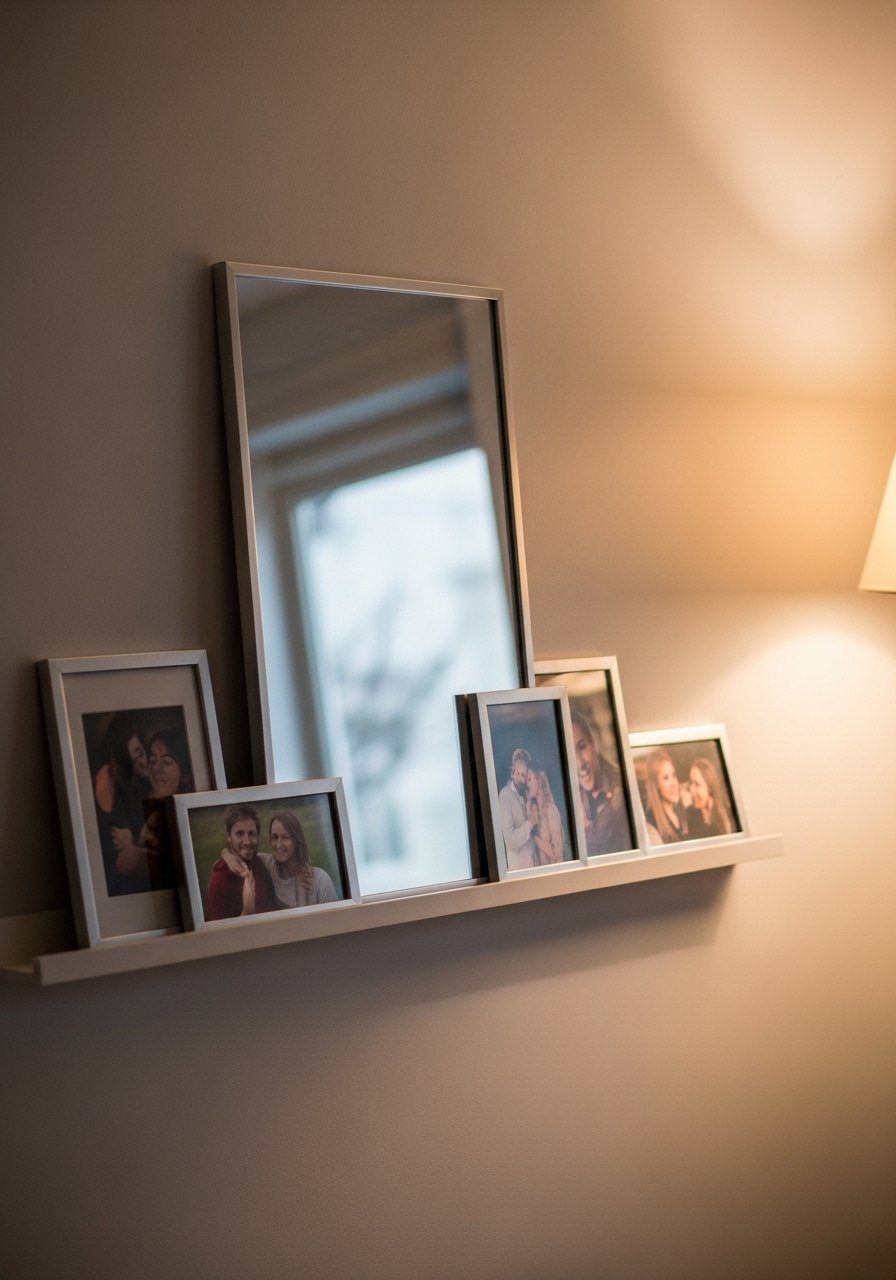
Mount a thin picture ledge around a mirror so you can layer prints in front for a gallery effect. I used a 2-inch ledge and stacked a 5×7 print and a 4×6 frame on it. The trick is to keep at least 1.5 inches between the mirror glass and any frame edge to avoid accidental contact. People often glue frames directly and then cannot change anything. The ledge keeps everything swap-friendly. I bought narrow picture ledges and small gallery frames.
Upholstered Padded Frame For A Cozy Corner
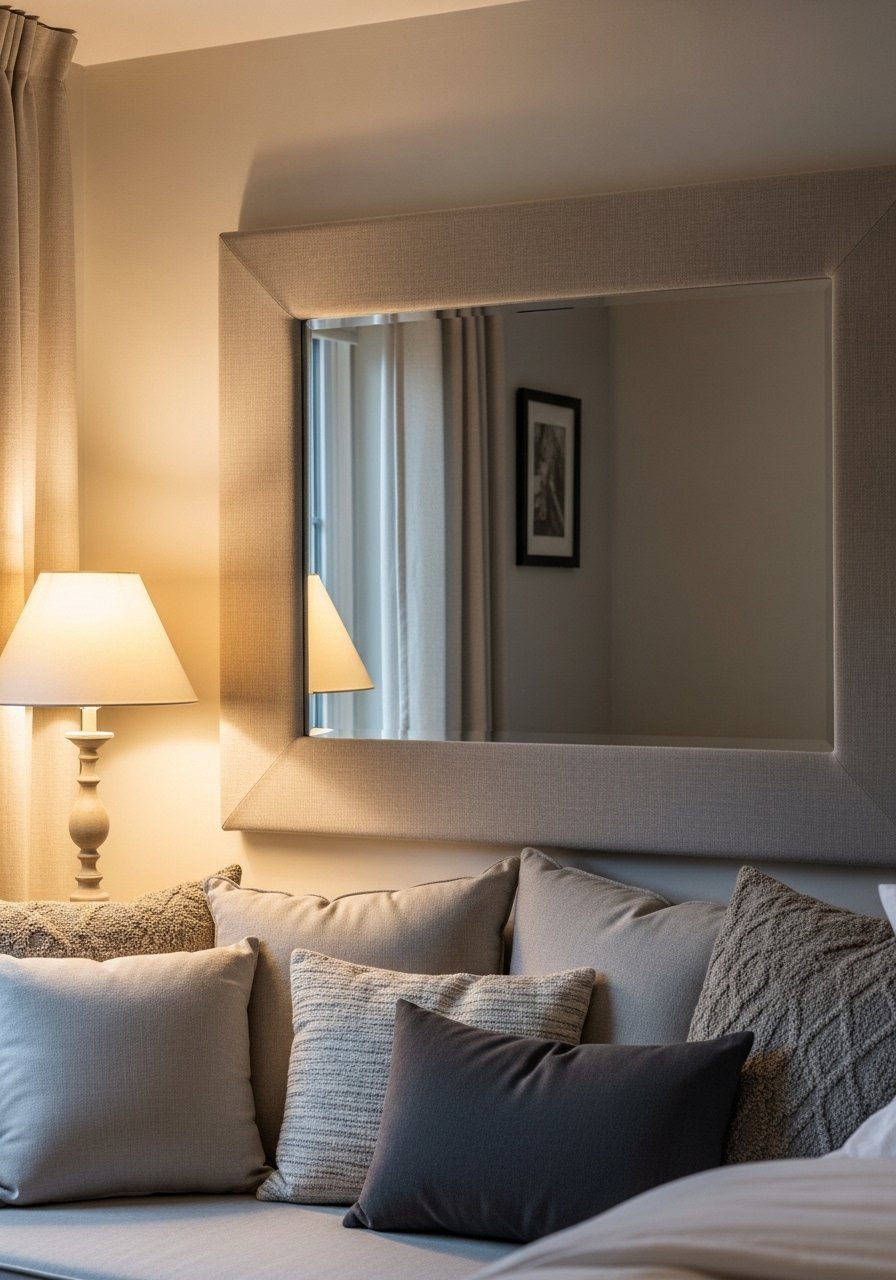
Upholstery tape and foam make a plush frame that softens a bedroom wall. Use 1/2-inch high-density foam and wrap with linen fabric. I staple the fabric to a thin plywood backing and use upholstery glue at the corners for a clean finish. A common mistake is using low-density foam that compresses and looks cheap. Measure the mirror and add 3 inches to each side of fabric for stapling room. I ordered high-density upholstery foam and a roll of natural linen fabric.
Rattan Sunburst Frame For A Boho Living Room
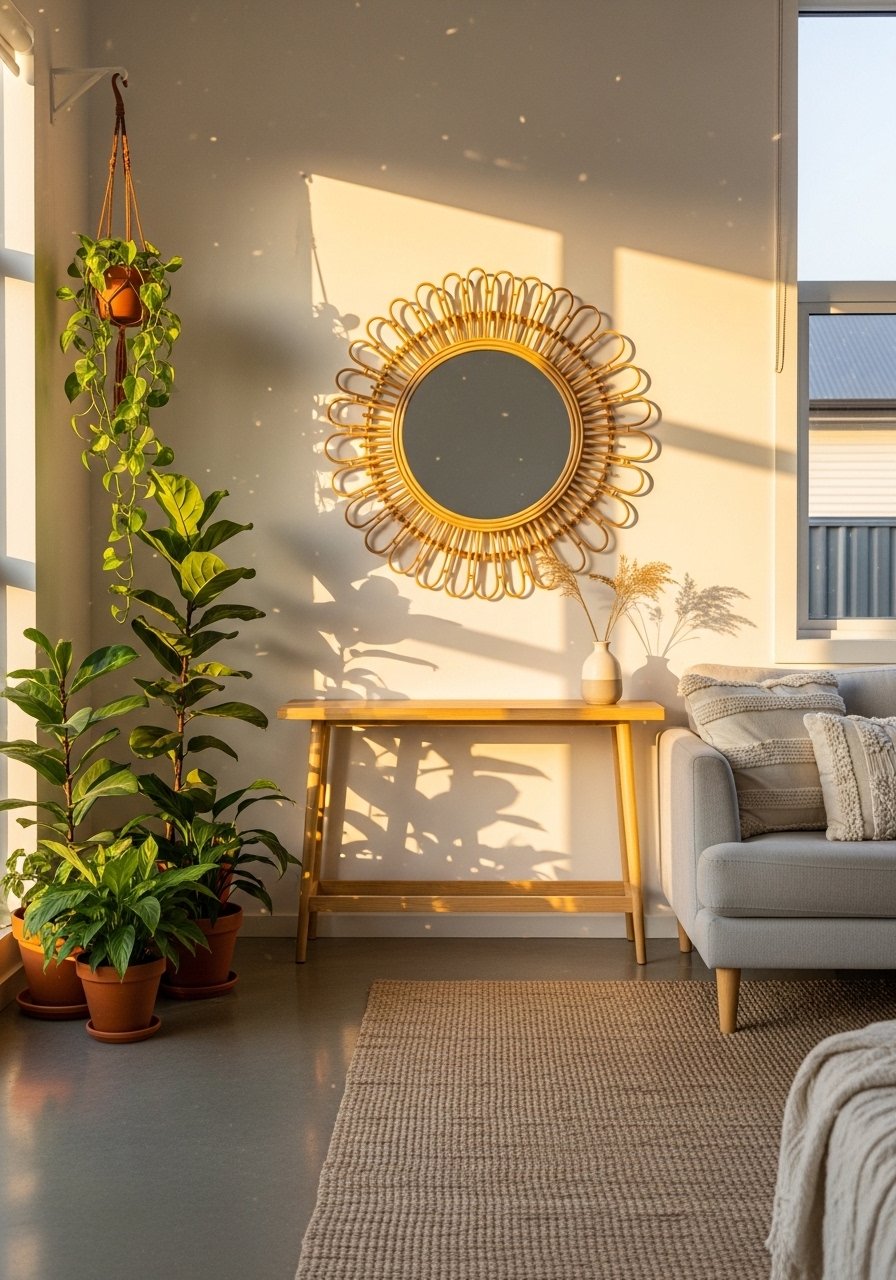
Rattan slats glued radially create a sunburst that reads expensive but costs under $50 in material. Use 12 to 16 evenly spaced spokes for balance. I lay out the spokes on paper first and glue each one so spacing stays consistent. People glue without a template and get uneven gaps. This frame looks great above a console paired with the picture-ledge idea. For materials I used rattan cane strips and a wood glue set.
Gold Leaf Accent Frame For A Glam Dressing Area
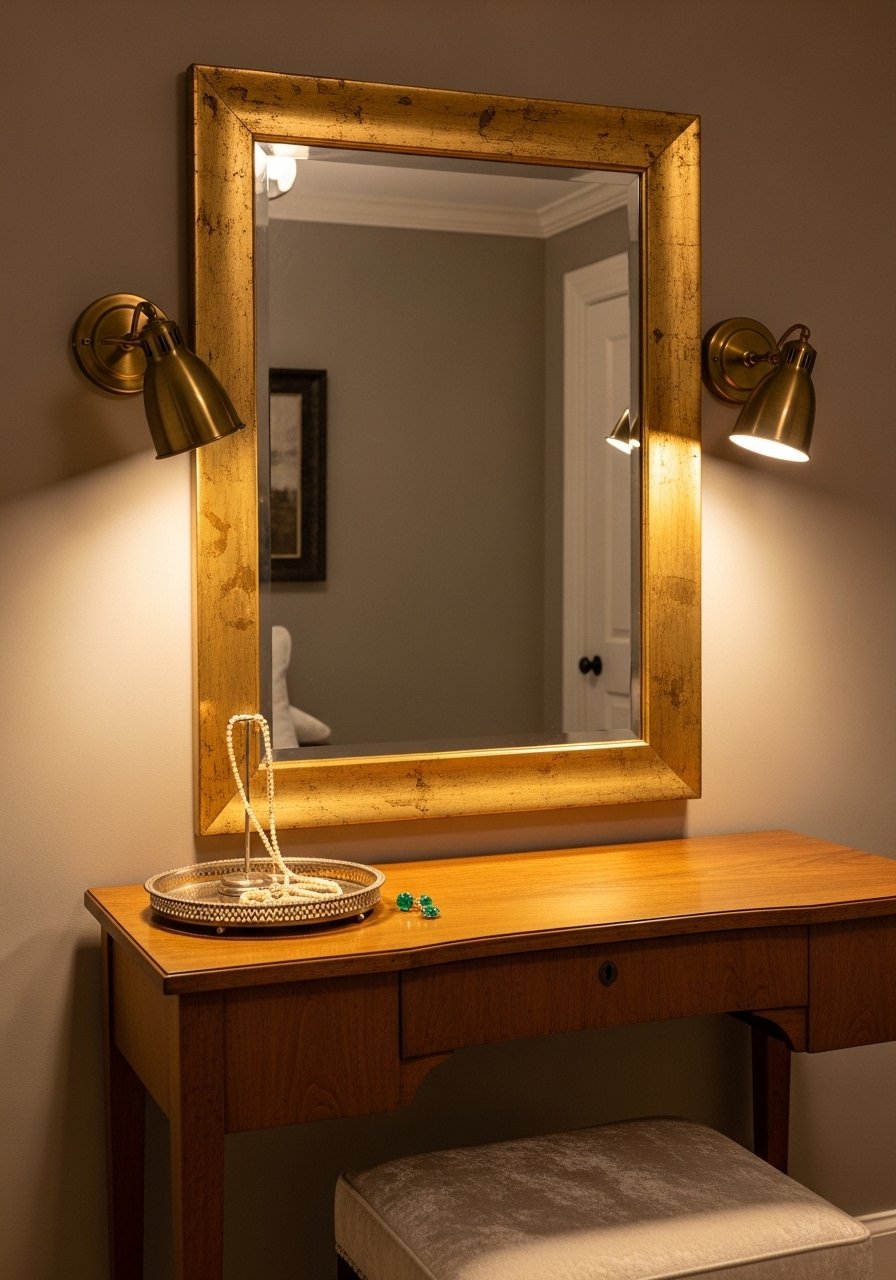
Gold leaf makes a small frame feel luxe without spending on a gilded antique. Apply gold leaf sheets over sizing and press with a soft brush. Use a light rub for a lived-in sheen. The common mistake I see is over-applying leaf which looks like foil and not real metal. Less is more. For a subtle look, leave about 10 percent of the underpaint showing. I bought a gold leaf starter kit and a soft gilding brush.
Painted Chalkboard Frame For A Kids’ Room
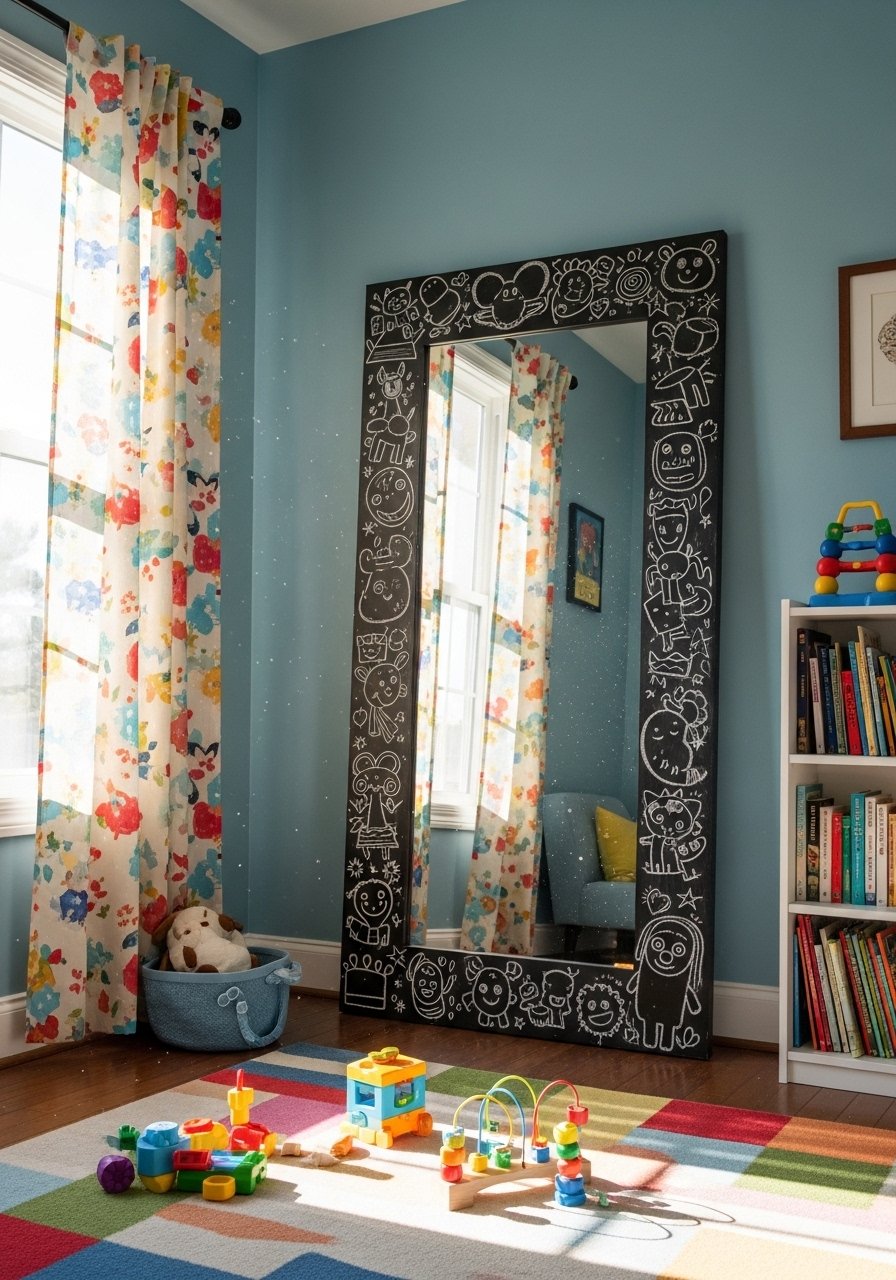
Painting the frame with chalkboard paint gives kids a place to scribble notes around their reflection. Use a satin finish chalkboard paint and mask off 1/4-inch from the glass so chalk dust does not smear. A frequent mistake is using regular chalk which is hard to erase. Use liquid chalk markers for cleaner lines. I applied two coats and let it cure 72 hours before use. I picked up a can of chalkboard spray paint and a pack of liquid chalk markers.
Industrial Pipe Frame For A Loft-Style Space
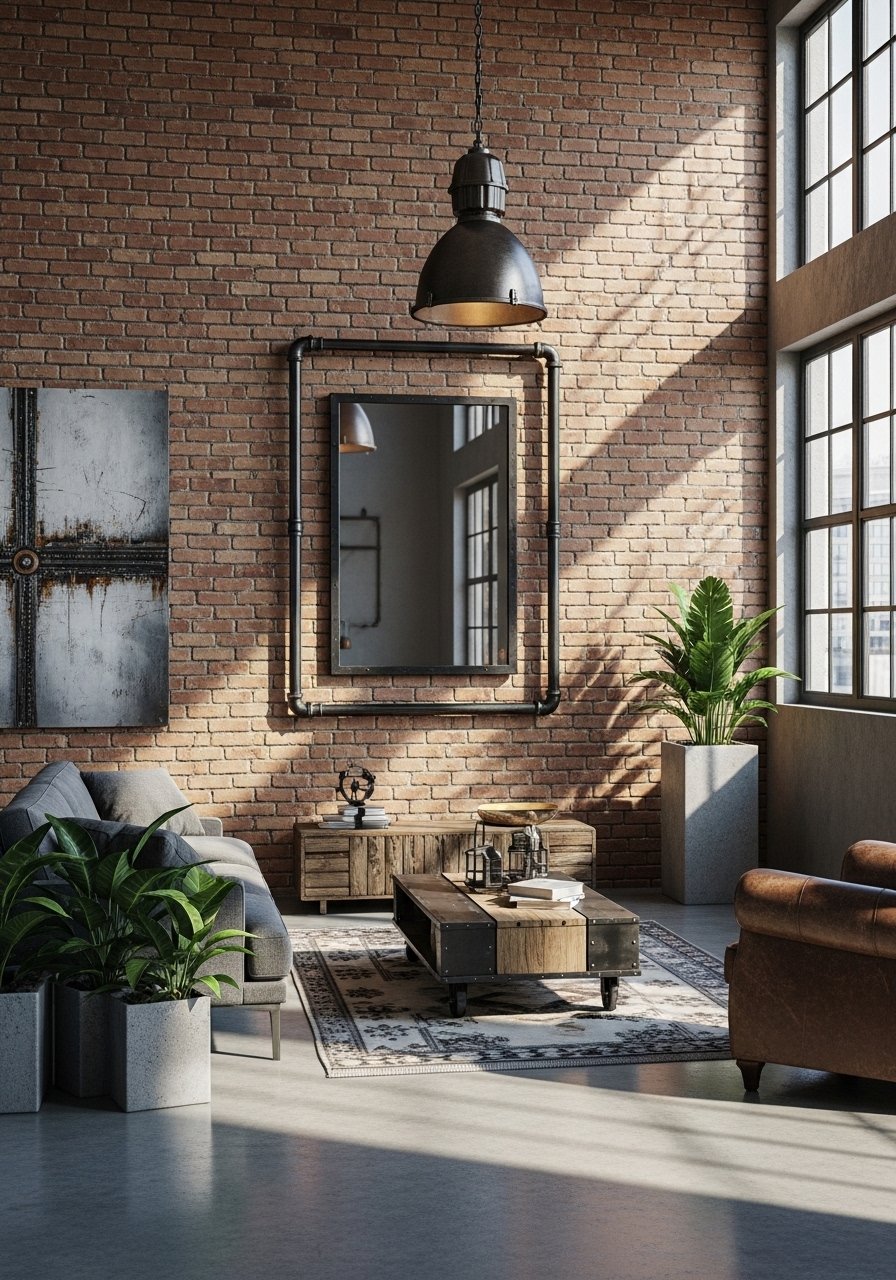
Black pipe adds grit and personality in an industrial living room. Use threaded pipe couplings to make a clipped-on frame that you can remove for cleaning. I recommend 1/2-inch pipe for small mirrors and 3/4-inch for anything over 30 inches. A mistake is overtightening the fittings and cracking the mirror edge. Leave a thin neoprene pad between metal and glass. I sourced a black iron pipe kit and neoprene mirror pads.
Stenciled Pattern Frame For Eclectic Spaces
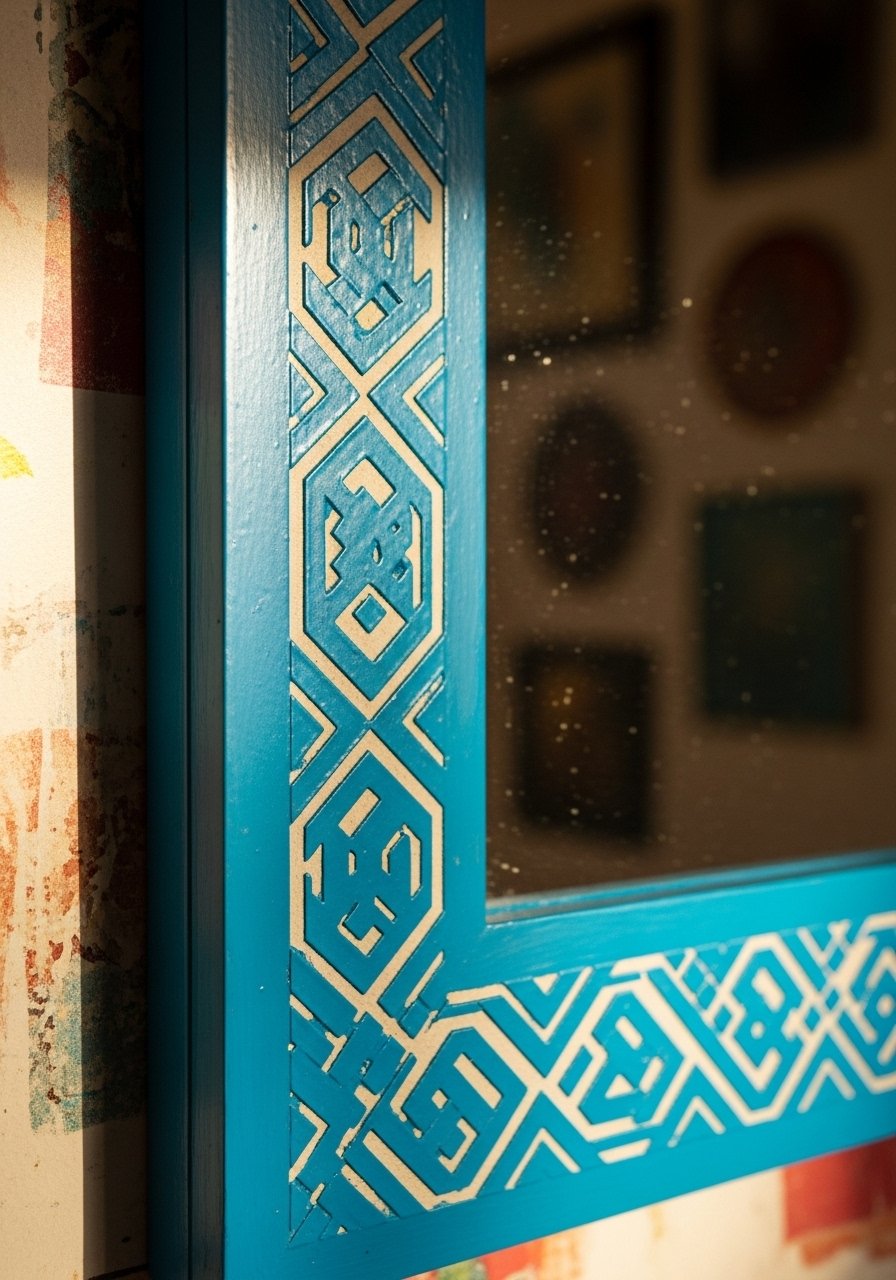
Stenciling offers a graphic punch with minimal skill. Use a small repeating stencil and pigment-rich acrylic. Keep a 1:3 paint-to-glaze dilution so the pattern looks crisp but not painted-on. People often overload the stencil and get blots. Dab lightly and build up layers. I stenciled a 1-inch repeat pattern around a 24-inch mirror and it reads handmade not amateur. I used a geometric stencil set and a small stencil roller.
Frame With Integrated Shelf For Entry Practicality
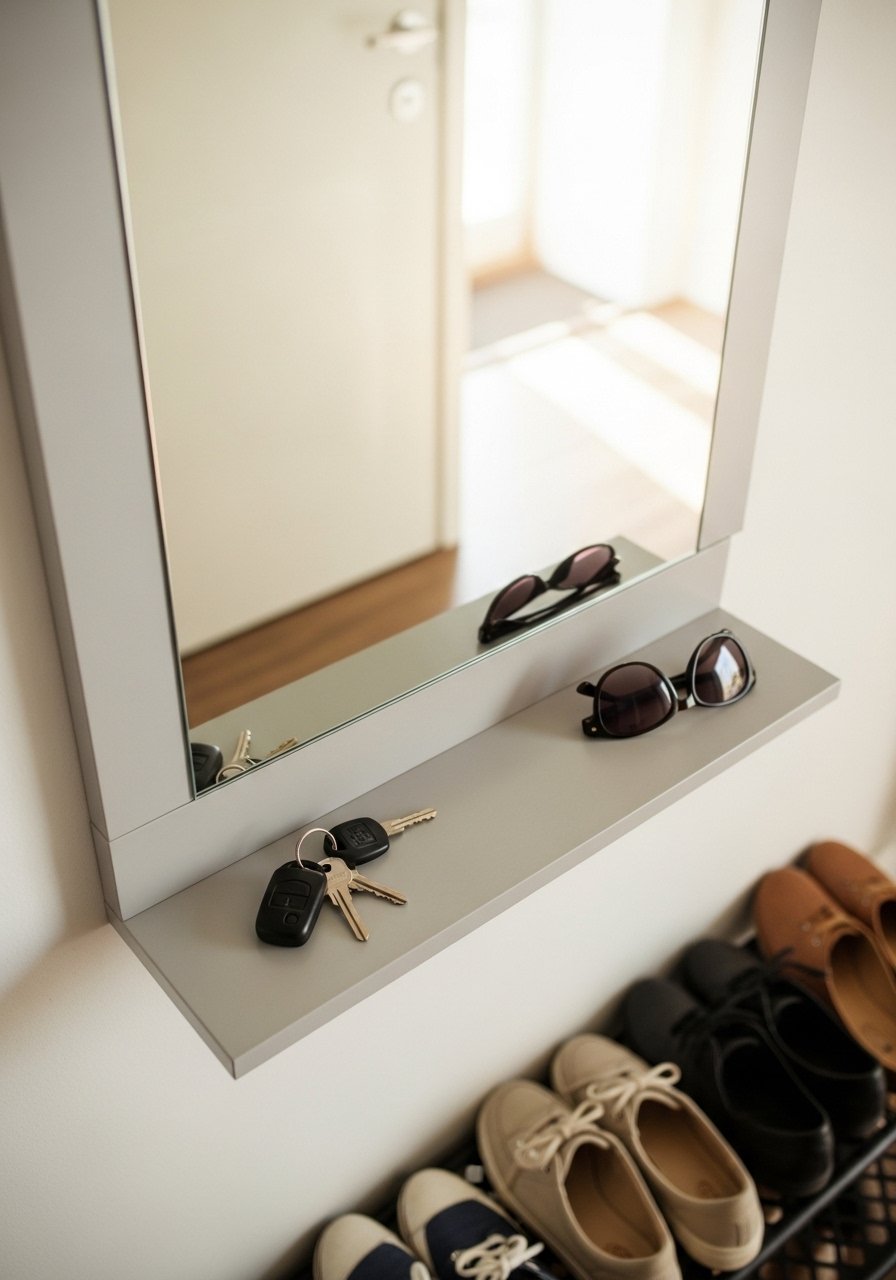
Add a 2-inch deep shelf to the bottom of a mirror for a practical catch-all by the door. Use a 1×4 pine strip and hidden brackets for support. I keep the shelf at 40 inches from the floor for easy reach and so a purse can sit beneath without hitting the mirror. A common mistake is making the shelf too deep, which competes with the mirror. Two inches is enough for daily essentials. I bought a narrow floating shelf kit and a set of small brass hooks.
Faux Stone Frame For A Rustic Bathroom
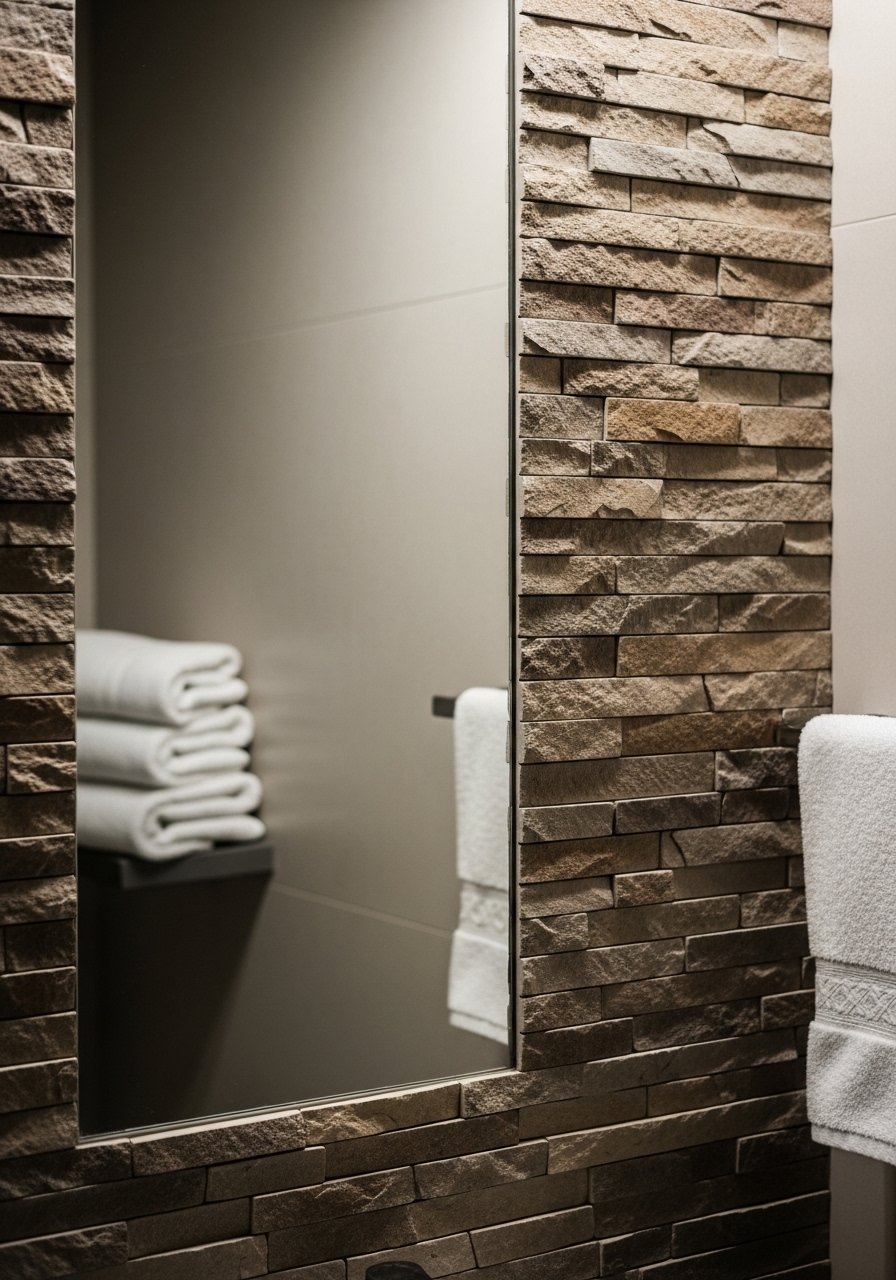
Lightweight faux stone veneer gives a bathroom an earthy edge without heavy masonry. Cut thin veneer strips to 1.5 to 3 inches and glue in a staggered pattern. Keep grout color close to the stone hue to avoid a tile look. Many people clamp every piece tight and end up with gaps. Instead use spacers and check alignment every few rows. I used faux stone panels and a construction adhesive suitable for bathrooms.
Mirror Frame Using Skirting Trim For A Budget Upgrade
Trim pieces like baseboard or skirting create a custom profile faster than buying moulding. Rip the trim to 1.5-inch widths and miter corners. I prime and paint the trim in the same shade as the wall for a built-in look, or a contrasting color for pop. People think trim must match wood tones but paint actually hides imperfect cuts. Measure twice then cut once, and use wood filler for visible gaps. I ordered decorative skirting trim and a small corner clamp set.
Tile Edge Frame With Penny Tiles For A Vintage Bath
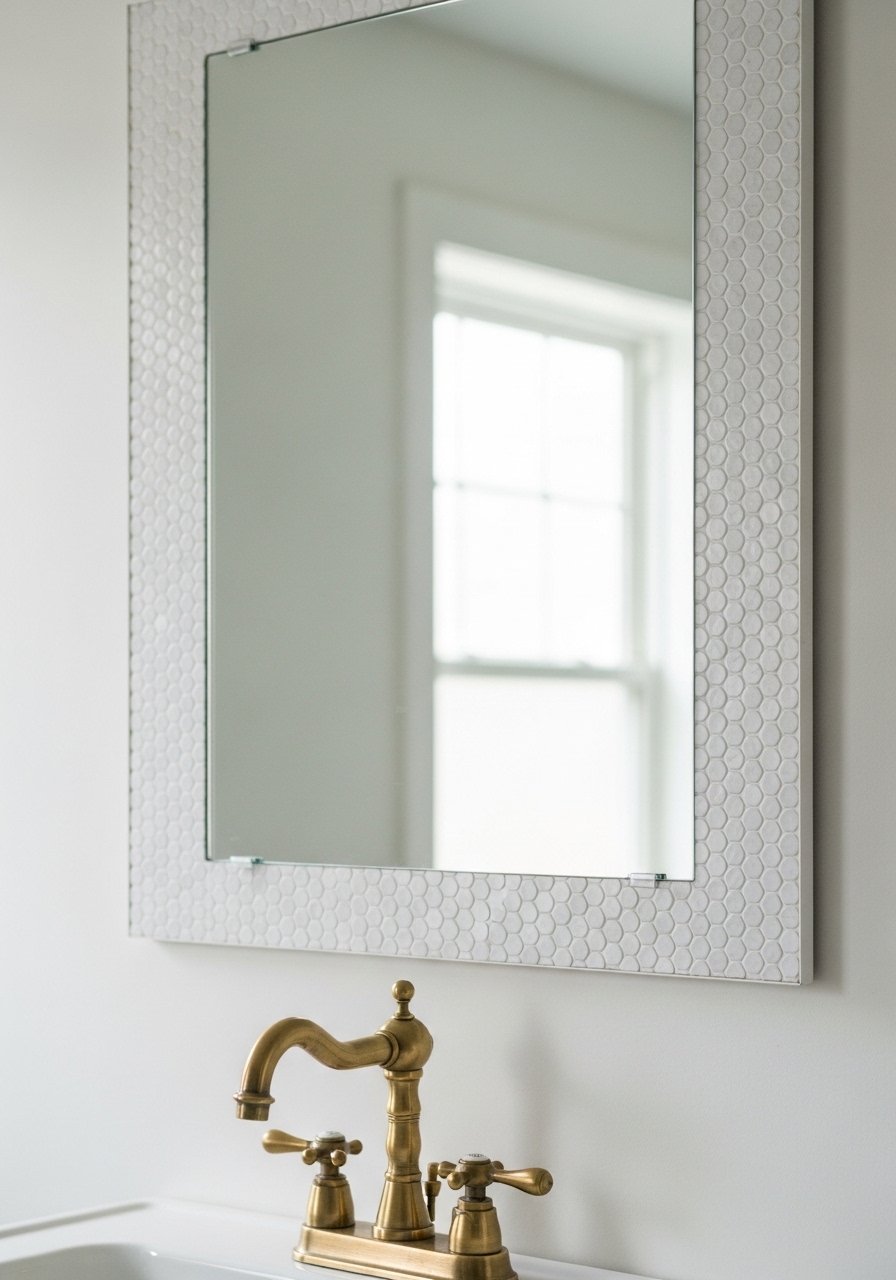
Penny tiles are perfect for a delicate, vintage frame. Run a single row with a 1/8-inch grout line and pick a grout that matches the tile glaze to avoid the checkerboard feel. Size rule of thumb I follow is one penny tile row per 12 inches of mirror height. A common mistake is using high-contrast grout that dates the design. I used copper penny tile sheets and a small tile cutter.
Mirror Collage With Thin Frames For A Gallery Wall
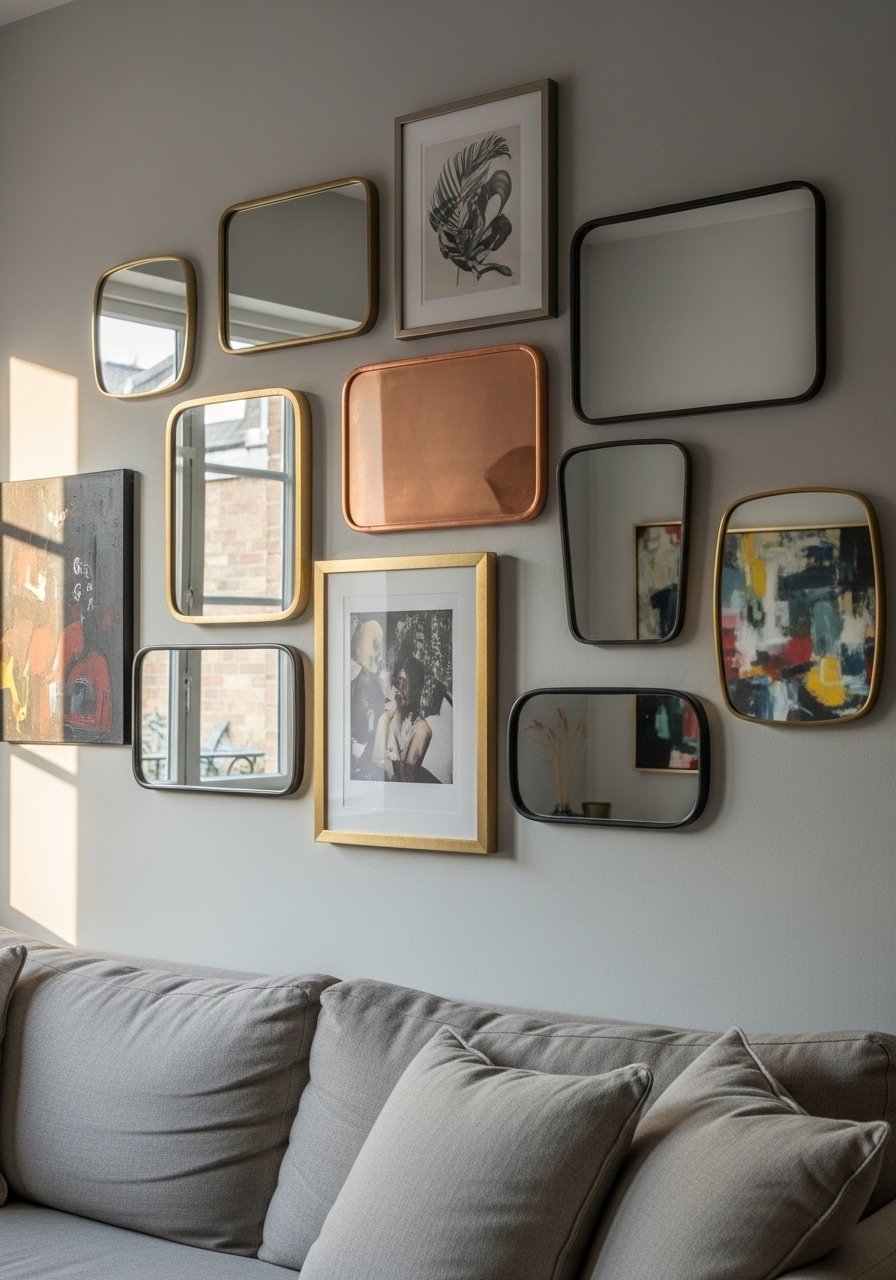
A collection of small mirrors with slim frames makes a living room wall feel curated. Keep frame widths under 1 inch so the collection reads airy. I arrange mirrors using a 2:3 aspect rule so vertical and horizontal pieces balance. Avoid identical spacing everywhere; vary by 1 to 2 inches for a relaxed look. A common error is mixing frame scales that do not play together. Stick to two metals at most. I grabbed a mixed metal frame set and wall mirror hanging kit.
Floating Frame With Hidden Mount For A Clean Look
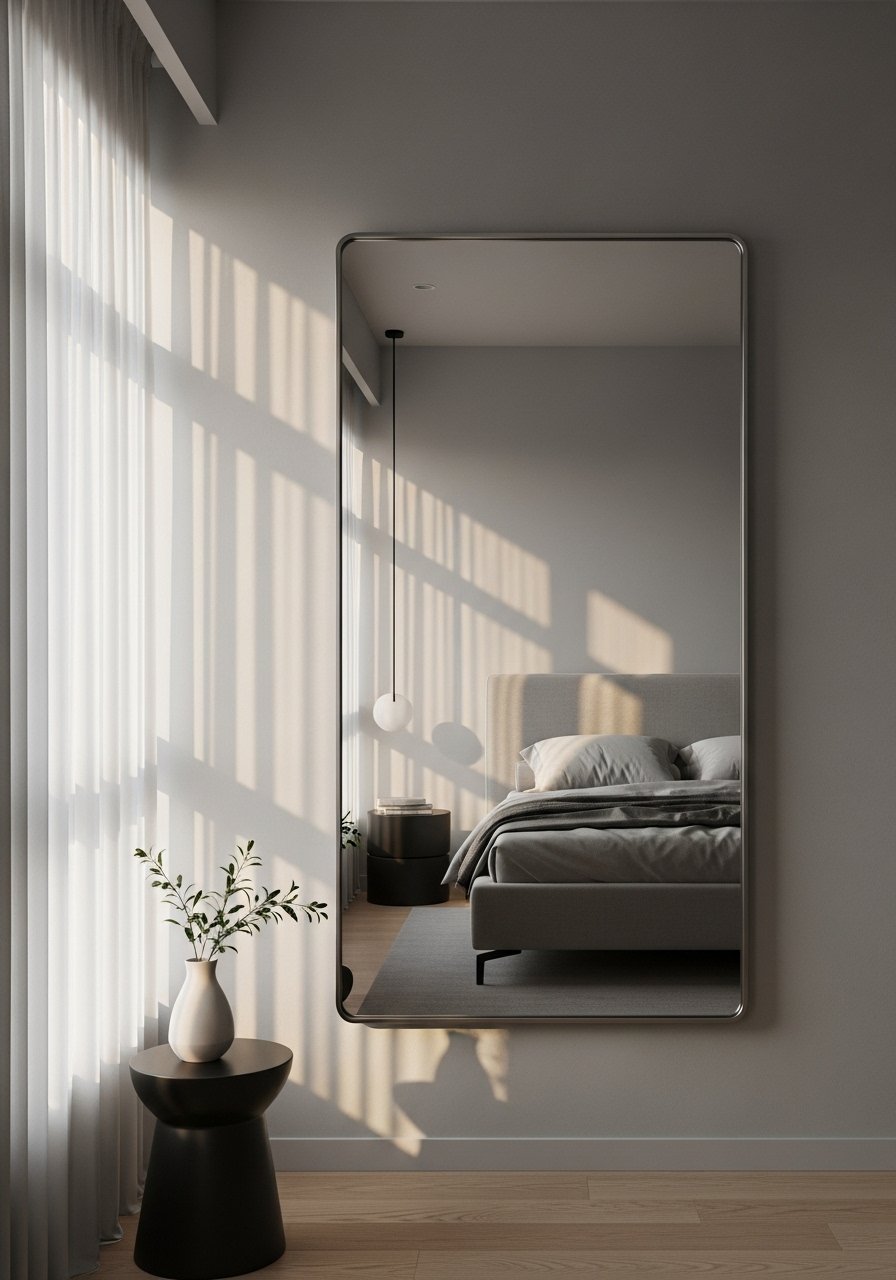
Floating frames that sit off the wall are sleek and surprisingly simple. Build a 1-inch deep rabbet in thin plywood then glue the mirror into it. Use keyhole hangers recessed into the frame so nothing shows. I aim for a 3/8-inch shadow gap all around to sell the floating effect. A mistake people make is cutting the rabbet too wide and letting the mirror wobble. I used a wood rabbet router bit set and recessed keyhole hangers.
Your Decor Shopping List
Velvet pillow covers, set of 4 in muted green and cream, 22-inch covers. Honestly the best $40 I have spent to add instant depth.
Natural jute rope 50ft roll for rope-wrapped frames, pairs with the nautical idea.
Wood mirror frame kit for quick entryway projects, includes corner brackets and screws.
Gold leaf starter kit for accents in dressing areas, includes sizing and sheets.
Narrow picture ledge 2-inch for swappable art setups, comes in 24 and 36 inches.
High-density upholstery foam 1-inch thick for padded frames, cut-to-size available.
Penny tile sheets copper for delicate bath borders, easy to trim.
Mini hot glue gun for craft frames, great for rope and cane work.
Black metal mirror trim kit for minimalist frames, includes corner pieces.
Faux stone panels thin for rustic bathroom framing, lightweight and easy to cut.
Most items have similar options at Target or HomeGoods if you prefer to see textures in person.
Shopping Tips
White oak beats dark wood in 2026. Design feeds have shifted completely. These white oak floating shelves look current, not dated.
Grab velvet pillow covers for $12 each. Swap them seasonally and the whole room reads different.
Curtains should puddle or kiss the floor, never hang halfway up. These 96-inch linen panels are right for standard 9-foot ceilings.
For heavy mirrors always use mirror mounting clips rated for weight. One bad fall and the room is ruined.
One large plant gives more presence than five small succulents. Try a faux fiddle leaf fig 6ft if light is low.
Use small test cuts of paint or stain on the frame material. Small paint sample pots save money and regret.
Frequently Asked Questions
Q: What mirror size should I pick for an entryway?
A: Choose a mirror at least 2/3 the width of the console or table beneath it. If your console is 36 inches wide, aim for a mirror around 24 inches wide. Leave 4 to 6 inches of wall between console edge and mirror edge for balance.
Q: Can I mix boho rattan with modern metal frames without it looking messy?
A: Yes. Stick to a limited palette of two finishes and keep frame widths consistent. For example, pair a rattan sunburst with thin black metal frames for smaller mirrors. The contrast reads intentional if you leave breathing room between pieces.
Q: How do I avoid a cheap-looking gilded frame when using gold leaf?
A: Less is more. Leave about 10 percent of the underpaint showing and scuff lightly with 220-grit paper after sealing. Use a soft brush to press leaf gently so it sits naturally on details.
Q: Are faux materials worth it in a bathroom?
A: Absolutely for moisture-prone spaces. Faux stone and sealed plywood withstand humidity better than raw wood and feel authentic if you match grout and finishing tones. Use waterproof adhesive and gaps under 1/8 inch to avoid water traps.
Q: Can I create a padded upholstered frame without a sewing machine?
A: Yes. Use spray adhesive, staple the fabric to a plywood back, and finish corners with upholstery glue. Choose high-density foam so it keeps shape over time.
Q: What common mistakes do people make when framing round mirrors?
A: They often use uneven spoke spacing for sunbursts or wrap rope too tightly. Measure and lay out a template on paper first. For rope frames leave a reveal so the mirror edges still shine.
Q: How do I hang a heavy framed mirror safely?
A: Use wall anchors rated above the mirror weight and dual hangers spaced at least 16 inches apart if studs are available. Consider a French cleat for larger pieces. Always test the attachment before finishing the wall.
