
My living room had nice furniture and decent lighting but it still felt like a waiting room. Took me embarrassingly long to figure out it was missing texture. Every surface was smooth, every color was flat, and nothing invited you to actually sit down. Lighting and small touches fixed that. Candles were the cheapest, fastest change that made the couch feel like a place to stay.
These ideas lean cozy-modern and a little rustic. Most projects use supplies under $30, with a few splurges near $70 for molds or specialty wax. Works for living rooms, dining tables, entryways, and small patios. Spent $400 on a new coffee table. Room still looked off. Spent $35 on a throw and three candles. Suddenly everything clicked.
Upcycled Jam Jars with Citrus and Twine

I save jam jars for this exact trick. Fill a cleaned jar with a pillar or votive, tuck in dried orange slices, then tie twine around the neck. It looks charming on a kitchen windowsill or stacked on a shelf, and costs next to nothing. For clean lines, use clear glass candle jars so the citrus silhouette shows. Common mistake is overcrowding the jar and trapping heat. Leave a half-inch gap between wax and glass so heat can circulate. A small real-life detail: one medium jar with a 2-inch pillar reads like two small votives from across the room, so use odd numbers when grouping.
Dried Flower Embedded Pillars for a Vintage Look

Embedding dried flowers into pillar candles gives a vintage, personal feel. I press flowers for 2-3 days and then use a wax sheet or gently melt the candle surface to press petals on. Wax sheets for candle decoration make the process predictable. The result is rustic and romantic, perfect for bedside tables or a bathroom shelf. People often use petals that still contain moisture. That causes bubbling or browning when lit. Dry thoroughly and test on a single candle first. Quick tip most guides skip, use shorter petals near the center and longer stems at the edge so the silhouette reads well from a distance.
Marble Painted Pillars for a Modern Table
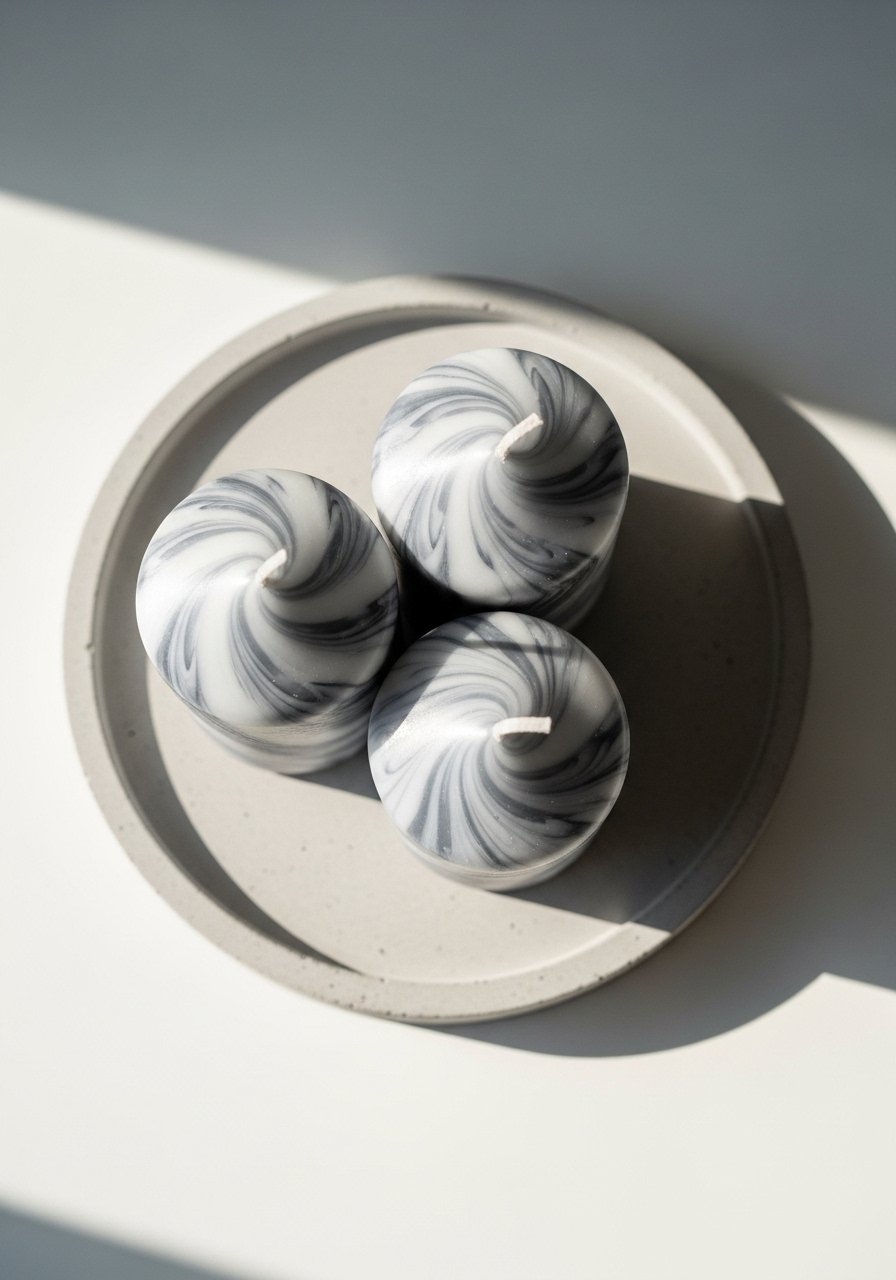
Painting a marble effect on plain pillars is easier than it looks. Mix a tiny bit of acrylic into rubbing alcohol and drag a small brush across the candle for veins. I use non-toxic acrylic paint sets and wipe with a paper towel for softer lines. This is great for dining table centerpieces in a modern living room. A mistake people make is heavy paint application. Thin layers read better and burn cleaner. Measurement detail: dilute paint with one part alcohol to three parts water for subtle veining. Pair with brass or black holders depending on your metal mix from idea six.
Concrete Tealight Holders for an Industrial Corner
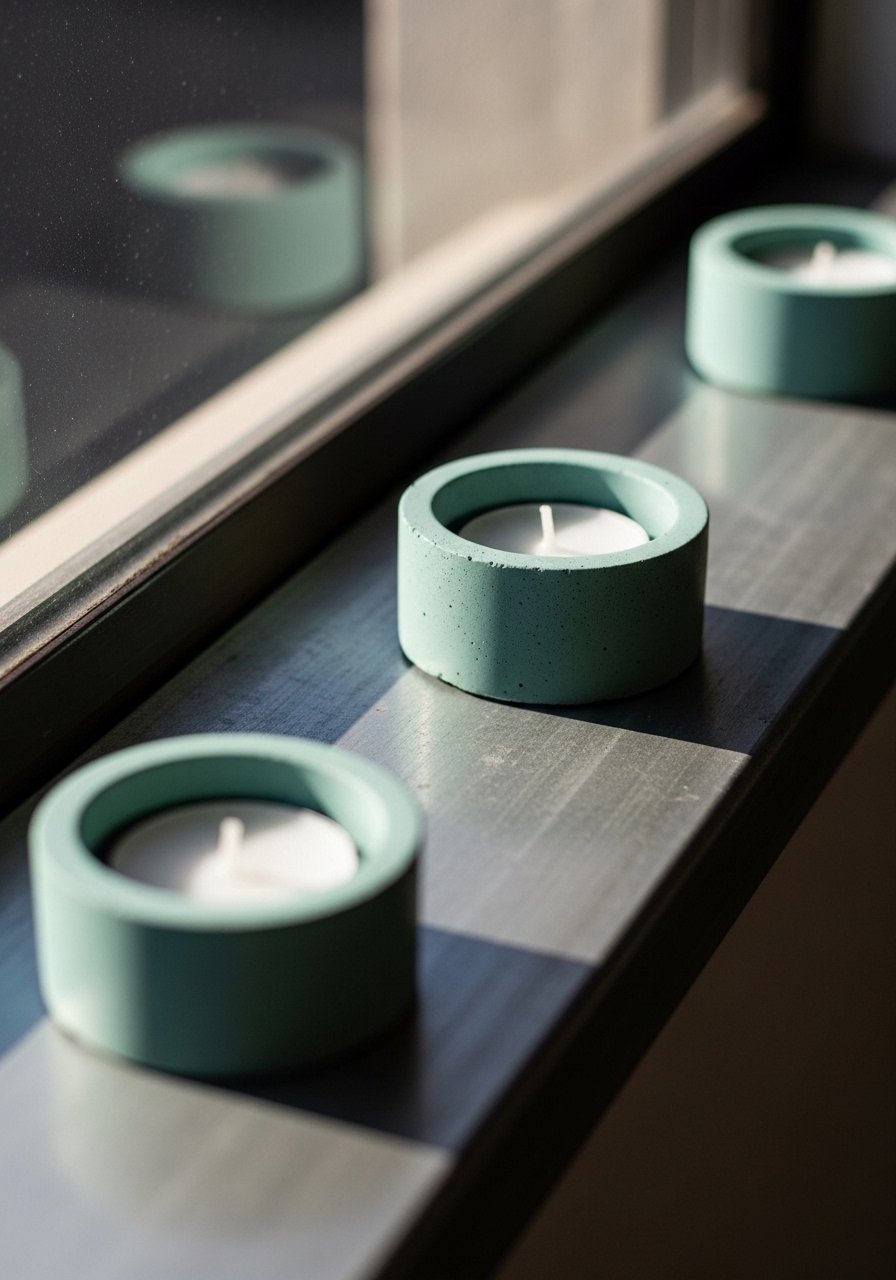
Mixing a small batch of quick-set concrete into silicone molds gives sturdy, tactile holders. Use disposable molds so you do not worry about scrap. A 2:1 water-to-mix ratio in small batches avoids bubbles. Silicone candle molds make the work fast. These holders are heavy and anchor a bookshelf vignette well. New makers often pour one big batch and regret the weight. Make multiple small pieces instead. One practical trick I use is embedding a tea light cup while the concrete is still soft so the real candle sits flush and doesn’t scorch the concrete edge.
Napkin Decoupage Candle Jars with Patterned Prints
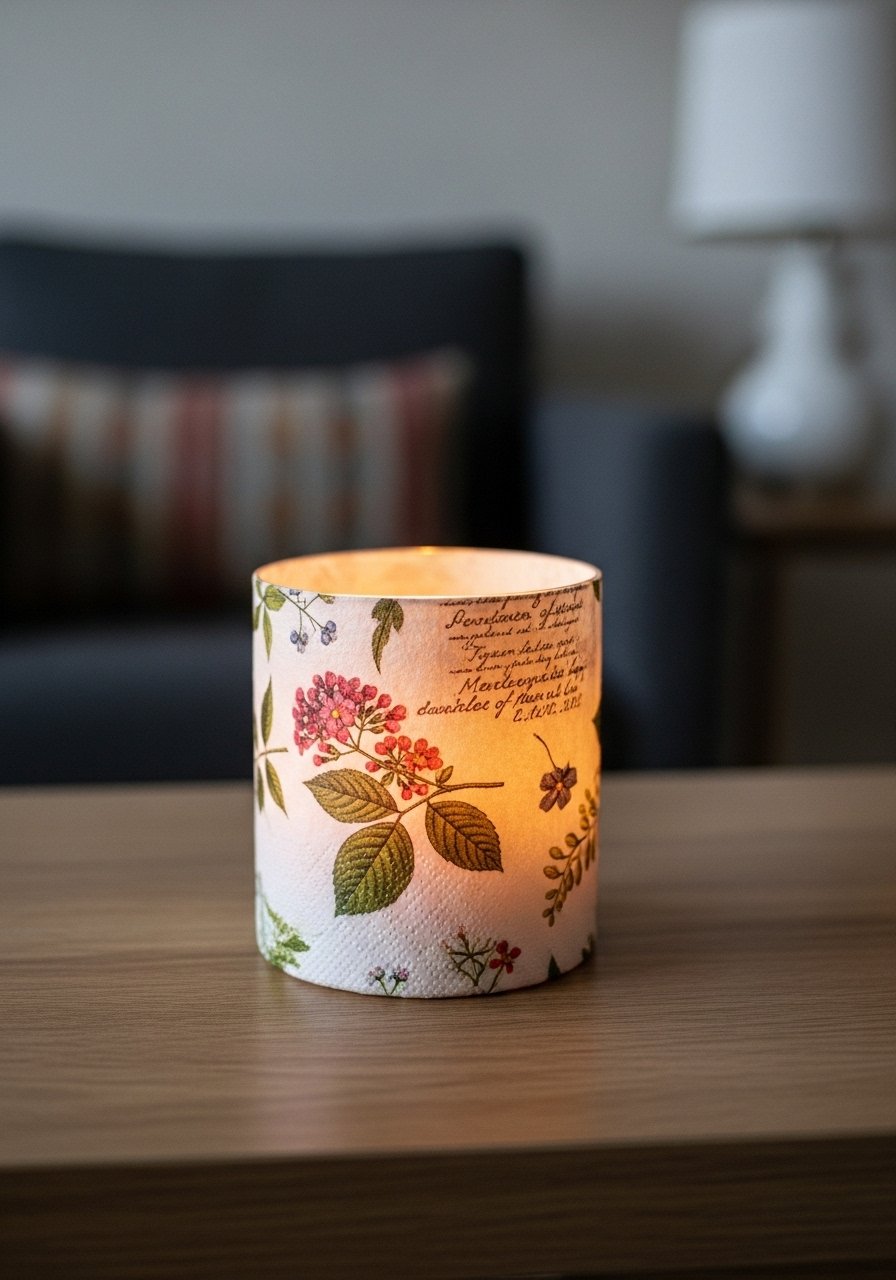
Decoupage with patterned napkins turns thrift-store jars into statement pieces. Peel plyer layers off a napkin and brush Mod Podge gently. I like using botanical paper napkins because the thin layer adheres smoothly. This is a great renter-friendly way to customize a bedroom or entry console. A common mistake is applying thick glue which shows brush marks. Work in thin layers and let each one dry. Real-life detail: if you want a matte finish, sand lightly between coats. Pair this with the jam jar idea for kitchen groupings.
Layered Candles on a Tiered Tray for Entryway Warmth
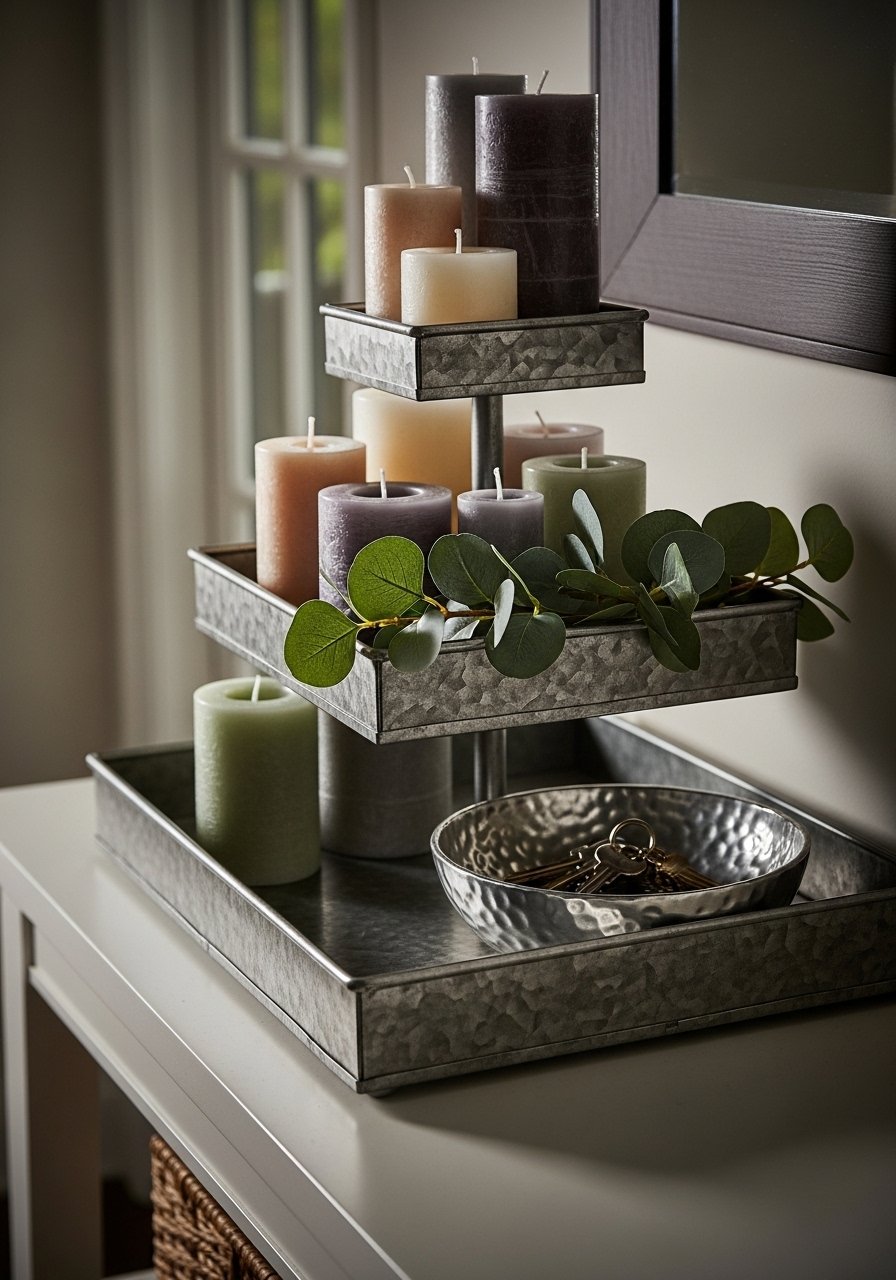
Layering candle heights on a tiered tray makes an entryway feel intentional instead of cluttered. I use a 3-tier tray and group candles by two small votives, one medium pillar, and one short taper. Wax melts and small votive packs keep it affordable. Mistake to avoid, do not place tall tapers next to low flameless candles unless you mind uneven light. A useful ratio I discovered is 1:2:3 for heights when viewed from the doorway. This trick reads as curated even if each piece costs under $10.
Sand and Shell Hurricane for Beachy Vibes
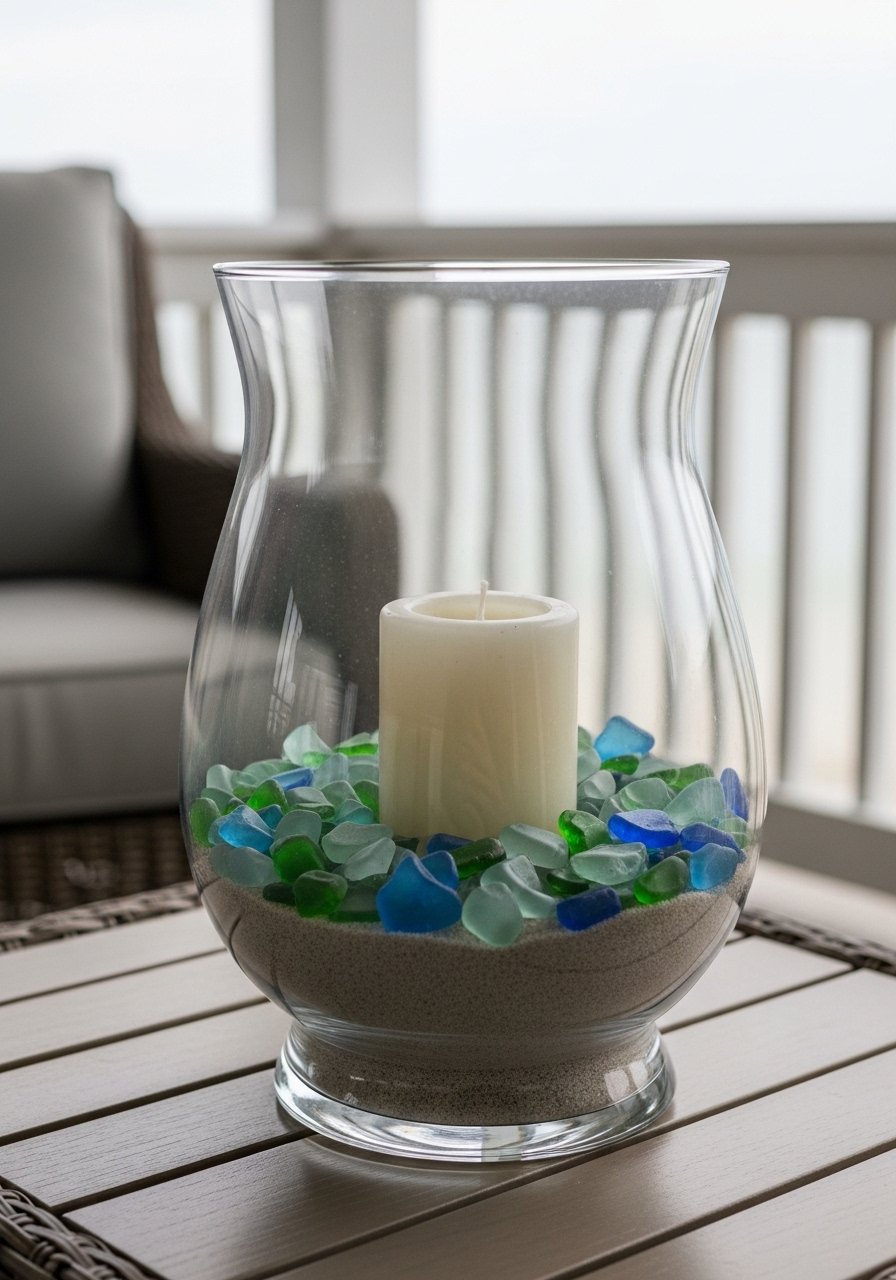
A tall hurricane filled with sand and shells works on a porch or sunroom. Layer sand first, then add shells and a central pillar. I weight the base with pebbles so wind does not tip it. Large glass hurricane vases are the main buy. Common error is using too tall a candle for the vase and creating excessive heat. Keep the candle two inches below the rim and swap to an LED candle if you plan extended use. Small detail most articles miss, add a ring of dampened sand at the bottom if you want the shells to sit without shifting.
Metallic Drip Accents for Glam Candle Scenes
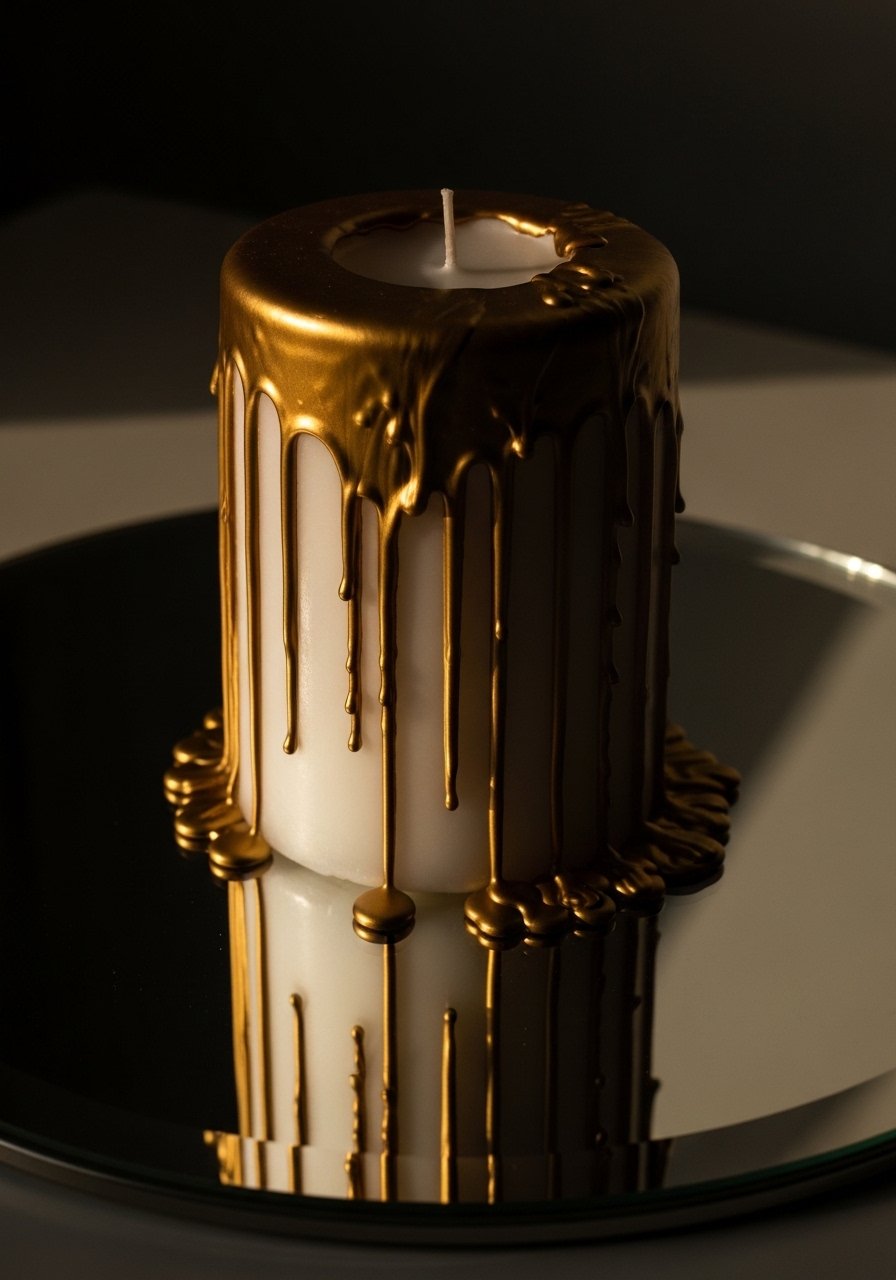
I love adding metallic wax to create deliberate drips down a pillar. Melt a small spoon of metallic wax and gently pour it over the candle edge while it sits on a plate. Candle wax dye and metallic mica powders let you match brass or pewter accents in the room. This works well on a coffee table when paired with a low stack of books. A frequent mistake is overdoing the metallic. One thin band around the middle reads much better than multiple layers. Practical note, test on a scrap candle to learn the pour speed for your wax type.
Ice Lantern Tea Lights for Summer Evenings
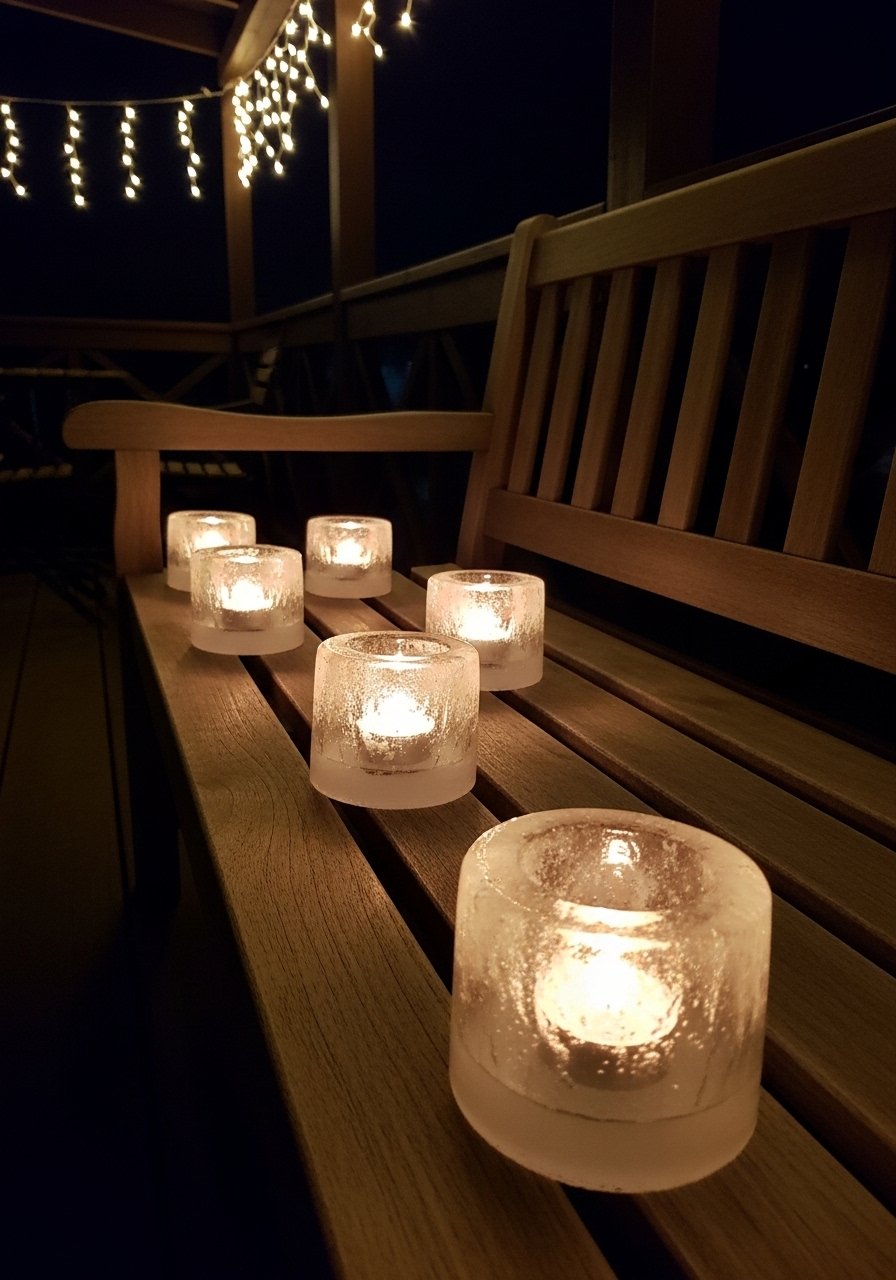
If you want a quick outdoor vibe, freeze water in small bowls with herbs or citrus halves around a tealight well. Pop them out and light the tealight just before guests arrive. Small outdoor tealights are cheap and replaceable. This is perfect for patios and late summer dinners. A caution, these are temporary and melt, so use them as a moment piece rather than a long-term fixture. One practical trick, freeze in layers so trapped air bubbles sit at the top and the lantern looks crystal clear from the side.
Repurposed Candle Jars as Mini Planters and Lights
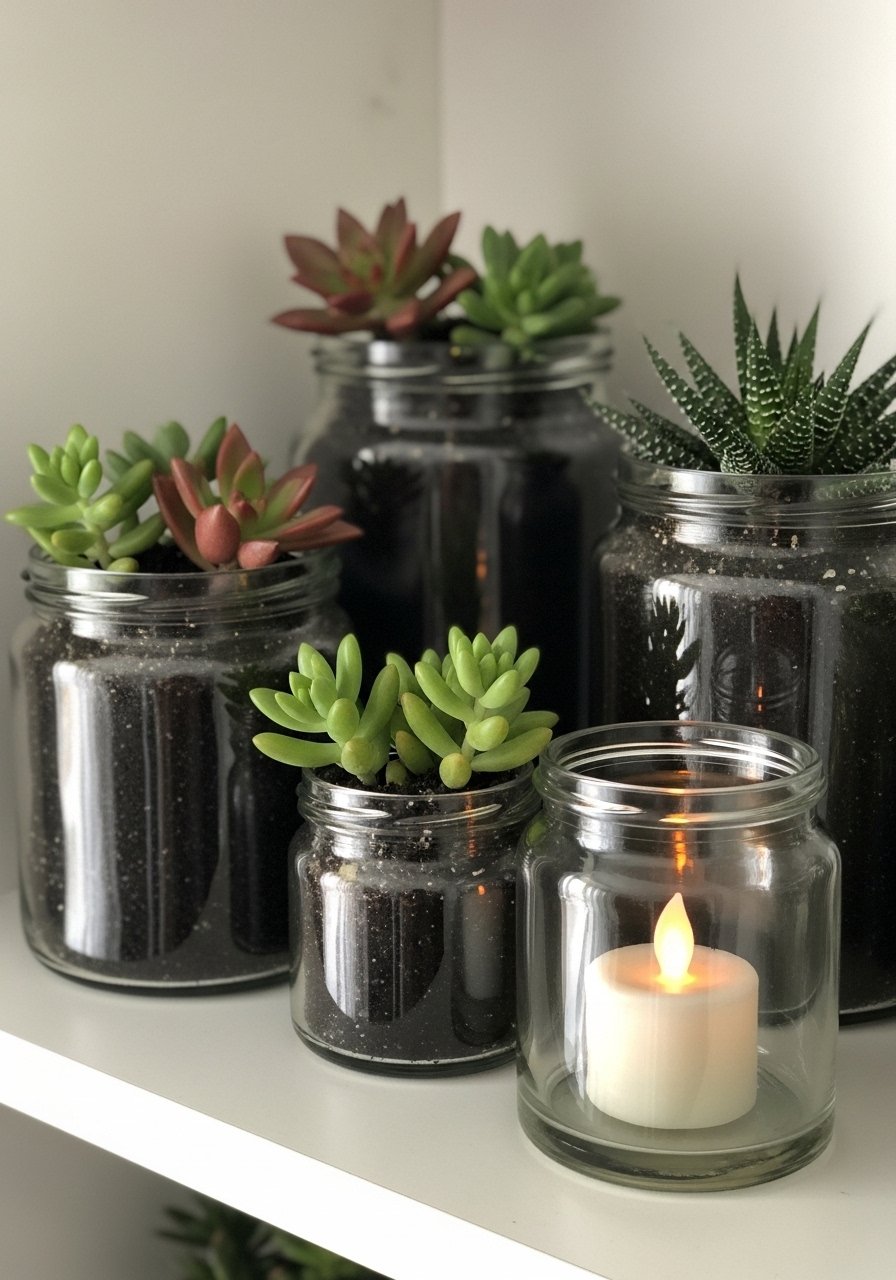
After candles burn down, don’t toss the jars. Clean with boiling water and a little baking soda, then use them as mini planters or storage. I like pairing a battery-operated tea light in one jar and a succulent in another for contrast. This works well on windowsills or a bathroom ledge. People often reheat jars in an oven which can shatter glass. Instead, pour boiling water into the jar, let it sit, and the wax lifts out. Specific detail, leave 1/4 inch of residual wax if you want the jar to glow warmly with an LED rather than be ring-stained.
Your Decor Shopping List
Textiles
- Honestly the best $35 I have spent. Chunky knit throw in cream (50 x 60 inches). Drape over a sofa arm for instant warmth
Candle Basics
- Votive candle pack, 24-count (~$18). Good for tray layering and testing scents
Tools & Supplies
- Silicone candle molds, set of 6 for concrete and wax projects. Use for uniform shapes
- Craft heat gun (~$30). Speeds embossing and smooths finishes
Decor Hardware
- Large glass hurricane vase (10 x 10 inches) for sand and shell displays. Similar at HomeGoods
Finishing Touches
- Non-toxic acrylic paint set, 24 colors for marbling and painted drips
- Battery-operated tea lights, 12-pack (~$15). Safer for long displays and renters
Shopping Tips
White oak beats dark wood in 2026. Design feeds have shifted completely. White oak floating shelves keep candle vignettes feeling current, not dated.
Grab wax sheets for candle decor. They make embedding flowers and patterns predictable and are cheaper than buying specialty pillars each time.
Curtains should puddle or kiss the floor, never hang halfway up. These 96-inch linen panels are the right call for standard 9-foot ceilings and help frame candlelit windows.
For outdoor nights, skip real flames and use outdoor battery lanterns. One tall lantern beats five small torches when you want a relaxed, even glow.
Buy one neutral base candle and swap accents seasonally. Plain white pillar candles, 3-pack keep your setup versatile and under budget.
Frequently Asked Questions
Q: Are these candle projects safe for renters?
A: Yes, most are renter-friendly. Use battery-operated candles when flames are not allowed. Clean jars with boiling water instead of oven methods to avoid glass damage.
Q: Can I mix real candles and battery candles in the same display?
A: You can, but keep real flames away from flammable textiles and do not rely on LEDs to supply heat. Place a 2-inch buffer around real flames and use LEDs where you want continuous light.
Q: How do I stop candles from dripping all over my tray?
A: Place a small plate or metal coaster under pillars, or use dripless wax formulas. Trim wicks to about 1/4 inch before each burn and rotate candles so they melt evenly.
Q: What supplies are worth splurging on for candle DIY?
A: Spend a bit more on a good craft heat gun and quality molds. Cheap molds bubble and cheap heat tools give uneven results. For many accents, budget supplies work fine.
Q: Can I put dried flowers directly into a burning candle?
A: Avoid placing petals so they overhang the flame. Embed small, fully dried petals into the wax surface or use a surrounding ring of petals outside the melt pool. Safety first, test one candle in a safe spot.
Q: How do I make a clear ice lantern without cloudy spots?
A: Freeze in layers and use boiled, cooled water to reduce trapped air. For small lanterns, freeze in two or three steps and tilt the container slightly between layers for a clearer finish.
