
My living room had nice furniture but it still felt like a waiting room. Took me embarrassingly long to figure out it was missing texture and low-level styling. Making a few simple clay trays changed how everything read, because small, tactile surfaces make a room ask you to sit down.
These ideas lean modern, slightly boho, and a touch midcentury. Most projects run $10 to $60, with a couple that peek toward $100 when you buy tools you will use again. Works for coffee tables, entry consoles, bathrooms, or a nightstand that needs a focal point.
Minimal Matte Clay Tray for a Cozy Coffee Table
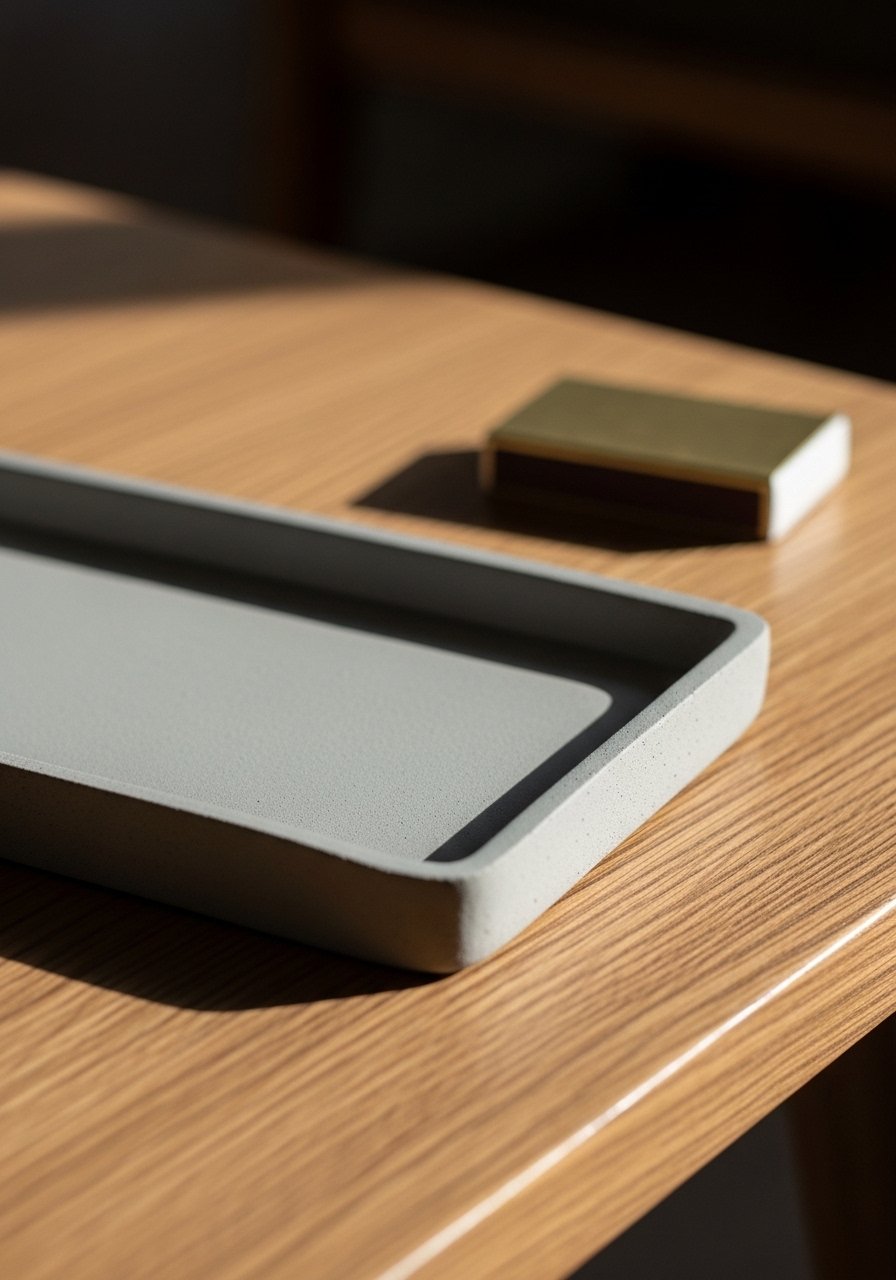
The moment I switched a glossy tray for a matte clay one, the coffee table stopped shouting and started whispering. A simple 10 to 12 inch round tray, hand-rolled from air-dry clay, reads modern and calm and fits into an 80/20 color ratio with a bold candle as the 20 percent. I used a polymer clay sculpting tool set to smooth the rim and a light sanding after drying. Common mistake is making the tray too thin so it warps. Aim for 6 to 8 millimeters thickness. Pair this with a polymer clay sculpting tool set for under $20, and a matte sealer spray if you want it water resistant.
Textured Coastal Tray for Beachy Bedrooms
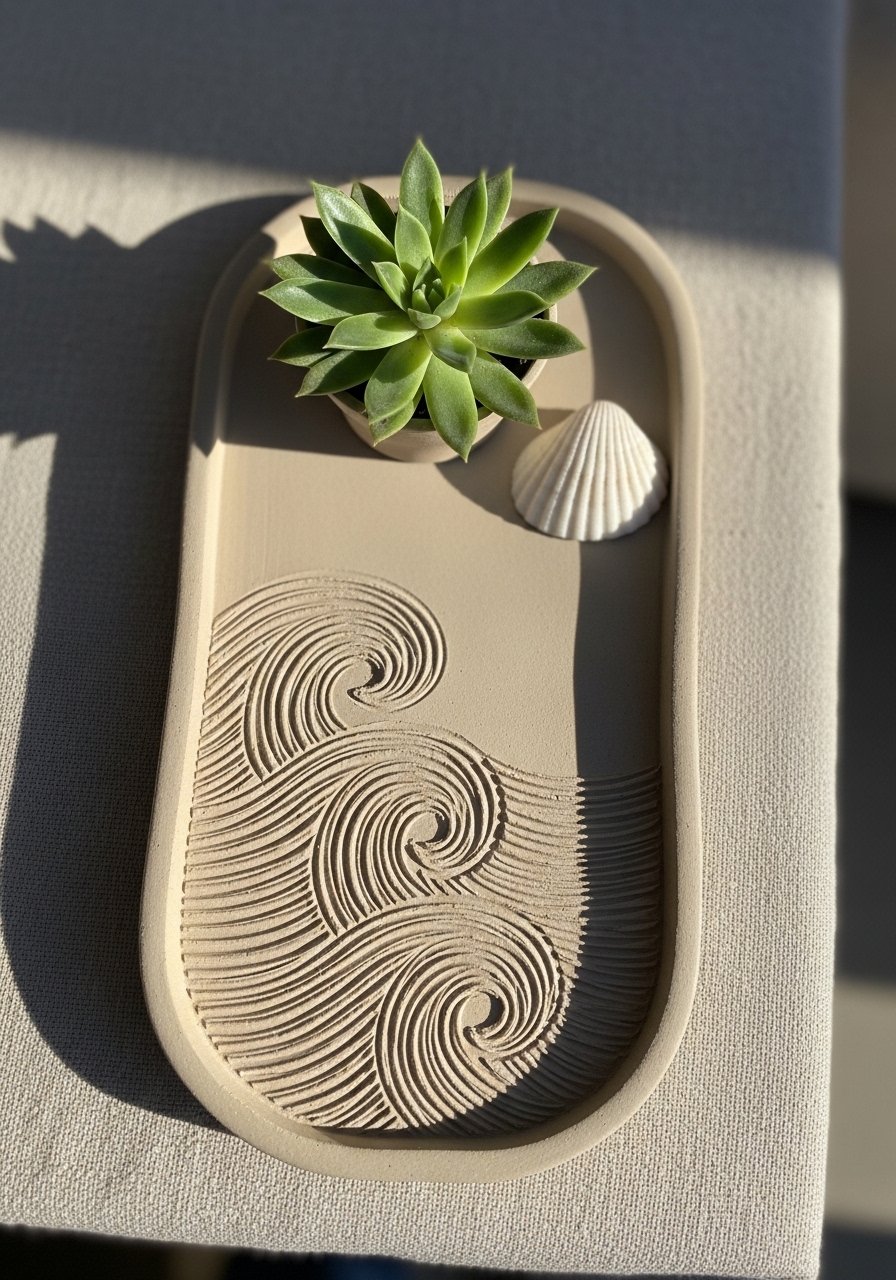
I carved a subtle wave pattern into a rectangular tray to echo the coastal throw pillows in my guest room. The texture gives a bedroom a lived-in, tactile feel without loud color. Budget here was about $25, mostly for the clay and a carving loop. Use a 3:1 focal rule, so one plant, one candle, one stack of jewelry looks balanced. People often overdo the carving and the pattern reads messy when lines are too close. Keep grooves about 1.5 to 2 millimeters wide and 3 to 4 millimeters apart. For tools try a silicone detail carving kit.
Marble Effect Clay Tray for Modern Bathrooms
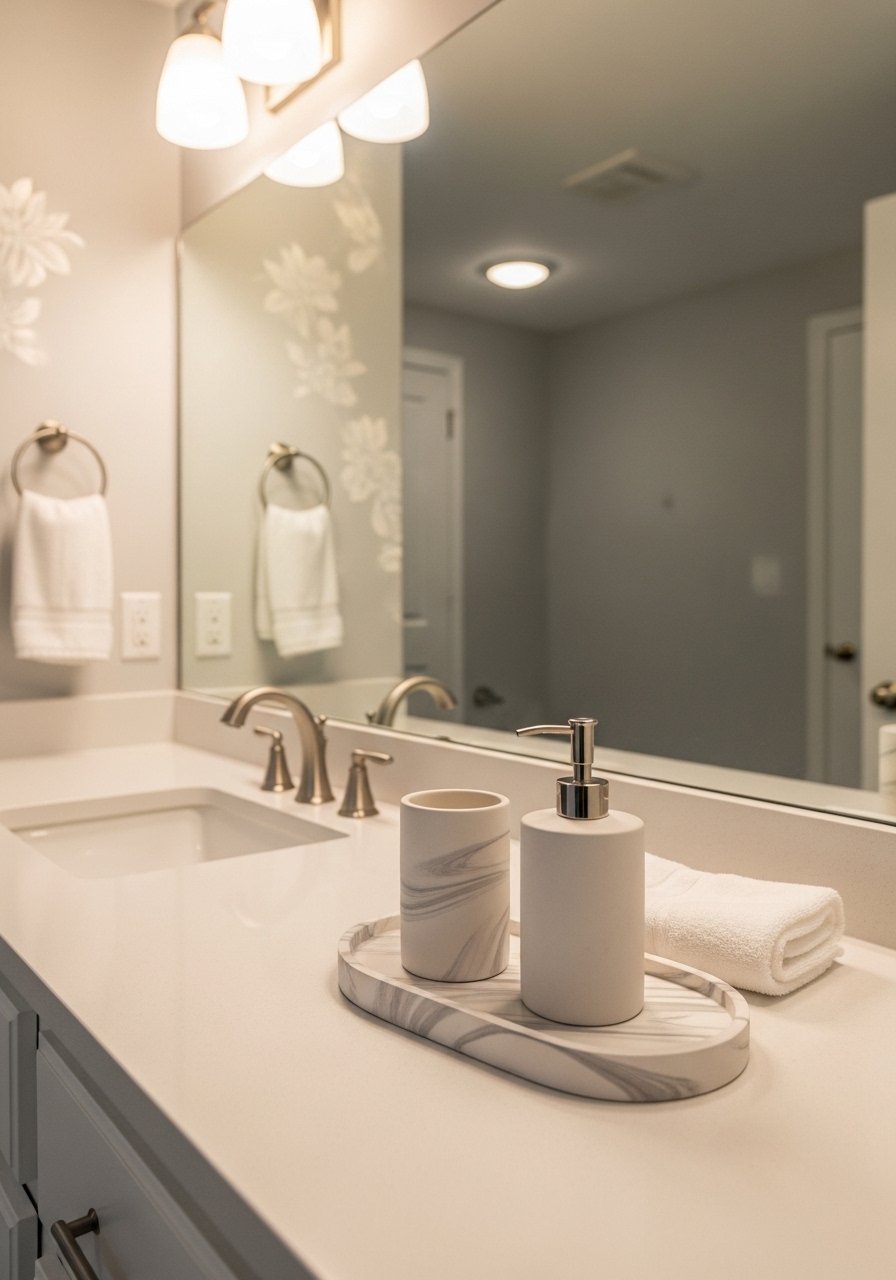
After I made a marbled tray for my powder room, the sink suddenly felt edit-ready. Swirling two clay colors gives a premium stone look without the price. The trick is to fold the two colors only a few times, not mix them into a uniform gray. Work on a 9 to 10 inch oval for soap and a hand towel. A common mistake is overworking the clay, which ruins the marbling. Seal with a glossy clear coat if you like a wet stone look, or use a satin finish for a softer feel. I picked up a small acrylic paint set to add veining when needed.
Gold Leaf Rim Tray for Modern Glam Accent
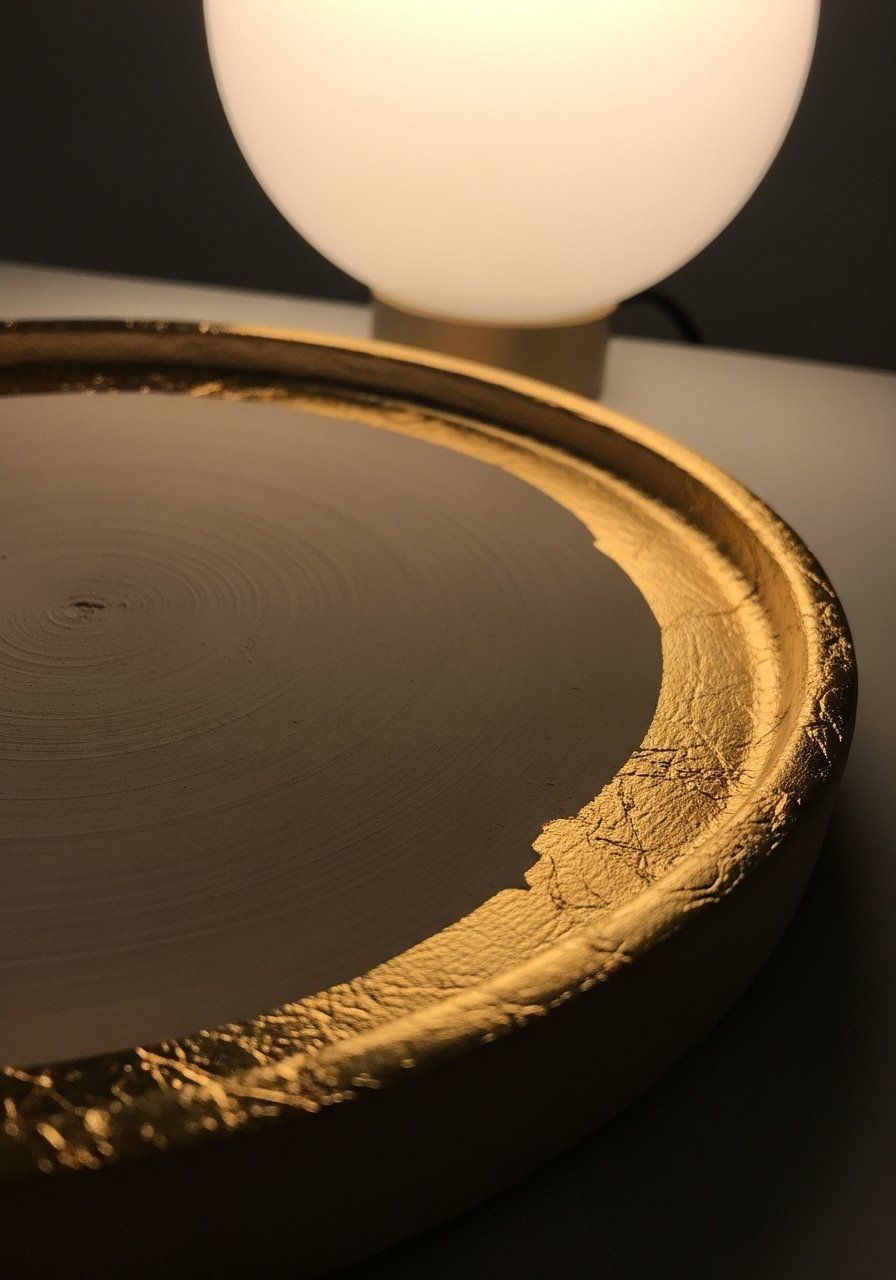
If your space feels flat, a thin metallic rim adds that elevated note without shouting. I adhered gold leaf to the rim of a 10-inch clay tray and it reflected lamp light in the most flattering way. Use two thin layers of adhesive and brush off excess with a soft brush. Mistake to avoid is a chunky rim. Keep the gold band to about 6 to 8 millimeters wide for subtlety. Works great on a bedside table in a modern glam bedroom. Try a gold leaf application kit and a soft artist brush for cleanup.
Layered Trays for Busy Entryways
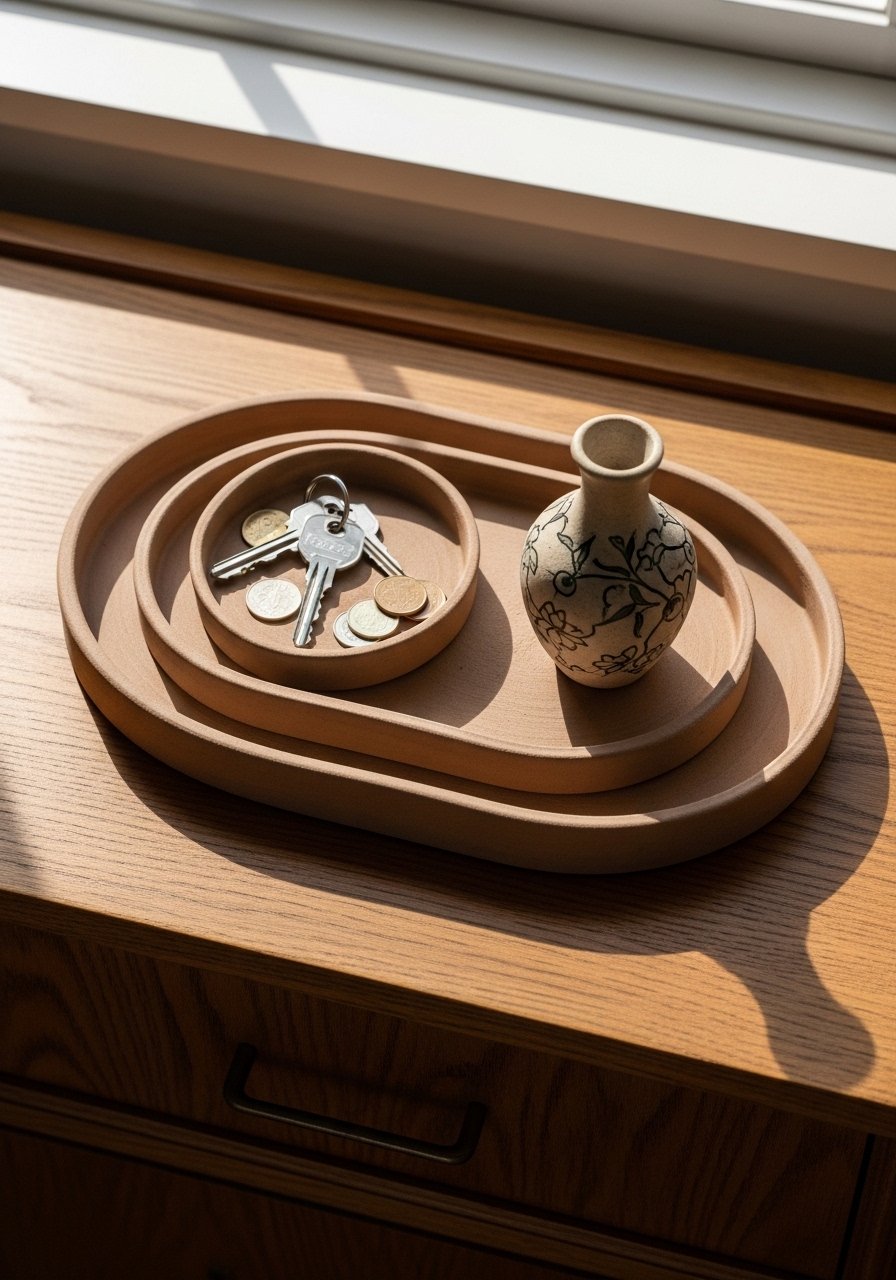
My entry table used to look like a junk drawer spilled out. Making two different sized clay trays fixed that. Use a larger tray for mail and a smaller one for keys and sunglasses. The visual rule I use is the rule of three: a tray, a plant, and a lamp look instantly curated. Common mistake is trays too close in size so they compete. Make the larger one at least 30 percent bigger in diameter. For durability, stick felt pads under the big tray and try adhesive felt pads so nothing scratches the console.
Terrazzo Style Clay Tray for Eclectic Living Rooms
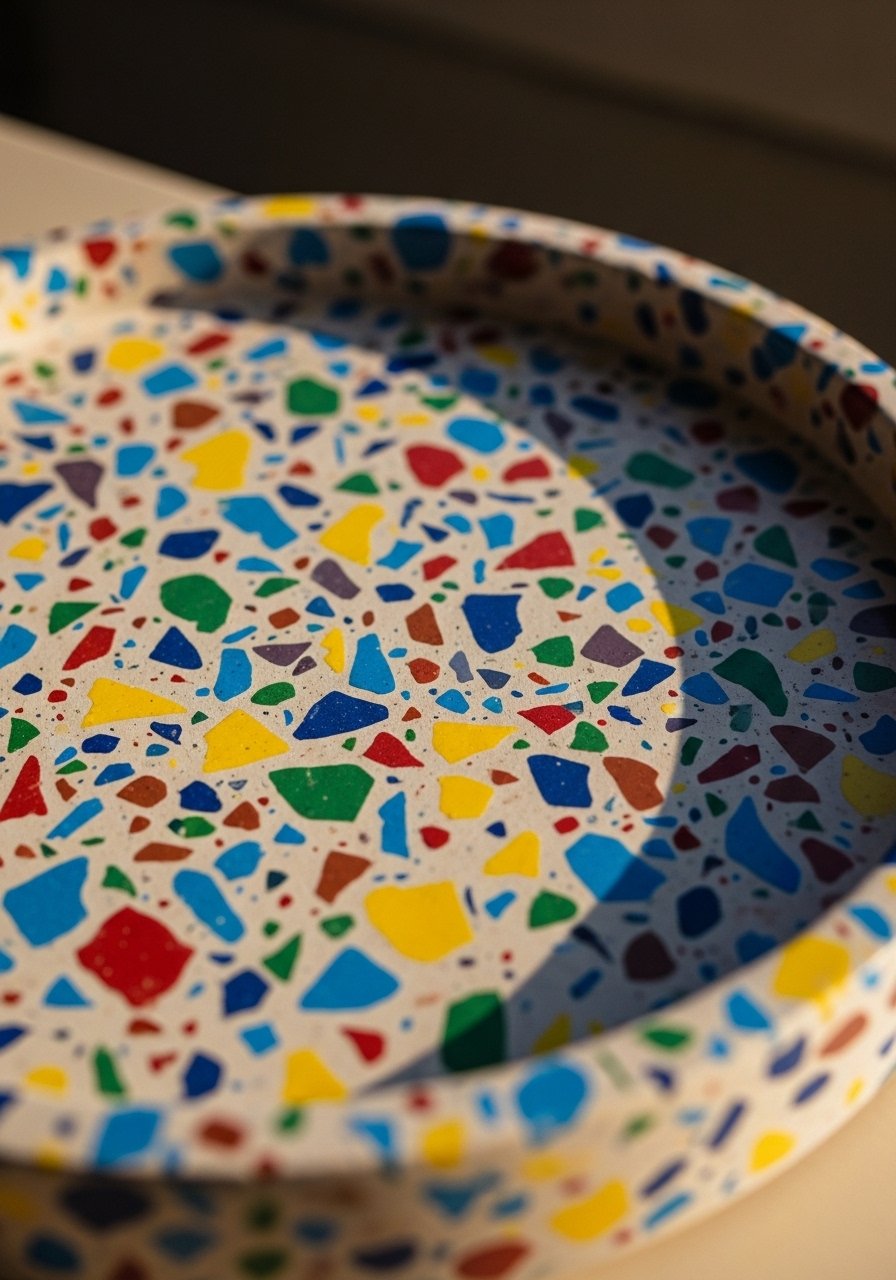
Terrazzo is one of my favorite tricks when I want pattern without wallpaper. I mixed small clay chips in contrasting colors into a base and pressed them so the surface is mostly level. Pick 6 to 8 colors that repeat elsewhere in the room so the tray ties into the palette. People often go tiny with the chips and lose the terrazzo effect. I use chips that are about 4 to 8 millimeters across for the best visual balance. This works for cocktail tables where you might also set drinks. Try a silicone round tray mold for consistent shapes.
Leather Handle Clay Tray for Rustic Nightstands
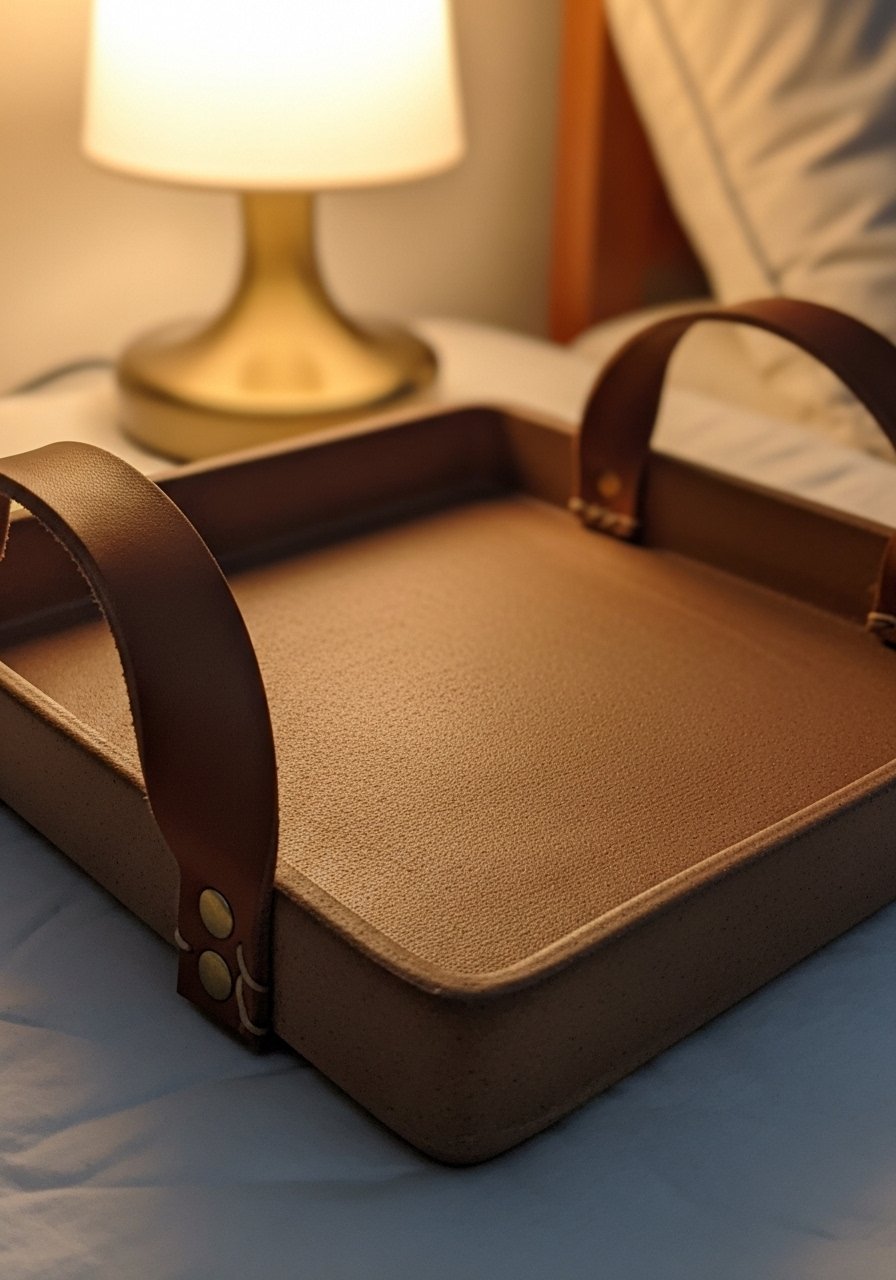
One friend needed something that felt handmade but polished. I added leather straps to the sides of a square clay tray and it instantly read rustic and grown-up. A 7 by 9 inch tray is perfect for jewelry and nightly glasses. Mistake people make is using straps that are too wide. Aim for 12 to 15 millimeter straps and set brass rivets about 1.5 centimeters from the edge. Use a hand punch for leather and pre-drill tiny holes in the clay while it is leather-hard. I grabbed a pack of leather strap handles to finish the look.
Concrete Look Clay Tray for Industrial Corners
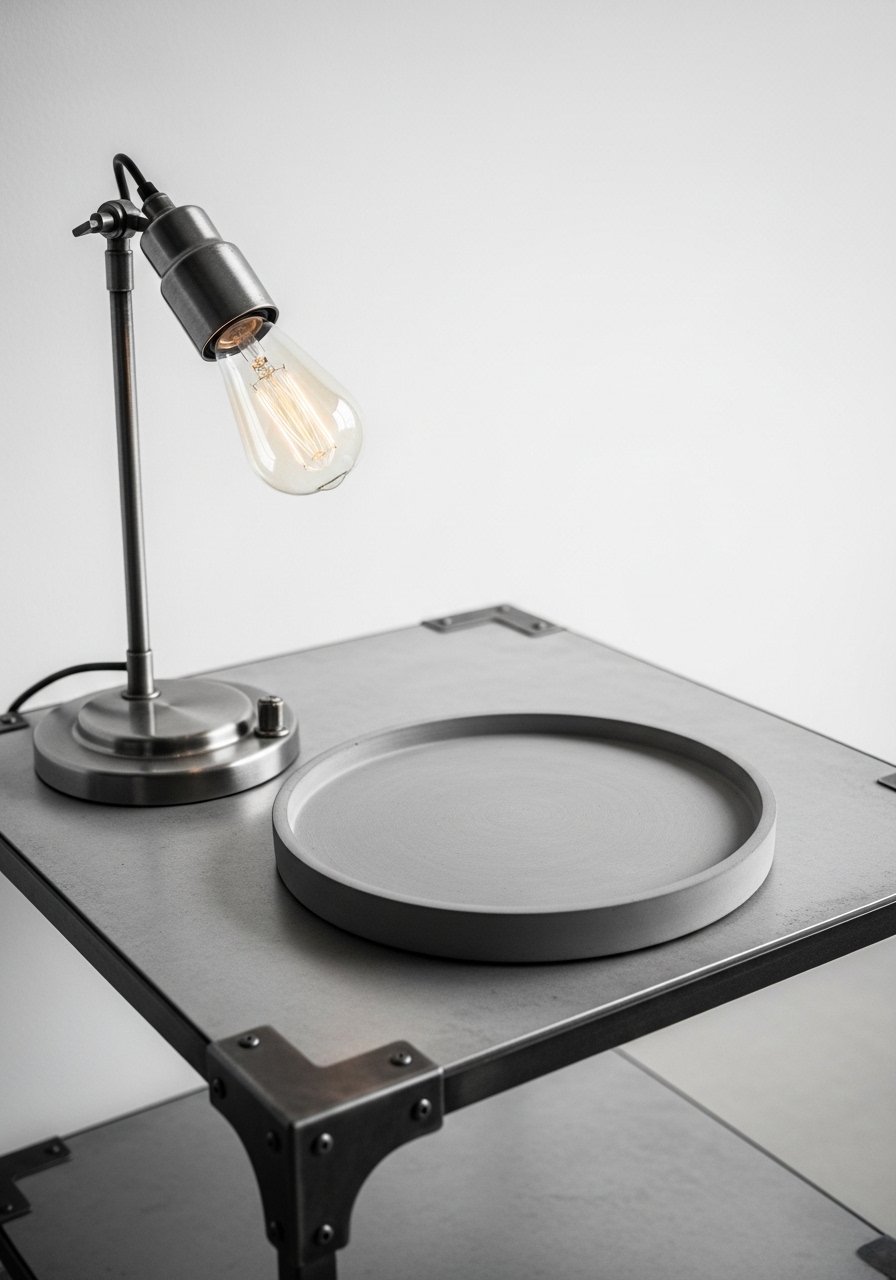
My apartment has metal-legged furniture, and a concrete-look tray completes that vibe. Use muted grays and dab darker pigments with a sponge to mimic pitting. A 12-inch square tray with rounded corners sits well on a metal side table. Avoid making the entire surface uniform; add three darker spots spaced like a triangle to read natural. People often expect the weight of real concrete and are surprised by how light the clay feels. If you want heft, glue a thin cork base to the bottom using a cork sheet cut-to-size.
Inset Tile Tray for Vintage Bathroom Styling

I inset tiny vintage-style tiles into a clay tray for soap and a bar of lotion and it solved my cold vanity. The tiles stop water from sitting on the clay and add a graphic point of interest. Use a 2-inch grout gap and keep grout lines thin, about 2 to 3 millimeters, for a delicate look. Common mistake is tiles set flush with the rim; instead recess them 1 to 2 millimeters so the tiles feel like a feature. For small tiles, the mini ceramic tile pack saved me time.
Colored Edge Tray for Playful Kid Spaces
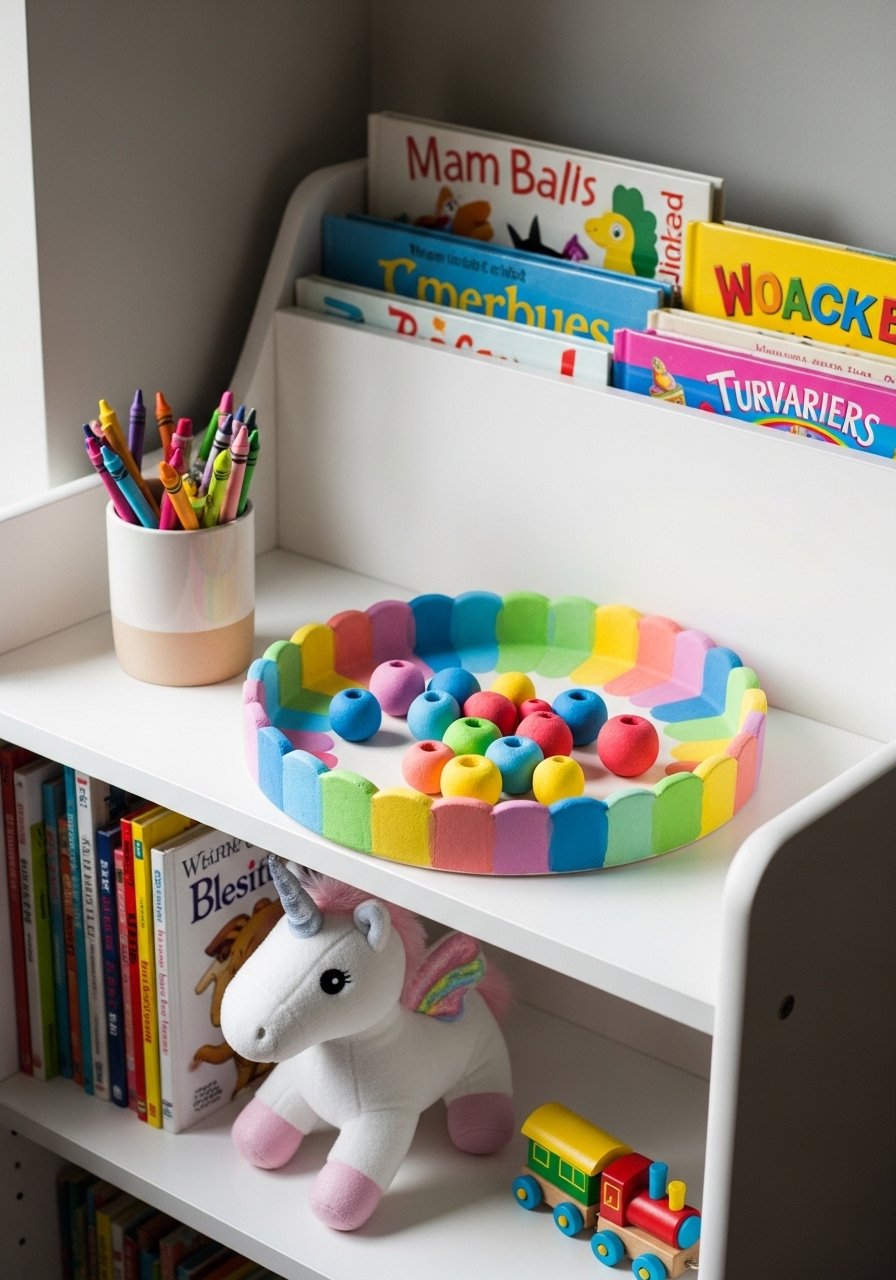
We needed a tray that could live on a kid shelf without looking like a toy. I added a 6 to 8 millimeter colored rim in a high-contrast hue so the tray reads intentional. Kids' rooms survive small scratches, so choose a durable sealer. A common error is making the color the same as toy tones which reads juvenile. Pick a color that repeats in adult elements nearby, like a navy or terracotta. For kid-proofing, I sprayed a clear coat from a glossy-sealant-spray.
Stackable Nesting Trays for Small Kitchens
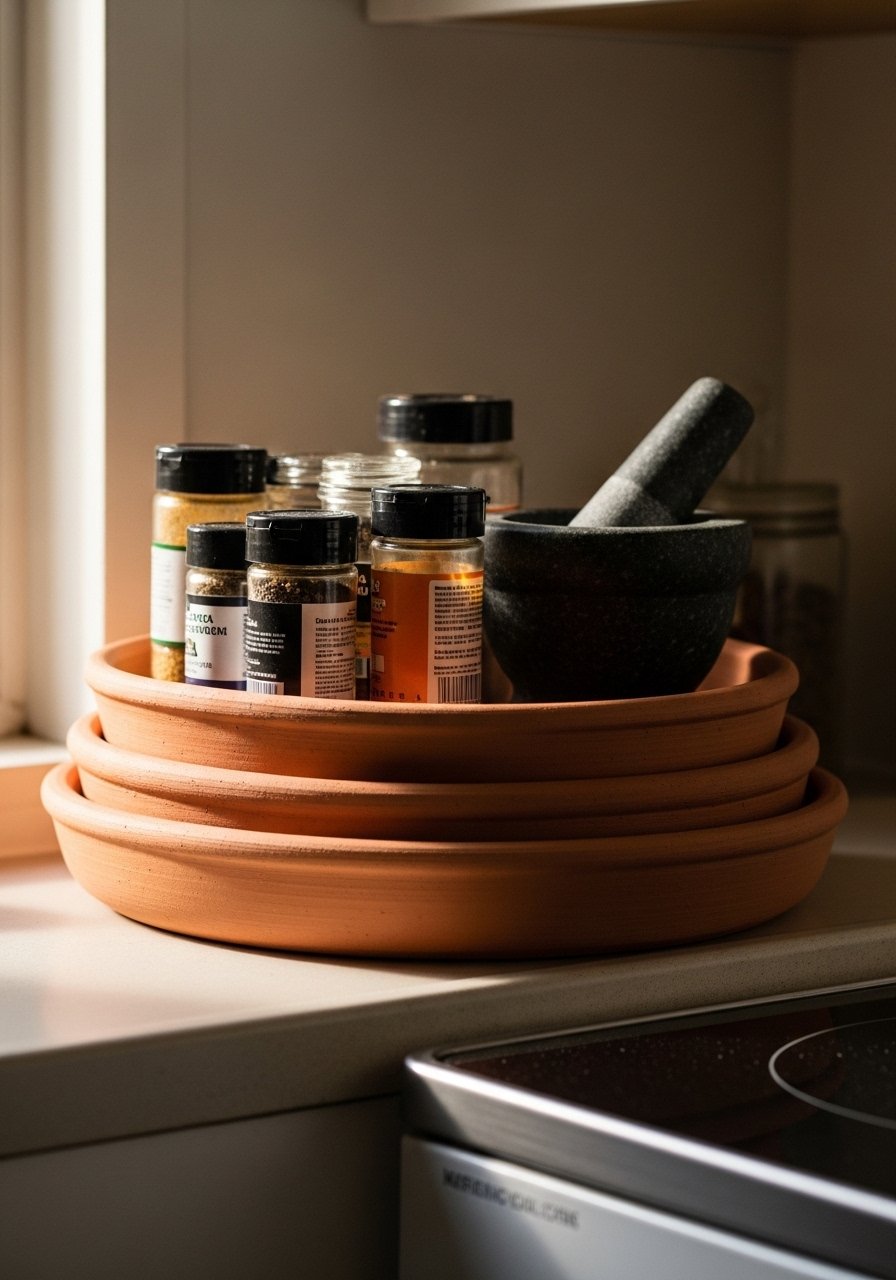
Small kitchens need storage that looks planned. I made three nesting trays in graduated sizes to corral oils, salt, and utensils. The trick is to keep the lip height consistent, about 15 to 18 millimeters, so they stack neatly. Mistake to avoid is differing base thicknesses that make stacking wobble. Use neutral tones so the trays blend with dishes and try a kiln-safe clay pack if you want oven-bake durability.
Pressed Leaf Tray for Botanical Entry Tables
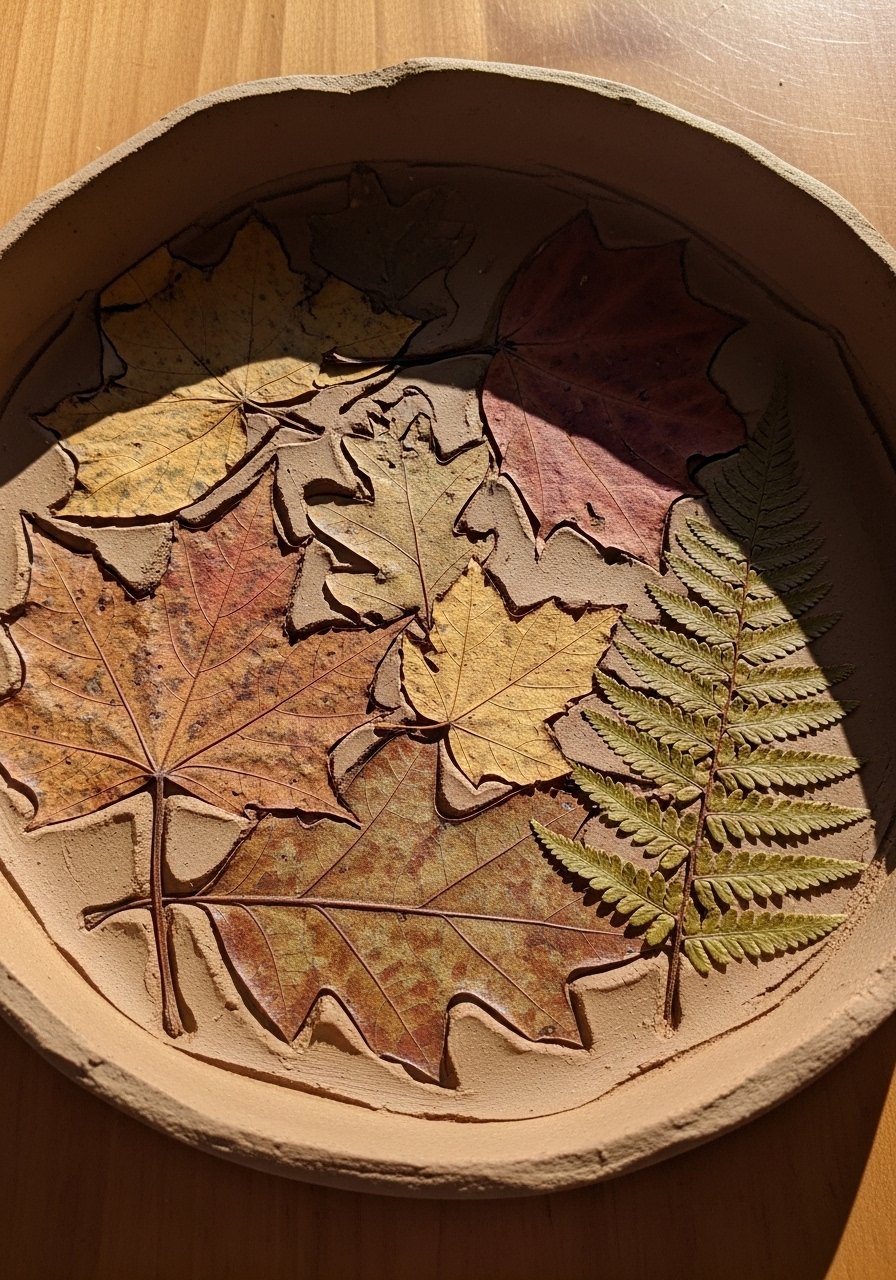
I pressed fresh leaves into a leather-hard tray and sealed them in so the entry table has a quiet organic detail. It adds texture without introducing another pattern. Use leaves that are 6 to 10 centimeters long so the veins read clearly. Common mistake is using wet leaves that rot. Press and dry leaves for at least a week first. Finish with a satin sealer and tuck a small card with the plant name underneath for a DIY museum vibe. I used a clear satin sealing spray to protect the surface.
Geo Cutout Tray for Modern Desk Styling
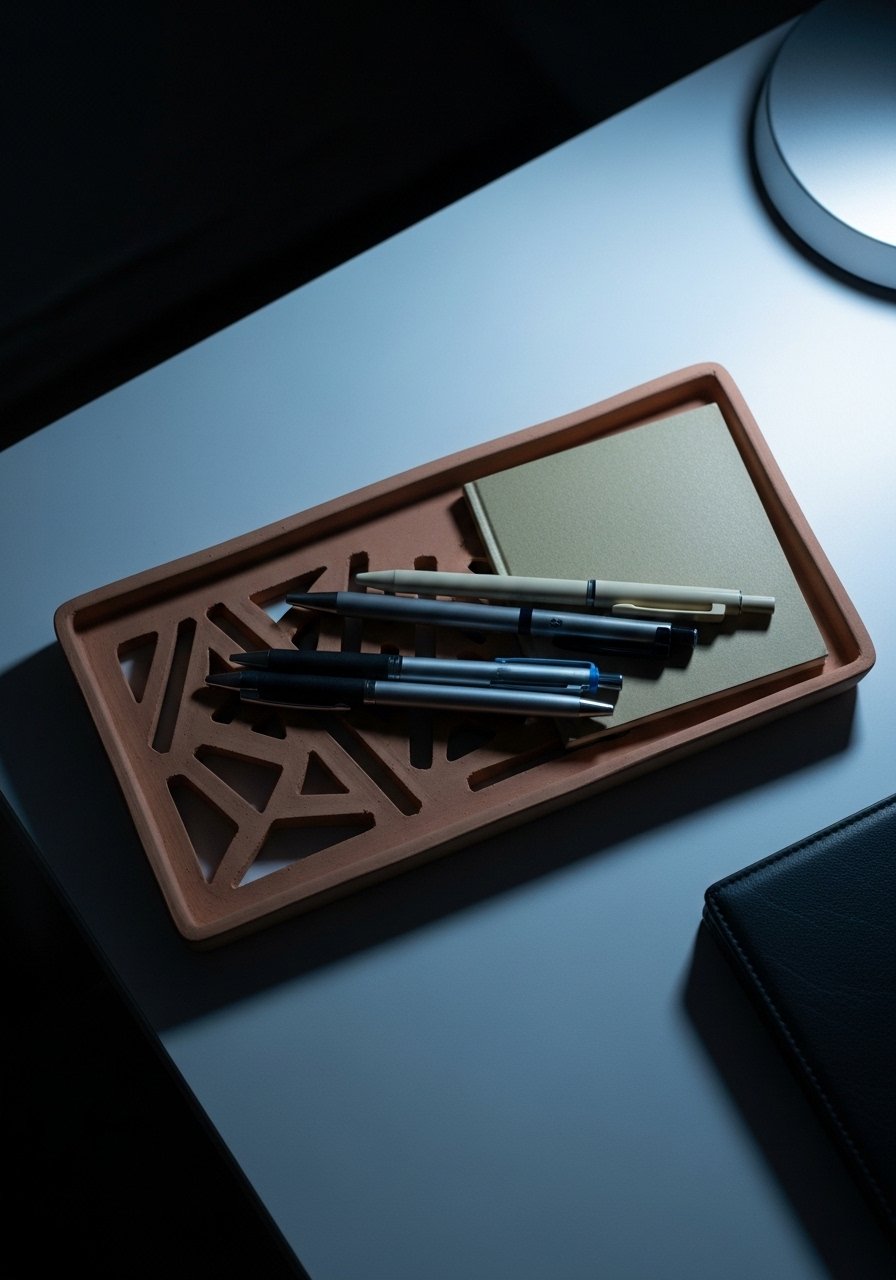
For my desk, I wanted function and a sculptural look so I cut triangle and circle holes into a long tray to hold pens and a phone. The negative space makes the tray feel light and doubles as cable passages. Keep cutouts at least 2.5 centimeters from the edge to avoid cracking. New makers often cut too close to the center and the tray loses structural integrity. A 30 by 10 centimeter format works well for most desks. I keep a small self-healing cutting mat nearby to protect surfaces during cutting.
Painted Pattern Tray for Layered Shelf Styling

I painted a tiny checkerboard on a 9-inch tray to echo the pattern on my throw pillow. Hand painting keeps it imperfect and human. Use a 1:3 scale rule, so the painted pattern elements are three times smaller than the pillow pattern nearby. A mistake many make is using paint that flakes. Use acrylic and seal well. For small brushes I like the control from a fine artist brush set. This tray plays nicely with the gallery wall idea if you want repetition.
Glazed Speckle Tray for Vintage Cabinet Styling
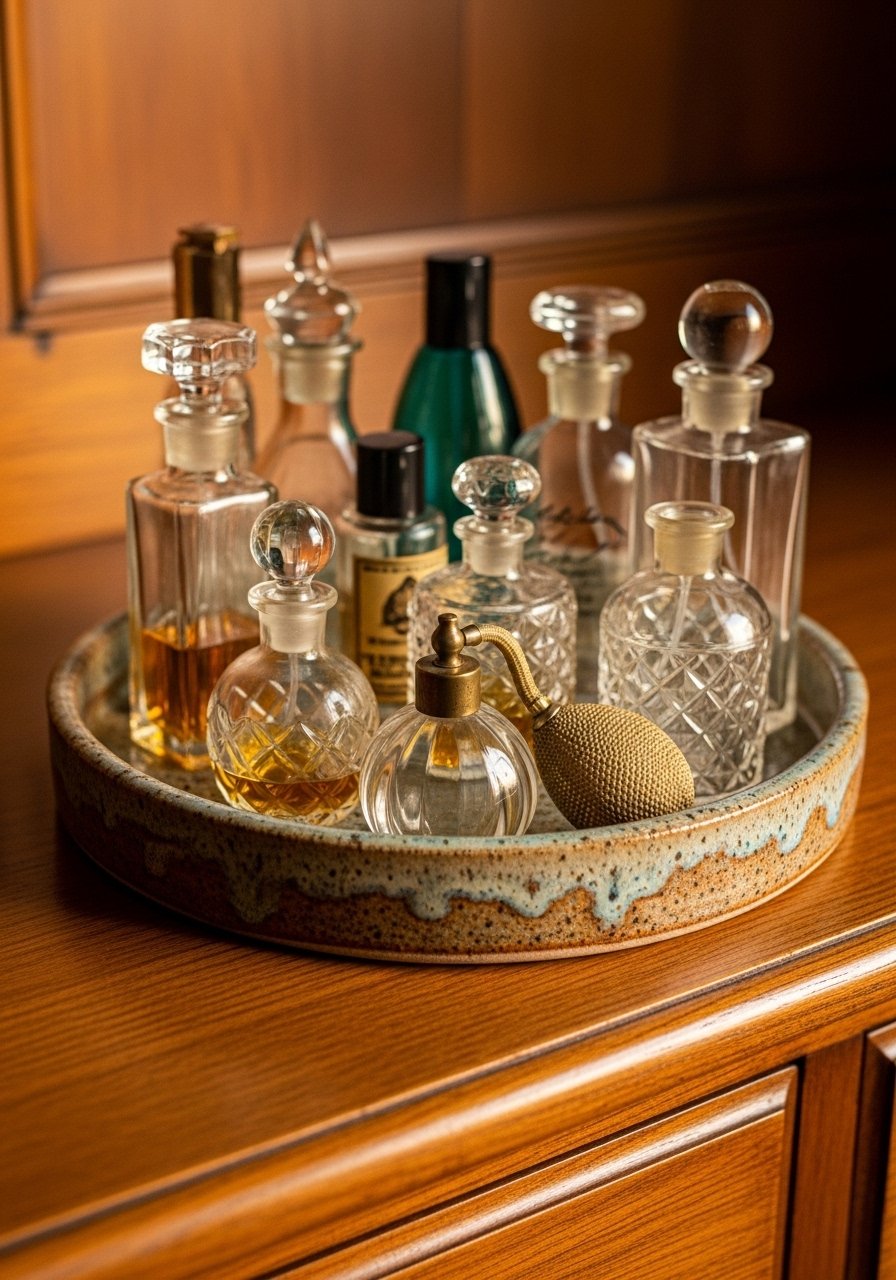
I glazed a small tray to hold vintage perfume bottles and suddenly the dresser looked intentional. Speckled glaze gives a nostalgic, slightly aged feeling without the clutter. Use a speckled glaze that fires to a satin finish and choose a 7 to 8 inch diameter for bottles and a jewelry dish. People often forget sealing the base so glaze sticks to wood. Add felt pads or a thin cork disc so it sits safely. For glazing at home try a beginner-friendly gloss ceramic glaze pack.
Your Decor Shopping List
Textiles
- Honestly the best $40 I have spent. Chunky knit throw in cream 50×60 inches, drapes beautifully over a sofa arm.
- Velvet pillow covers, set of 2 in deep green 22-inch, down insert sold separately. Similar at Target.
Wall Decor
- Brass picture ledges 24-inch, great for swapping small prints without new holes.
Lighting
- Small amber glass table lamp with 40W bulb, perfect for soft corners.
Clay & Tools
- Air-dry clay 2lb pack neutral, enough for several trays.
- Polymer clay sculpting tool set for smoothing and carving.
Finishing Supplies
- Clear satin sealing spray 11 oz, protects surfaces.
- Gold leaf application kit for thin metallic accents.
Hardware & Extras
- Leather strap handles 12 mm, for rustic pulls.
- Adhesive felt pads round pack of 24 for protecting surfaces.
Shopping Tips
White oak beats dark wood in 2026. Design feeds have shifted completely. These white oak floating shelves look current, not dated.
Grab these velvet pillow covers for $12 each. Swap them every season and the whole room feels different.
Curtains should puddle or kiss the floor, never hang halfway up. These 96-inch linen panels work for standard 9-foot ceilings.
Everyone buys five small succulents. One single 6-foot fiddle leaf fig has ten times the visual impact.
If you are new to clay, buy an inexpensive silicone round tray mold to keep shapes consistent while you learn.
Frequently Asked Questions
Q: How thick should a clay tray be so it does not warp?
A: Aim for 6 to 8 millimeters for small trays and 8 to 12 millimeters for larger ones. Thicker edges help keep the shape and make the tray feel premium, especially if you want to attach handles or rivets.
Q: Can I make these trays in an apartment without a kiln?
A: Yes. Air-dry clay and polymer clay work great and need no kiln. Use a clear satin sealing spray like this one if your tray will see moisture.
Q: What is a common styling mistake with trays?
A: People clutter them. Keep to the rule of three and vary heights. One tray should have a low object, a medium object, and a tall object, not a pile of small stuff that reads messy.
Q: Can I mix faux plants with real ones on a tray?
A: Yes. Use a real low-maintenance plant like a snake plant and one faux accent where you need height. A small faux plant can be part of the three-object rule if light is limited.
Q: Which sealer should I use for a tray that holds drinks?
A: Use a waterproof glossy sealer and make sure to seal both sides. For an at-home option, I use a glossy-sealant-spray to guard against rings.
Q: What size tray do I need for a nightstand?
A: 7 to 9 inches diameter or a 7 by 9 rectangle works for most nightstands. It leaves room for a lamp, a book, and the tray without overcrowding.
Q: How do I avoid my colors clashing with other decor?
A: Pick one color from the tray and repeat it elsewhere in the room. Stick to an 80/20 color ratio, where 80 percent is neutral and 20 percent is your accent.
Q: Are there tools I should buy only once?
A: Yes. A basic polymer clay sculpting tool set and a silicone mold will serve many projects and pay for themselves after a few trays.
