
My living room had nice furniture and decent lighting but it still felt like a waiting room. Took me embarrassingly long to figure out it was missing texture. Every surface was smooth, every color was flat, and nothing invited you to actually sit down. After one weekend of swapping frames and adding small photo vignettes, friends stayed longer and conversations started flowing.
These ideas lean soft modern and approachable. Most projects cost between free and $75, with a few splurges around $100 for nicer frames or shadow boxes. These work in entryways, family rooms, dining rooms used for memorial gatherings, or any corner where you want photos to feel intentional.
Intimate Tabletop Memorial Vignette for Living Rooms
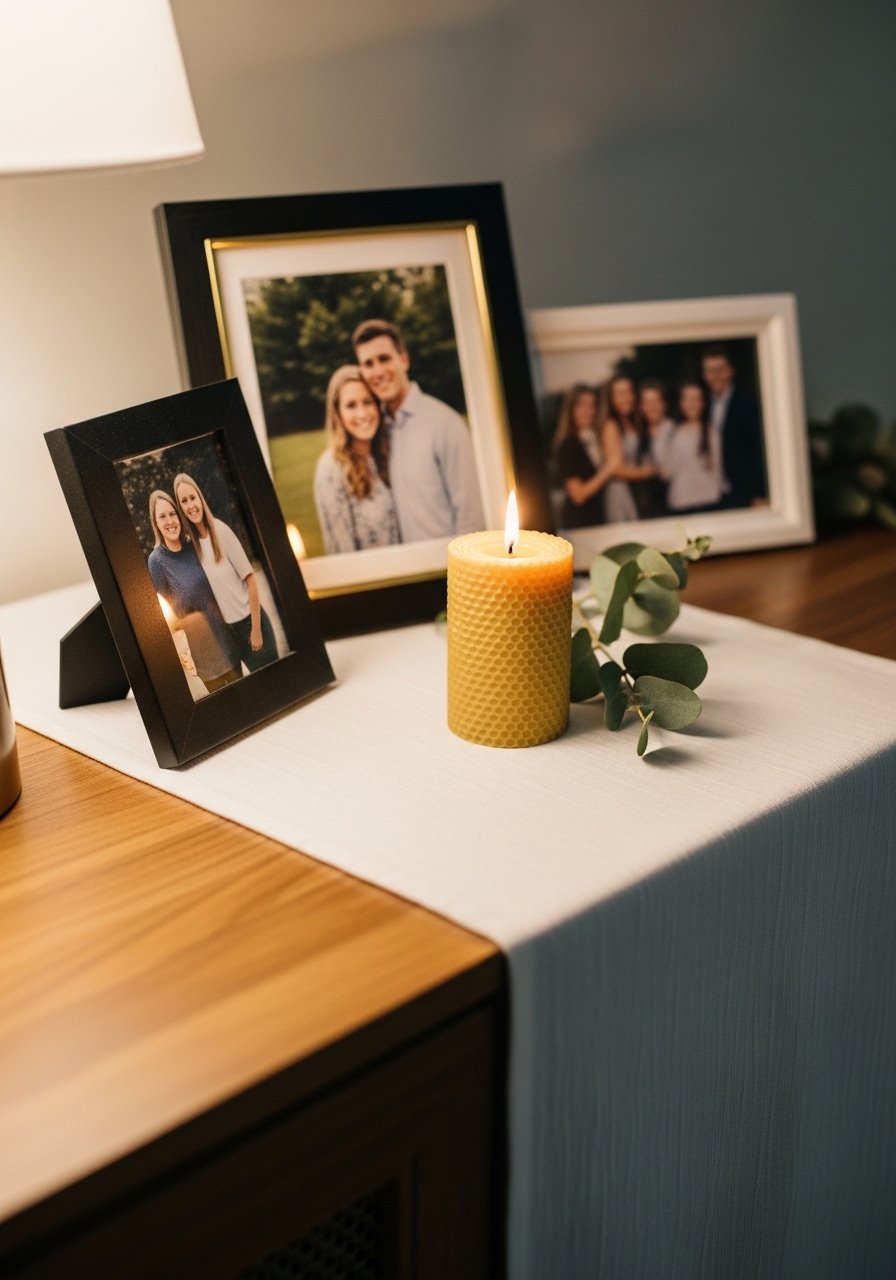
I started with a small console because my entry felt empty and guests needed a place to pause. Cluster three frames at varying heights to make it feel curated, not like a shrine. Use a 2:1 height ratio between the tallest and shortest frame so the eye moves naturally. I used 8×10 black wood frames for the main portraits and a 4×6 brass frame for a candid. Budget was under $50 total because I mixed thrifted frames with new ones. A common mistake is lining everything up perfectly. Slight overlap and different textures make the scene feel honest and lived in.
Salon-Style Photo Wall for Dining Rooms
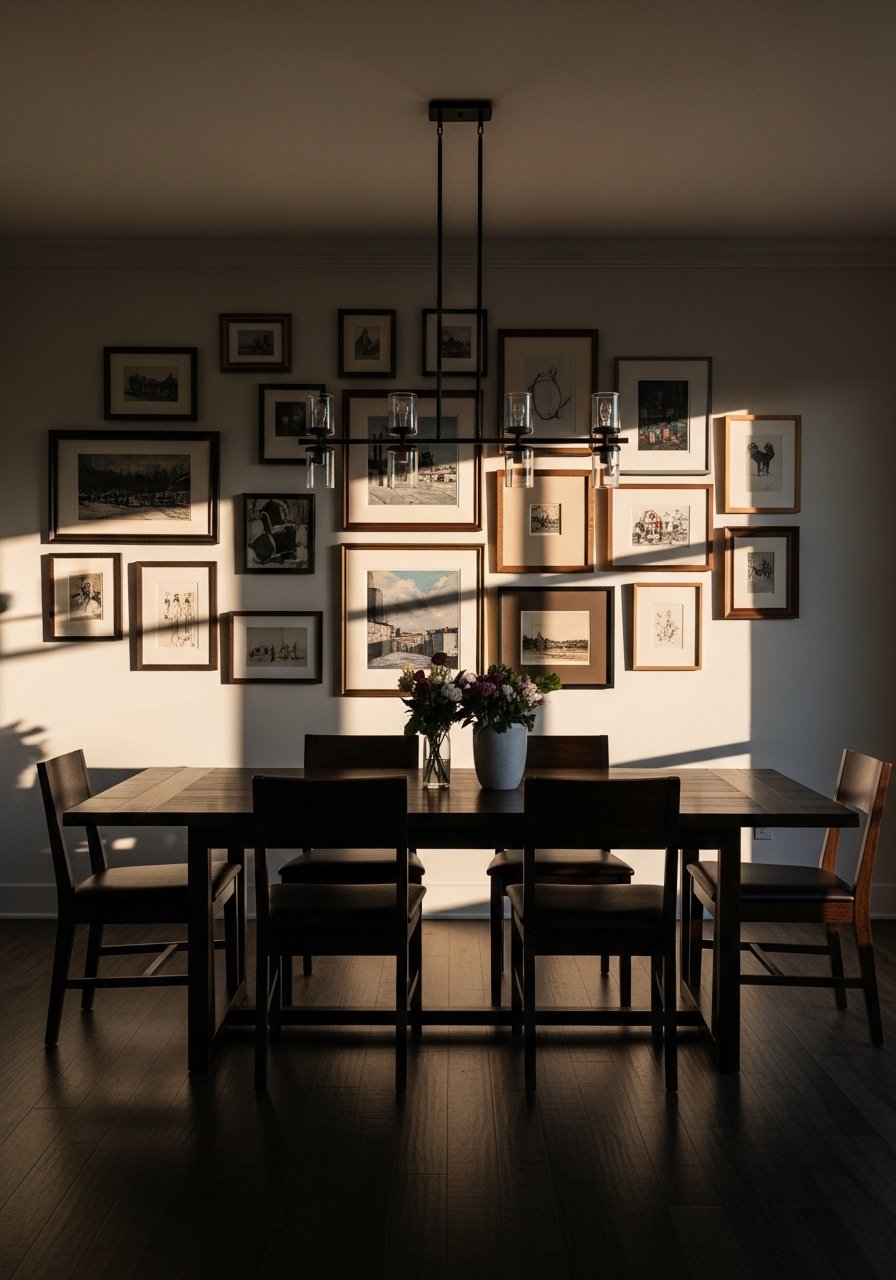
The first time I did a salon wall I pinned everything to kraft paper cutouts for a week before hammering nails. That simple rehearsal saves tears. This works great behind a dining table during a celebration of life, letting people look up and remember. Aim for a 60/40 layout where 60 percent of frames are clustered to one side. I used a mix of matboard-ready frames and thrifted mirrors. Expect $75 to $200 depending on how many mats you add. A mistake is making all frames the same color. Swap a grid of identical black frames for mixed metal and wood to feel more personal.
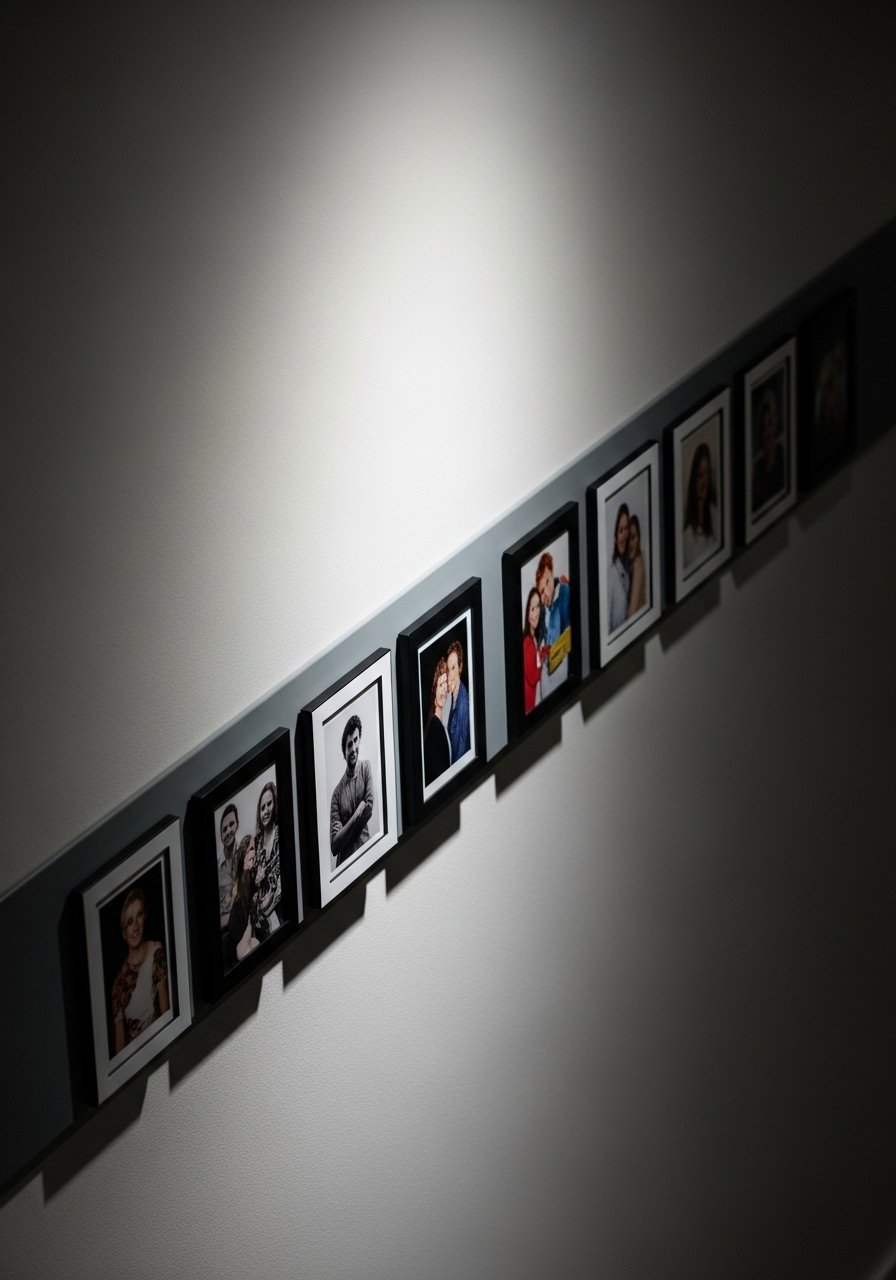
Clothesline Photo Display for Casual Corners

This is low commitment and great for renters. I clipped black-and-white wallet prints to twine above a couch and people kept stopping to point at faces. Print 2×3 or 3×5 strips so the line doesn't feel heavy. Mini wooden clothespins cost under $6 and look better than plastic clips. Budget under $25. The usual mistake is crowding the line. Leave negative space of about 4 inches between images so each face reads. Pair this with idea about fairy lights for a soft evening glow.
Magnetic Photo Frame Wall for High Traffic Halls
I needed something my kids wouldn’t knock down, so I installed magnetic frames on a narrow metal rail. The visual works because everything sits on one plane. Use magnetic picture frames for quick swaps after a life event, and keep a stack of prints by size. Plan for 2 inches between frames for breathing room. This method solves the problem of crooked frames and constant rehanging. Budget is $40 to $120 depending on rail length. A mistake is buying frames without a protective film, which makes photos fade faster in direct sun.
Shadow Box with Keepsakes for Shelves
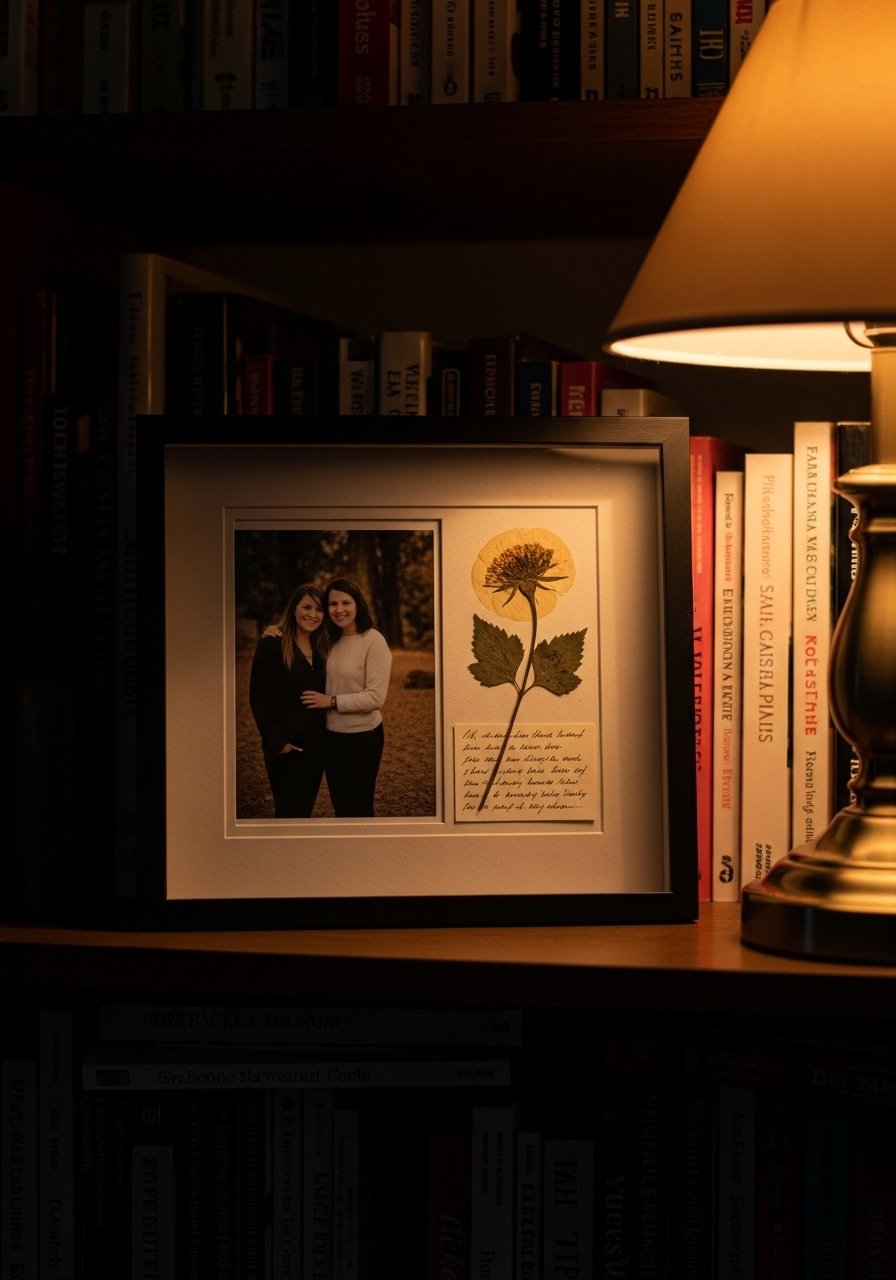
I made a shadow box for a memorial and tucked in ticket stubs and a dried corsage. It feels more intimate than a photo alone because it layers memory. Use an 11×14 shadow box so you can include a full 5×7 print and items without crowding. Shadow box frames range $25 to $80. People often mistake trying to fit everything into one box. Pick two items plus the photo and let negative space tell part of the story. This works on entryway shelves or mounted above a console.
Floating Ledge for Rotating Memorial Portraits
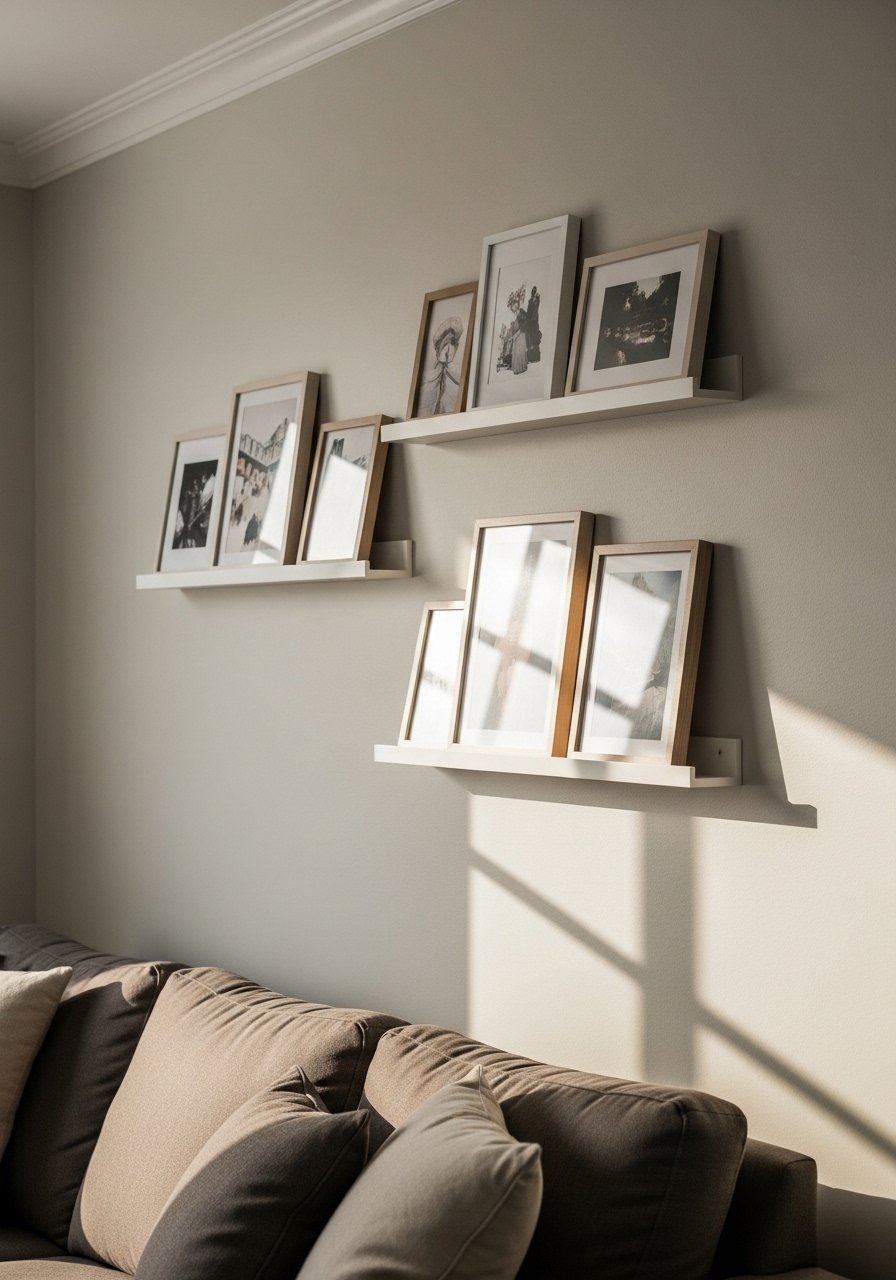
I found these ledges when I wanted an easy swap solution. Lean frames for a relaxed look and rotate images before gatherings. For 8-foot ceilings, install ledges so the top shelf sits about 60 inches from the floor. White floating picture ledges are under $30 each. Budget $30 to $100 depending on length. A mistake is hanging them too low, which makes the display compete with furniture. Pair with the tabletop vignette idea for continuity.
Wooden Clipboard Gallery for a Casual Family Room
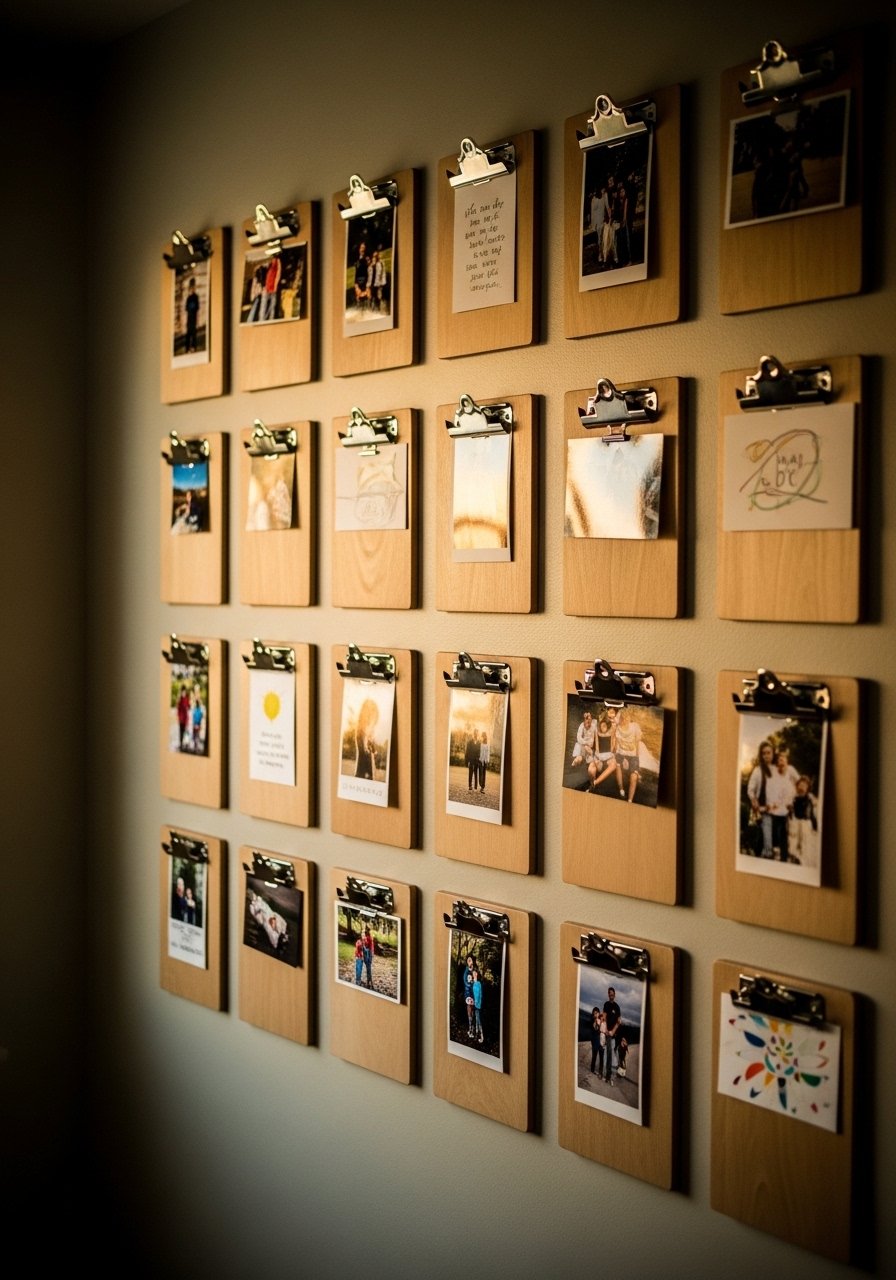
Clipboards let you change photos without tools, which is perfect when you want to update a memorial wall week to week. I painted the clipboards a uniform neutral to keep things calm and used 5×7 wood clipboards so all images read at the same scale. Keep a 2-inch margin around each image to stop the display from feeling cramped. Cost is under $50 for a small grid. Common mistake is mixing too many paper sizes. Stick to one format and it looks much cleaner.
Photo Mobile for Quiet Corners or Nurseries

This is one I made when floor space was limited. Laminate small photos and hang them on brass hoops so they turn gently in the breeze. Use 3 to 5 photos and center the lowest photo about 60 inches from the floor for sightlines. Brass embroidery hoops and clear laminating pouches keep costs around $25. A mistake is overloading the mobile. Keep it light so it moves and stays readable. It adds a quiet, gentle presence to bedrooms and reading nooks.
Collage Canvas for Emotional Impact in Entryways
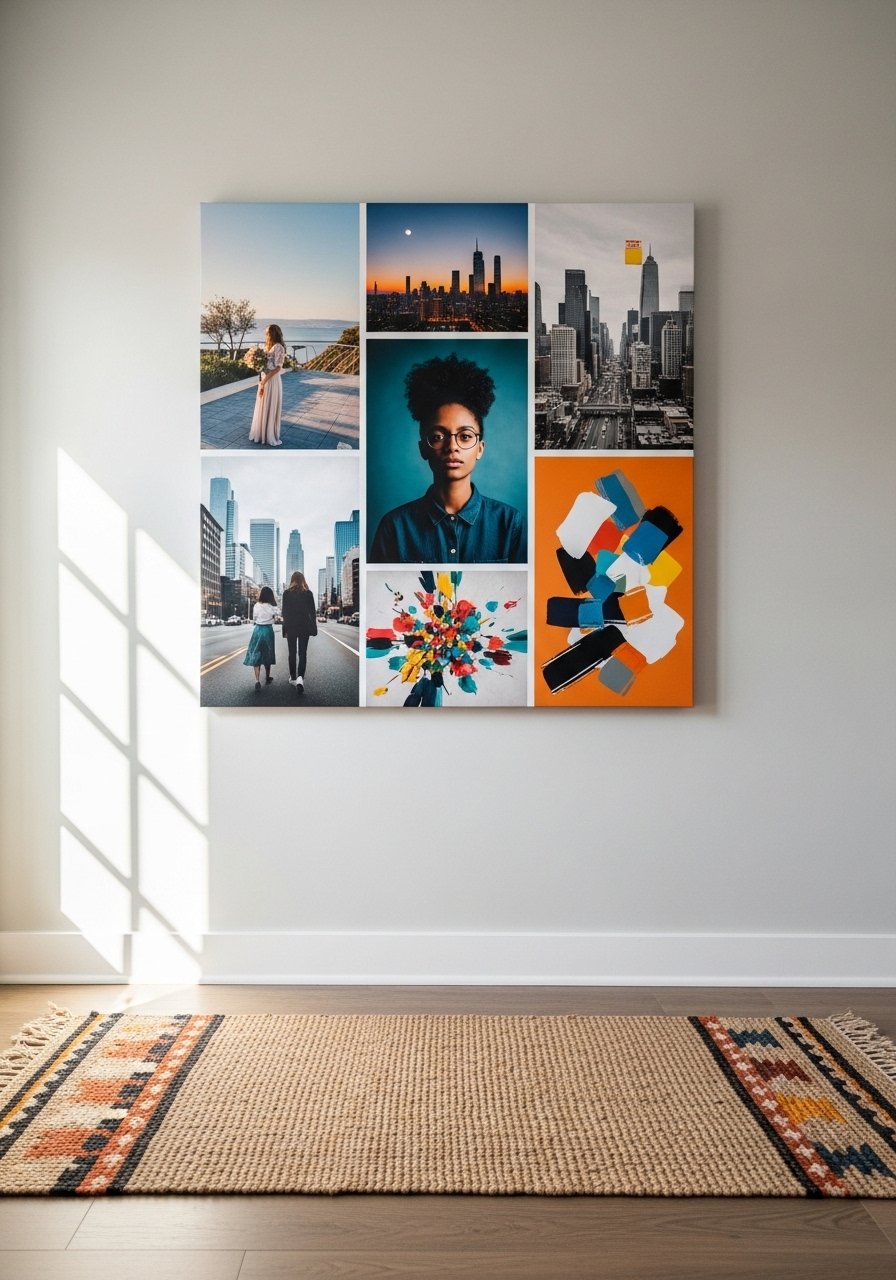
I printed a collage canvas for a celebration of life dinner and people kept pointing at the details. A 24×36 canvas with six evenly spaced images reads clearly from across a room. Use a 2:1 horizontal to vertical balance when placing portraits and candids. Custom photo canvas prints are around $60 to $120. Common mistake is over-editing photos; natural tones work best. This pairs well with minimal tabletop displays to avoid visual competition.
Vintage Window Frame Photo Panels for Cozy Dens
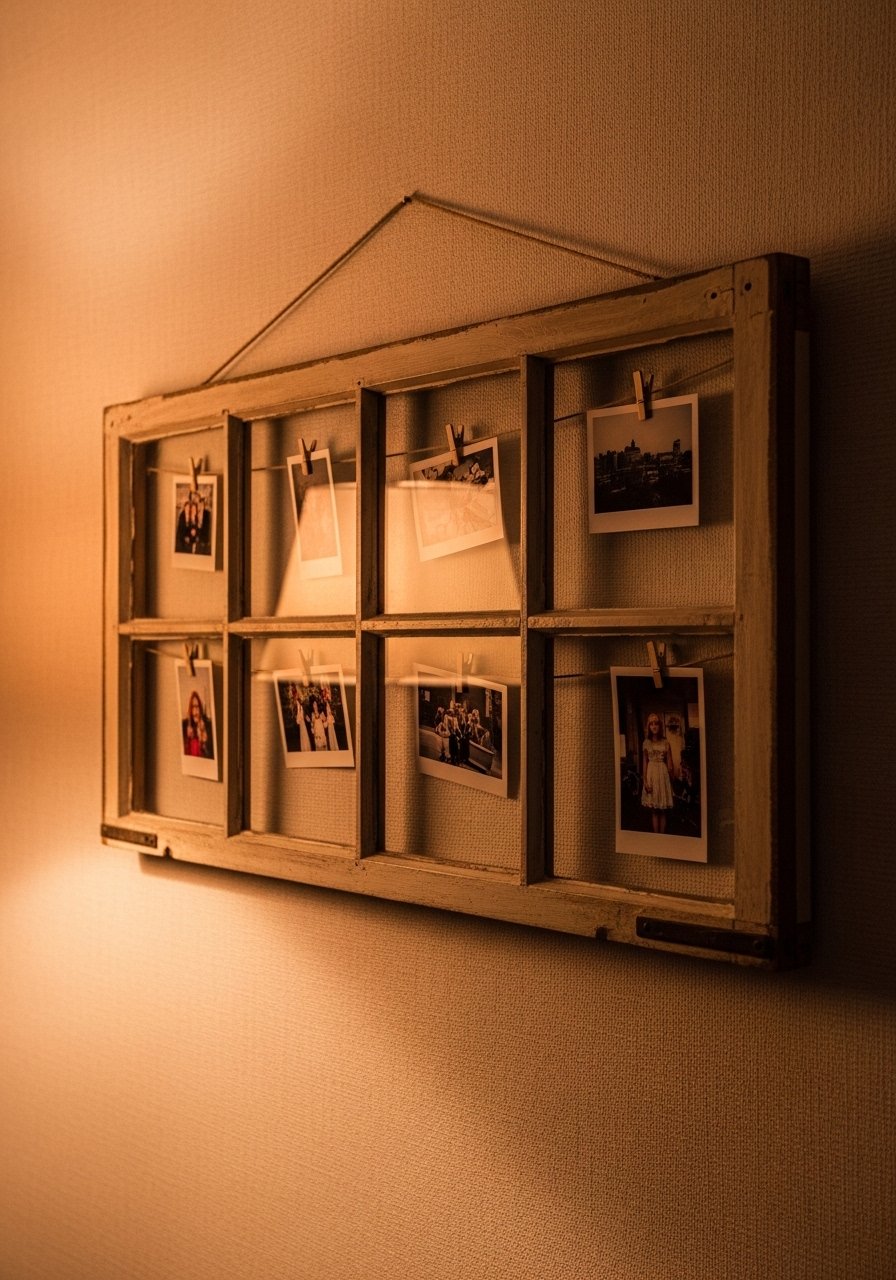
I rescued an old window frame and clipped photos in each pane. It felt like looking into snapshots of life. Use a 36-inch frame for four to six 4×6 photos so nothing is visually crowded. Vintage window frames can be found affordably or replicated with distressed pine. Budget $20 to $80. A common mistake is using glossy photos which glare under lamps. Opt for matte prints to keep it readable at night.
LED Backlit Photo Panels for Evening Gatherings
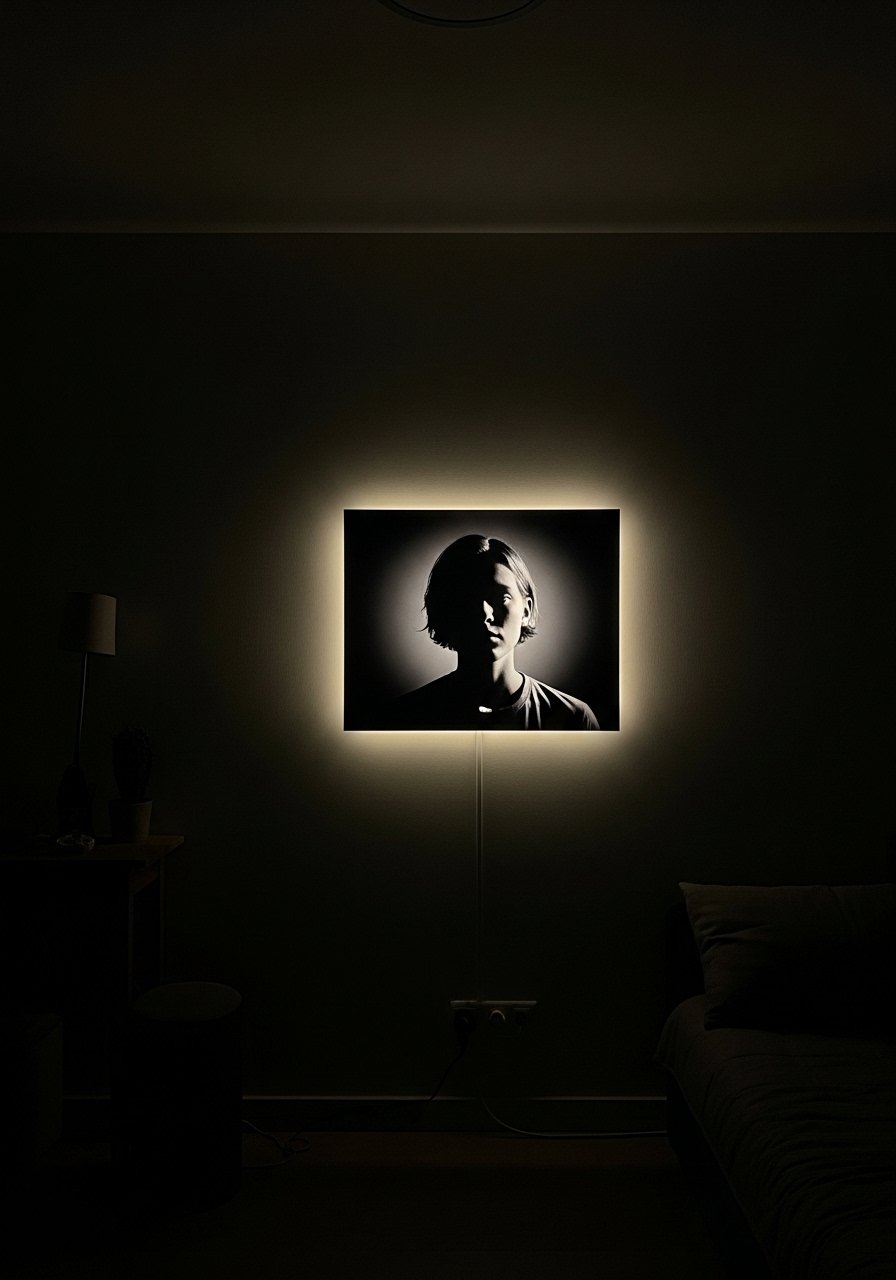
For evening memorials I wanted something that felt gentle and modern. Mount a thin LED panel behind a framed print to create a halo effect. Use a 12×18 panel and dimmable LEDs so you control the mood. LED light strip kits are under $30. Expect a $50 to $150 total cost. The usual mistake is using LEDs that are too cool in temperature. Choose warm white to complement skin tones and wood furniture.
DIY Photo Lampshade for Side Tables
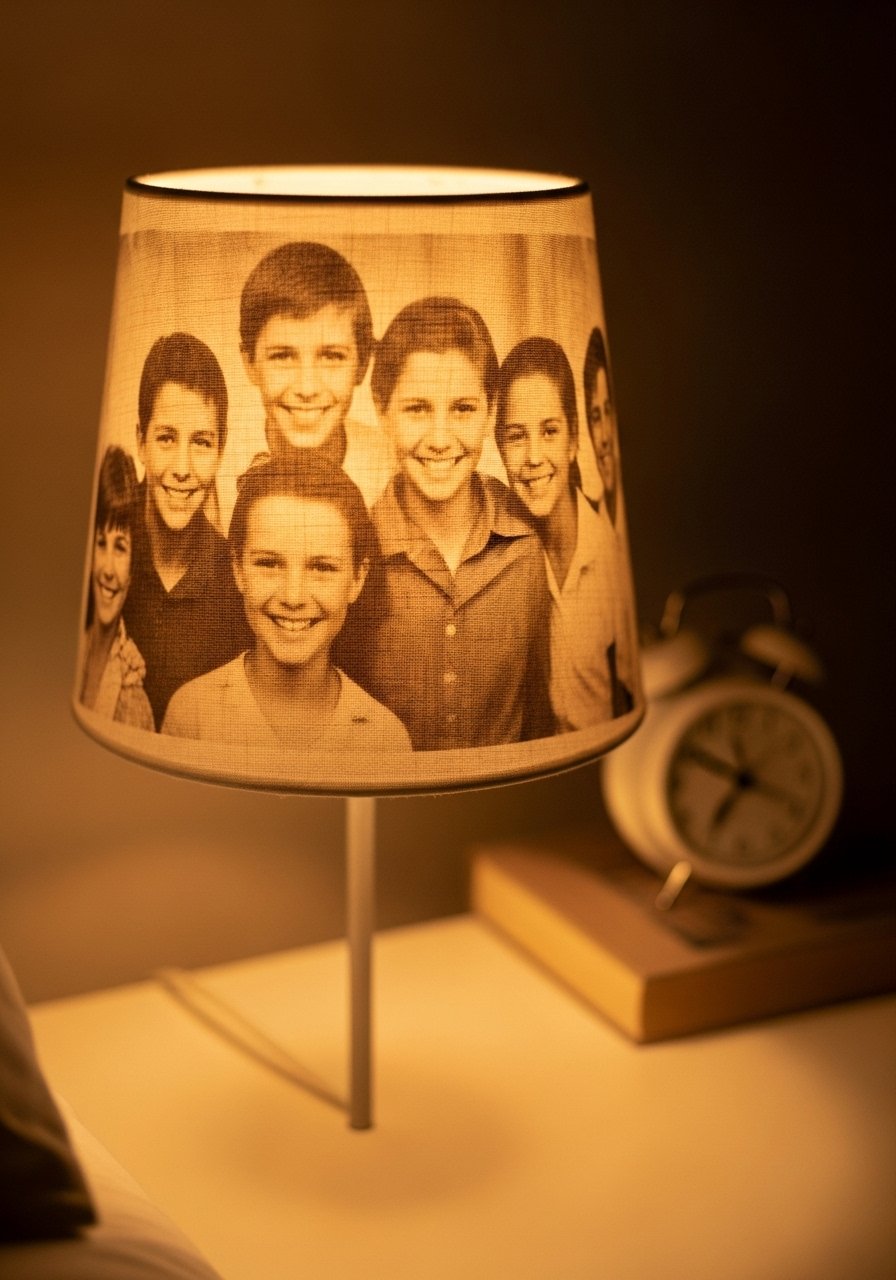
I made a photo lampshade for a memorial corner and it became the calmest piece in the room. Print the image on lightweight fabric and attach to a drum shade. Use a 12-inch diameter shade for balanced light on a standard table lamp. Printable fabric sheets and a drum shade kit keep the project under $60. People often forget to adjust exposure when printing for lamps. Images need slightly higher contrast to read under light.
Digital Photo Frame Loop for Modern Family Rooms
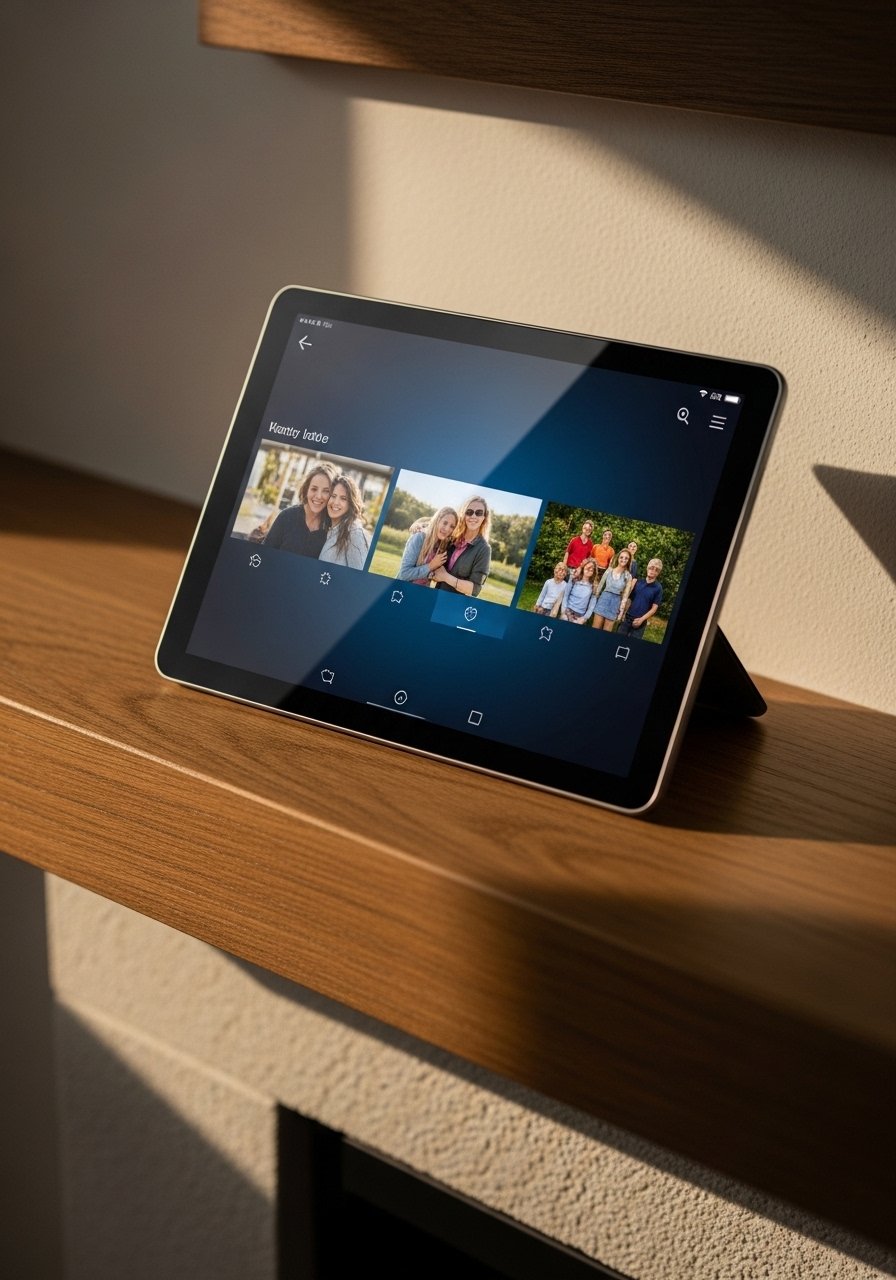
When we had too many photos to pick a few favorites, a digital frame saved the day. Pick a model with a USB slot and Wi-Fi so relatives can send images remotely. I set mine to a slow 8-second change interval and it felt restful. Wi-Fi digital photo frames range $70 to $200. A mistake is fast transitions which feel noisy. Keep transitions slow and avoid auto-play music unless you want a soundtrack for the room.
Memory Ribbon Board for Community Events
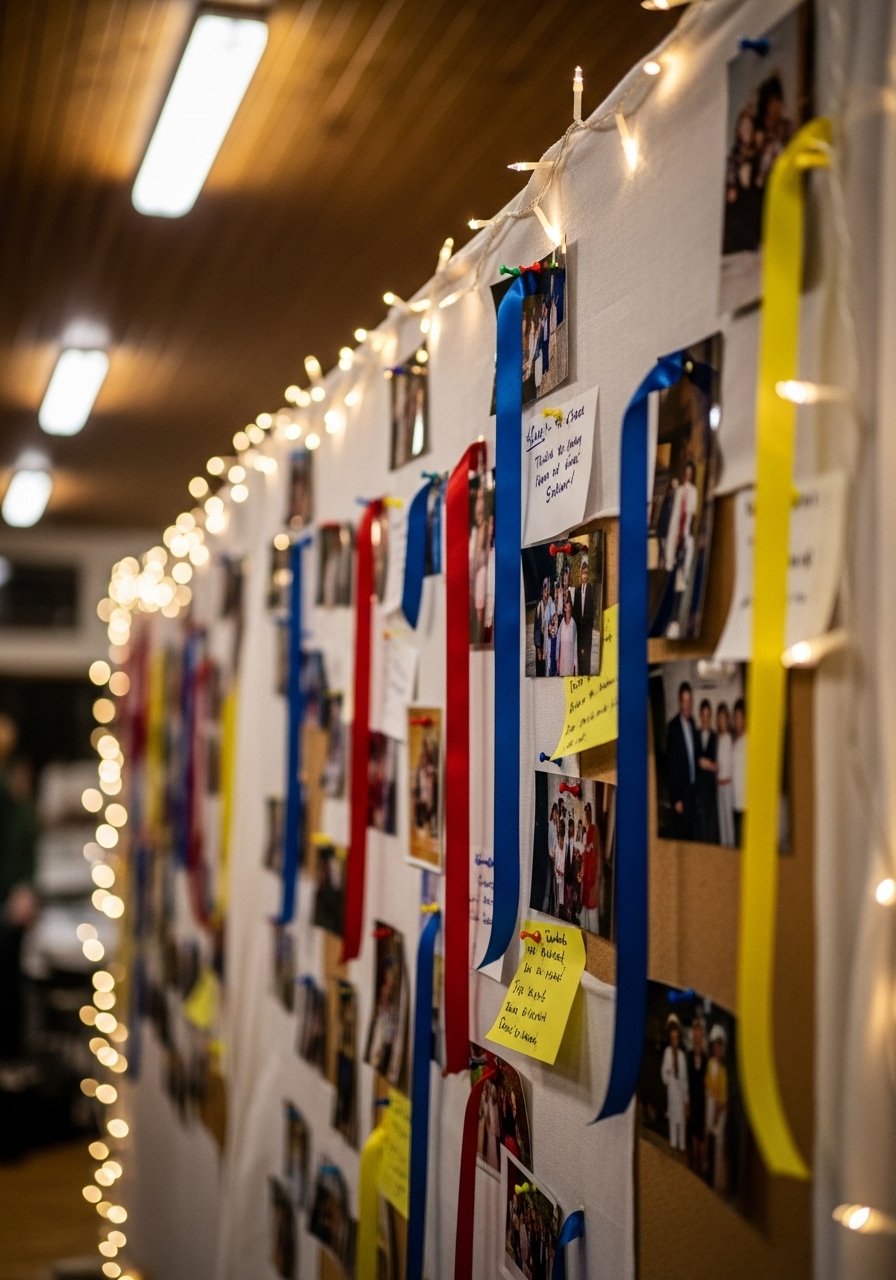
At a celebration of life potluck I set up a ribbon board so guests could pin photos and notes. Use a 24×36 fabric-covered cork board and arrange ribbons vertically every 6 inches. Decorative push pins and printable photo sleeves make it tidy. Budget under $40. The mistake people make is running out of pins. Provide extras and a small instruction sign so guests feel comfortable contributing. This doubles as a guest book and a living collage.
Pocket Photo Ladder for Staircase Landing
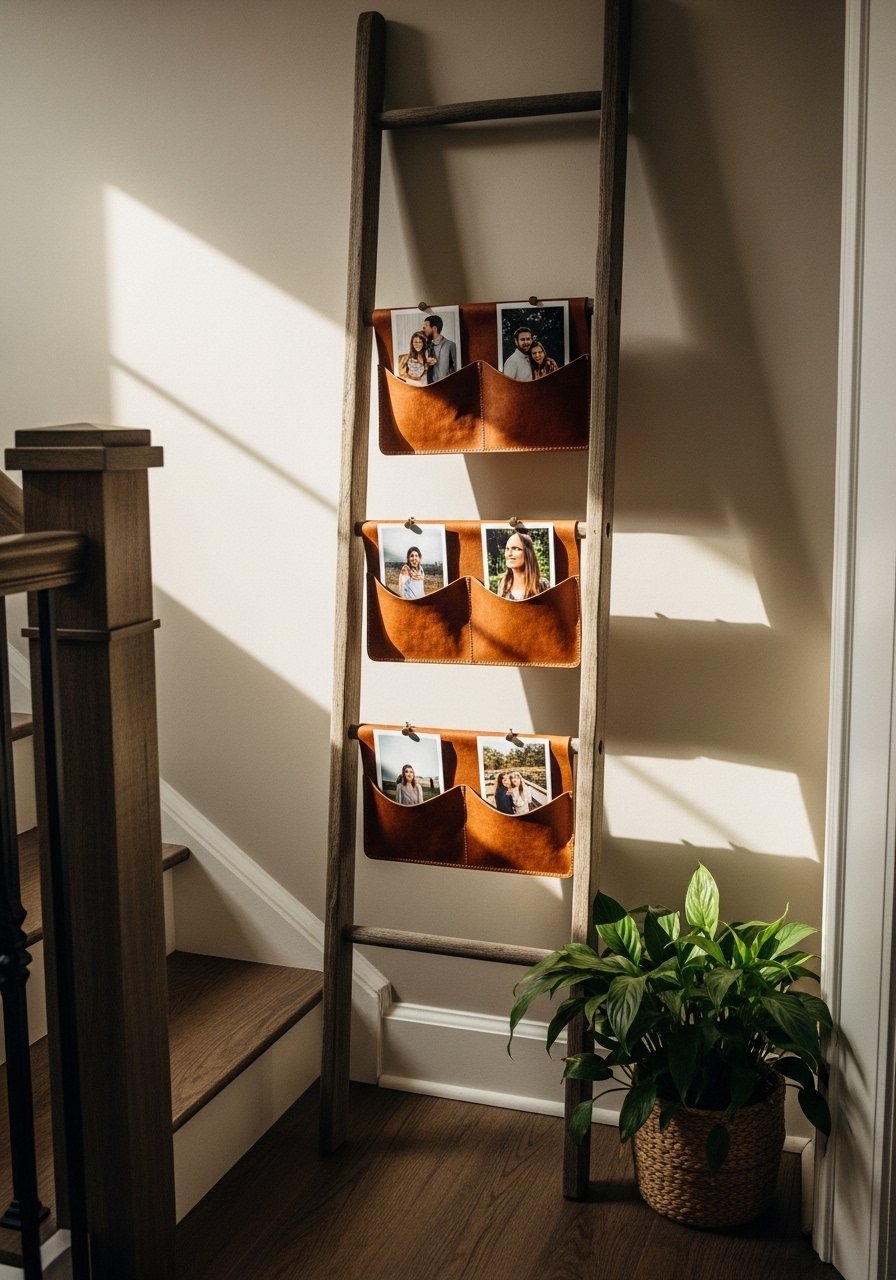
I leaned an old ladder in my stairwell and slipped photos into leather pockets. It adds vertical interest and keeps photos at eye level while you climb. Use pockets sized for 4×6 prints and space rungs about 10 inches apart. Leather photo pockets are about $15 to $30 for a set. Budget $30 to $90 including ladder refinishing. A mistake is using big framed images that fight with the stair proportions. Keep scales small and cohesive.
Your Decor Shopping List
Textiles
- Honestly the best $40 I have spent. 22-inch down-filled linen pillow covers, set of 2 in warm gray for layered seating
- Chunky knit throw in cream (~$35-55). Drape over an arm for instant warmth
Wall Decor
- White floating picture ledges, 36-inch (~$25 each)
- 8×10 black wood picture frames, set of 3 (~$30). Similar at Target or HomeGoods
Lighting
Display Hardware
- Mini wooden clothespins, pack of 100 (~$6)
- Magnetic picture frames, 5×7 set (~$40)
- 11×14 shadow box frame (~$30)
Printing & Paper
Budget Finds
Shopping Tips
White oak beats dark wood in 2026. Design feeds have shifted completely. These white oak floating shelves look current, not dated.
Grab mini wooden clothespins for $6. Use them for photo lines and table place cards so swapping content is painless.
Curtains should puddle or kiss the floor, never hang halfway up. These 96-inch linen panels are right for standard 9-foot ceilings.
Lead with one anchor piece, then layer. Start with a 24×36 collage canvas and build smaller frames around it.
Everyone buys five small succulents. One single 6-foot fiddle leaf fig has ten times the visual impact.
If you are renting, use command picture hanging strips to avoid holes. They hold well and remove cleanly.
Frequently Asked Questions
Q: Can I mix candid snapshots with formal portraits on the same wall?
A: Yes, mixing candid and formal photos tells a fuller story. Keep a consistent color treatment, like converting all to black and white or using the same matte border. That keeps unity even with different eras and outfits.
Q: What size prints work best for a salon wall above a dining table?
A: Aim for one large piece about 24×36 or two 18×24 pieces, then fill in with 5×7 and 8×10 prints. Keep the top of the highest frame roughly 6 to 8 inches above the chair backs so it feels connected to the table.
Q: How do I keep photos from fading if I display them near windows?
A: Use UV-protective glass in frames and print on archival matte paper. Avoid direct sun angles during the warmest hours. A practical quick fix is rotating prints seasonally so nothing sits in sun long term.
Q: Is it okay to use faux plants in memorial displays?
A: Yes, faux plants are fine and low stress. Use a taller faux like a fiddle leaf fig when you need height without maintenance. This artificial fiddle leaf fig works well in dim corners.
Q: How do I store extra photos so they stay ready for rotating displays?
A: Keep prints in archival sleeves by size in a shallow box, labeled with dates or events. A flat 12×15 photo storage box keeps prints flat and dust free and saves frantic last-minute printing.
Q: Can I create a memorial display that feels respectful but not somber?
A: Yes. Mix warm textures like a linen runner, a single candle, and candid smiling photos. Small details matter. I used a neutral 2:1 balance of portraits to candids and people commented the setup felt honoring and gentle rather than heavy.
