
My closet used to be a black hole. I would open the door and throw anything I could not decide on onto the floor. One weekend I pulled everything out, measured shelf depths, and realized I had three wasted inches above every hanger. That tiny measurement led to a weekend of fixes and a closet that actually makes getting dressed faster and less annoying.
These ideas lean practical and slightly modern. Most projects cost under $50, with a few splurges around $100 for long-term pieces. They work for reach-in closets, small walk-ins, and even bedroom corners where you need smarter storage.
Double the Hanging Space with Tension Rods and Slim Hangers
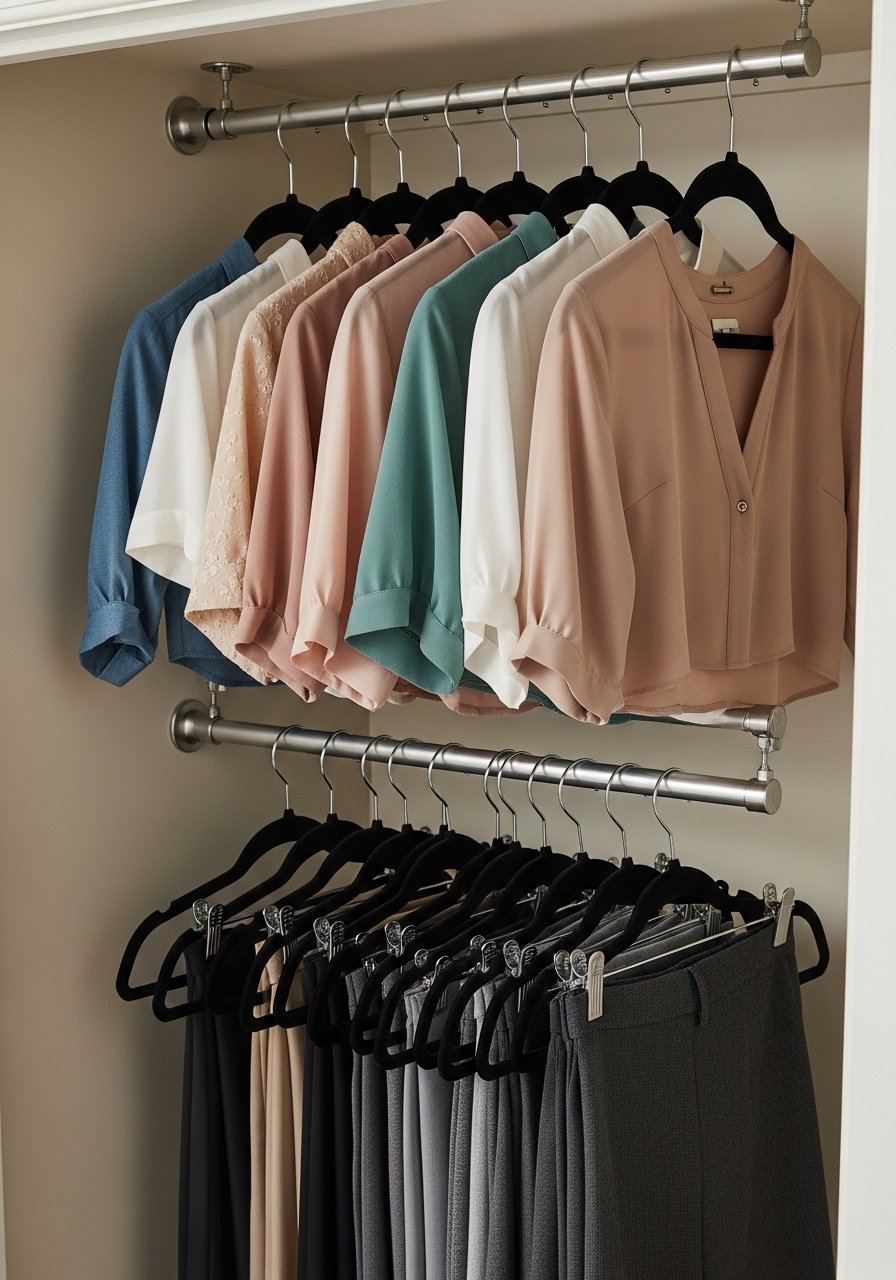
I added a tension rod about 36 inches below my existing bar to double my hanging space. It worked because I separated tops from bottoms by length and used slim velvet hangers to keep everything slim. Budget: under $30 for two rods and a pack of hangers. I like slim velvet hangers because they grip but do not bulk up the rail. Common mistake is leaving too little space between rods. Measure so you have at least 10 inches between tiers for folded pants or skirts. This is perfect for rental closets and small walk-ins.
Add Under-Shelf Baskets for Invisible Storage
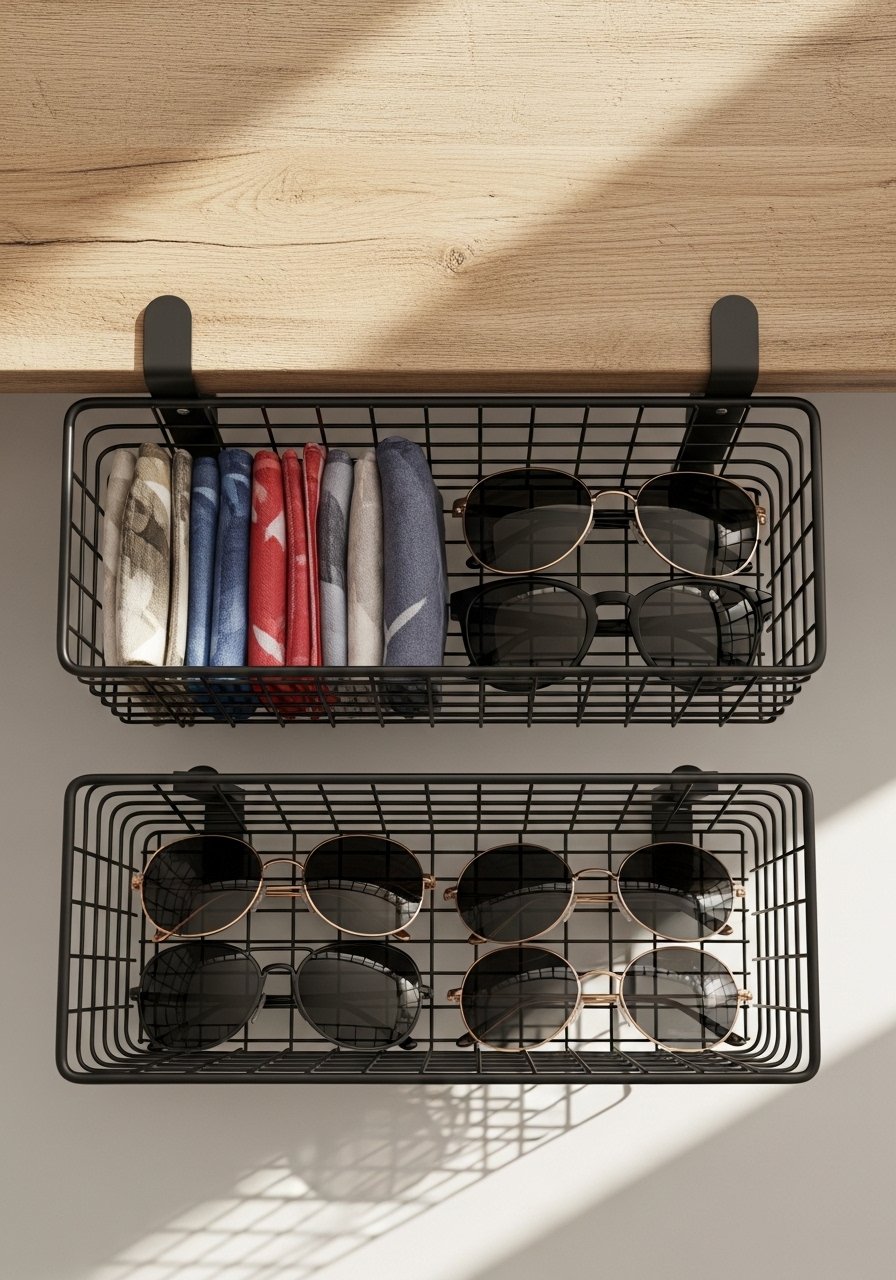
I thought boxes would fix my scarf chaos, but under-shelf baskets were the real win. They slide onto a 10 to 12-inch deep shelf and make use of the dead space under folded sweaters. I bought under-shelf baskets for about $15 each. The visual result is cleaner because textiles are hidden but accessible. A common mistake is buying baskets too wide for the shelf lip. Measure the shelf thickness first. Pair this with label tags on the front edge so you avoid fishing for accessories in the dark.
Build a DIY Shoe Wall with Clear Stackable Boxes
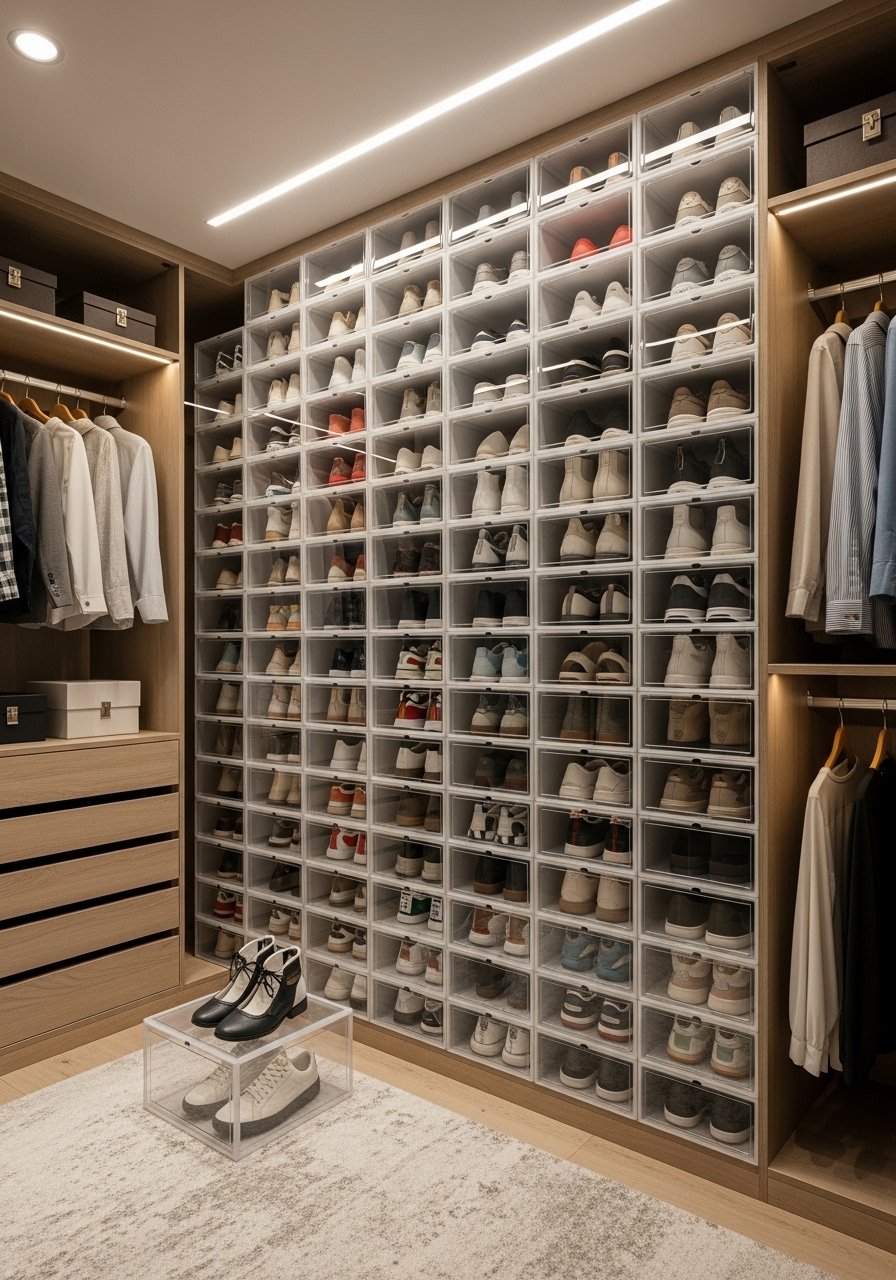
I stopped tripping over shoes the day I labeled and stacked clear boxes. Use 12x7x5 inch clear boxes for flats and low sneakers, and 14x9x6 inch for boots and heels. Clear shoe boxes make outfit planning faster because you see what's inside. Expect to spend $25 to $60 depending on quantity. Many people buy opaque bins and forget what's inside. The extra transparency cuts decision time in half. If you have limited floor depth, stack two columns and label front and side for easy reach.
Install Pull-Out Baskets for Everyday Items
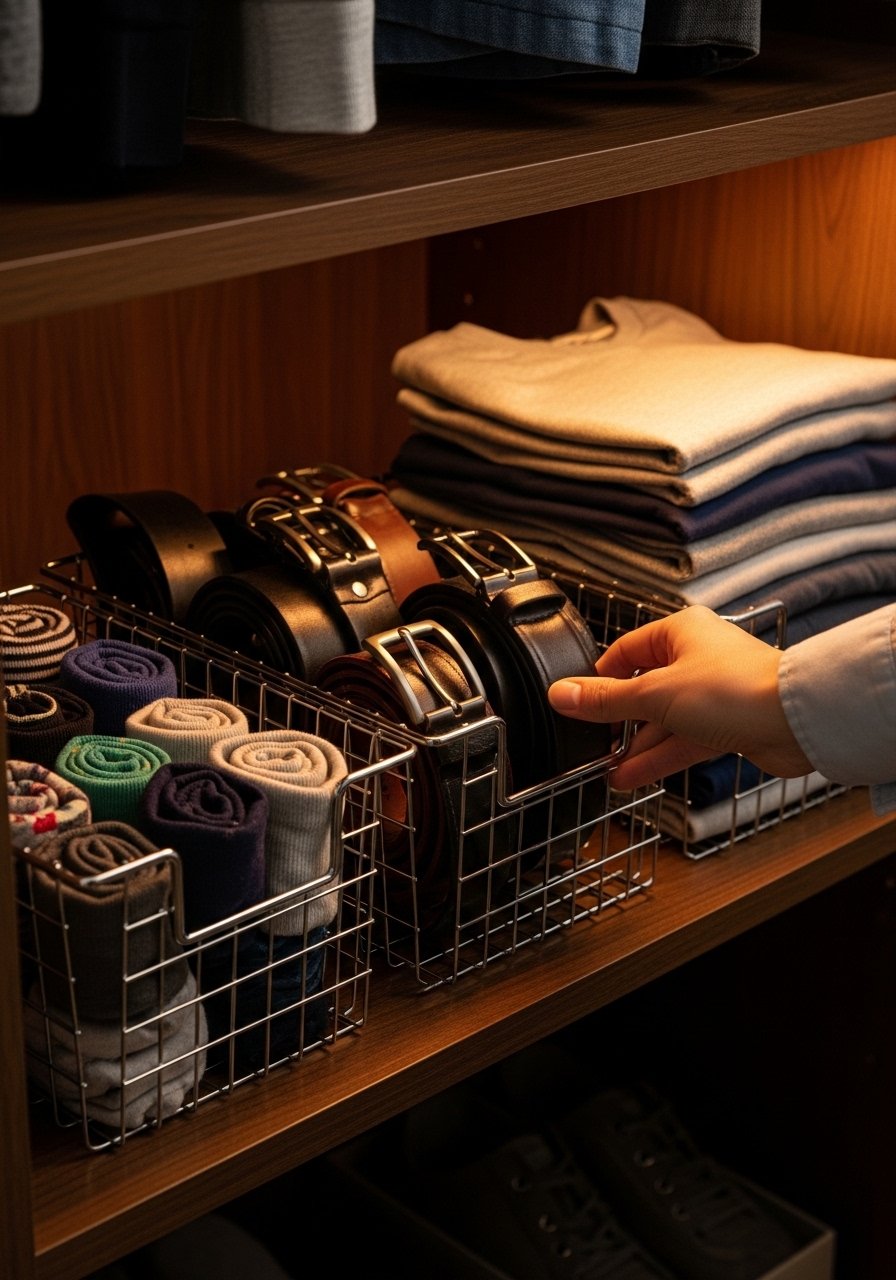
Pull-out baskets are a closet game I added after noticing daily items kept landing in drawers. A 12-inch deep pull-out basket fits neatly beneath hanging shirts and holds socks, belts, or activewear. I used pull-out wire baskets with rails that cost about $35 each. They make small closets feel organized because everything has a visible place. A common mistake is mounting them without drawer stops, which lets baskets slide all the way out. Leave a 1-inch gap at the front so the basket rests on the lip when closed.
Use Tension Rods for Vertical Shoe Storage
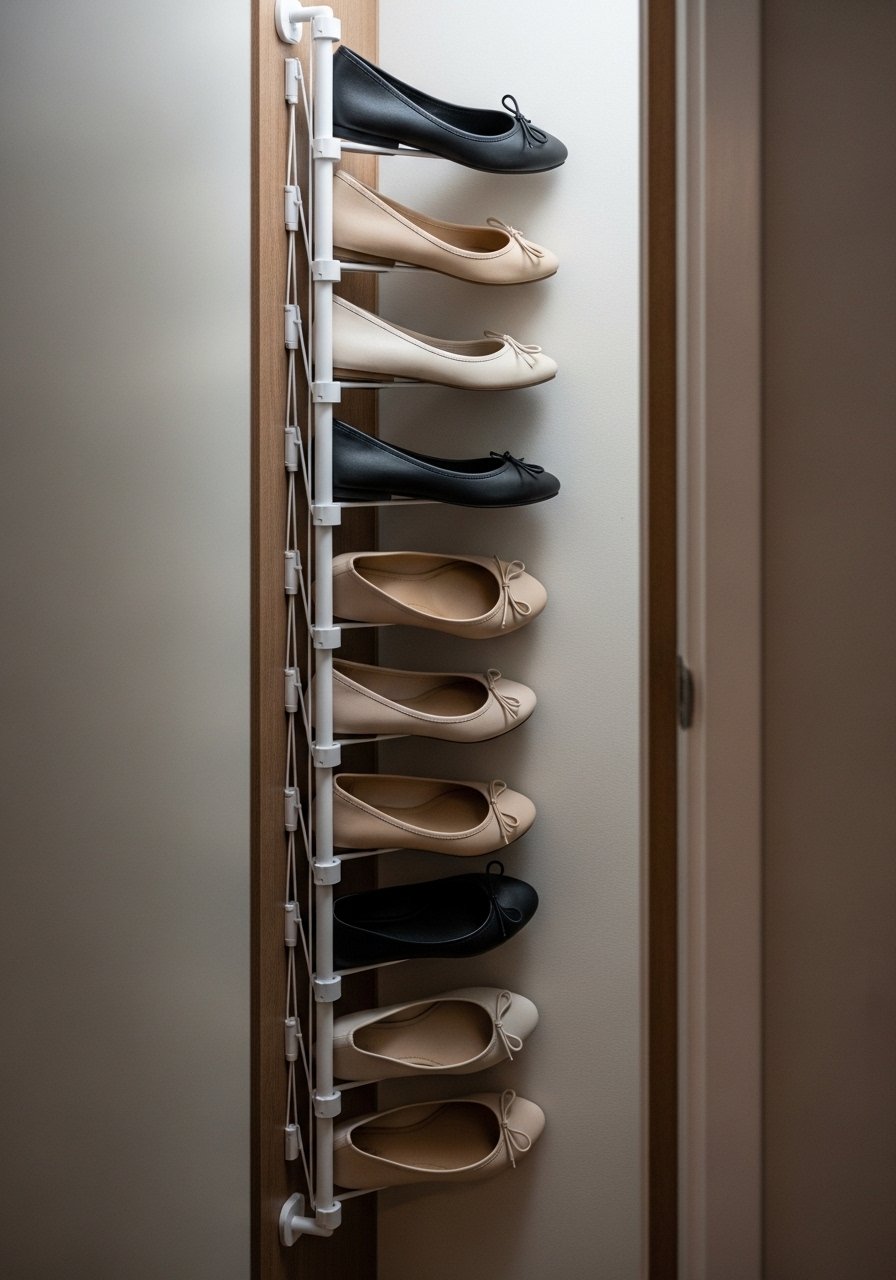
My flats used to make a sad pile by the door. I solved it by putting a short tension rod vertically between shelf and floor and sliding flats over it by the heel. It sounds weird, but it saves shelf depth and keeps shoes visible. Short tension rods cost under $15. The tactile detail that helps is using soft foam heels as a spacer so shoes slide on and off easily. Mistake people make is placing the rod too high. Keep it low enough that heels clear the baseboard.
Create a Belt and Scarf Rack with Pegboard
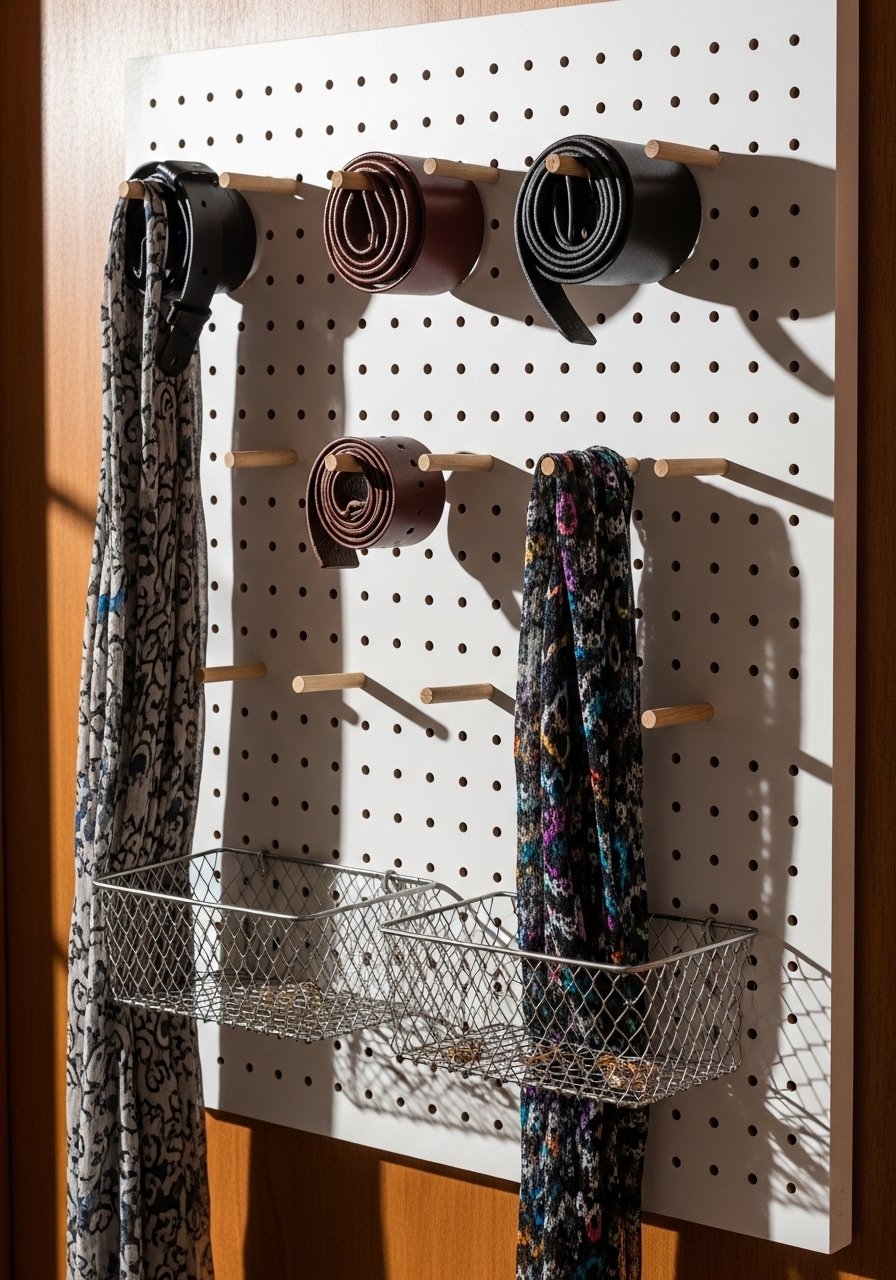
A pegboard installed on the inside of my closet door freed up drawer space and made belts finally accessible. Use 12×24 inch pegboard panels and hang peg hooks at 3-inch intervals for even spacing. Pegboard hooks and kit run about $25. What makes this work visually is grouping items by color or function so you do not get a jumbled look. Common mistake is crowding hooks. Leave a two-hook gap between items so everything hangs straight and is easy to grab.
Repurpose a Dresser Drawer as a Pull-Out Jewelry Tray
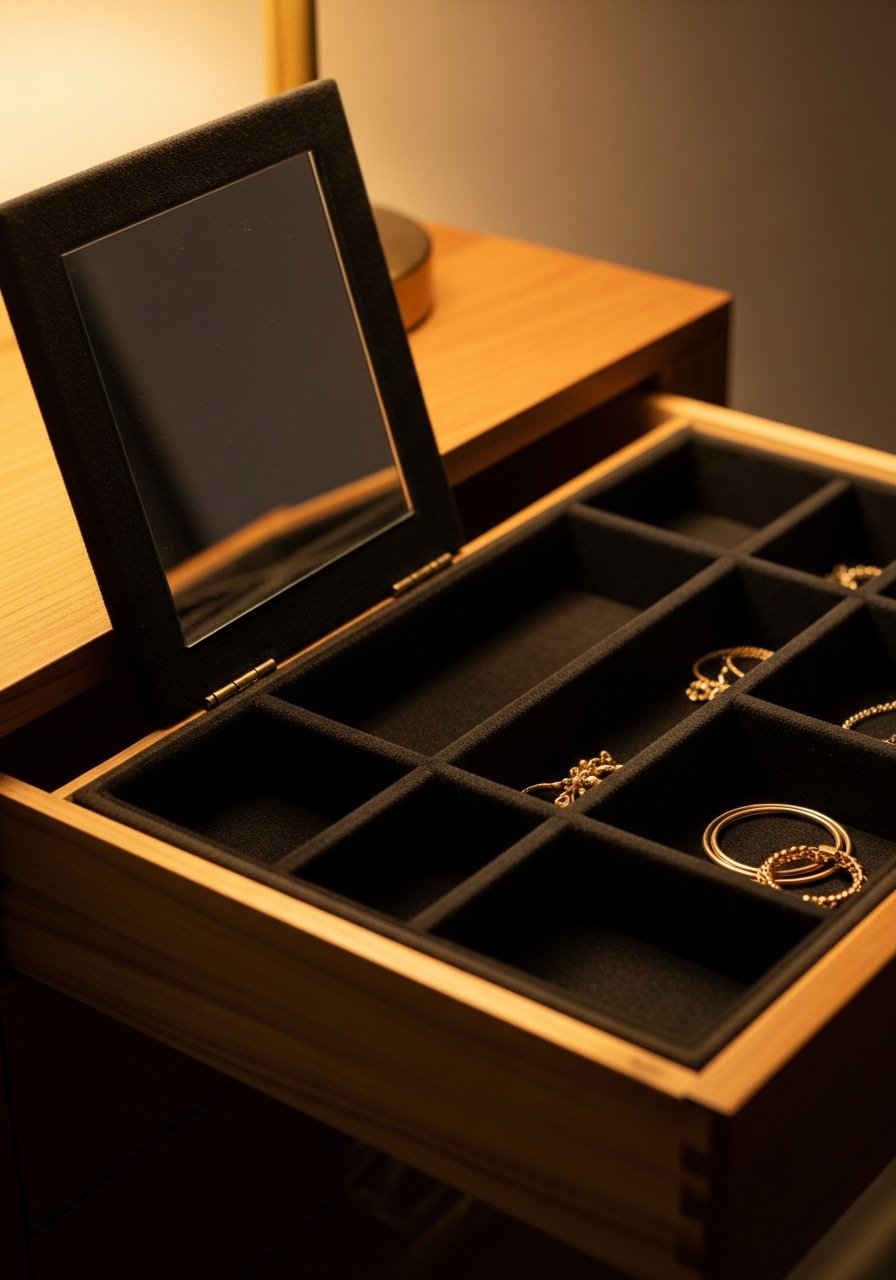
I pulled a shallow old dresser drawer, added velvet liner and divided it into sections, and slid it into a lower shelf opening. Necklaces stop tangling, and bracelets are visible. Use felt drawer liners and adjustable dividers for a custom fit. Adjustable drawer dividers cost about $20. The detail people skip is measuring the internal drawer depth and subtracting 1 inch for the liners so dividers stay tight. This trick works great in bedrooms where you need to free up dresser top space.
Make a Fold-Down Ironing Station from a Cutting Board
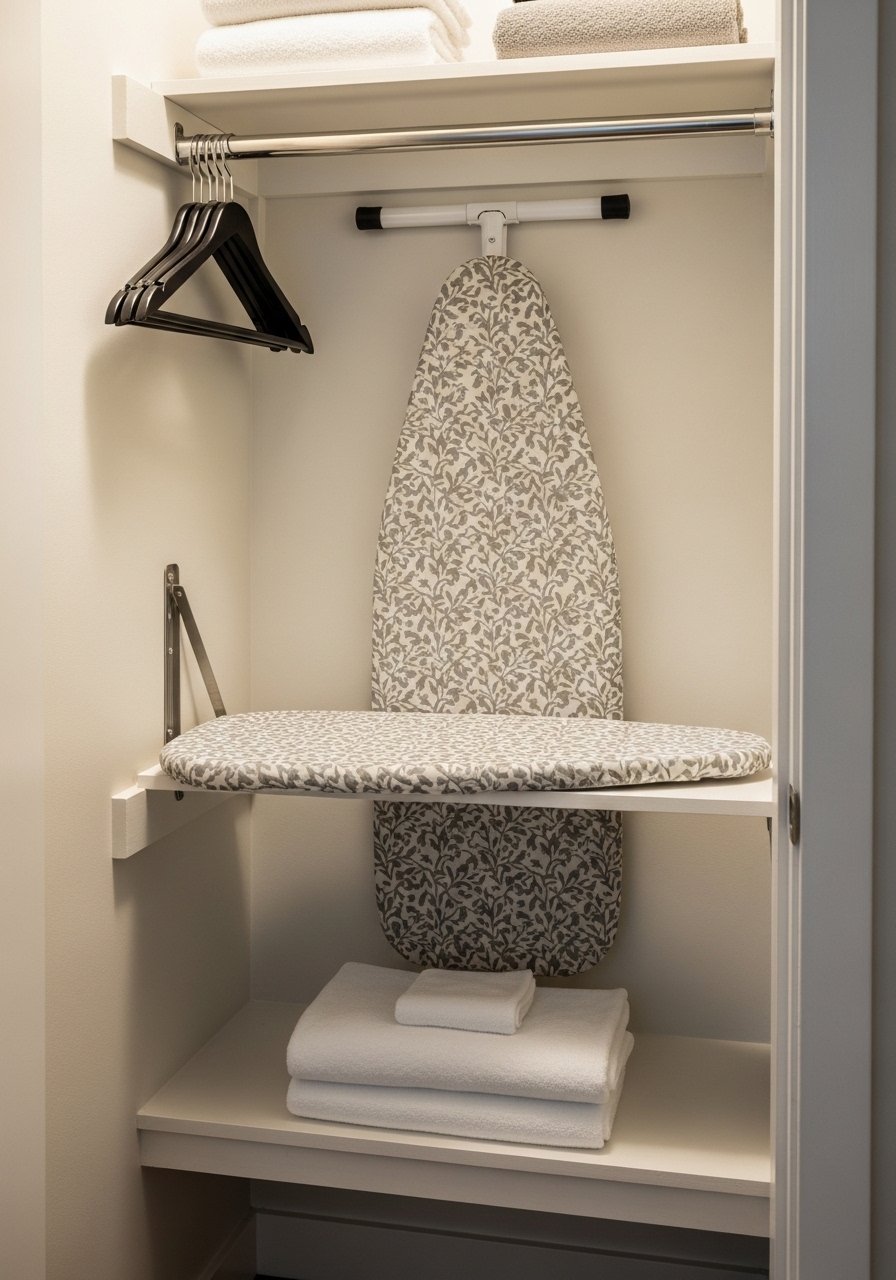
I hate lugging the ironing board out. I built a tiny fold-down station using a 24×12 inch cutting board, hinge, and wall cleat. It supports quick touch-ups and tucks flat when not in use. Hardware was under $30 and the board was around $15. Use lightweight plywood for a cleaner look. People assume they need a full board. For closet doors or narrow nooks, a half-size works perfectly. Just make sure the mount is secured to a stud to avoid wobble.
Use Clear Labels and a Consistent Color Ratio
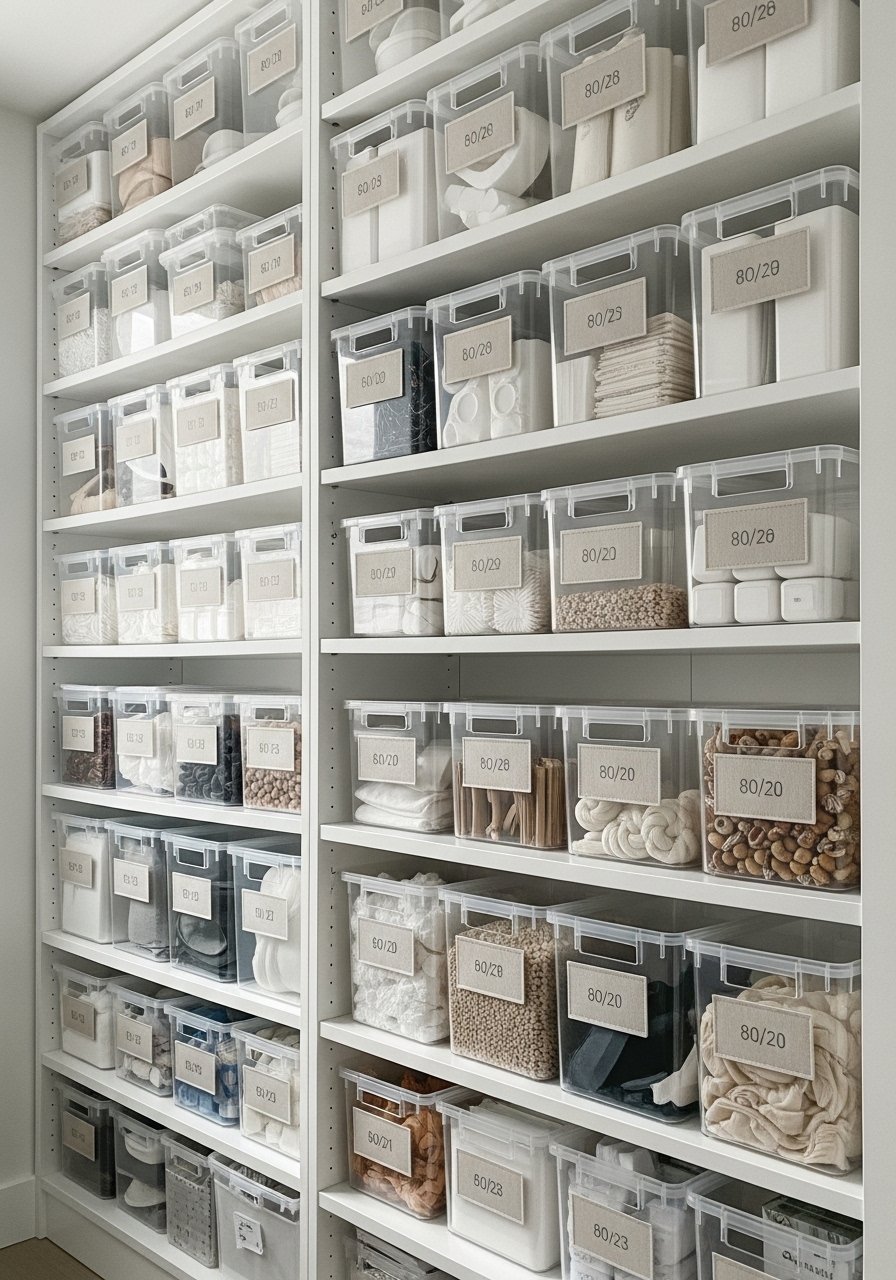
I started labeling everything and realized labels are a visual cue that changes behavior. Stick with two neutral label colors and one accent color. I used an 80/20 color ratio by keeping 80 percent neutral bins and 20 percent a single accent color so the closet looks unified. Waterproof label stickers are cheap and look tidy. Common mistake is using too many label styles, which makes organized spaces look messy. The specific detail I love is labeling the short side of bins as well as the front for visibility on deep shelves.
Install LED Strip Lights Under Every Shelf
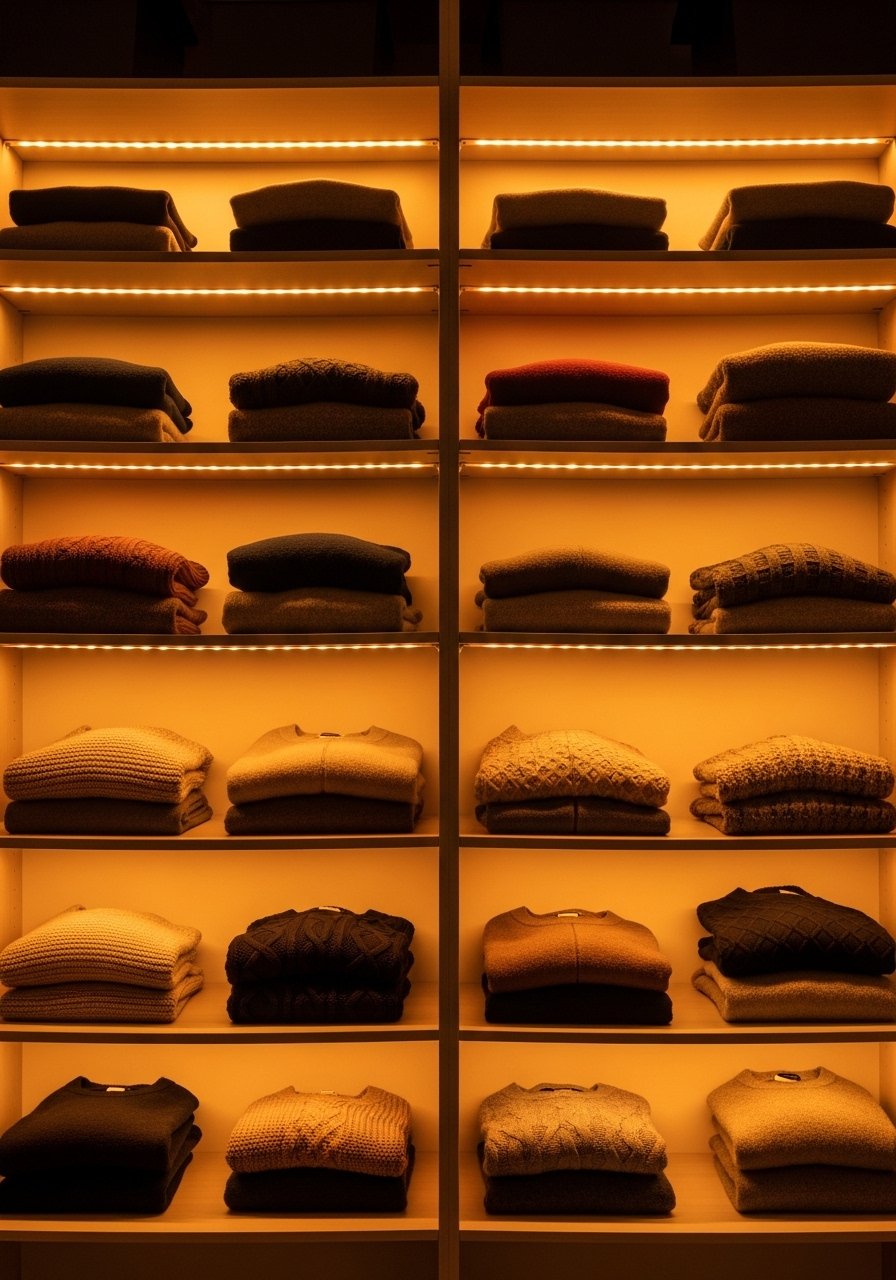
Turning the lights on in my closet used to be a negotiation with a switch. I installed stick-on LED strips under each shelf and it made a bigger visual difference than reorganizing. Stick-on LED light strips are around $20 to $40. The key detail is using warm white bulbs and sticking lights 1 inch back from the shelf front to avoid glare. A common mistake is installing a single overhead bulb and hoping it reaches every corner. Shelf lighting creates zones and makes morning outfit decisions faster.
DIY Drawer Dividers from Thin Plywood for Deep Drawers
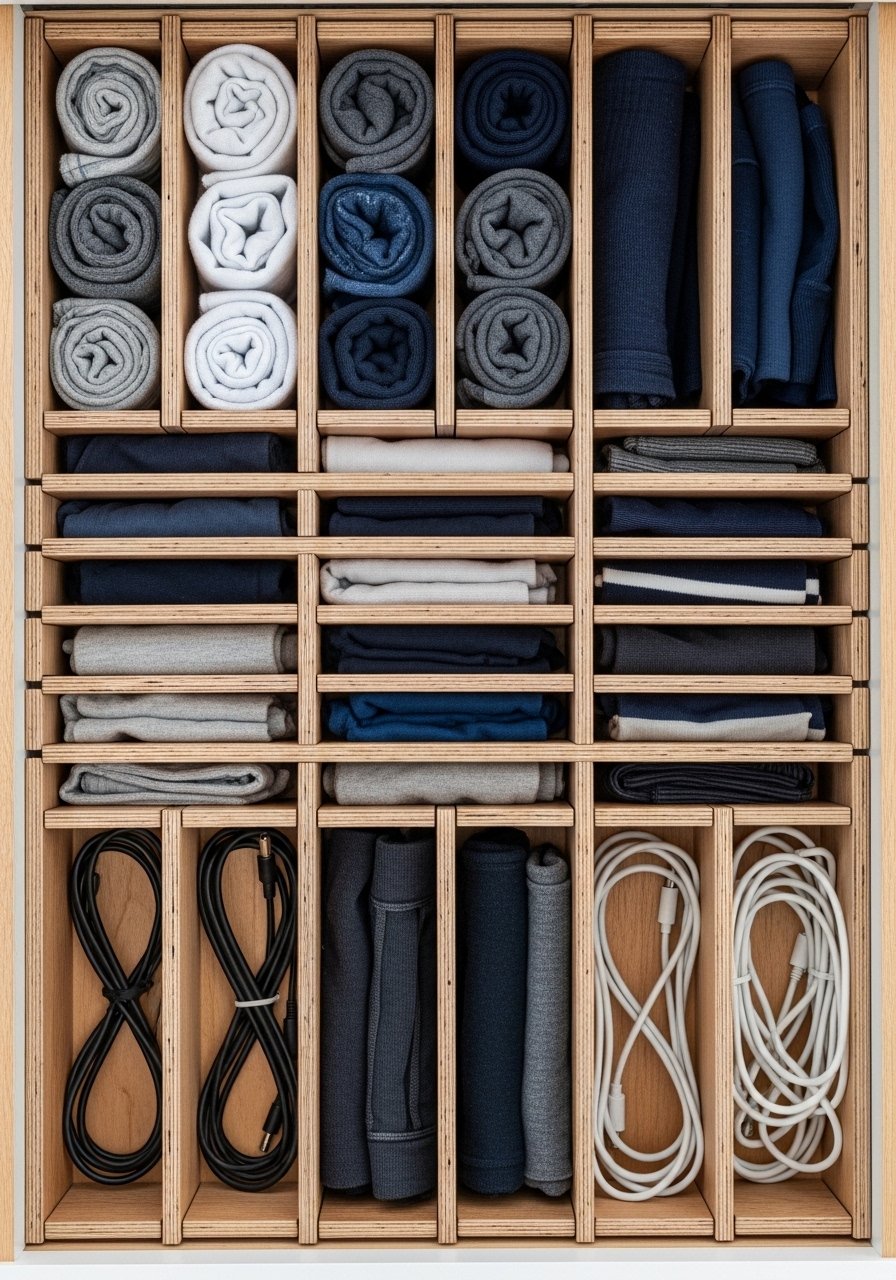
I measured my deepest drawer and cut thin plywood into modular dividers that slide together without screws. The modular grid keeps things from shifting when you open the drawer. Use 1/4 inch plywood and notch pieces at half thickness so they interlock. A small pack of plywood and a jigsaw cost about $20. Many people buy plastic trays that are too shallow. The specific ratio I use is three equal columns for socks, underwear, and workout gear in a 30-inch drawer. It keeps things tidy and visible.
Hang a Mirror with Storage Hooks Behind It
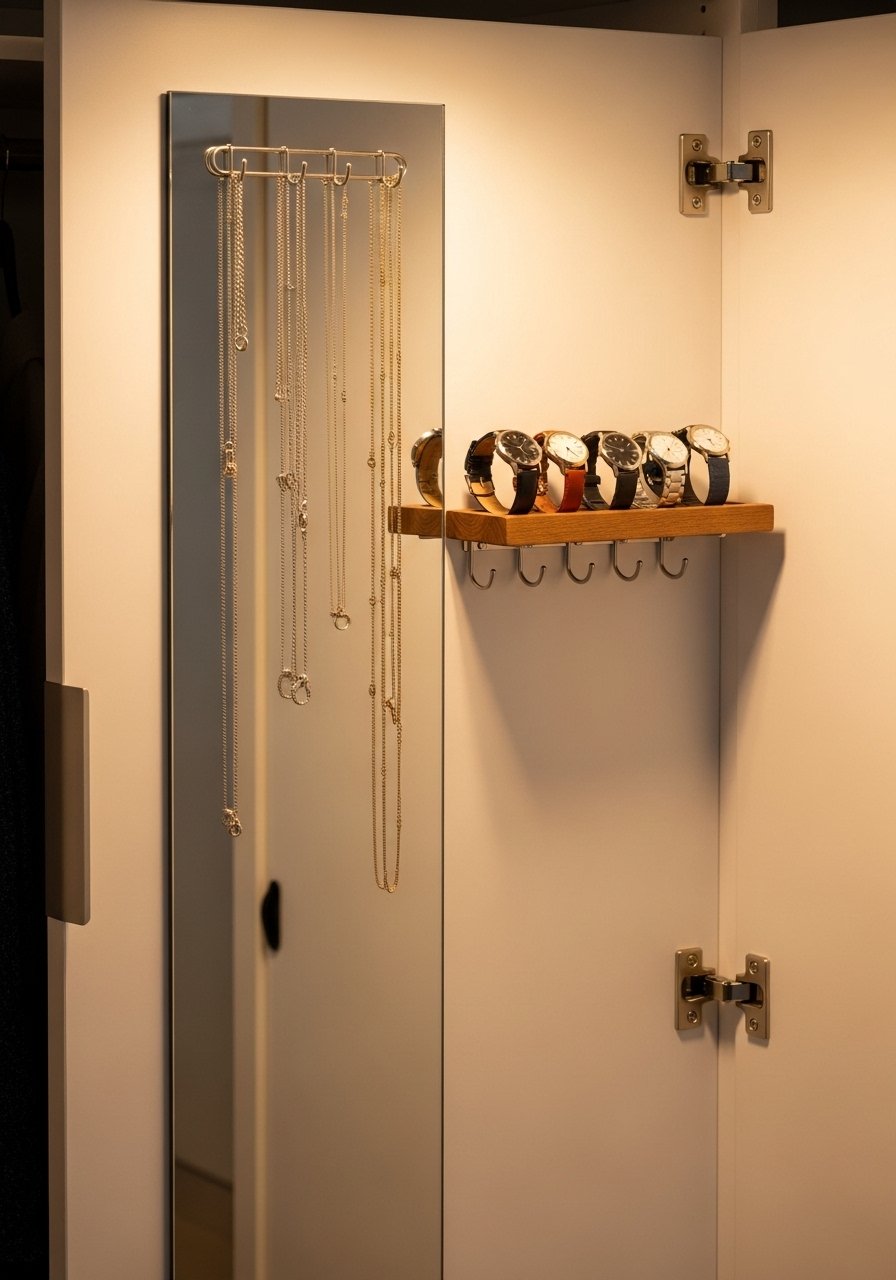
I installed a thin framed mirror on my closet door and added low-profile hooks around the inside edge for necklaces. It gives you a full outfit view and saves a wall. I used over-the-door hooks and a slim mirror that slipped on easily. Cost was under $60. The detail most people miss is spacing the hooks every 4 inches so necklaces do not tangle. Pair this with idea seven's jewelry drawer and your accessories are sorted.
Make a Seasonal Swap Box System with Rolling Bins
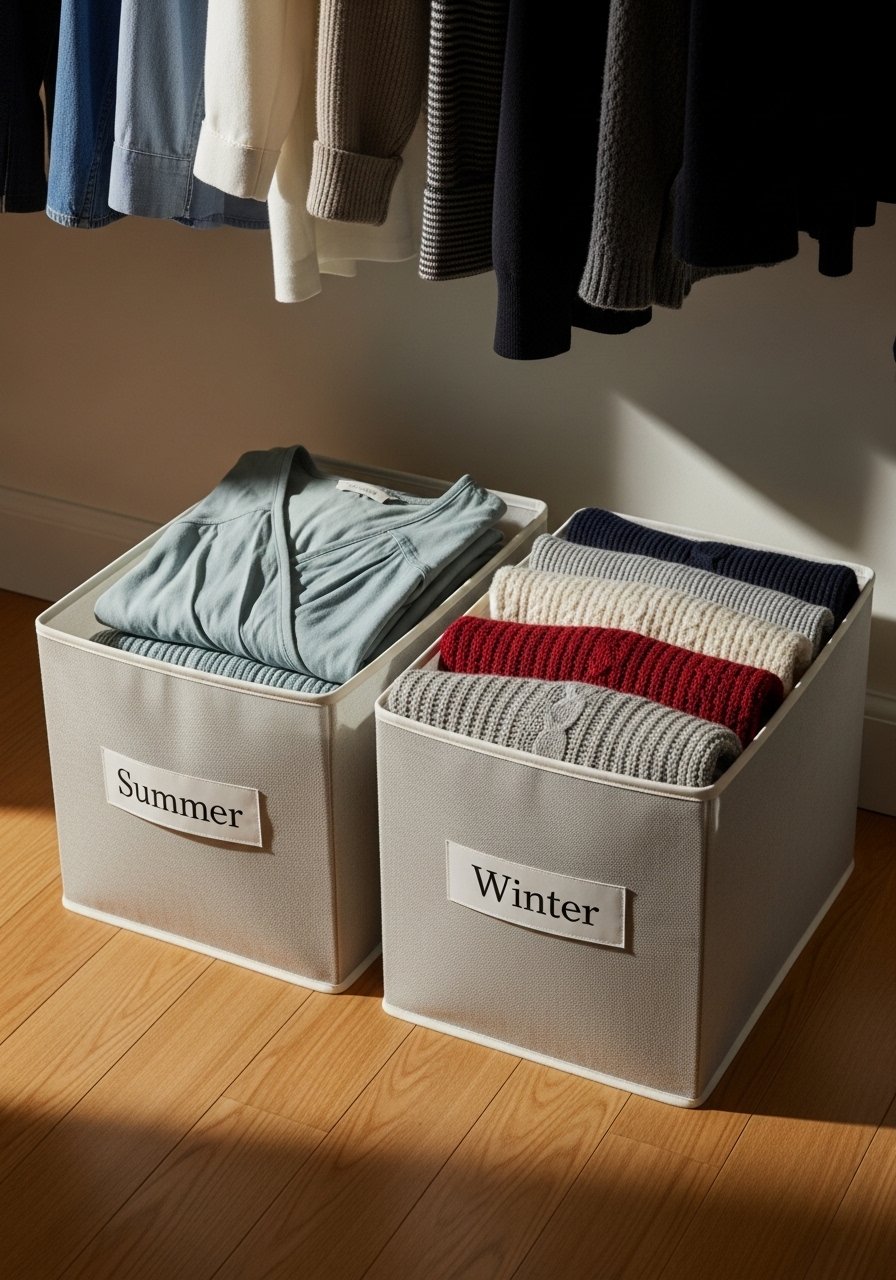
I keep a rolling bin under my lower shelf for seasonal items I do not want in rotation. Use a 24x15x10 inch rolling bin for sweaters and a similar one for swimsuits and beachwear. Under-shelf rolling storage bins are around $30 each. The trick is to vacuum pack only bulky items and leave delicates loose. People make the mistake of swapping everything at once. I swap one bin each month as weather shifts, which keeps the closet current without chaos.
Use a Slim Laundry Hamper and a Sorting System
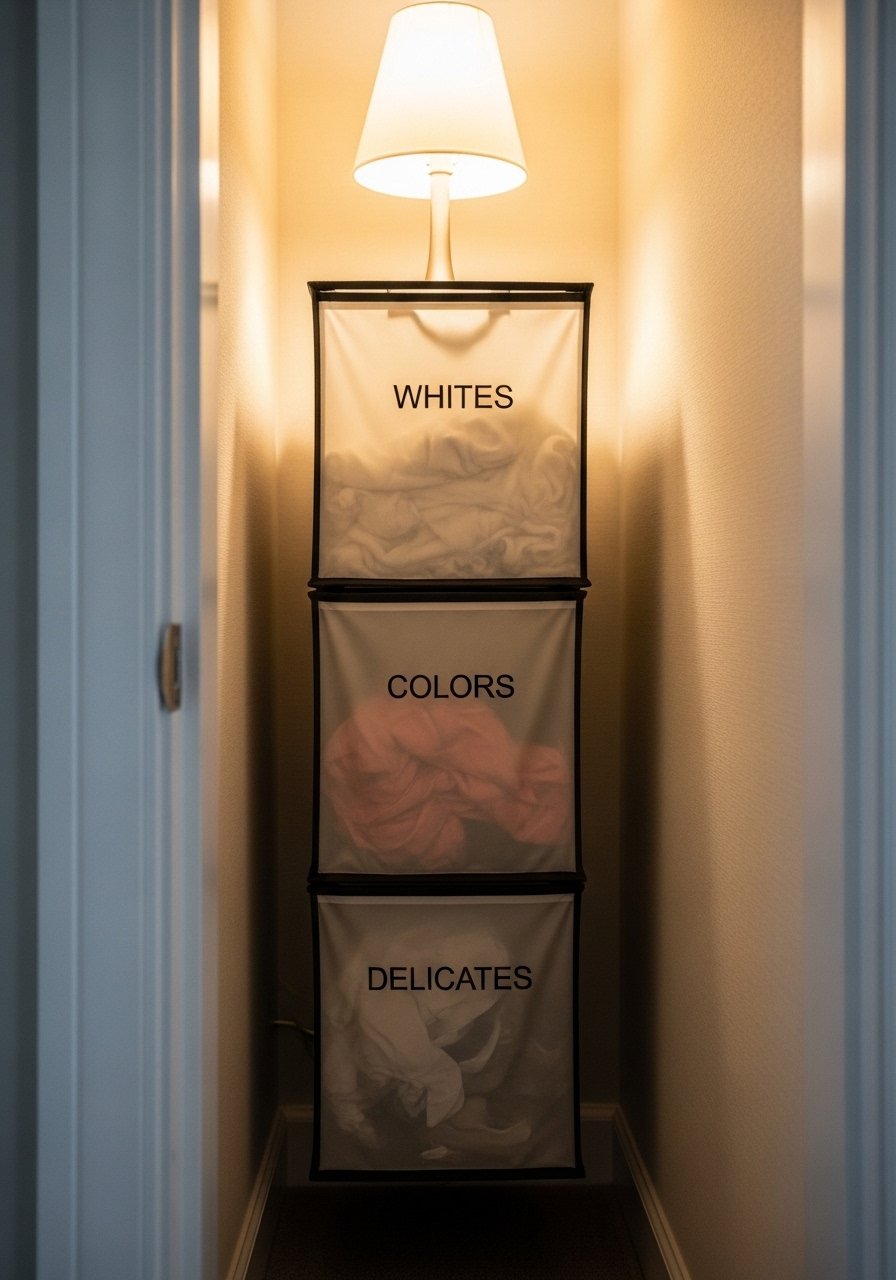
My laundry pile used to live on the bed. A slim three-compartment hamper solved that. I bought a 12x18x24 inch slim hamper with removable bags and mounted a small hook on the inside wall for the bags to hang when full. Three-compartment laundry hamper cost about $40. The detail that matters is labeling each bag and keeping a dedicated mesh bag for delicates. Many people underestimate how much a simple sorting system reduces laundry day dread.
Create an Open Bins System for Kids or Guest Closets
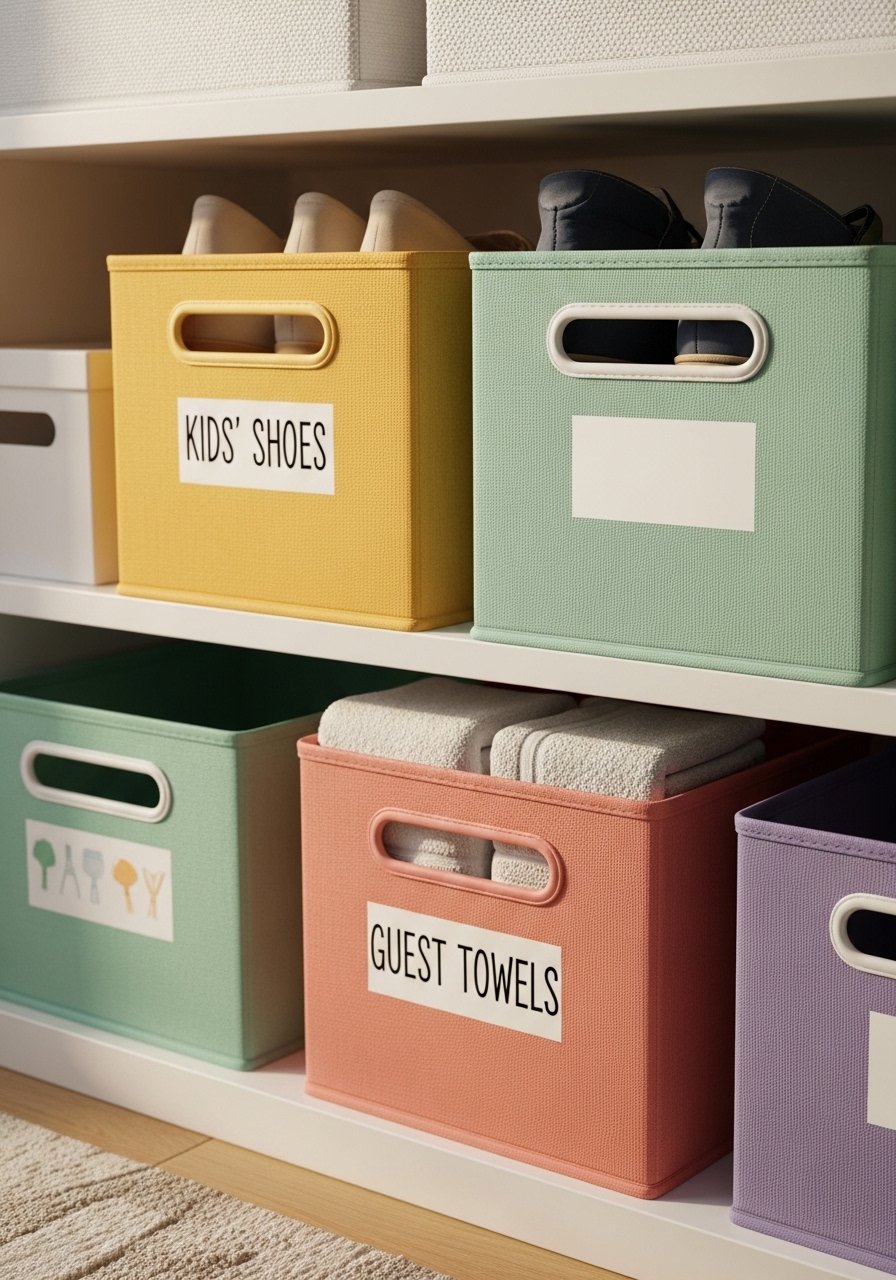
For guest closets and kids' spaces I ditched lids for open fabric bins so items stay visible and accessible. I use three bins per shelf and keep the same color family to avoid the chaos of mixed textiles. Open fabric storage bins are about $12 each. The specific measurement hack is choosing bins that are 12 inches wide by 10 inches deep to fit most closet shelves. Mistake people make is overfilling bins until they bulge. Leave a little breathing room so items slide in and out.
Your Decor Shopping List
Textiles
- Honestly the best $40 I have spent, 22-inch linen pillow covers, set of 2 in warm gray and cream for a clean folded sweater look
- Chunky knit throw in cream (~$35-55). Drape over a closet bench for texture
Storage & Hangers
- Slim velvet hangers pack of 50 (~$25)
- Clear shoe storage boxes set (various sizes) for visible shoe stacks
- Under-shelf wire baskets (~$15 each)
Hardware & Lighting
- Stick-on LED light strips 12ft (~$25-40)
- Short tension rod 12-inch for vertical shoe solutions
Accessories
- Adjustable drawer dividers (~$20)
- Waterproof label stickers set for front and short-side labeling
- Three-compartment laundry hamper (~$40)
Note: Similar items can often be found at Target or HomeGoods if you prefer to see them in person.
Shopping Tips
White oak beats dark wood in 2026. Design feeds have shifted completely. These white oak floating shelves look current, not dated.
Grab slim velvet hangers for $25. Swap them out by season and the whole closet feels different.
Curtains should puddle or kiss the floor, never hang halfway up. These 96-inch linen panels are right for standard 9-foot ceilings.
Everyone buys five small succulents. One single 6-foot fiddle leaf fig has ten times the visual impact.
Frequently Asked Questions
Q: Can these ideas work in a tiny apartment closet?
A: Yes. Use vertical solutions like tension rods and under-shelf baskets, and favor clear stacking boxes to keep floor space usable. Measure shelf depth and leave at least 1 inch for hardware and liners.
Q: How do I stop shoes from smelling in stackable boxes?
A: Stuff shoes with dryer sheets and rotate the boxes every few months. Cedar blocks or small sachets inside each box help too.
Q: What is the easiest project to start with?
A: Swap hangers and install LED strips. Changing hangers is instant and cheap, and lights make everything easier to find.
Q: How should I organize by color without wasting time?
A: Start with a neutral base and use the 80/20 rule, keeping 80 percent of items grouped neutrally and 20 percent as an accent color. Group similar items together first, then arrange by color within each group.
Q: Can I DIY a jewelry system without tools?
A: Yes. Use adhesive-backed hooks on the inside of a mirror or peel-and-stick pegboard strips. They hold lightweight jewelry without drilling.
Q: How do I keep kids from dumping bins out when guests arrive?
A: Use open bins at their reach for daily items and a top shelf for special toys. Teach the one-shelf rule where each bin returns to its labeled spot after play.
