
My living room had nice furniture but it still felt like a waiting room. Took me embarrassingly long to figure out it was missing texture. The right wall decal fixed that more than a new rug ever did, because it tied the eye upward and finally made the sofa feel anchored.
These ideas lean modern minimal and Scandinavian cozy. Most projects are under $50, with a few specialty materials around $75. They work for living rooms, bedrooms, nurseries, home offices, and rental walls where you want a clean removable look.
Minimal Geometric Shapes for a Modern Living Room
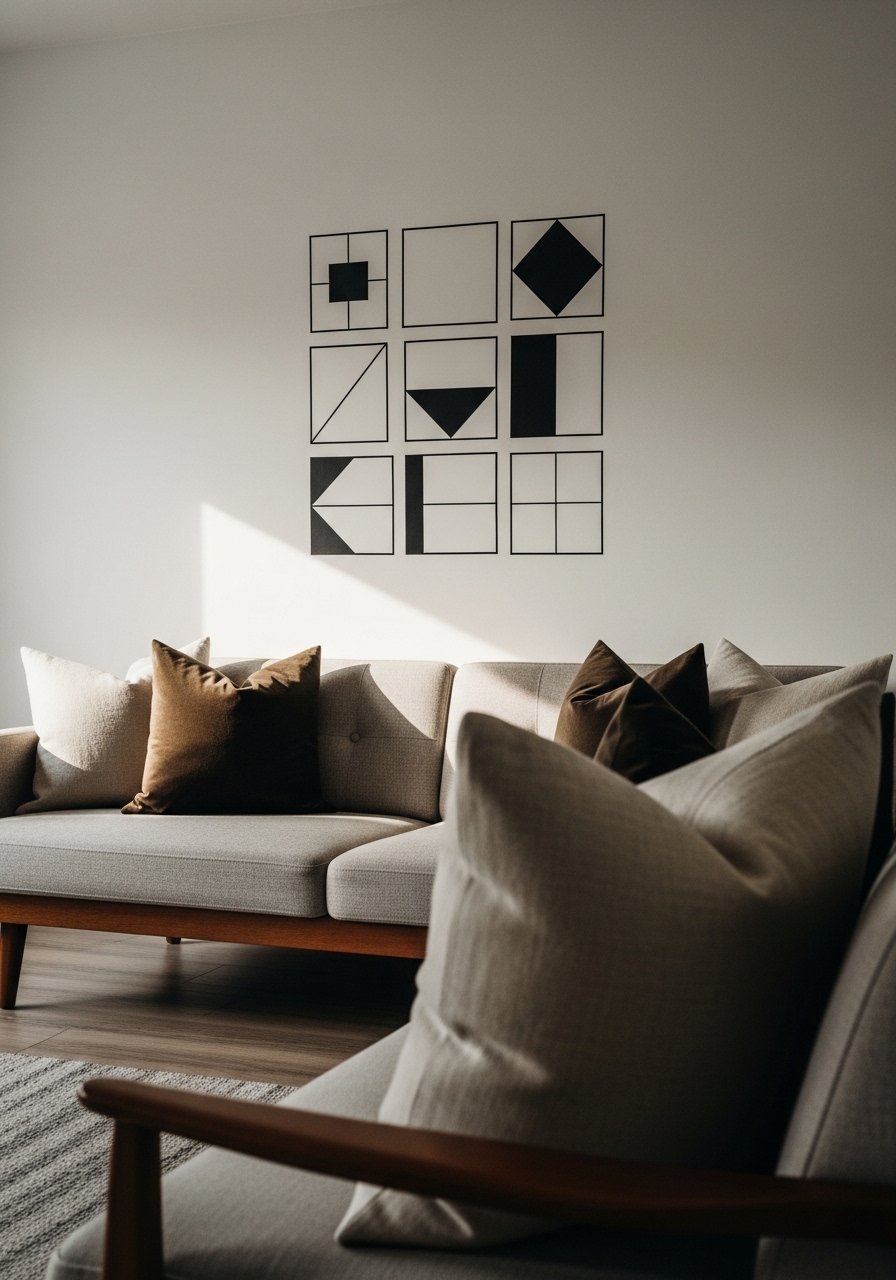
Cut simple triangles, circles, and squares from removable vinyl and arrange them in a loose grid over a sofa. The visual trick is to keep 60 percent negative space so the shapes feel intentional, not cluttered. I used matte black removable vinyl to keep the lines crisp, and it cost less than $25 for a whole wall. People often make the mistake of spacing shapes evenly like graph paper. Instead, use a 2:1 ratio where two shapes sit close and the next one sits twice as far away. I used matte removable vinyl sheets and a scraper tool to avoid bubbles.
Single Accent Phrase in a Cozy Bedroom
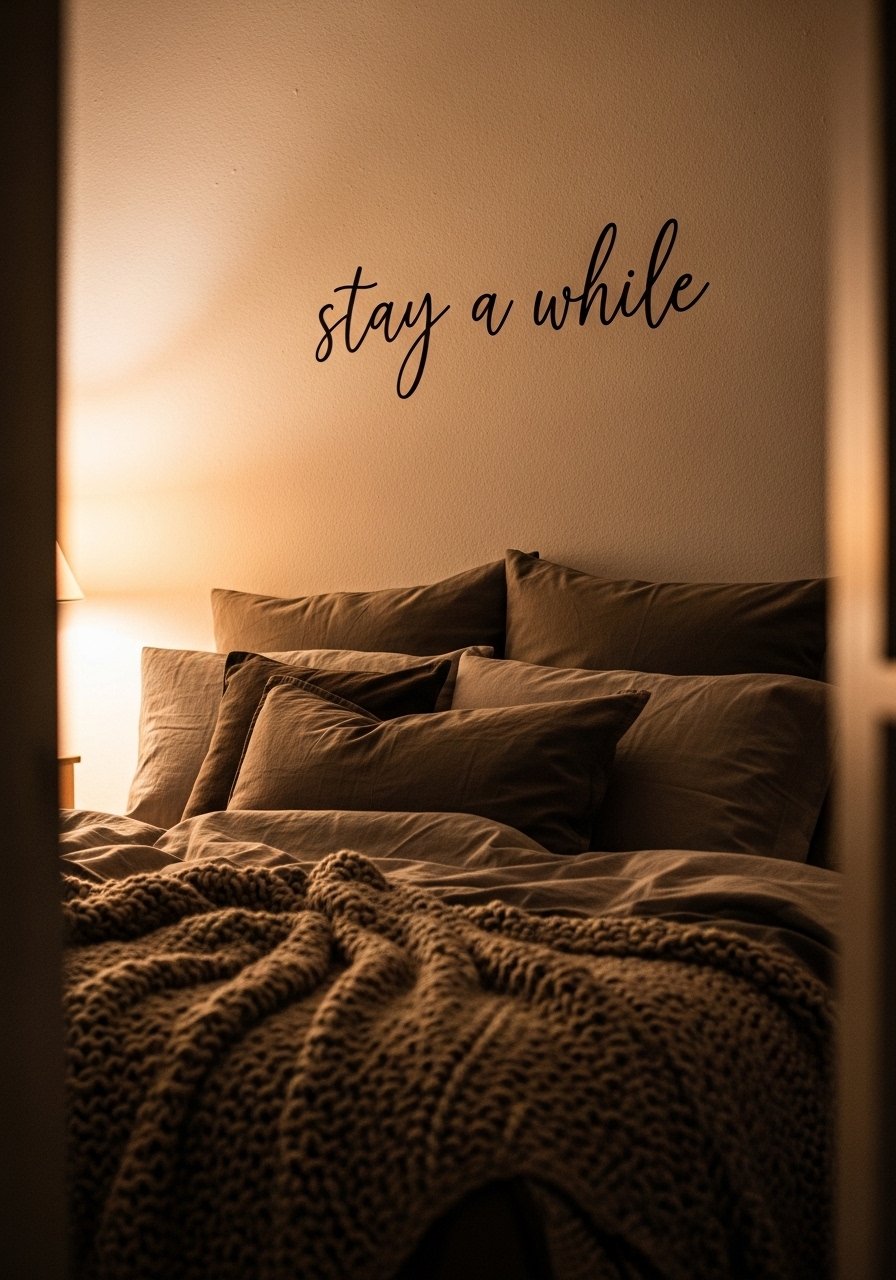
Text decals instantly give personality. Pick a short phrase, scale it to sit 6 to 8 inches above the headboard, and choose a script font that reads from three feet away. I cut "stay a while" on removable black vinyl and it made the whole room feel lived-in. A rookie move is using a font that has tiny counters, which disappear once applied. Use transfer tape and test at 24-inch height before committing. This works great in bedrooms and small guest rooms and costs under $15 for materials.
Overscale Botanical Silhouettes for an Entryway
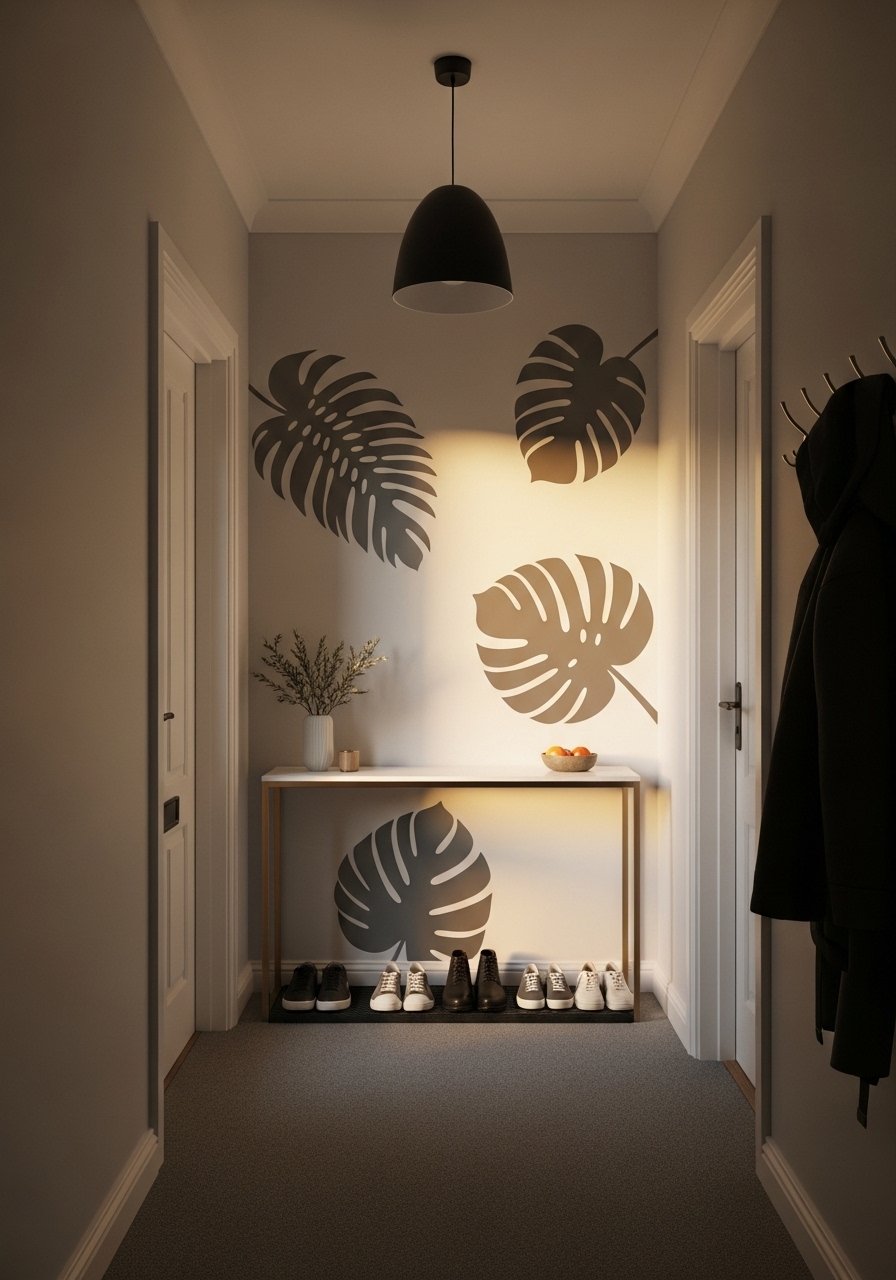
Cut oversized leaves in a single color to fill vertical space without busy patterns. I did a 36-inch monstera silhouette that reads like art from the sidewalk. The feeling is calm and modern, and it solves the "wall looks empty but framed art feels too small" problem. For a balanced look, keep the largest shape about one third the width of the wall. Use removable peel-and-stick vinyl rolls so you can reposition without damage. Common mistake, especially in narrow halls, is covering the whole wall. Leave breathing room around the edges.
Layered Negative Space in a Home Office
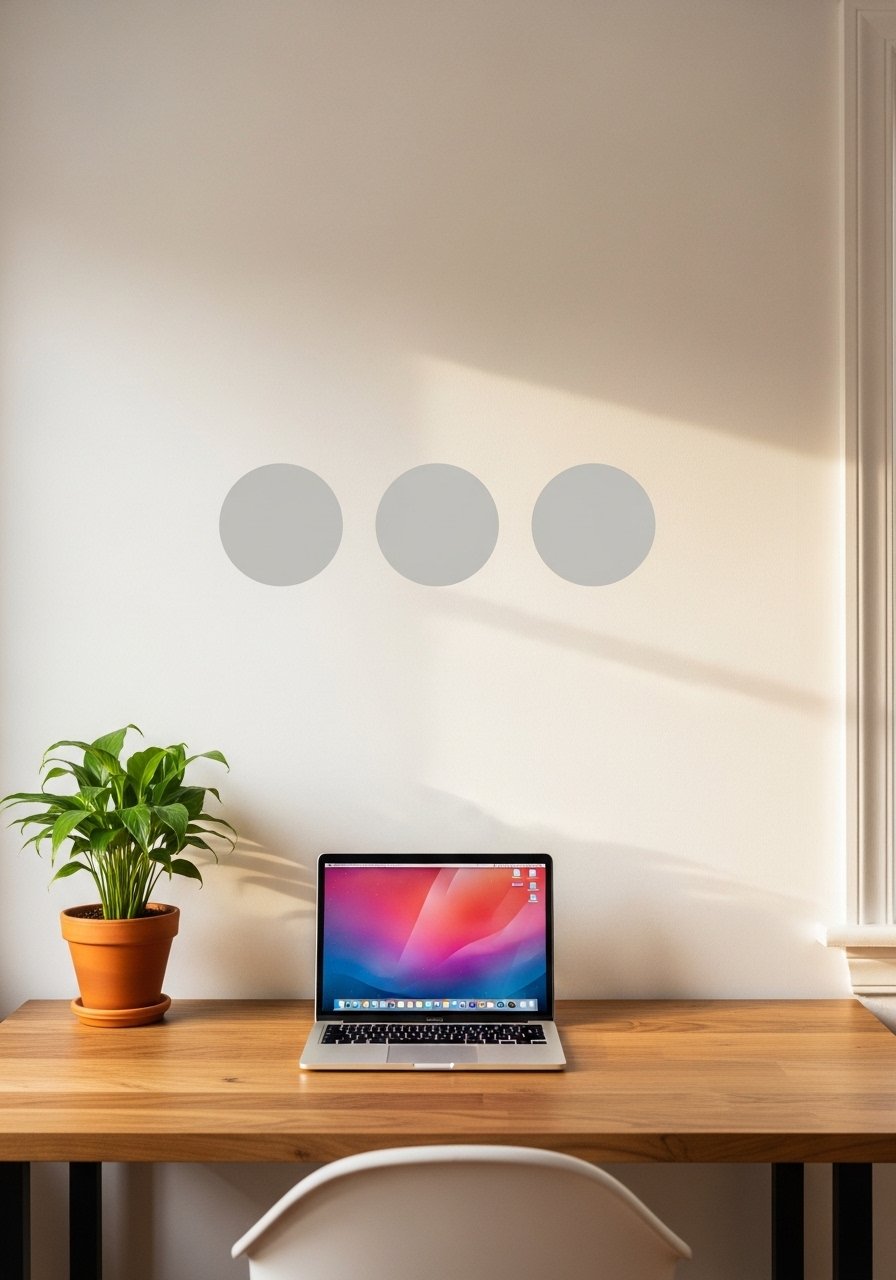
Negative space is not empty, it is deliberate. I cut three soft gray circles at different sizes and staggered them so the largest sits behind the monitor. It reduced screen glare and gave depth without adding color. Use lighter tones for walls that get direct sun. One detail most articles skip is to match decal opacity to the paint sheen; matte walls take matte vinyl best. I used light-gray removable vinyl and weeding tools to lift small centers cleanly.
Botanical Repeat Pattern for a Nursery Wall
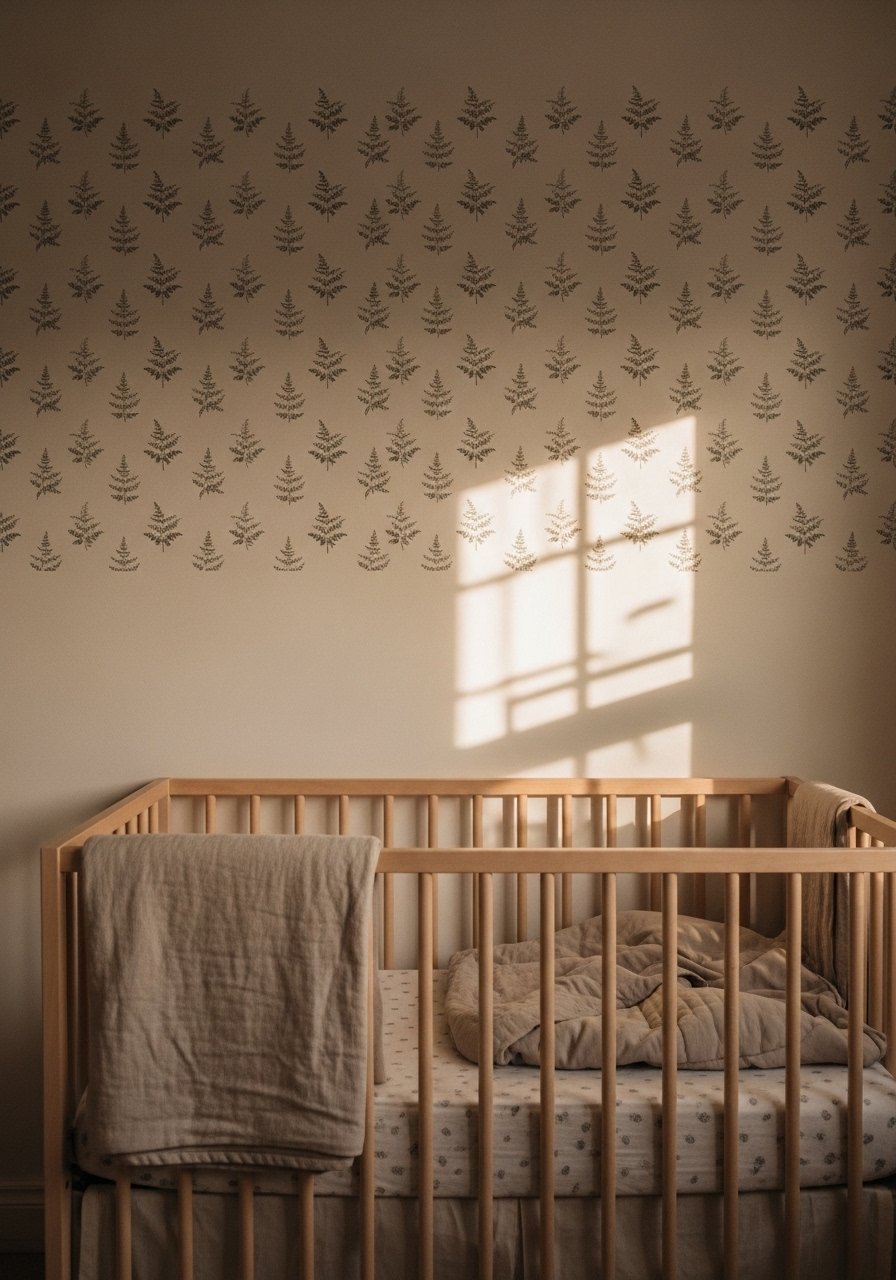
Small repeat decals across the upper third of a nursery read like wallpaper but cost a fraction. I cut 3.5-inch ferns and repeated them in rows, leaving 4 inches between each to keep it airy. The result is whimsical without feeling childish. Parents often overcommit by covering the whole room. Stick to a band at eye level for a sleeper-friendly look. Use removable baby-safe vinyl and test placement on a paint scrap first.
Faux Molding Strips for a Classic Dining Room
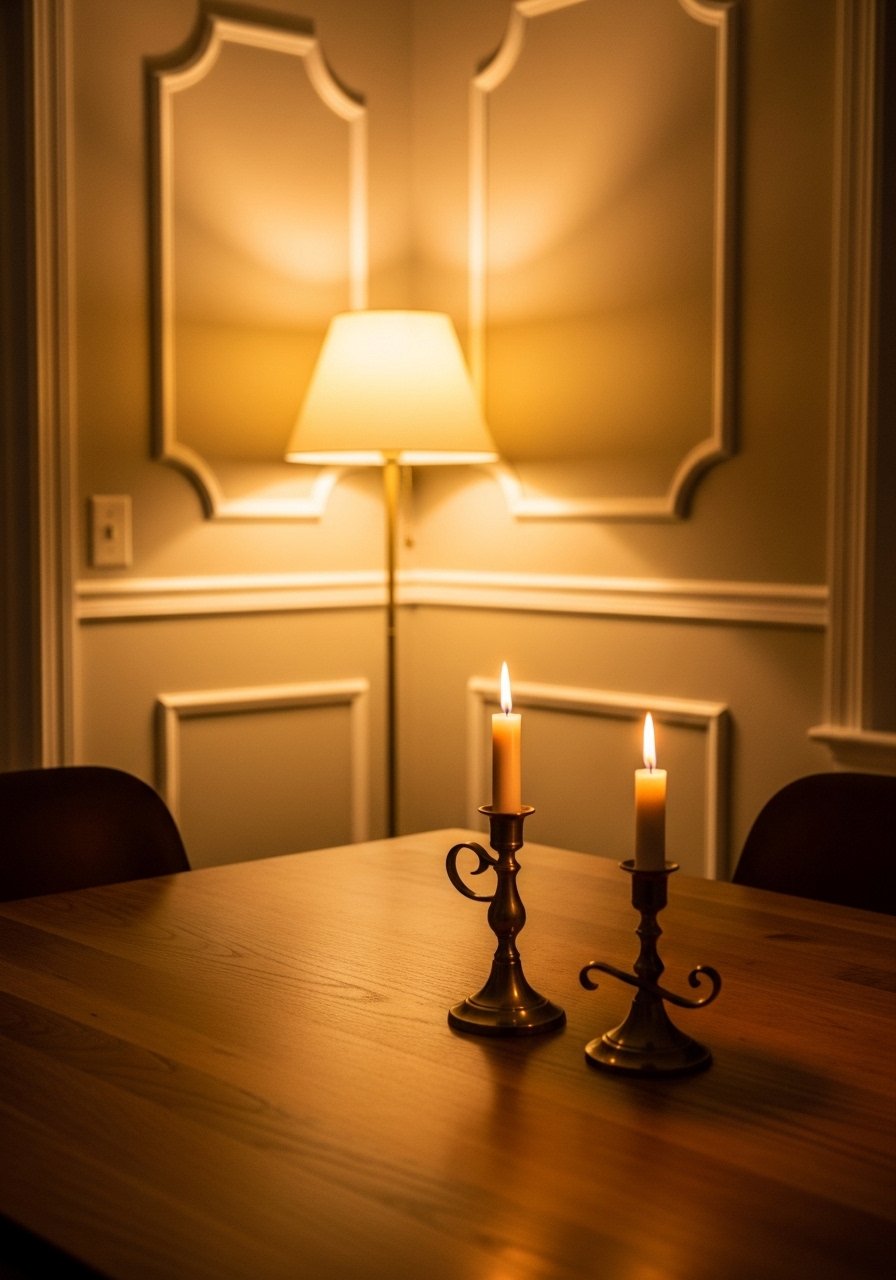
If you live in a rental with plain walls, thin white vinyl molding strips can fake paneling with minimal tools. Cut 1.5-inch strips and follow a simple three-panel layout across a wall. I used a level and measured 10 inches between panels to keep proportions pleasing. It costs under $40 and the visual weight of molding immediately grounds the room. A common error is uneven spacing, so mark with painter’s tape before applying. I linked the white vinyl strips I used.
Chalkboard Decal for a Kitchen Command Center
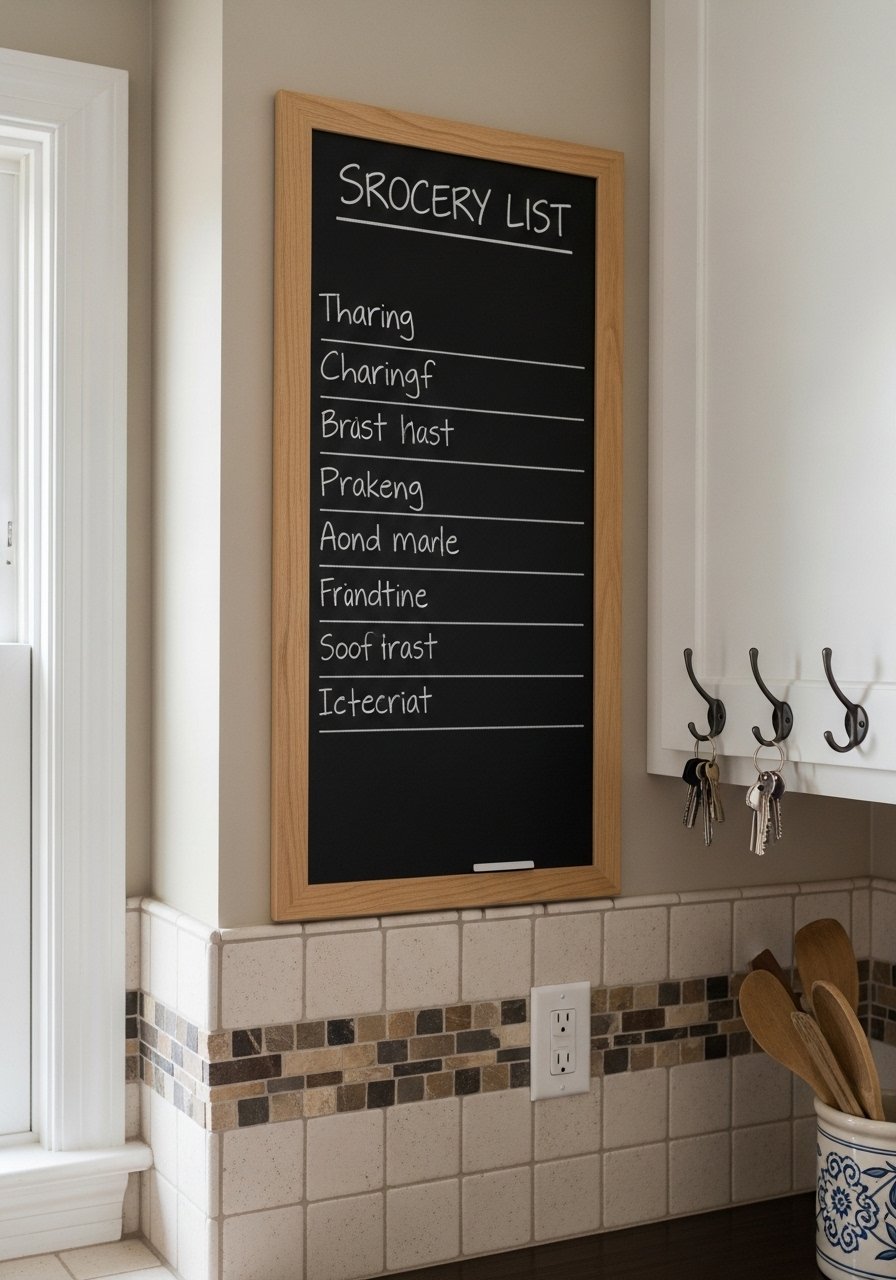
Instead of painting, cut a chalkboard decal for menus and lists. I made a 24 by 36-inch rectangle and wrote the week's meals on it. It was renter-friendly and cleaned up without ghosting. Measure so the chalkboard sits at eye level for standing use, about 56 inches from the floor. One nitpick most people miss is to sand glossy paint slightly before applying so the decal sticks evenly. Use a peel-and-stick chalkboard sheet and liquid chalk markers.
Half-Wall Ombre Fade for a Minimal Hall
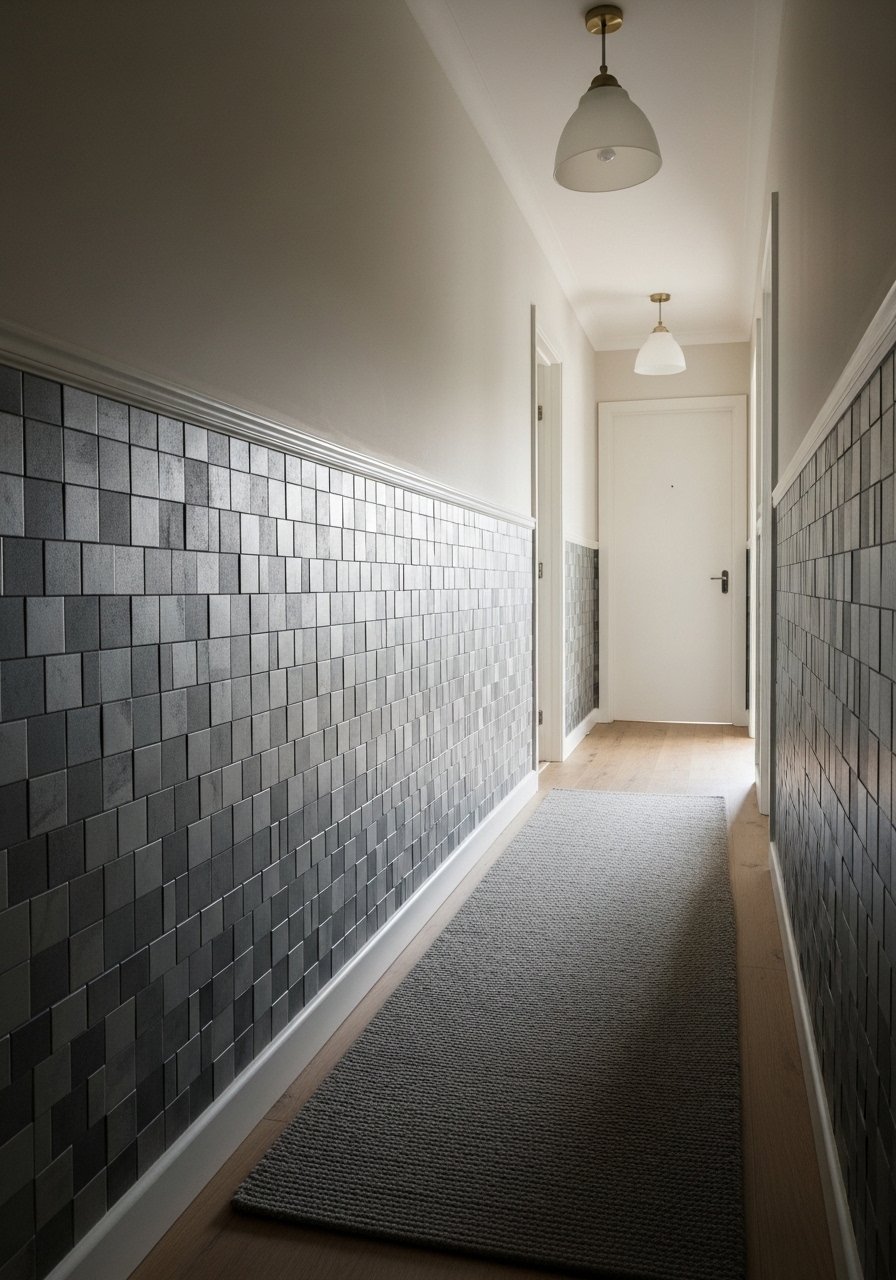
Fading decals from dark to light is an easy ombre without paint. Cut 6-inch squares in three tones and stagger them in rows, darkest at the base. I used a 3:2 height ratio so the entire lower half felt intentional. It solves the problem of scuffs in high-traffic areas and looks modern. People usually try a strict gradient, which can look busy. Randomize a few placements for a lived-in feel. I used three-tone removable vinyl packs.
Peel-and-Stick Window Frame Decals for Privacy
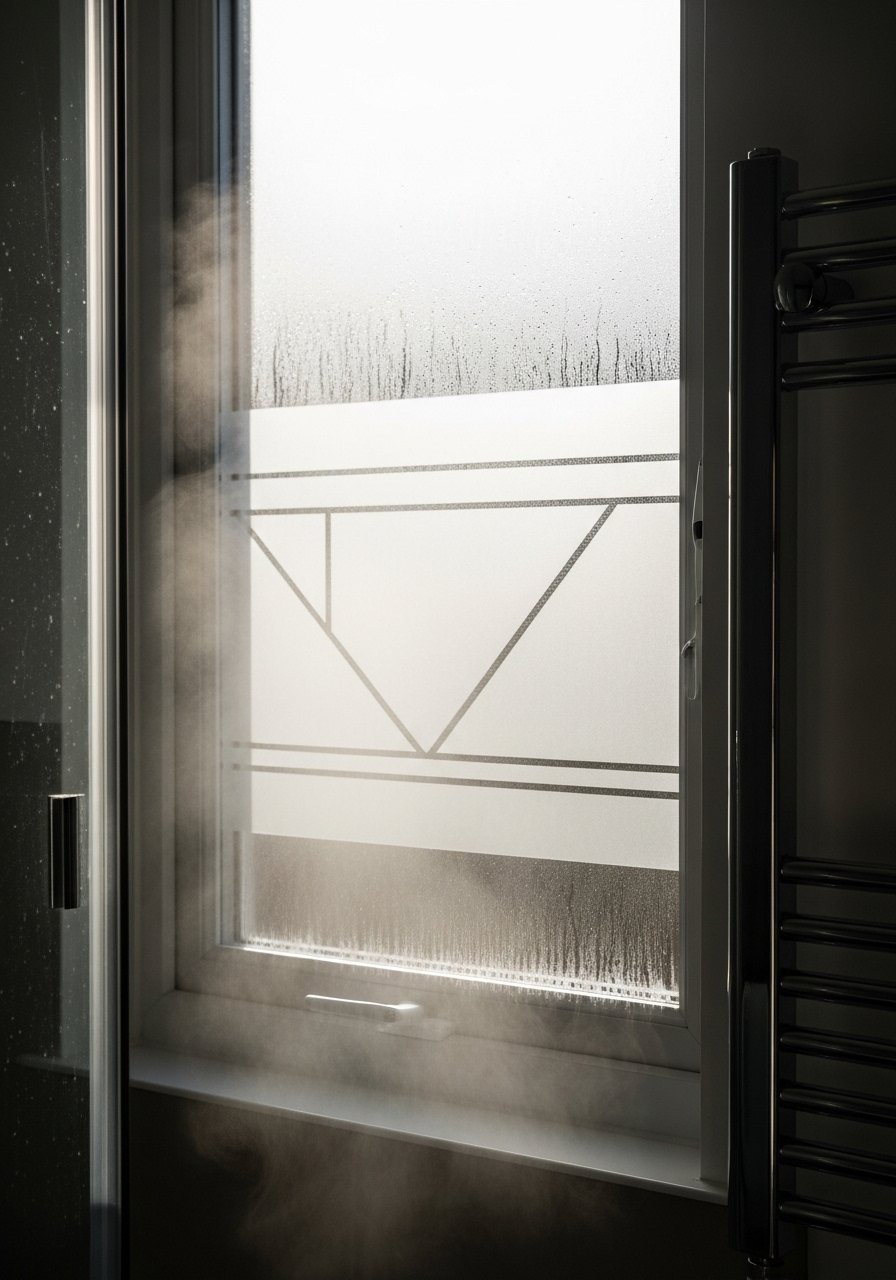
You can cut frosted-effect vinyl into bands to add privacy without losing light. I cut 3-inch horizontal bands spaced 2 inches apart and they blurred view while keeping brightness. This solved my rental bathroom privacy panic and cost under $20. A mistake is applying full sheets straight from the roll. Instead, cut strips to size and use a squeegee for no bubbles. I used frosted privacy vinyl and a window squeegee.
Metallic Accent Lines for a Modern Entry
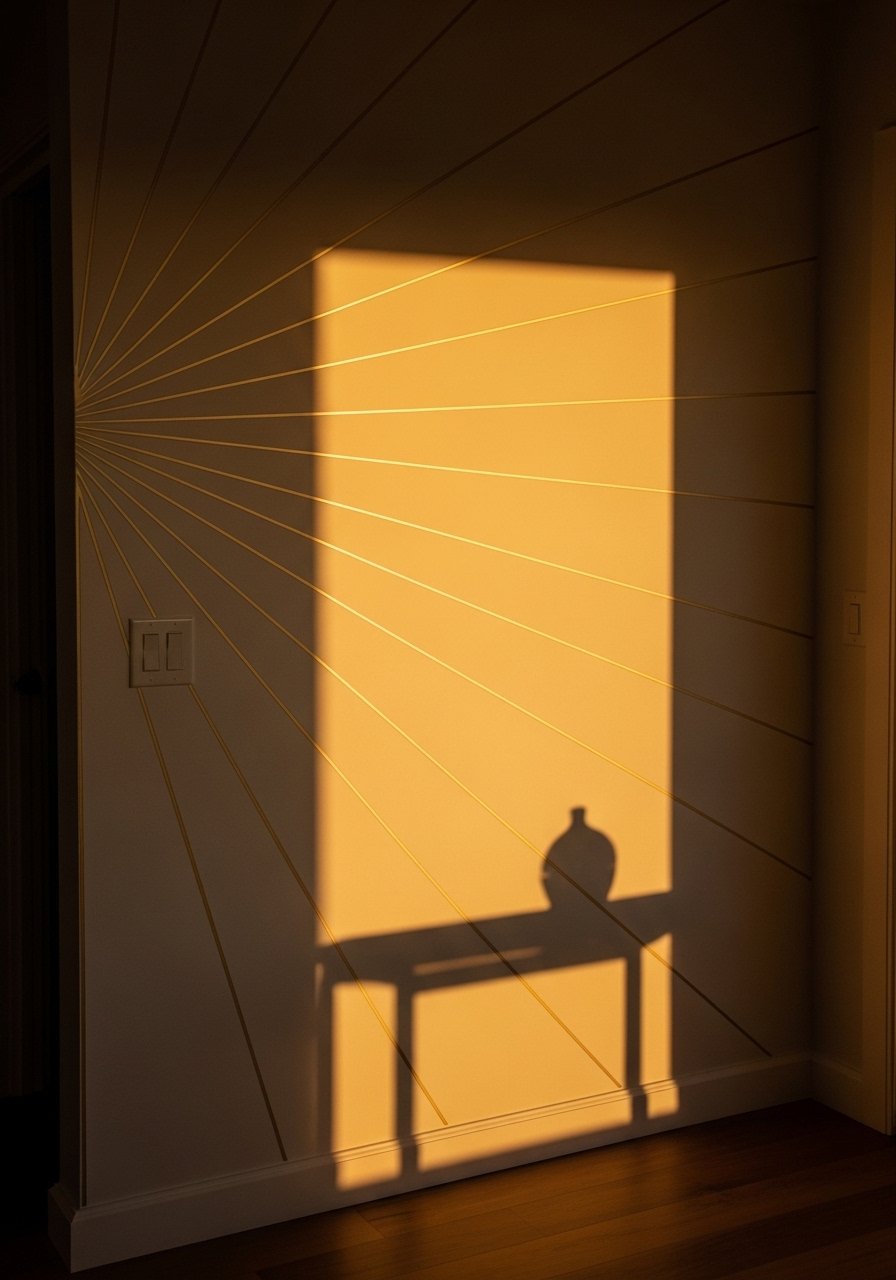
Thin metallic vinyl lines add a subtle glam that catches light without overpowering. I placed three 1/4-inch gold lines radiating outward from a light switch to turn a cosmetic flaw into a design moment. The right placement feels deliberate. A common error is using too many lines which reads like tape. Stick to one focal point and repeat the 80/20 color rule: 80 percent matte tones, 20 percent metallic shine. Use brushed-gold removable vinyl.
Chalk-Effect Growth Chart for a Kid's Room
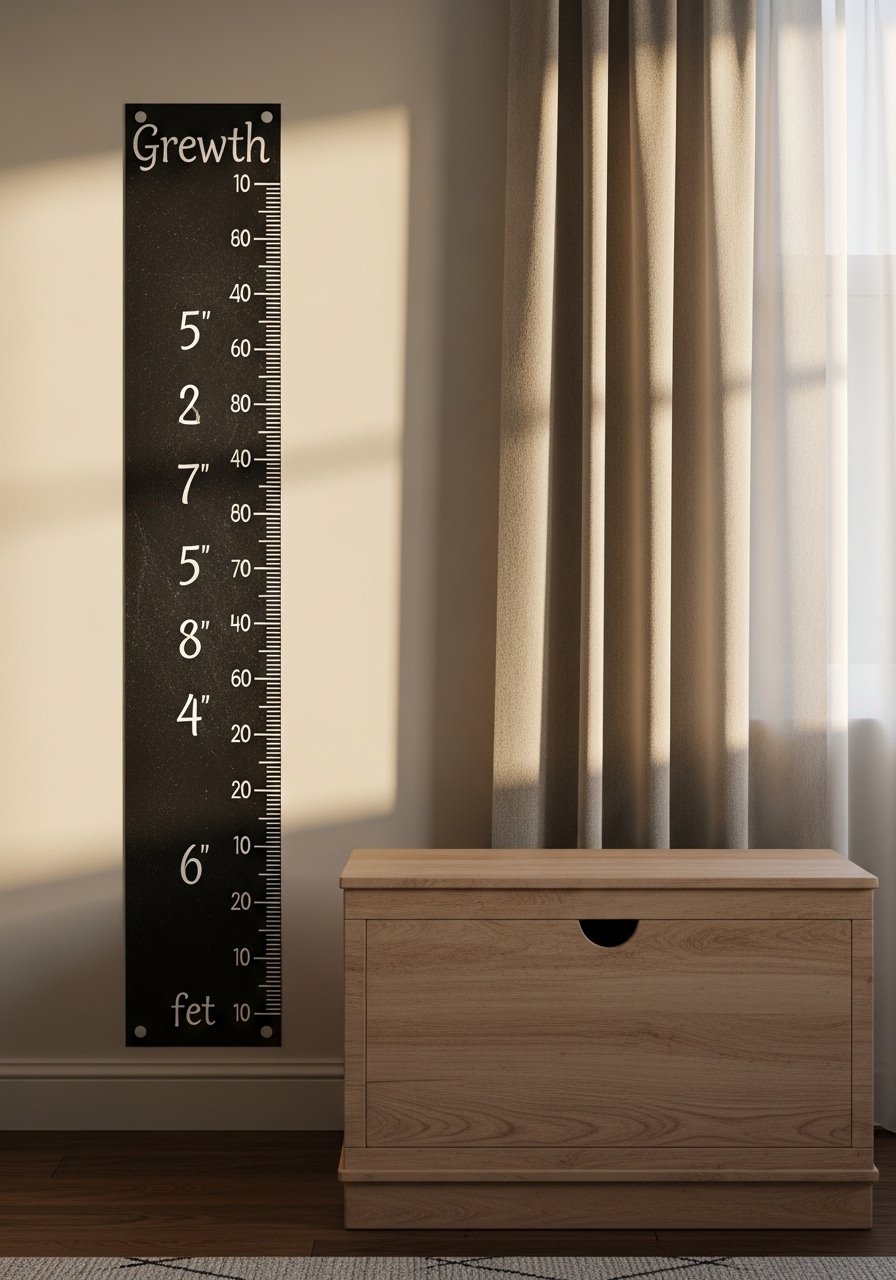
Instead of a wooden plank, cut a vertical chalk-effect decal with measurement marks. I adhered mine at 6 inches from the baseboard so shoes and slippers didn’t obscure the numbers. The result is personal and swaps out easily if you move. Parents often center charts on a wall instead of next to furniture. Place it where you actually measure kids, often beside a doorway. I used growth-chart vinyl decal and a fine-tip craft knife.
Map Silhouette for a Travel-Themed Office
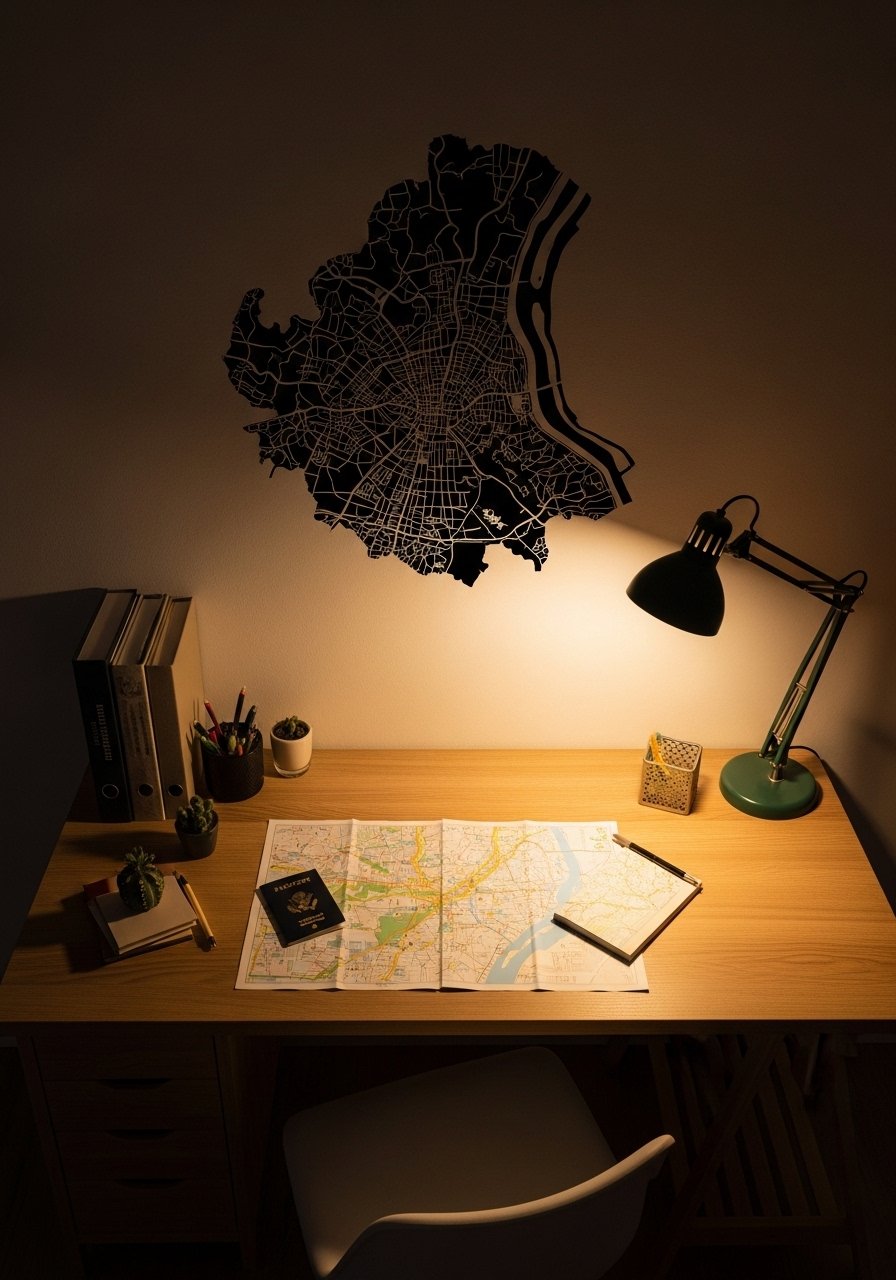
Cut a single-city skyline or continent outline in charcoal vinyl for a personal wall. I traced my favorite city and scaled it to 48 inches wide, which fills a desk wall without crowding. The map becomes a conversation starter and keeps the wall uncluttered. People mistake detailed maps for decals; simple silhouettes read better from a few feet. Use charcoal removable vinyl sheets and an extra-strong cutting mat.
Corner Accent Clusters for a Small Bedroom
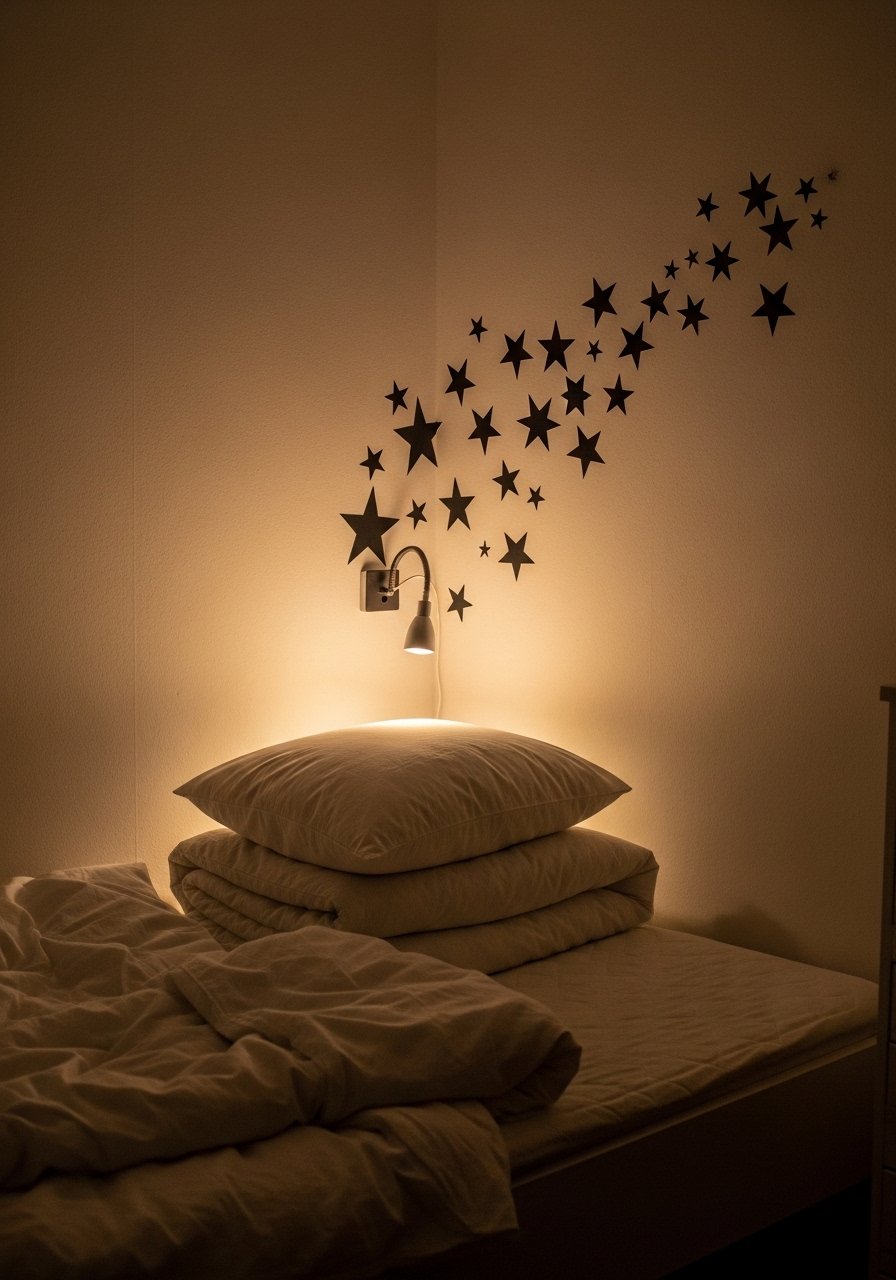
Corners are often ignored. I cut small star clusters and applied them to the top corner over a reading light. The result is intimate and draws the eye upward, making the ceiling feel higher. Try a 3:2 scale where the cluster occupies three feet horizontally and two feet vertically to avoid overdoing it. A common mistake is centering art on the wall instead of tucking it into corners where it actually reads better in small rooms. Ivory star vinyl decals worked great for me.
Peel-and-Stick Tile Motif Behind a Stove
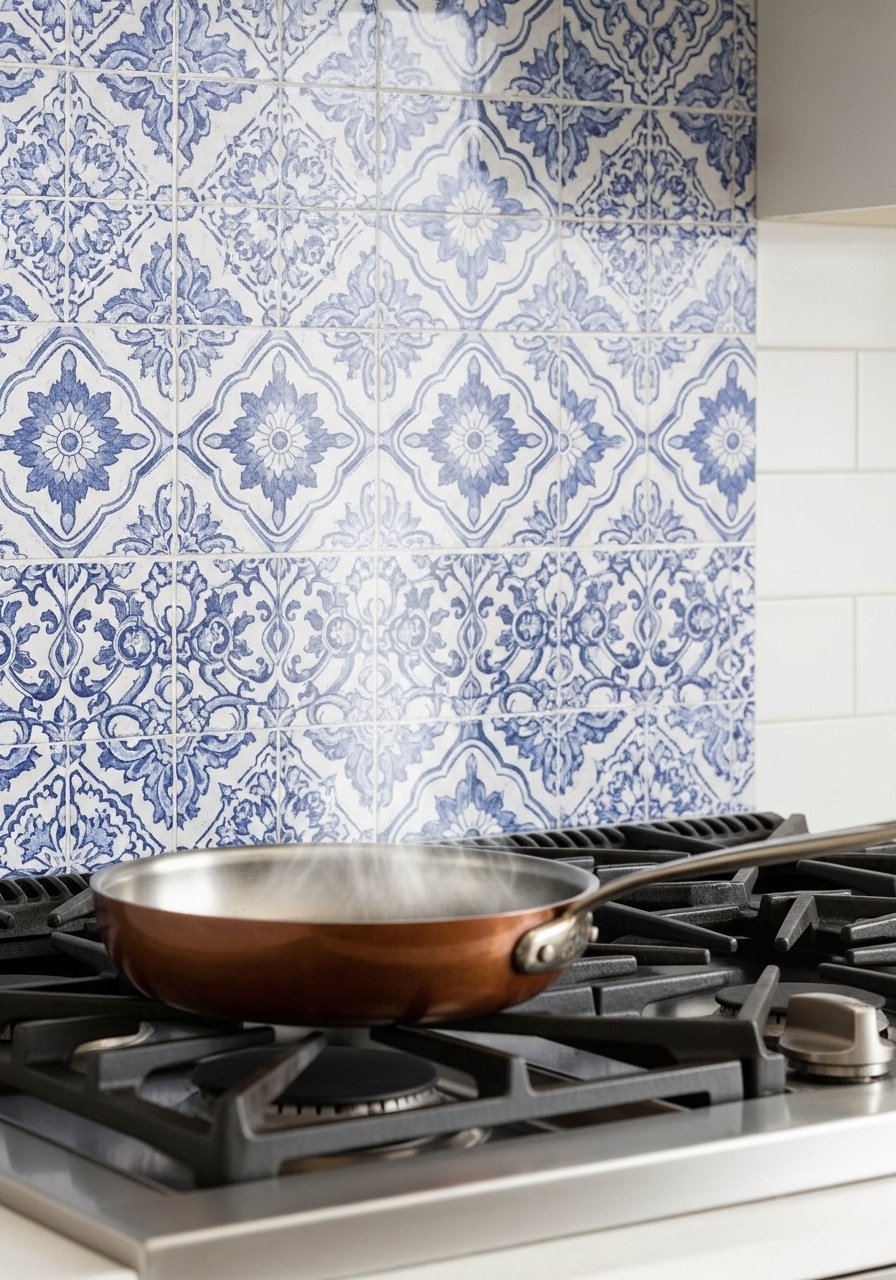
You can make a faux tile backsplash with small square decals arranged in a 6×6 pattern. I used 4-inch squares and an alternating color pattern to mimic ceramic tile. It handled splatters and cleaned with a damp cloth. The key detail others miss is to overlap edges slightly so grout lines look real. Use peel-and-stick tile decals rated for kitchen use and a microfiber cloth for smoothing.
Layered Frame Mat Decals for a Gallery-Lite Look
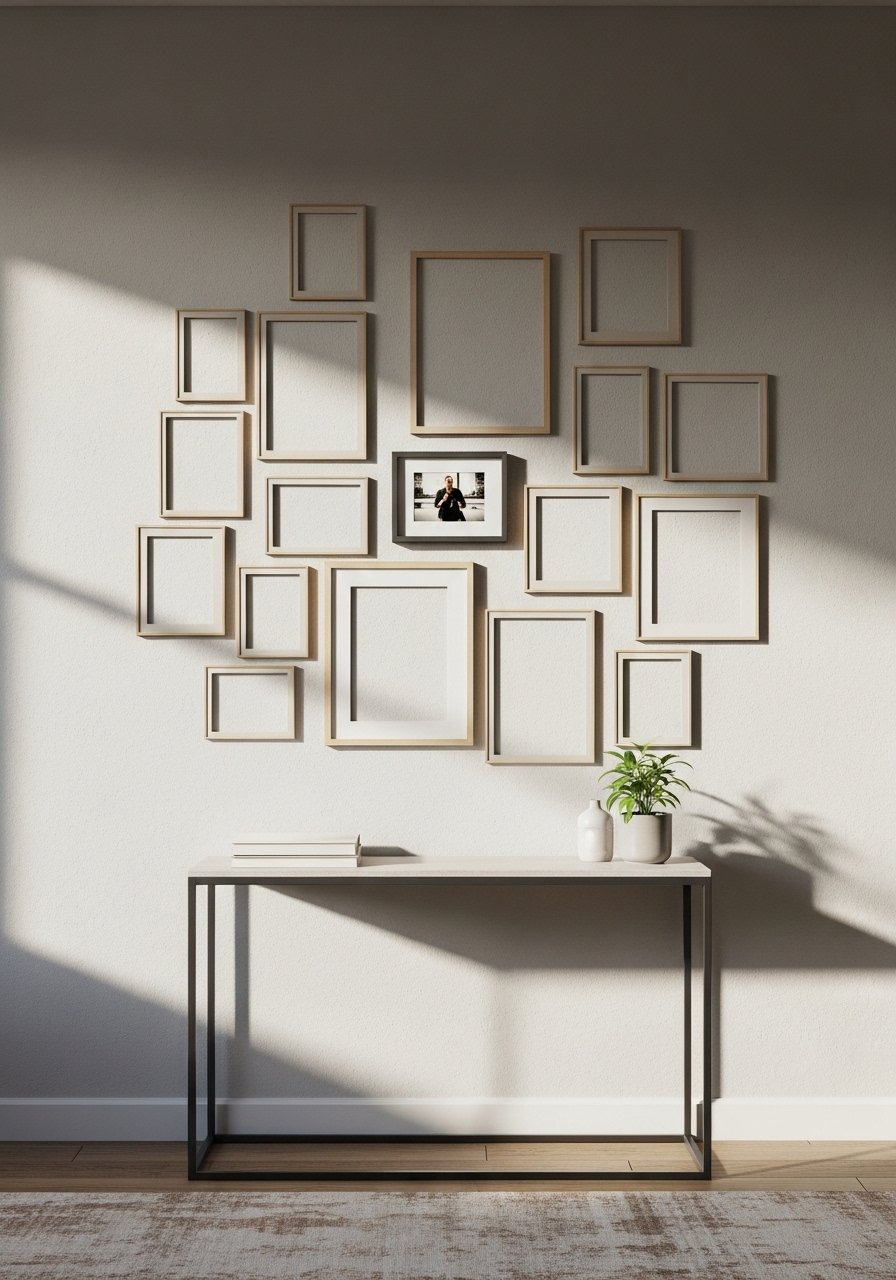
Instead of hanging heavy frames, cut matboard-shaped decals to create a gallery-lite look. I made 12-inch by 16-inch mat outlines in beige and stacked a real 8×10 photo in the center. It gives depth without extra nails. A typical mistake is matching mat color to the wall. Choose a slightly lighter or darker tone for contrast. Use beige removable vinyl sheets and a picture-hanging kit for the real photo.
Ceiling Stars for a Relaxing Nursery Nook
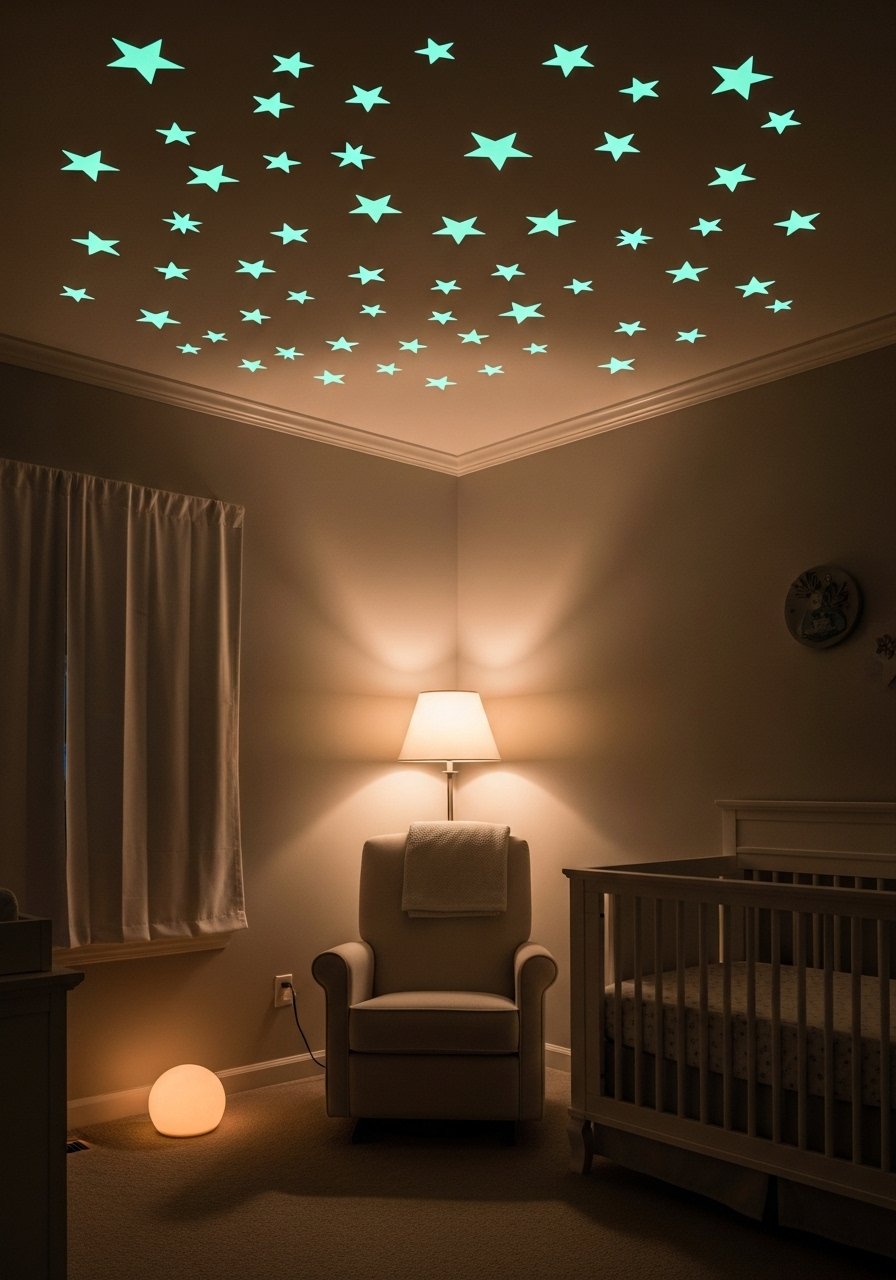
Cut glow-in-the-dark vinyl stars and place them sparsely on the ceiling above a crib or reading nook. I spaced mine about 8 inches apart and used two sizes so it looks like depth. It makes bedtime friendlier and gives the ceiling purpose. Parents often skimp on adhesive quality for ceilings. Use glow-in-the-dark removable vinyl and a ladder with platform for safe installation.
Monochrome Animal Silhouettes for a Playroom
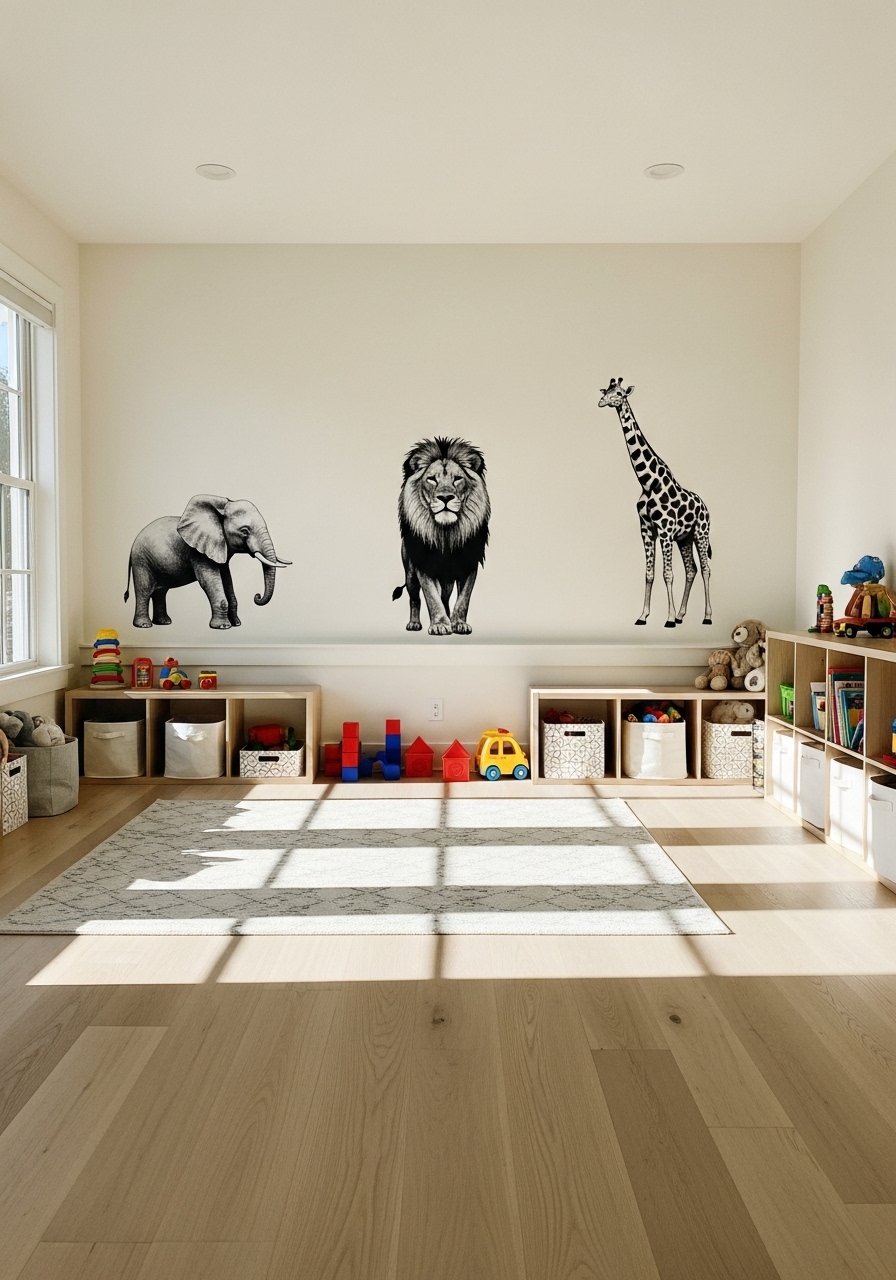
Cut simple animal silhouettes in one color for a cohesive playroom look that won’t overwhelm the eyes. I used 24-inch silhouettes and kept them all the same tone to maintain calm. The trick is to choose animals that sit at the child’s eye level, about 30 to 36 inches from the floor. A common mistake is mixing too many colors which competes with toys. I used navy removable vinyl and child-safe corner bumpers.
Negative Space Portrait Backdrop for an Accent Wall
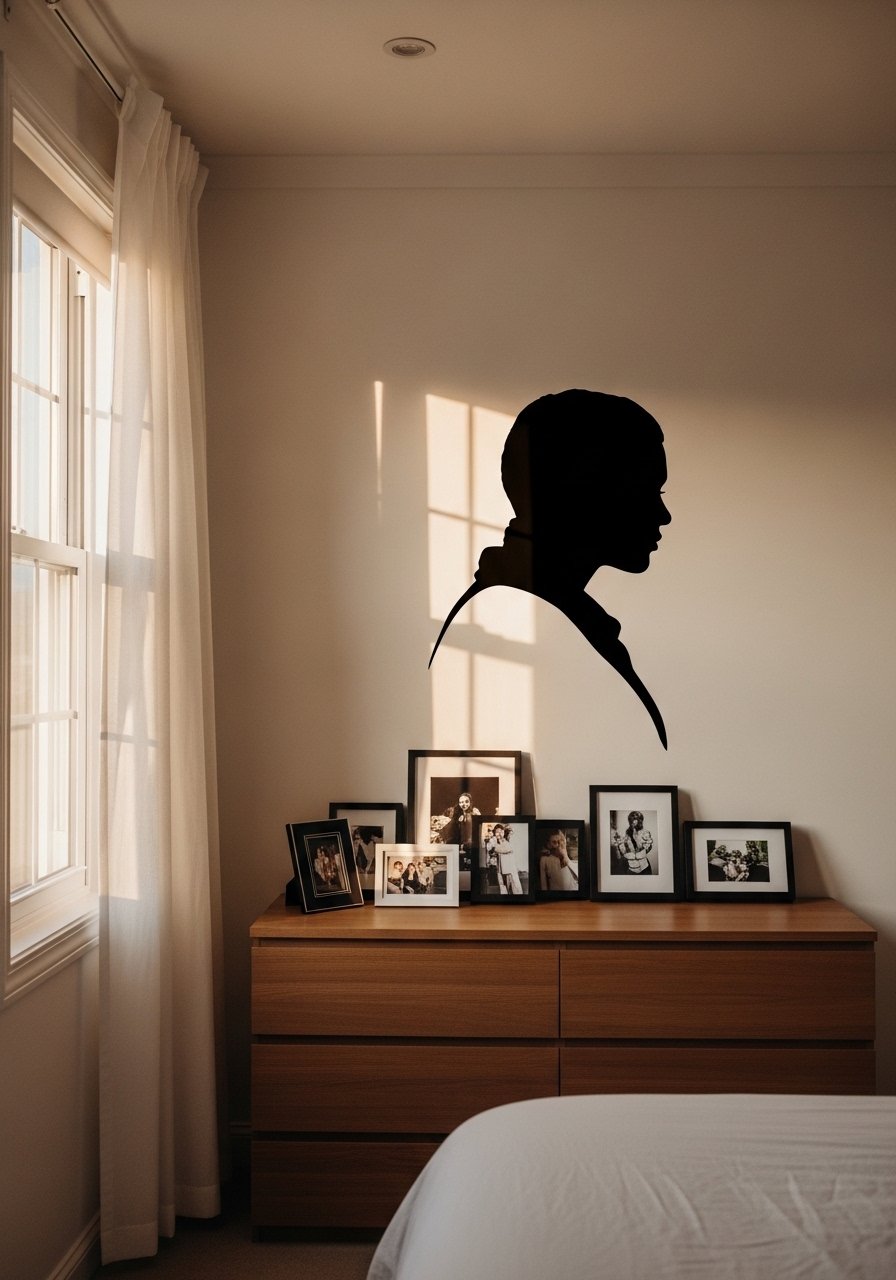
Use a single continuous line portrait cut from vinyl to create a modern accent that reads as art without frames. I scaled mine to 30 inches tall and centered it over a dresser. It creates a focal point without adding physical clutter. People sometimes try detailed faces which turn muddy. Stick to a bold single-line design for clarity at a distance. Use black removable vinyl and a precision weeder tool.
Wallpaper-Scale Decal Panel as a Headboard Alternative
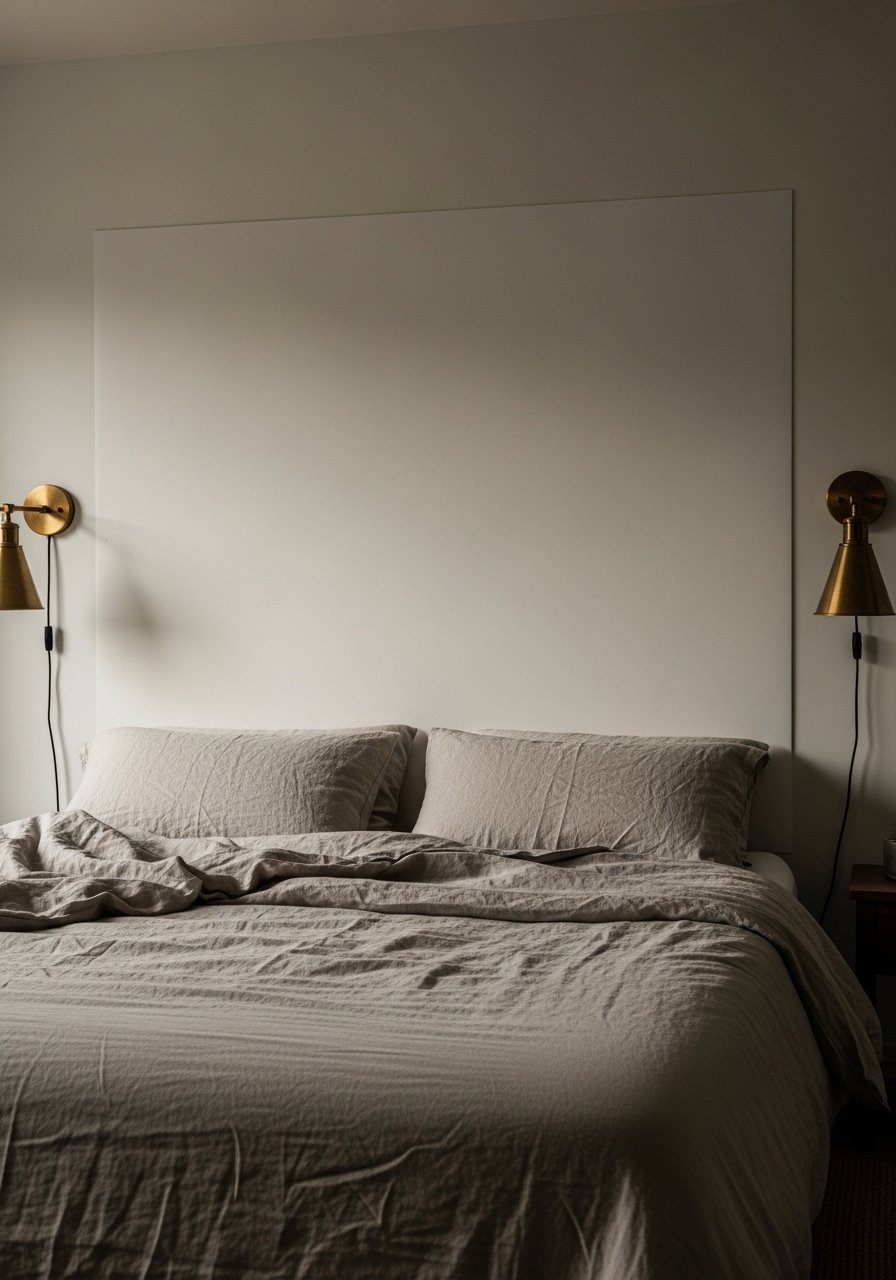
If you don’t want a physical headboard, make a wallpaper-scale decal panel to anchor the bed. I cut a 48 by 60-inch floral panel in muted tones and centered it so 8 inches peeked above pillows. It gives the same anchor effect as a headboard without furniture. The mistake people make is sizing panels too small. Aim for at least 60 percent of bed width for a balanced look. I used floral removable vinyl-panel.
Repeating Motif as Stair Runner Accent
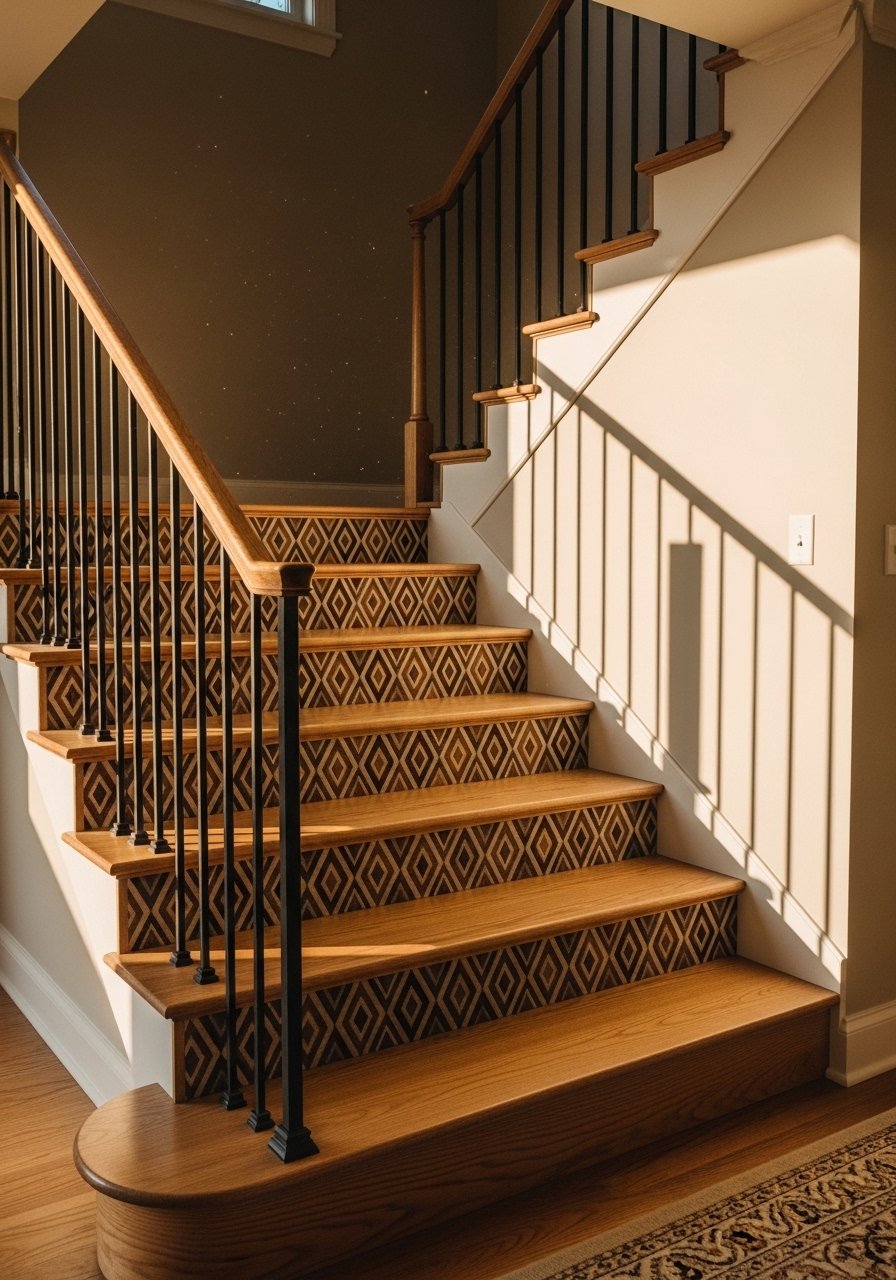
Apply small decals to stair risers to mimic a runner without fabric. I used a 5-inch diamond repeated up the steps and it gave the illusion of a patterned runner without tripping hazards. Measure the riser height and keep the motif centered vertically. Install from the bottom up to keep pattern alignment. People forget to account for overlapping scuffs from shoes. Use durable removable vinyl rated for high-traffic areas.
Your Decor Shopping List
Textiles
- Honestly the best $40 I have spent. Chunky knit throw in cream (~50×60 inches). Drape over the sofa arm for instant warmth
- 22-inch down-filled linen pillow covers, set of 2 in warm gray (~$34)
Wall Decor
- For the headboard panel, use floral removable vinyl panel 48×60 inches (~$45)
- Found these while looking for something else. Matte removable vinyl sheets variety pack (~$18)
Tools
- Clear transfer tape roll 12-inch for smooth application
- Vinyl weeding tool set with hook and tweezers (~$9)
Lighting & Accessories
- Brushed-gold removable vinyl 12×12 sheets for metallic accents
- Peel-and-stick chalkboard sheet 24×36 inches (~$22)
Budget Finds
- Microfiber smoothing cloth pack (~$8) for bubble-free application
- Precision self-healing cutting mat 12×18 inches (~$15)
Shopping Tips
White oak beats dark wood in 2026. Design feeds have shifted completely. These white oak floating shelves look current, not dated.
Grab removable vinyl starter pack for under $20. Try three small projects before committing to a big wall.
Curtains should puddle or kiss the floor, never hang halfway up. These 96-inch linen panels are right for standard 9-foot ceilings.
Lead with a tool. A quality scraper tool is worth the extra $8. It saves time and keeps decals bubble-free.
Everyone buys five small succulents. One single 6-foot fiddle leaf fig faux tree has ten times the visual impact.
Swap overly busy wallpaper for a single large decal panel. Large removable decal panels 48×60 inches let you change style seasonally.
Frequently Asked Questions
Q: Can I use Cricut decals on textured walls?
A: You can, but textured walls reduce adhesion. For light texture try small decals only, or use a framed decal panel instead. Test a 4-inch sample on the wall and check after 48 hours before committing.
Q: What size should wall text be above a sofa?
A: Aim for text that spans two thirds of the sofa width and sits 6 to 8 inches above the back. That proportion keeps the composition balanced without competing with cushions.
Q: How do I avoid bubbles when applying large decals?
A: Use a clear transfer tape and a scraper tool, work from the center outward, and apply slowly. If a bubble forms, prick it with a fine needle and press the air out.
Q: Can renters remove vinyl without damaging paint?
A: Most removable vinyl lifts cleanly if you peel slowly at a 45-degree angle. If the paint is low quality, warm the adhesive slightly with a hairdryer before peeling.
Q: Should I match decal color to room accents or contrast them?
A: I like an 80/20 approach, where 80 percent of tones are neutral and 20 percent is an accent. Use the accent color for one or two decals, not every piece.
Q: Any tips for scaling a decal to fit an oddly sized wall?
A: Measure wall width and height, then mock up the decal size on kraft paper first. Cut the paper to scale and tape it to the wall so you can live with the size before you cut vinyl.
Q: Can I mix hand-painted sections with Cricut decals?
A: Yes. A painted backdrop with a crisp vinyl silhouette on top looks custom. Paint first, let it cure fully, then apply decals. Avoid latex paints with high sheen for best adhesion.
