
My living room had nice furniture but it still felt like a waiting room. Took me embarrassingly long to figure out it was missing texture. Every surface was smooth, every color was flat, and nothing invited you to actually sit down. Once I started DIYing frames and adding small details the whole place stopped feeling staged.
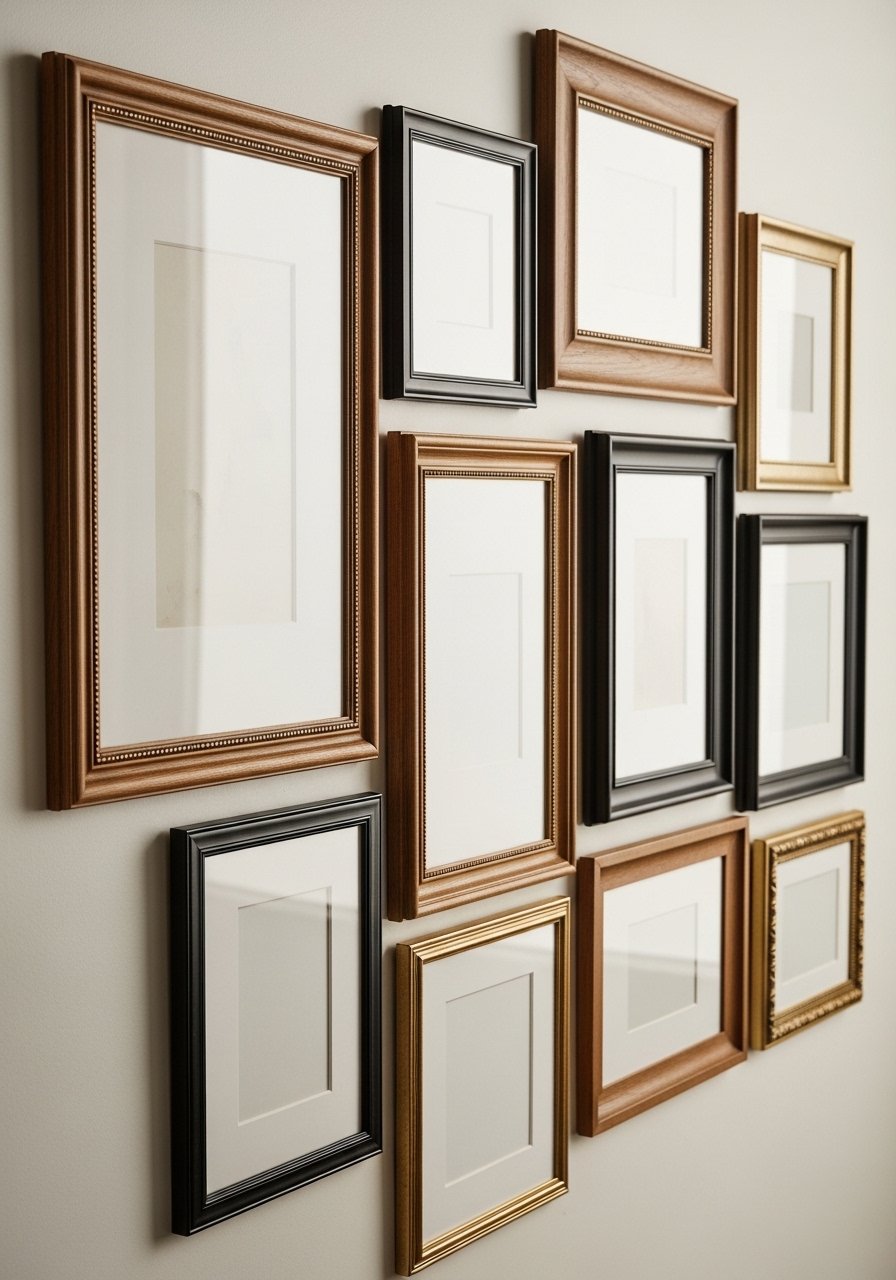
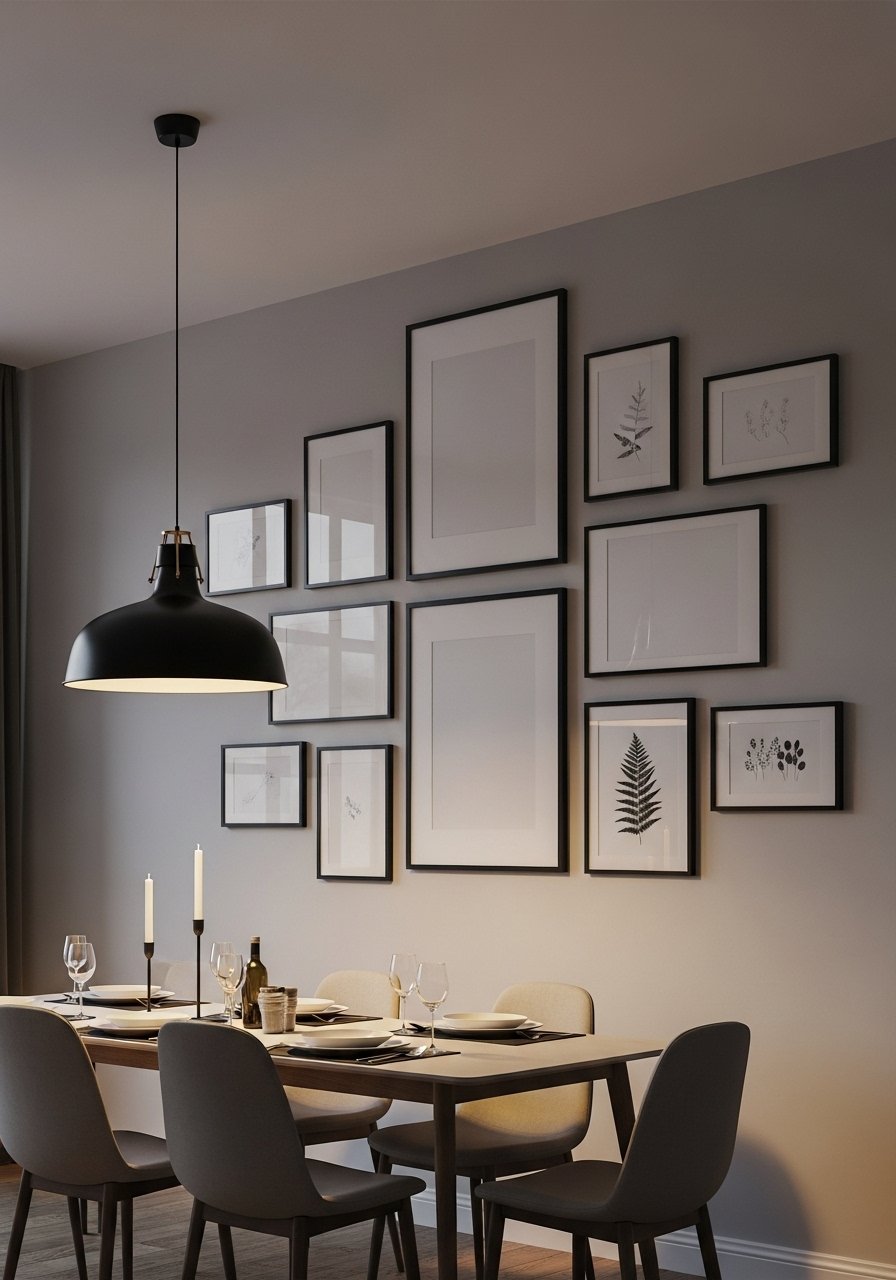
Gallery walls work because the eye reads them as one object, not a bunch of separate pieces. I built mine with thrifted frames, spray paint, and consistent mat sizes so the whole thing reads expensive. Budget: about $5 to $40 per frame depending on thrift luck. I used a set of black wood frames for a few anchor pieces, then brass thrift finds for contrast. Common mistake is inconsistent mat widths. Keep a 2.5-inch mat around each print and the result looks curated. Pair this with the floating-shelf idea below when you need to swap art often.
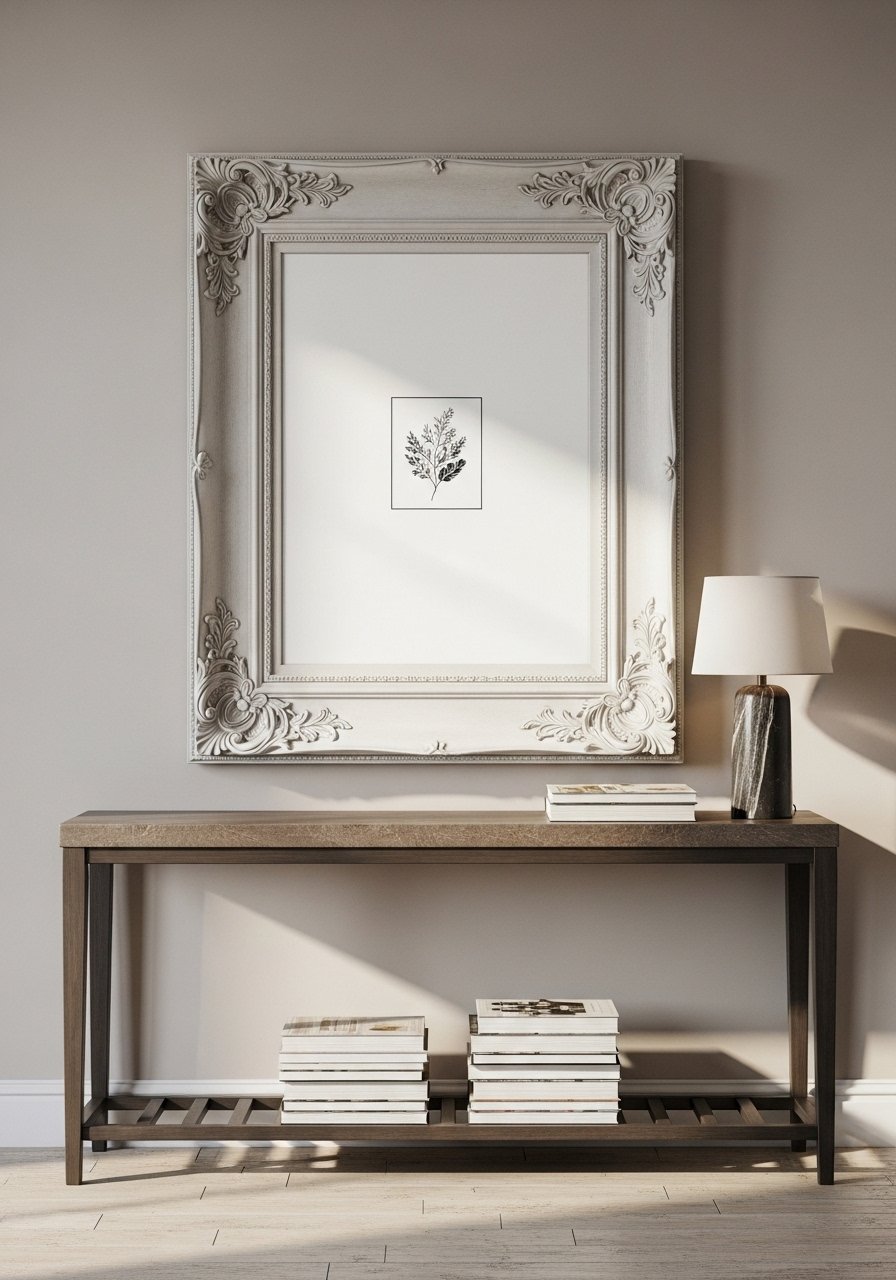
Oversized frames around small prints make everything look editorial. I painted an old gilded frame matte white, popped in a tiny modern print, and suddenly my entryway looked like a magazine spread. Budget under $75 if you find the frame at a thrift store and use a spray paint. A frequent error is leaving the frame center empty visually. Use a 24-by-36 frame around a 11-by-14 print with wide matting to keep proportions pleasing. For a ready option, try these ornate picture frames.
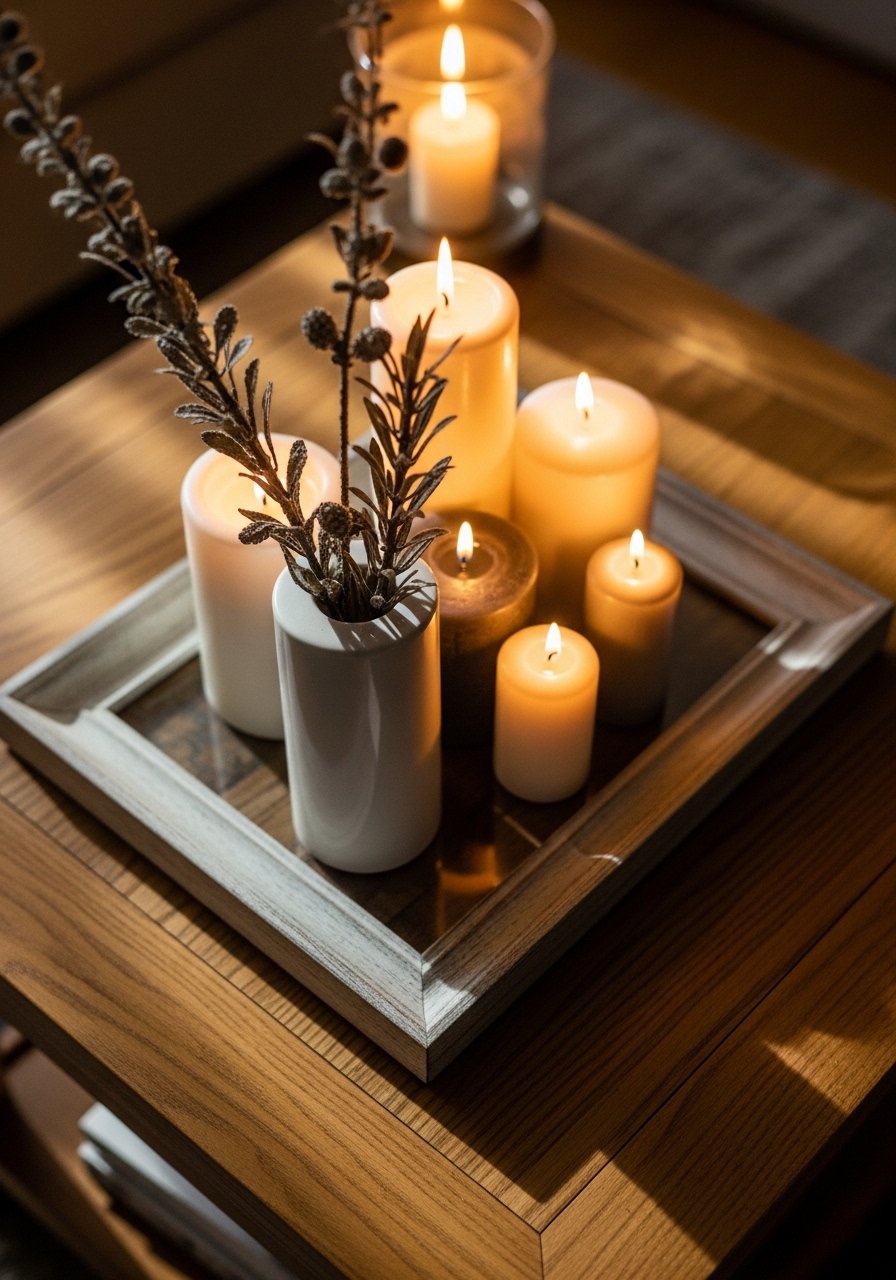
Turn deep frames into trays for coffee table styling. I measured the inner rabbet depth before picking glass and backing, then added small brass feet. The finished tray held a stack of books and three candles and read way more expensive than a plain tray. Budget runs $20 to $60 depending on hardware. Avoid using frames with loose corners. Reinforce them with a few finishing nails. For hardware, these small brass furniture feet are unobtrusive and cheap.
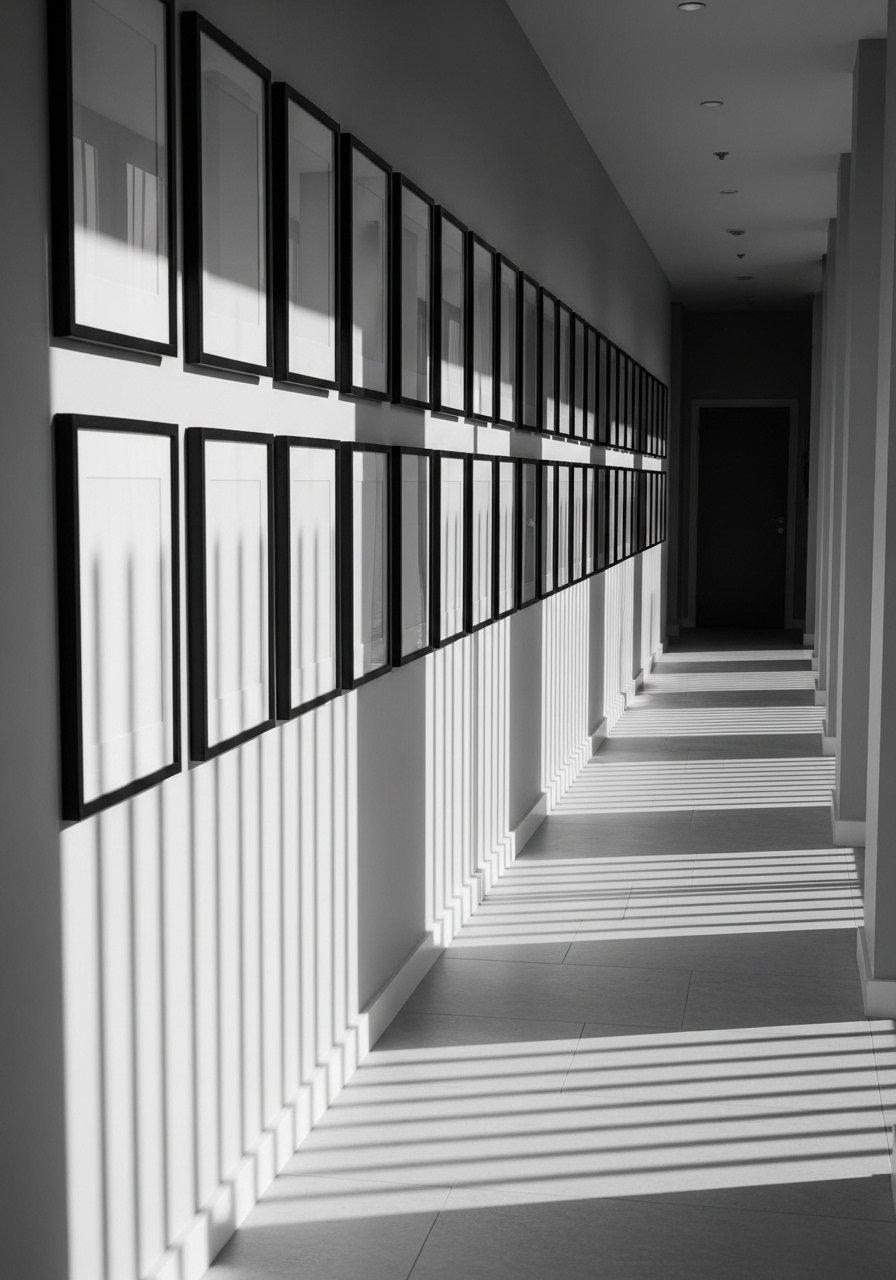
A linear row of identical frames in a hallway creates a gallery-like rhythm. I spaced mine 3 inches apart and kept the frames the same depth and finish. It makes a narrow corridor feel intentional, not cluttered. Budget per frame is $15 to $40. The common misstep is varying frame widths. Stick to one frame model and one mat thickness, then vary the picture content. These slim black metal frames are affordable and uniform.
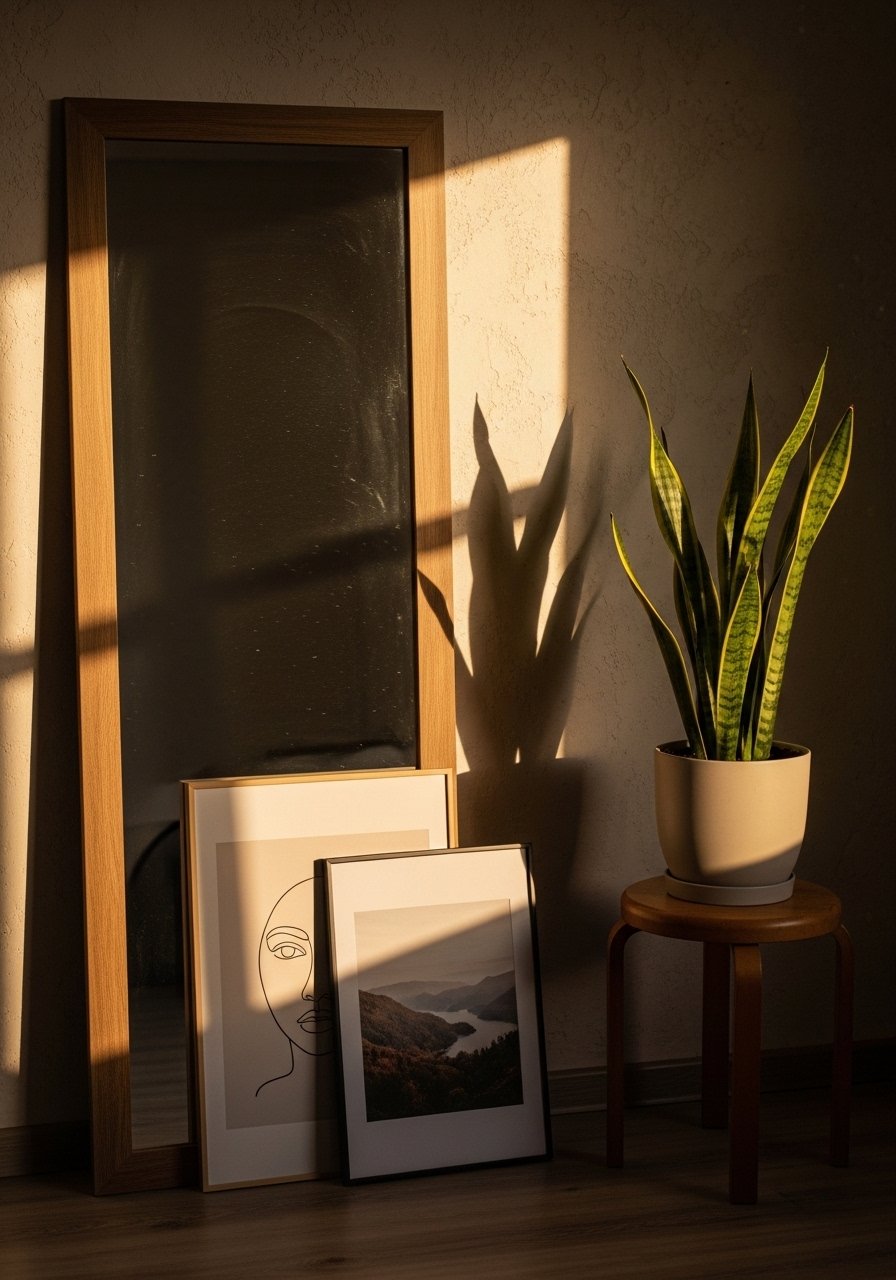
Leaning a framed mirror or print creates casual luxury. I lean a 30-by-40 mirror behind a 16-by-20 print and a sculptural vase. The trick is to anchor with weight at the base, like a stack of books. Budget varies, mirrors can be $80 to $200. A mistake is leaving the arrangement top-heavy. Keep the bottom 1/3 visually dense. If you do not want a mirror, these large framed mirrors are proportionally balanced for leaning.
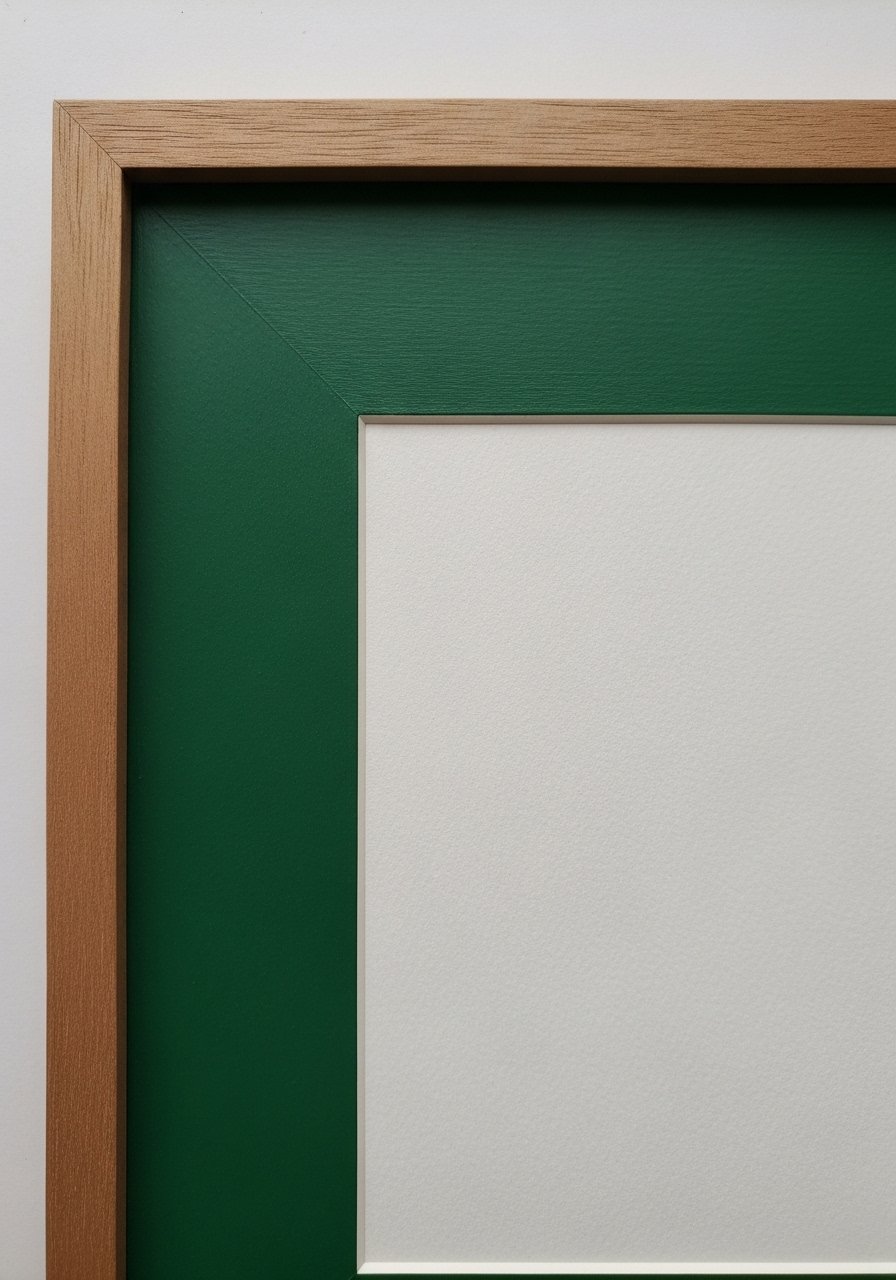
Painting the mat inside an inexpensive frame makes prints pop. I mixed a tiny bit of black paint into my emerald to get depth and painted a consistent 2.5-inch border. It cost me $8 in paint and made cheap prints feel custom. Oversight: paint bleeding onto artwork. Always mask with low-tack painter's tape and test on a scrap mat. For a frame that tolerates this trick, try these plain wood frames with removable mats.
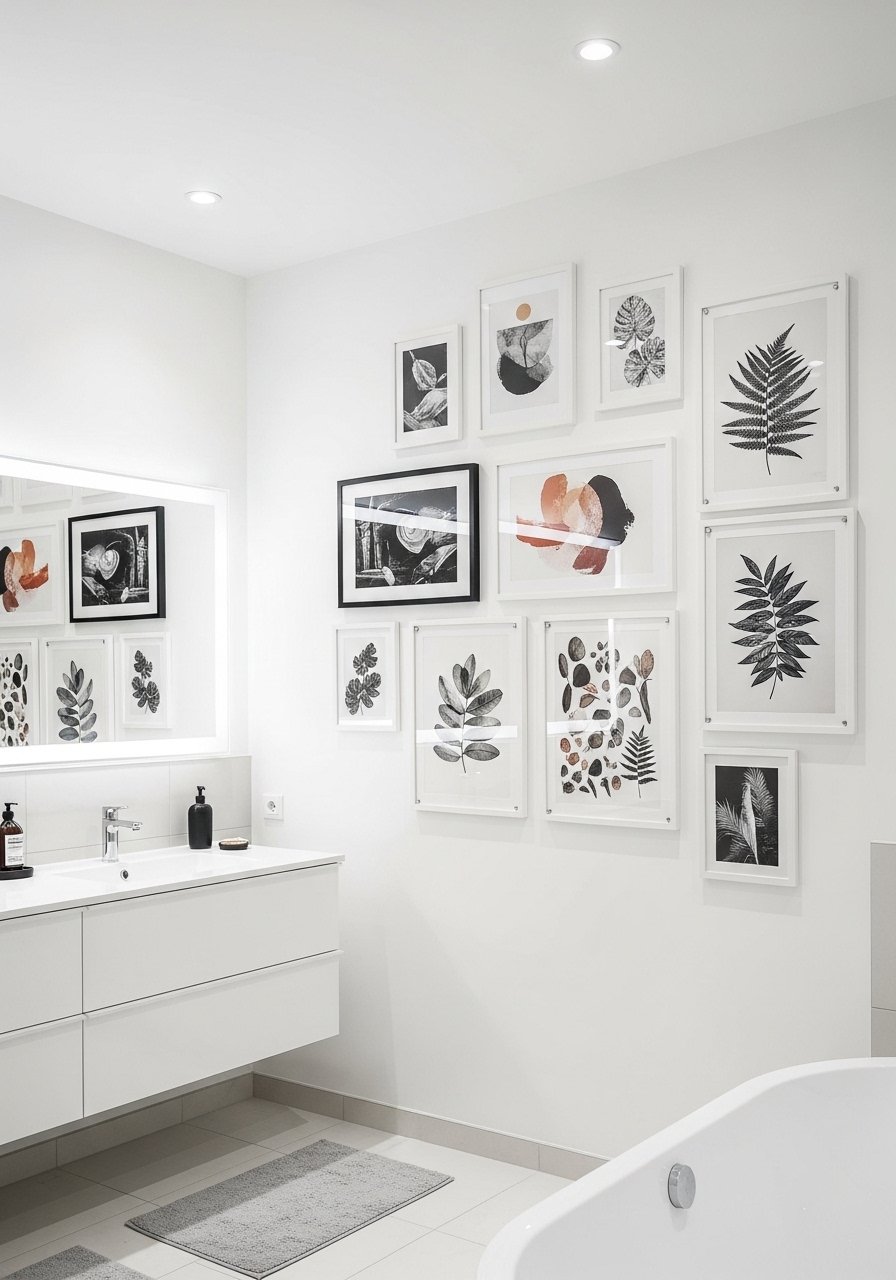
Bathrooms need moisture-friendly frames. I swapped my old wood for acrylic and sealed the back with weatherstrip tape. It gave the room a spa vibe without warping after showers. Budget: $20 to $60 per frame. A common error is using unsealed wood frames. Go acrylic or metal near water. These clear acrylic frames are lightweight and wipeable.
Round frames break the rectilinear monotony in a bedroom or nook. I swapped a square frame for a 24-inch round and paired it with woven textures. The result felt softer right away. Budget under $70 for a ready round frame. People often scale round frames too small. Make sure at least one circular piece is close to tabletops or eye level. I used a 24-inch round frame that fit perfectly over the side table.
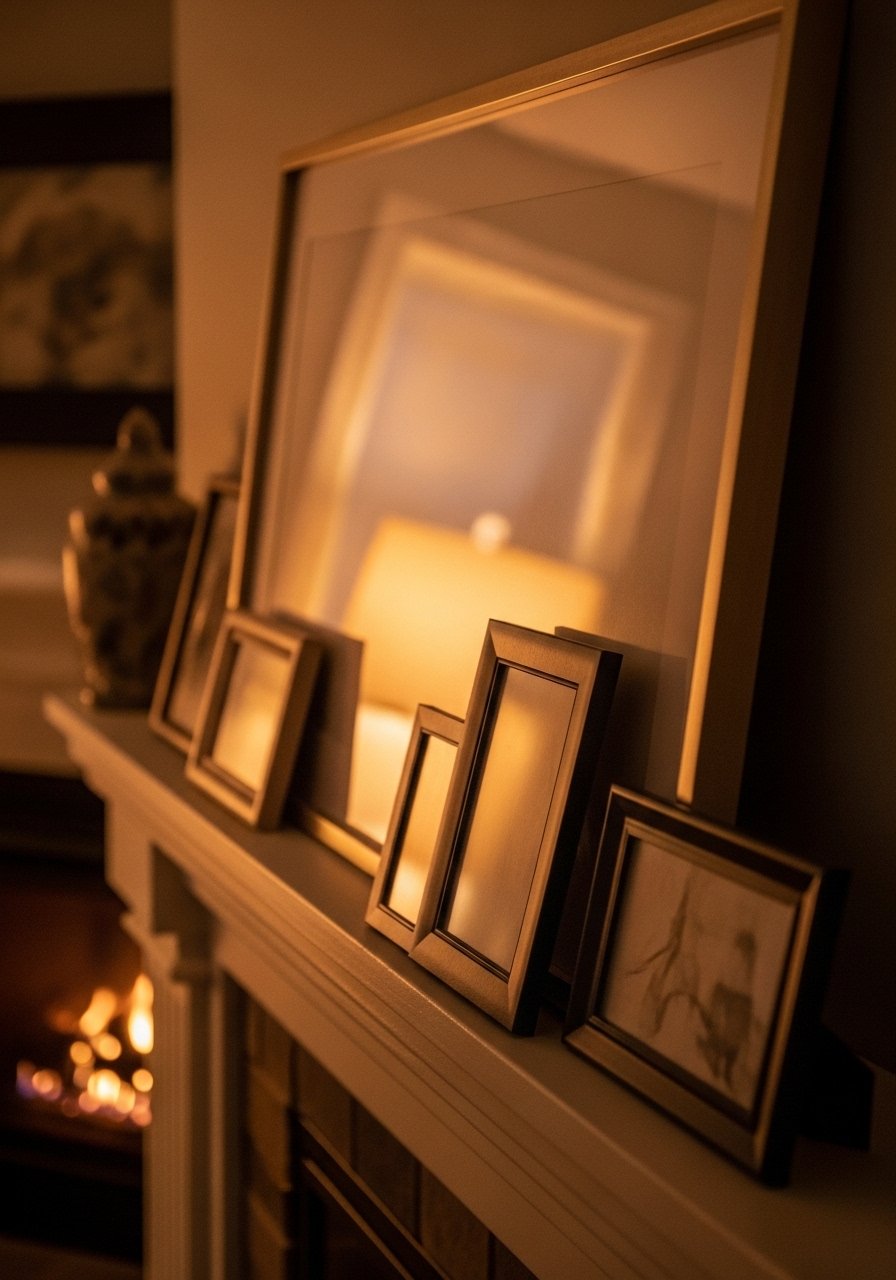
Layering frames on a mantel creates depth. I place one large frame as a backdrop and let smaller frames overlap in front, inconsistent spacing included. Budget under $150 total if you use thrift finds. Mistake is creating visual clutter by mixing too many colors. Keep the palette to two finishes and one accent color. These mixed-size gallery frames make it easy.

Mixed metallics look intentional when balanced. I used thin brass frames next to matte black hardware for contrast. Budget per frame $18 to $40. A typical error is matching every metal. Mix a warm and cool metal instead. Grab a pack of these thin brass frames for a modern glam touch.
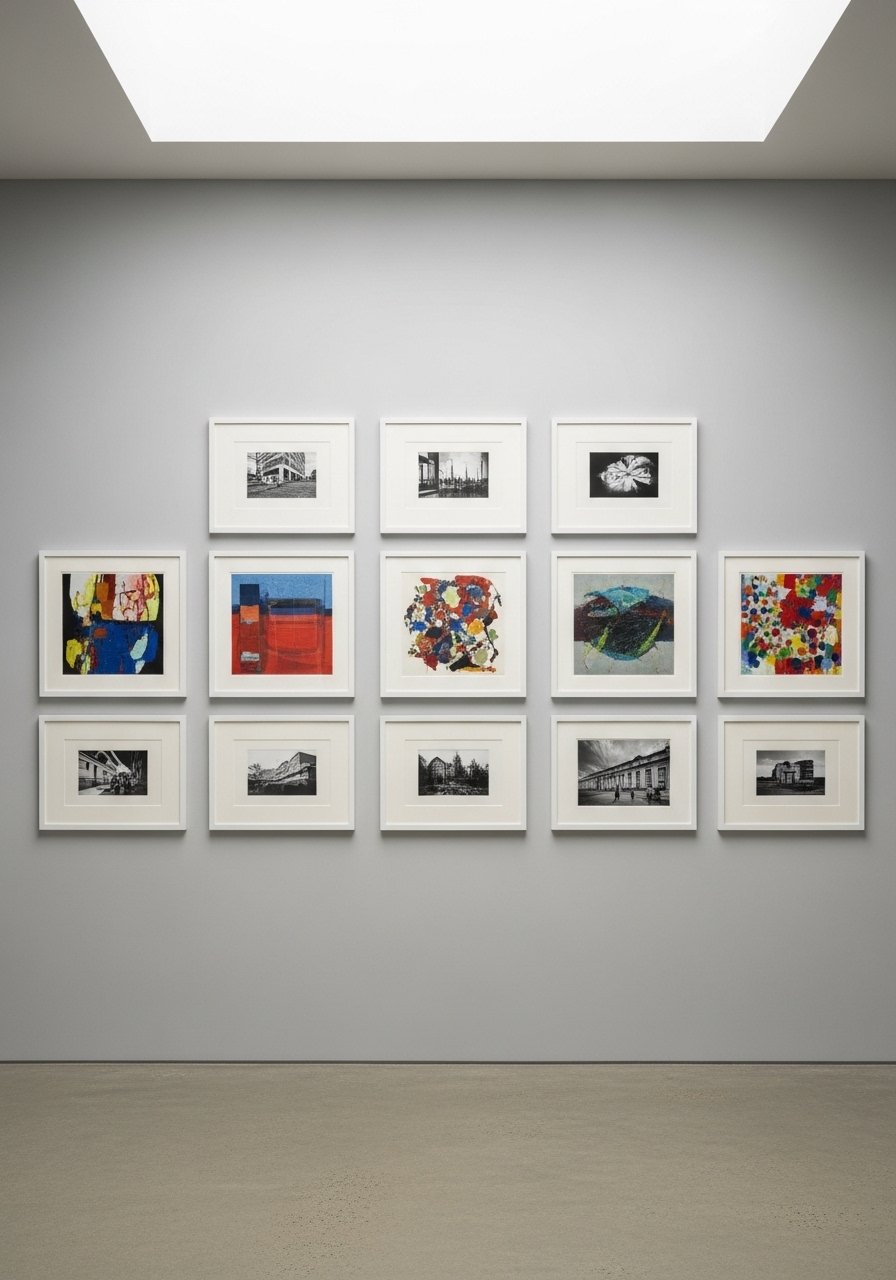
A strict grid reads expensive because it signals planning. I measured the wall, used a template with 3-inch spacing, and hung everything with picture-hanging strips. Budget depends on frame size, but the work is mostly free. People get spacing wrong. Use a 1:3 ratio for frame height to wall height. For easy hanging, try these leveling picture-hanging kits.
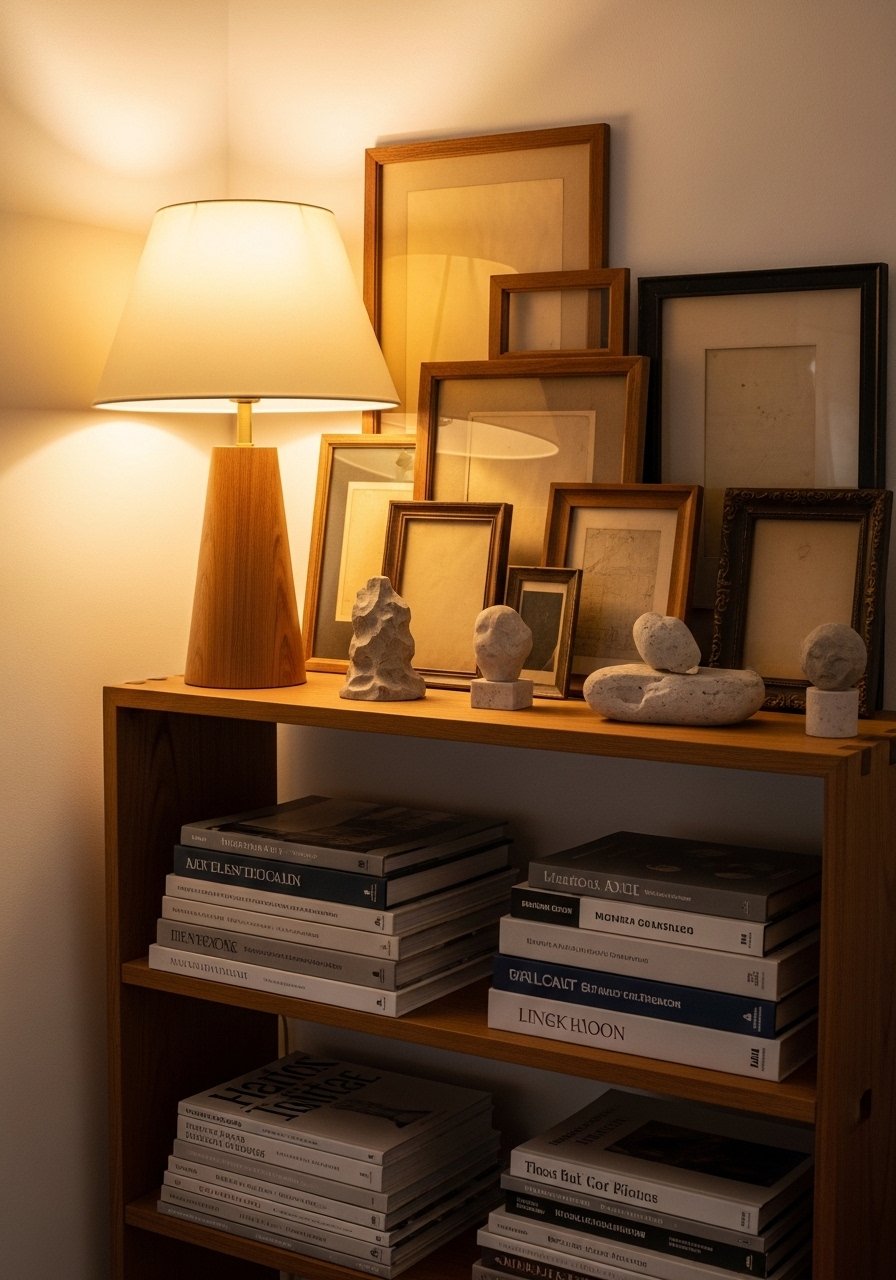
Framed photos mixed with objects on an open shelf make a vignette feel collected, not staged. I mix 5-inch to 11-by-14 frames and keep the rule of three in play for objects. Budget tiny for frames, under $30 each when thrifted. Mistake is symmetric placement. Let one frame lean while the others stand for casual balance. I picked up a handful of vintage-style frames that were easy to layer.
Matless frames with art that bleeds to the edge feel minimal and modern in dining rooms. I use prints with wide white margins printed to the image edge and stick them in slim black frames. Budget $20 to $60 per piece, cheaper if you print at home. A mistake is using tiny art in big frames. Match the frame profile to the artwork scale. For minimal frames, these slim black frames without mats work well.
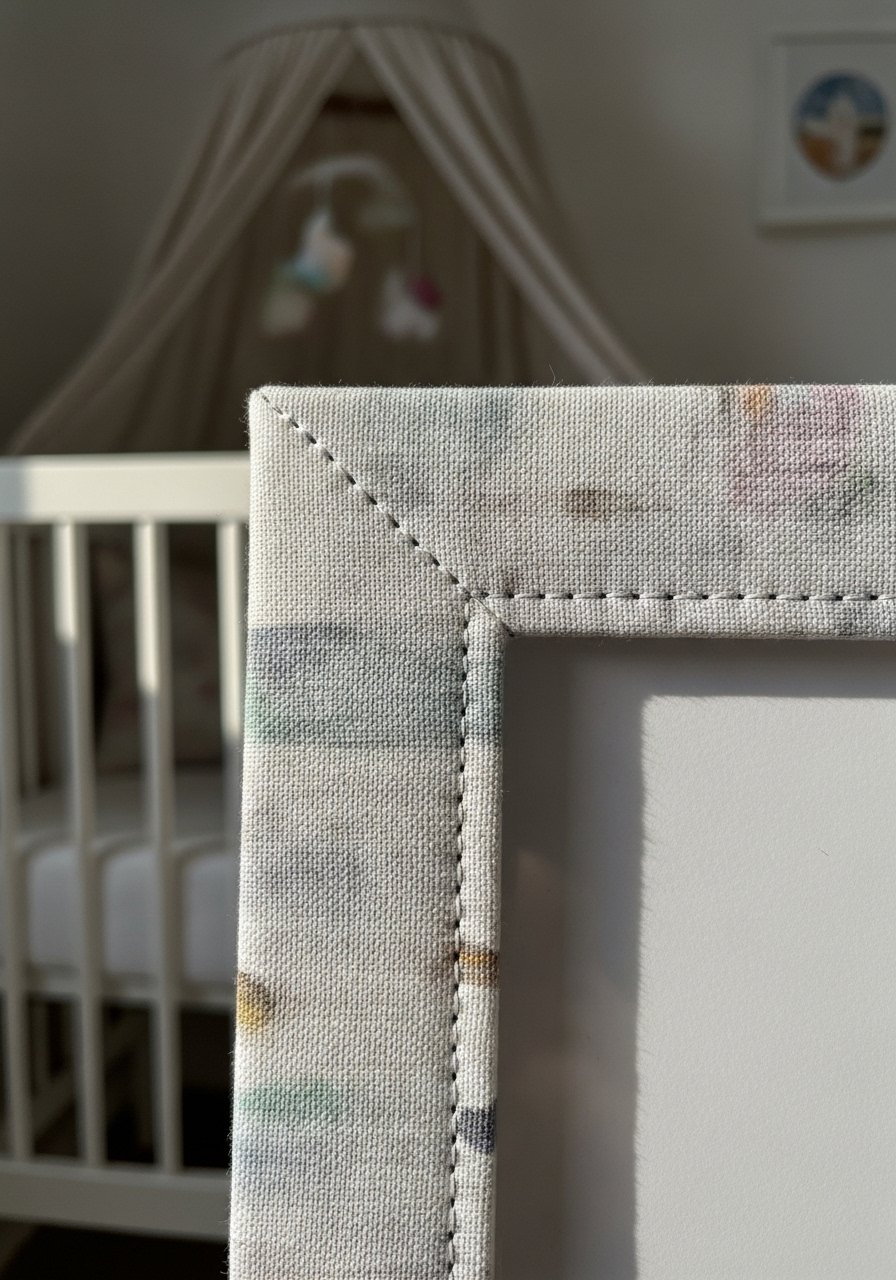
Fabric-covered frames add softness to a nursery or bedroom. I wrapped inexpensive frames in cotton, stapled neatly at the back, and used coordinating thread color for a stitched look. Budget under $30 per frame. Mistake is using slippery fabrics that shift. Stick to woven cotton or linen. For quick covers try these linen fabric swatches for a high-end feel.
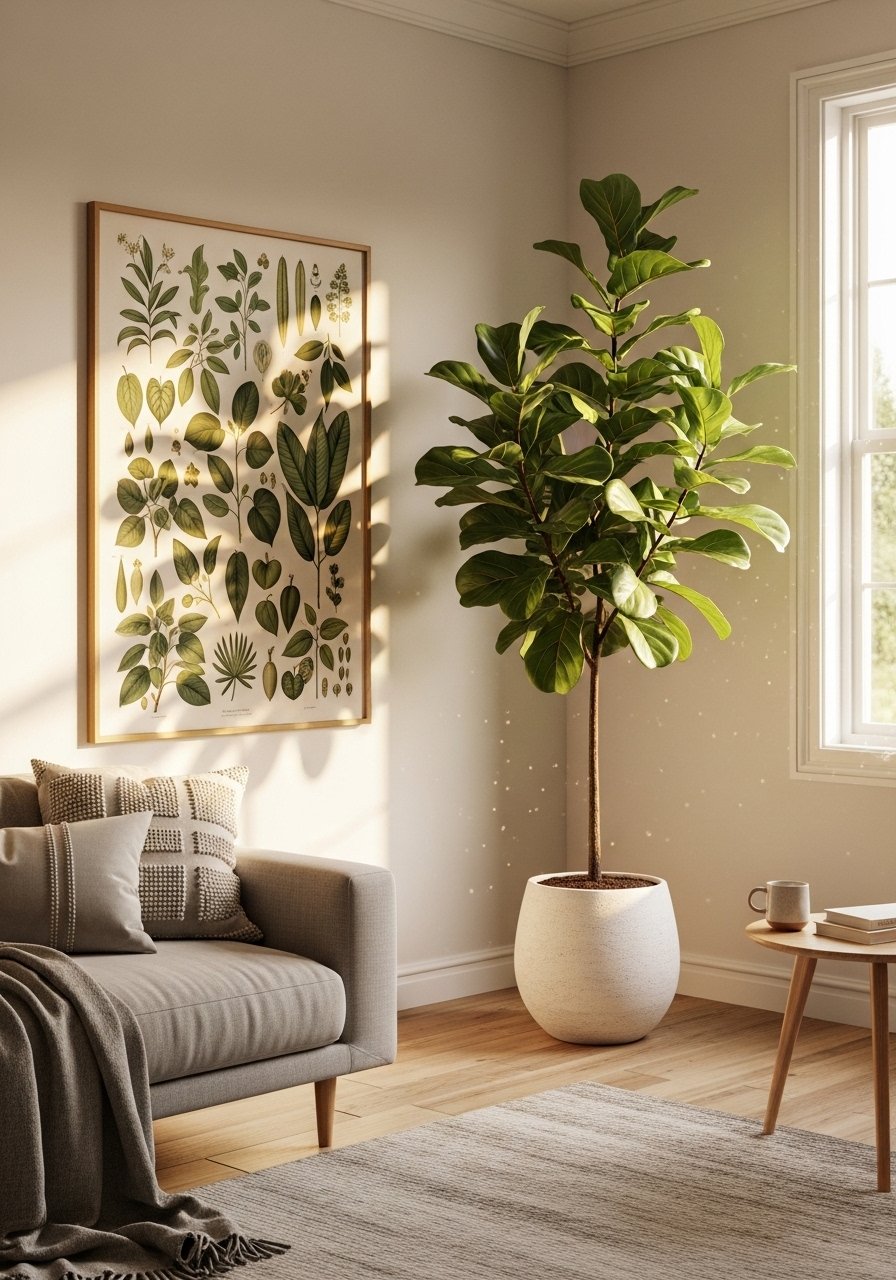
Everyone buys five small succulents. One single 6-foot fiddle leaf fig has ten times the visual impact. I positioned a tall botanical frame next to mine, and both pieces read like a design pair. Budget for a realistic faux fig is $80 to $200. Common mistake is crowding tall plants with low frames. Give height breathing room. If you need a plant that does not die on you, consider this artificial fiddle leaf fig 6ft.
Your Decor Shopping List
Textiles
- Honestly the best $40 I have spent, 22-inch down-filled linen pillow covers, set of 2 in warm gray and cream
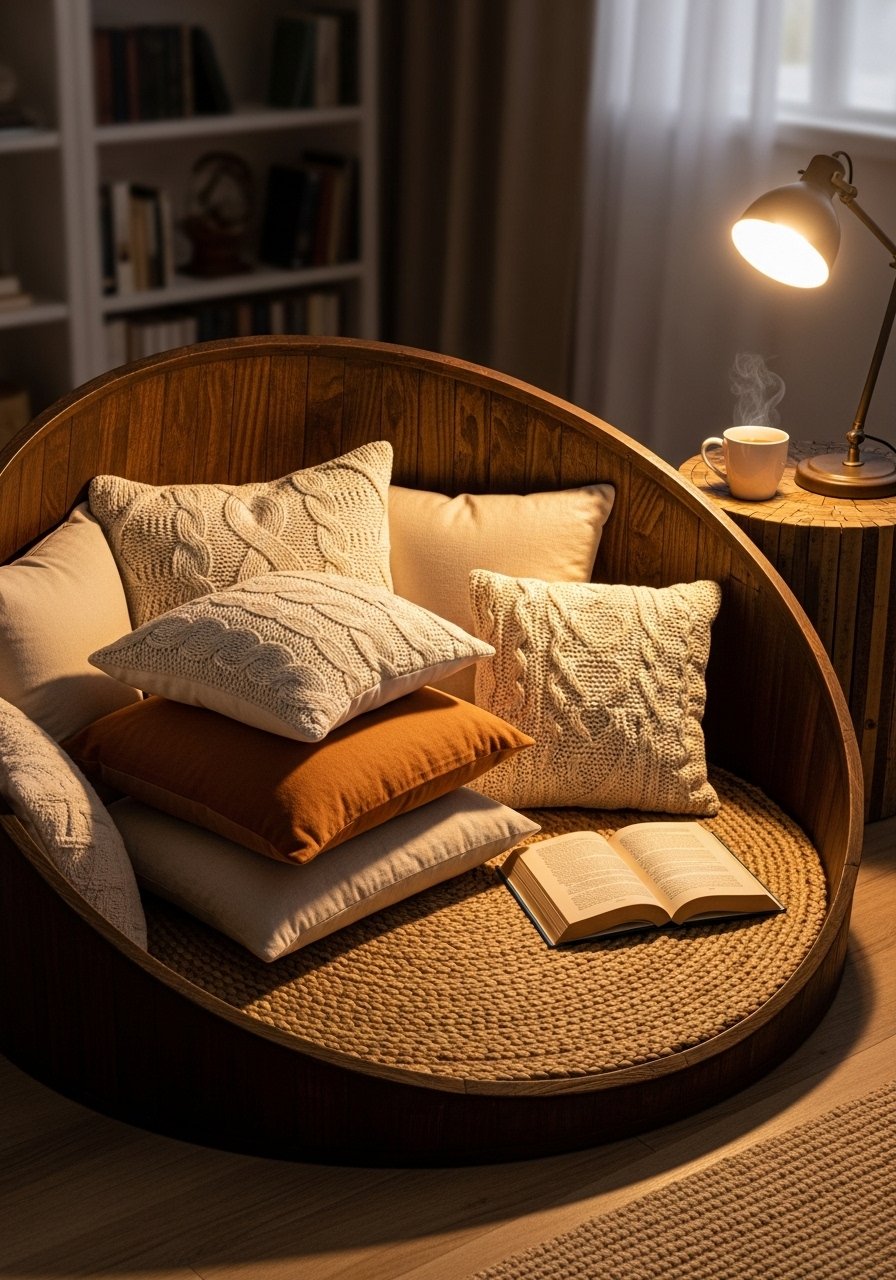
- Chunky knit throw in cream (~$35-55). Drape over the sofa arm for instant warmth
Wall Decor
- For the gallery wall, these black wood frames, set of 4 (~$45)
- Large ornate picture frame 30×40 (~$90) for an oversized statement
Lighting and Hardware
- Brass furniture feet, set of 4 (~$12) for turning frames into trays
- Picture hanging kit with level (~$15)
Plants
- Artificial fiddle leaf fig 6ft (~$120) for height without fuss
Budget Finds
Shopping Tips
White oak beats dark wood in 2026. Design feeds have shifted completely. These white oak floating shelves look current, not dated.
Grab velvet pillow covers for $12 each. Swap them seasonally and the whole room feels refreshed.
Curtains should puddle or kiss the floor, never hang halfway up. Most people hang curtains right at the window frame. That is why their rooms look shorter than they are. These 96-inch linen panels work for standard 9-foot ceilings.
Everyone shops for tiny succulent pots. One large statement plant changes a room. Try an artificial fiddle leaf fig 6ft if you need height without maintenance.
Mix a splurge and several cheap frames. Ornate thrift frames painted matte white read custom when paired with inexpensive black frames.
Frequently Asked Questions
Q: What size frame should I use for a focal piece above a sofa?
A: Go about two-thirds the width of the sofa for a single piece, or group pieces that together cover two-thirds of the sofa. If your sofa is 90 inches, aim for about a 60-inch-wide overall arrangement. Use a large frame like this large ornate picture frame 30×40 for a single focal point.
Q: Can I mix frame finishes without it looking messy?
A: Yes, mix two finishes and one accent metal. Keep one finish dominant and the other as a secondary. For example, mostly black frames with a couple of thin brass frames looks intentional. These thin brass frames are a good accent.
Q: How do I protect art in humid rooms like a bathroom?
A: Use acrylic frames or metal and seal the backing with weatherstrip tape. Avoid raw wood near steam. These clear acrylic frames are easy to wipe down.
Q: What is a simple way to make cheap frames look expensive?
A: Add consistent matting, paint a mat color, or layer frames. A 2.5-inch mat and clean spacing make prints look custom. If painting, mask carefully and use these plain wood frames with removable mats to practice first.
Q: Should I use real plants or faux with framed art?
A: Both are fine. Real snake plants and pothos tolerate neglect. If you need height without fuss, use an artificial fiddle leaf fig 6ft. It keeps the scale and drama without weekly watering.
Q: How can I hang a grid so everything is perfectly spaced?
A: Measure the wall, pick a consistent mat and frame size, and use a template with 3-inch spacing. Picture-hanging kits with a small level make this easier. These picture-hanging kits with level save time and stress
