
My living room had nice furniture and decent lighting but it still felt like a waiting room. Took me embarrassingly long to figure out it was missing texture and small, deliberate details on the walls. Once I started playing with stickers and cut vinyl, the room felt edited, not stagey. Most renters skip wall stuff because they dread the deposit hit. I spent under $40 per project and it made the whole bedroom feel like mine.
These ideas lean cottagecore and boho with a few modern-minimal options. Most projects run $10 to $50, with a couple around $75 if you splurge on tools. Works best for bedrooms, small guest rooms, or any rented space where you want dramatic change without paint.
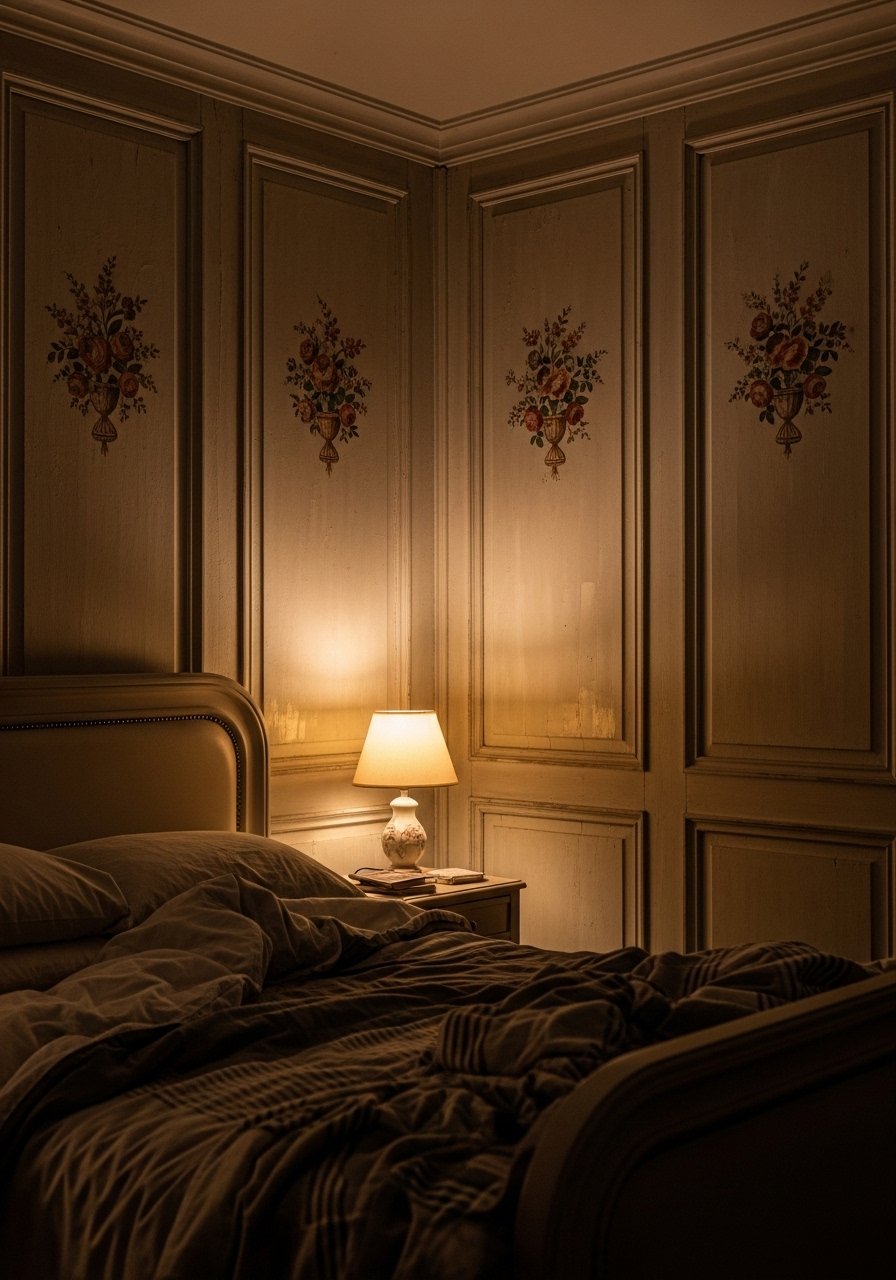
Cottagecore Floral Panels Behind the Bed
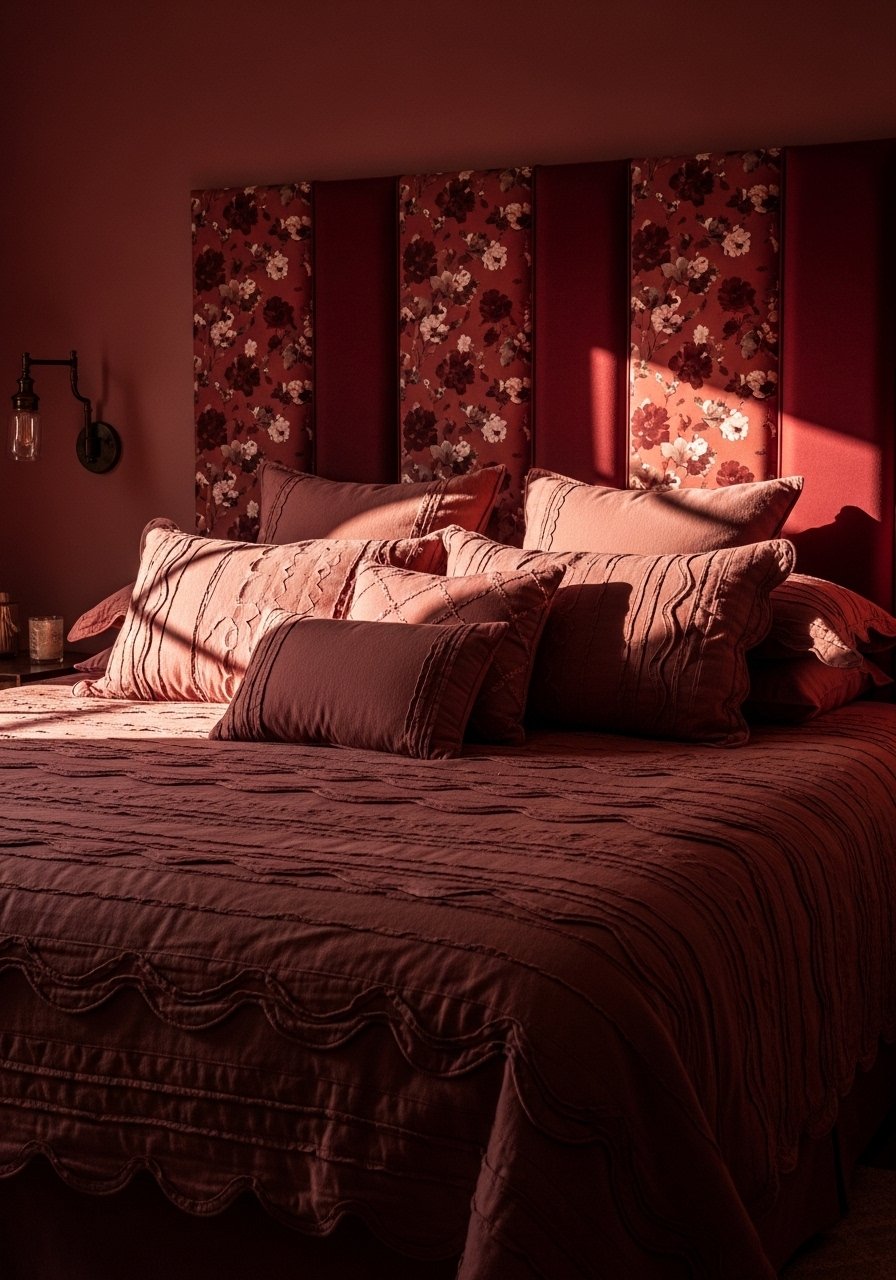
The floral panels fake a headboard and soften old plaster walls. I alternate two different floral patterns on uneven panels to fake symmetry, which hides wonky plaster without measuring every inch. Use removable wine vinyl and cut clusters in groups of 4 to 6 florals per 12×12 sheet to avoid wasting material. Budget is $20 to $40. I used removable wine vinyl roll and a cheap mat for my Cricut. Common mistake is skipping the alcohol wipe before sticking. Wipe with rubbing alcohol, press firm for two minutes, and space floral clusters 2 to 3 inches apart so the wall reads intentional, not crowded.
Boho Arch Frame to Center a Bed
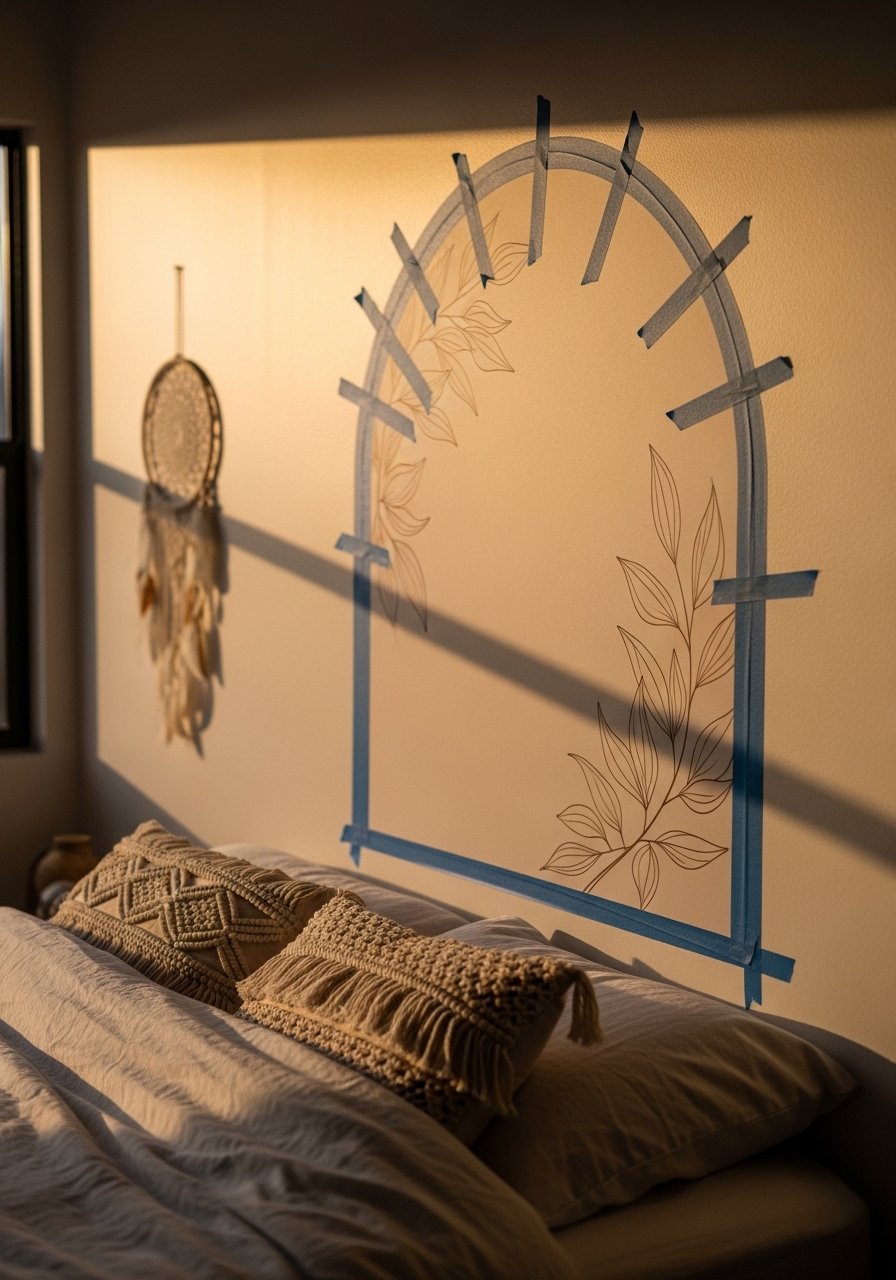
The arch sticker is a cheap way to create built-in art that frames a bed like a headboard. It reads bohemian but keeps things minimal, and it works great in small bedrooms. Budget is $15 to $30. I bought self-adhesive matte vinyl sheets and cut the arch on my machine, then added hand-drawn leaf details with a fine-tipped removable vinyl. A lot of people apply a giant arch and then realize it overpowers the room. Scale the arc so the top sits about one foot above your pillow line. Painter's tape transfer helps on textured walls to prevent tears while you move the decal into place.
Minimalist Stripe Accents Behind a Nightstand
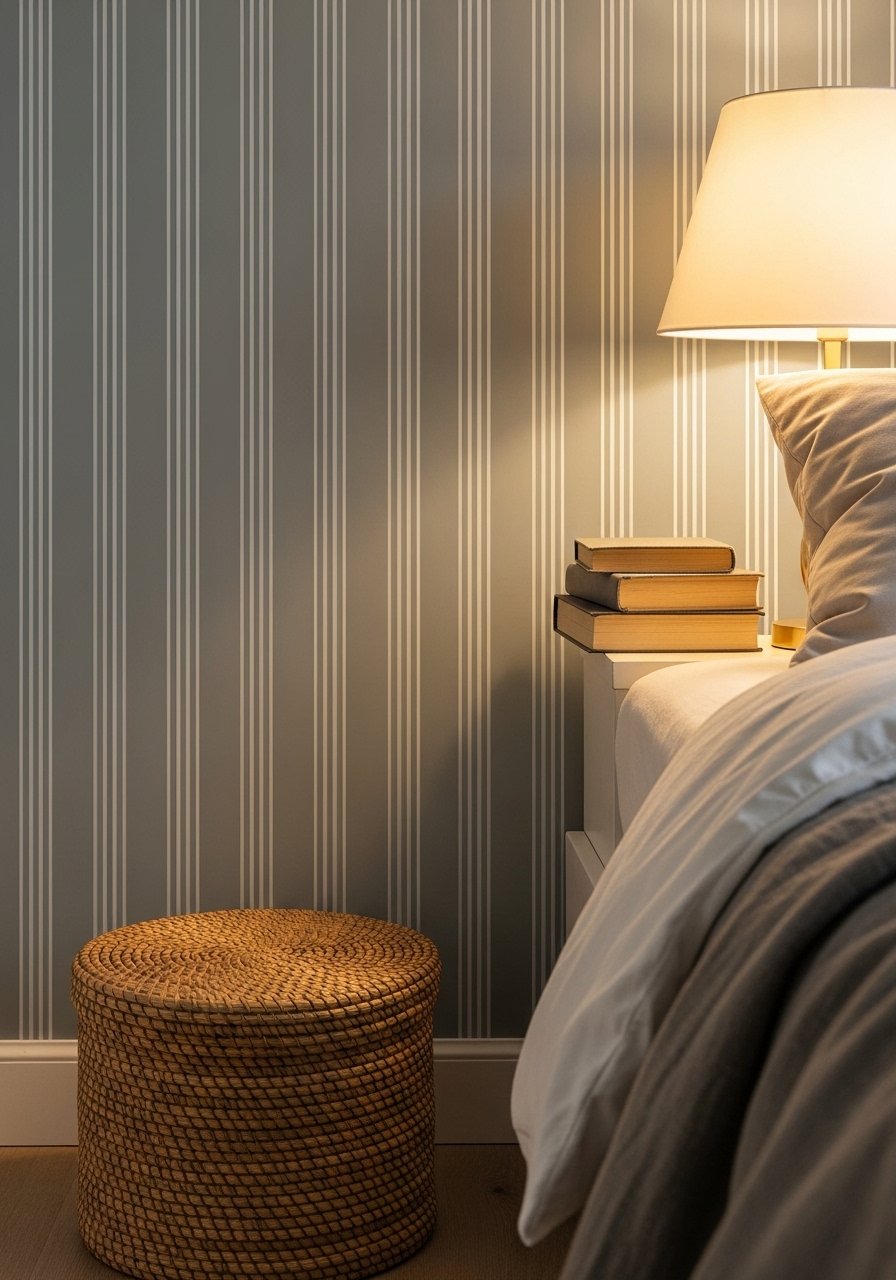
Thin stripe accents add depth without stealing visual real estate in tiny bedrooms. Long strip decals 1 to 2 inches wide are subtle and modern. Budget is $10 to $25. Use removable white vinyl strips, and keep equal spacing for a Scandinavian feel. I used 1-inch removable vinyl strips and a small level to keep the lines straight. The mistake I see is people making stripes too wide. Wider than two inches and a small room feels boxed in. Cut your strips in nested batches to save vinyl and plan equal gaps of about 3 to 4 inches for a balanced rhythm.
Half-Wall Mandala in a Boho Guest Room
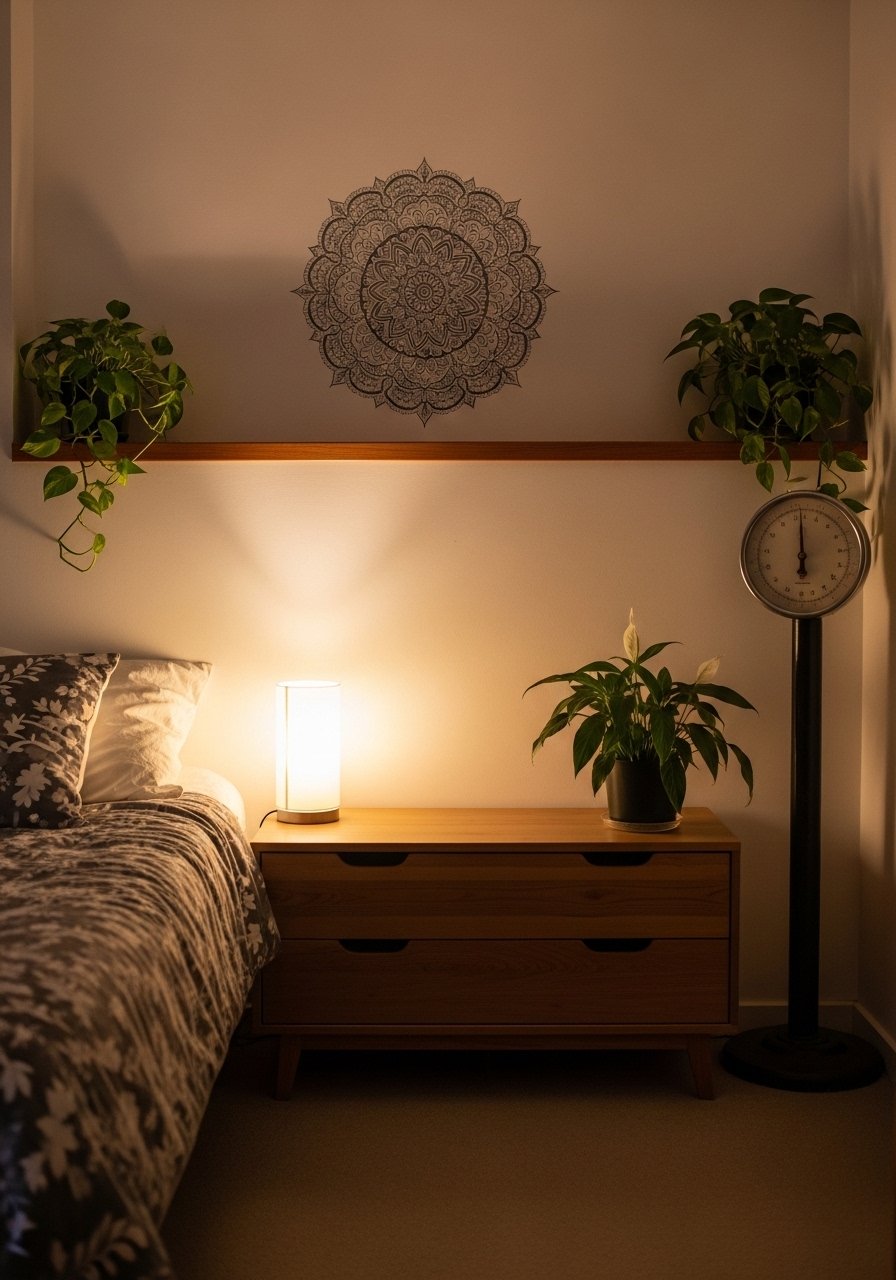
A mandala scaled to half the wall grounds a room without forcing a full mural. I like setting the top edge at about four feet to anchor furniture. Budget is $25 to $50. Buy a removable mandala decal set and center it over the dresser. Folks often pick a mandala and make it too small, then the wall reads unfinished. Mandalas work well with neutral bedding and a few layered pillows. If your wall is uneven, alternate smaller mandala segments rather than one giant piece to avoid misalignment.
Quirky Geometric Clusters Above a Dresser
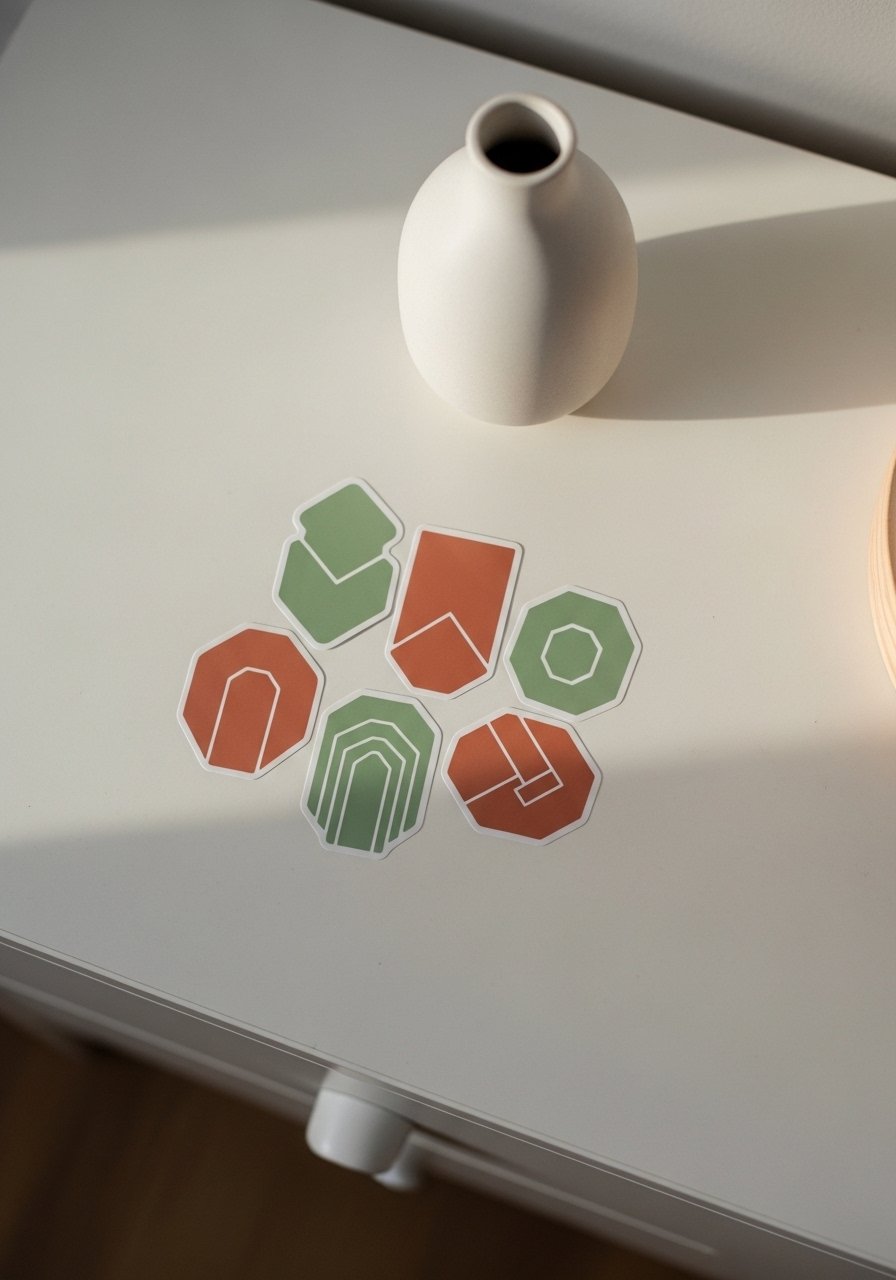
Odd shapes break up beige walls fast and read playful without being juvenile. Cluster five shapes for a dresser pop and keep sizes mixed so the eye moves. Budget $15 to $35. I grabbed a pack of sage geometric vinyl decals and nested the cuts to get the most shapes from each sheet. People often place shapes in a straight line which looks forced. Instead, offset them and keep 2 to 3 inches of breathing room between pieces. For pet homes, press each piece extra firmly and wipe weekly so claws do not catch loose edges.
Wine-Red Scallop Ceiling Border for Taller Rooms
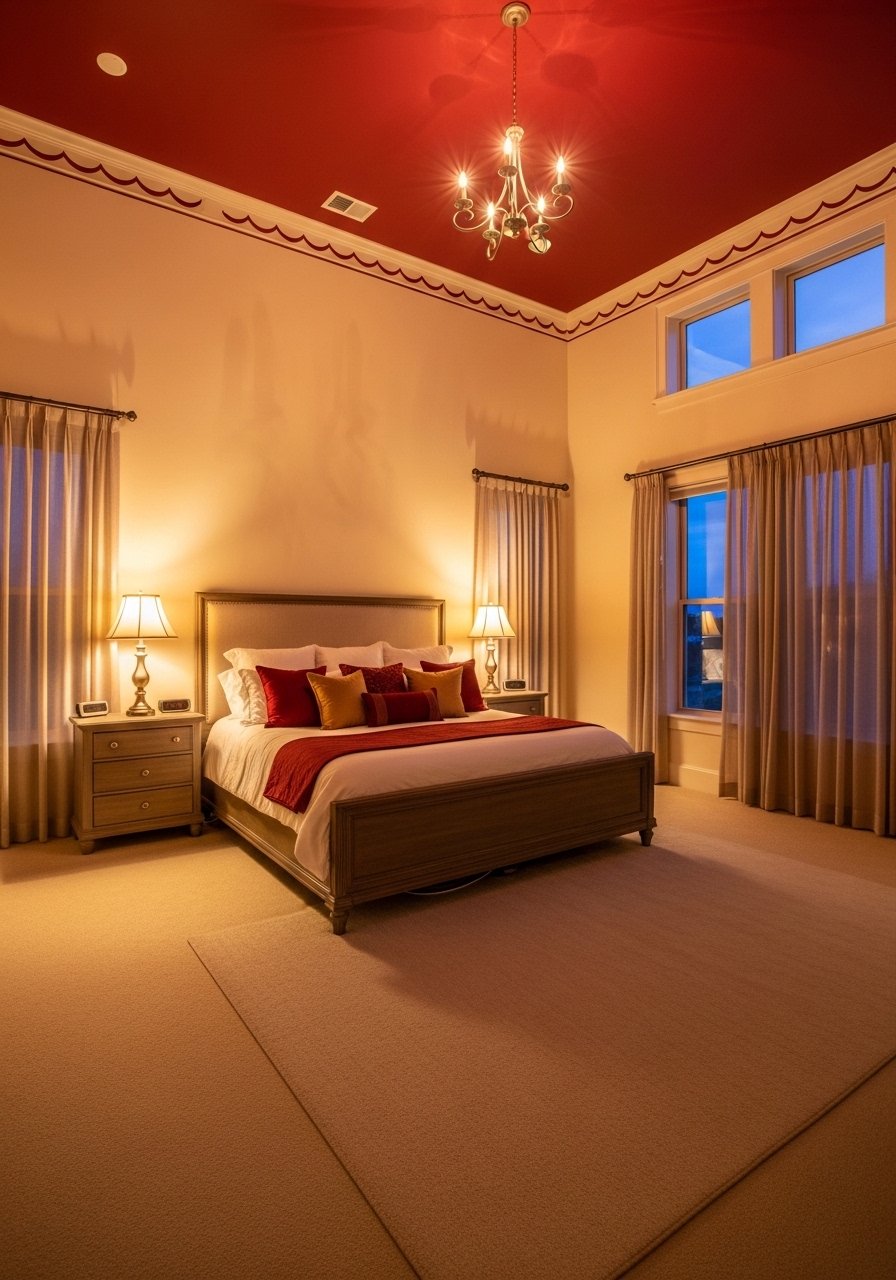
A scallop border tricks the eye into thinking the ceiling is higher and gives a grandmillennial touch without paint. Elongated scallops look best when the border sits 2 to 4 inches below the ceiling trim. Budget $20 to $45. Use wine-red removable vinyl cut into scallops on a Cricut. A common mistake is starting the border too low which shortens the room. Cut scallops so each one is about 6 to 8 inches wide, and overlap edges slightly for a seamless curve. Painter's tape transfer helps around corners and crown moulding.
Floral Vine Trail Around a Door Frame
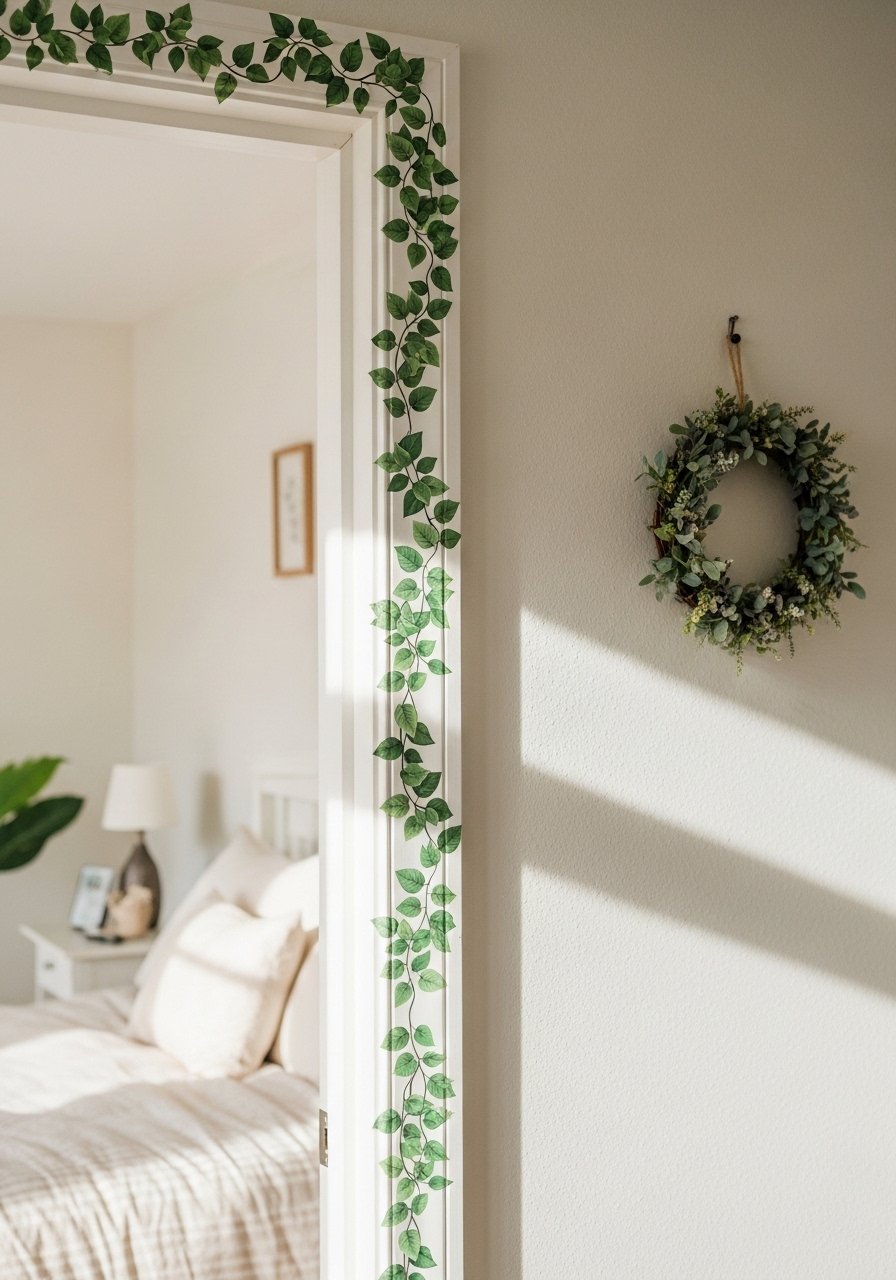
Trails that run from the door frame into the room connect trim to wall and make transitions feel intentional. I like a six-foot vine that climbs and then trails toward the bed. Budget $18 to $40. I used removable vine decal strips and pressed each section for two minutes. Mistake alert: people stick vines directly against painted trim without testing. Test a small piece first and keep 0.08mm thickness decals if you plan to remove them later. For renters, tuck the ends just under the trim so a landlord sees clean lines not random sticky residue.
Symmetry Hack with Offset Florals for Old Apartments
Old apartment walls rarely sit perfectly straight. I alternate floral clusters on narrow and wide panels to fake symmetry. It reads edited in a transitional cottage way. Budget $22 to $50. Use peel-and-stick floral packs and a ruler to stagger groups. The usual mistake is trying to mirror every piece exactly. Instead, offset clusters so the eye reads balance, not a photocopy. Cut vinyl in nested groups to stretch your sheets and plan for 45 to 60 minutes of work, including surface prep and dry time between placements.
Playful Shape Grid for a Small Bedroom Accent Wall
A tight grid of small stickers creates a wallpaper-like punch without commitment. Keep repeats at 12 inches or less in small rooms so the pattern does not swallow the space. Budget $15 to $35. I ordered a set of pastel shape stickers and laid them out on a cardboard mockup first. A mistake many make is skipping the mockup and then running out of matching shapes mid-wall. Space rows 2 to 3 inches apart and use nested cuts so you get 20 to 30 shapes from each 12×12 sheet.
Your Decor Shopping List
Textiles
- Honestly the best $40 I have spent, 22-inch linen pillow covers, set of 4 in muted sage and cream for layering
- Chunky knit throw in cream (~$35-55). Drape over the foot of the bed for texture
Wall Decor
- Removable wine vinyl roll for scallops and florals, 12-inch width recommended
- Removable mandala decal set scaled to 4 feet for half-wall looks
Tools & Prep
- Painter's tape, 1.88-inch roll for transfer and alignment
- Isopropyl alcohol wipes, pack of 100 to clean walls before applying
Budget Finds
- Sage geometric decal pack (~$15)
- Pastel shape sticker set for small accent grids
Shopping Tips
White oak beats dark wood in 2026. Design feeds have shifted completely. White oak floating shelves look current, not dated.
Grab removable vinyl rolls in two colors to mix and match. People drop about $35 on quick wall fixes like these.
Curtains should puddle or kiss the floor, never hang halfway up. 96-inch linen panels are the right call for standard 9-foot ceilings.
If you have pets, buy slightly thicker 0.08mm removable vinyl and press each decal for two full minutes. Removable vinyl set, 0.08mm will peel clean.
One big plant beats five tiny ones. Artificial fiddle leaf fig, 6-foot adds height with minimal upkeep.
Frequently Asked Questions
Q: Will these stickers damage painted walls when I remove them?
A: Most removable vinyl at 0.08mm peels clean if you wipe the surface first with alcohol and peel slowly at a 45-degree angle. Test a small scrap in an inconspicuous spot before committing to a whole wall.
Q: How do I plan sticker placement on uneven or panelled walls?
A: Alternate patterns to fake symmetry rather than trying to mirror every piece. Use a ruler to stagger clusters, and cut pieces in groups of 4 to 6 per 12×12 sheet to maximize material and make mid-wall adjustments easier.
Q: What if my stickers start to peel or bubble after a week?
A: Wipe walls with alcohol before apply and press every piece firmly for two minutes. If bubbles appear, use a pin to release trapped air and smooth again. Most bubbles come from dust or oils, not the vinyl itself.
Q: Can I mix the boho arch idea with minimalist stripes in the same room?
A: Yes, mixing works if you limit colors to two or three tones and scale each element. Try thin 1 to 2-inch stripes behind a small bedside area and keep the arch a single color so the room reads cohesive.
Q: How long does a typical sticker project take?
A: Simple stripe or shape clusters can take 20 to 40 minutes. More involved panels or symmetry hacks with alternating patterns take 45 to 60 minutes, including surface prep and layout tweaks. People who plan a mockup on cardboard save time and avoid running out of matching pieces.
