
My living room had nice furniture but it still felt like a waiting room. Took me embarrassingly long to figure out it was missing texture. Every surface was smooth, every color was flat, and nothing invited you to actually sit down. Swapping one big print for three textured pieces made the room feel lived in overnight.
These ideas lean modern farmhouse with a hint of boho. Most projects are under $50, with a few around $100 for nicer materials. They work in living rooms, bedrooms, entryways, and small apartments that need vertical interest.
Hand-Painted Modern Abstracts For A Minimal Living Room
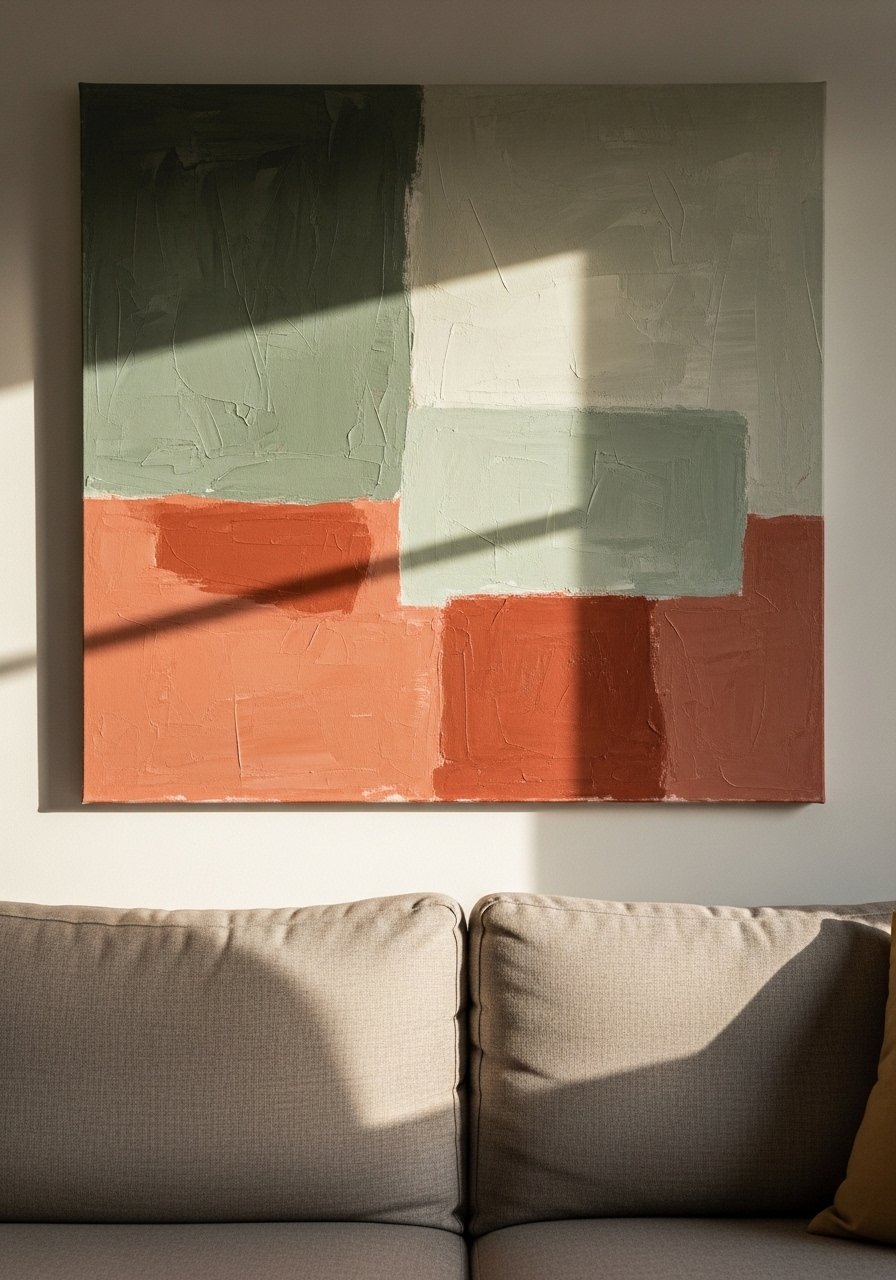
I teach myself color mixing on 16×20 canvases because they fill wall space without feeling too big. Keep it to two or three acrylic colors to avoid muddy mixes and use loose shapes instead of precise lines. I bought blank 16×20 canvases and a starter set of acrylics and the whole project ran me about $25. A common mistake is trying to copy a photo exactly. It looks better when you let shape and texture win. For renters, use command-picture-hanging strips for canvases. If your sofa is under 84 inches, aim for a canvas about 24 to 36 inches tall, or cluster three canvases so the group is roughly two thirds the width of the sofa. Blank 16×20 canvases are an easy buy.
Thrift Frame Gallery For An Eclectic Bedroom

I love hunts at thrift stores for wood frames that cost under $5 each. Pick mostly 8×10 and 11×14 sizes so printable art fits without trim. The trick is odd numbers. Group three or five frames and anchor the biggest one in the center. People often make the mistake of spacing pieces evenly like a grid. Instead vary heights by 3 to 5 inches for a collected look. Print low-res art at home and disguise pixelation with a linen mat or mount fabric instead. Set of mixed 8×10 frames keeps costs down.
Woven Fiber Hangings Clustered For Texture In Small Spaces
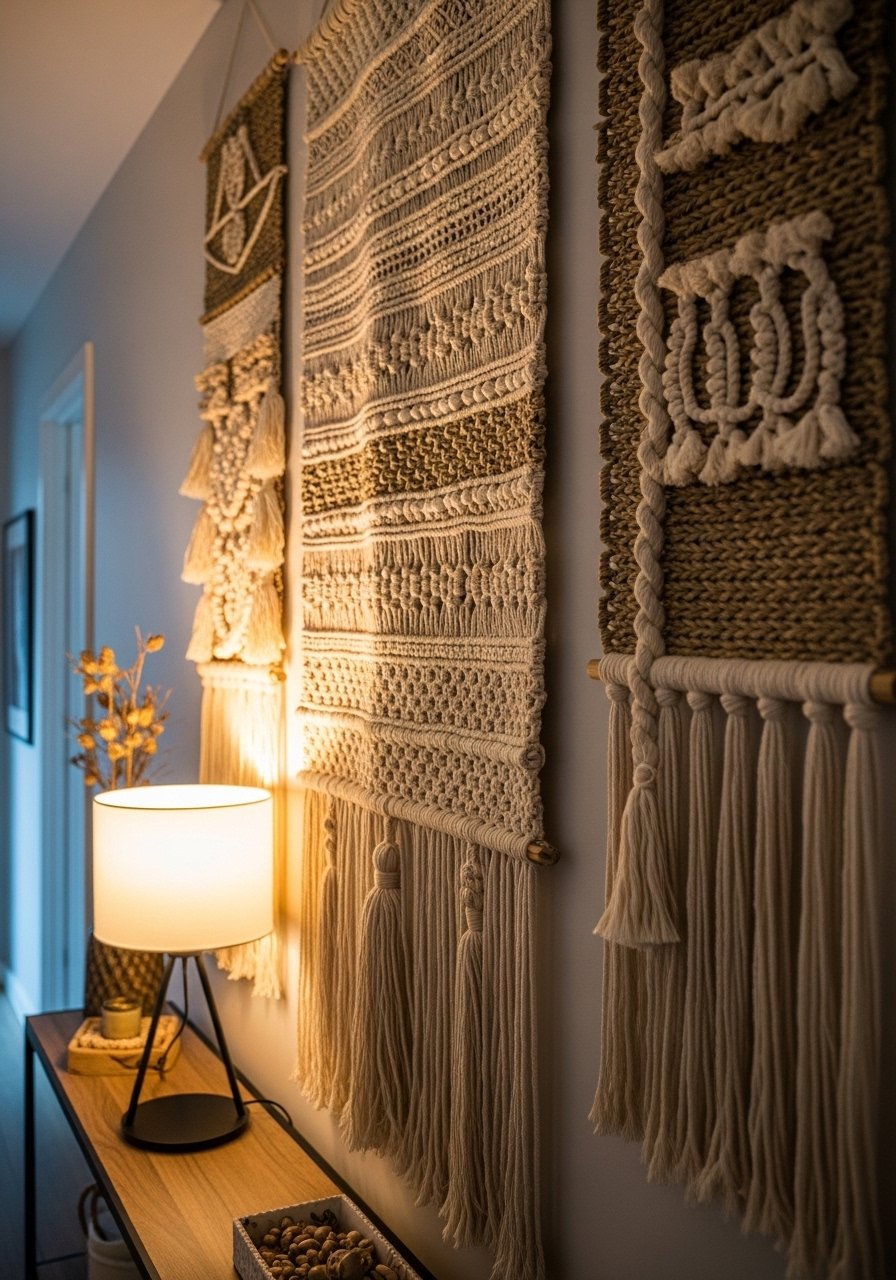
Texture beats flat posters every time, and woven pieces do that job without needing a huge wall. I hang 3 to 5 woven pieces at varying heights, about 12 to 18 inches apart, to create depth without overcrowding. A frequent error is buying identical weavings in the same color. Choose neutrals with one color pop so the wall stays versatile. These are great for small apartments because vertical clusters lift the eye. Most handmade weavings are $20 to $60. If lighting is low, pick pieces with contrast so they read from across the room. Handwoven wall hangings are perfect for this.
Faux Succulent Shadowbox For Low-Maintenance Greenery
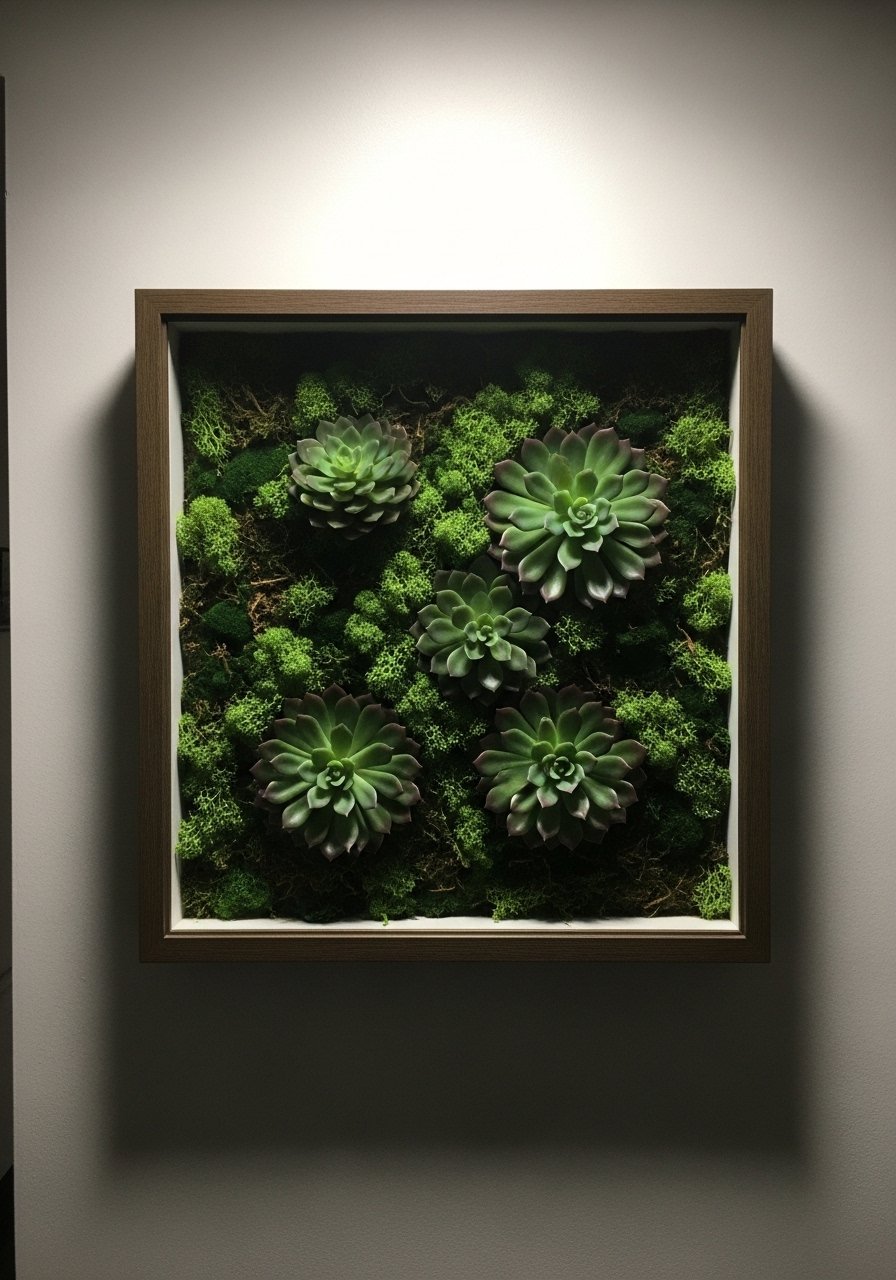
I used faux succulents in a 12×12 craft frame to fake a garden on a shaded wall. The whole piece sits flat, so no pots to tip and no watering drama. Hot-glue the plants to foam board and seal with a thin clear spray to keep dust off. People try living succulents in frames and they warp or rot. Faux means no maintenance, and it reads as texture rather than fake greenery from a distance. Use removable hooks if you rent. Faux succulent panels cost about $25 to $45 depending on materials. 12×12 craft shadowbox frames are my go-to.
Branch Snowflake Pallet Art For Seasonal Rustic Charm
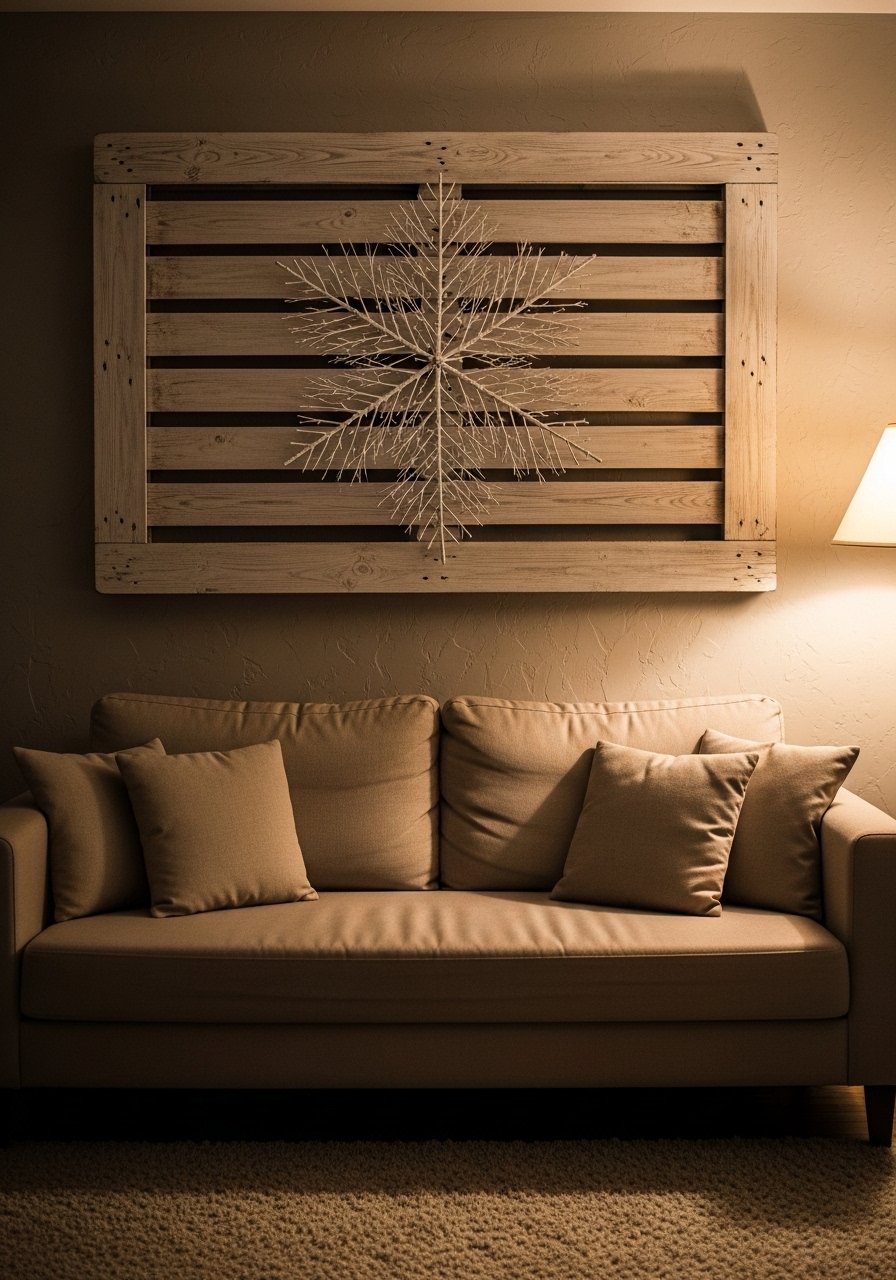
I glued twigs into a snowflake onto a 24×36 pallet frame and painted the background white. It scales well over a sofa and swaps easily for other seasons. Keep the twig arms about 2 to 3 inches thick so they read from across the room. A pitfall is using thin twigs that disappear at a distance. Budget runs $30 to $60 if you source pallet wood and paint. This is not renter-friendly for heavy frames, so use wall anchors if you hang it over furniture. It’s also a great pairing with the thrift gallery idea when you want one large anchor piece surrounded by smaller frames. Wood pallet frames 24×36 are useful when you want this scale.
Brush Lettering Quote Prints For A Modern Farmhouse Bedroom
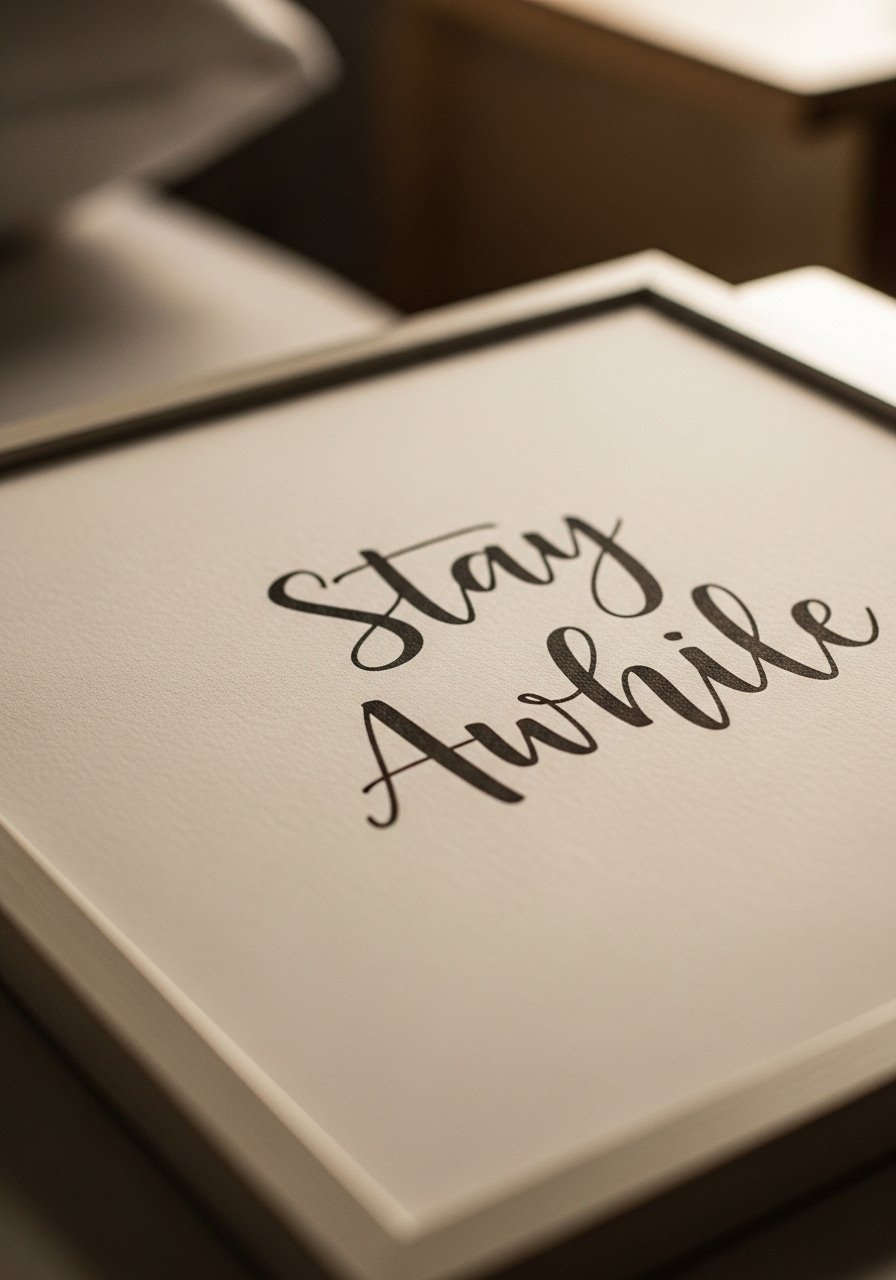
I learned simple brush lettering for cheap and now I make prints on multi-purpose paper to drop into IKEA Ribba frames. One sheet and a good black ink pen make a clean, modern look for about $10 total. The common mistake is using fonts that are too busy. Keep words short, and let white space do the work. These frames are renter-friendly with command strips and are perfect for a bedroom or entry. If your printing looks pixelly, hand-lettering on thicker paper looks far more professional. IKEA Ribba 8×10 frames are cheap and simple.
Fabric Remnant Frame Flip For Color And Pattern
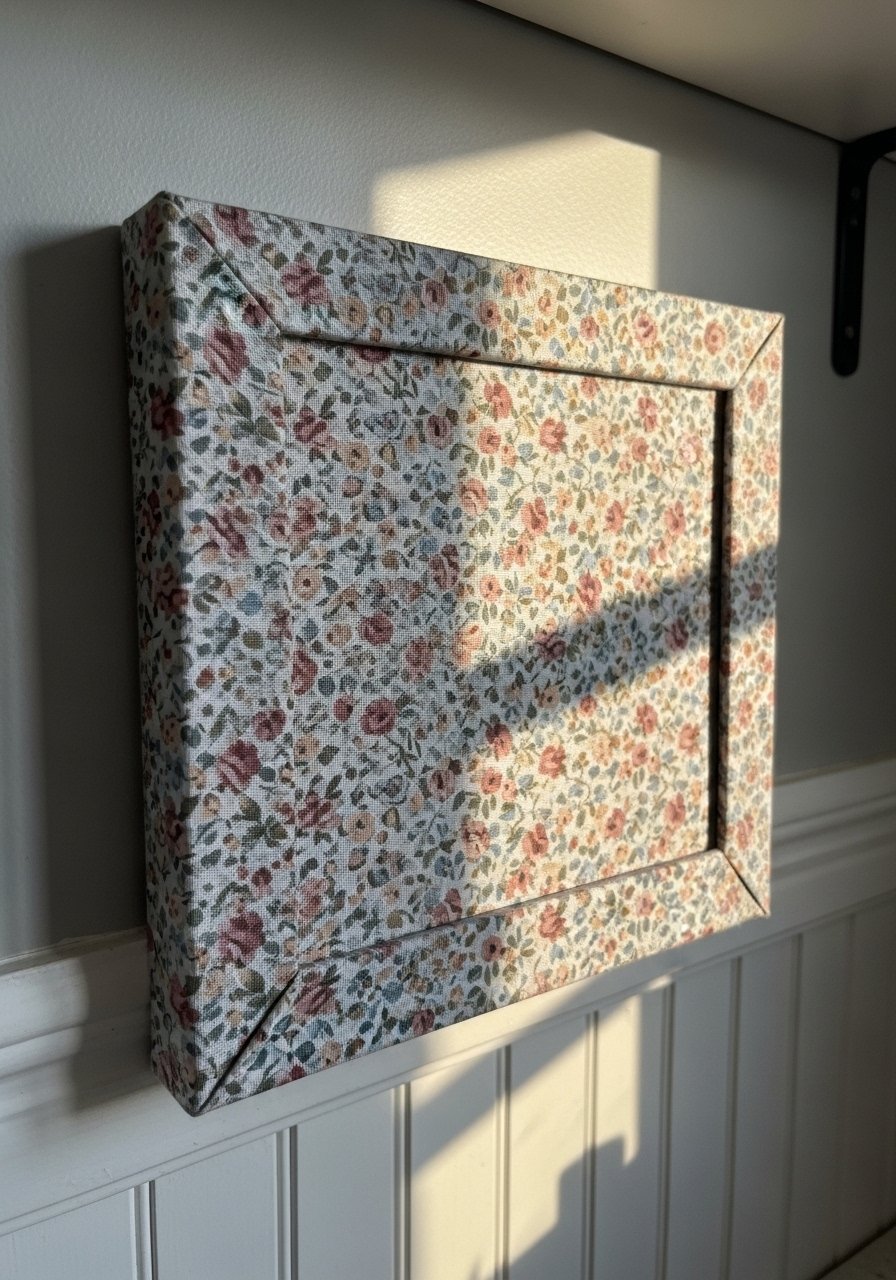
I wrap fabric remnants around backing boards and pop them into old frames when prints start to feel flat. Fat quarters are usually $3 to $8 at big box stores, making this a $15 to $35 solution. A mistake I see is stretching fabric too tight so the edges pucker. Keep it slightly relaxed and secure with double-sided tape. Scraps work well when your paint color is permanent and you need an easy swap for seasonal color. This technique also hides low-res print issues because fabric looks intentional up close. Floral fat quarter fabric bundles are great finds.
Wallpaper Sample Mats For Designer Looks On A Budget
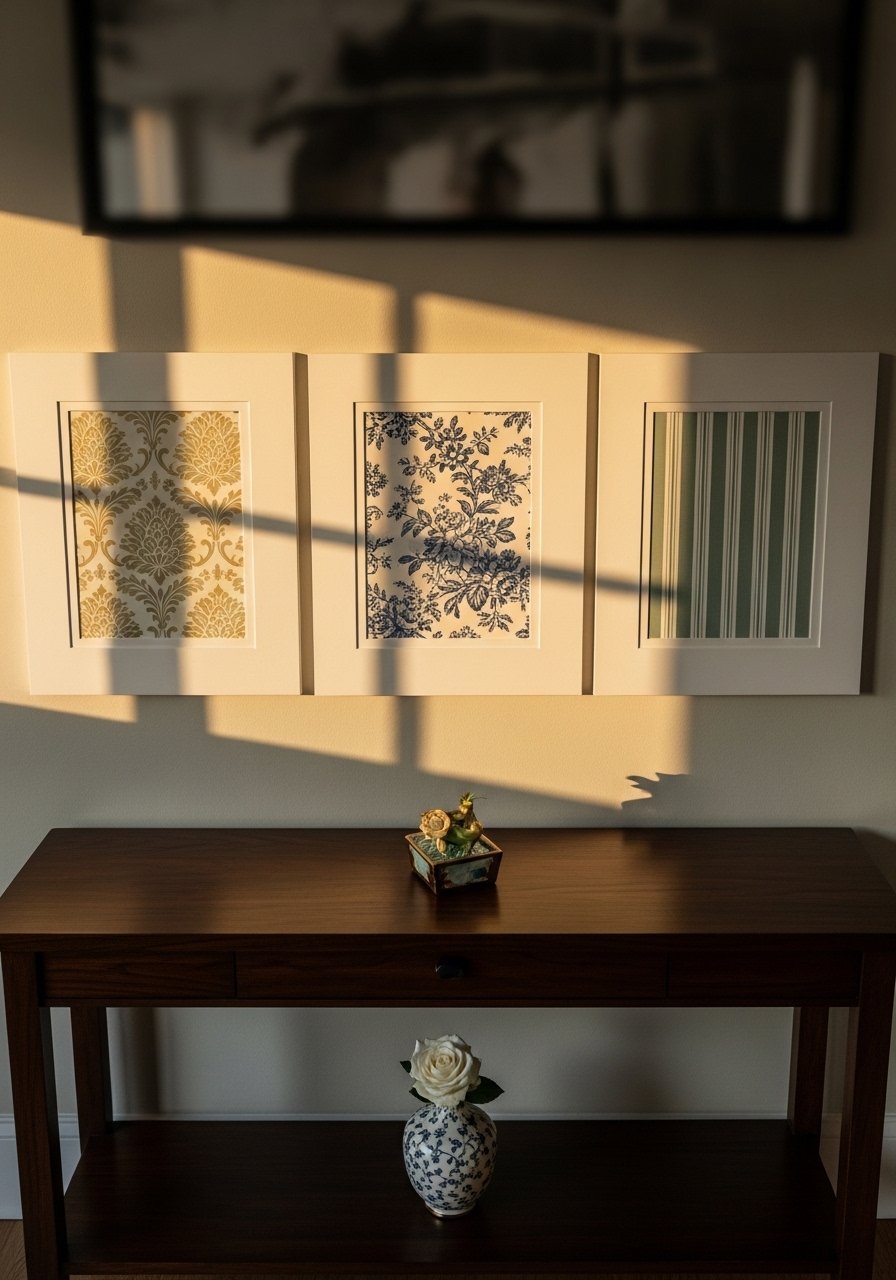
Wallpaper samples are free or cheap but feel designer when matted in thrift frames. I mat five by seven samples and arrange them in odd-numbered clusters. The result looks expensive but costs under $30 total. People make the mistake of picking tiny prints that vanish on the wall. Choose samples with medium-scale patterns and neutral backgrounds so they layer well. These are renter-friendly and the best quick fix when you do not want permanent wallpaper. Most readers nail a wall update for under fifty bucks when they do this. Assorted wallpaper samples are easy to order.
Yarn Pom-Pom Cloud For Playful Texture In A Kid's Room
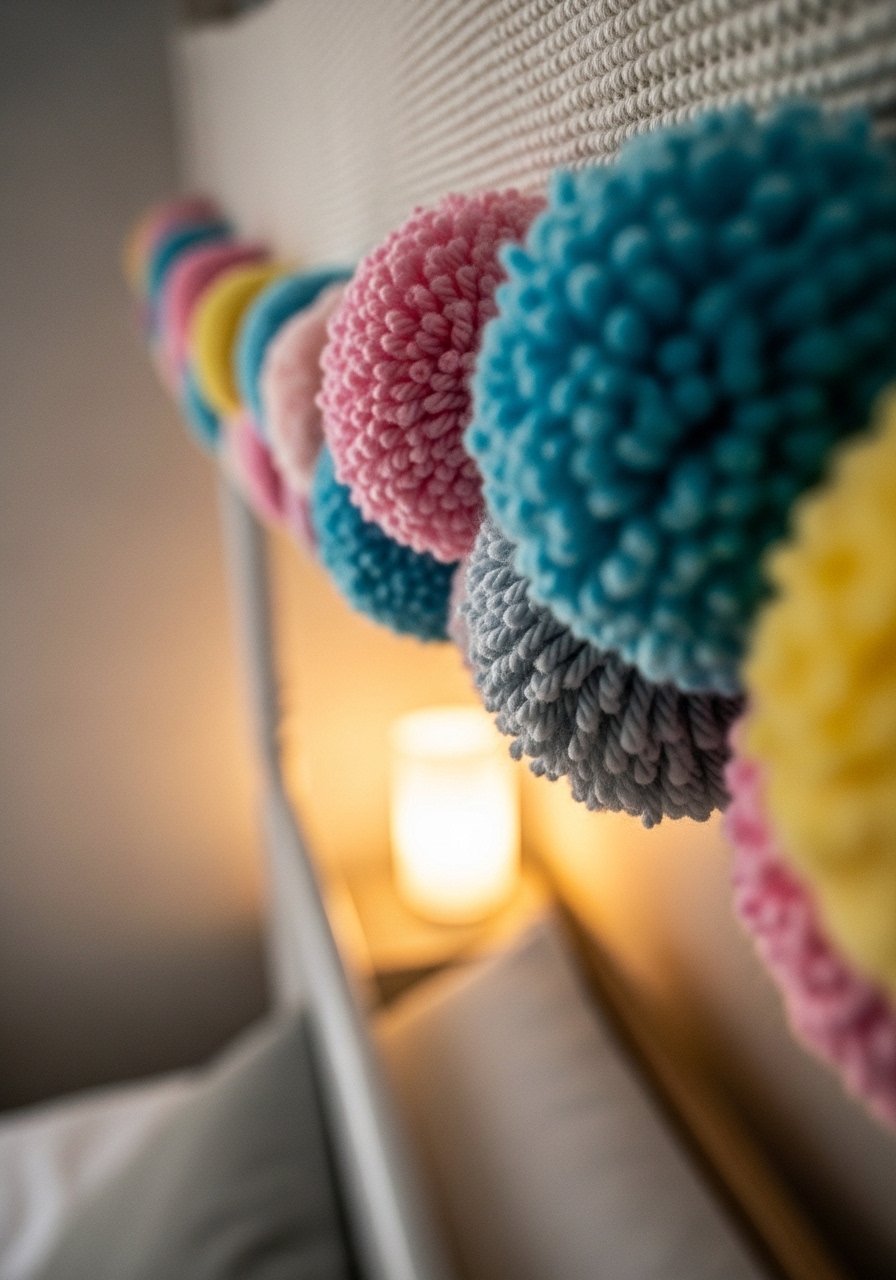
Pom-poms are quick to make and add fluffy texture without permanence. I string them on a dowel and hang three to five in a staggered cluster. Keep pom-poms about 3 to 4 inches across so they read at a distance. A common error is using too thin a cord which sags. Switch to waxed twine or a thin chain. This is cheap, about $10 to $30 depending on yarn, and perfect for bedrooms where softness matters. Texture wins out for most over plain paper hangs, so pom-poms are an easy win. Yarn skeins for pom-poms make it simple.
Crepe Paper Flower Burst For A Colorful Boho Accent
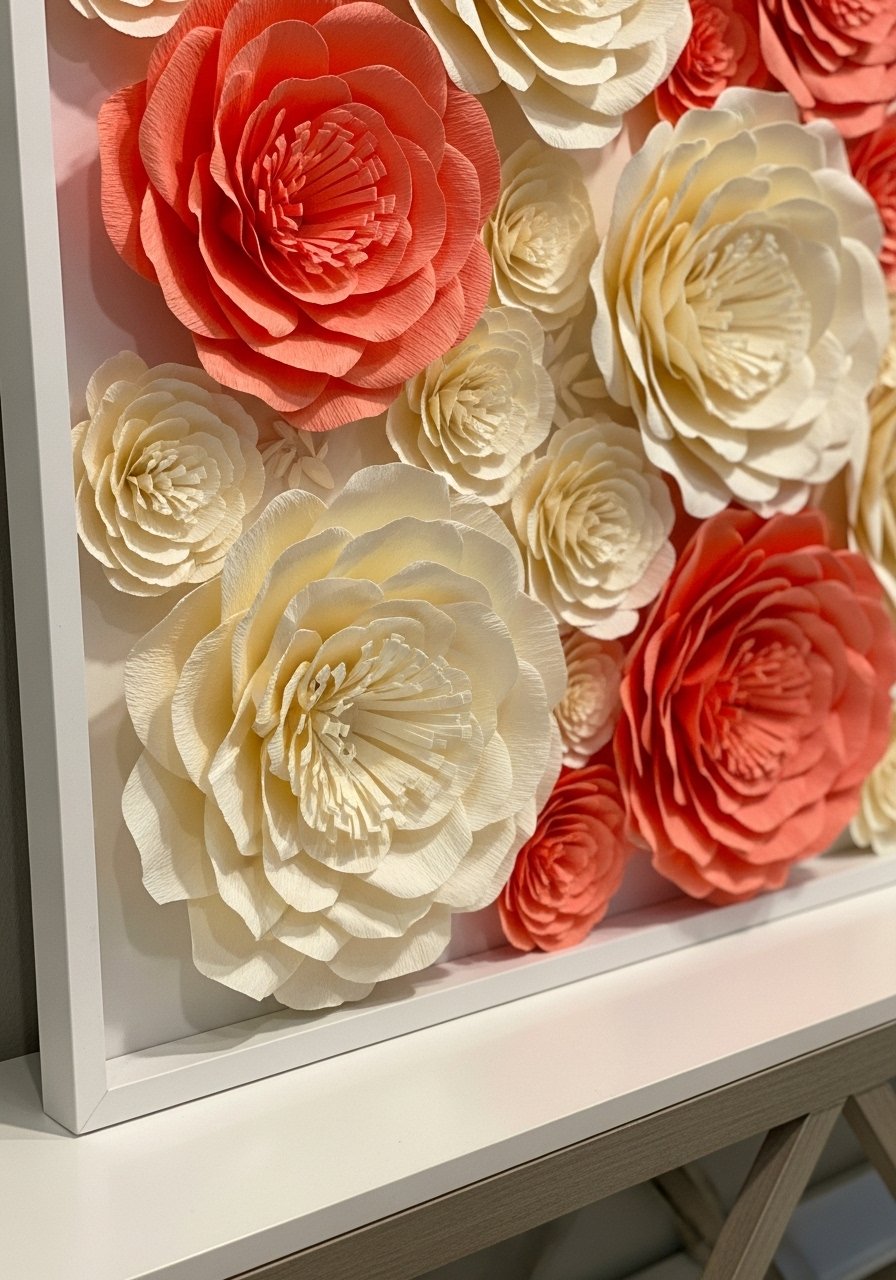
Paper flowers feel like art without the upkeep and they last all year if you keep them out of humidity. I glued crepe petals into a 16×20 frame and let them cascade off one corner. People assume paper crafts are cheap looking. Use a high-quality crepe and a painted background to avoid that. Budget is $15 to $40 and the assembly takes about 45 minutes. For humid bathrooms choose sealed or laminated petals. Pair this with a fabric remnant frame to soften the vignette. Crepe paper packs are the main purchase.
Pressed Leaf Nature Panels For an Organic Bedroom Vibe
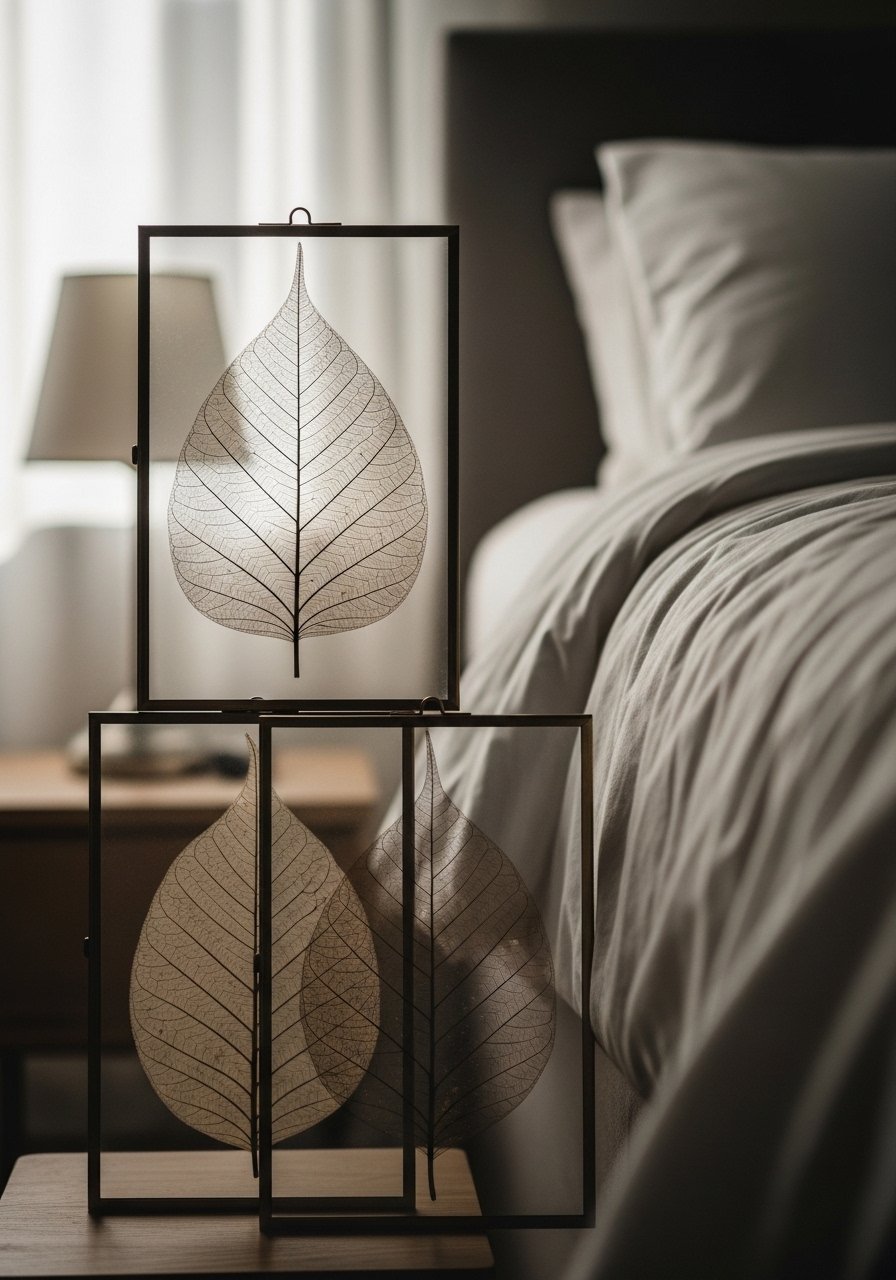
I press leaves between heavy books and mount them in glass frames for cheap, natural art. People forget that leaves shrink as they dry, so press them for two to three weeks for best results. This costs next to nothing and is great for bedrooms and hallways. A mistake is using flimsy frames that fog or warp in humid rooms. Use sealed glass or plexiglass and avoid bathrooms unless sealed. Bedrooms get way more DIY art attempts than living rooms, so this is a friendly, low-cost craft that still feels grown-up. Glass floating frames work really well.
Twigs And Twine Geometric For Modern Rustic Walls
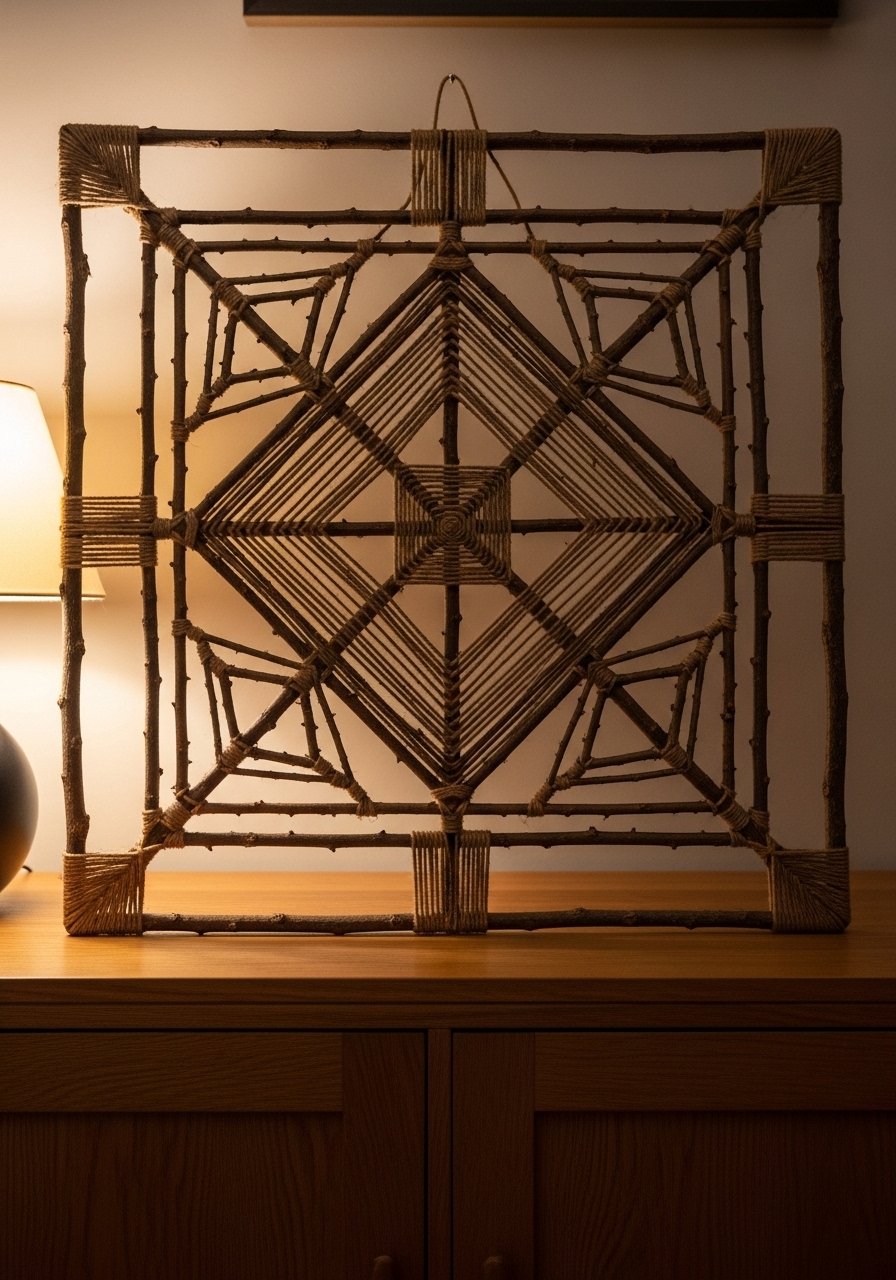
Line-art with twigs is an easy project that reads modern from across a room. Cut twigs to length and glue them into triangles or diamonds on a backing board, then wrap fine twine around intersections for contrast. Keep the pattern simple so the eye rests. A frequent misstep is making shapes too small. Aim for lines at least 2 inches thick so they read against wall paint. This project is $5 to $25 and pairs well with the pallet twig art if you want a rustic-meets-modern look. Natural jute twine is perfect here.
Oversized Map Collage For Travel Lovers In A Home Office
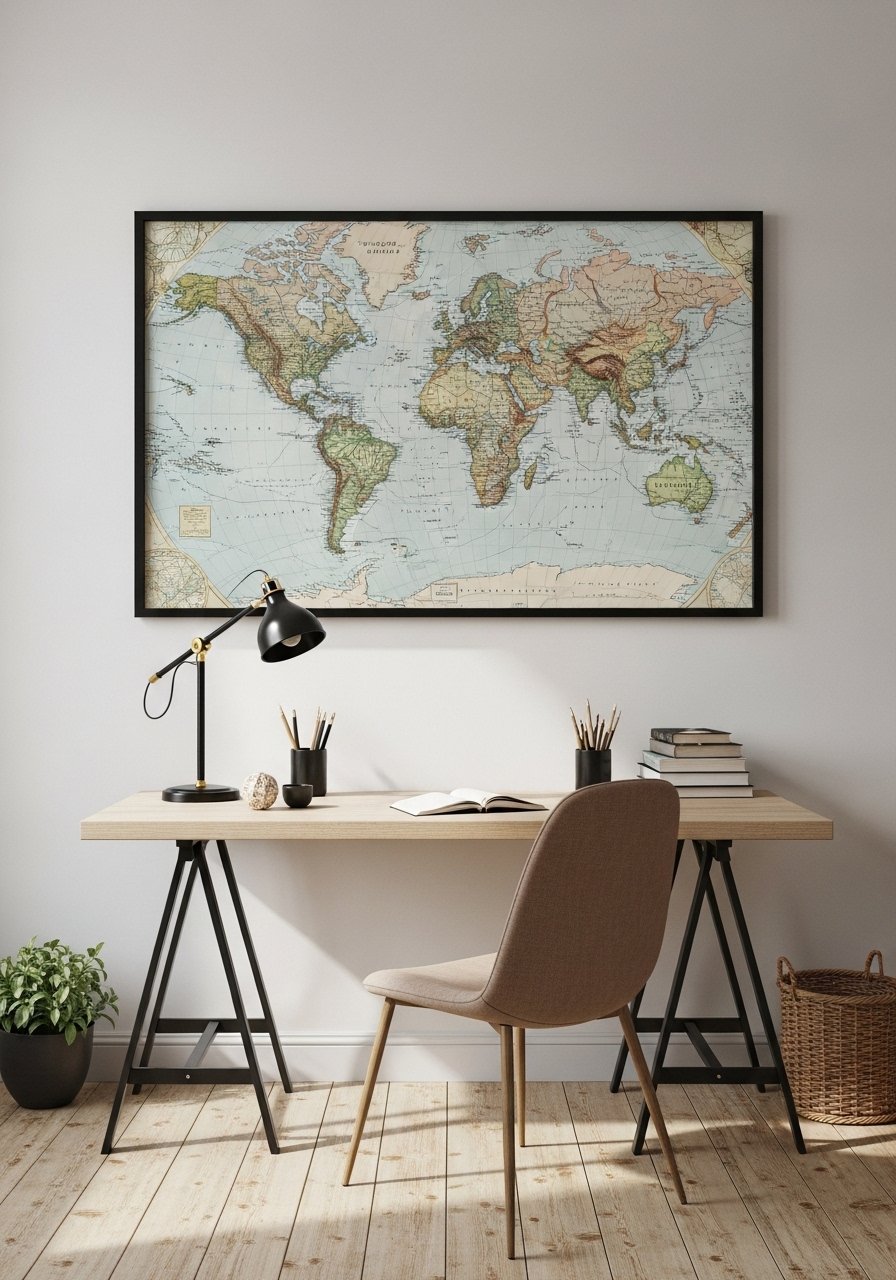
I cut vintage map prints into a grid and mount them in a single oversized frame to make a wall-sized escape. Use 24×36 as your base so it feels intentional over a desk. The common mistake is buying too-small maps that look like a scrapbook. Keep pieces at least 8×10 each so details show. Budget depends on frames and prints, $40 to $120. For a renter swap, use picture ledges instead of one heavy frame so you can change the collage without new holes. Vintage map print set makes assembly simple.
Washi Tape Geometric Shapes For Temporary Trendy Walls
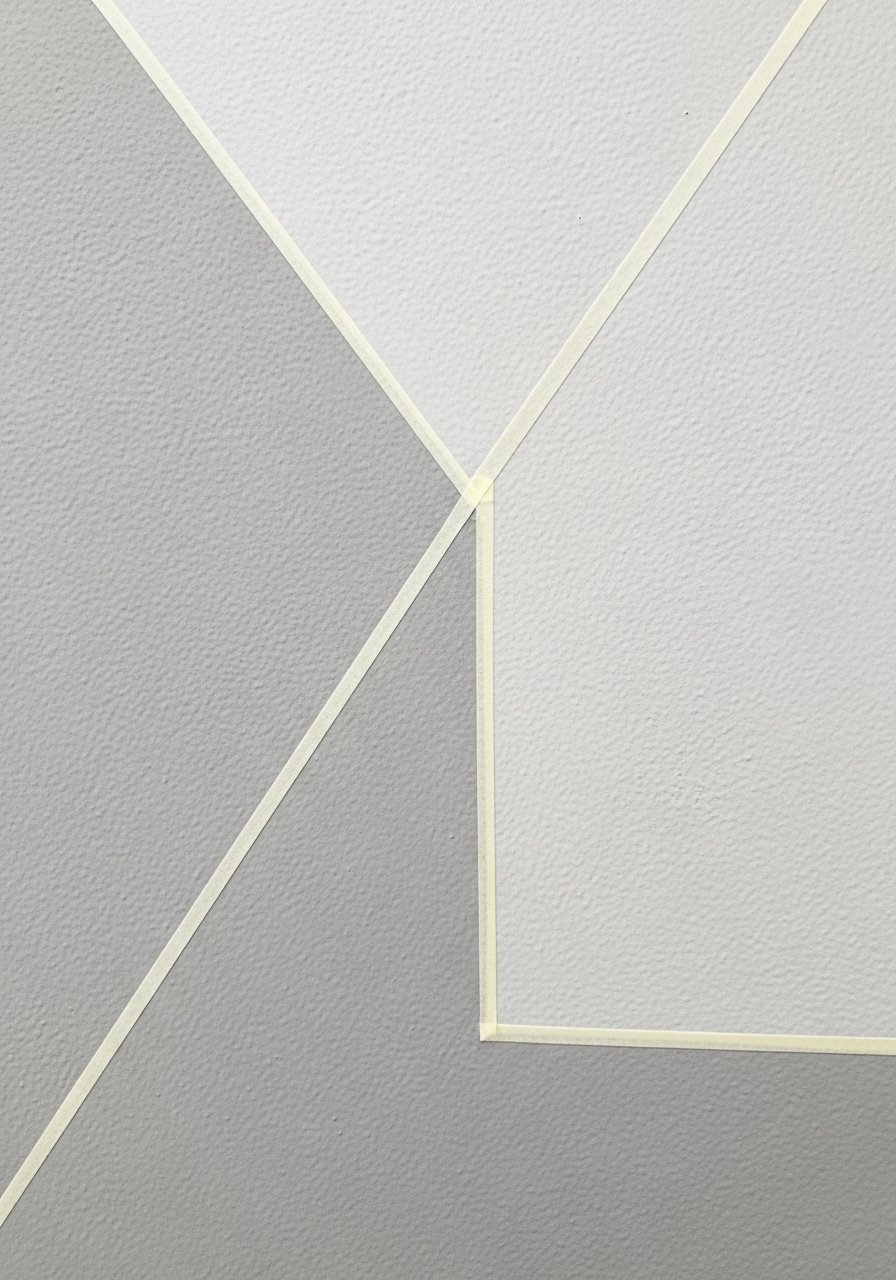
When you want a low-commitment pattern, washi tape is your friend. I used it to create a terracotta triangle field on an accent wall that peeled off cleanly after six months. The mistake is choosing too narrow tape which shows the wall underneath. Use 1-inch wide tape for solid shapes. It is cheap at $8 to $20 and renter-friendly. If you love the layout, trace and paint the shapes later. Washi tape is also great for creating mockups before you buy canvas or wallpaper. Wide washi tape rolls are my pick.
Yarn Fringe Dip-Dye For A Casual Boho Focal
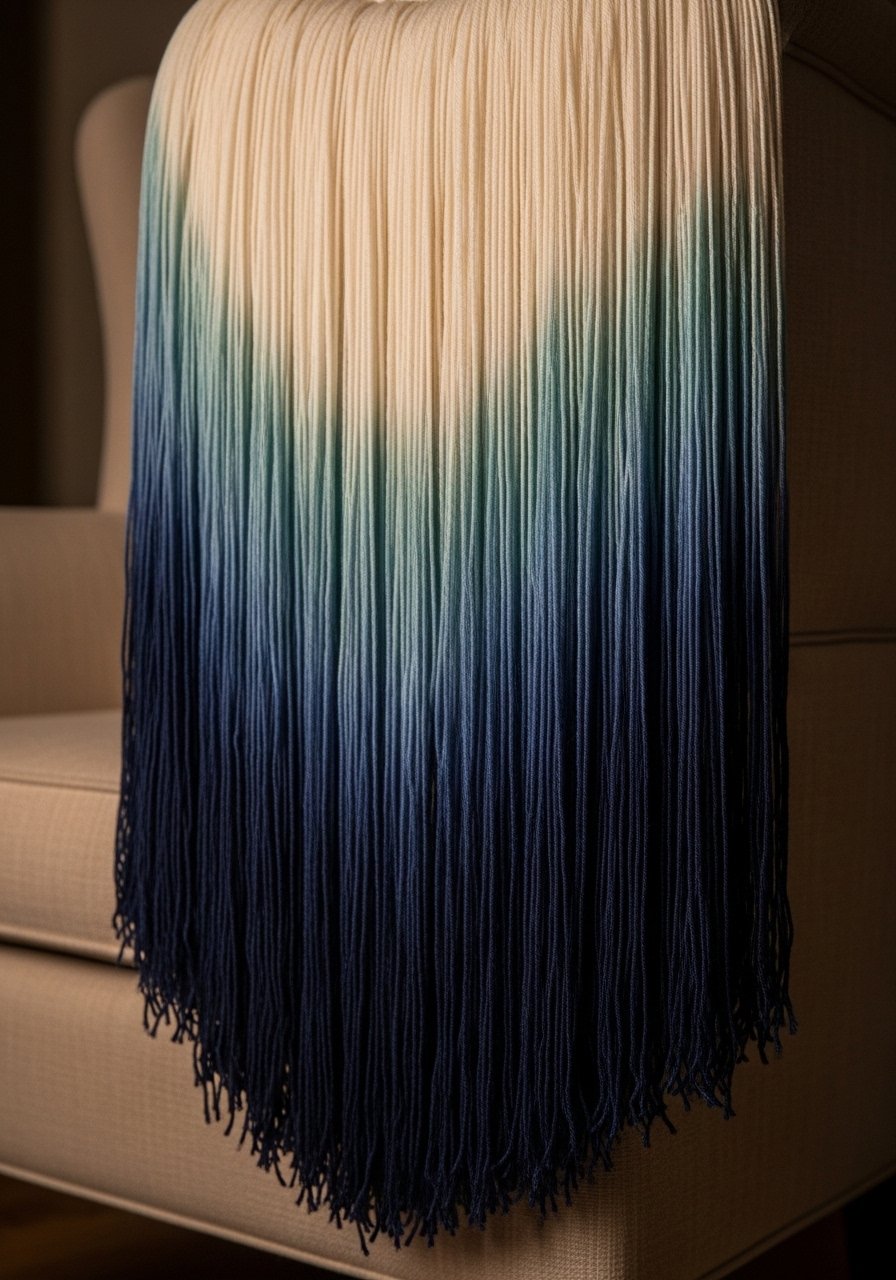
Dip-dyeing yarn and attaching it to a wooden dowel creates a soft, relaxed focal that looks handmade. I used three shades and left the ends blunt for a modern edge. A common error is over-dyeing so colors mud together. Work in small batches and rinse well. This runs about $25 to $50 depending on yarn quality and dye. Pair it with woven hangings and pom-poms from earlier ideas for a layered bedside wall. Acid dyes and yarn sets are easy to source.
Mirror Mosaic To Brighten Dim Corners
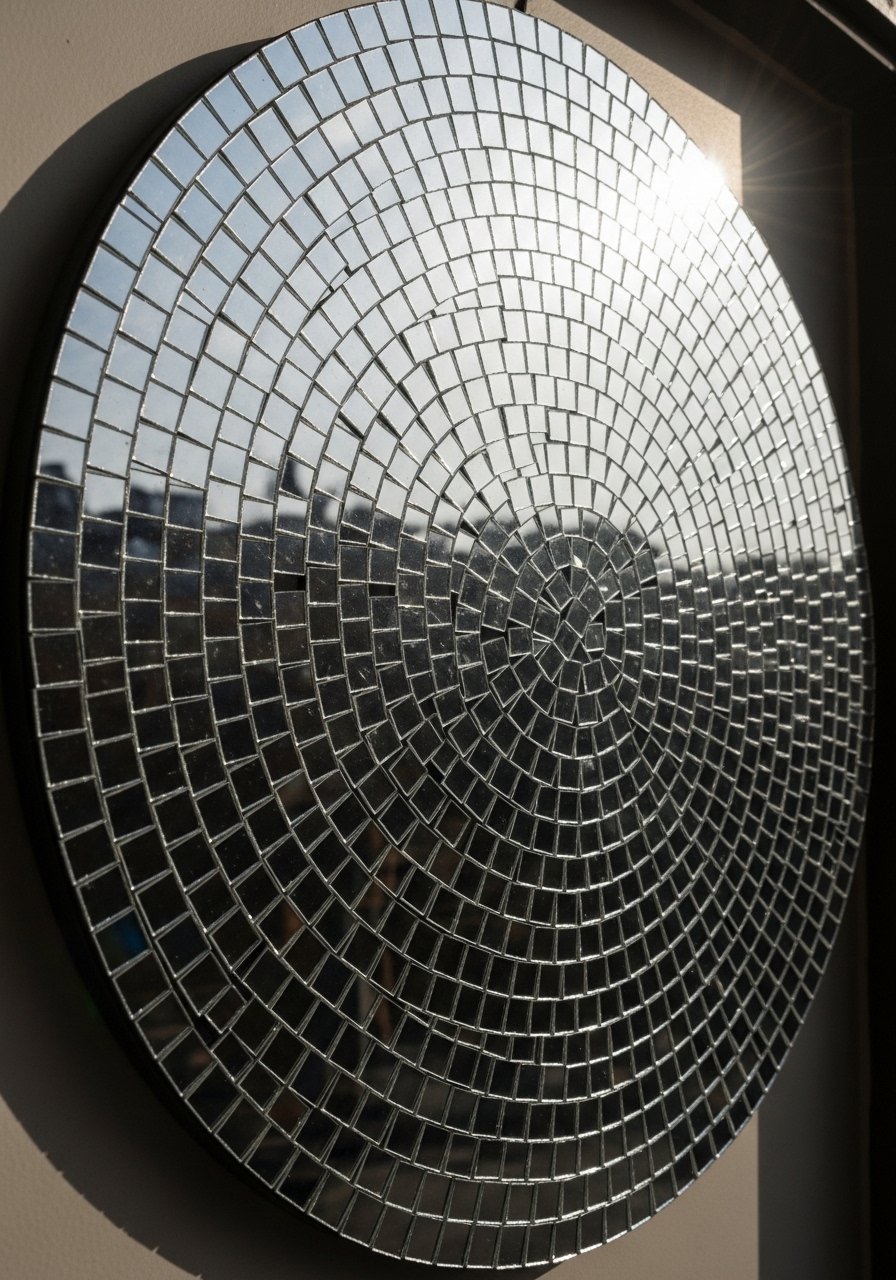
I broke small mirror tiles and mounted them into a circular mosaic to bounce light into a dark corner. Mirrors help where lighting is poor and they are especially useful in small apartments. A rookie mistake is using irregular shapes without planning. Lay the pattern out first and then glue. For safety use mirrored acrylic tiles if you have pets or children. Cost is $30 to $90 depending on size. This idea works great above a console paired with brush lettered prints from earlier. Acrylic mirror tiles are safer and lighter.
Painted Wood Plank Stripes For A Subtle Accent Wall
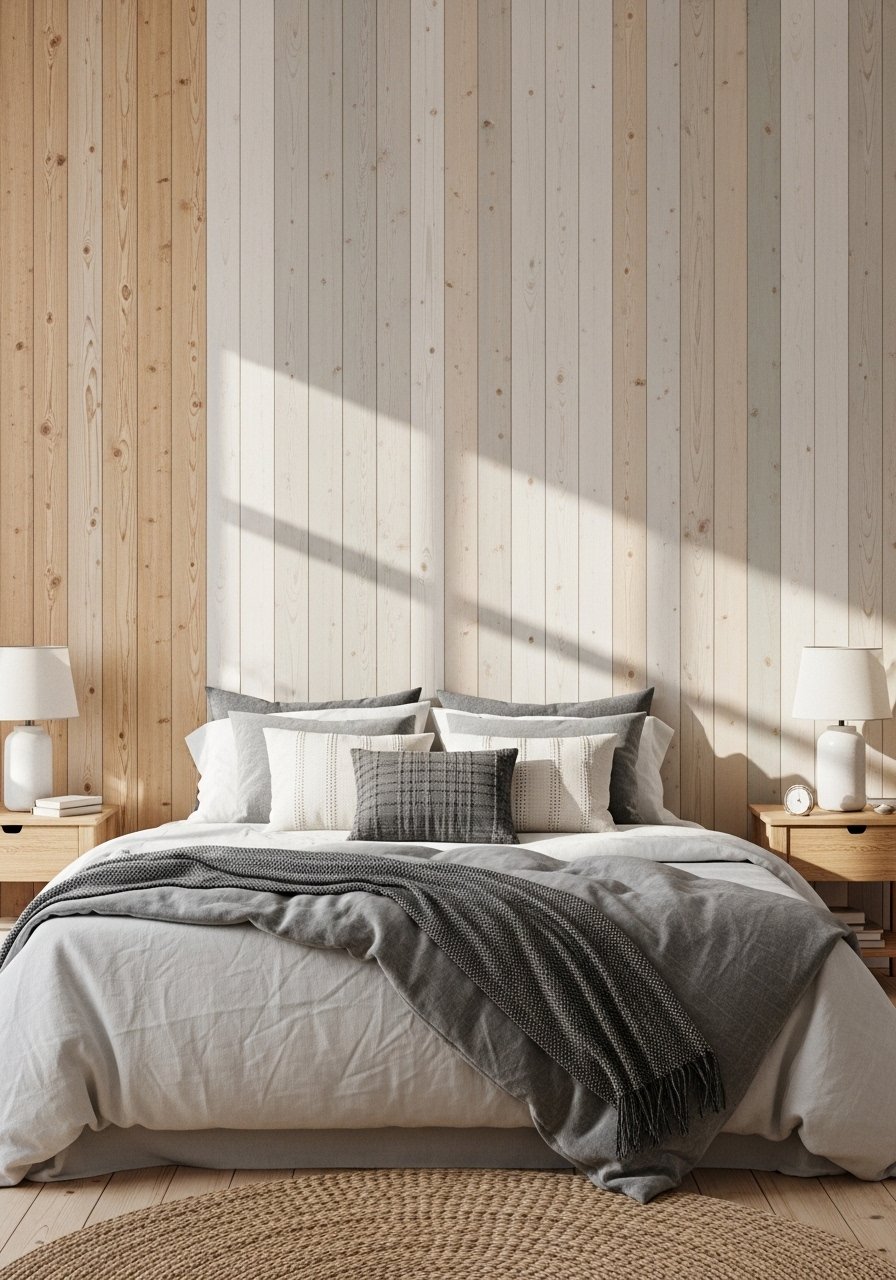
I painted alternating wood planks in two neutrals to add height to a room without going bold. Use 3 to 4 inch plank widths and keep the color contrast low so it reads as texture not pattern. People often pick high-contrast colors that date quickly. This method costs $40 to $100 and is more forgiving than full wallpaper. For renters, paint thin plywood panels that hang with hooks so removal is easy. It pairs nicely with layered textiles from the shopping list below. Precut wood planks speed things up.
Minimal Macrame Wall Hanging For A Modern Boho Corner
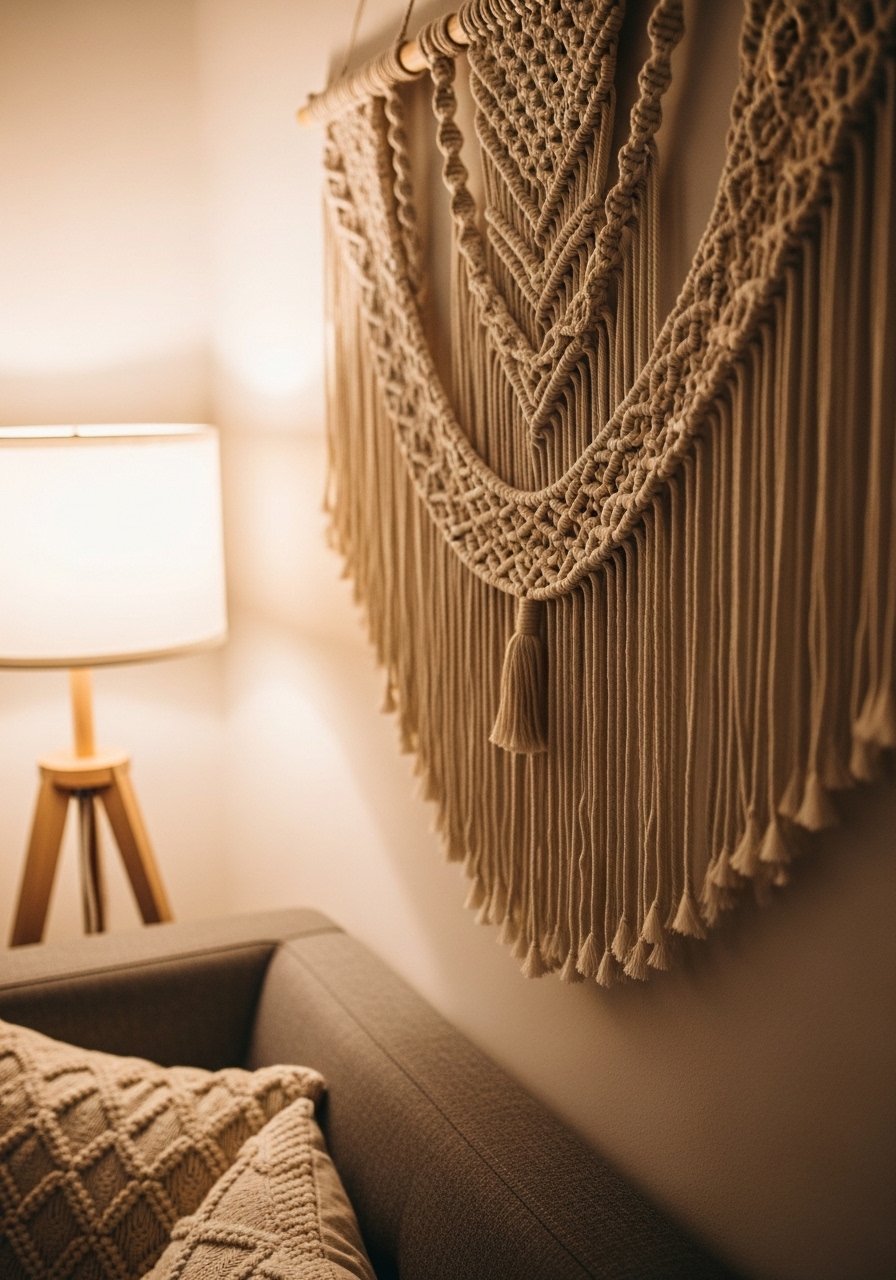
Macrame brings texture and movement without heavy color. I make simple pieces with cotton rope and keep the knotting minimal for a clean look. The most common mistake is going too intricate. For modern spaces, less knot equals more impact. Budget runs $20 to $60 depending on rope quality. Macrame reads well in bedrooms and living rooms and works in low light where prints wash out. Pair with a faux plant shadowbox for a full vignette. Cotton macrame rope is the basic supply.
DIY Neon Rope Quote For A Fun Accent
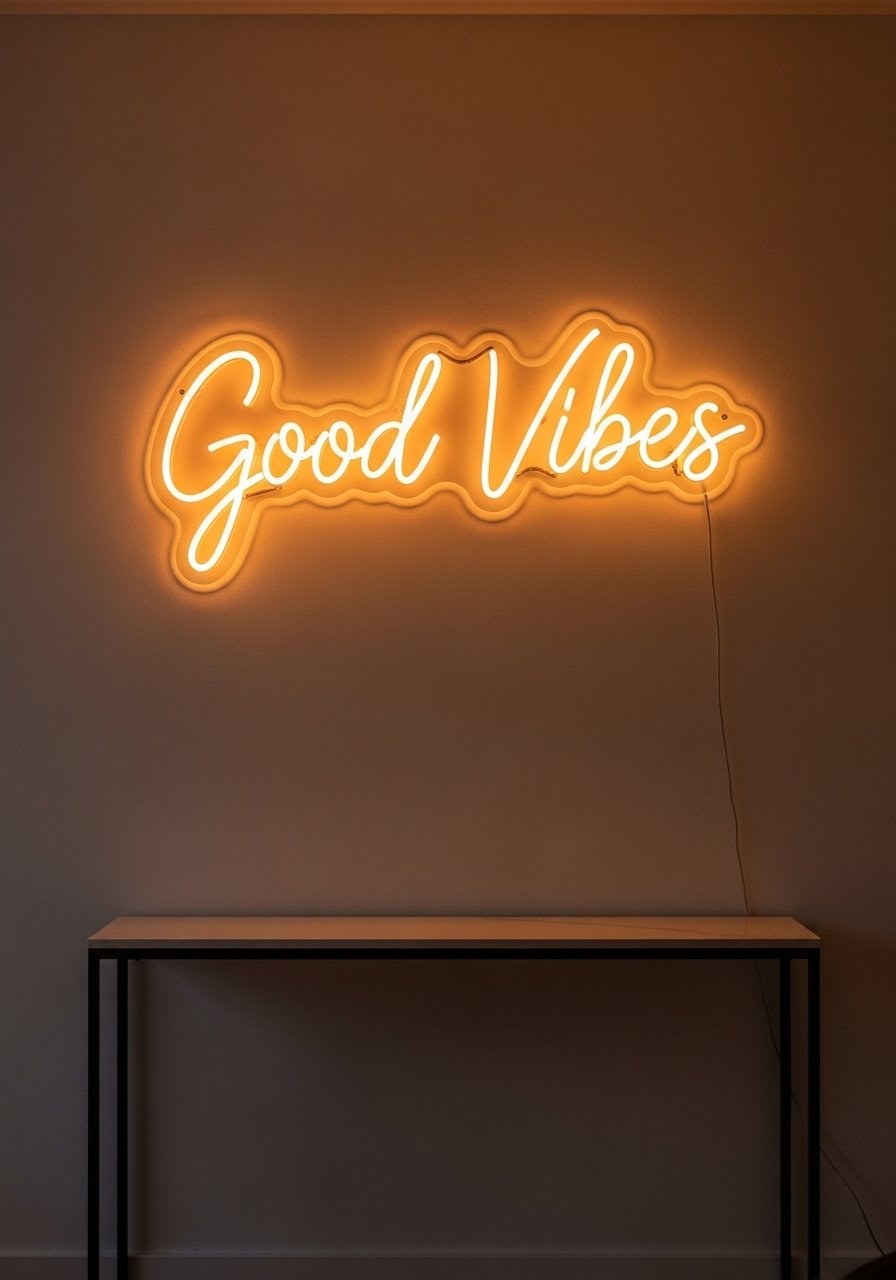
I bent neon rope lights into a short phrase and mounted it with clear clips. The result makes a casual, playful statement without permanent wiring. Keep phrases to two words and letters about 6 inches tall so they read from across a room. A frequent error is trying long sentences that look cluttered. This costs $40 to $120 based on length and brightness. Use it over a gallery of small frames for contrast with textures like woven hangings. Flexible neon rope lights give great results.
Layered Textile Mats For Soft, Tactile Frames
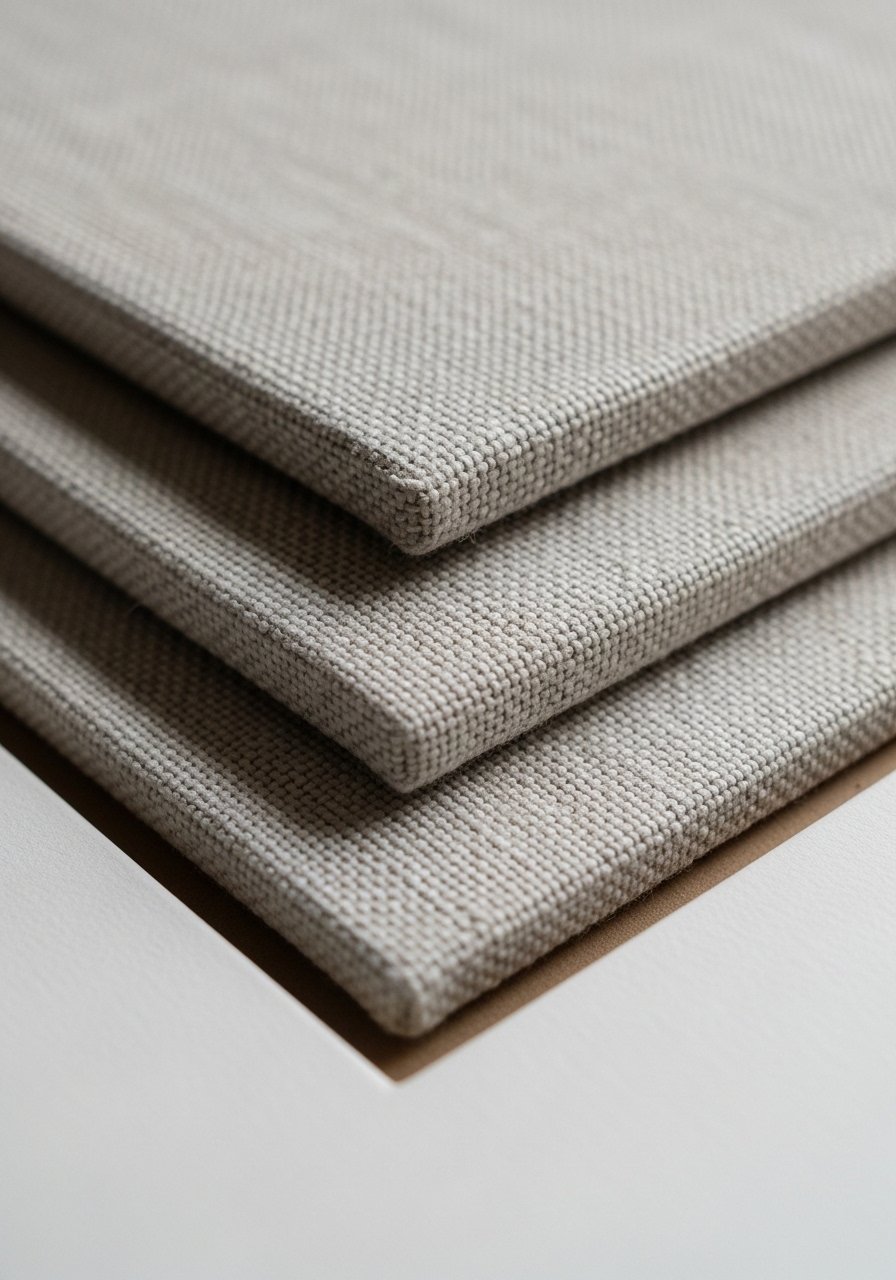
Instead of paper mats, I use linen and canvas mats behind glass for small framed pieces. The depth adds tactile interest and hides pixelly prints. The secret detail other guides skip is matching the mat thickness to the frame depth so nothing gaps. This upgrade costs $10 to $35 per frame but makes thrift prints look curated. Use odd-numbered clusters and stagger sizes. These mats also survive humid rooms better than paper. Linen matboard sheets are a subtle splurge.
Repurposed Book Page Collage For A Vintage Study
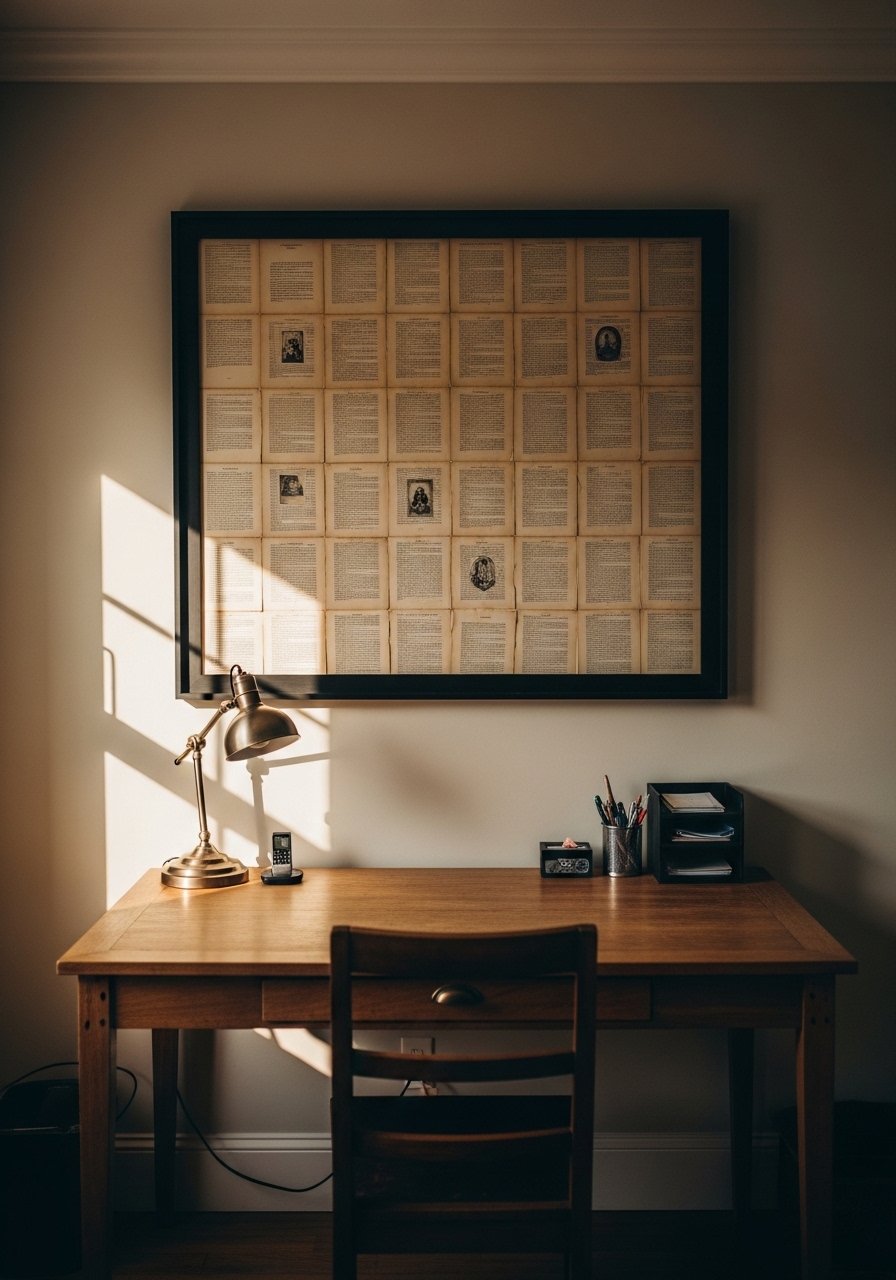
I cut book pages into rectangles and arranged them like a modernist grid. It reads like wallpaper without the commitment and costs almost nothing. People often make the mistake of mixing font sizes wildly. Keep typefaces similar and vary only the scale. For durability, seal with archival spray so pages do not yellow faster under light. Bedrooms and studies love this look because it feels calm. Archival fixative spray helps it last.
Natural Fiber Round Weave For Coastal Living Rooms
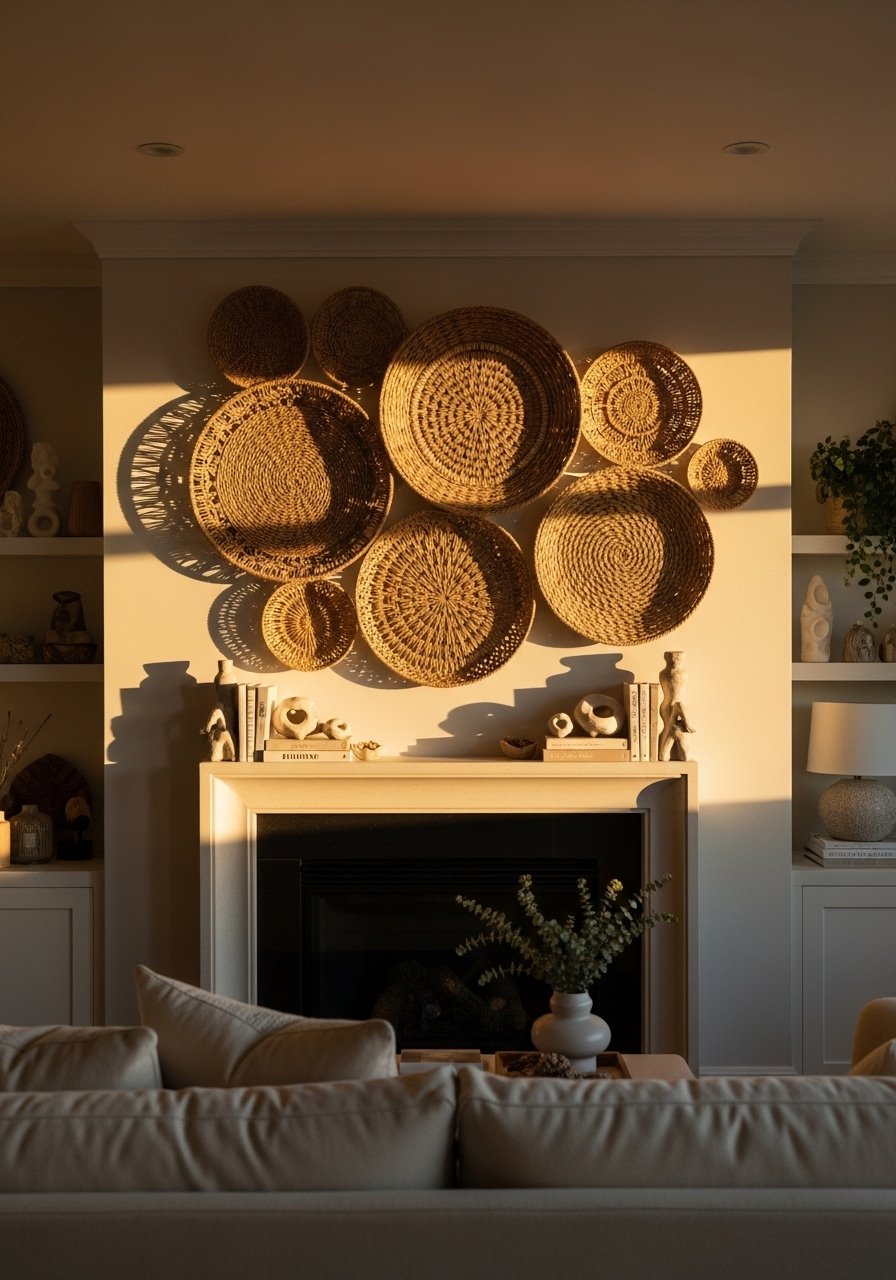
I mounted three woven seagrass baskets in a cluster for a relaxed coastal feel. Use diameter variety, like 12, 18, and 24 inches, and arrange the largest in the center. The mistake is spacing them evenly. Bring them in tight so they feel intentional. Natural fibers photograph well in low light and are perfect when prints feel cold. Most rounds are $15 to $50 and they pair well with faux succulents or pressed leaf panels. Seagrass wall basket set is a handy kit.
Your Decor Shopping List
- Honestly the best $40 I have spent. Chunky knit throw in cream (50×60 inches) to drape over a sofa arm for instant warmth
- For the canvas work, grab blank 16×20 canvases in a pack of three, about $20
- For gallery flexibility, mixed 8×10 frames that you can spray-paint to match
- For woven texture, handwoven wall hangings in neutral mixes, similar at HomeGoods
- For low-light green, 12×12 shadowbox frames and faux succulent packs
- For cleaner swaps, brass picture ledges to change art without extra holes
- For durable frames around pets, acrylic mirror tiles and acrylic frame glazing sheets
- For paper crafts, crepe paper packs and archival fixative spray
- For macrame and yarn projects, cotton-macrame-rope-3mm and acrylic yarn skeins
- Budget find kit: wide-washi-tape-rolls for temporary geometric trials
Shopping Tips
- White oak beats dark wood in 2026. White oak floating shelves look current and keep walls feeling light
- Grab velvet pillow covers for $12 each and swap them seasonally to change the room without paint
- Curtains should puddle or kiss the floor, never hang halfway up. 96-inch linen panels are right for standard 9-foot ceilings
- Found these while looking for something else. Brass picture ledges let you replace art without a new hole
- Everyone buys five small succulents. One single artificial fiddle leaf fig 6ft has ten times the impact
- If you have pets, use acrylic glazing sheets instead of glass to avoid cracked frames
Frequently Asked Questions
Q: Can I mix boho textiles with modern furniture without it looking messy?
A: Yes. Keep colors neutral and pick one accent color across textiles. Use odd-numbered groupings like three pillows and a throw to create rhythm. If you worry about texture overload, use the woven hangings idea as your single textured piece and keep the rest simple.
Q: How do I size art above a sofa?
A: Aim for art about two thirds the width of the sofa. If you are using one large piece, 24×36 is a reliable scale for a standard three-seat couch. For galleries, let the largest piece anchor and keep surrounding frames 3 to 5 inches apart.
Q: What if I rent and cannot put nails in the walls?
A: Use picture ledges, command-picture strips, and removable hooks. For heavier items like the pallet twig art, mount it on a lightweight plywood panel that hangs from adhesive hooks. Most folks nail a wall update for under fifty bucks when they plan for renter-friendly fixes.
Q: Will pressed leaves and paper crafts hold up in humid rooms?
A: Not without sealing. If humidity is an issue, use fabric, sealed paper, or acrylic sheets to keep moisture out. I sealed my pressed leaf panels and they lasted much longer than unsealed ones.
Q: How do I stop prints from looking pixelated up close?
A: Use thicker matting, fabric-backed prints, or hand-lettered pieces. Paper textures hide low resolution better than glossy prints. I often swap in fabric remnant frames for close-up viewing spots.
Q: Which DIY idea is best for low-light spaces?
A: Shadowboxes with faux succulents, mirror mosaics, and textured weavings read well in dim rooms. They do not rely on color contrast to be interesting, so the texture alone carries the look.
Q: Should I use real plants or fake ones in frames?
A: Use faux in shadowboxes and frames to avoid rot and warping. Real plants in open frames need light and water and tend to short-lived in craft frames. A faux fiddle leaf fig gives height without the maintenance.
Q: How do I make a gallery wall look collected, not chaotic?
A: Stick to a cohesive palette, use odd numbers, and anchor with one largest piece. Vary frame styles but repeat a material or color across pieces so the whole feels intentional. Command strips let you test layouts before committing.
