
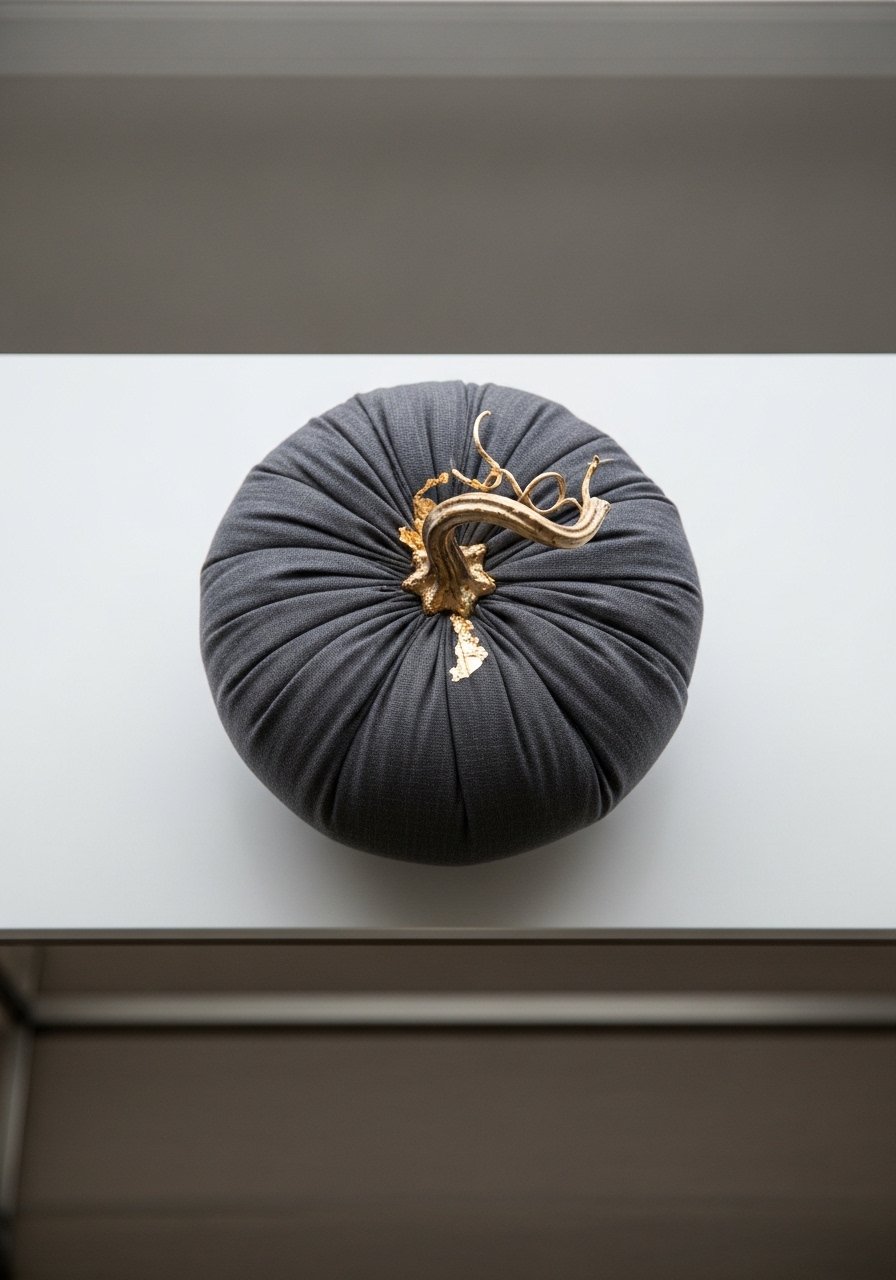
My living room had nice furniture and decent lighting but it still felt like a waiting room. Took me embarrassingly long to figure out it was missing texture. Every surface was smooth, every color was flat, and nothing invited you to actually sit down. When I started making easy fabric pumpkins with no-sew tricks, the room finally felt lived in. The trick was small, tactile pieces stacked around bigger objects to break the monotony.
These ideas lean cozy modern farmhouse with a hint of boho. Most projects run $0 to $25, with a couple under $40 when you buy materials that last. Great for mantels, coffee tables, entry consoles, kid tables, and front porches.
Cozy Linen Pumpkin Trio for the Coffee Table
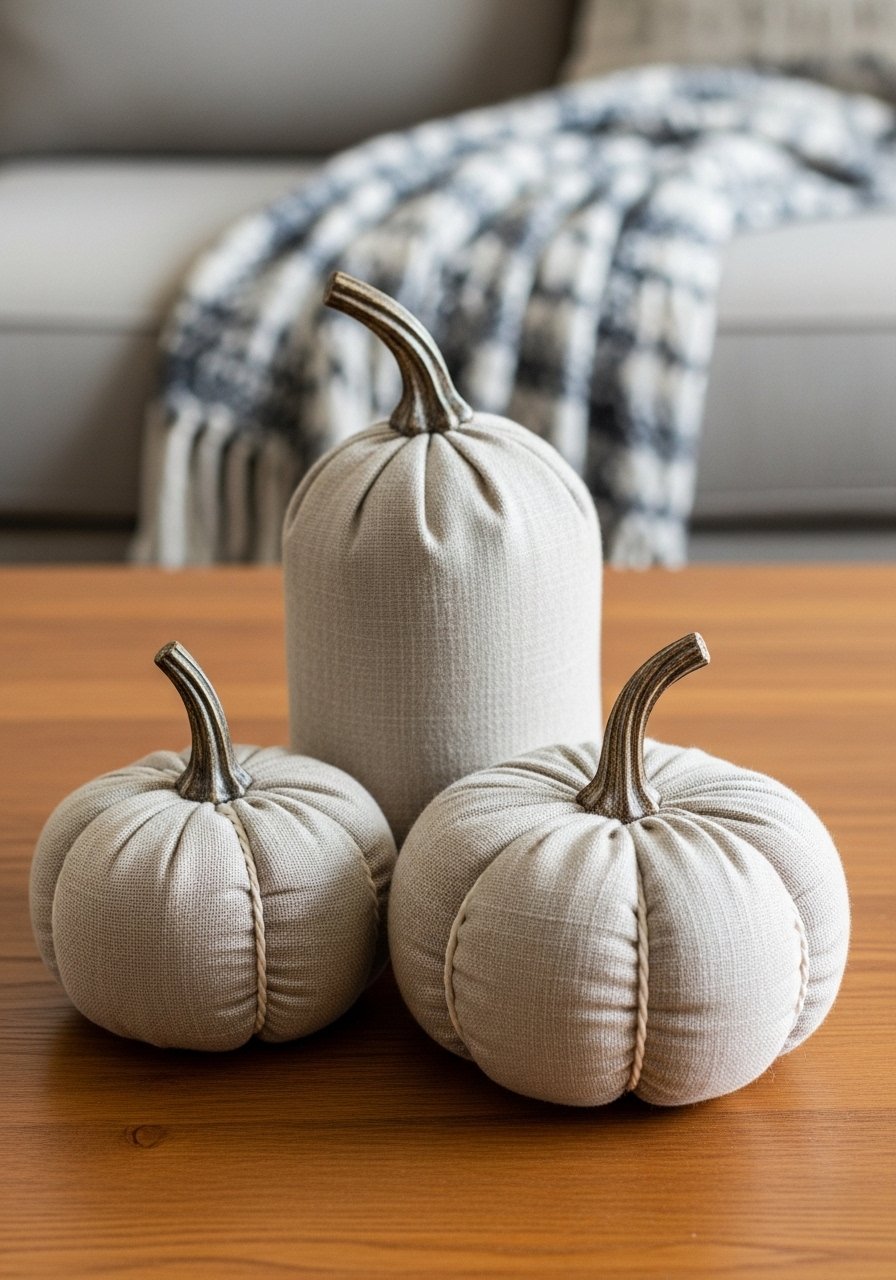
I started with a simple linen pumpkin trio after ruining one by overstuffing it. Use lightweight linen scraps, tie with twine, and stuff about 70 percent to keep a soft shape that still reads like a pumpkin from across the room. Works great on coffee tables in living rooms or on nightstands in bedrooms. Budget is around $10 to $20 for fabric and stuffing if you use thrifted linen. I use polyfill stuffing and tie stems with natural jute twine. Common mistake is making all pumpkins the same height. Vary heights by 1 to 2 inches and follow a 2:1 ratio for medium to small pieces.
Vintage Velvet Pumpkins for a Cozy Reading Nook
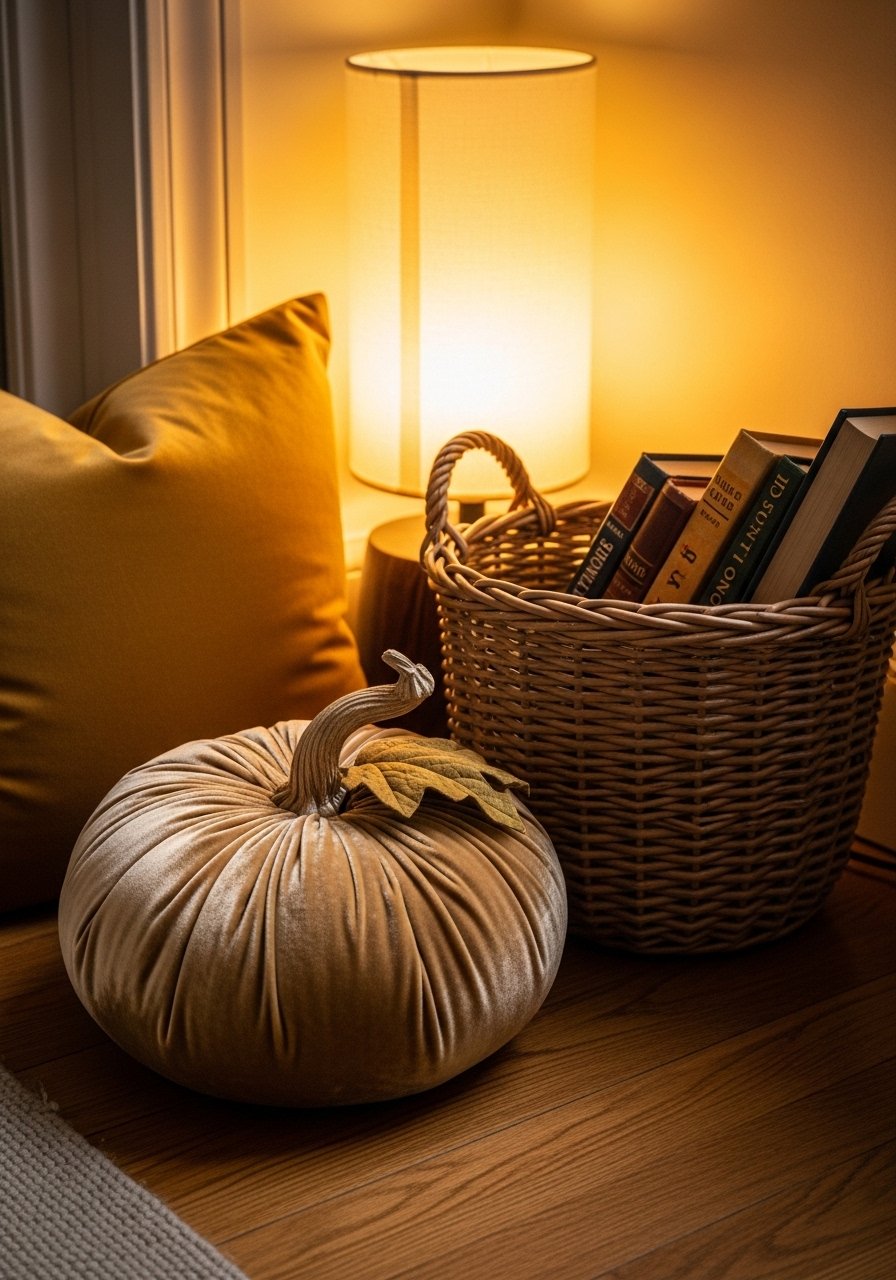
Velvet reads richer than cotton, even in DIY form. I cut velvet circles, gathered the edge using ribbon, then cinched a faux stem into the center. Budget was $15 to $30 depending on fabric choice. Use velvet fabric remnants or recycled velvet from old cushions. A mistake is using stiff stuffing that makes the pumpkin look like a ball. Aim for soft, forgiving polyfill so the pumpkin settles into place. Velvet pumpkins look extra good next to a textured throw or layered pillow cluster following the rule of three for balance.
Rustic Burlap Pumpkins for Porches and Entryways
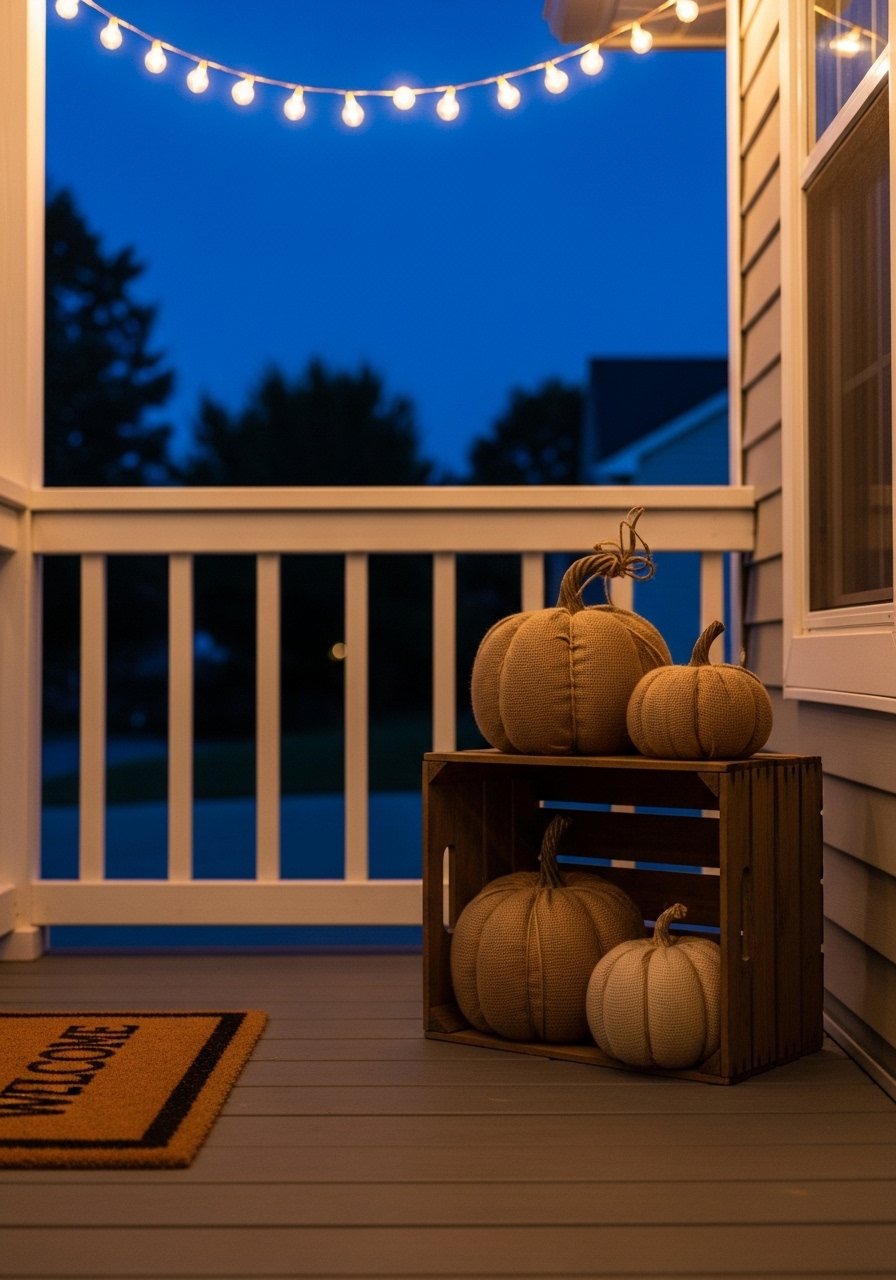
Burlap is inexpensive and weather tolerant for covered porches. I wrap small foam balls with burlap squares and secure with hot glue, which gives a firm shape without sewing. Budget under $10 per pumpkin when you buy a roll of burlap. Use craft foam balls and burlap fabric by the yard. People often forget to seal raw edges. Fold edges under or hot glue them down so your pumpkins don’t fray. For a modern look, swap the usual orange for natural and white painted stems.
No-Sew Floral Accent Pumpkins for a Dining Table
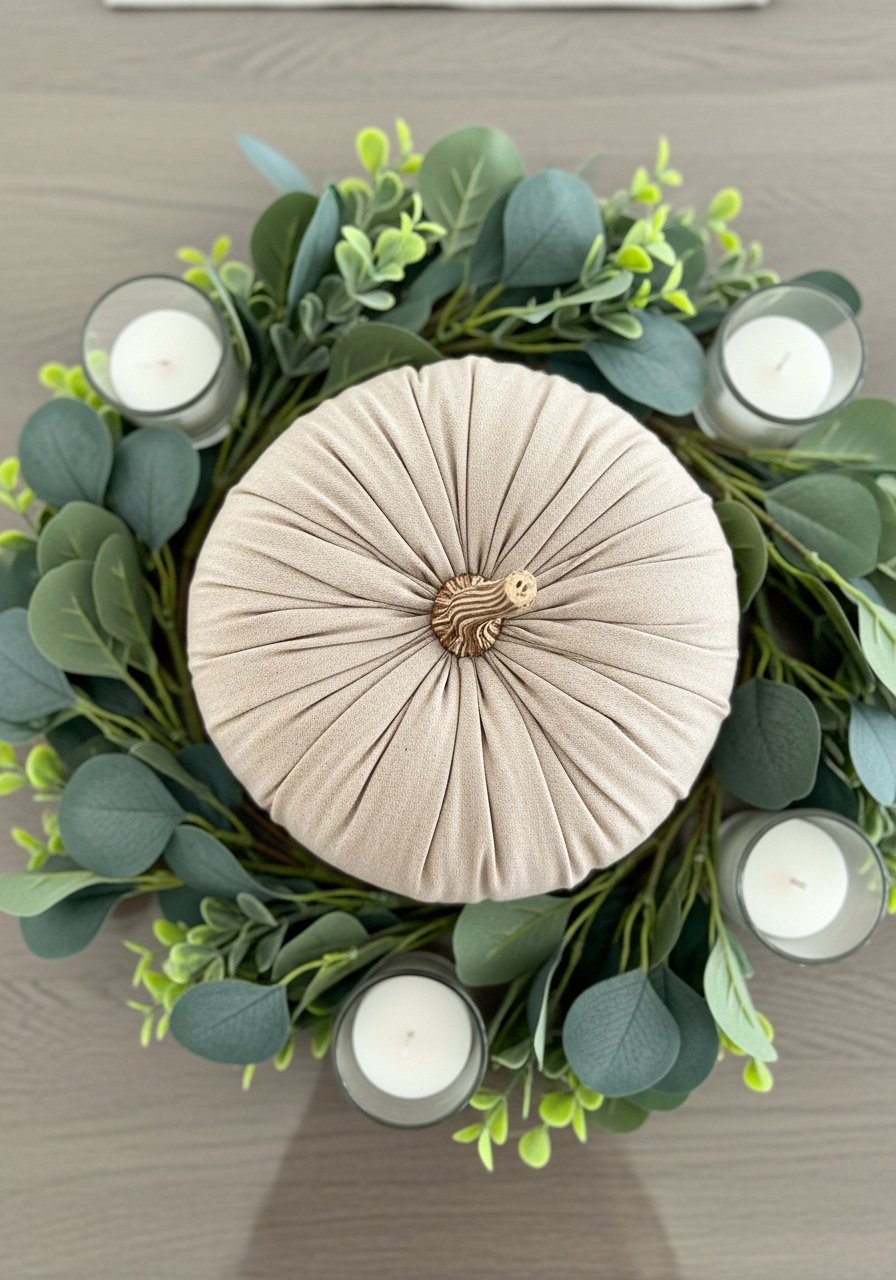
For a table centerpiece make a medium-sized pumpkin and glue small faux flowers into the top around the stem. A single floral ring makes the pumpkin feel intentional, not craft fair. Materials cost $8 to $20 depending on faux flower quality. I use faux eucalyptus stems and floral hot glue sticks. A common mistake is overcrowding the top. Leave one third of the stem visible so the piece still reads pumpkin. Works with farmhouse, cottage, and casual modern dining rooms.
Striped Knit Pumpkins for a Soft Nursery Accent
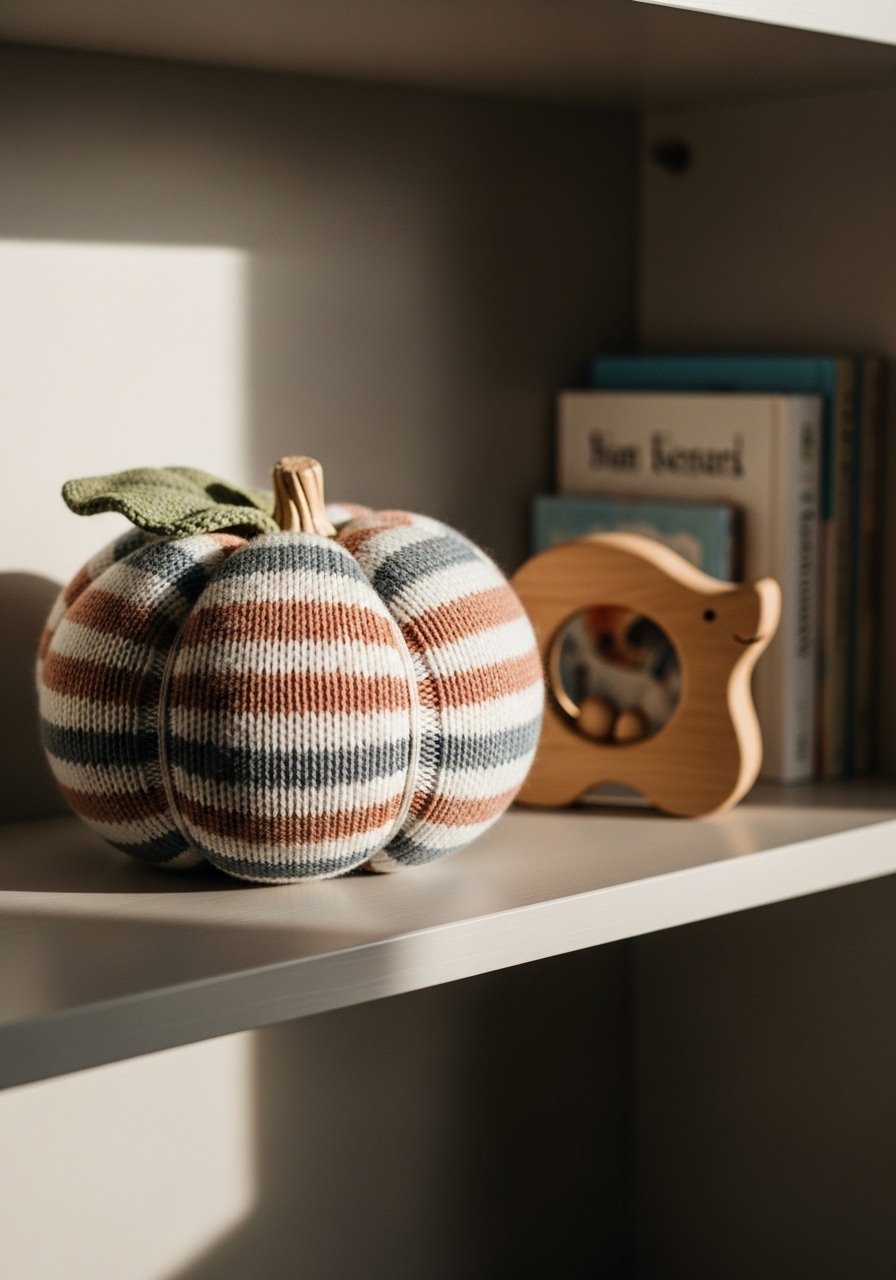
Striped knit makes a pumpkin feel soft and playful, perfect for a nursery or kids’ table. I used old oversized socks, stuffed them, and secured the top with elastic before tying with ribbon. This was basically free because I used socks with holes. If you need supplies plan $5 to $15. Try cotton socks multipack if you want uniform stripes. The quick mistake is stuffing too little, which makes the stripes sag oddly. Aim for steady firm stuffing so the knit pattern reads cleanly.
Minimalist Neutral Pumpkins for a Shelf Styling
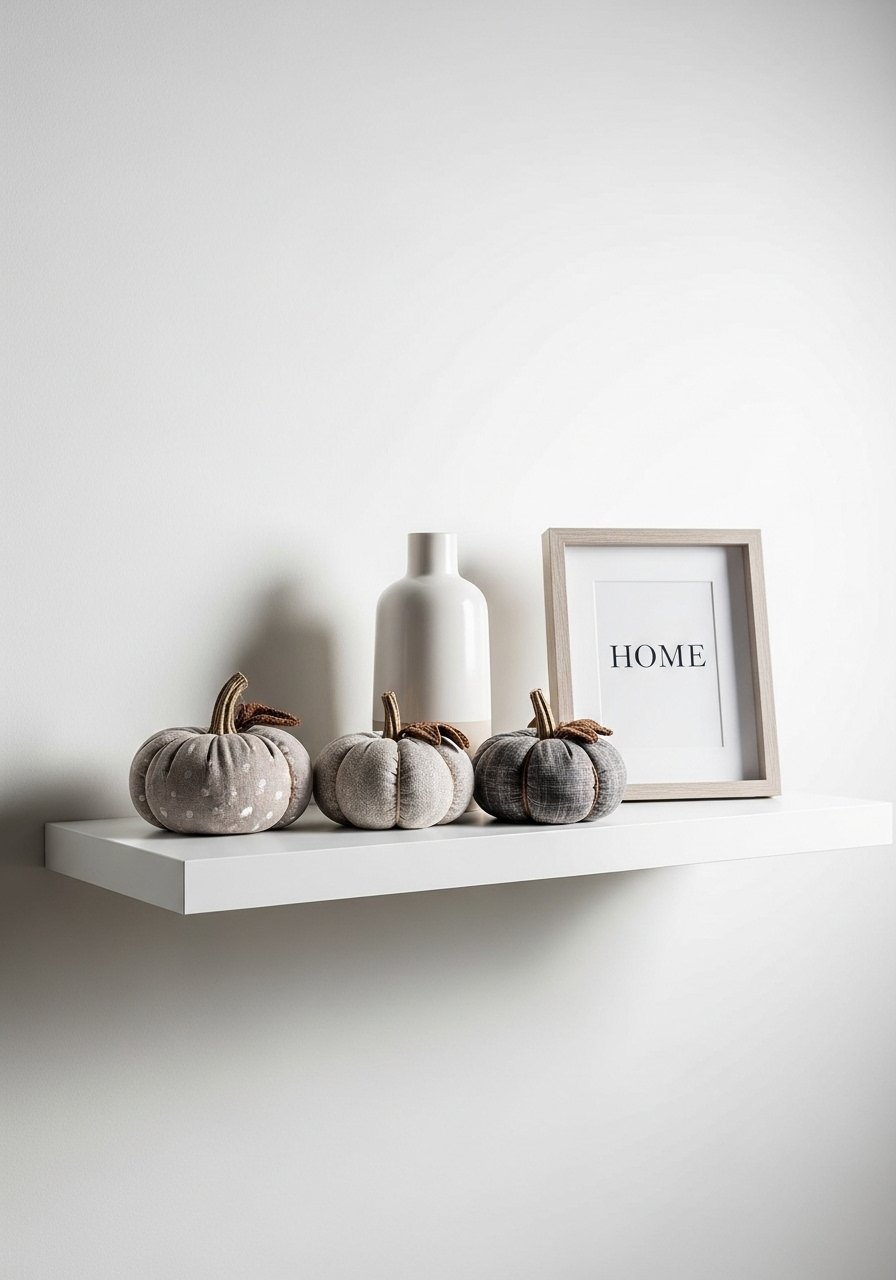
Neutral pumpkins in oat, cream, and warm gray make shelves feel layered without clutter. I cut 6-inch circles of fabric and tied them around a small ball then glued a short wooden dowel for the stem. Budget around $5 to $12 per pumpkin if you buy small dowels and fabric scraps. Use wooden dowels short and cream cotton fabric. A mistake I see is tiny pumpkins competing with brassy accessories. Keep a 80/20 color ratio where pumpkins are the subtle 80 percent.
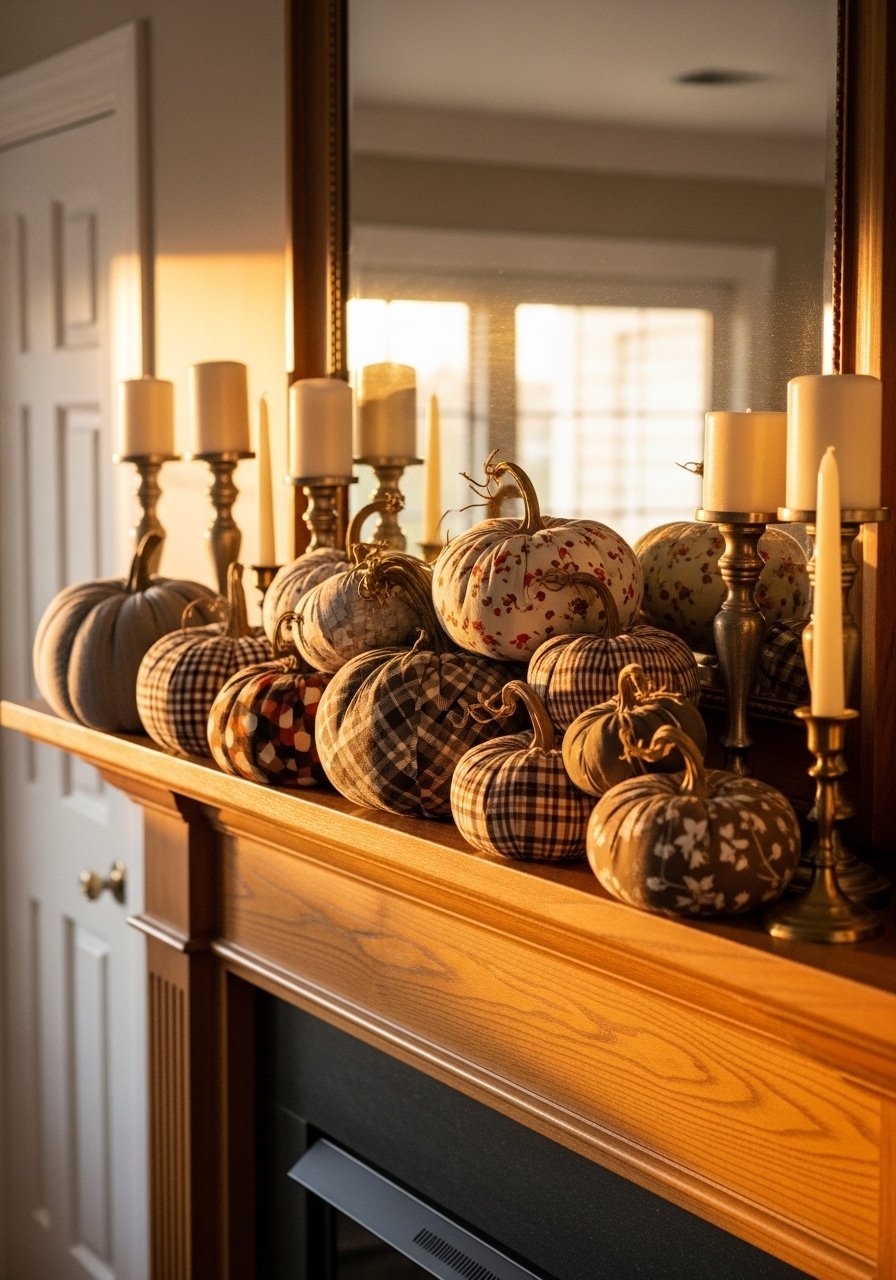
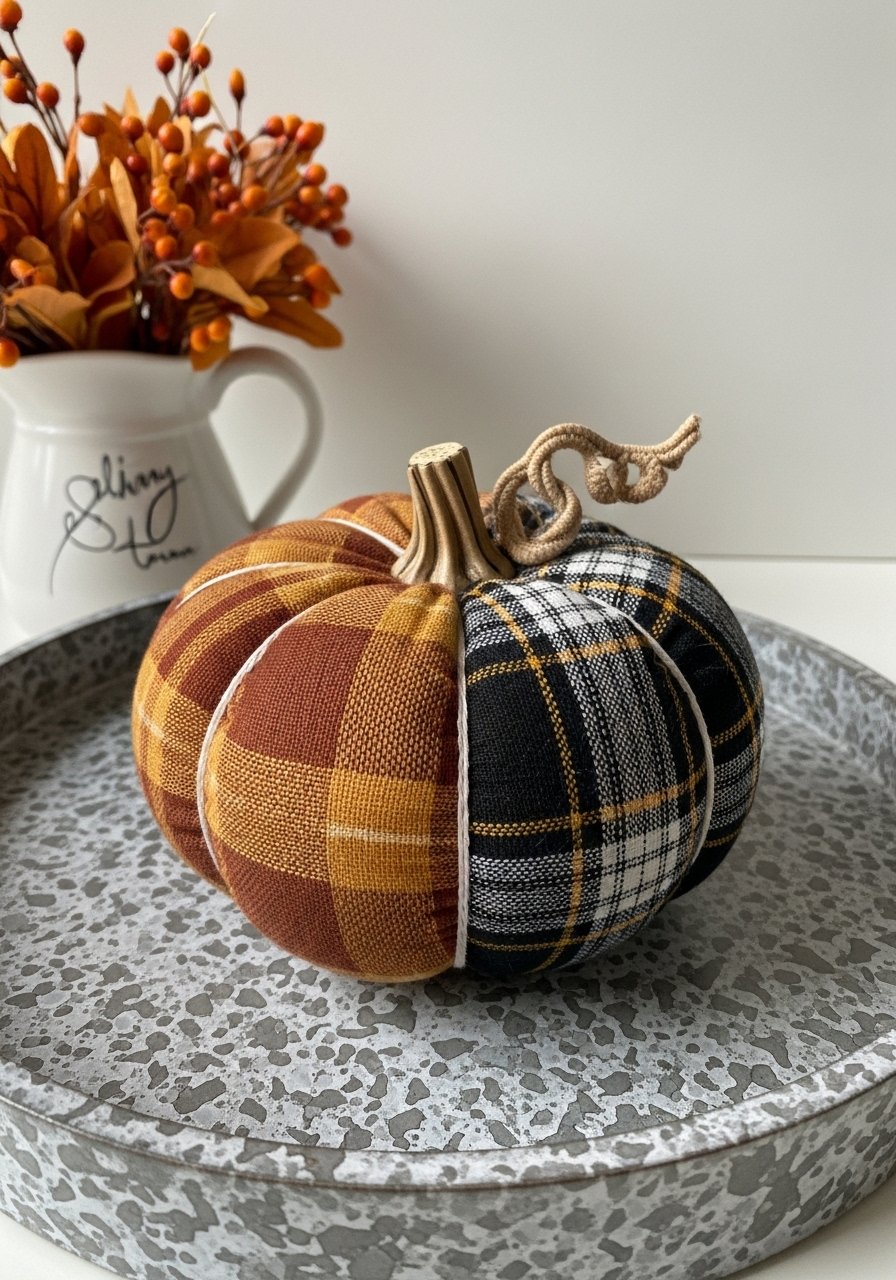
Plaid Patchwork Pumpkins for a Cabin Style Mantel

Patchwork screams cabin charm and hides imperfect cuts. I sewed nothing. I glued small fabric patches onto a base made from an old sweater sleeve wrapped around stuffing. Cost was $10 to $25 depending on thrift finds. Use sweater upcycle kits or pick thrifted sweaters for color variety. The common mistake is using too many small contrasting patterns. Limit to two dominant plaids and one neutral to keep the mantel cohesive. Pair with real pinecones for texture contrast.
Denim Pumpkins for a Casual, Durable Look
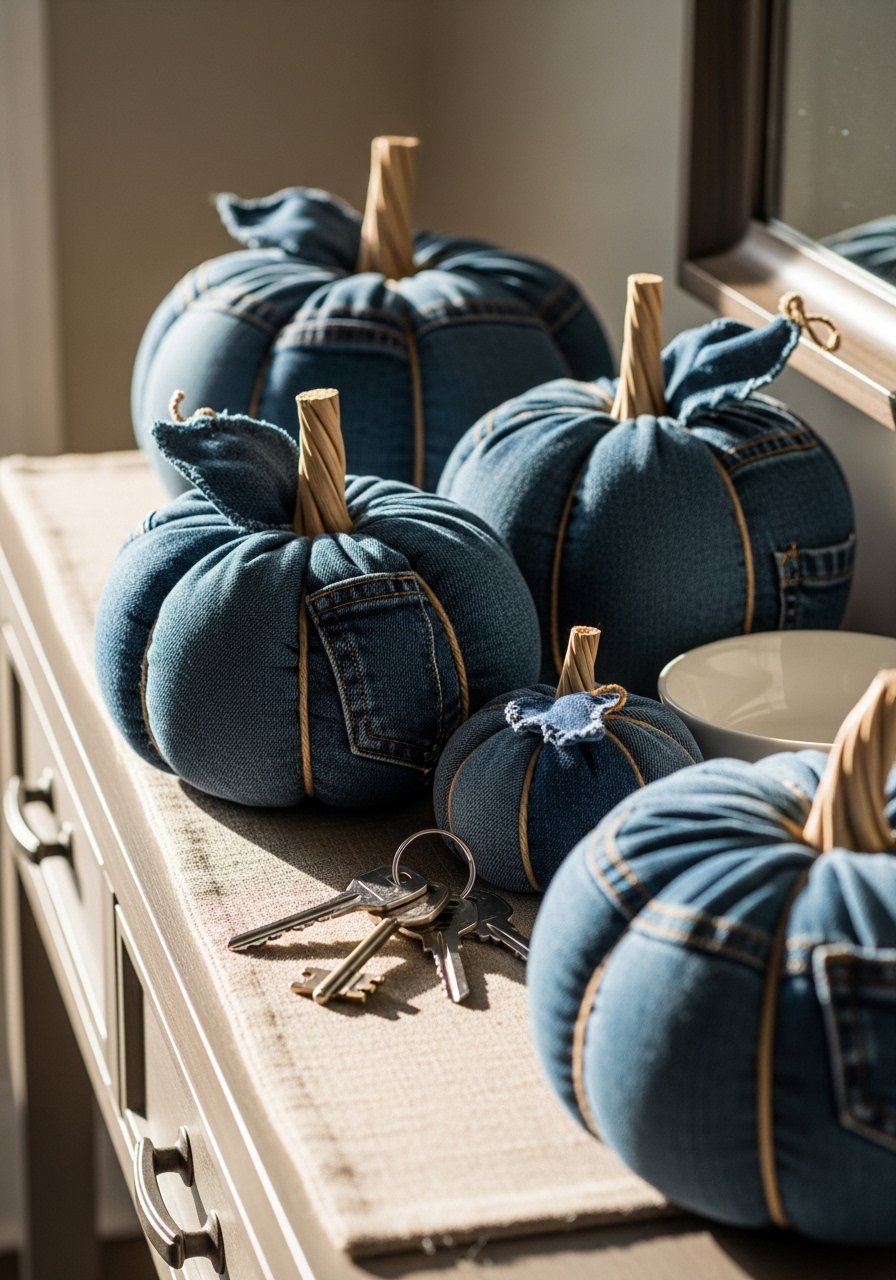
Old jeans are gold for no-sew pumpkins. Cut leg sections, tie the ends, and stuff. The seams make a natural vertical ribbing so you do not need to add cords. Cost is free if you repurpose. I keep a jar of upholstery buttons to glue into the top for a rustic stem anchor. Mistake is cutting too narrow a tube which makes the pumpkin squat. Aim for 6 to 8 inches wide for a tabletop piece. Denim works great in entryways and casual living rooms.
Faux Leather Mini Pumpkins for Modern Farmhouse
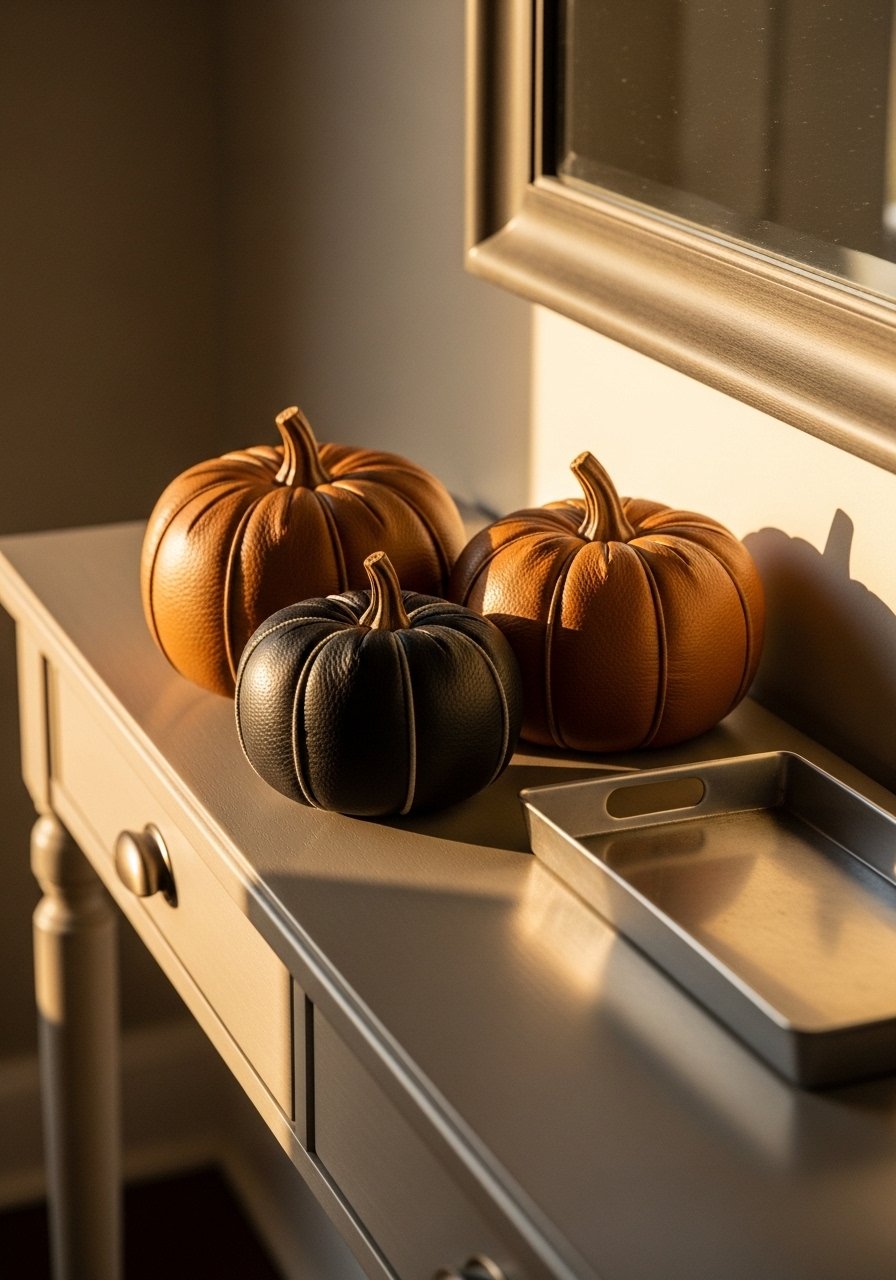
Faux leather gives a sculptural look without being precious. Cut circles, use a glue gun to form a gathered center, and glue a small twig or faux stem. Expect $5 to $15 per mini pumpkin. I used faux leather fabric and mini wood twigs pack. People often pick stems that are too long for minis. Keep stems around 1 to 1.5 inches for scale. These look great in a trio on an entry console following the rule of three.
Knit Cable Pumpkins for Layered Textures on Sofas
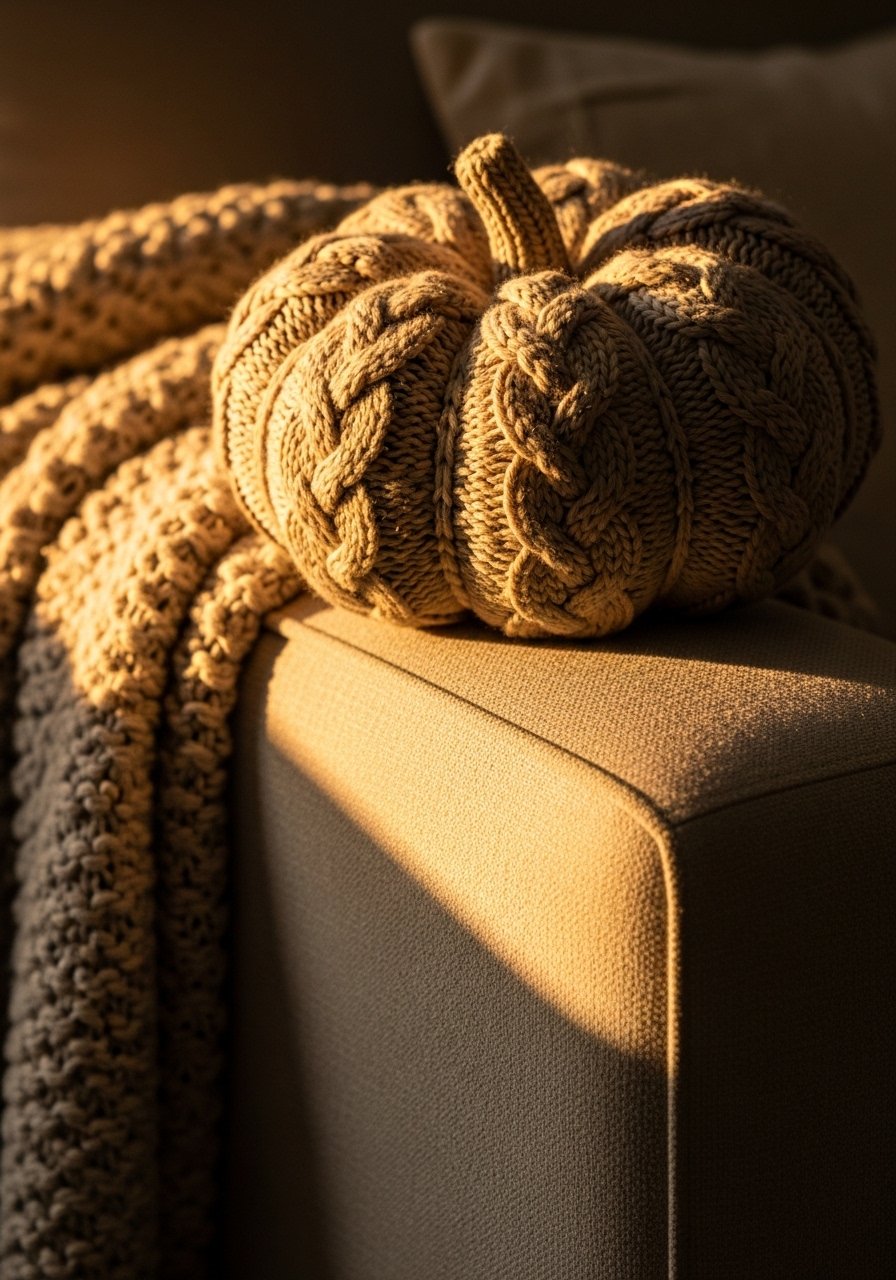
Chunky cable knit reads as a small sculpture against smooth sofa fabric. I cut the end of a chunky knit sleeve, tied it off, and used a short scrap of broom handle for the stem. Budget $8 to $25 if you buy knit sleeves or upcycle an old sweater. Use chunky knit throw sleeves if you want consistency. A mistake people make is mixing too many heavy textures. If your sofa is already textured keep the pumpkin a single neutral to avoid visual noise. These are perfect for living rooms that felt flat before.
Boho Tassel Pumpkins for Bedroom Nightstands
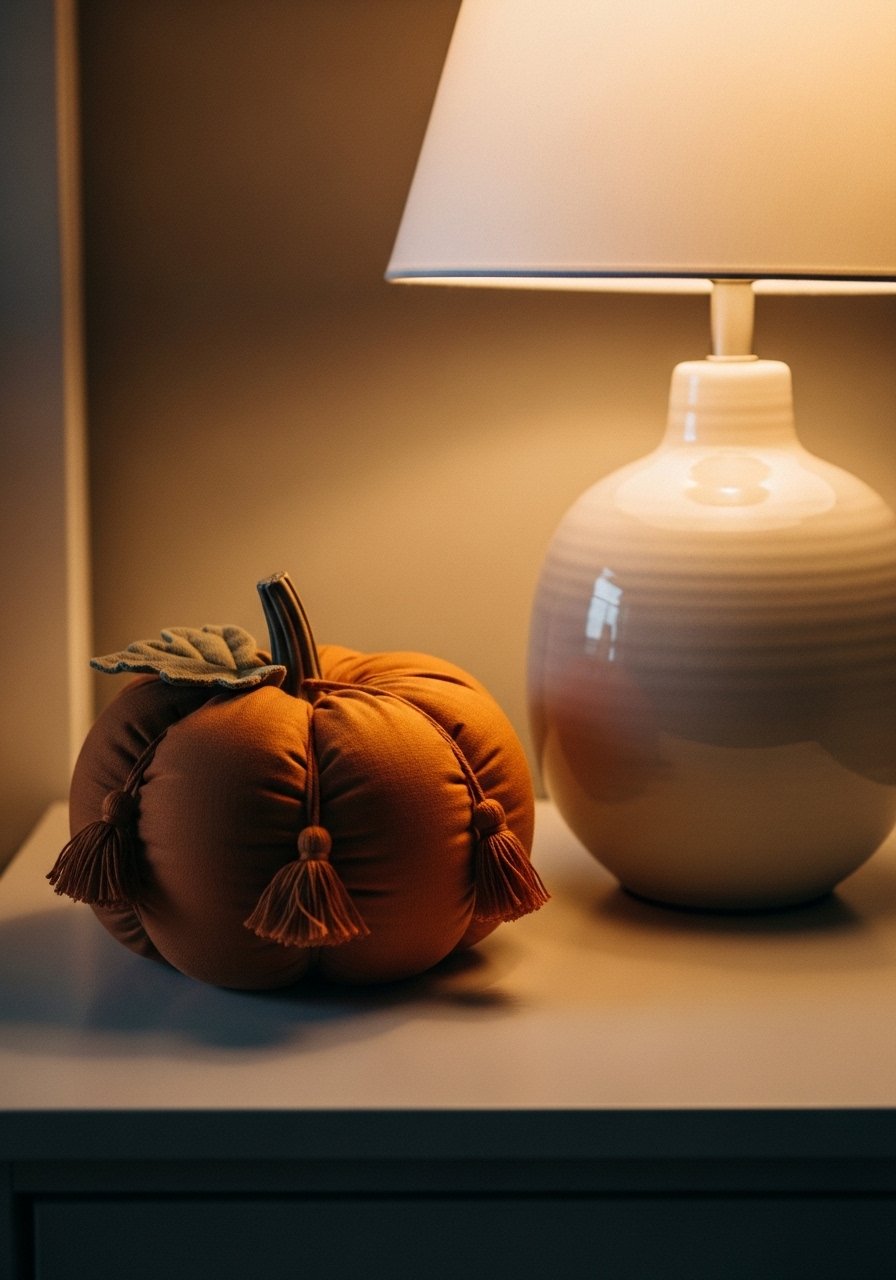
Add tassels to the stem to give a boho spin. I glued a few small tassels around a short dowel stem and used muted terracotta fabric. Budget for tassels and fabric is $12 to $25. I grabbed small cotton tassels to mix colors. The mistake is using oversized tassels that overwhelm the pumpkin. Aim for tassels that are 1 to 2 inches long for balance. This works in bedrooms to soften lamp glare and add a hand-made look on a nightstand tray.
Wool Felt Pumpkins for a Scandinavian Minimal Space
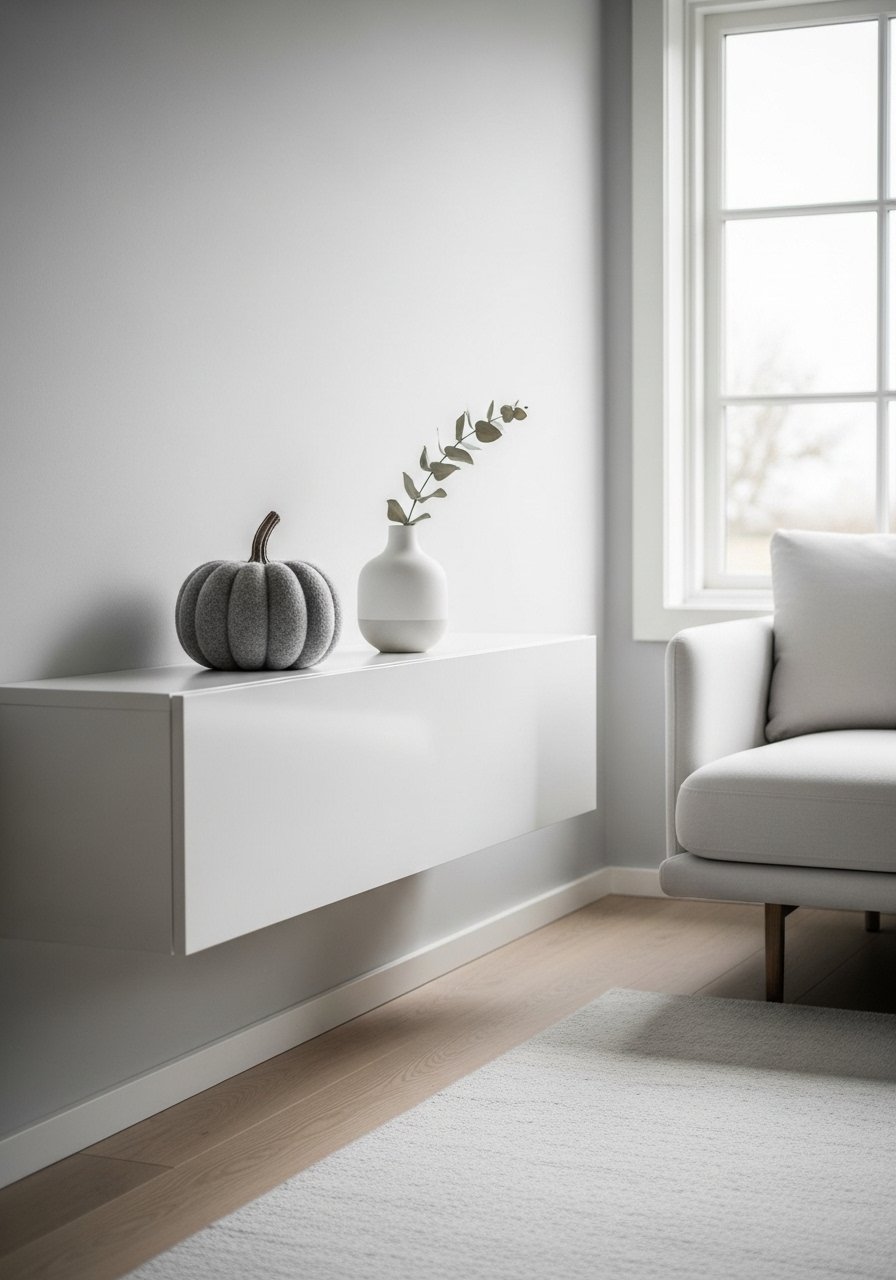
Wool felt holds shape beautifully without stitching. Cut circles, glue around a foam core, and add a short leather stem. Budget runs $10 to $30 for felt and a quality leather scrap. I order wool felt sheets in muted tones. The common mistake is choosing colors too close to the wall which makes the pumpkin vanish. Use the 80/20 color rule and let the pumpkin be one of the 20 percent that pops. Felt pumpkins are great on floating shelves or as single accents.
Quilted Patch Pumpkins for Cottage Kitchens
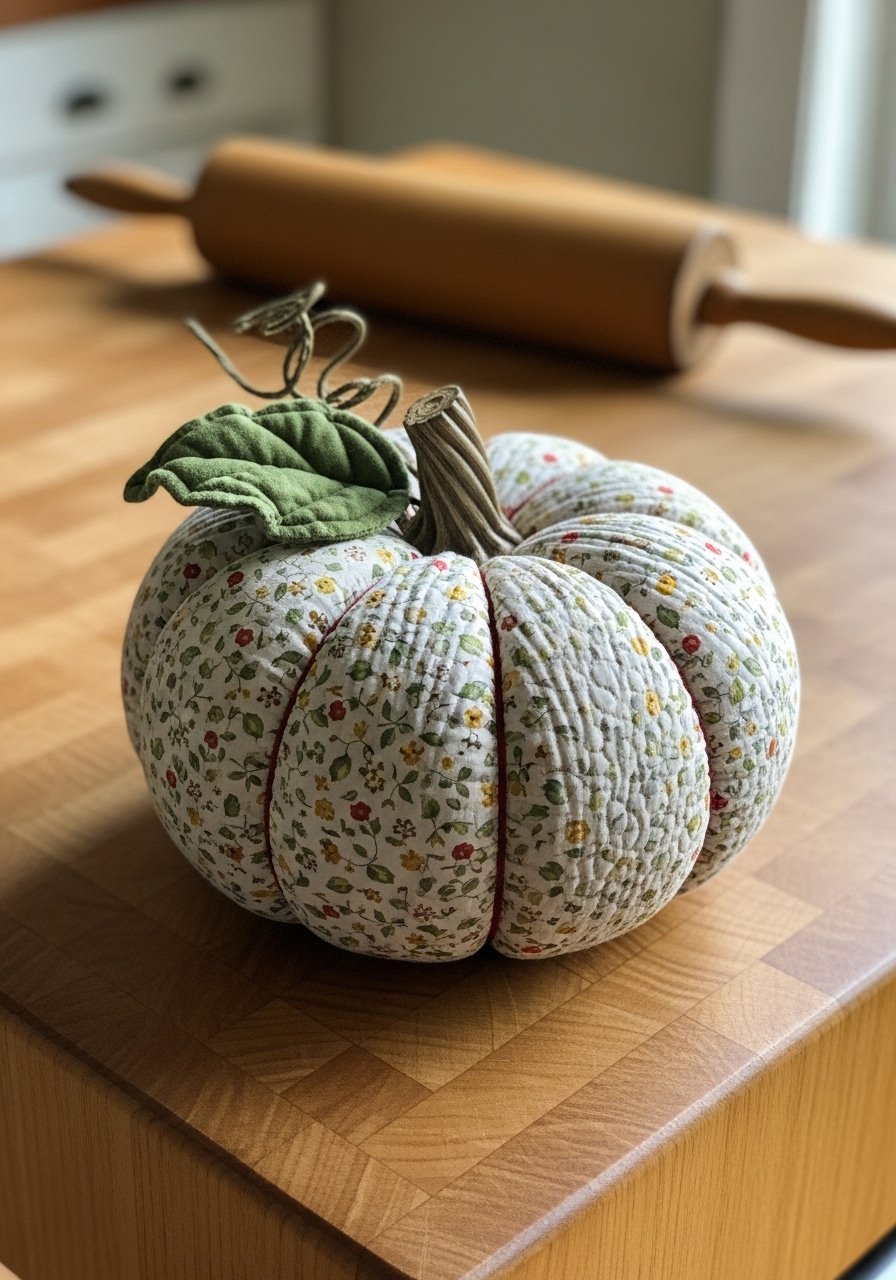
Quilted pumpkins feel homey and hold up to kitchen traffic. I glued quilt batting onto fabric circles to give a puffy look, then gathered and tied. Budget $15 to $35 depending on batting and fabric choices. Use cotton quilt batting and thrifted quilt scraps. A mistake is using too stiff batting which makes the pumpkin look boxy. Use low loft batting for a gentle roundness. Pair with a bowl of apples for a natural vignette.
Printed Cotton Pumpkins for an Eclectic Mantel
I like bold prints on an otherwise calm mantel. Use different cotton prints but limit the color palette to three hues so it reads curated. I bought small yards of printed cotton and used clothespins and ribbon to create puckered centers. Budget $8 to $20 per pumpkin. Try printed cotton fat quarters. A typical mistake is mixing too many scale sizes. Keep one large print, one medium, and one small to create proportion that reads well from across the room.
Tiny Pom-Pom Pumpkins for a Child-Friendly Table
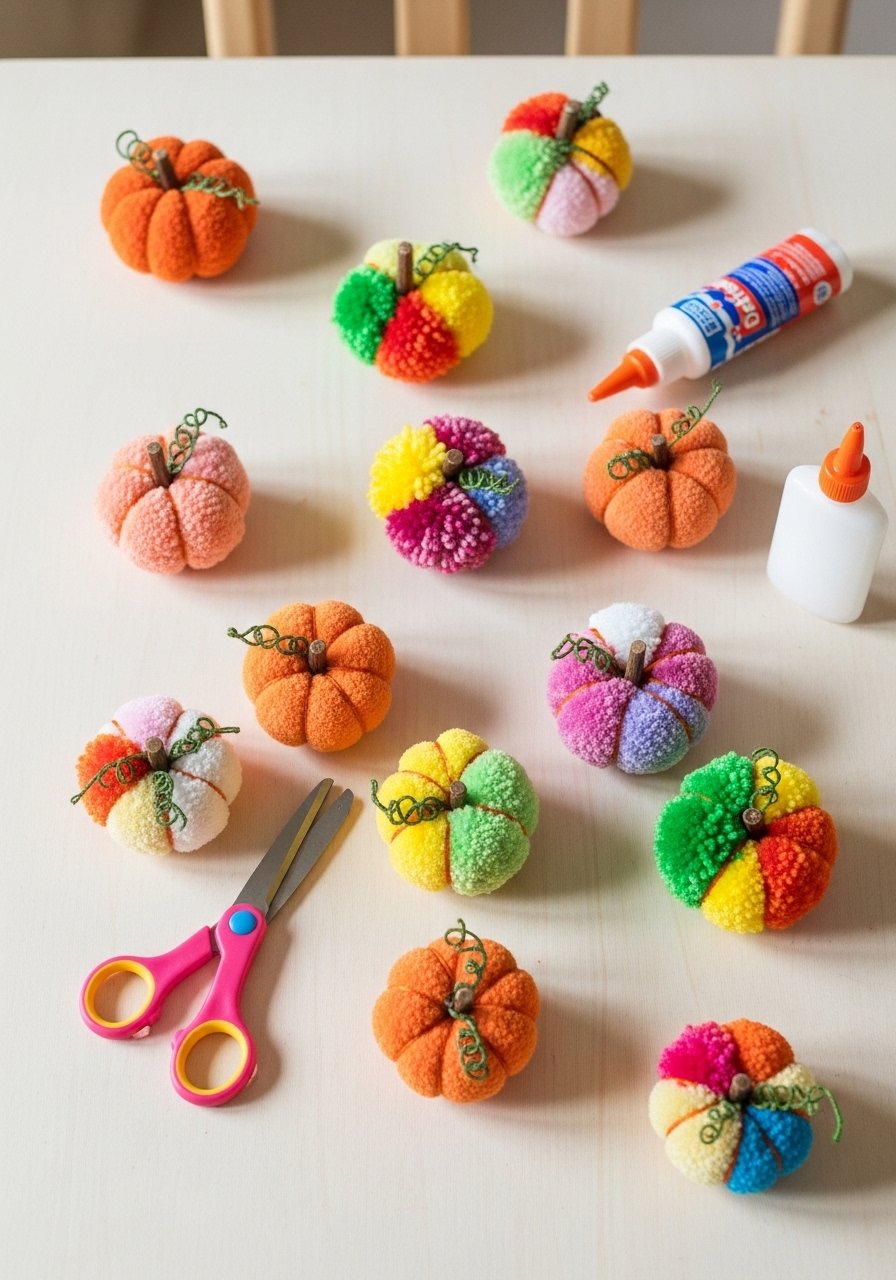
Tiny pom-pom pumpkins are fast and safe for kids. I used felt circles and glued pom-poms in the center, then glued a short ribbon stem. Cost is low, $0 to $10 if you use leftover felt and pom-pom packs. I use craft pom-pom packs. Parents often pick pom-poms that are too small to see from across the room. Make pom-poms at least 1 inch wide for visibility. These are perfect for kid tables and classroom crafts.
Monochrome Satin Pumpkins for a Glam Entry Console

Satin reads dressy even when the technique is simple. I used large satin circles, gathered edges with a ribbon, and added a faux metallic stem. Budget runs $15 to $40 depending on fabric size. Satin fabric by the yard and faux metallic stems pack add polish. Mistake is overstuffing which creates visible lumps on satin. Keep stuffing smooth and finish with a small dab of glue to hide seams. This pairs well with a statement mirror.
Layered Textiles Pumpkin Garland for a Mantel Runner
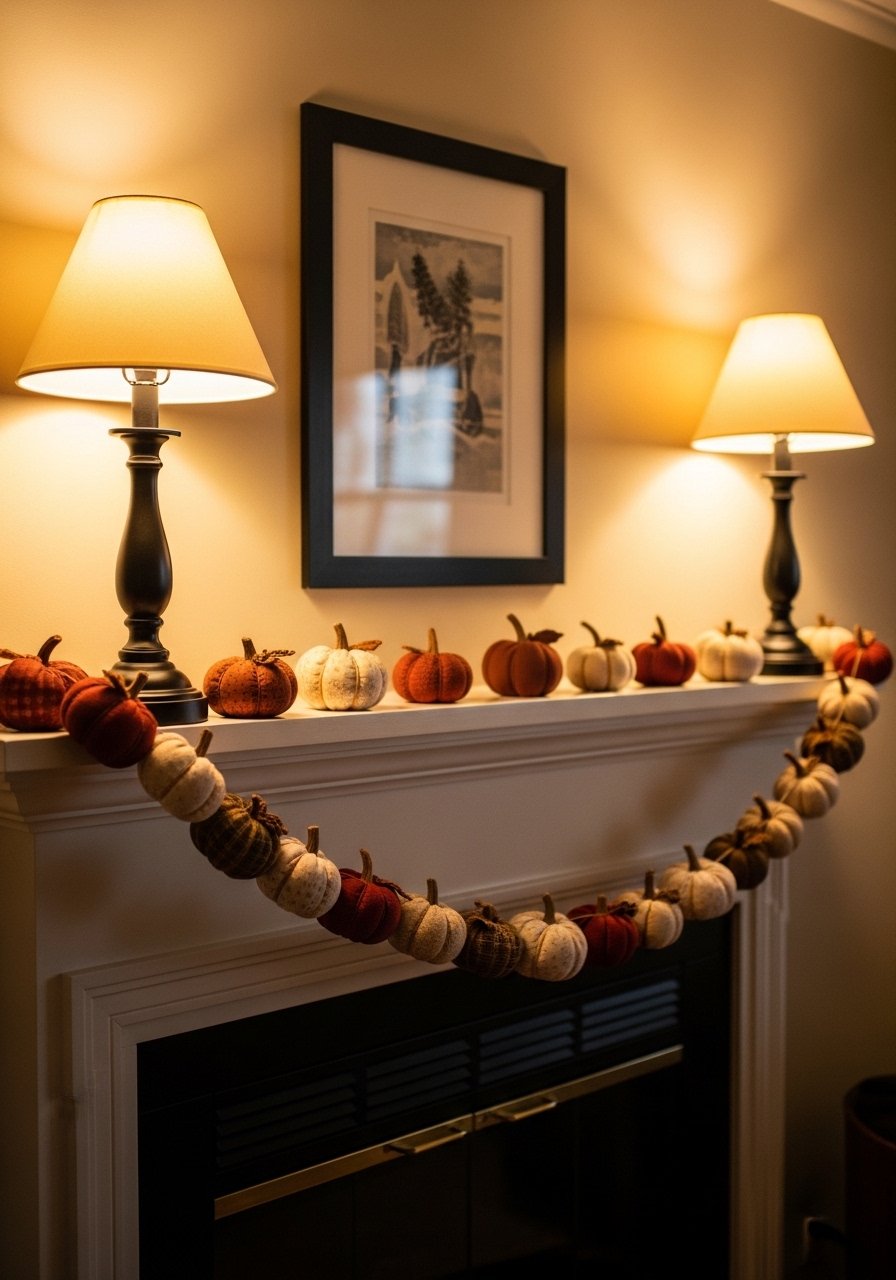
Turn small pumpkins into a garland by threading them on a loop of twine. I spaced pumpkins every 6 inches and added faux berries between them. Budget $10 to $30 total if you make 8 to 10 pumpkins. Use mini pumpkin stems pack and faux-berry garland accents. People often crowd pumpkins too close. Give each pumpkin breathing room so the garland reads intentionally loose. This works well with the layered neutrals idea from earlier.
Reversible Holiday Pumpkins for Multipurpose Decor
I made reversible pumpkins by gluing two different fabric circles back to back. Flip the stem a different way and you get another look. Cost depends on fabric but expect $8 to $20. I used double-sided fabric tape to keep things tidy. The common mistake is making the pumpkin too thick which hides the reversal seam. Keep each side light and use thin stuffing so the pumpkin flips neatly. Great for people who want fall and early winter decor without new projects.
Metallic Accented Pumpkins for a Modern Console
A little metallic at the stem makes a simple pumpkin look elevated. I used fabric scraps and glued a thin metal leaf wrap around a stem. Budget $12 to $35 depending on metallic materials. Use gold leaf craft sheets and thin floral wire. People overdo the metallic and make the pumpkin look costume-y. Keep metallic to 10 percent or less of the piece and the effect reads modern. Pair with mixed metallic frames on the wall.
Felted Wool Mini Stack for Coffee Table Styling
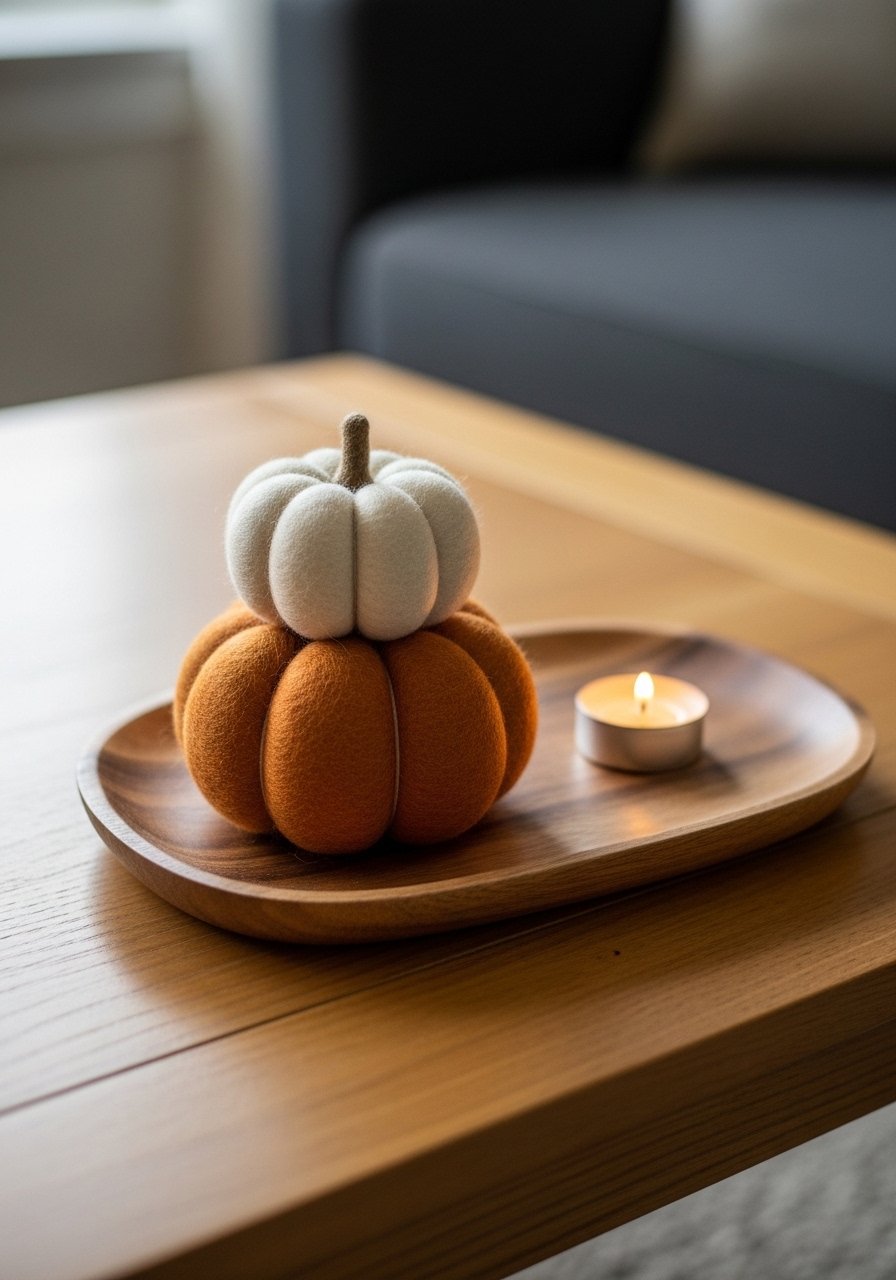
Stacking mini felt pumpkins creates instant height and layering. I glued a 2-inch base to the underside of the bottom pumpkin to stabilize the stack. Expect $6 to $18 per stack if you buy felt sheets. I like wool roving packs for richer texture. A mistake is making the base too small which makes the stack wobbly. Aim for the bottom pumpkin at least one third larger in diameter than the top. Works great on coffee tables and side tables where you need a vertical accent.
Your Decor Shopping List
Textiles
- Oat linen fabric by the yard (~$12 per yard). Good for the linen trio and neutral shelf pieces.
- Velvet fabric remnant bundle (~$18-30). Use for velvet pumpkins and luxe accents.
- Chunky knit sweater sleeves or throw sleeves (~$25). Great for cable pumpkins on sofas
Wall and Display - Mini wood dowels 6-inch pack (~$6). Use short stems for minis and trims.
- Mixed faux eucalyptus stems 6-pack (~$15). For floral toppers on dining table pumpkins.
Tools and Basics - Polyfill stuffing large bag (~$12). Good value for multiple pumpkins.
- Hot glue gun and sticks set (~$20). Essential for no-sew construction.
Budget Finds - Craft pom-pom assortment pack (~$8). For tiny kid-friendly pumpkins.
- Mini stems and twig pack (~$7). Quick, authentic-looking stems.
Splurge Option - Wool felt sheet bundle (~$30). For the felted Scandinavian look.
Similar at Target and HomeGoods for textiles if you want to touch fabric before you buy.
Shopping Tips
White oak beats dark wood in 2026. Design feeds have shifted completely. These white oak floating shelves look current, not dated.
Grab polyfill stuffing in a large bag for the best value. Using one bag for 10 to 15 pumpkins keeps the feel consistent.
Curtains should puddle or kiss the floor, never hang halfway up. These 96-inch linen panels are right for standard 9-foot ceilings.
Found velvet fabric remnants while looking for sofas. Buying remnants gives you richer textures without wasting material.
Everyone buys five small succulents. One single 6-foot fiddle leaf fig has ten times the visual impact. Place it next to a pumpkin cluster for scale.
Frequently Asked Questions
Q: Can I make these pumpkins completely without glue or tools?
A: Yes, some methods use knots and elastic bands only. The sock method and some knit techniques need no glue. Foam core based pumpkins work best with a little adhesive for durability.
Q: What stuffing looks most natural for no-sew pumpkins?
A: Polyfill is easiest and softest. For firmer pumpkins use foam balls as an internal base and add light polyfill around them. I use polyfill for about 70 percent fill so shapes stay soft but hold.
Q: How do I scale patterns so smaller and larger pumpkins look like a set?
A: Use a 2:1 ratio between medium and small pieces and vary heights by about 1 to 2 inches. Keep fabric prints to one dominant scale and one accent scale so they read cohesive from across the room.
Q: Can I use outdoor fabrics on a covered porch?
A: Yes. Use marine or outdoor fabrics for covered porches and keep the pumpkins under a roof. Outdoor canvas remnant holds up better than burlap in damp climates.
Q: How do I make realistic stems without carving wood?
A: Cheap options include wrapping a short wooden dowel with twine or using faux metallic stems. Keep stems short on minis, about 1 to 1.5 inches, so they stay in scale.
Q: Will these look homemade or can they read store-bought?
A: They can read both. The details that matter are stuffing density and stem proportion. Smooth stuffing and a proportionate stem make even a glued pumpkin look intentional.
Q: What common mistakes should I avoid when styling pumpkins on a mantel?
A: Avoid lining them up evenly. Leave negative space, vary heights, and pair pumpkins with one or two textural props. Crowding the mantel is the usual culprit for a messy look.
Q: Can I store fabric pumpkins easily for next year?
A: Yes. Stack small ones in a box with tissue between pieces. For larger ones remove stems if glued and wrap in cotton sheets to prevent color transfer.
