
Spent $400 on a coffee table once, then fixed the whole room for under $40 with a throw and three candles. That same idea works for fairy gardens. Small details, a little texture, and a few cheap supplies make a shelf or windowsill feel deliberately collected instead of cluttered.
These projects lean cottage and playful, with most supplies under $25 and a few small splurges around $40. They work for window sills, entryway consoles, kids craft time, or a bright corner in a living room that needs personality.
Polymer Clay Mushroom Cluster for Any Pot
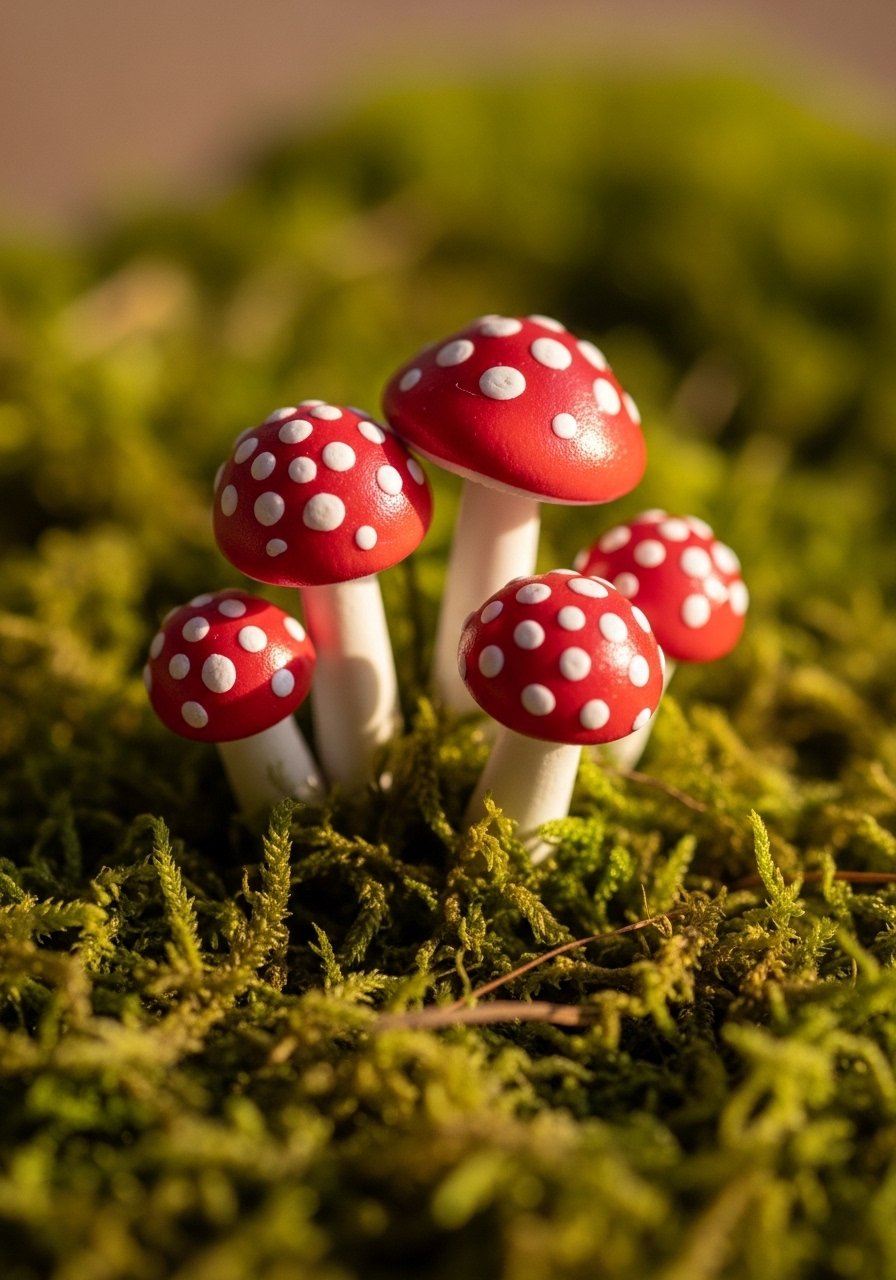
I make these first because they survive indoor pots. Roll 1-inch caps, add tiny white dots, then bake at 275F for 15 minutes so the color stays bright in humid planters. I like a trio of two small and one medium for the rule of three. A common mistake is making them too large for the moss. Keep pieces around 1 to 2 inches tall so they read as mushrooms, not ornaments. I use a small Sculpey pack I bought on Amazon for quick batches Polymer clay 2oz pack. Pair these with a moss roof from idea nine for a classic cottage look.
Pea Gravel Stepping Stone Path to Define Zones
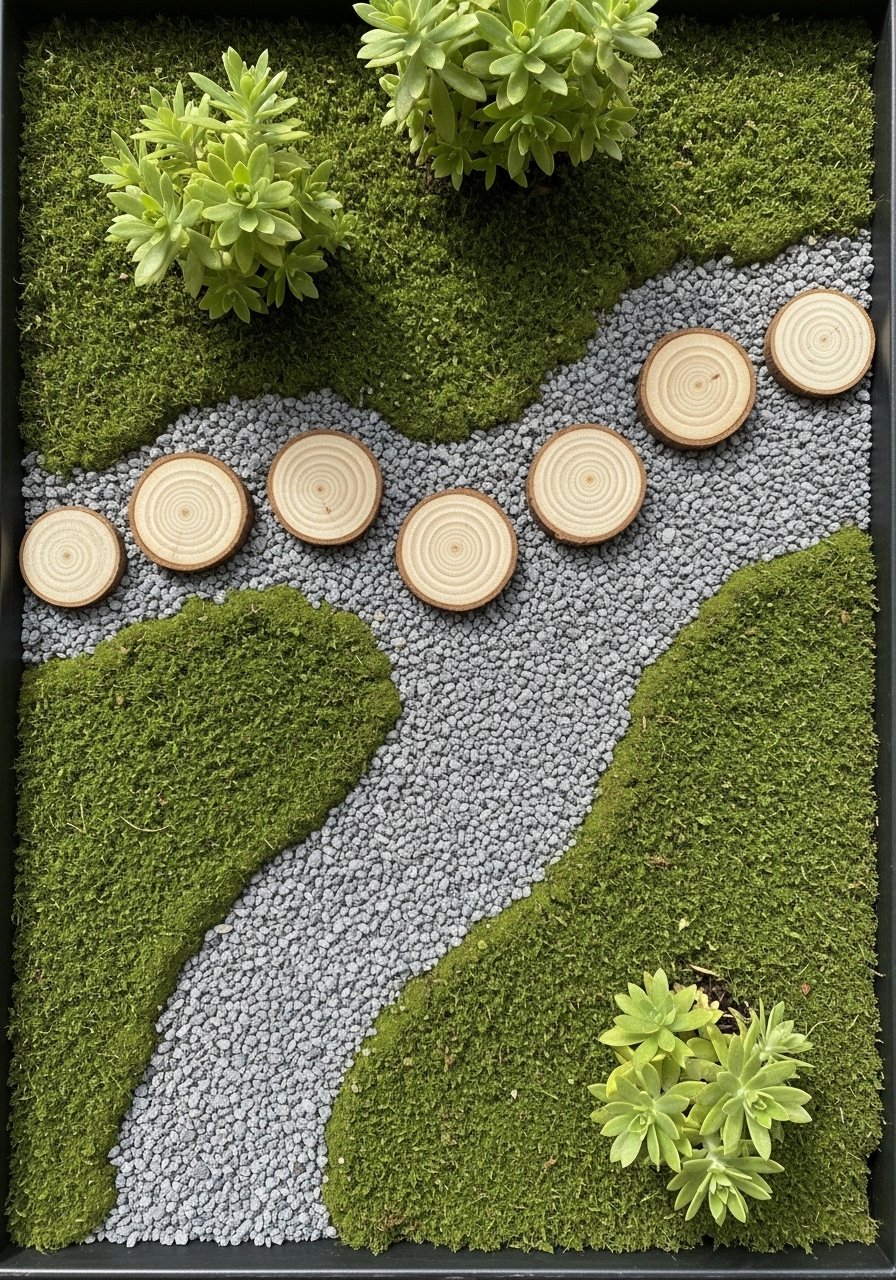
Paths stop everything from turning into a single dirt blob. Lay 1/4-inch aquarium gravel in 1-inch wide lines to separate house and play areas. I press the gravel into a thin layer of tacky craft glue so it does not migrate after play. People often dump gravel on loose soil and watch it sink. Use a base that is 2/3 drainage mix and top 1/3 with playdough or sheet moss to hold shape. For that bright pond look, keep a few blue stones nearby Aquarium gravel bag.
Twig Swing Hanging from a Branch
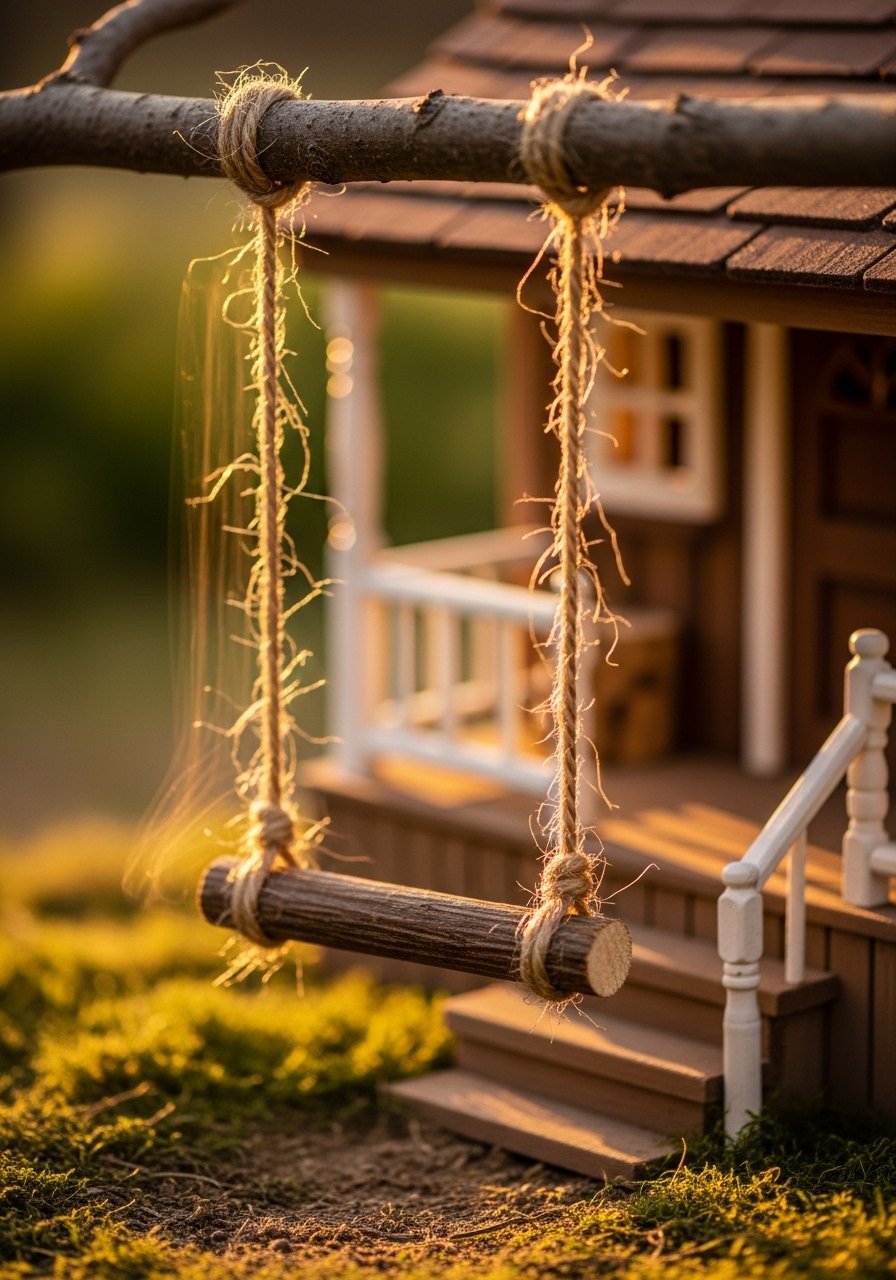
A swinging seat brings motion and makes the scene feel lived in. Tie three 3-inch twigs as a seat and hang them with twine at about a 45 degree angle so the swing sits naturally. A mistake I made early on was tying too short a loop and watching the swing sit crooked. If you want durability, knot twice and dab hot glue on the knots. Keep the swing scale to 1 to 2 inches across. I grabbed craft twine and lightweight hooks to hang them from a small branch in a pot Natural jute twine roll.
Popsicle Stick Wire Fence Border for Neat Edging
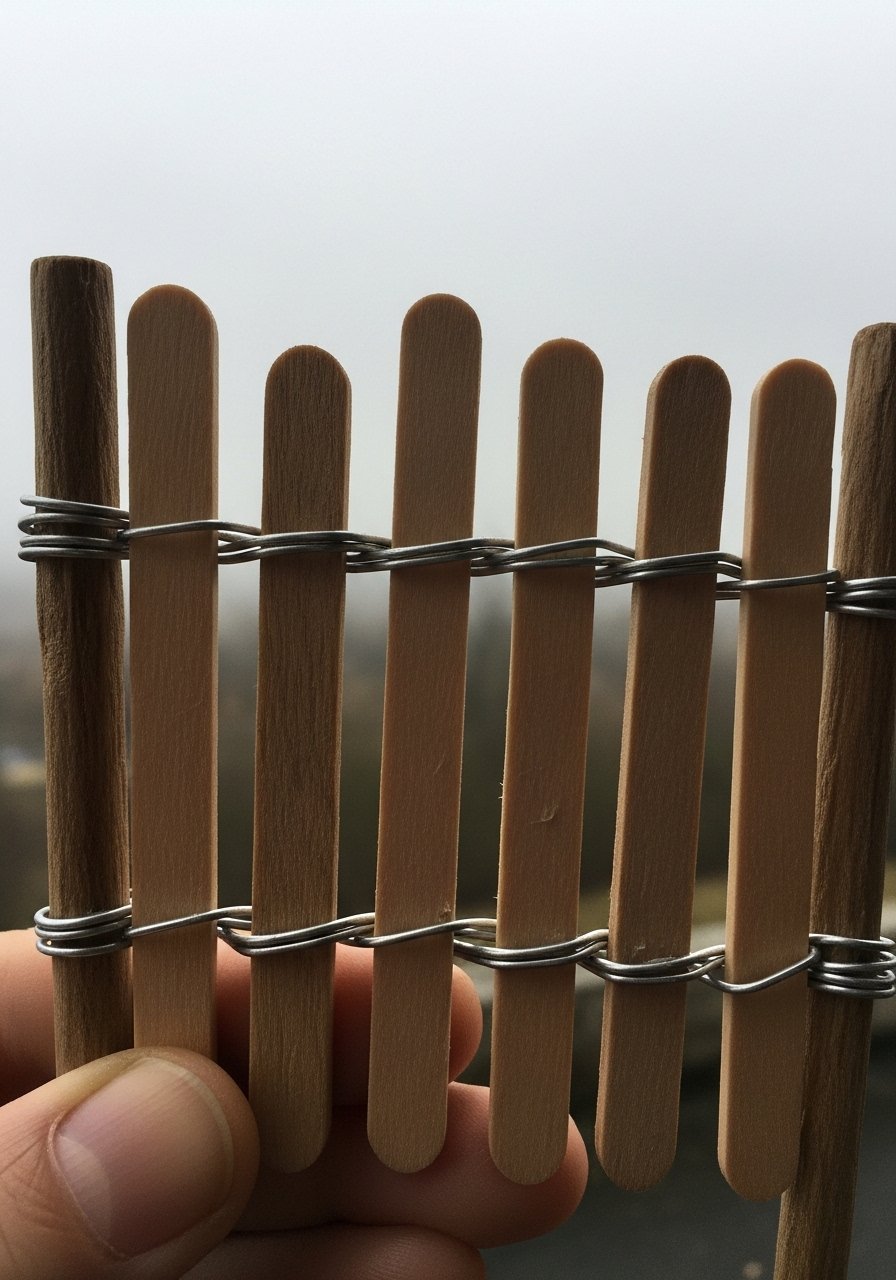
Fences make a tiny village read as organized. Glue popsicle sticks 6 to 8 inches long together then space them 1/2 inch apart and wire them at the back instead of gluing straight into soil. That wire backing is the trick I rarely see in other tutorials. If you glue sticks directly into peat, they wobble. Floral wire plus a dab of paint makes the fence look aged. For quick supplies, use a pack of craft sticks and floral wire Wooden craft sticks and floral wire.
Bottle Cap Table and Chair Set That Upcycles
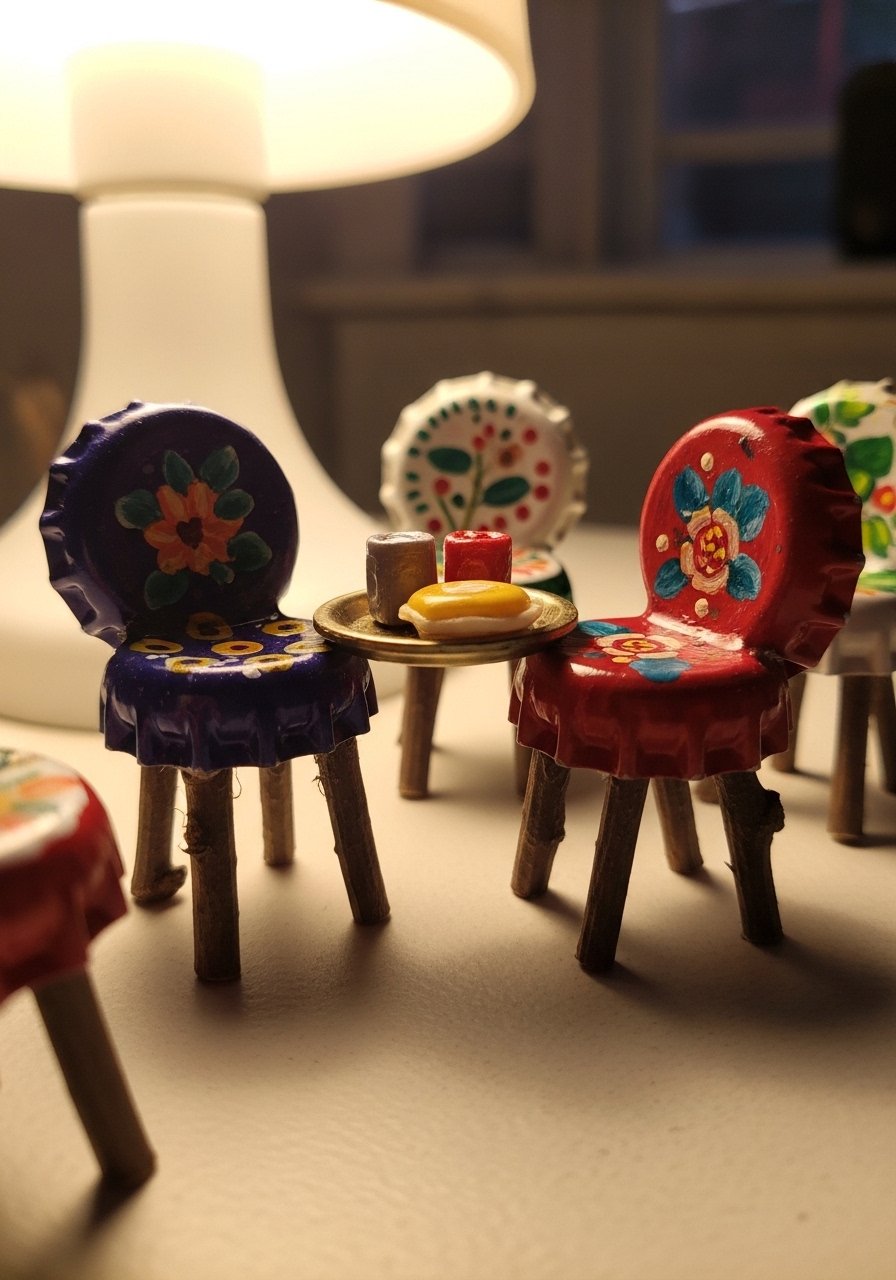
Upcycling bottle caps into seats is one of the cheapest ways to add function to a fairy scene. Paint caps with acrylics, then glue twig legs at three points for stability. A frequent mistake is using only two legs which tips under play. Three legs sit solid on uneven surfaces. This is perfect for kids projects because it uses recycled bits and stays under $5 for a small set. I use a small acrylic paint set for colors Acrylic paint set small tubes.
Jar Fairy Garden with Lights That Last Indoors
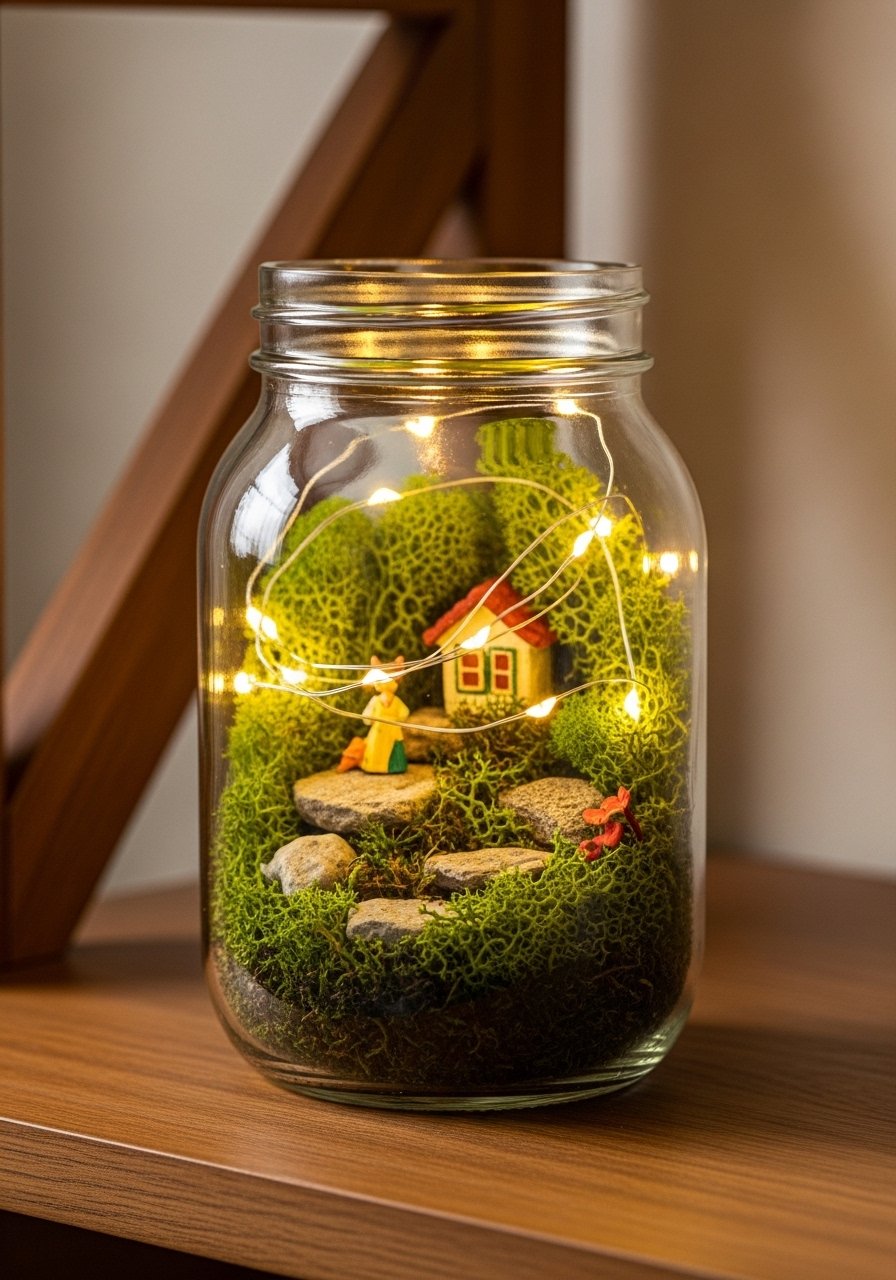
Sealed jars keep dust and curious pets out of the scene. I make a 2-inch layer of drainage beads, top with a hand-shaped playdough hill, and then add preserved moss so nothing rots inside. About half go sealed jars now because they last longer and clean up is easier. The mistake is planting live succulents in a closed jar and finding brown mush in a week. For a soft glow, tuck in a tiny battery light string Battery fairy lights mason jar.
Toilet Paper Roll Mushroom House for Kid-Friendly Builds
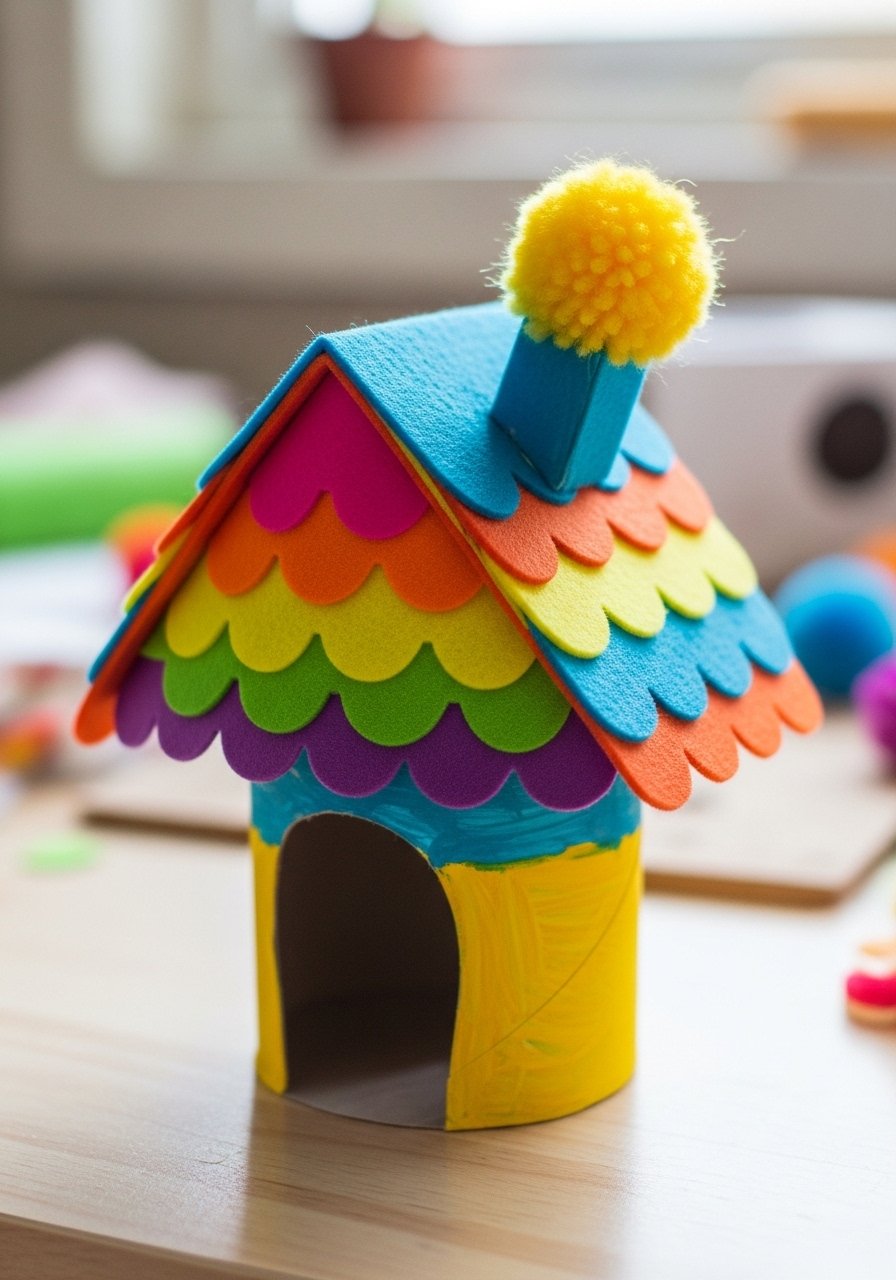
This is a kid-friendly staple that stays upright if you anchor it. Cut a toilet paper roll, glue felt for a roof, then push a 1/8-inch wooden dowel through the center before stacking to avoid it tipping. Parents usually pull these together for under $20 and kids can handle painting. The common mistake is leaving the roll hollow and unstable. Reinforce the base with a coin or small washer under the bottom. I keep felt sheets and small dowels on hand for fast builds Assorted craft felt sheets and wooden dowels.
Faux Pond with Blue Aquarium Gravel
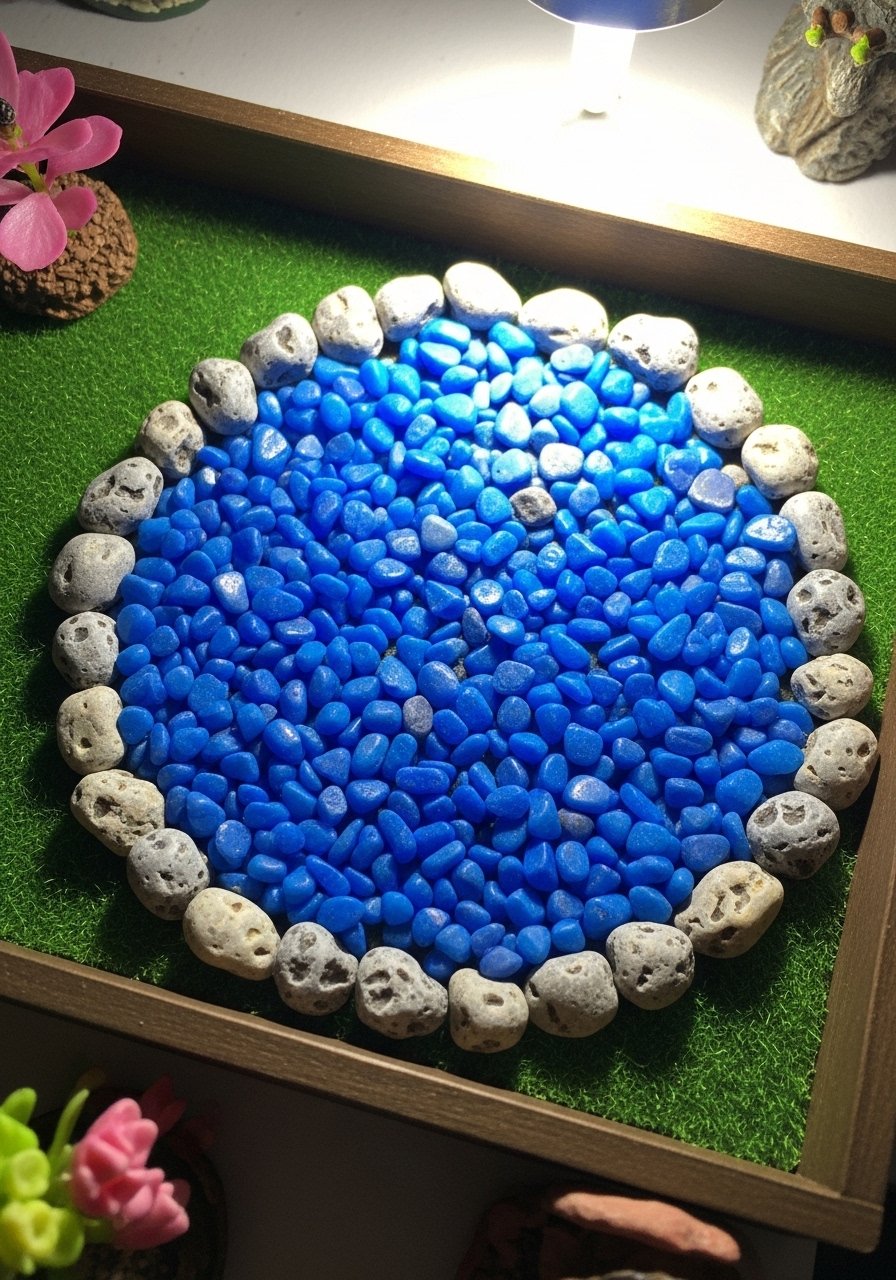
Glitter ponds look great in photos but make a mess. Swap them for a 2-inch circle of blue aquarium gravel set into a shallow dip. Press the stones into a thin line of clear craft glue to keep them from scattering. A real trick is to add a ring of lighter stones to act as a shoreline so the pond reads as reflective rather than flat. If you need to fake depth, paint the base a deeper blue first. I keep a small bag of blue gravel in my craft stash Blue aquarium gravel small bag.
Moss Roof Barrel Planter for Cozy Cottage Vibes
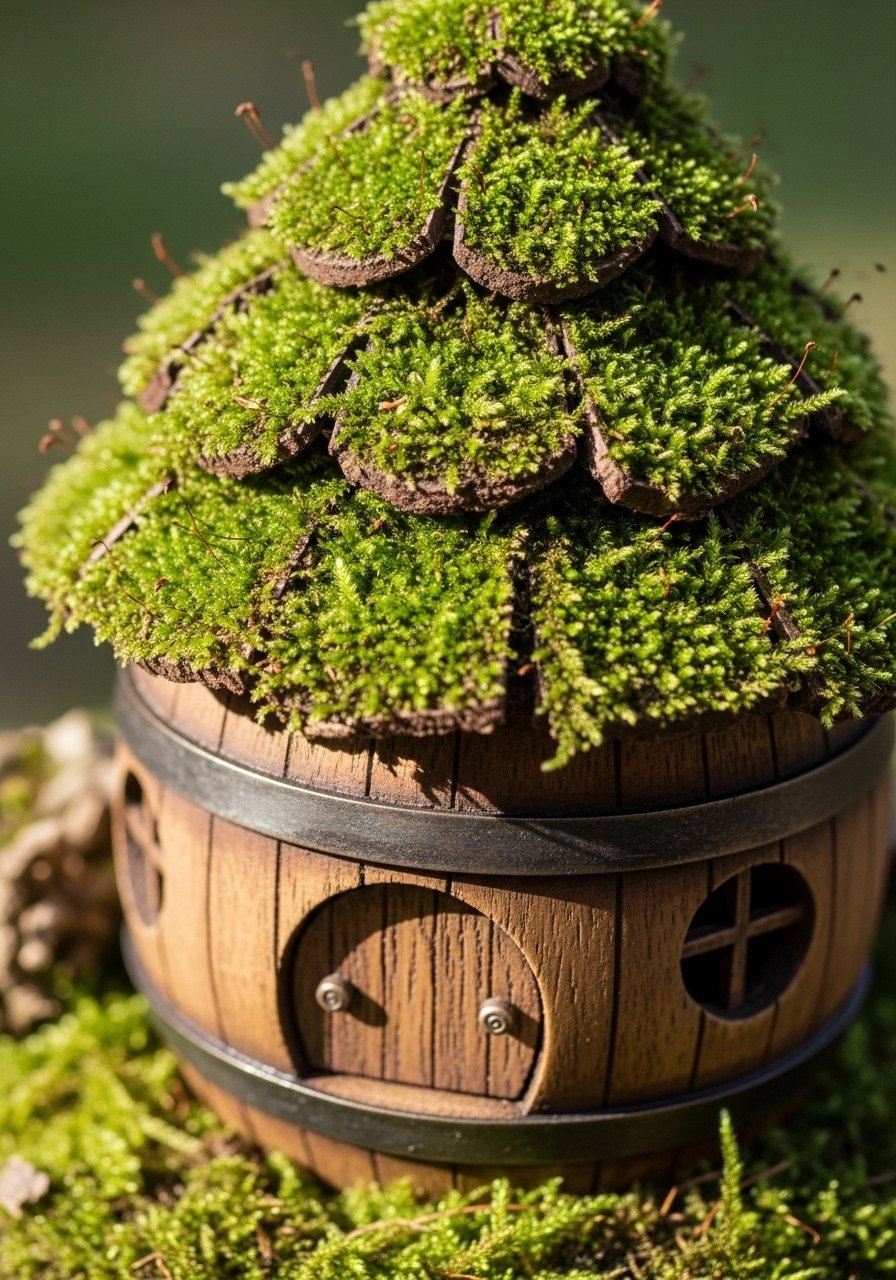
A moss roof softens hard pottery and hides glue lines. Use preserved sheet moss so it stays green, not the sprayed live stuff that yellows in two weeks. Cut the roof to about one third of the house height for proper proportions. Many tutorials skip that ratio and end up with a roof that overwhelms the house. I glue the moss down with craft adhesive and press a layer of fine gravel below for drainage. Preserved moss also pairs perfectly with polymer mushrooms from idea one Preserved sheet moss pack.
Wood Slice Vertical Sign Garden for Small Walls
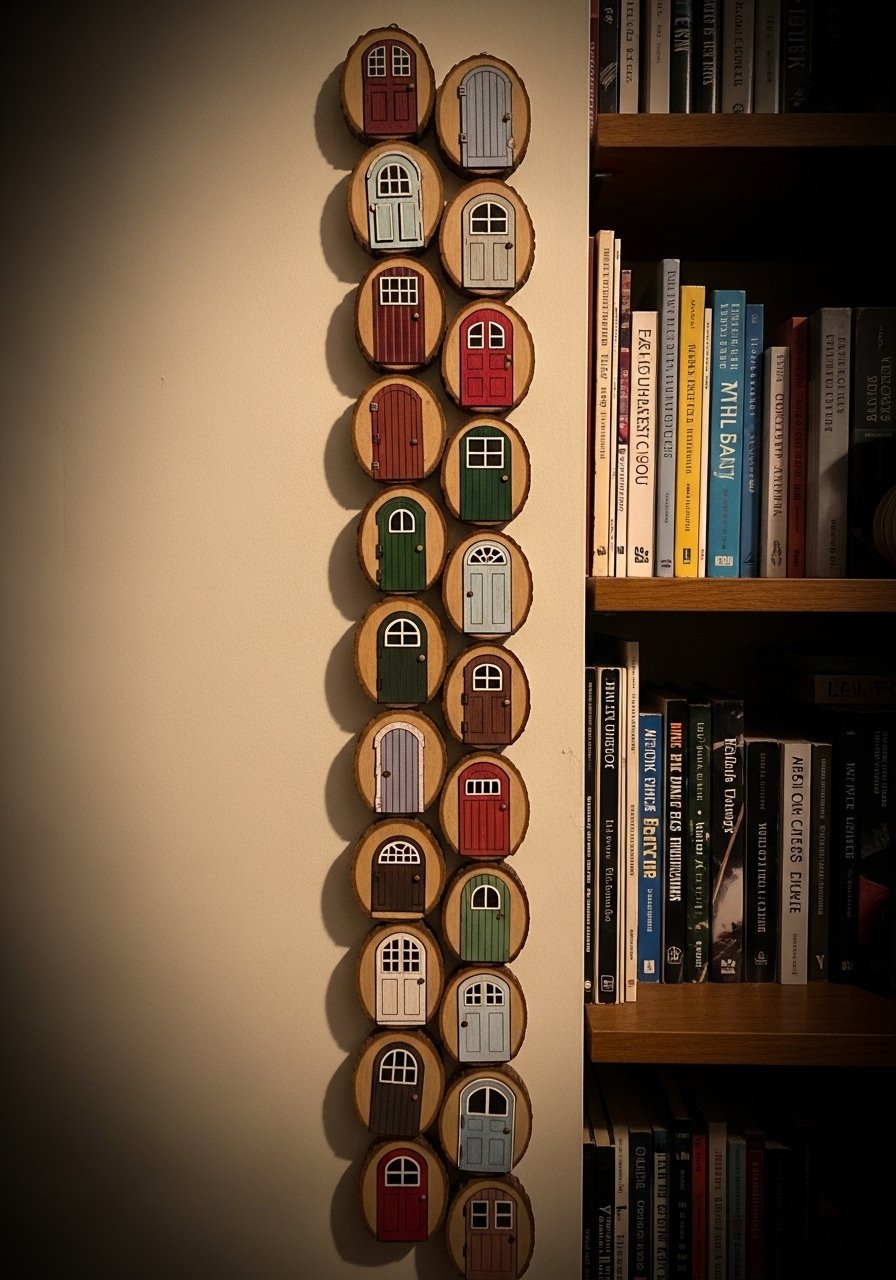
Vertical wood slice signs turn a narrow wall into a fairy alley and they are renter-friendly with command hooks. Use 6-inch slices and paint tiny doors in a 60 40 color ratio so one color dominates and another accents. A common mistake is using slices too large for the space and having them read like coasters. Drill a small hole and hang with twine. I like these natural wood slices because they add height without clutter on shelves Natural wood slice pack.
Beaded Pipe Cleaner Garland for Sparkle Without Weight
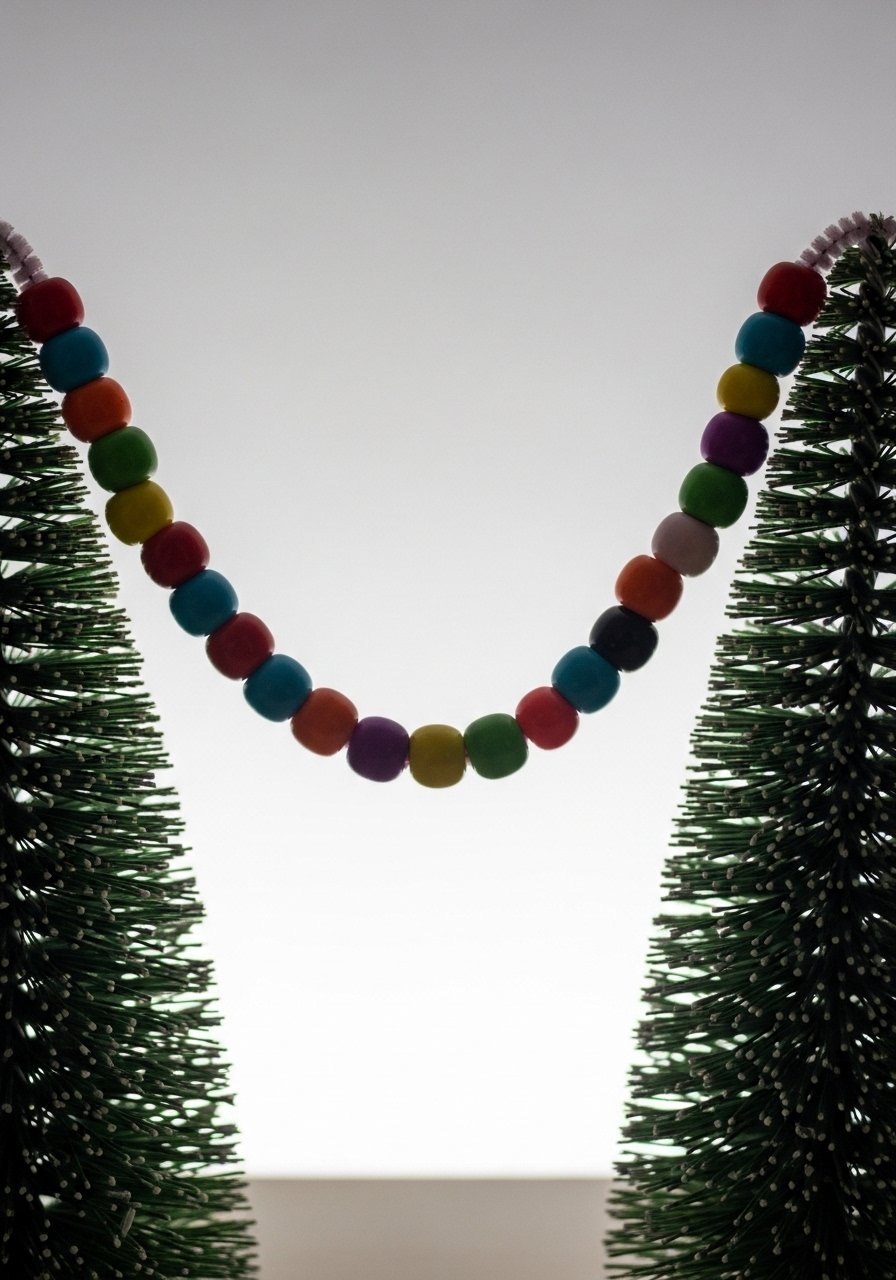
Beaded garlands add movement and memory without being fragile. Thread plastic beads onto pipe cleaners and twist the ends into tiny loops to hang. Use lightweight beads only. Metal or glass beads make it heavy and it sags. The bead spacing rule I use is three beads then a two-twist section, repeated, which creates rhythm and looks intentional. These garlands are also perfect for seasonal swaps. Grab a bead mix that will survive outdoor humidity if you plan an open-air pot Plastic craft beads multicolor pack.
Tiki Bar Beach Setup with Tiny Umbrella
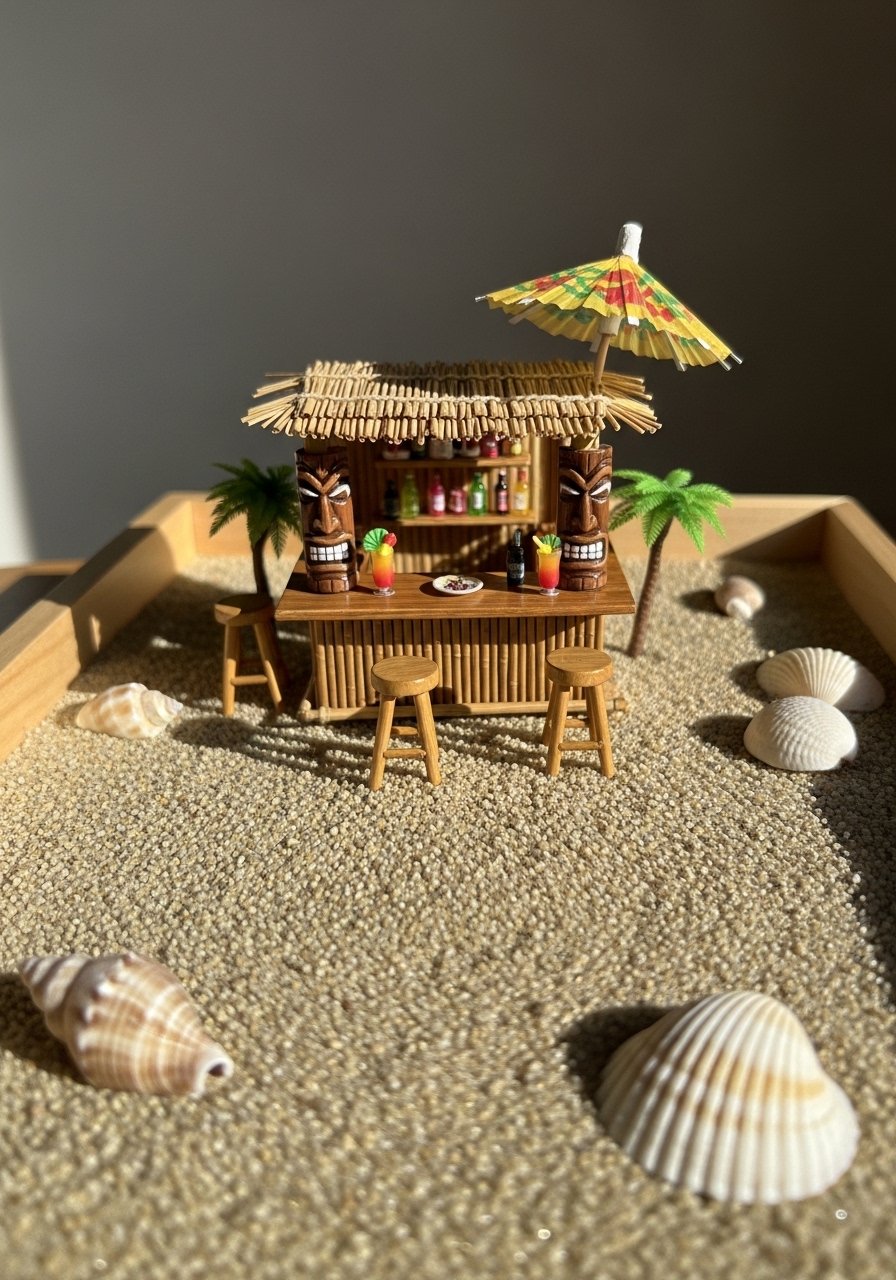
Themed vignettes are fun for summer and they are kid magnets. Use craft sand glued with matte medium instead of loose sand that spreads everywhere. Keep the bar footprint under 3 by 4 inches so it fits in standard pots. A mistake is using real sand without sealing it and ending up with a gritty shelf. I keep a pack of mini cocktail umbrellas and small shells for these setups. They pair well with a pea gravel path to keep the scene tidy Mini cocktail umbrellas and shell pack.
Dustpan Berm Mini Landscape for Tiny Spaces
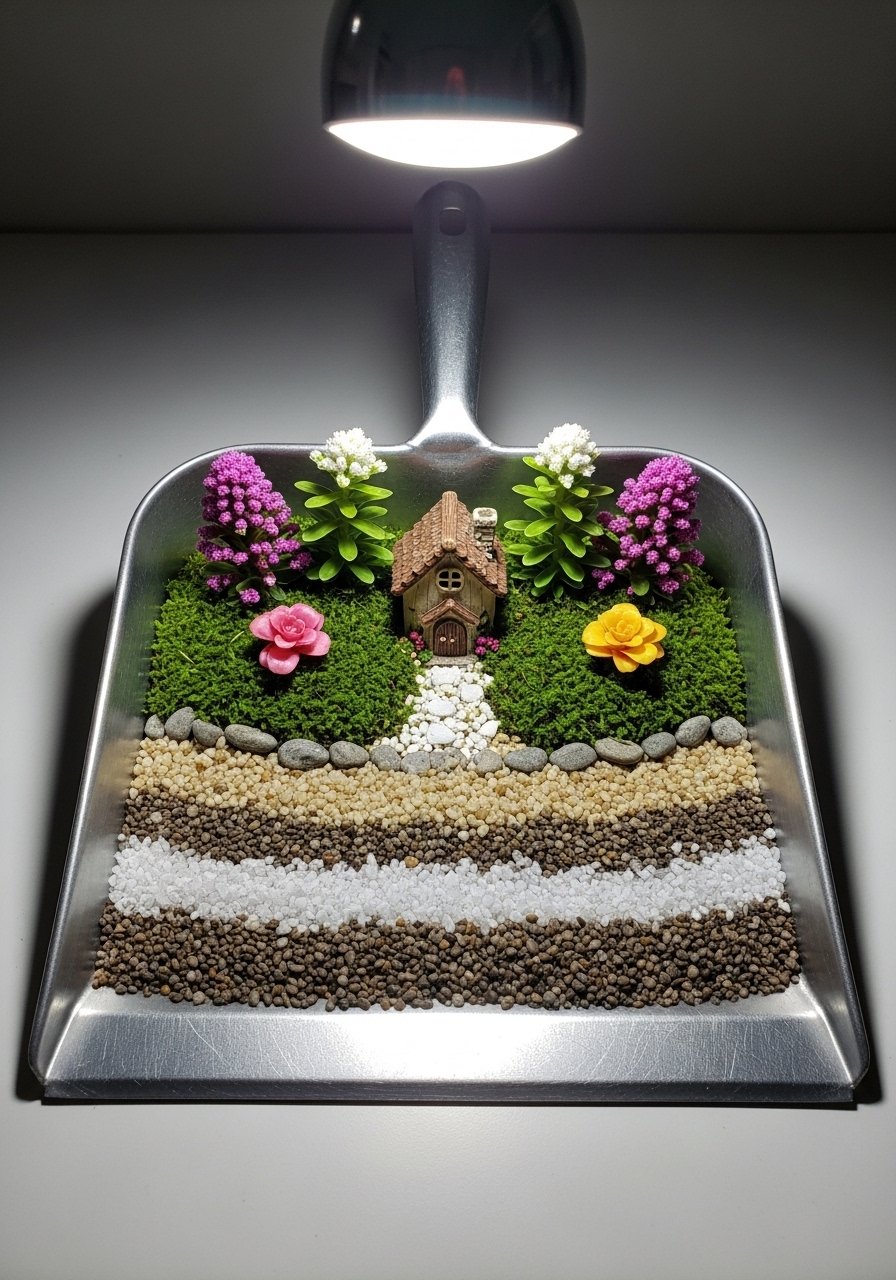
Apartment dwellers, this one is for you. A dollar store dustpan makes a shallow, portable base that fits shelves and dodges window sill issues. Build a berm by piling soil mix on one side, then lock everything with a gravel border. This is a smart pet-safe option because gravel discourages cats from digging. The common mistake is using a pot too deep for a shelf and having it look top-heavy. Keep dustpan scenes under 6 inches across for balance. I use a simple dustpan and a small bag of pea gravel for structure Dustpan tray small.
Arbor Built from Popsicle Sticks for Entrances
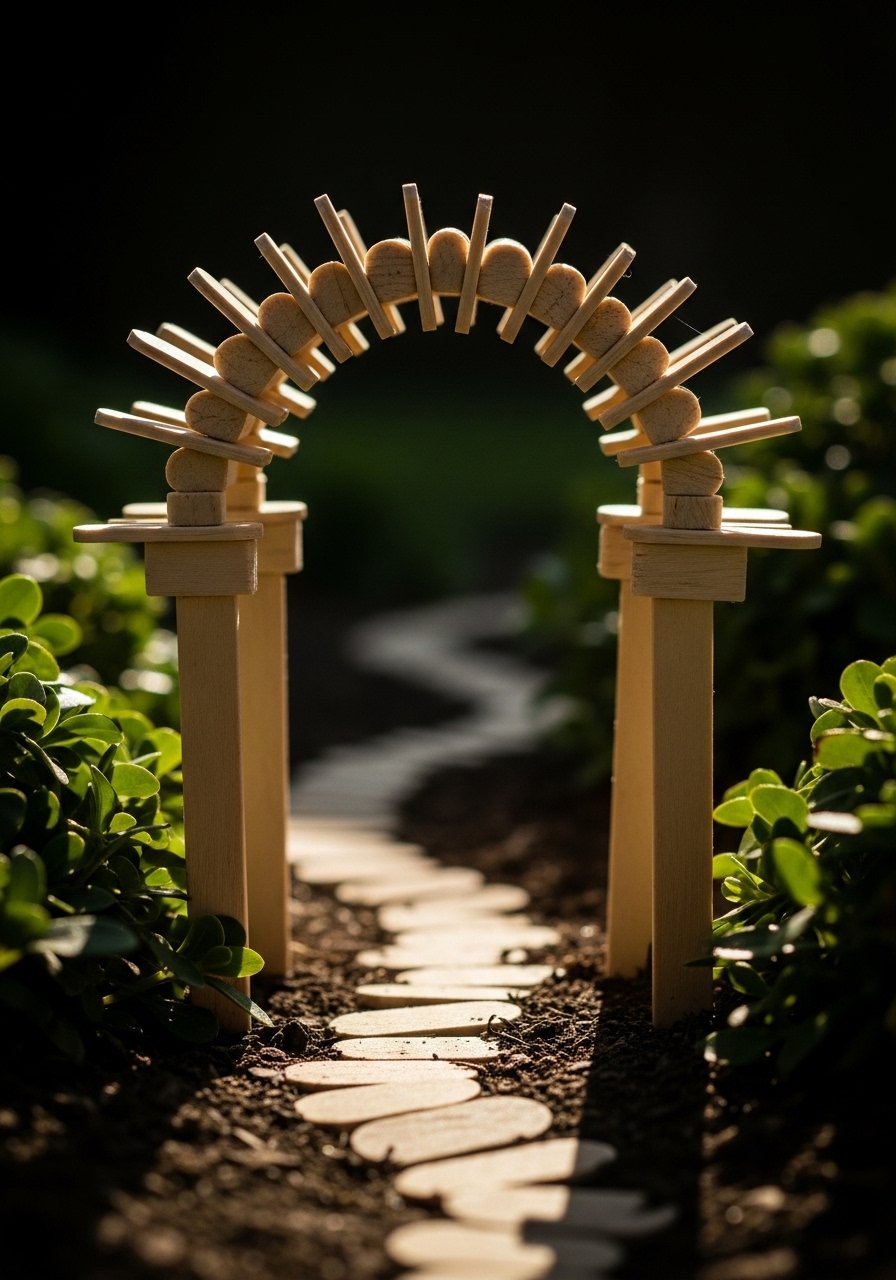
A tiny arbor frames an entrance and lifts your eye up in a shallow planter. Build one by gluing 20 popsicle sticks into an arch about 4 to 6 inches tall. Use thin craft glue and clamp with clothespins until dry. Beginners often try to bend sticks and end up with splitting. The trick is to hot glue short overlapping sections and sand the joints smooth. That height reads properly next to 1 to 2 inch houses and swings. I keep a box of popsicle sticks on hand for these quick builds Craft popsicle sticks bulk pack.
Mini Slate Stepping Stones from Air Dry Clay
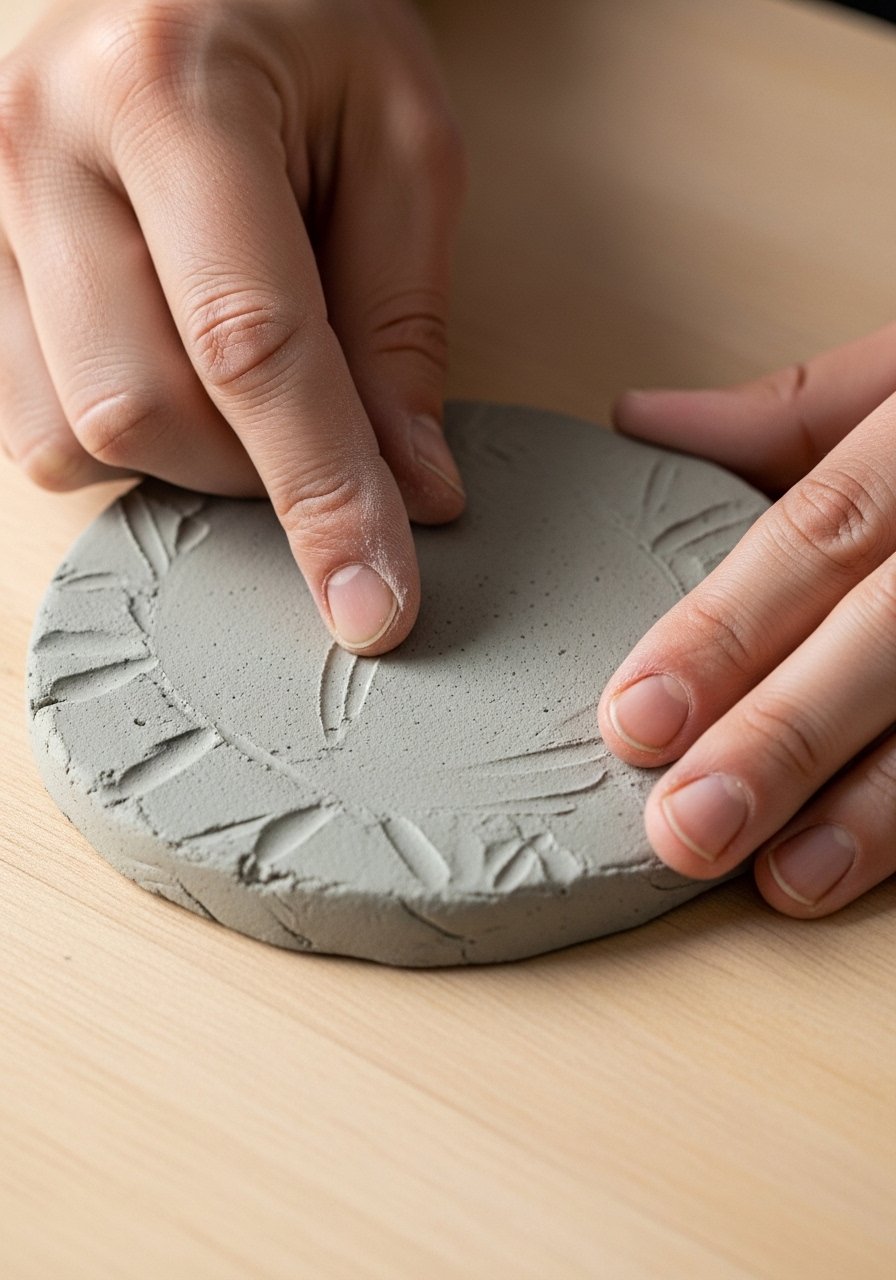
Make tiny slate stepping stones by pressing air dry clay into small molds about 1 inch across and letting them cure for 24 hours. Paint a few darker strokes to mimic slate and seal with matte spray. A mistake is making all stones identical. Vary sizes and edge roughness for realism. These stones handle foot traffic from tiny figures and help visually link gravel paths from idea two. For a fast start, grab a small air dry clay pack Air dry clay 1lb pack.
Your Decor Shopping List
Textiles and Texture
- Honestly the best small splurge for shelf scenes, Preserved sheet moss pack, enough to cover three small houses
- Air dry clay 1lb pack, for stepping stones and roofs
Craft Basics
- Craft popsicle sticks bulk pack, great for fences and arbors
- Natural jute twine roll, for swings and hangers
- Blue aquarium gravel small bag, for ponds and accents
Tools and Small Supplies
- Polymer clay 2oz pack, for mushrooms and tiny accessories
- Battery fairy lights mason jar, for enclosed jars and outdoor pots
- Acrylic paint set small tubes, for painting caps and signs
- Dustpan tray small, if you need a compact base
Budget Finds Note
- Most folks kick off with dollar store pots and sticks. Replace a few items with higher quality pieces if you want longevity.
Similar at Target or HomeGoods is fine for bulk decor and seasonal props.
Shopping Tips
White gravel and blue stones reflect light in shady spots. Blue aquarium gravel small bag brightens dim windows, so use it where plants get little sun.
Grab Preserved sheet moss pack for roofs and jar tops. Preserved moss stays green far longer than fresh moss and keeps your indoor jars looking alive.
For kid-friendly projects, pick items that survive knocks. Craft popsicle sticks bulk pack and acrylic paints are cheap and replaceable, and parents usually nail it for under $20.
If you want a glow without tampering with electricity, use Battery fairy lights mason jar. They seal inside jars and are safe around kids.
Buy a small bag of gravel rather than loose sand. Gravel locks things in place and keeps pets from digging. Aquarium gravel bag is a good multiuse option.
Frequently Asked Questions
Q: Can I use real plants in a jar garden?
A: You can, but sealed jars need plants that tolerate humidity and low airflow. Most beginners find jar gardens last longer when they use preserved moss and faux accents. If you try live plants, pick small succulents and leave the lid off for airflow.
Q: How do I keep a fairy garden from sinking into mush?
A: Start with a base that is 2/3 drainage mix and top 1/3 with playdough or sheet moss. That structure holds shapes like paths and hills so displays do not slump after a week.
Q: What do I do if my cat digs everything up?
A: Use a gravel top layer. Gravel discourages digging and makes areas less attractive to pets. Dustpan trays also keep scenes out of reach and are perfect for apartments.
Q: Are polymer clay mushrooms hard to make?
A: They are beginner friendly. Roll 1-inch caps for scale and bake at 275F for about 15 minutes. Keep a small pack of polymer clay on hand and you will churn out clusters fast.
Q: Which items should I buy at a craft store versus online?
A: Buy bulk items like popsicle sticks, twine, and basic glue locally if you can. Specialty items like preserved moss, specific gravel colors, and small battery fairy lights are worth ordering online Battery fairy lights mason jar.
Q: How do I make a fairy garden survive kids and play?
A: Build glue-only bases for kid areas, reinforce tall pieces with dowels, and lock loose items in with gravel. Parents usually nail it for under $20 when they prioritize sturdiness over tiny fragile details.
