
My living room had nice furniture and decent lighting but it still felt like a waiting room. Took me embarrassingly long to figure out it was missing texture. Every surface was smooth, every color was flat, and nothing invited you to actually sit down. Once I started with tiny, functional changes at the door the whole place relaxed, and that included a handful of key holders I made over a couple weekends.
These ideas lean modern farmhouse with a few boho and minimalist twists. Most folks knock this out for under 20 bucks. Over half want stuff that won't wreck the walls. Works for entryways, mudrooms, kitchen nooks, or any small wall that needs a little order.
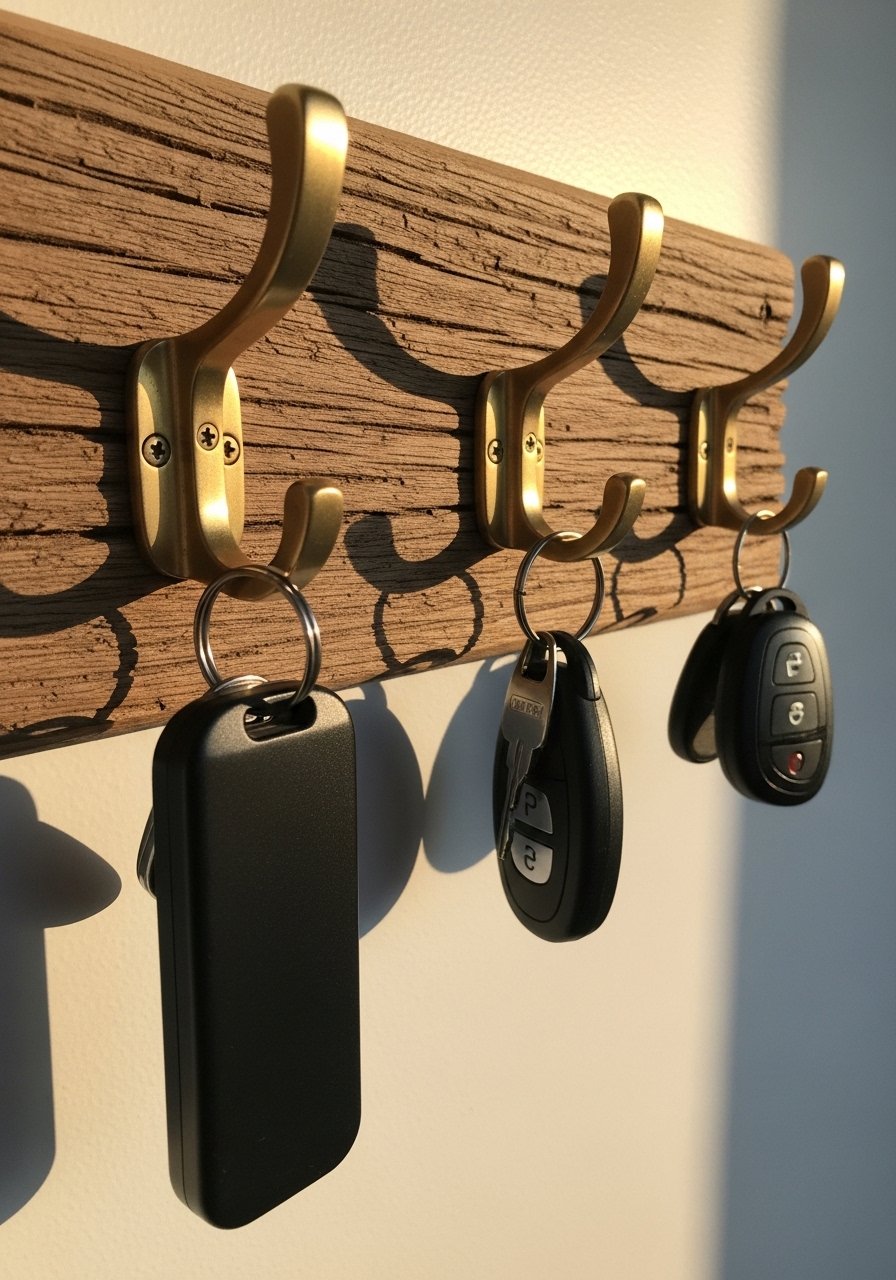
Rustic Pallet Plank With Brass Hooks
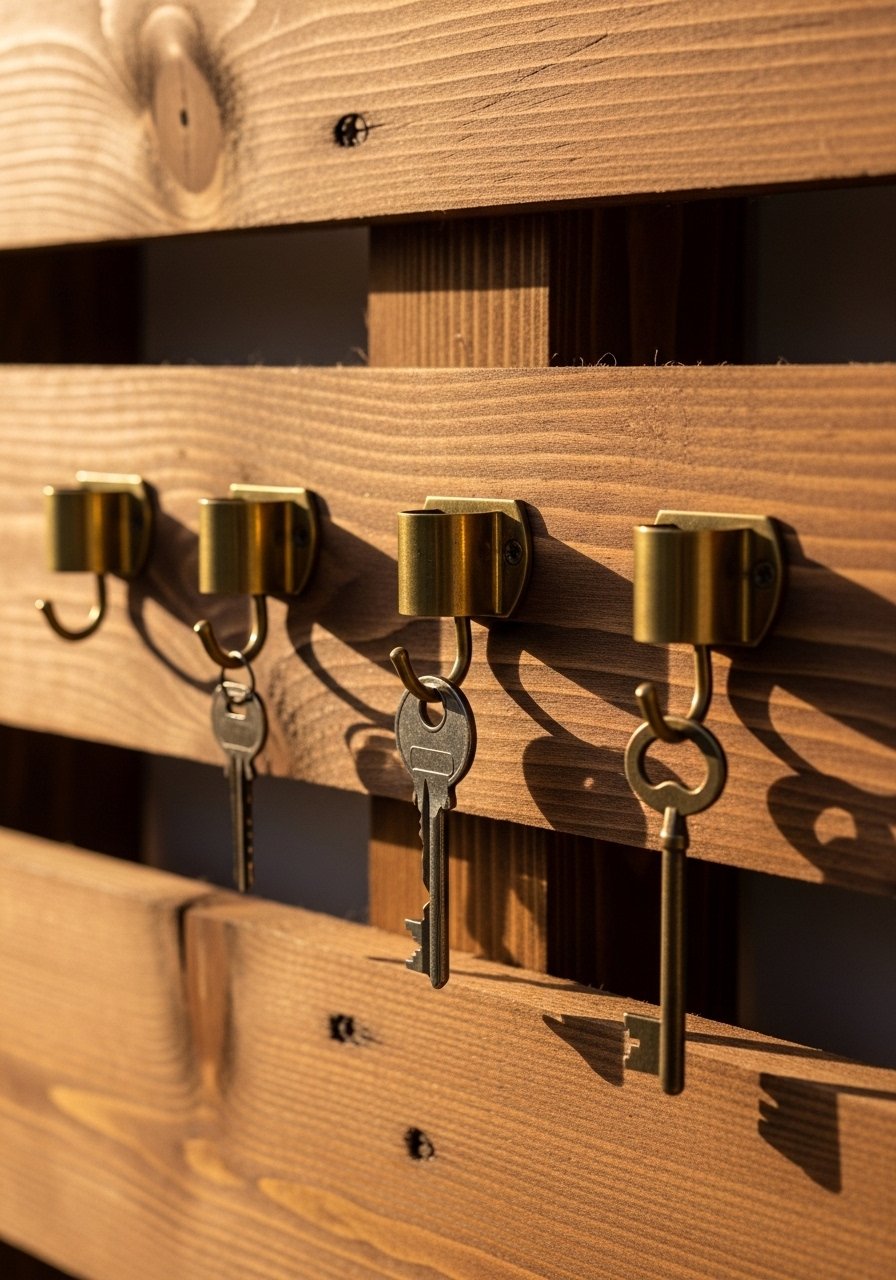
The easy win is a scrap pallet slat cut to about 14 inches. I like the look of brass cup hooks on warm walnut stain because the hooks grip better than flat ones and the wood hides dings. Space hooks 2 to 3 inches apart so fobs and keychains do not tangle. Drill shallow pilot holes first or the thin pallet pieces will split. If you rent use these brass cup hooks and mount the plank with heavy duty command picture hangers. One extra detail most tutorials skip, distress sand after staining to hide fingerprints and daily wear.
Distressed Pine Single Row Key Rack
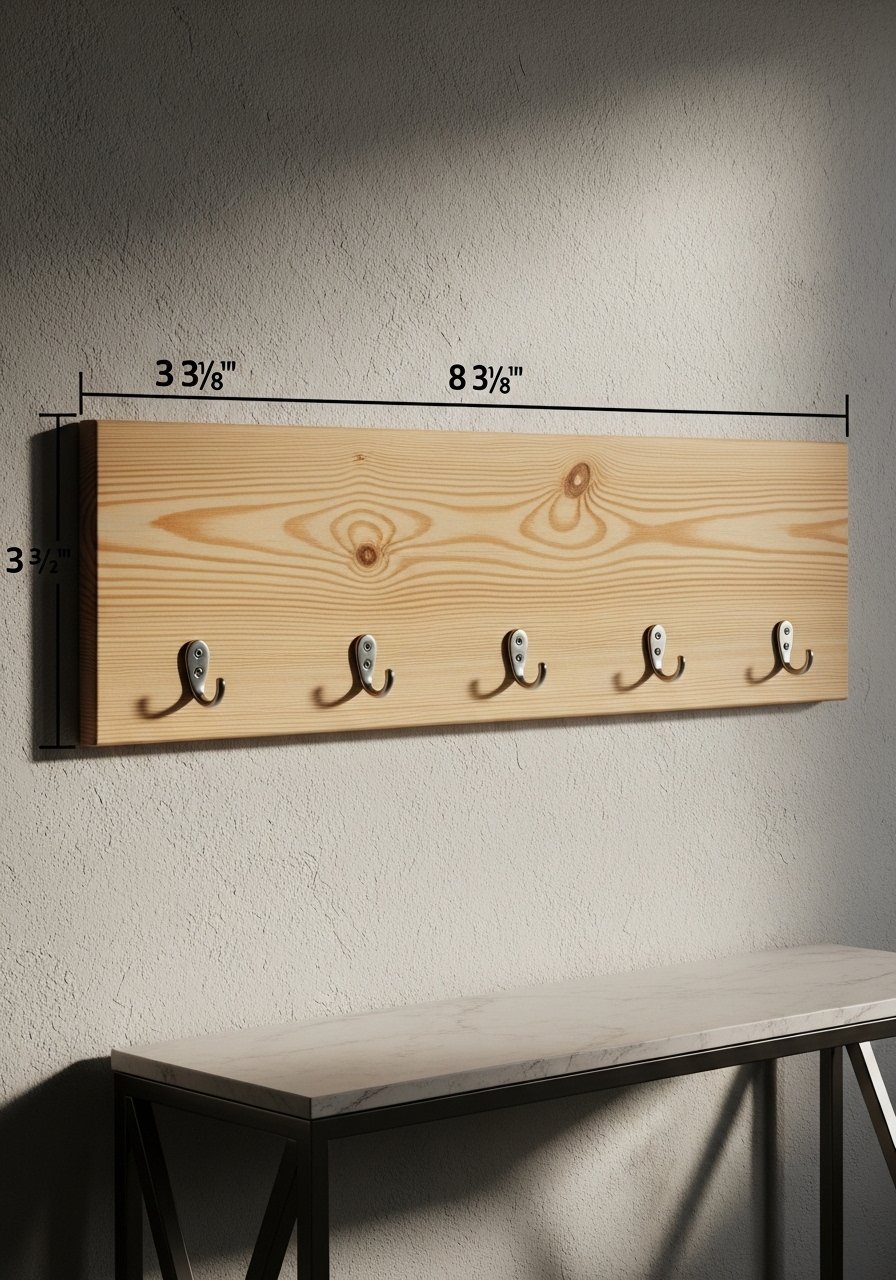
I cut a pine board to 3 3/8 by 8 3/4 inches for a compact single-row holder that fits four to five hooks without looking crowded. Sand before staining, then stain and follow with a clear coat to keep the finish from chipping after a month of daily use. Use screw-in hooks for heavy fobs and drill pilot holes just deep enough for the screw threads so the wood does not crack. Try Minwax stain in walnut tone and cup hooks for a classic look. Common mistake is spacing hooks too tight, which makes grabbing keys a one-handed mess.
Dollar Tree Shadowbox Key Nook
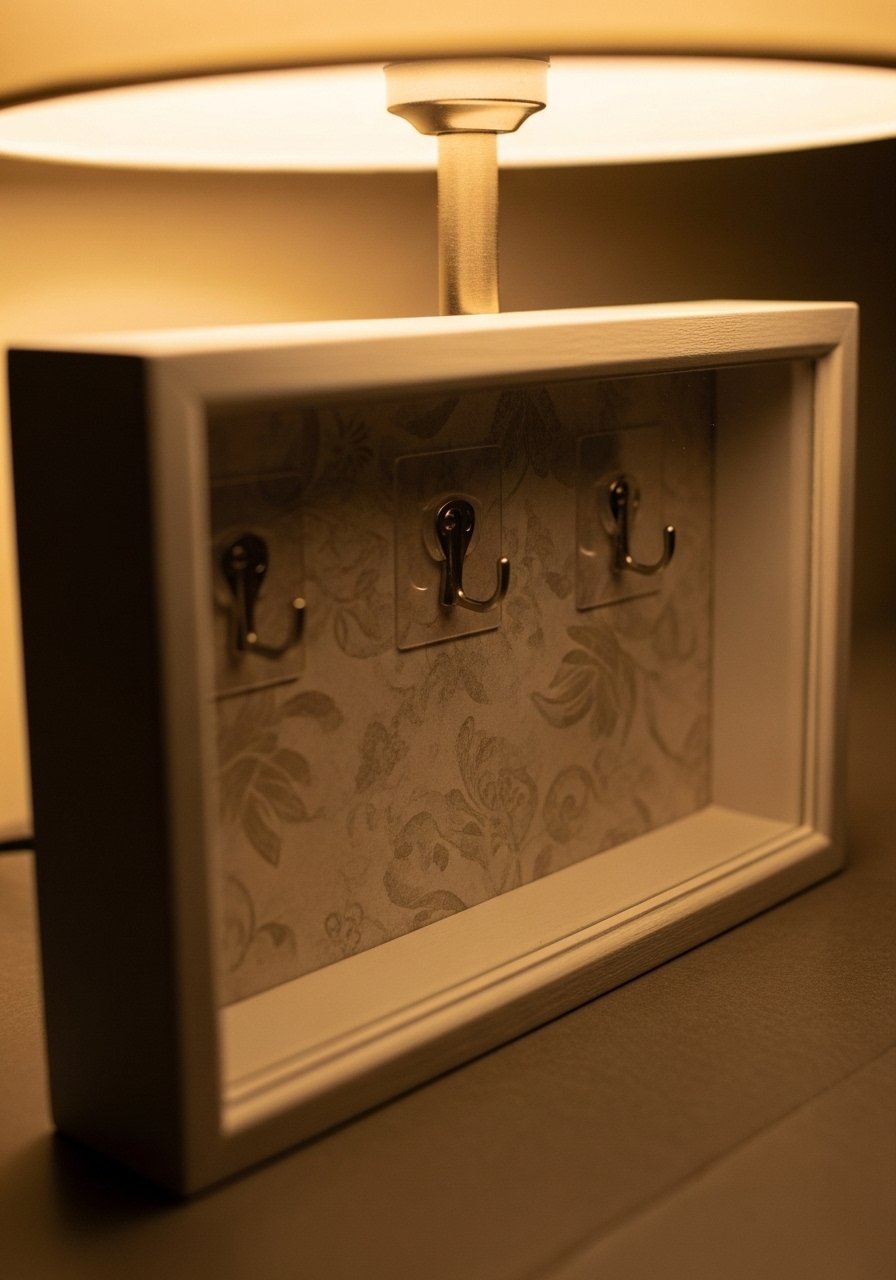
If you want the holder to read like art, hide hooks inside a shadowbox. I used a Dollar Tree shelf with scrapbook paper backing and sticky hooks so nothing needs to be nailed. It looks like wall decor but holds daily essentials and even hides a small mail slip. This one stays renter-friendly and under $15. Pair it with foam adhesive hooks if you do not want holes. A detail others miss is to glue a thin strip of felt to the back of the box so keys slide in quietly and do not scratch the paint.
Newspaper Weave With Mini Basket
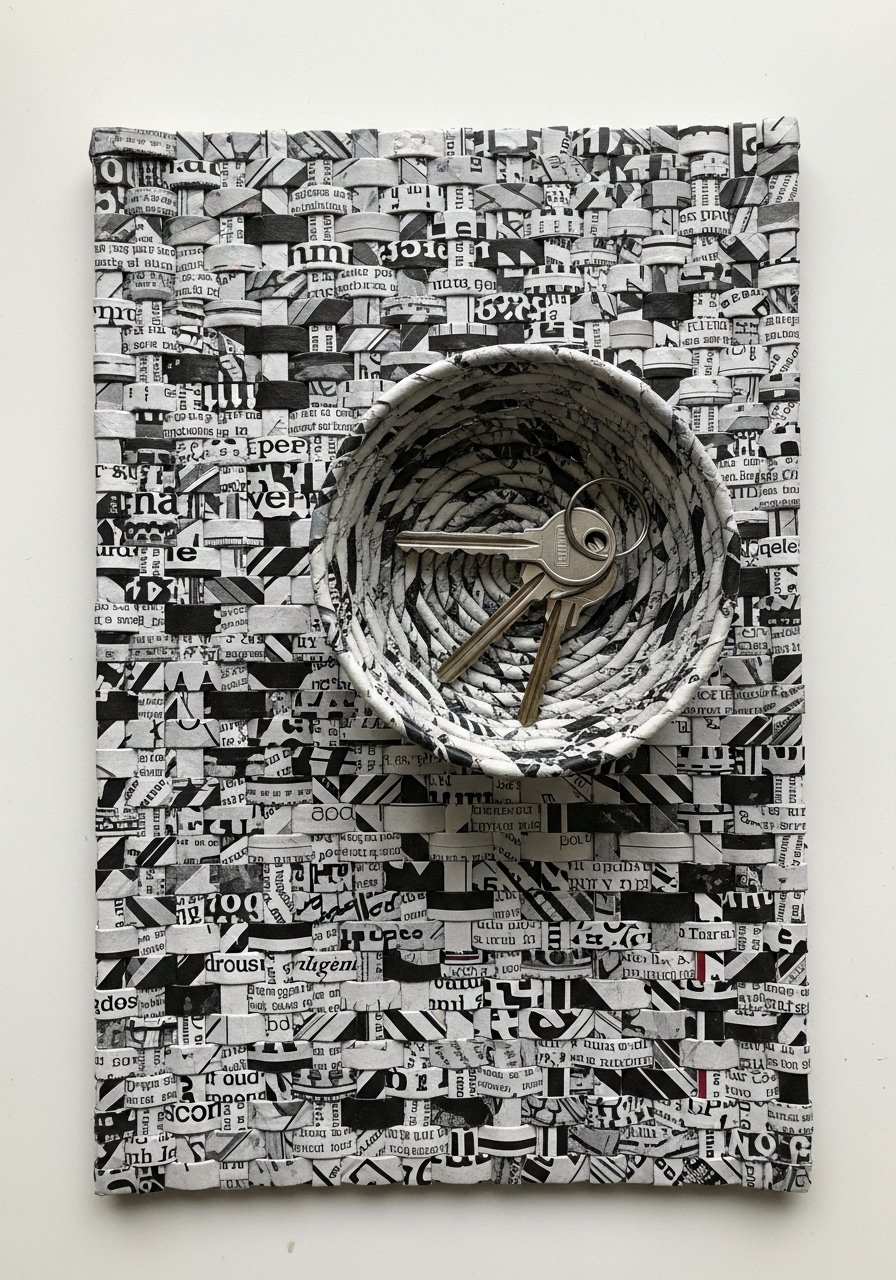
Upcycling newspapers into a woven panel gives surprising texture at almost no cost. I roll pages into tight tubes, braid them into a 12 by 8 inch panel, then glue a tiny basket pocket onto the lower third for spare change and keys. It is lightweight so command strips are fine and it reads boho without costing anything. One pitfall is making the basket too small, which means keys spill out. Make the pocket at least 3 inches deep and test it with your bulkiest fob. For a neater finish, spray a clear sealant after the weave dries.
Beaded Personalized Keychain Hanger
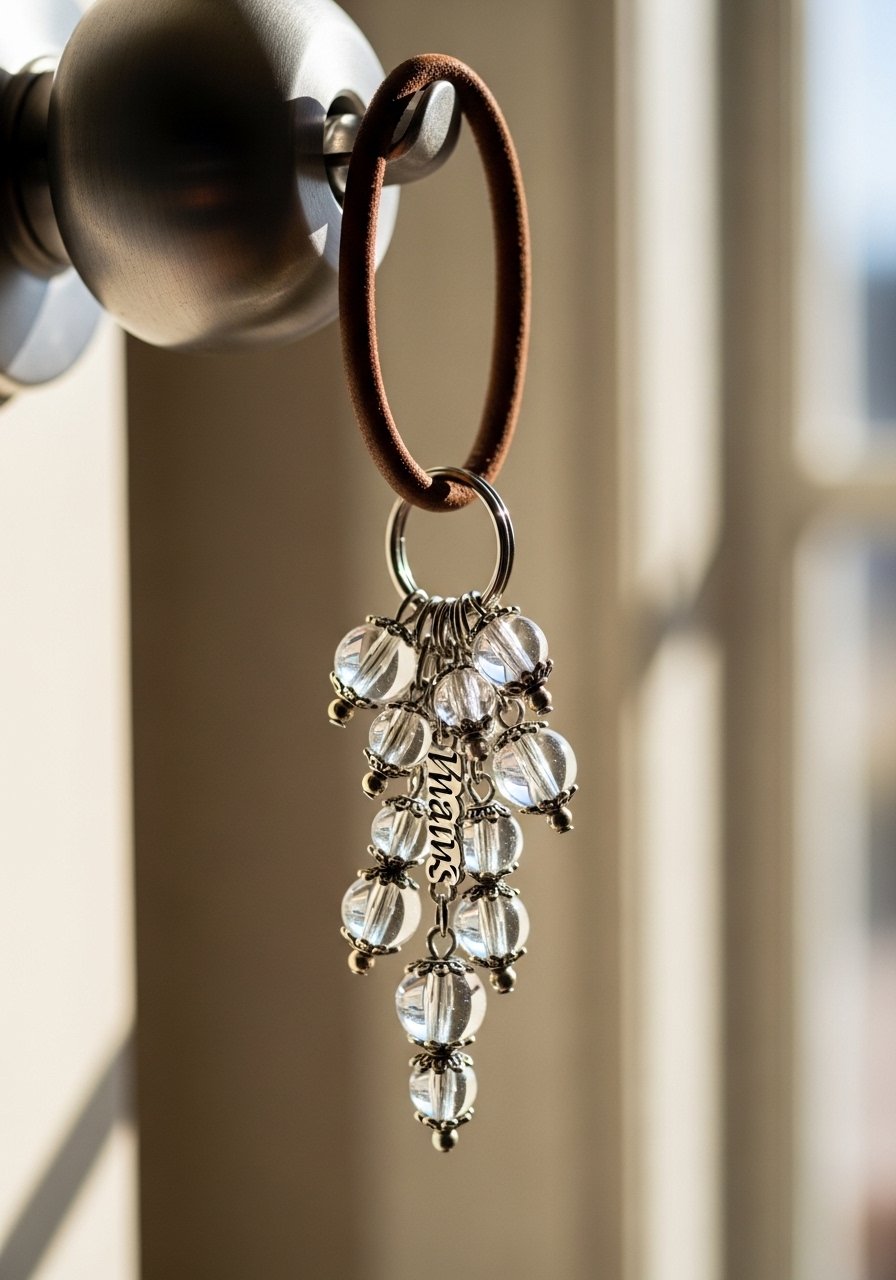
When wall space is non-existent I made personalized beaded keychains that hang from a doorknob or a hook by the door. Use head pins, glass beads, and a jump ring to make a charm that matches your bag. The result is portable and helps guests find the right set. I prefer a leather strap loop for durability and added grip. Try glass bead kits and split rings. Most people skip a reinforced loop and the bead strand tears off after a few months, so wrap the base with strong thread and a dab of glue.
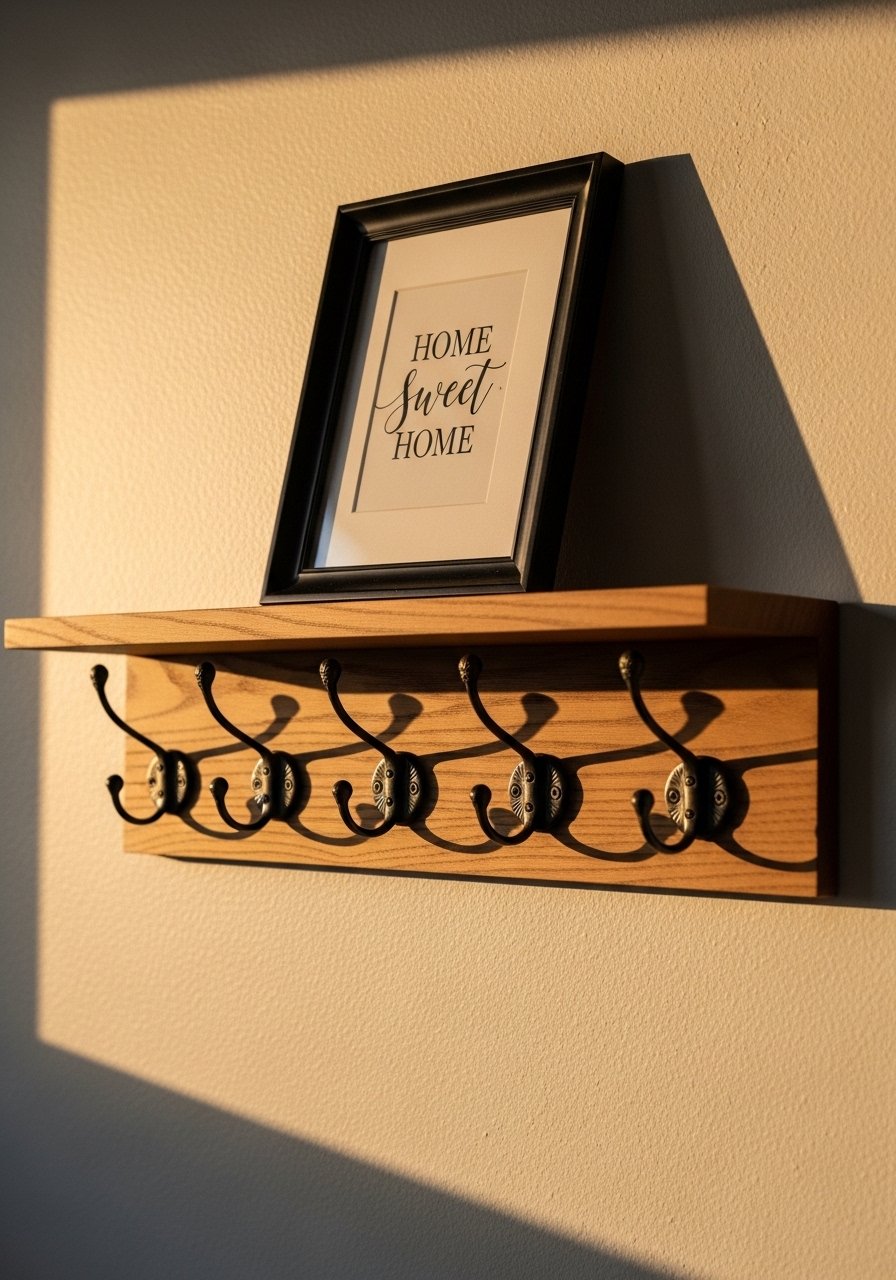
Framed Multi-Hook Shelf Organizer
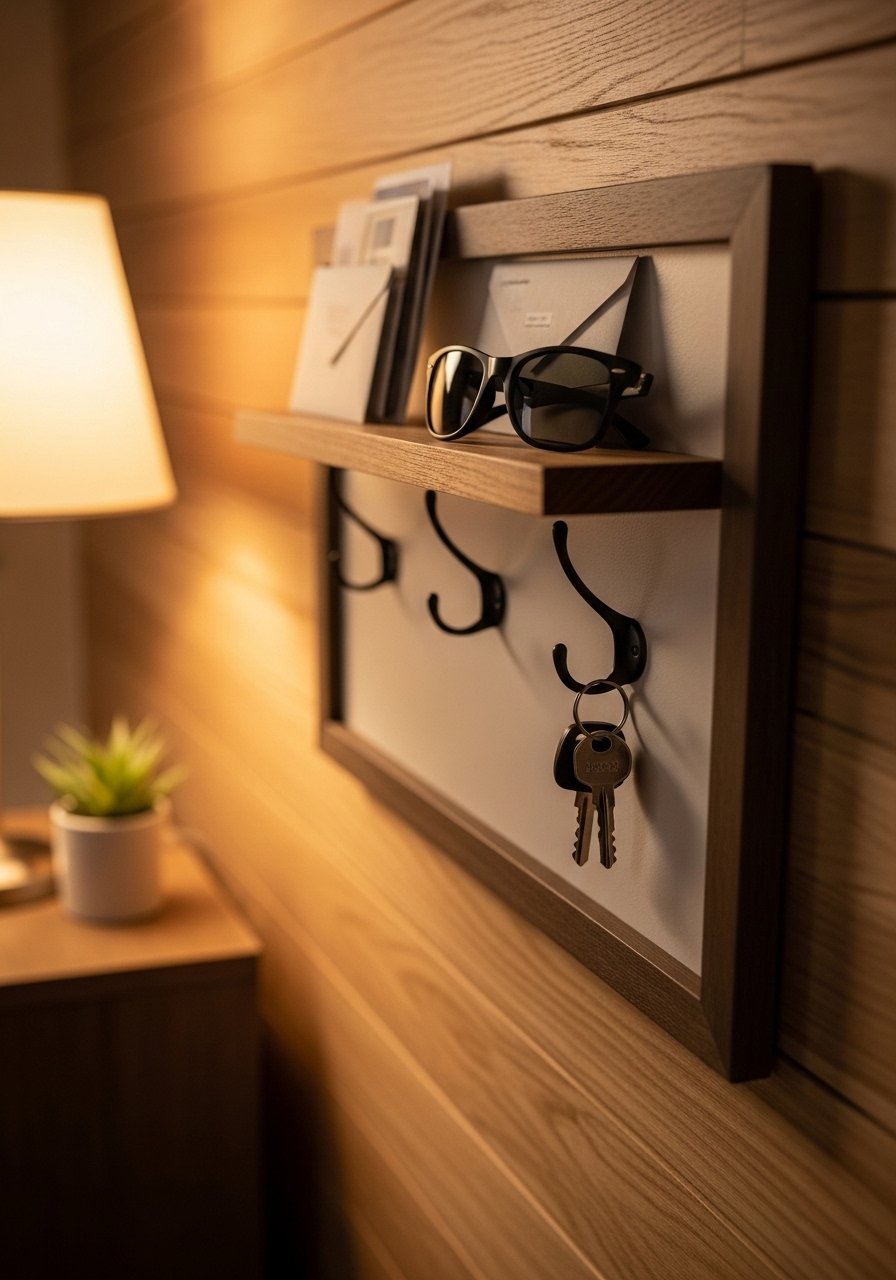
This one changed my entryway for good. A shallow shelf above several screw-in hooks gives you a place for mail and sunglasses plus a row for keys. Cut the shelf to 12 to 14 inches and space hooks 2 to 3 inches apart. Use two back hangers so it stays level on textured walls. I used poplar boards and screw-in hooks. The usual mistake is a shelf too shallow to hold envelopes, so make it at least 3 inches deep and add a small lip to stop things from sliding off.
Whitewashed Coastal Key Ledge

Whitewashing brightens a dark hall and reads coastal without heavy carpentry. I thin white paint with water to get a soft wash over a 12-inch plank, then glue on small cup hooks. Add a tin cup with faux flowers for softness. If the stain underneath was blotchy, sand lightly before whitewash to avoid uneven color. For hanging use removable picture hangers if you rent. People often skip sealing whitewash and it rubs off within weeks. A matte clear coat keeps the look and prevents thumb marks.
Stained Wood With Picture Hangers
For a Scandinavian vibe I stained a 12 by 6 inch pine plank in a light oak tone and used picture hangers on the back so it sits flush. This trick stops it from leaning on textured plaster. Sand twice, once after cutting and once after staining if you want a distressed edge. I used white oak stain and picture hangers. A common problem is skipping pilot holes and splitting the wood when you screw hooks in, so drill shallow holes first.
Woven Paper Panel Organizer
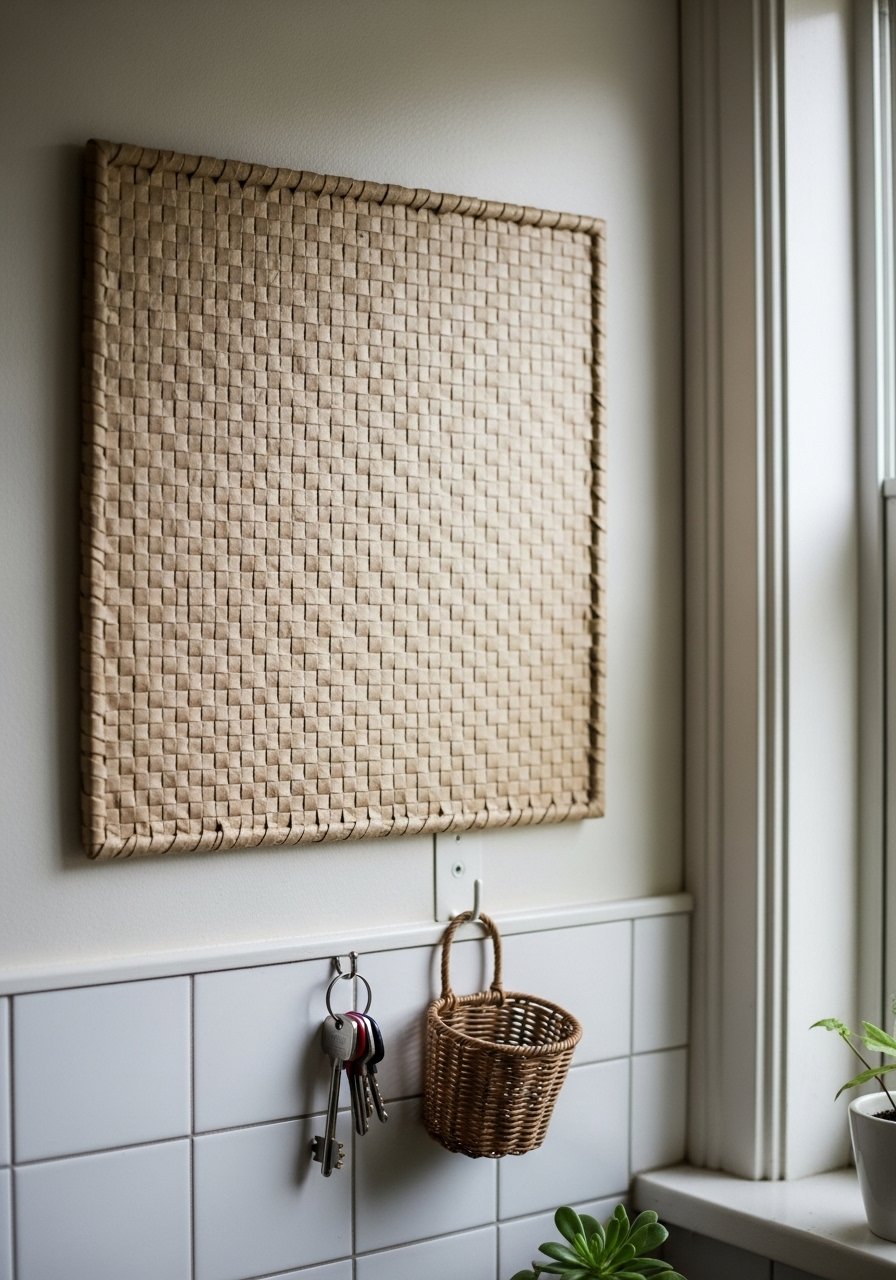
This upcycle version is about weight and adaptability. A 10 by 10 inch panel will hold a couple of key sets without looking bulky. The lightweight construction makes it perfect for renters because adhesive strips handle the load. Use tight rolls and weave them like wicker for strength. Add a tiny glued basket to catch receipts. Many tutorials miss a test for weight so always hang and load with your heaviest fob before final mounting. Try clear mounting strips for a damage-free install.
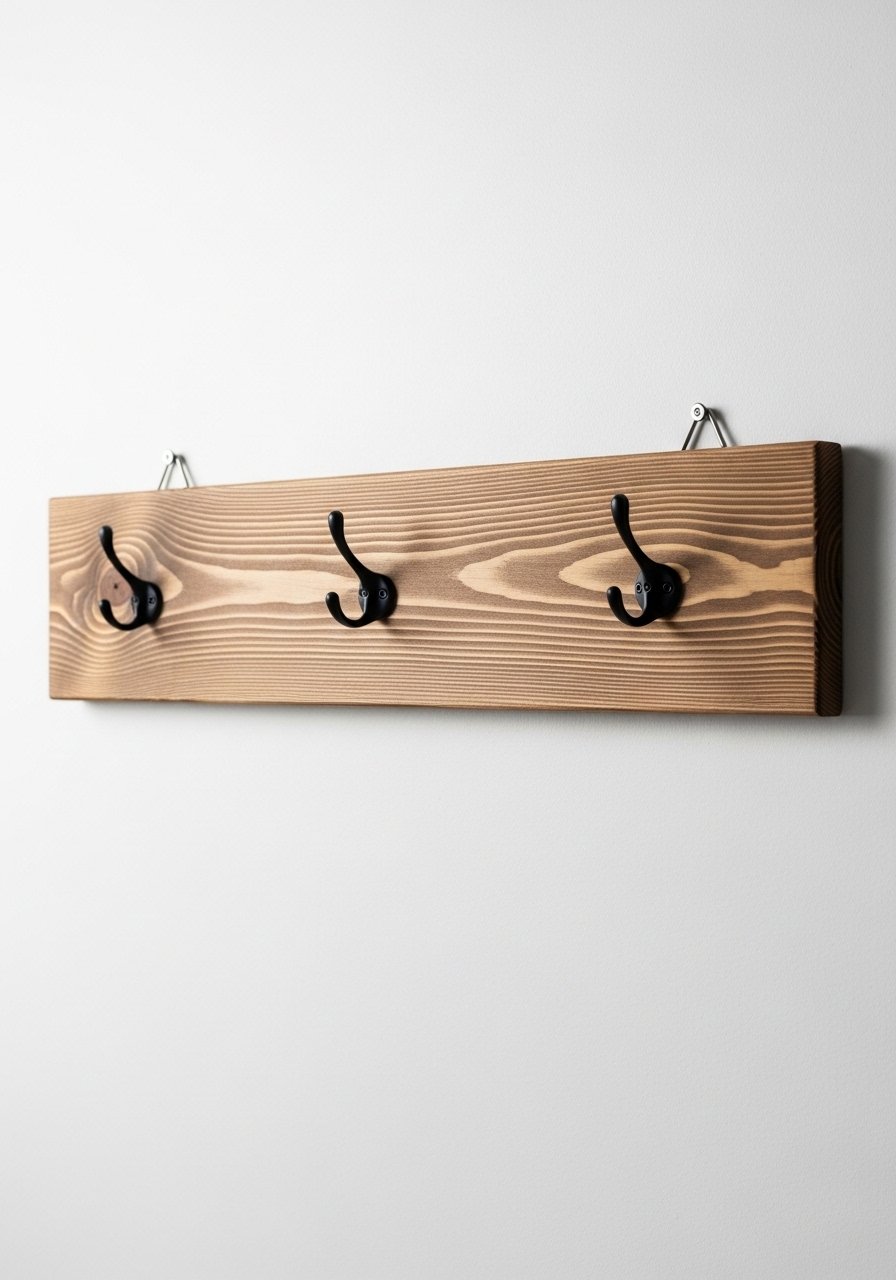
Brass Hook Rustic Slat For Heavy Keys
If your household runs on heavy car keys and a garage remote, use brass hooks and a thicker slat. I like a 14 to 18 inch plank for families, spaced 2 to 3 inches between hooks. Brass resists tarnish and grips heavier items better. Drill pilot holes about half the screw length to avoid splitting and add a clear coat after staining for durability. Use solid brass hooks and mount with two back hangers. Pet owners should consider rounded cup hooks so collars and leashes do not catch.
Shadowbox With Monogram Detail
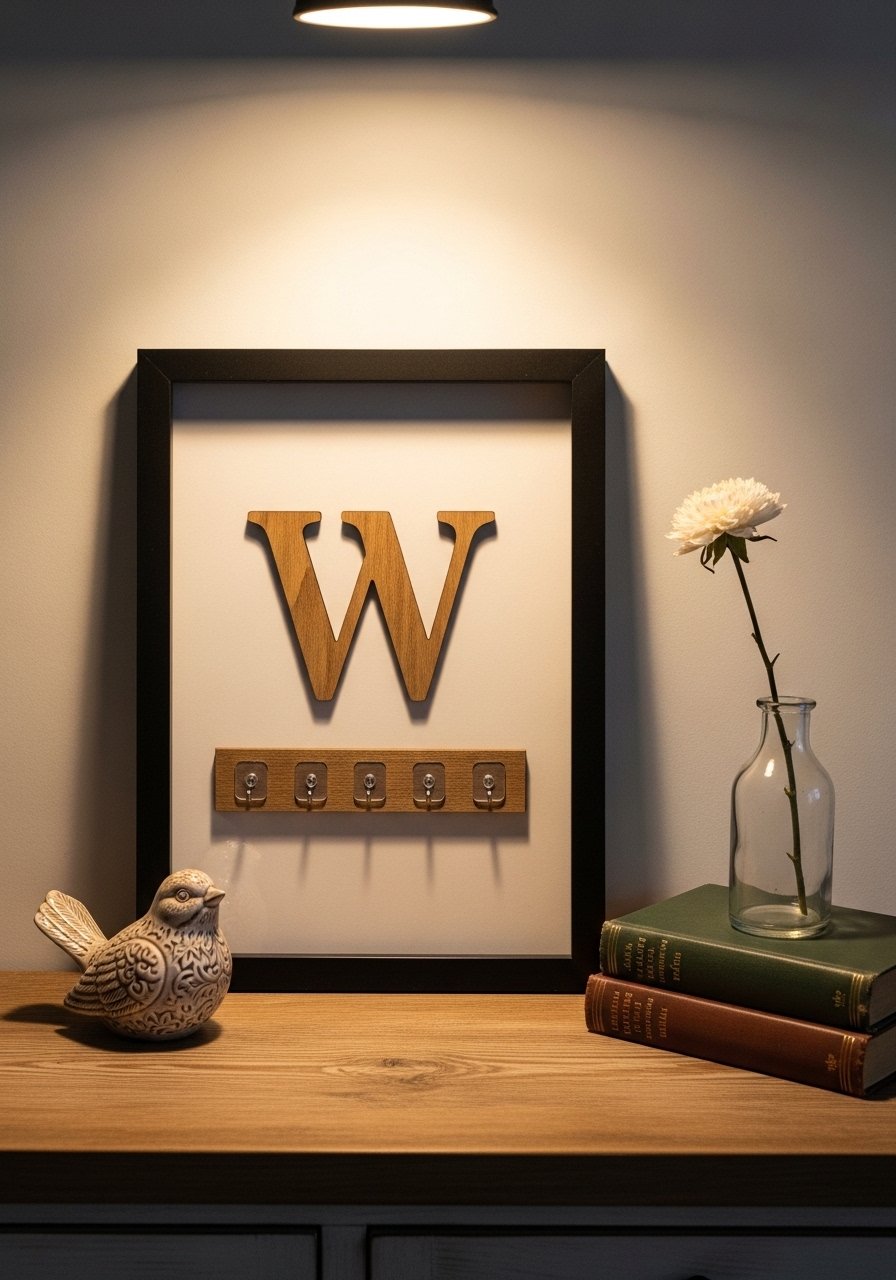
Adding a monogram turns a simple key holder into personal decor. Paint the letter to match your palette and glue it in the center of a shadowbox. Hooks inside keep keys hidden and the piece reads like art. I used a 10 by 12 frame and mounted adhesive hooks to the interior backing. For renters this is perfect because it looks solid while still using removable hanging hardware. Try painted wood letters. A detail others skip is adding a strip of scrapbook paper behind the letter to hide screw marks and make the finish look intentional.
Poplar Frame With Molding Shelf
Adding simple molding makes a shelf look built-in. I built a small poplar frame 14 inches wide and attached a base shoe molding as the shelf front to catch items. The look reads more expensive than it costs. Use poplar boards cut to size and stain lightly for a beachy feel. Drill pilot holes for hooks and mount with two hangers for stability. Use poplar craft boards and base shoe molding. The oversight many have is not making the shelf deep enough. Aim for at least 3 inches so sunglasses and mail fit comfortably.
Bead Charm Mobile Hanger For No-Wall Spaces
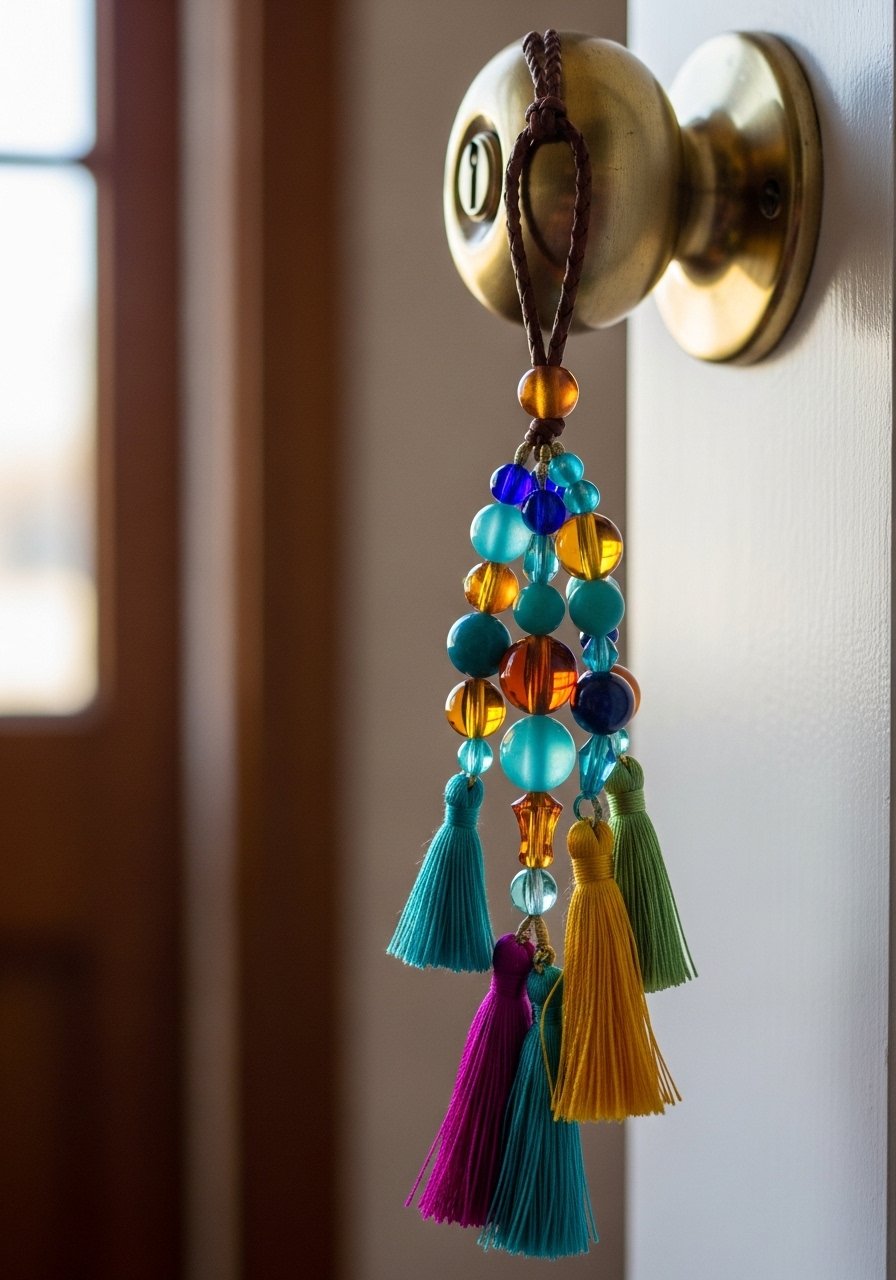
When you cannot drill or do not want anything on the wall a beaded mobile that hangs from a knob or hook is a lifesaver. I strung wooden beads, a tassel, and a split ring on a short chain so it doubles as decor and function. It is lightweight and portable and adds personality to a small apartment door. Use wooden bead kits and short chains. A real-life tip is to keep the chain short enough to avoid tripping when you walk by. This is a renter-friendly solution many projects skip.
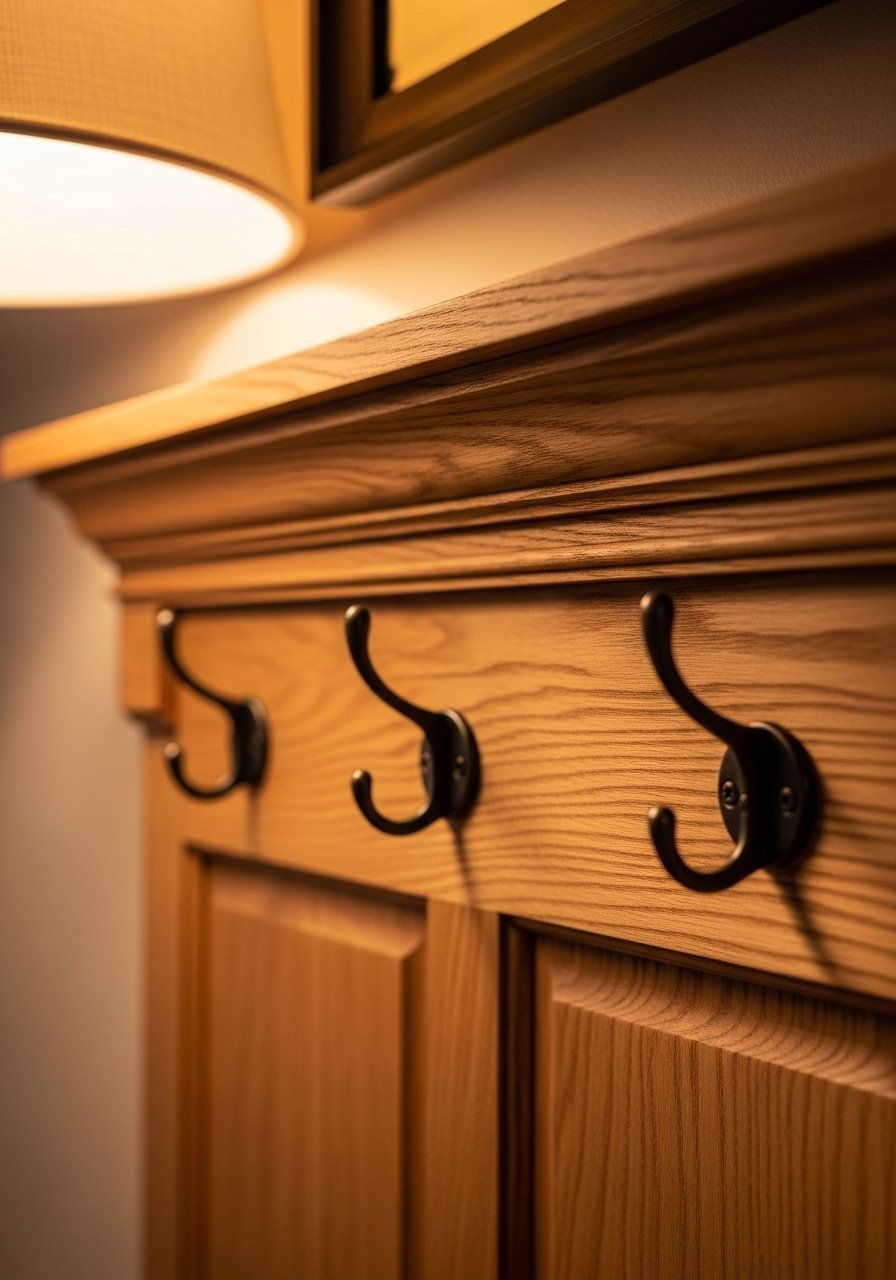
Painted Coat Rack With Integrated Key Shelf

If you already need coat storage, add a slim shelf above pegs for keys. I painted mine a cheerful color to read like built-in storage and used pegs spaced 6 inches apart for coats and 2 to 3 inches for keys under the shelf. Paint first, distress slightly after assembly for a lived-in look. Use wooden coat pegs and a small floating shelf bracket for support. Many people mount pegs too low which crowds shoulder space. Set the shelf at least 60 inches from the floor for average height entryways.
Magnetic Key Strip For Minimalist Kitchens

In a kitchen, a magnetic strip mounted under a cabinet is one of my favorite no-clutter solutions. Use a 12-inch magnetic bar and keep magnets aligned to hold metal key rings and small tools. Skip magnets that are too weak or keys will slip during busy mornings. I used neodymium magnetic bars. One detail people miss is protecting painted cabinets. Put a thin felt strip under the magnet to prevent scratches and test with the heaviest keychain before final mounting.
Clip Hanger With Mail Slot For Families
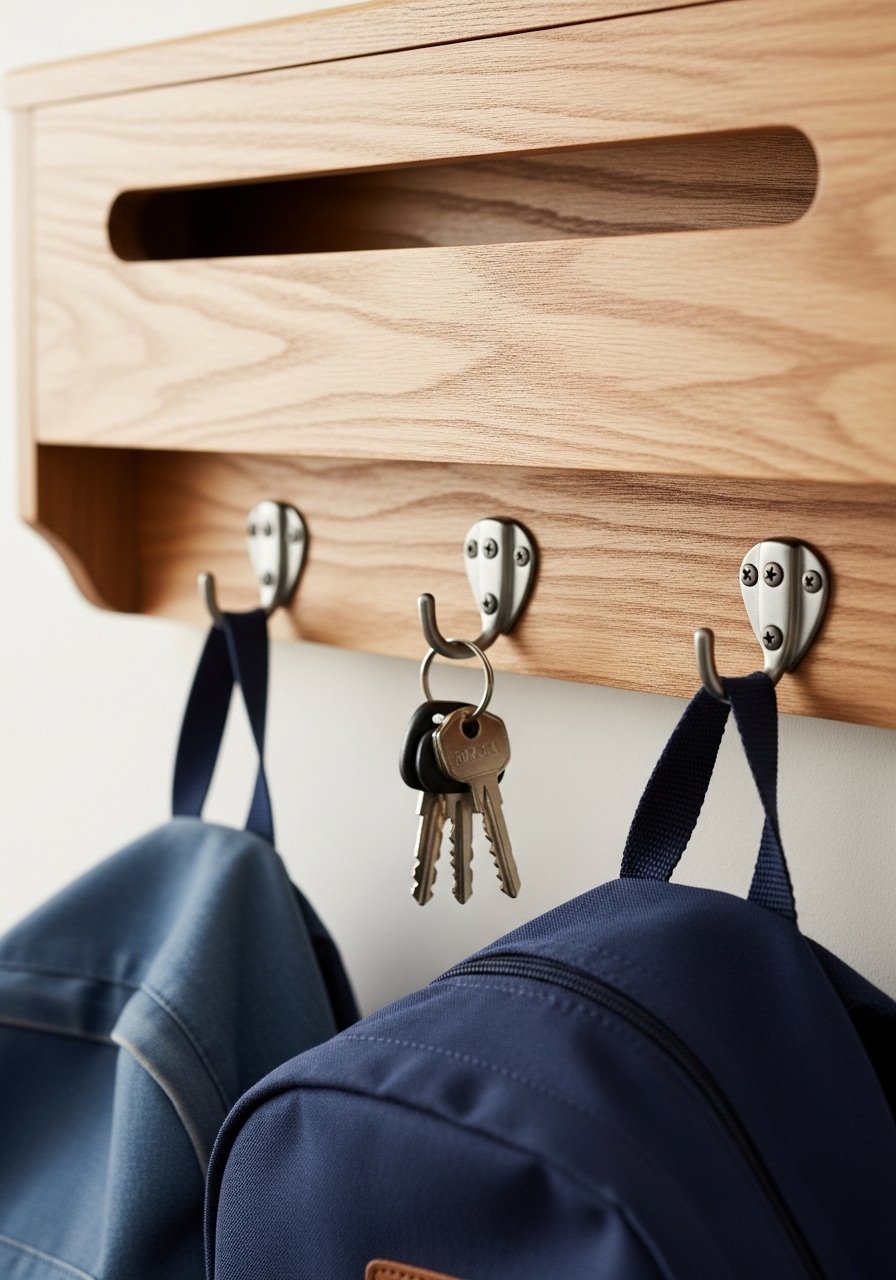
Families often need a place to drop permission slips and keys together. My clip hanger has a 3 inch deep mail slot above and three hooks below for keys and small backpacks. Use sturdy screw-in hooks and mount on a stud or use heavy duty anchors. The built-in mail slot keeps paper from ending up on the floor. I used wall anchors heavy duty and metal clipboards repurposed as holders. A common mistake is making the mail slot too shallow. Make it at least 3 inches deep.
Upcycled Drawer Front Key Panel
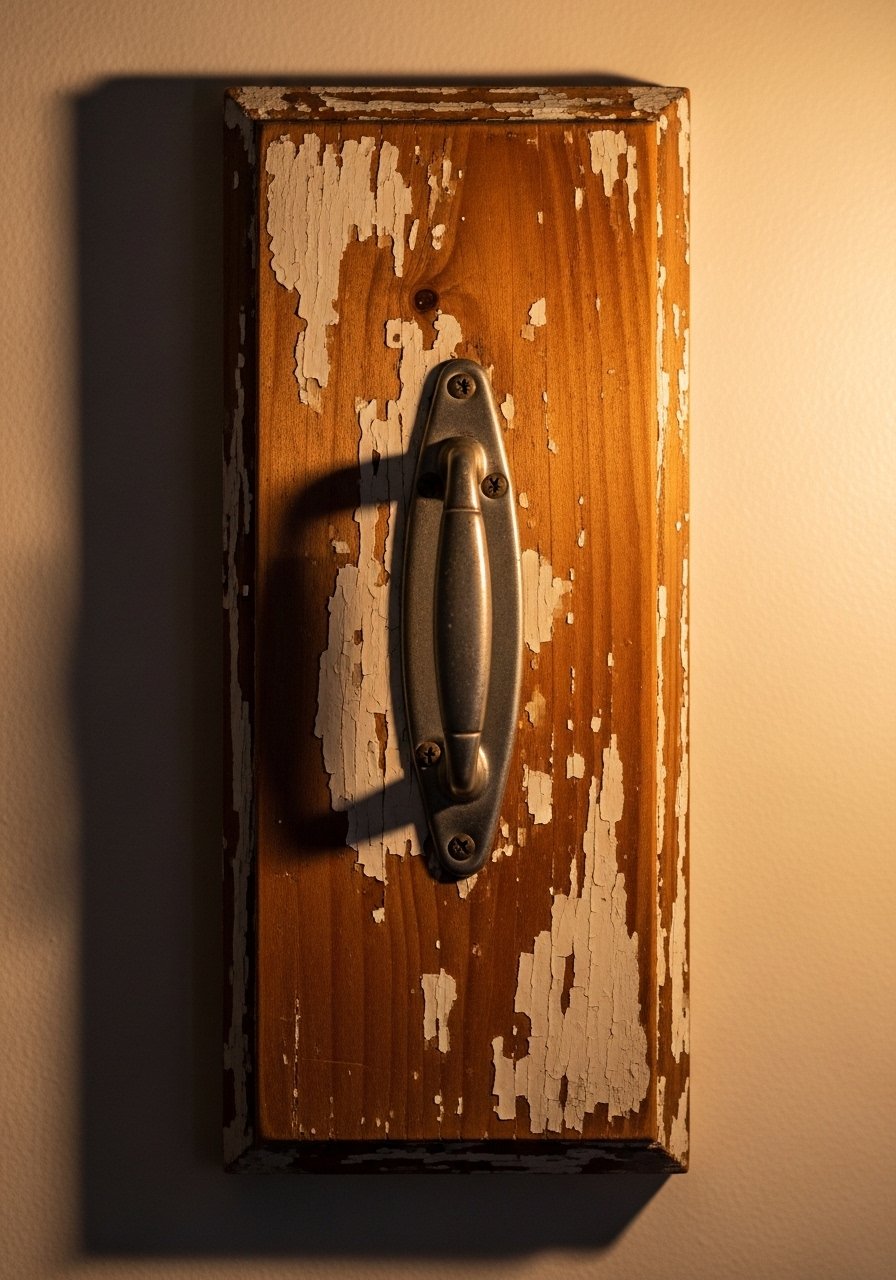
I once salvaged an old drawer front and it became a statement key panel. The original drawer pull made a perfect hook and the patina reads like a found object. Cut to a 12 to 14 inch width and add two small cup hooks under the pull for extras. Seal with a matte clear coat to keep the finish from rubbing off. Use vintage drawer pulls if you cannot find salvage. This idea solves the problem of keys looking utilitarian because it disguises them as art.
Small Space Vertical Key Ladder
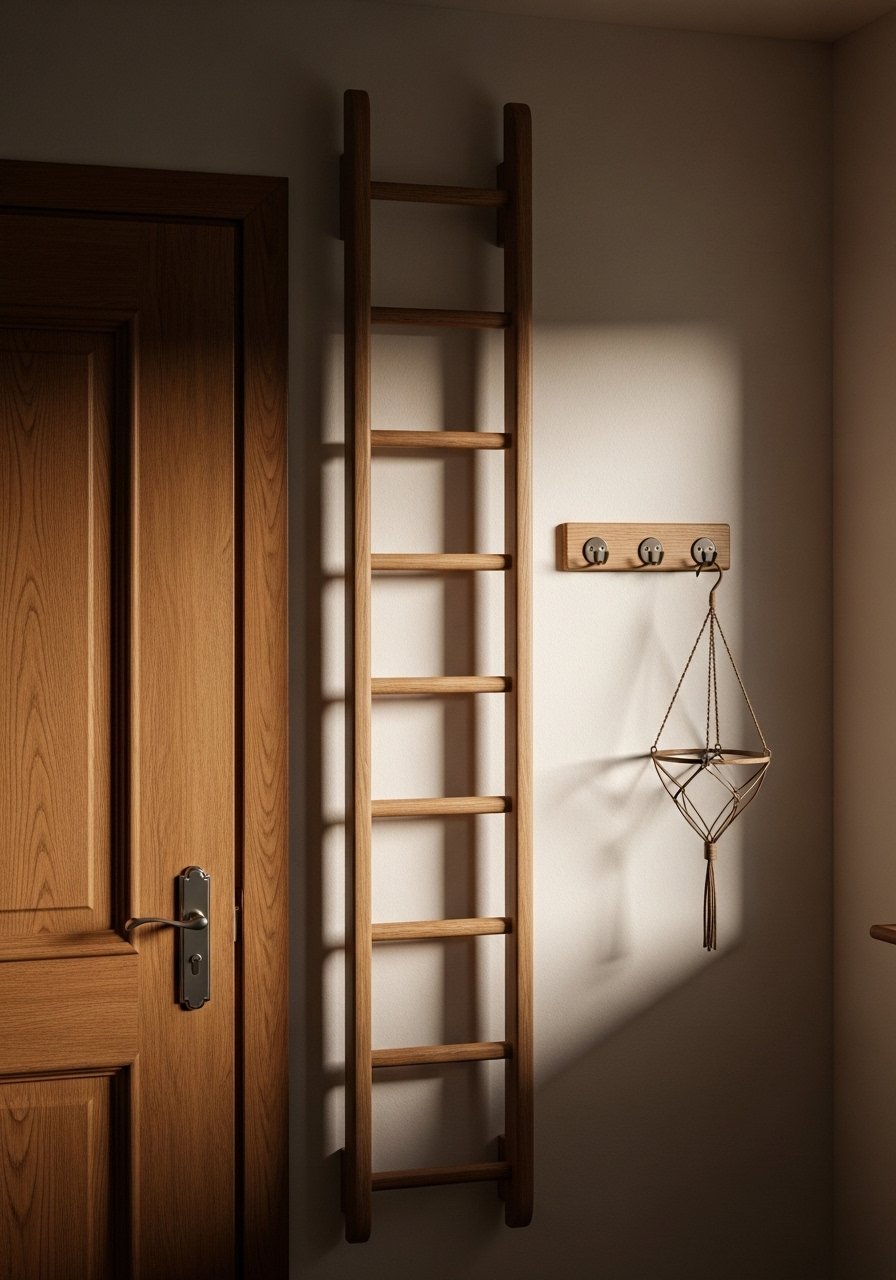
Vertical solutions are perfect for narrow walls beside doors. A mini ladder about 18 inches tall with staggered hooks keeps keys and light items organized without taking horizontal space. Space hooks about 4 inches apart vertically so rings do not tangle. I used lightweight poplar and mounted with two picture hangers. Mini wood ladder shelves work if you do not want to build. The detail most people miss is that vertical spacing needs to consider keychain length. Measure your bulkiest fob before drilling.
Leather Strap Hook Row For Modern Minimalists
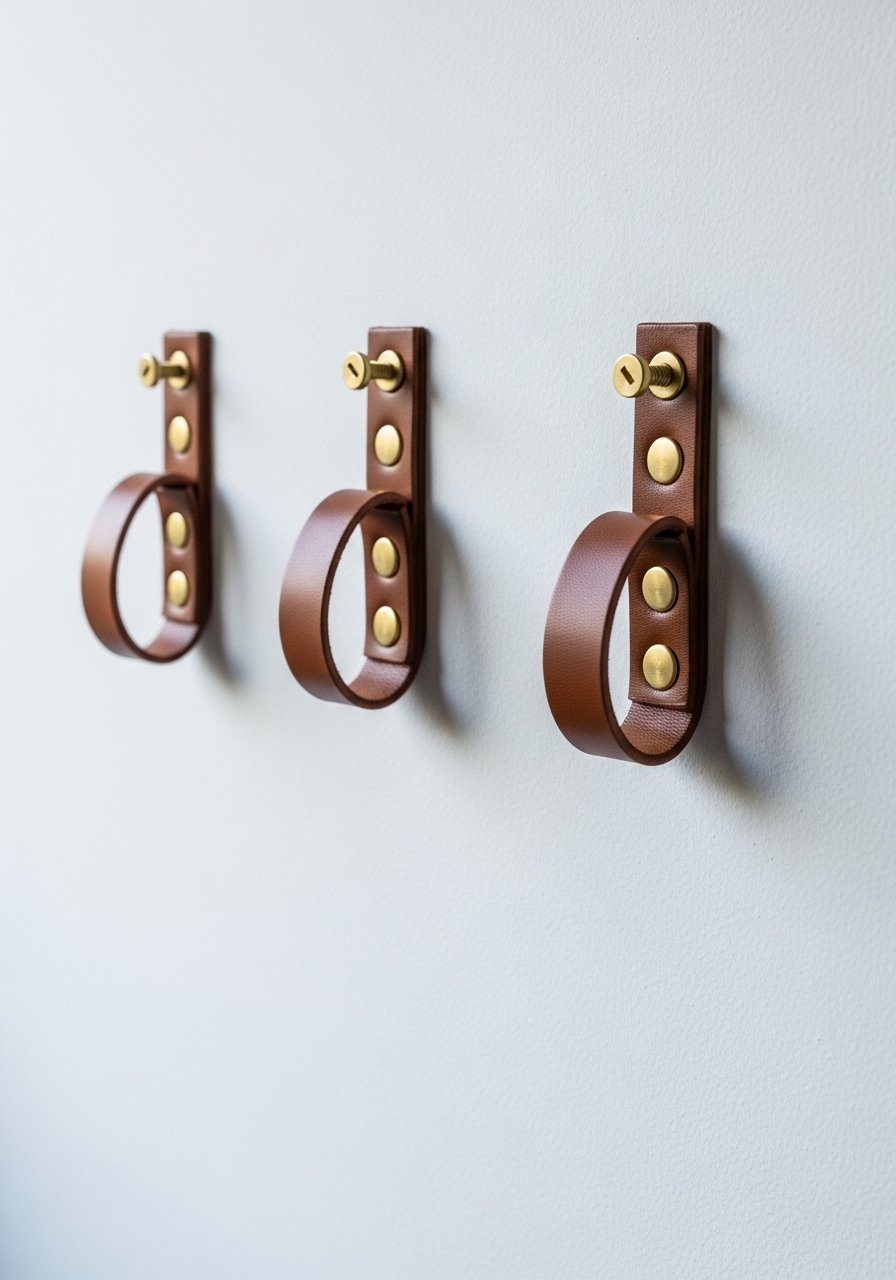
Leather straps mounted with brass screws read modern and soft. Cut straps 6 to 8 inches long and fasten them with decorative screws to a 12 inch plank for added stability. They hold keys gently and look less utilitarian than metal hooks. I used genuine leather straps and brass screws small. Avoid thin straps that stretch. A practical tip is to reinforce the screw hole with a tiny dab of wood glue inside the plank so straps do not pull loose after months of use.
Painted Chalkboard Key Command Center
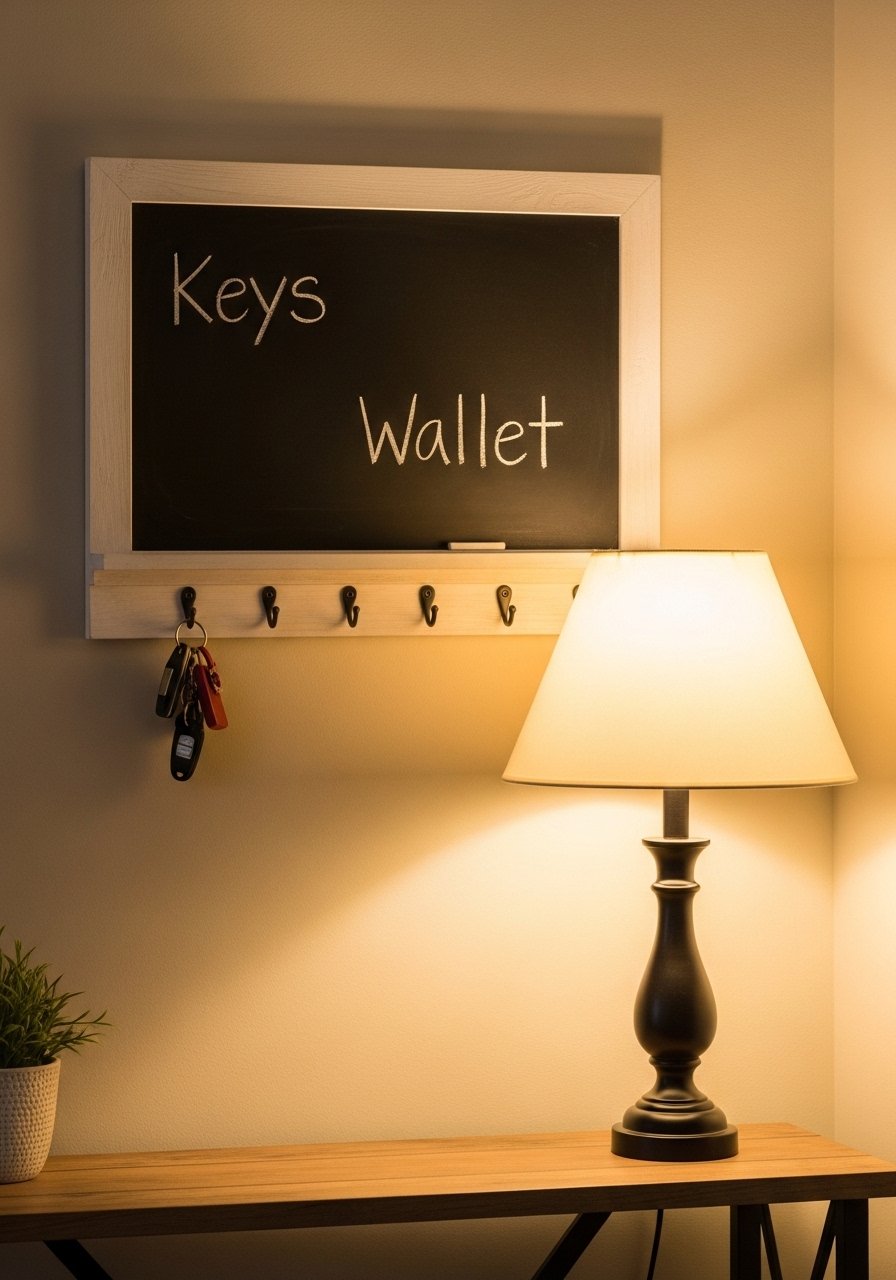
Make a command center that communicates. Paint a 12 by 10 inch board with chalkboard paint, add three hooks and leave space for notes like "keys" or "take out trash." I keep mine by the door and scribble reminders in the evening. Use chalkboard paint and adhesive chalk holders. People forget to seal chalkboard edges and the paint chips. Sand first and apply two thin coats for a smooth finish.
Floating Shelf With Hidden Hook Bar

A floating shelf that hides hooks underneath keeps keys out of view while providing a spot for other bits. I made a 12 inch shelf and screwed a small metal hook bar to the underside so keys hang unseen. Add a shallow dish on top for sunglasses. Use floating shelf brackets slim and hidden hook bars. One detail many miss is not anchoring the bracket into studs. For heavier loads anchor into a stud or use heavy duty anchors.
Repurposed Picture Ledge Key Display
A picture ledge mounted low becomes a perfect key display if you add hooks along the front edge. I used an 18 inch ledge so small frames and a bowl sit comfortably above the hooks. It is great where you want art and function together. Use brass picture ledges and small screw-in cup hooks. Make sure the ledge is anchored well because keys can bounce and loosen screws otherwise.
Your Decor Shopping List
Textiles
- Honestly the best $40 I have spent. 22-inch linen pillow covers, set of 2 in two neutral colors for layered entry bench seating
- Chunky knit throw in cream (~$35-55). Drape over a bench for texture
Wall Decor
- Brass cup hooks, 12-pack (~$12) for heavy keys and fobs
- Small picture ledge, 18-inch brass finish (~$20-30) for the repurposed ledge idea
Hardware & Tools
- Neodymium magnetic strip 12-inch (~$15) for kitchen use
- Heavy duty picture hangers, 2-pack for level mounting
Budget Finds
- Mini shadowbox frame (~$8) for hidden hook designs
- Glass bead jewelry kit (~$10) for beaded keychains
Finish & Fasteners
- Minwax stain sample kit (~$12) to test on scraps
- Clear matte spray sealant (~$10)
Similar at Target or HomeGoods for things like small bowls, faux florals, and frames.
Shopping Tips
White oak beats dark wood in 2026. Design feeds have shifted completely. These white oak floating shelves look current and keep key holders from reading dated.
Grab these brass cup hooks for about $12. Brass holds heavy fobs and ages nicely.
For the plaster wall problem, use two back picture hangers. Heavy duty picture hangers keep narrow planks level on textured surfaces.
If you rent, aim for adhesive mounts and removable options. Try clear mounting strips strong that hold light panels without holes.
Measure twice and cut once. For single-row racks use 3 3/8 x 8 3/4 inches so the piece does not overpower a small entry. Poplar boards cut-to-size save time.
Frequently Asked Questions
Q: How do I stop thin wood from splitting when screwing in hooks?
A: Drill pilot holes just deep enough for the screw threads and not all the way through. Use a drill bit slightly narrower than the screw. For very thin pine reduce torque or hand-turn the screw at the end to avoid cracks.
Q: Can I make these renter-friendly without drilling?
A: Yes. Many ideas here work with heavy duty adhesive strips or removable picture hangers. The newspaper weave panel, beaded mobile, and shadowbox options are ideal because they are light and secure with strong strips.
Q: What length should my key holder be for a standard door area?
A: Aim for 12 to 14 inches for a compact look and 18 inches if you need more hooks or family use. For single-row vintage style use 3 3/8 by 8 3/4 inches so it fits without overwhelming the space.
Q: My stain looked blotchy. What did I miss?
A: Sand the board smooth before staining and test the color on a scrap. If pine soaks unevenly, use a pre-stain conditioner or sand a hair smoother after the first coat then finish with a clear coat.
Q: How do I keep pets from snagging keys or leashes?
A: Use rounded cup hooks or a shelf lip to catch leashes. Place the hooks higher than shoulder height for small dogs or create a dedicated leash hook in a mudroom away from running paths.
Q: What tools do I actually need for these builds?
A: Minimal tools work for most. A hand saw or jigsaw, drill with small bits, measuring tape, sandpaper, and a screwdriver cover most projects. If you want to skip power tools look for ready cut boards or pre-made ledges online.
Q: Do I need to shellac wood after staining?
A: Yes, a clear coat seals stains and stops daily jingles and fingers from wearing the finish. Use a matte clear spray for a natural look.
Q: Will magnetic strips scratch my backsplash?
A: They can. Put a thin felt or foam strip under the magnet to protect painted or delicate surfaces and test with your heaviest keys before relying on the setup.
