
My living room had nice furniture but it still felt like a waiting room. Took me embarrassingly long to figure out it was missing texture. I started with the mirror and everything else fell into place.
These ideas tilt modern farmhouse with a few modern and boho detours. Most projects are under $50, with a handful of splurges around $80 to $150. Works great for living rooms, bedrooms, entryways, bathrooms, and even awkward hallway corners.
Modern Reclaimed Wood Frame for Living Room
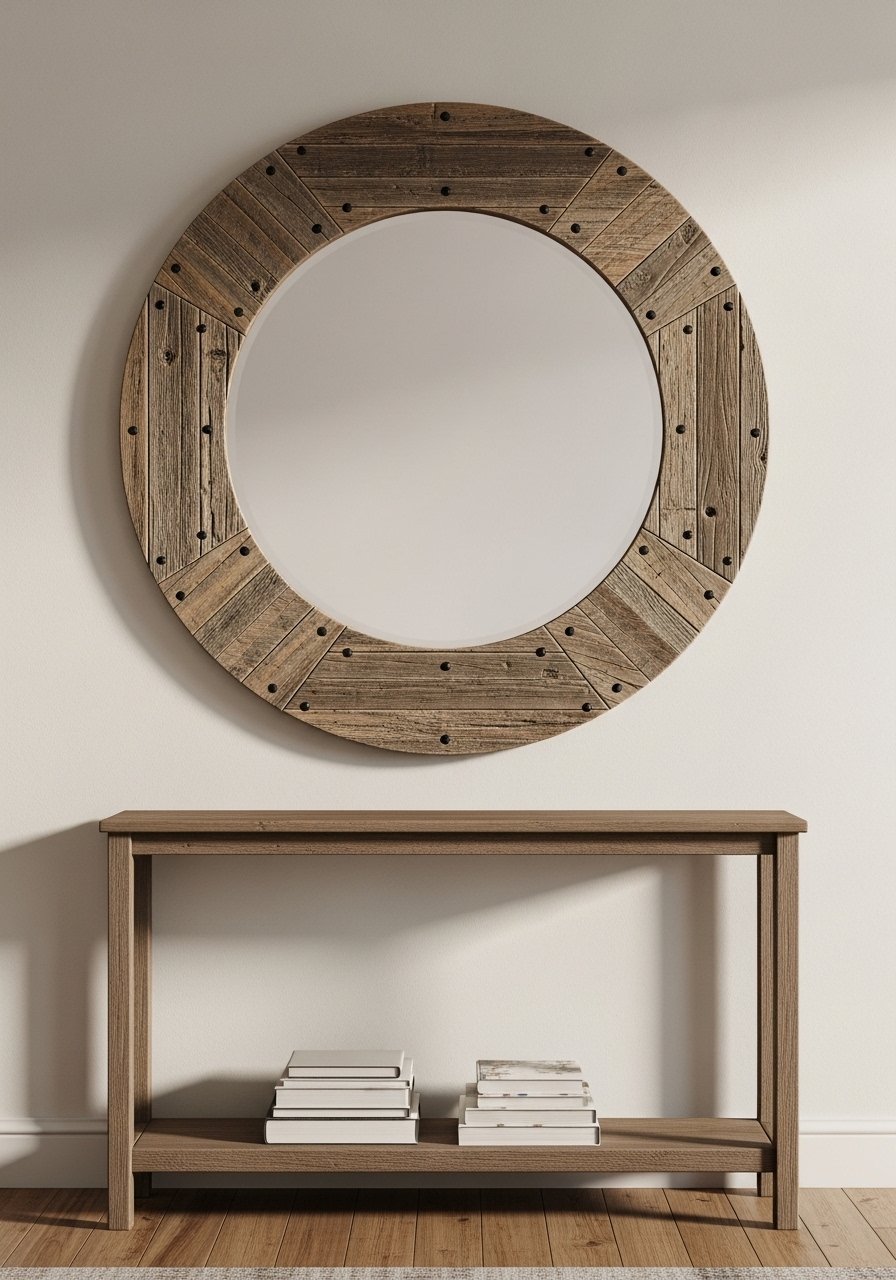
A simple reclaimed wood frame adds instant warmth. I cut boards to add a 2-inch wide surround, leaving a 1-inch gap at the mirrored glass for a built-in look. Visually this anchors the mirror and makes soft furniture feel more intentional. Works best over a console or sofa where the mirror is about two thirds the width of the furniture. Budget runs $25 to $75 depending on wood choice. I used a reclaimed wood mirror frame kit for the first one to learn the angles. Common mistake is making the frame too thin for a big mirror, which reads cheap. Pair this with the chunky molding idea below for a layered look.
Thin Brass Trim for Modern Glam Bedroom
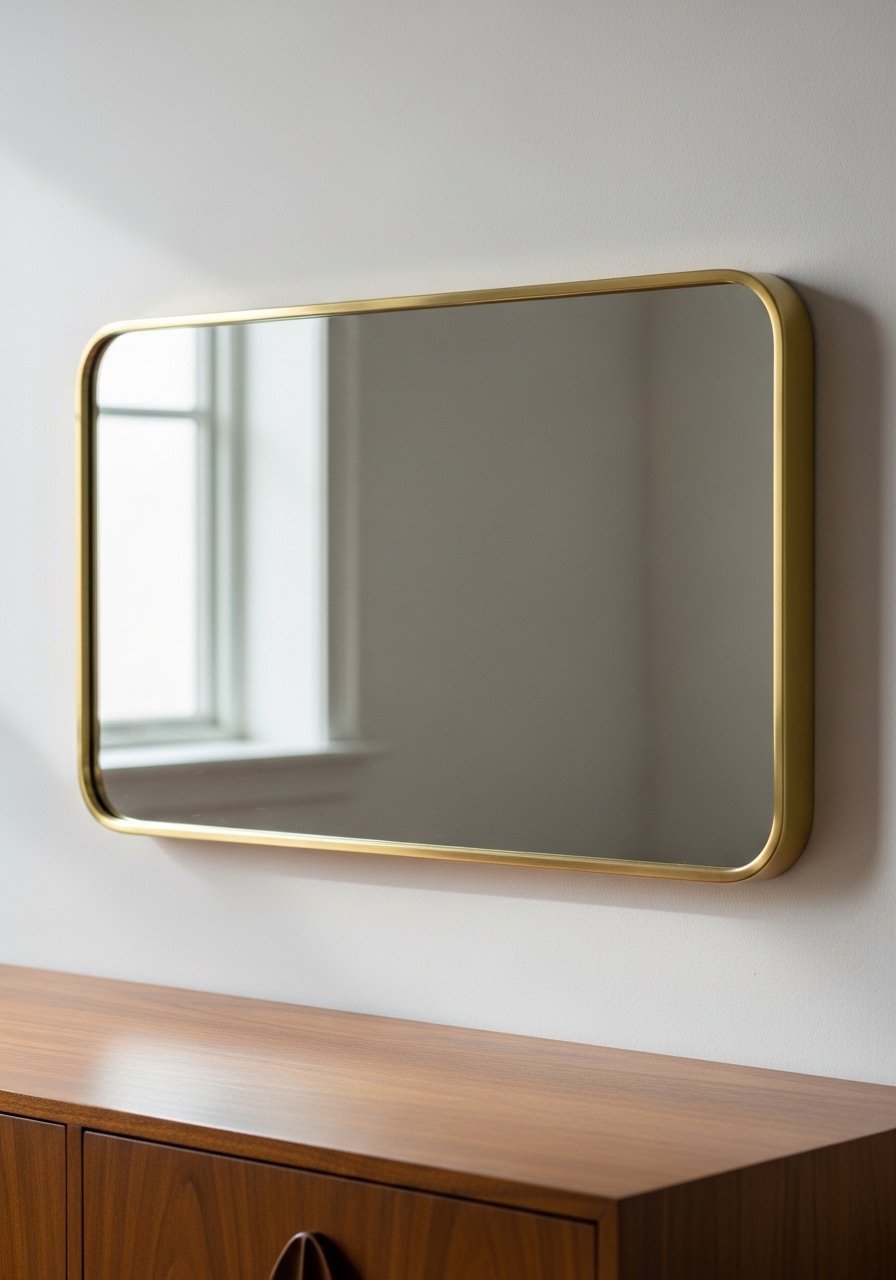
A thin brass trim turns a plain mirror into a glam focal point without shouting. I measured a 3/8-inch metal U-channel to slip over the mirror edge, which keeps it sleek. It creates a softer reflection and makes metallic accents in the room feel cohesive. Budget about $40 to $120 depending on finish. Try a brass U-channel trim kit. People often overpolish brass and it ends up too shiny. I prefer a brushed finish and an 80/20 color ratio, with 80 percent matte neutrals and 20 percent warm metal.
Rope-Wrapped Frame for Beachy Bathroom
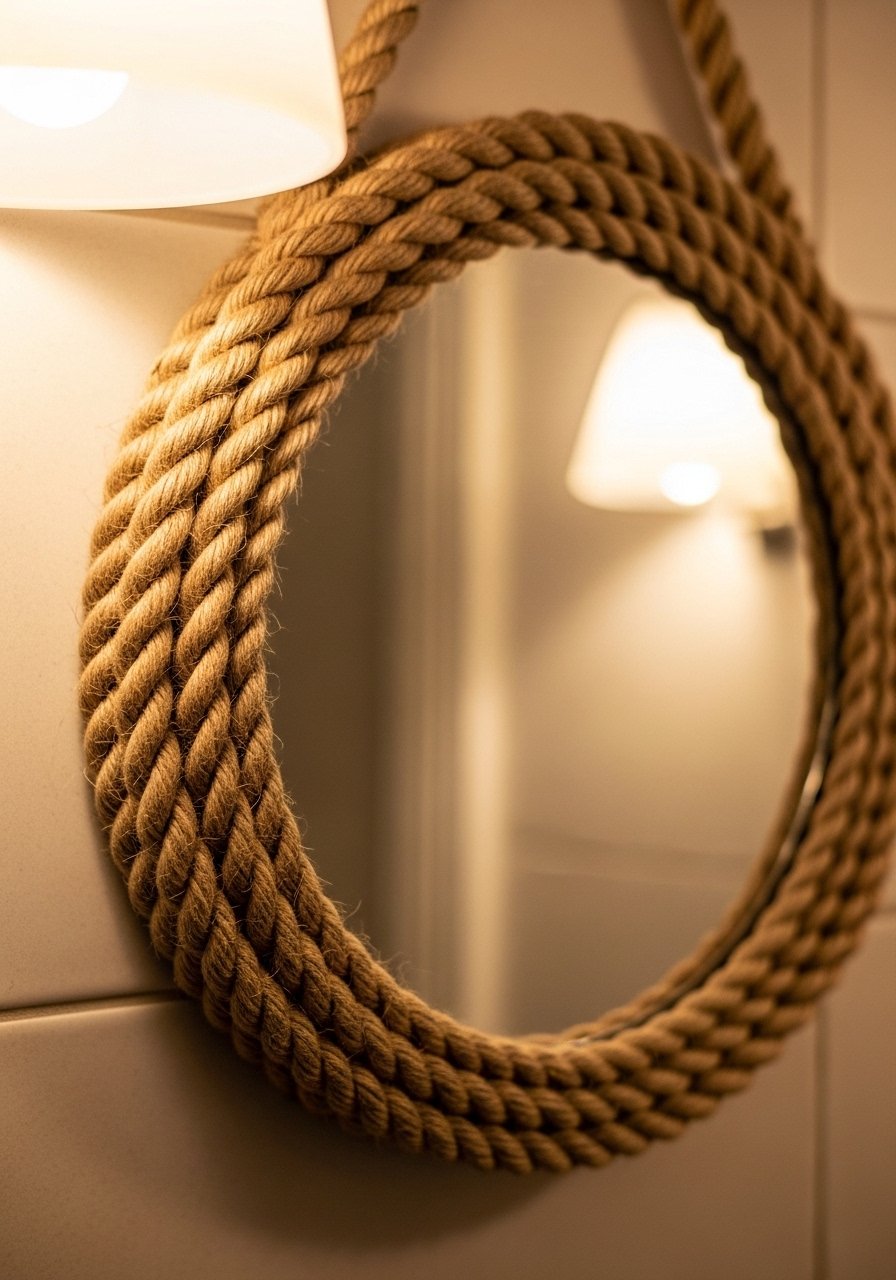
I wrapped sisal rope around a thin existing frame to add texture in a bathroom. It survives humidity if you seal the rope with clear matte spray. The effect is low cost, roughly $15 to $30, and fits coastal and cottage bathrooms. A common mistake is using rope that is too thick; a 3/8-inch rope reads cleaner on small mirrors. I used a natural sisal rope roll and hot glue. This is a renter-friendly swap for tile or heavy restoration.
Beaded Boho Frame for Bedroom Nook
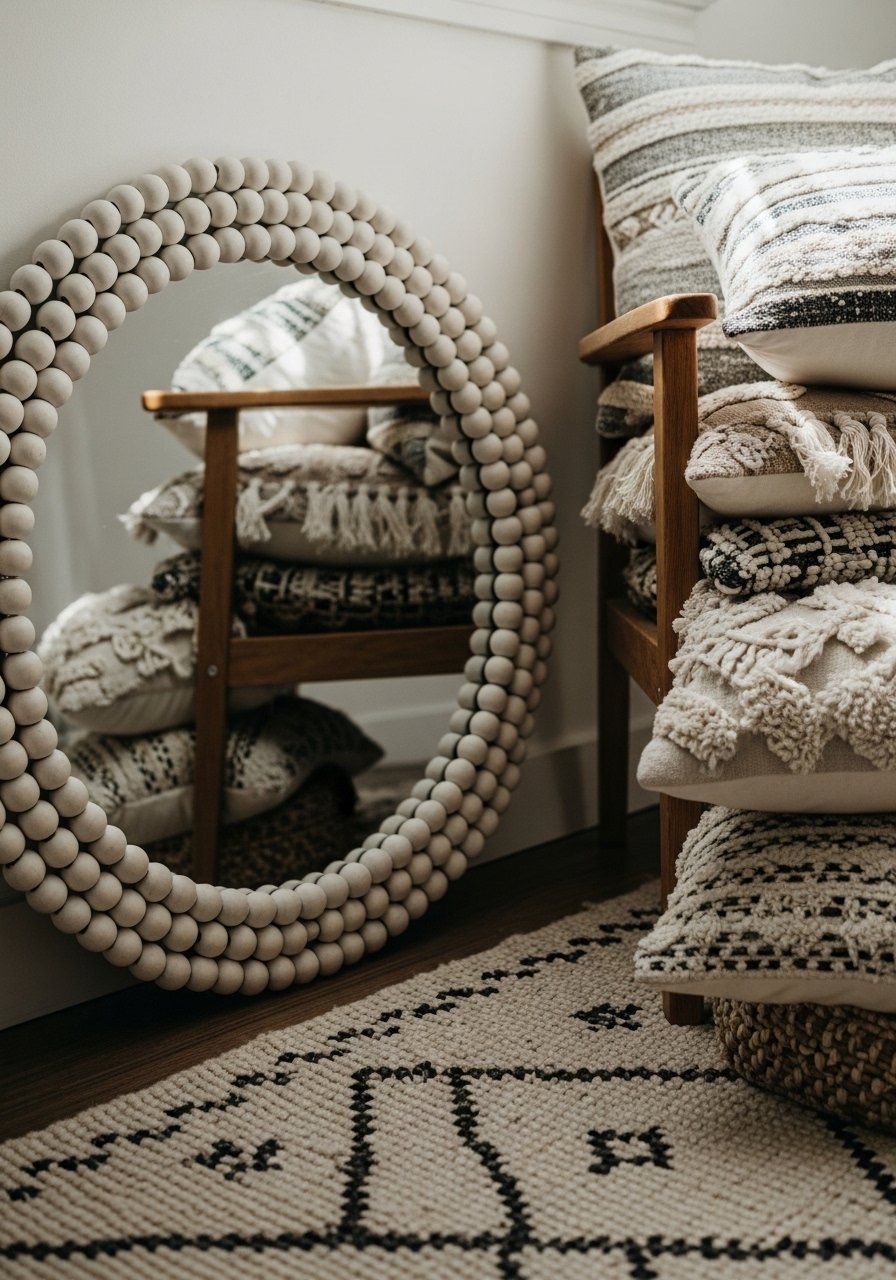
Bead trim makes a mirror feel handmade. I glued 1/2-inch wooden beads to a pre-made frame in a repeating pattern, leaving a 2:1 spacing ratio to keep it from reading cluttered. Budget around $30 to $60. The trick is painting the beads the same color as a nearby wood tone to tie the nook together. Avoid crowding the beads; one consistent rhythm reads better than random clusters. I used wooden beads on a string to speed things up.
Painted Color-Block Frame for Entryway
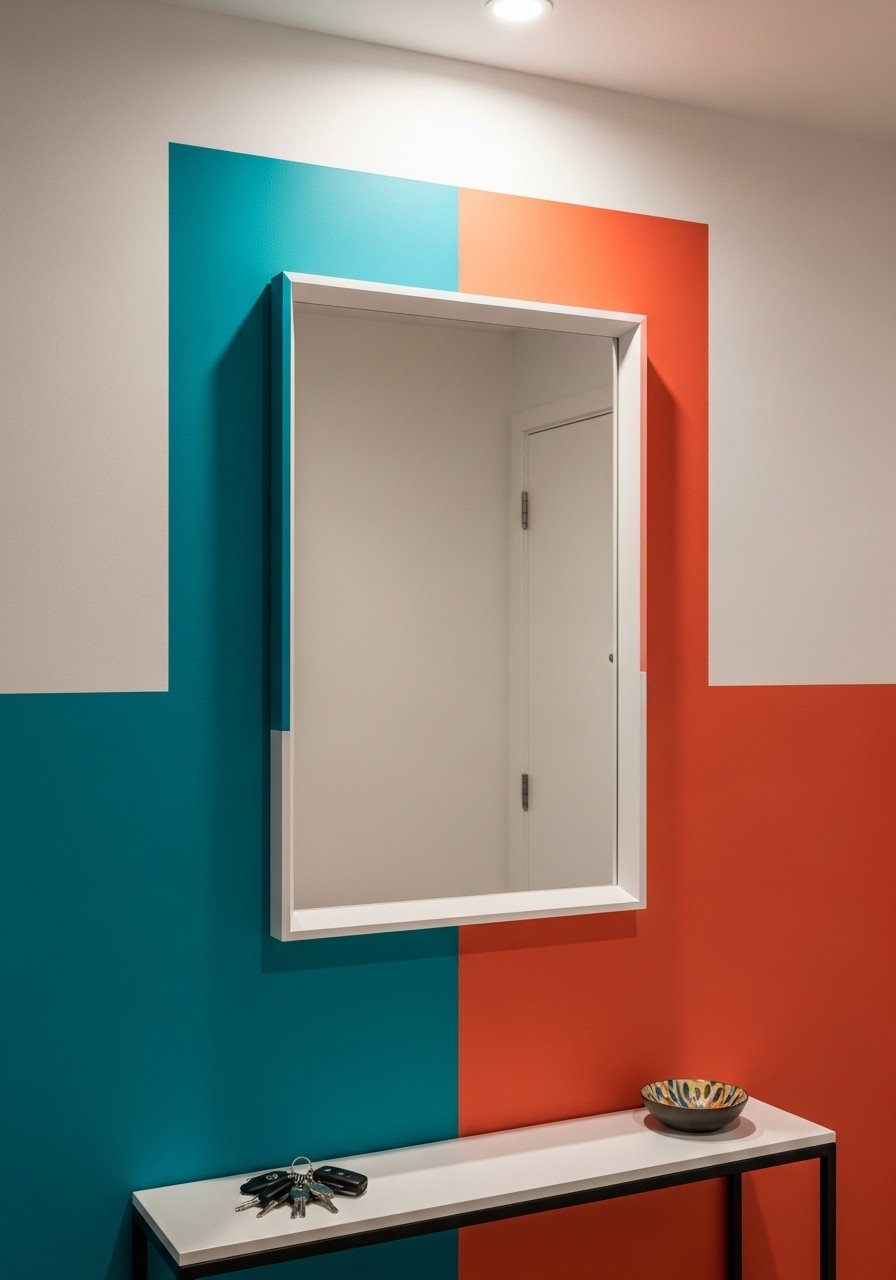
A color-block frame is an easy way to tie the mirror into hooks, rugs, or art. I used two sample paints and taped a 1.5-inch stripe to create a modern contrast. Works for budget under $20 for paint. Most people paint the whole frame one color and miss the chance to pull an accent from the rug. Use a 60/40 balance when choosing the two colors so it doesn't overpower the wall. For shorter walls, reduce the stripe width to 1 inch so proportions stay right.
Tile Mosaic Frame for Powder Room
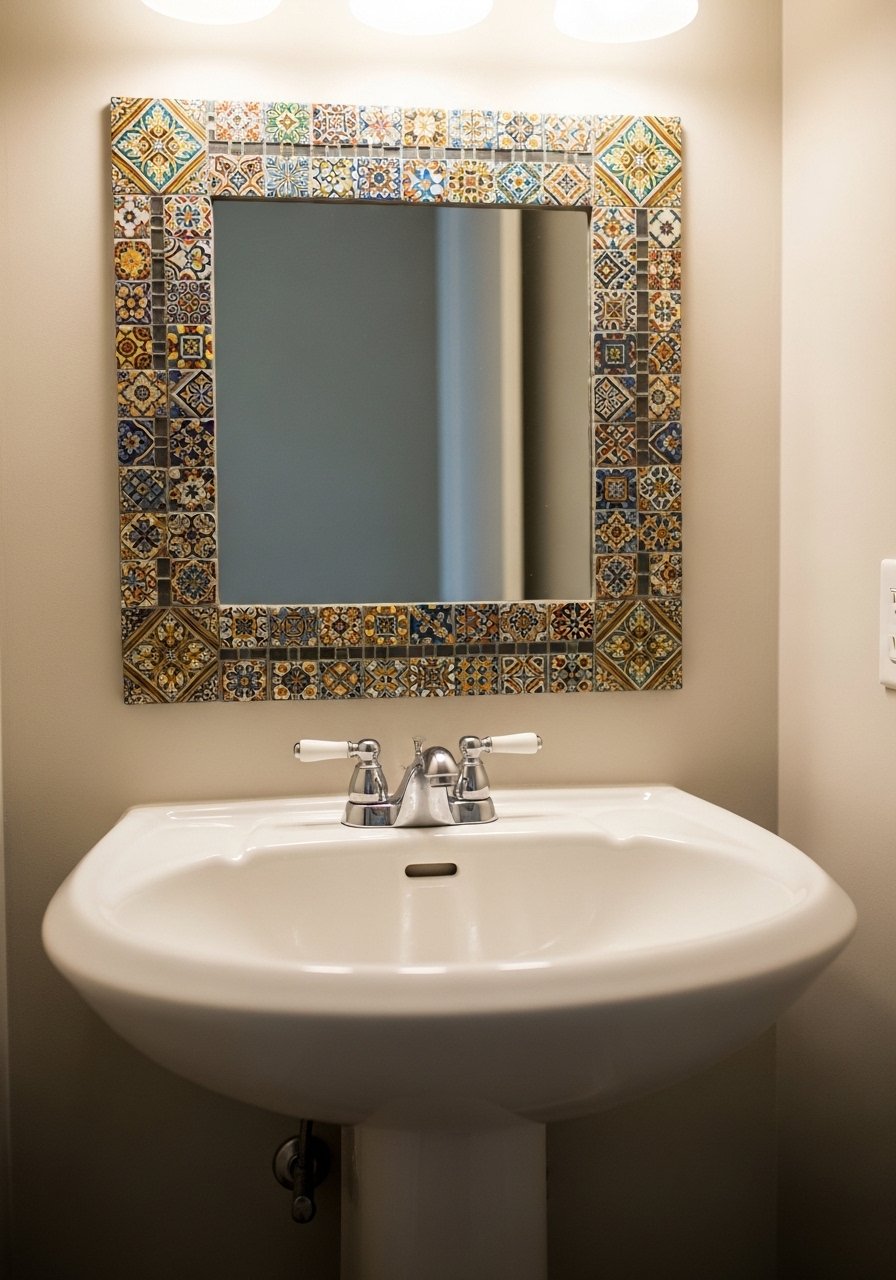
Mosaic tile is dramatic in a small space. I used 1-inch hand-cut tiles and staggered colors for rhythm. Budget depends on tile choice but you can stay under $60 using offcuts. Leave 1/8-inch grout lines for a neat finish. A mistake is picking tiles that reflect too much and compete with the mirror. Use matte or semi-matte tiles if you want a softer look. Try mixed ceramic mosaic tiles for a quick start.
Peel-and-Stick Tile Frame for Renters
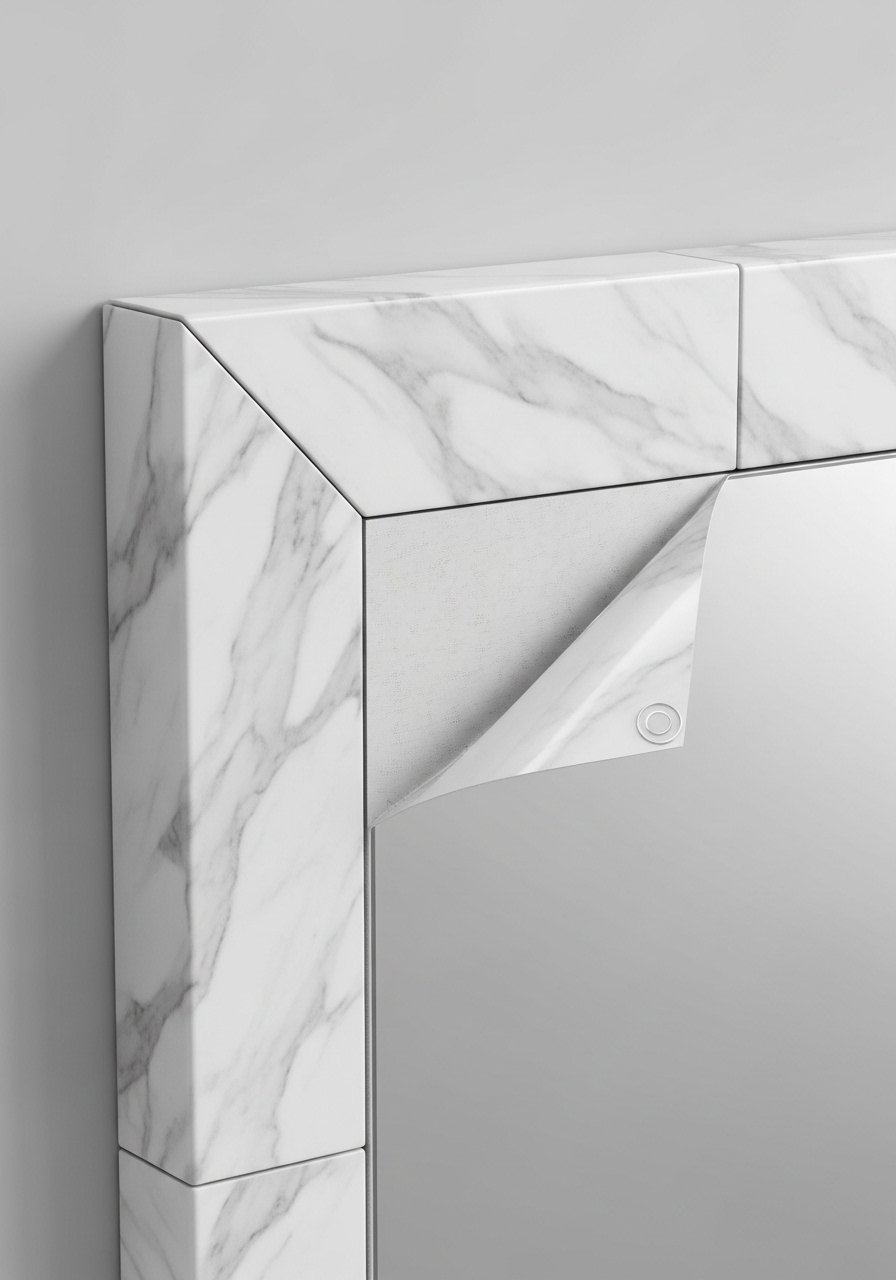
If you rent, peel-and-stick tiles let you fake a tiled frame without damage. Cut with a craft knife and miter corners for a seamless look. Cost is around $20 to $40. Common mistake is using full-size tiles on a narrow frame; instead use mosaic strips or 1×6 inch faux tiles. They peel off cleanly when you move. I used peel-and-stick marble tiles and pressed them with a rolling pin for good adhesion.
Layered Frame with Picture Ledge for Gallery Wall
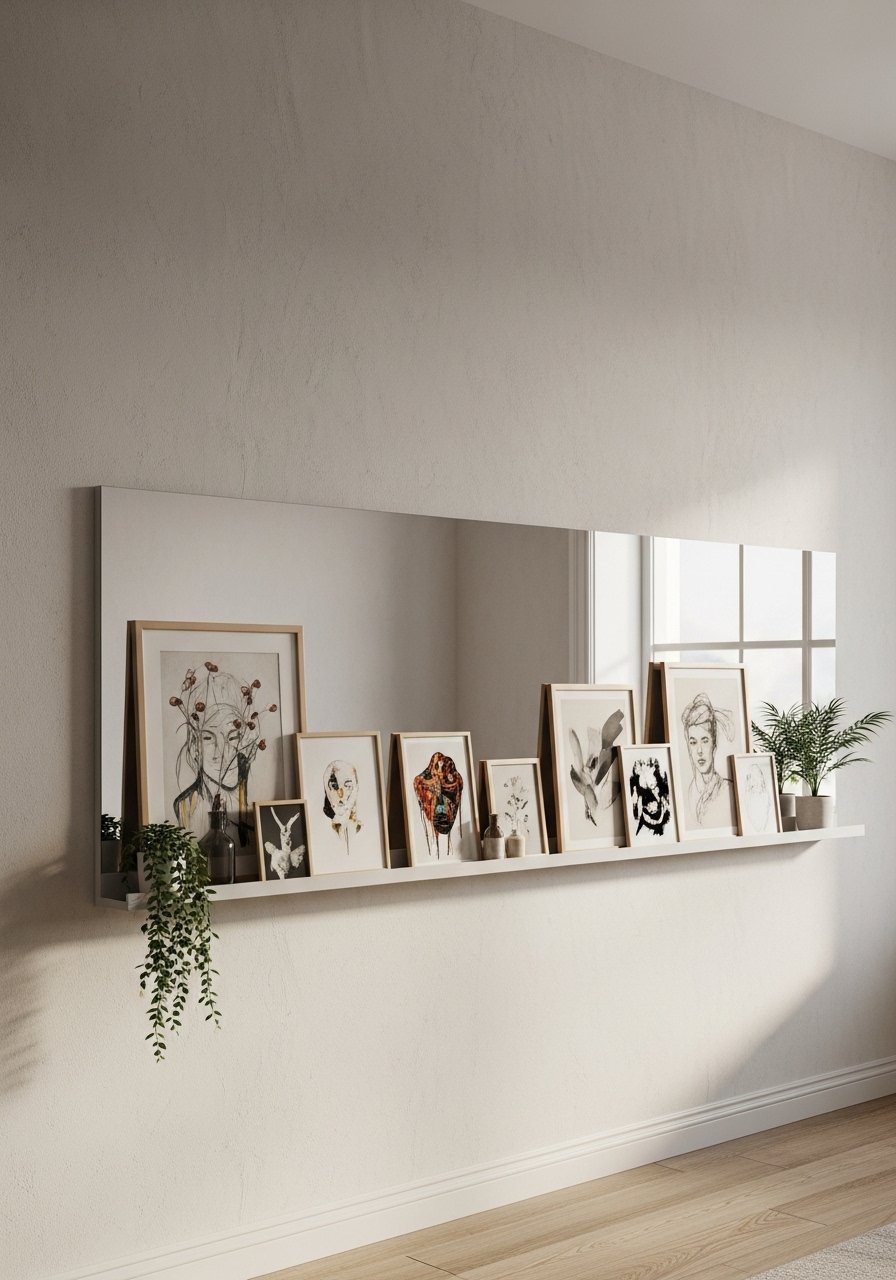
I built a 1.5-inch picture ledge onto a mirror frame so I could change art seasonally. It makes the mirror feel like part of a larger installation and solves the "what to put beside a mirror" problem. Budget $30 to $80. The rule I use is three items on the ledge for scale. A mistake is making the ledge too deep, which hides the mirror edge. Pair this with the gallery cluster idea below for a layered composition.
Chunky Molding Frame for Traditional Spaces
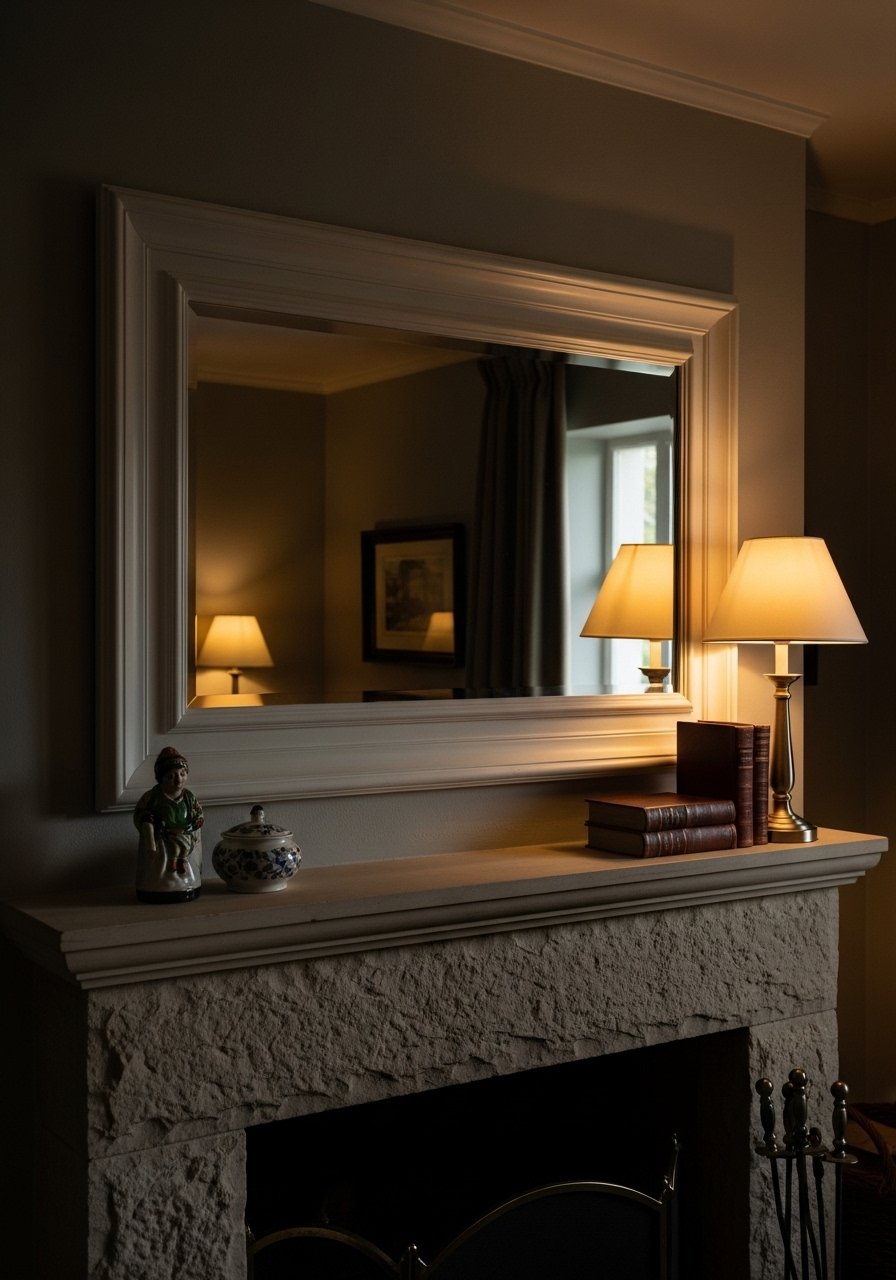
Thick molding gives a mirror weight and pairs nicely with traditional mantles. I rip 1×4 trim and add 1/4-inch reveal so the mirror looks recessed. For a mantel mirror go 4 to 6 inches wider than the fireplace opening to balance the wall. Budget $40 to $120 depending on paint. Avoid painting molding the same high gloss as the trim or it reads knockoff. Instead use satin or eggshell. Primed decorative molding strips make this faster.
Leather Strap Hanging Frame for Minimalist Hallway
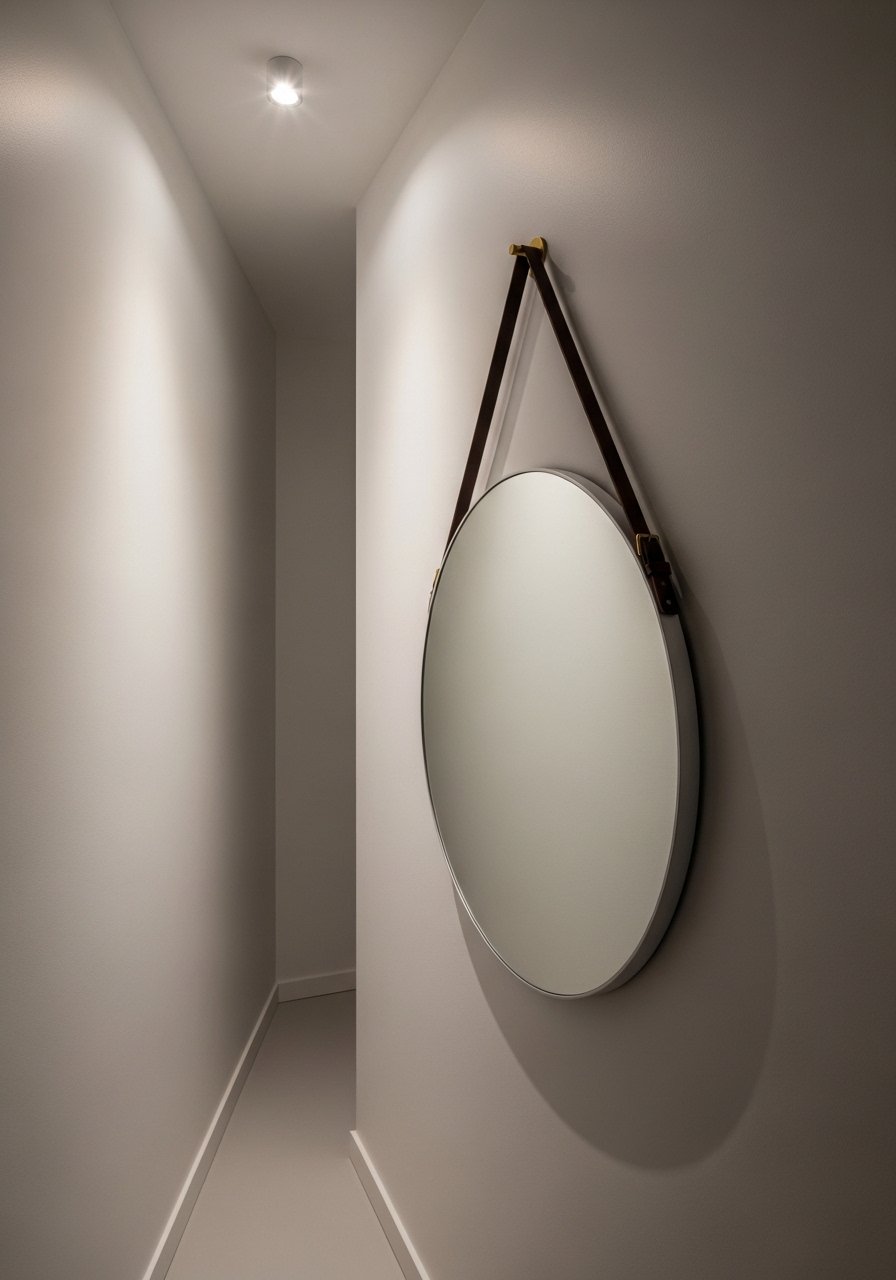
Leather straps are an easy way to add sculptural interest without bulk. I used a 1-inch vegetable-tanned leather strap and a brass hook. It looks especially good in minimalist entryways and works on plaster or drywall. Budget $20 to $60. The common mistake is choosing a strap that is too short; measure so the mirror hangs 60 to 65 inches from floor to center. I bought vegetable-tanned leather straps and riveted them for strength.
Sunburst Twig Frame for Rustic Bedroom

I wired small twigs around a base frame for a handmade sunburst. It reads rustic without being kitschy. Using twig lengths that vary by 1.5 to 3 inches gives a natural rhythm. Budget under $30 if you forage or $50 with ready-made materials. Don’t overdo the finish; a light matte seal keeps the organic look. This pairs well with the reclaimed wood frame idea for a textured wall trio. Try natural decorative twigs bundle.
Upholstered Fabric Frame for Soft Boho Vibe
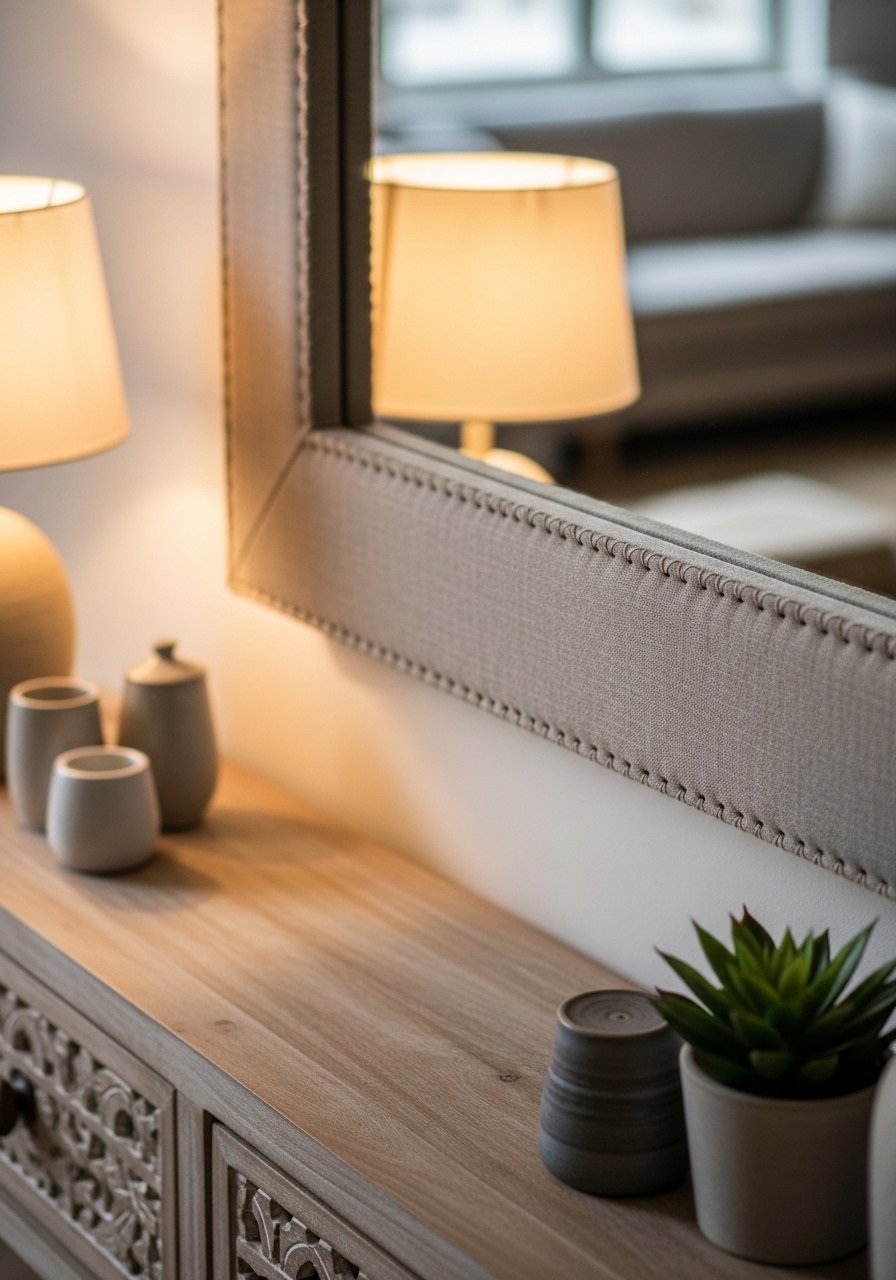
Wrapping a thin foam strip and fabric around the mirror edge adds softness to a bedroom or nursery. I use 1/2-inch foam and a linen blend for durability. Budget $25 to $60. The mistake is choosing busy prints; solids or subtle weaves photograph better. This tactic solves the cold, reflective feel some rooms get when they have zero textiles. Use linen blend upholstery fabric in a neutral.
Marbled Contact Paper Frame for Quick Update
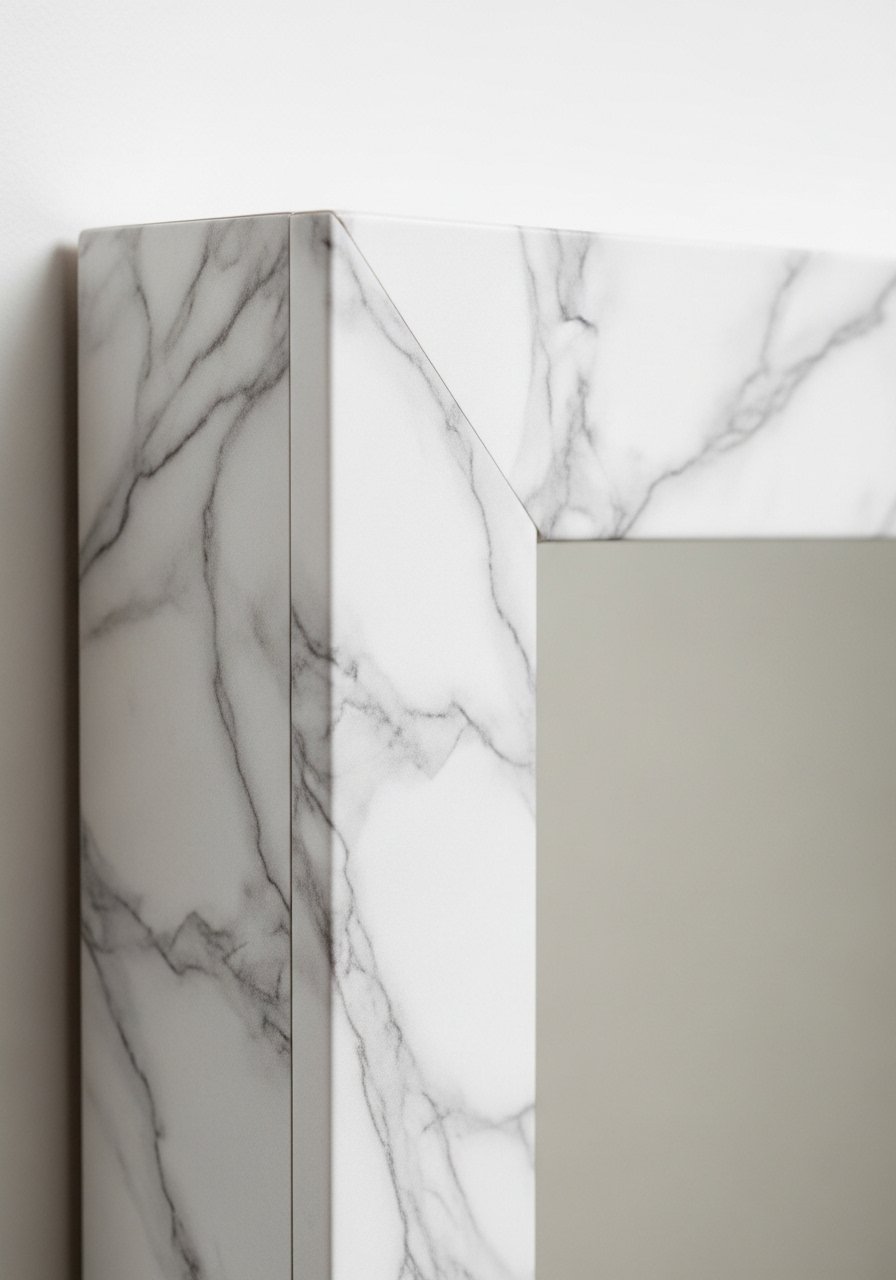
Contact paper is the fastest makeover. I cut strips with a 1/4-inch overlap and burnish them with a soft cloth. Budget under $20. Measure twice because redoing sloppily cut seams is annoying. It makes the mirror look custom and avoids heavy carpentry. A common mistake is not smoothing air bubbles; a small squeegee fixes that. For a luxurious look try marble contact paper.
Mixed Metals Frame for Modern Eclectic Living Room
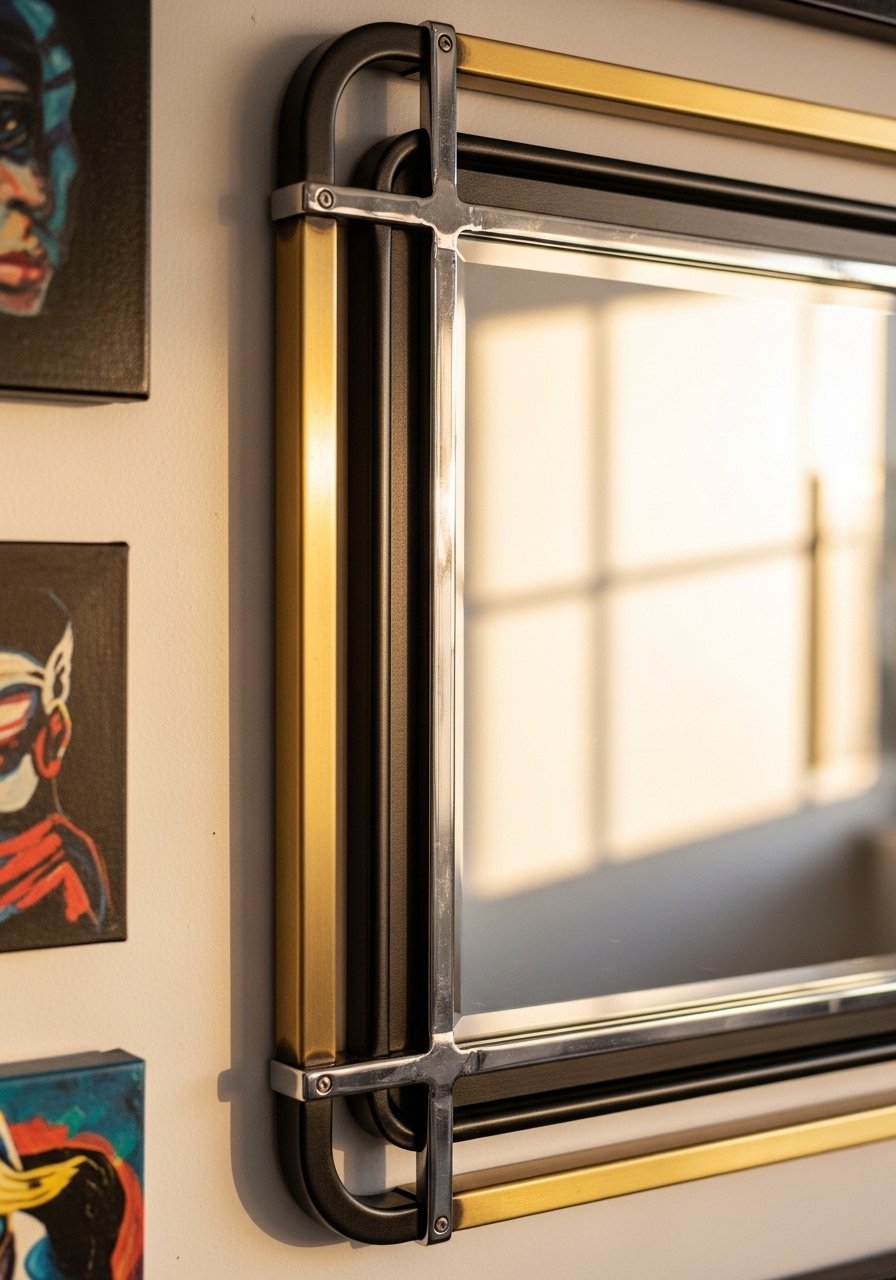
I layered thin brass strips with a matte black outer edge to add depth. Mixing metals avoids the matchy-matchy trap and reads intentional. Budget $50 to $150. The rule I follow is two metals in large areas and one accent metal. A frequent mistake is overloading with shiny finishes; mix matte and polished pieces. This works well next to the mixed gallery cluster idea for dining rooms. Try mixed metal trim pieces.
Ceramic Tile Grout Frame for Kitchen Pass-Through
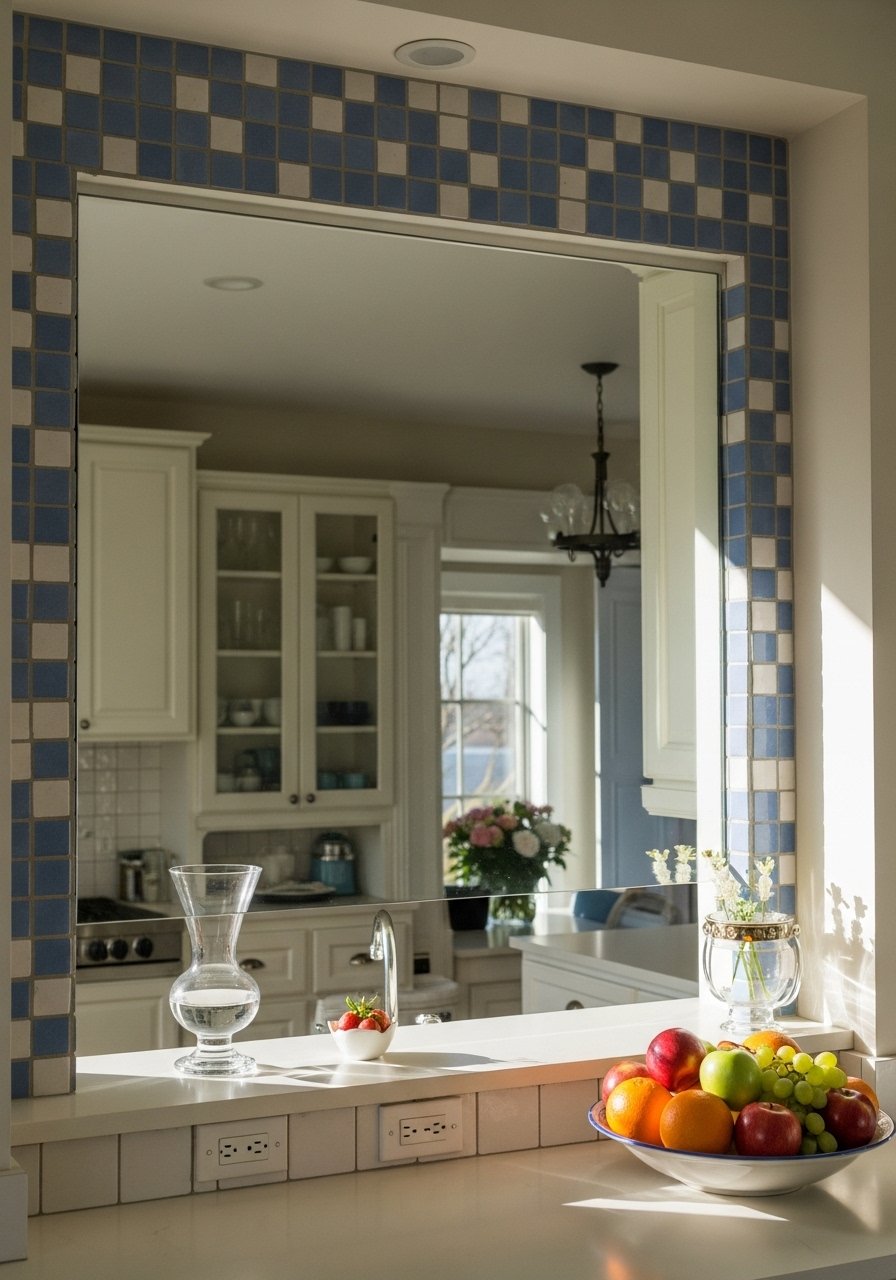
Using leftover ceramic tile gives an intentional, handmade feel. I set tiles on a thin adhesive back and use a sanded grout for durability. Allow 24 hours for drying. Budget $20 to $60. People forget to seal grout in kitchen zones; do that. Use 1-inch tiles for small frames so each piece reads. This is a great way to match backsplash colors without full renovation.
Macrame Fringe Frame for Cozy Nook
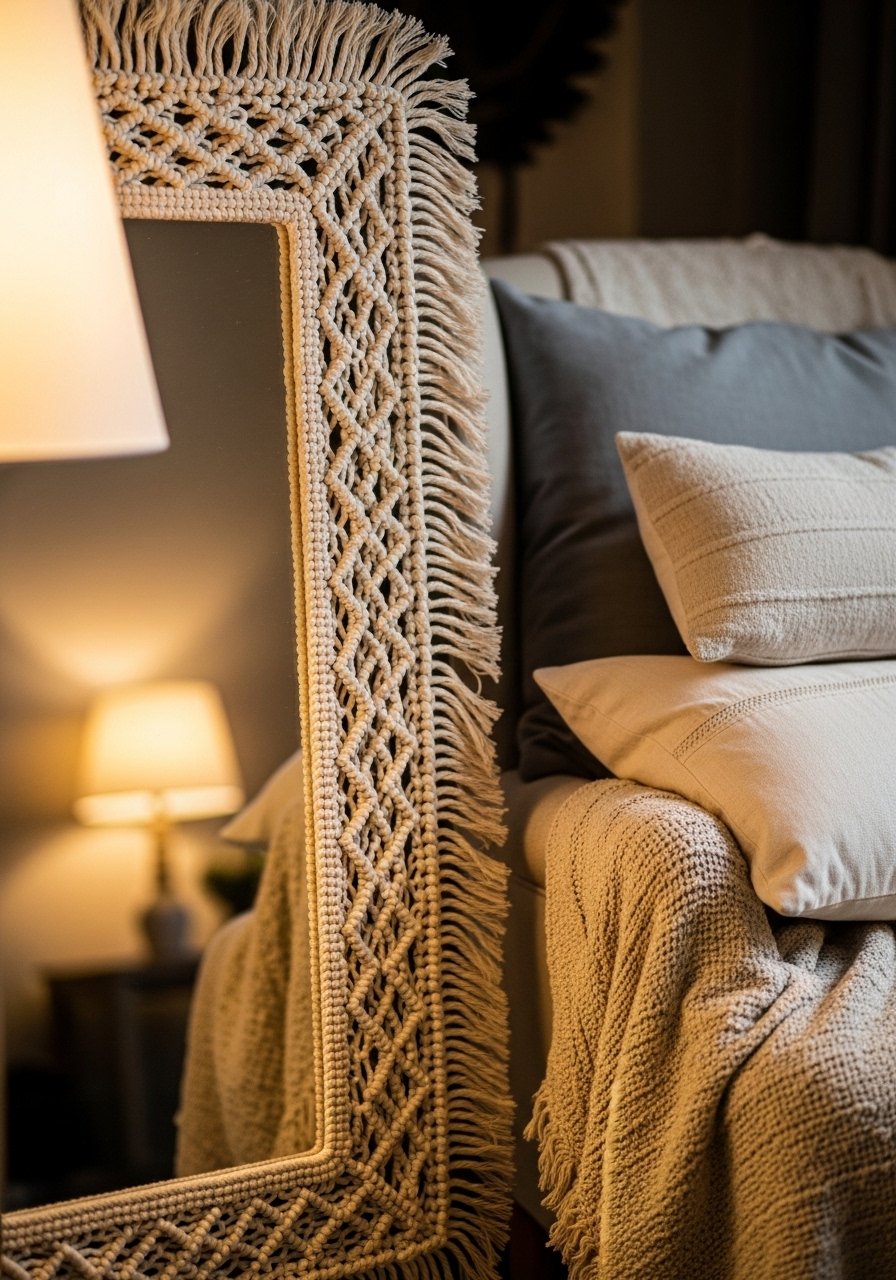
Macrame fringe brings warmth and motion. I knotted a 3-foot fringe and attached it to the top and sides so the bottom could sway. Budget $20 to $45. A common mistake is heavy fringe that gathers dust; keep it above reach or use washable fibers. This idea solves the "everything is the same height" problem by adding vertical movement. I used macrame cord bundle.
Oversized Floor Leaner Makeover for Dark Corners
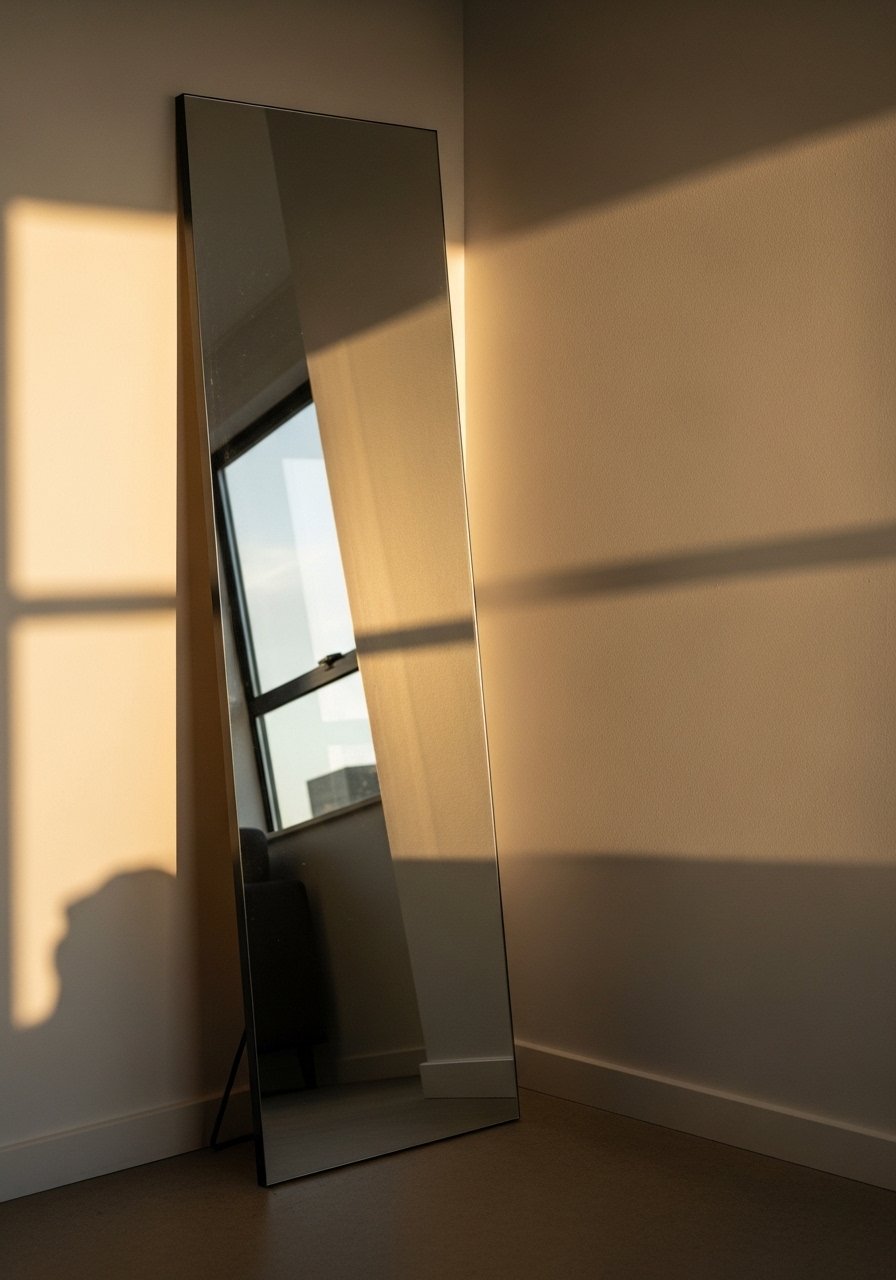
Leaning an oversized mirror brightens dark corners and doubles window light. I angle mine about 5 degrees back from vertical so it reflects more ceiling and less floor. Budget varies; a solid framed 5×7 leaner can be $120 to $300, but you can DIY with a reclaimed wood surround for under $80. Mistake is leaving it flat against the wall which reduces reflected light. This pairs nicely with the layered frame idea for a gallery effect.
Mirror Cluster with Mixed Frames for Dining Room
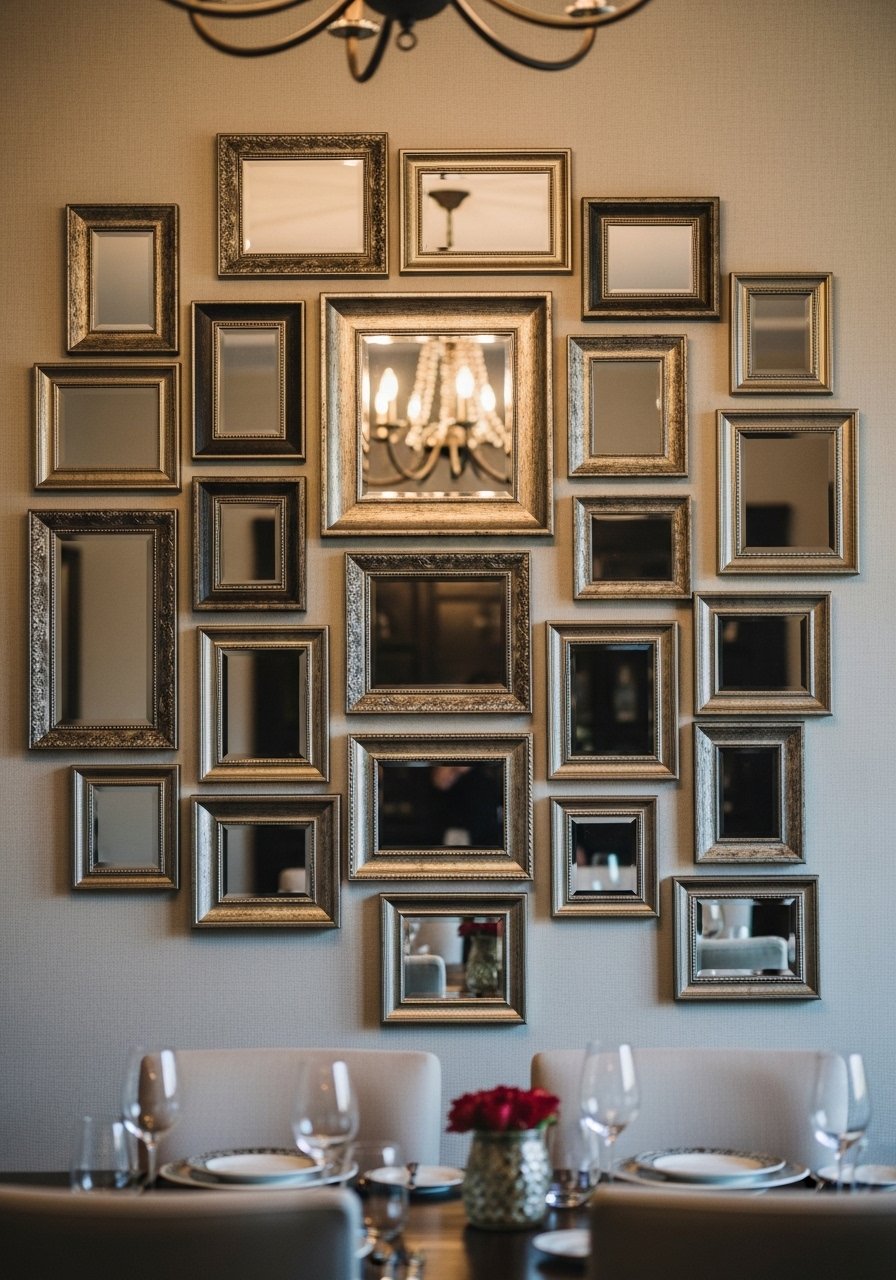
A cluster reads intentional when you use a 3-inch spacing rule and keep frames within a 2:1 size ratio. I anchor the cluster with one largest mirror then echo its finish in two smaller frames. Budget $40 to $200 depending on frame sources. The mistake is random gaps that look like padding instead of design. Use one glue template on kraft paper to test layout before nailing.
Mirror Tray Frame for Console Styling
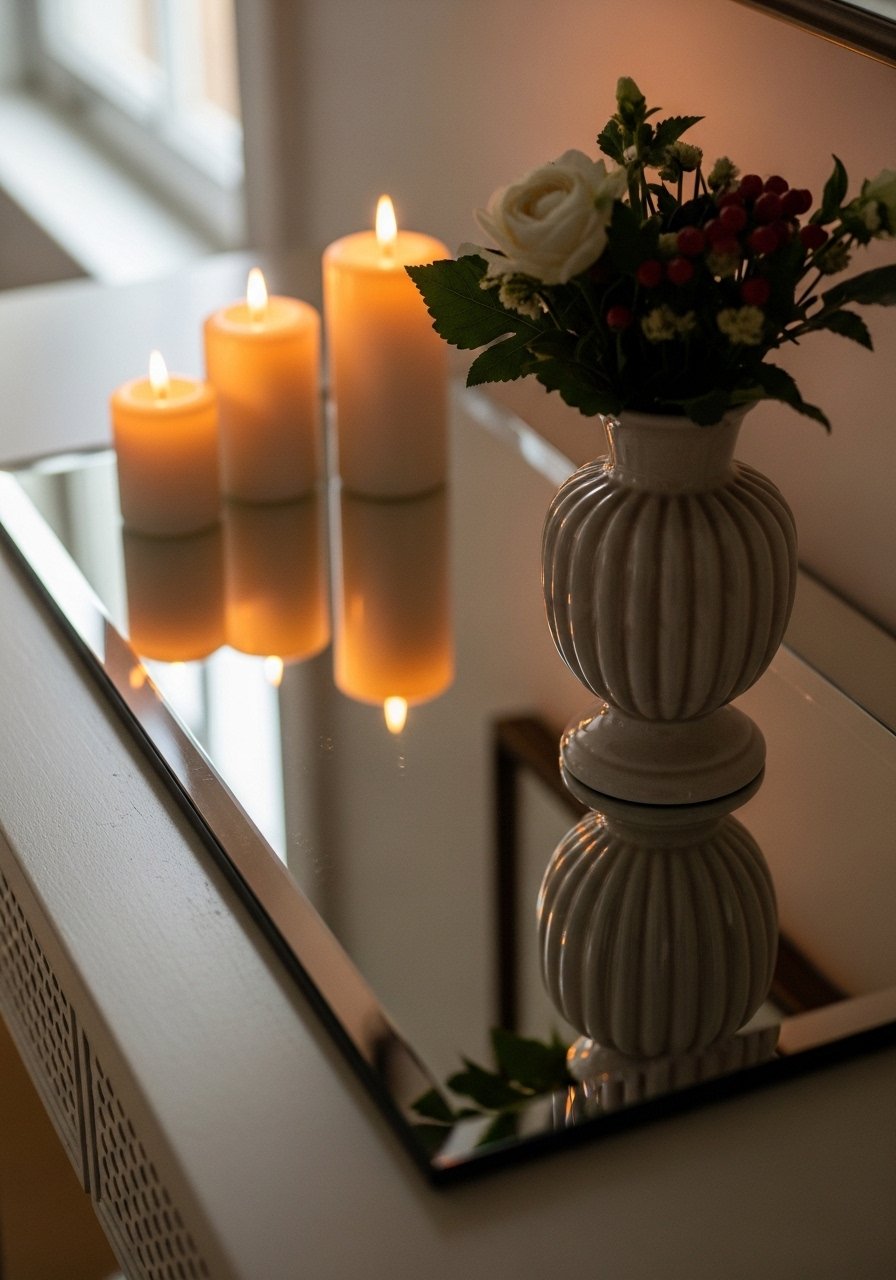
Turn a mirror into a tray by framing it with a 1-inch raised edge to keep decor from sliding. It becomes an instant style layer and protects the surface. Budget $20 to $60. This fix solves the "shelf looks empty but furniture is fine" problem. Don’t use a mirror tray under hot items. I used adhesive rubber feet to lift it slightly.
Painted Abstract Frame to Tie Into Artwork
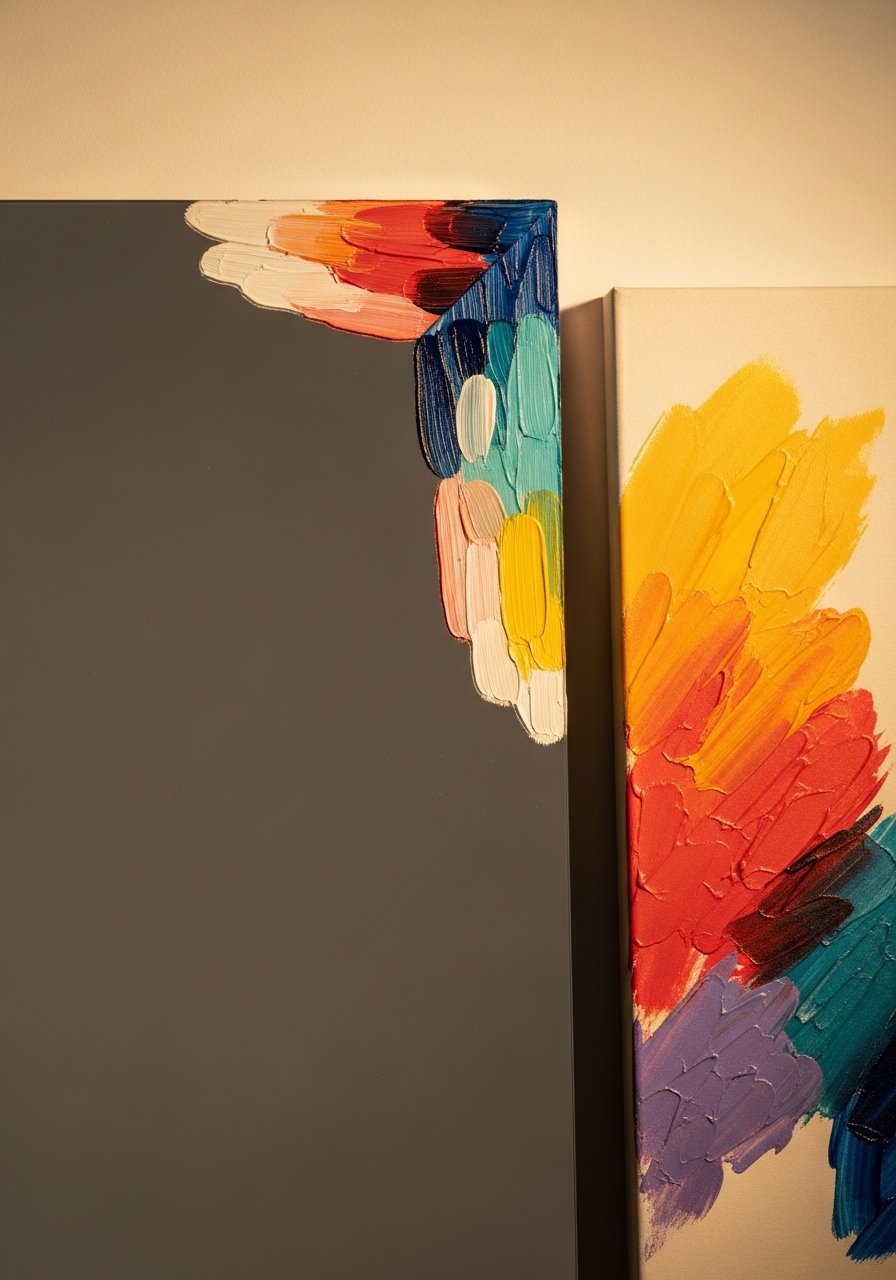
I painted an abstract corner on the frame with three colors pulled from nearby art, which made the wall feel cohesive. Use a 60/40 dominant-to-accent color rule. Budget under $25 for paint samples. A common mistake is matching colors too exactly; tonal matches read better. This idea pairs well with the color-block frame and the gallery wall techniques above.
Thin Concrete Edge for Industrial Entry
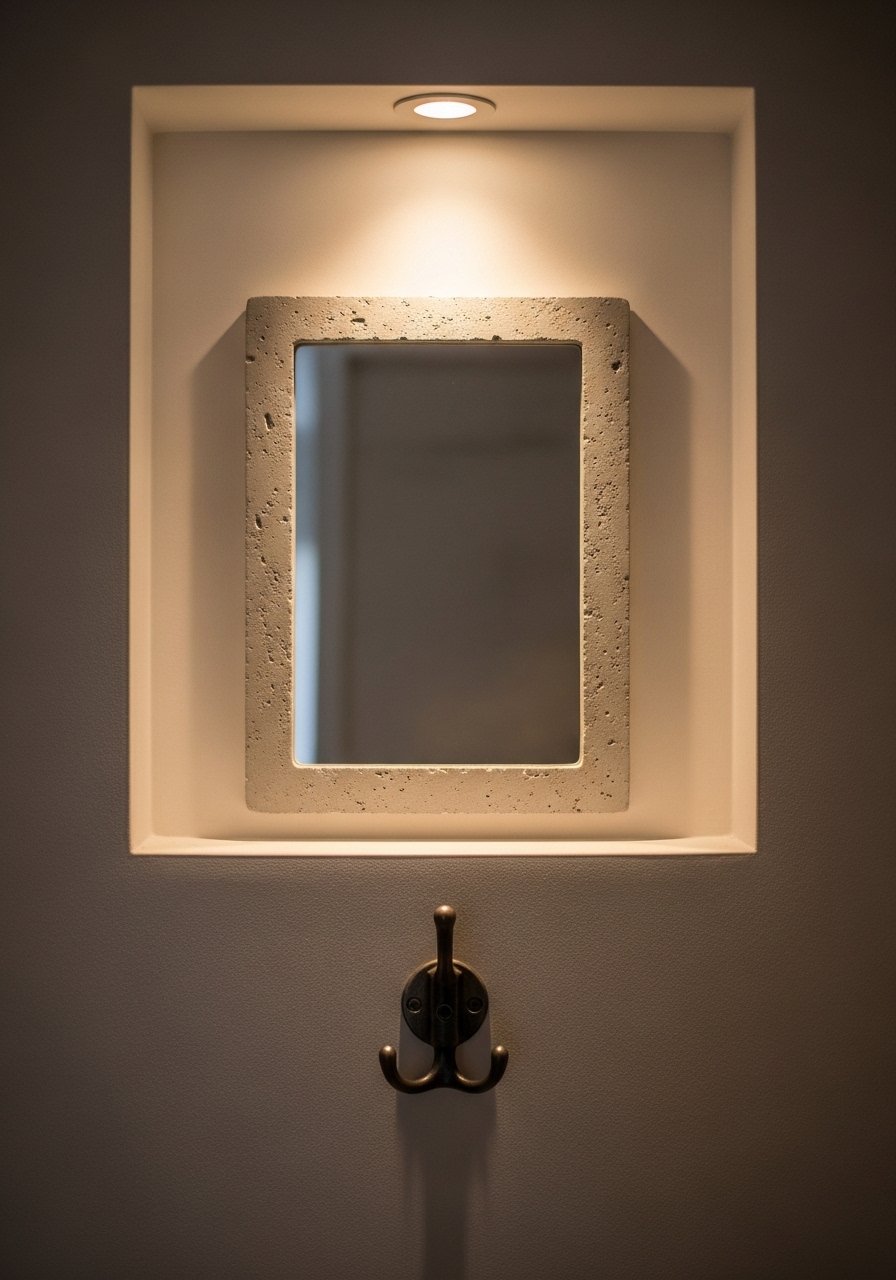
Casting a thin concrete frame gives a modern industrial look without feeling heavy. I used a 1/4-inch silicone mold to keep the frame slim. Budget $50 to $100 for materials. The mistake is making the concrete too thick, which is heavy on drywall. Keep it under 1.5 pounds per square foot for safe hanging. Seal with matte concrete sealer. Try concrete casting mix small-batch.
Mirror with LED Backlight for Modern Hallways
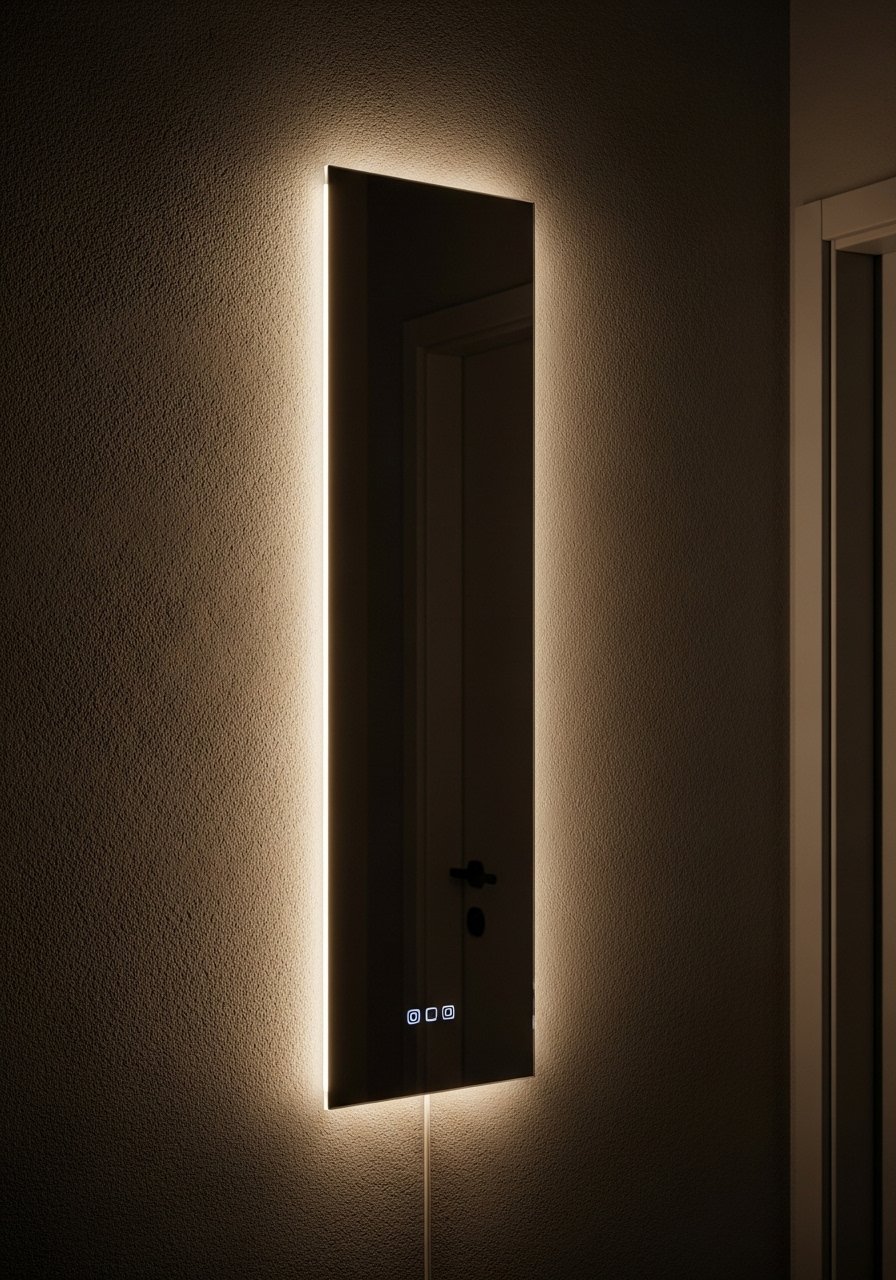
Adding LED backlight makes a mirror feel high end and helps a dark hallway. I used warm 2700K LED strips and hid the driver behind the frame. Budget $25 to $80. Mistakes include choosing LEDs that are too cool or skipping a dimmer. Use a 300 to 600 lumen strip depending on mirror size. I like warm LED strip light kit with a dimmer.
Your Decor Shopping List
- Textiles: Honestly the best $40 I have spent. Chunky knit throw in cream 50×60 inches. Drape over sofa arm for instant warmth
- Wall Decor: Marble contact paper for quick frame facelifts, 2 rolls
- Framing Materials: Primed decorative molding strips for chunky frames, 8 feet
- Hardware: Brass U-channel mirror trim kit for thin metal frames
- Lighting: Warm LED strip light kit with dimmer for backlit mirrors
- Natural Elements: Reclaimed wood mirror frame kit for quick rustic builds
- Budget Finds: Peel-and-stick marble tiles for renters
- Upholstery: Linen blend upholstery fabric 1 yard for wrapped frames
- Tools: Adhesive rubber feet set to lift mirror trays
- Decorative: Natural sisal rope roll for nautical frames
Similar finds at Target and HomeGoods for many of these items if you prefer to see textures in person.
Shopping Tips
White oak beats dark wood in 2026. Design feeds have shifted completely. White oak floating shelves look current, not dated.
Grab peel-and-stick marble tiles for $20. Use them on thin frames to fake a high-cost material in a weekend.
Curtains should puddle or kiss the floor, never hang halfway up. 96-inch linen panels are right for standard 9-foot ceilings.
Lead with a single anchor piece, then add contrast. A large round mirror frame can support three smaller frames and keep a wall from feeling choppy.
Everyone buys five small succulents. One single 6-foot faux fiddle leaf fig has ten times the visual impact.
Frequently Asked Questions
Q: What mirror size should I buy for above a console?
A: Aim for about two thirds the width of the console. If your console is 48 inches wide, a mirror around 30 to 32 inches works well. Make sure the bottom of the mirror sits 4 to 6 inches above the table surface.
Q: Can I mix boho textile frames with modern furniture without it looking messy?
A: Yes. Keep scale and color balance in mind. Use the rule of three for accessories and an 80/20 color ratio so the boho piece reads like a deliberate accent instead of clutter.
Q: Can peel-and-stick materials damage my mirror or wall when removed?
A: Most modern peel-and-stick tiles and papers remove cleanly if you use a low-tack adhesive product. Test a small hidden area first and heat the adhesive slightly with a hairdryer when removing.
Q: How do I hang a heavy framed mirror safely?
A: Use a French cleat or two to three heavy-duty mirror clips anchored into studs when possible. For plaster walls, use toggles rated for the mirror weight. Always follow the hardware weight limits.
Q: Real plants or faux for styling around mirrors?
A: Both. Real fiddle leaf figs and snake plants add life but need light. A tall faux like a 6-foot fiddle leaf fig gives you height without maintenance. Place it opposite a window to get reflected greenery.
Q: What common mistake do people make when framing a mirror?
A: They choose a frame width that is out of proportion to the mirror and the wall. Match frame width to mirror size and room scale. For a large wall mirror, a 3 to 4-inch frame is usually the sweet spot.
Q: How do I make a mirror feel built-in without major work?
A: Paint the wall behind the mirror a slightly deeper shade and add a 1/4-inch reveal around the frame. This gives a built-in depth illusion without cutting into drywall.
Q: Is LED backlighting worth it for a hallway mirror?
A: Yes if your hallway lacks overhead light. Warm LEDs with a dimmer create ambient glow and pull the space together. Make sure to hide the driver behind the frame for a clean install.
