
My living room had nice furniture and decent lighting but it still felt like a waiting room. Took me embarrassingly long to figure out it was missing texture. Every surface was smooth, every color was flat, and nothing invited you to actually sit down. I started saving extra paint stir sticks and turned them into small, cheap upgrades that suddenly made the place feel lived in.
These ideas lean modern farmhouse with a few coastal and boho twists. Most projects are under $50, and many stay way under ten bucks. Works for living rooms, entryways, porches, and small apartment nooks.
Coastal Vase Wrap For Living Room
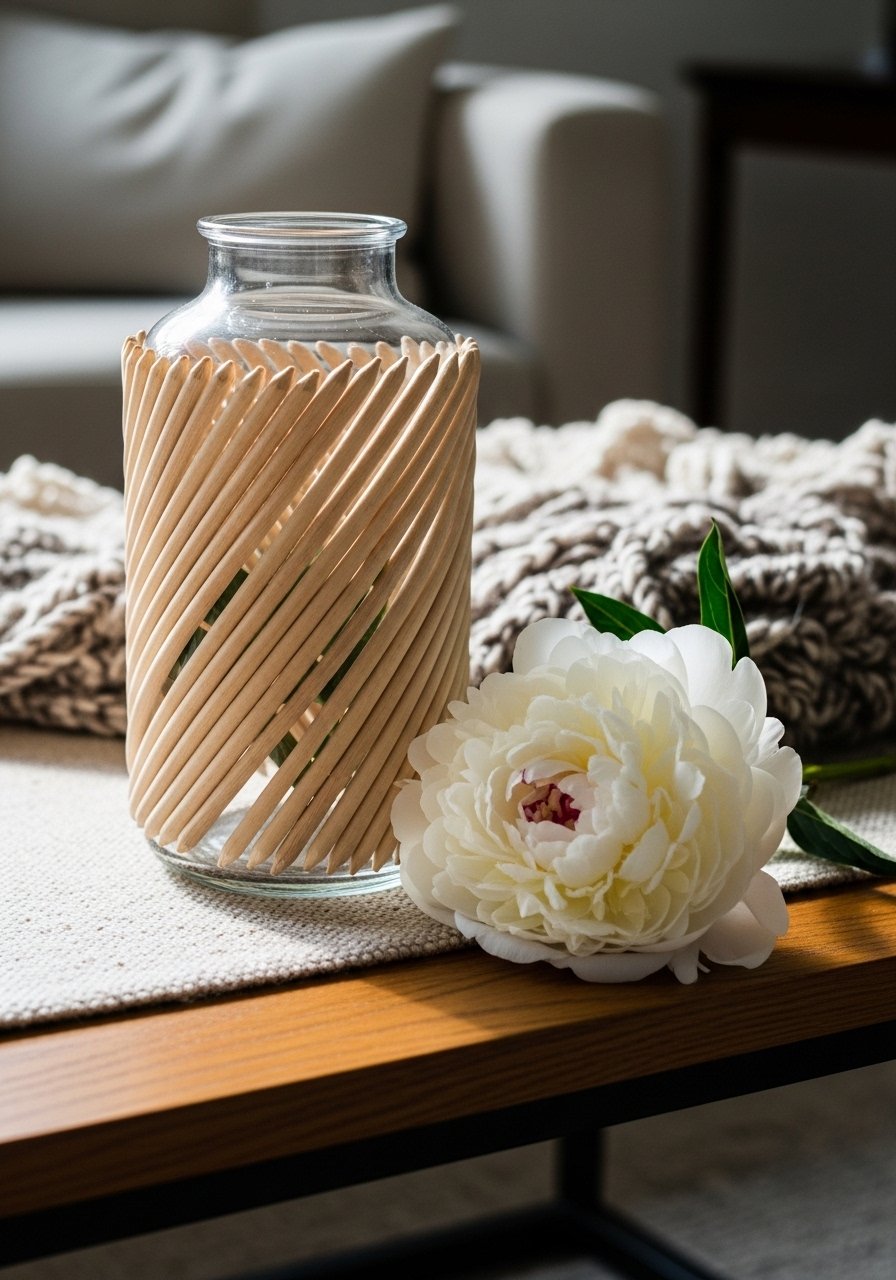
The vase wrap is the quickest piece that fooled guests into thinking I bought a boutique vase. Use 20 quart-size sticks glued vertically around a Dollar Tree vase, then glue two sticks slanted on opposite sides to break the straight lines. Stain before gluing so any drips stay even. I used craft glue and clamped with rubber bands while it dried. Most folks grab free sticks over paying for craft wood. A common mistake is gluing without lining sticks up first, which causes gaps. Measure the circumference and test-fit sticks before glue. I like adding a coat of clear spray for grip and to avoid splinters when you water flowers. Try matte clear spray if your vase will get handled.
Farmhouse Photo Frame Gallery For Hallway
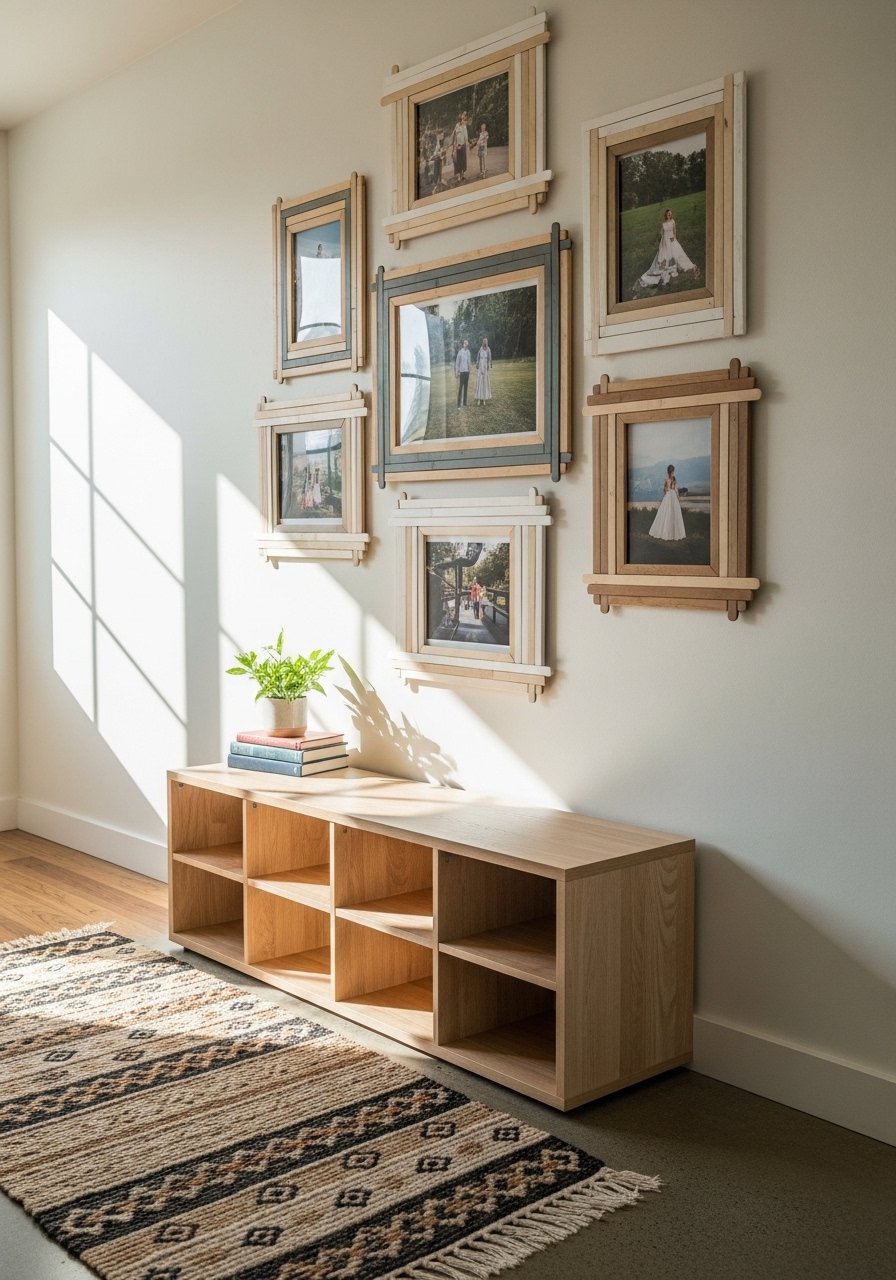
Gallery walls with slatted frames give real depth. Cut four sticks per 8×10 frame, handles removed, sanded smooth. Glue three slats horizontally for a thicker profile, then trim to size with a miter shears for cleaner corners. I leaned into a slightly distressed white paint and tied the frames together with jute for cohesion. The result reads farmhouse but not cliche. People often hang frames without staggering heights and the wall reads flat. Space frames so eye movement flows, roughly 2 to 3 inches between pieces. For quick hanging, use picture ledges and swap art without new holes. Brass picture ledges made switching photos painless.
Rustic Snowman Door Hanger For Seasonal Entry
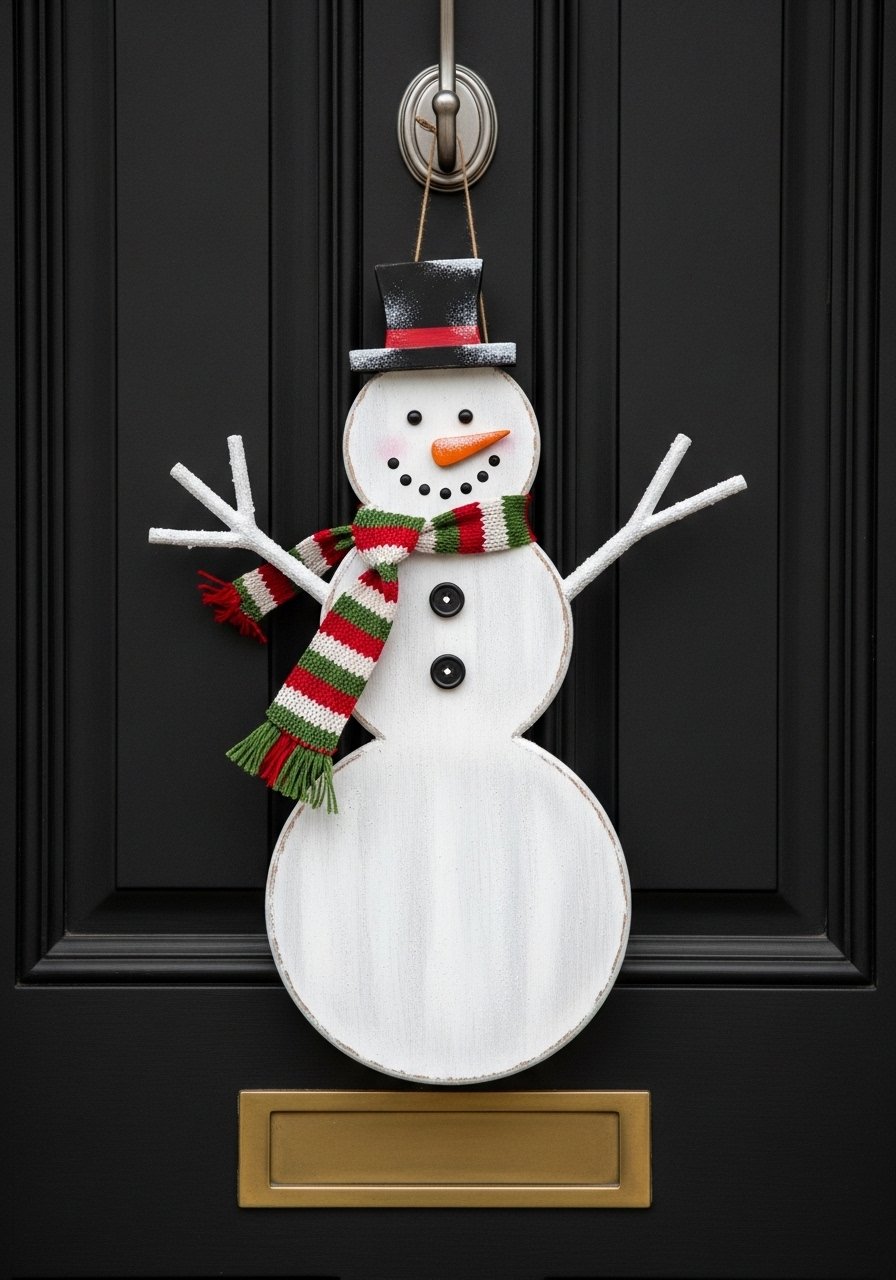
Snowman door hangers are a holiday win when you do them right. Glue 3-4 sticks side by side for the body and use two short sticks for a hat brim. Paint the body white, paint the hat black, and add a ribbon scarf. About two thirds of holiday makes start with stuff like free sticks. I wired a small battery LED inside the hat for a night glow, which felt modern and kept the piece from looking like a school project. The usual mistake is skimping on sealant and leaving raw edges that absorb moisture. If kids are helping pick non-toxic craft paints like washable acrylics.
Minimalist Storage Basket For Entryway
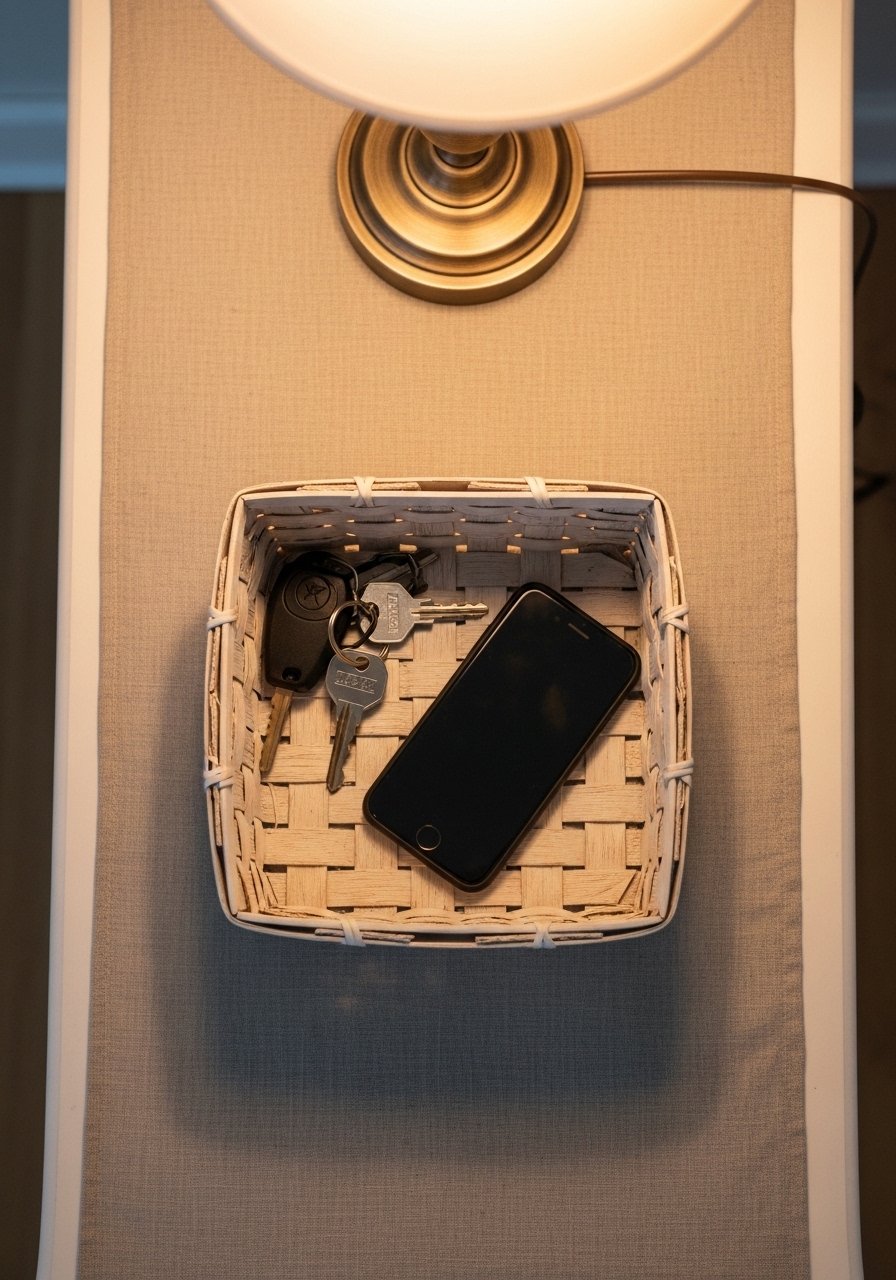
I turned four sticks and a short dowel into a small basket to corral daily clutter. Cut handles off four sticks, glue them into a square, then staple a thin dowel across the base for rigidity. Reinforce the back with two extra sticks glued across and you will have a basket that holds real weight. A common mistake is assuming glue alone will hold heavy items. Use small staples or a hot glue gun for extra strength. For stain, I like a light walnut rubbed on with a rag. These crafts stay way under ten bucks easy. If you live with pets, add a wipe-on sealant so nails do not cause splinters, a tip many tutorials skip.
Industrial Herringbone Dresser Makeover For Bedroom
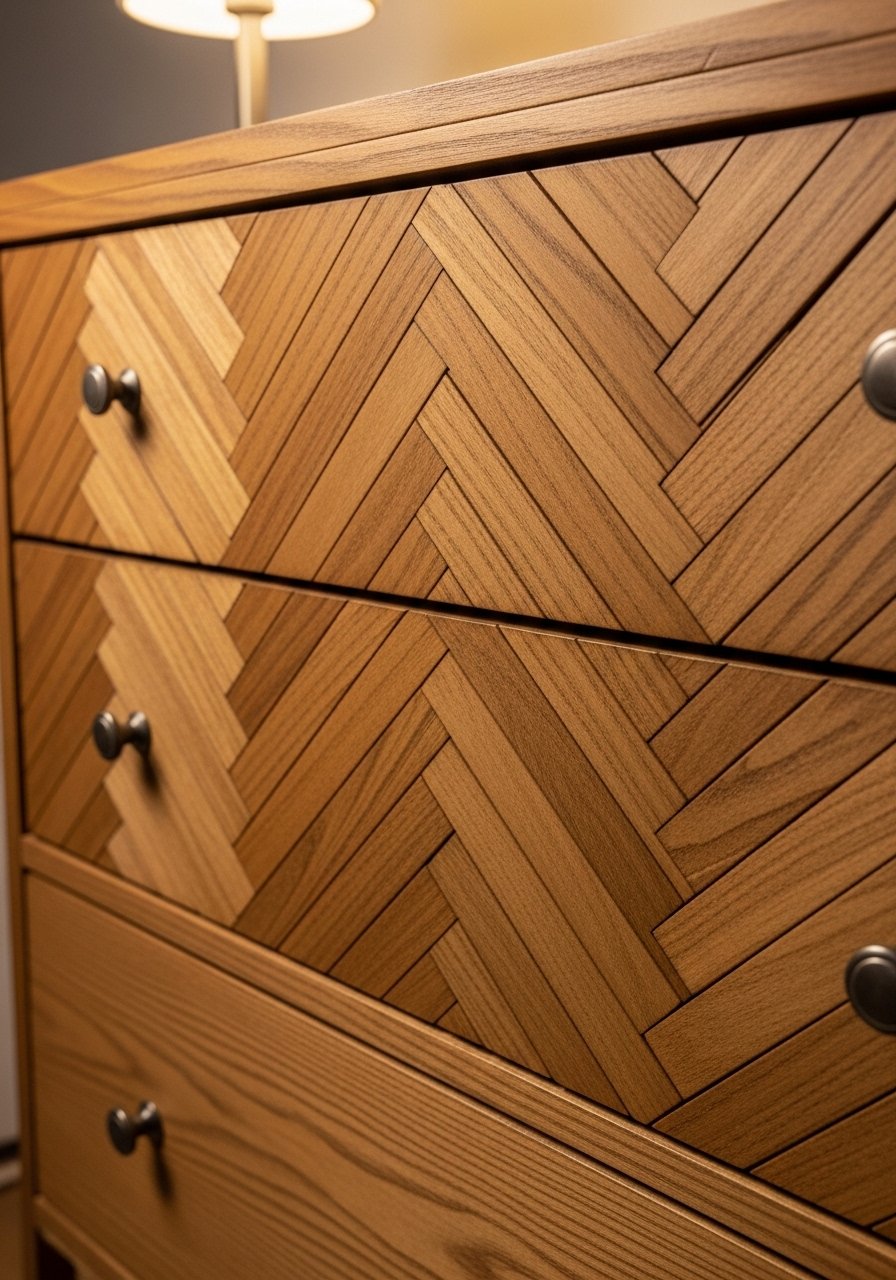
Covering a cheap dresser with a herringbone of stained paint sticks makes it look custom. You need about 50 sticks for a standard dresser face. Stain each stick before assembly, then lay them in a zigzag pattern and glue to the drawer fronts. Miter the ends for tight seams. I learned the hard way that staining after gluing causes bleed and uneven tone. The trick is a small spacer block to keep rows true while the glue dries. Most mistakes come from not planning the pattern layout first and cutting too many short pieces. This one took me two hours but the result hid scratches and saved me $400 on a new piece. Minwax stain works well for an even finish.
Scandi Lamp Shade Wood Ring For Bedroom
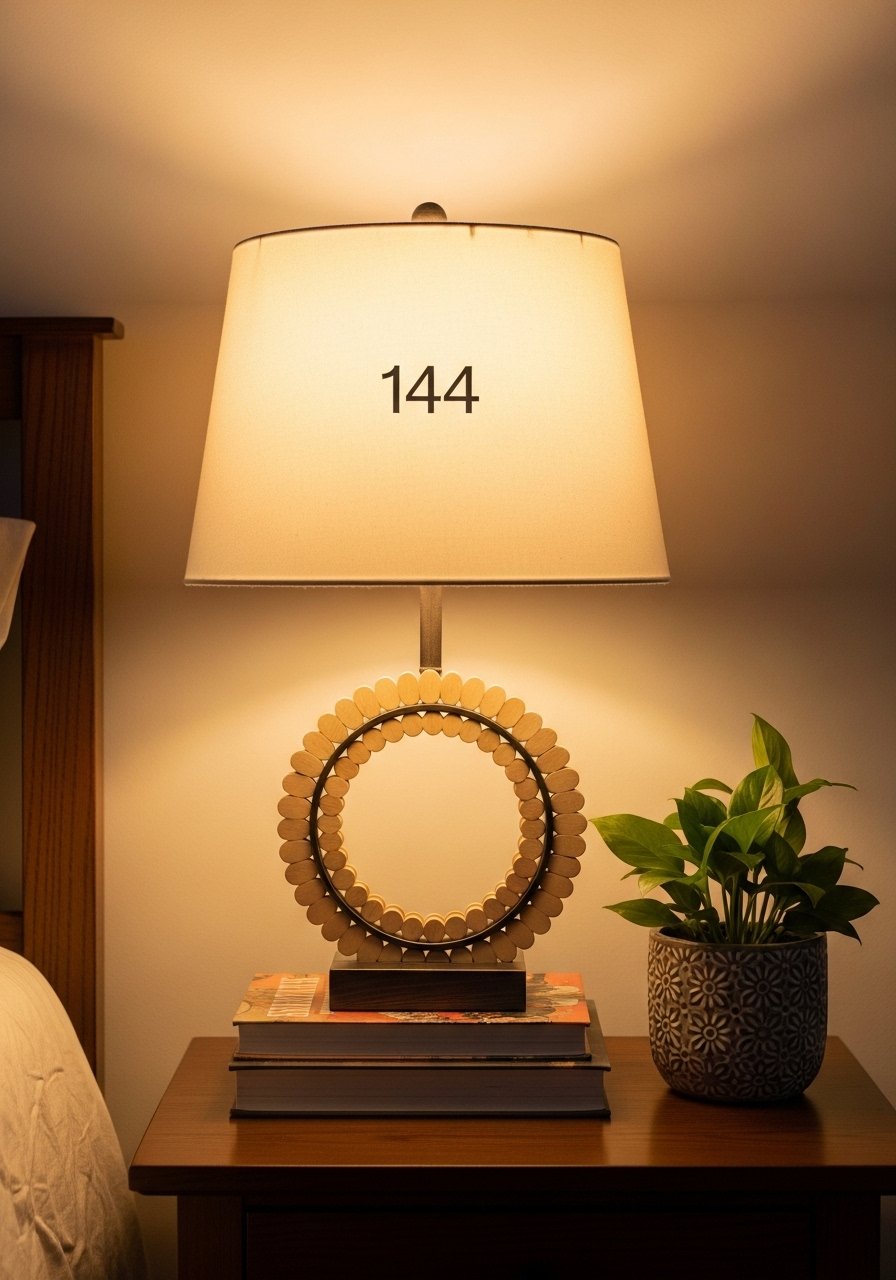
I wrapped full-length sticks around a drum shade to add wood grain to a simple lamp. Use 21-inch sticks if you can find them for a clean vertical wrap, or trim quart sticks to fit a 14-inch shade. Glue at the top and bottom and use removable glue dots if you are in a rental. The lamp instantly felt calmer, as if someone spent more on lighting. Common errors include overlapping without trimming, which bulks the seam. Pair this with a linen shade and the look reads Scandinavian and soft. If you want to swap the look seasonally, use Velcro tabs for a no-damage option. Removable adhesive dots are a renter-friendly win.
Boho Flower Box Planter For Porch
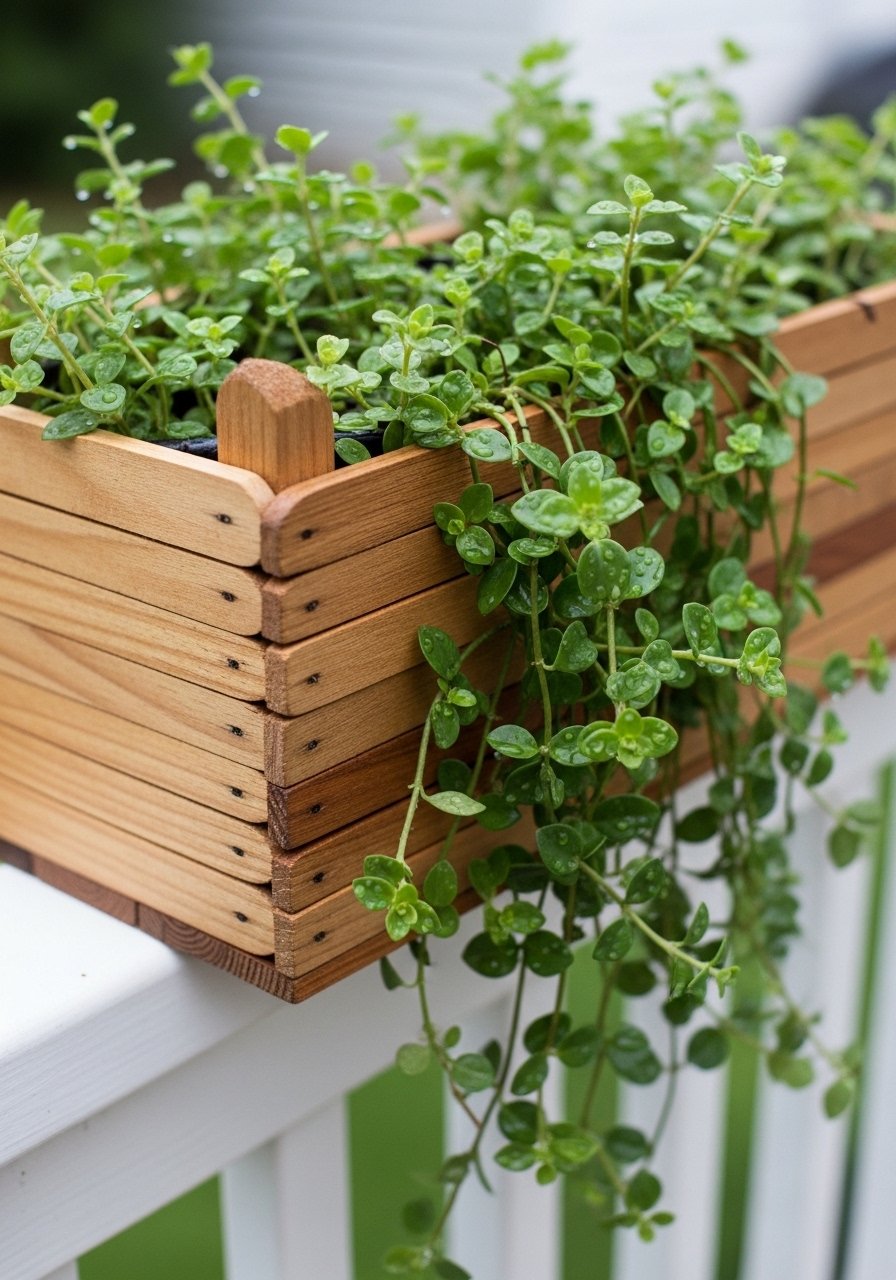
A paint stick flower box is a porch pick-me-up that you can swap seasonally. Glue sticks into a box shape, reinforce corners with small screws, and line the inside with a plastic planter liner to avoid swelling. If you plan to keep it outdoors, seal every surface with a waterproof exterior sealer. Many DIYs forget to seal the inside where water hits first. I stained mine a warm honey and planted succulents that barely care for attention. The budget is low, roughly $5 to $12 for liner and screws, depending on what you already have. For longevity, recoat the sealer each season.
Coastal Bottle Vases For Mantel
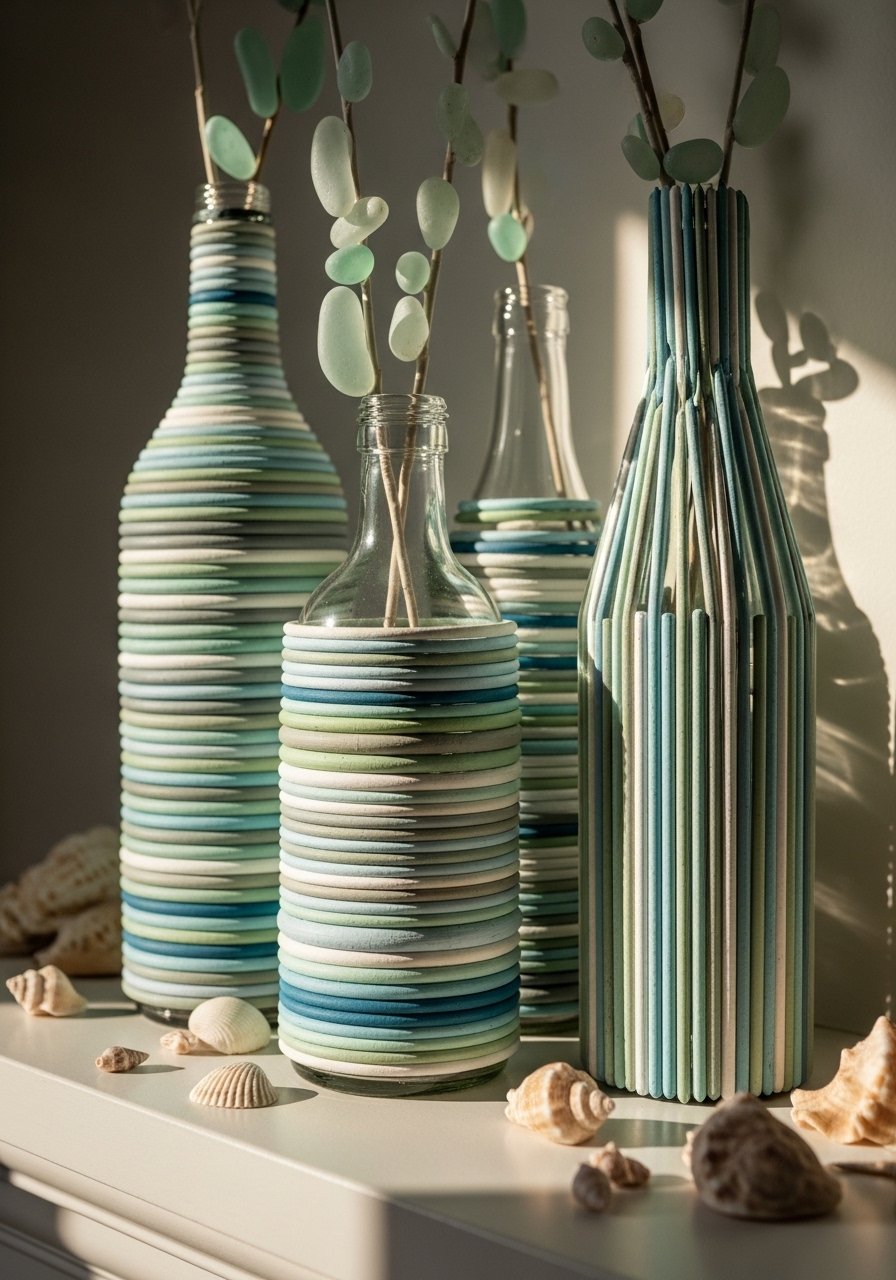
Create a trio of bottle vases by wrapping 6 to 8 sticks around each bottle and finishing with sea-glass spray paint for a coastal feel. Spray first, then glue, or glue and touch up as needed for a layered look. People often try to wrap without measuring so bottles end up uneven. I match heights by using one tall 21-inch stick based ring for the tallest bottle and shorter rings for others. These are great for mantel or grouped on a console. Spend $4 to $10 on a good spray paint and the result looks curated. If you want a quick purchase, sea-glass spray paint gives a uniform finish.
Grandmillennial Oversized Wall Panel For Living Room
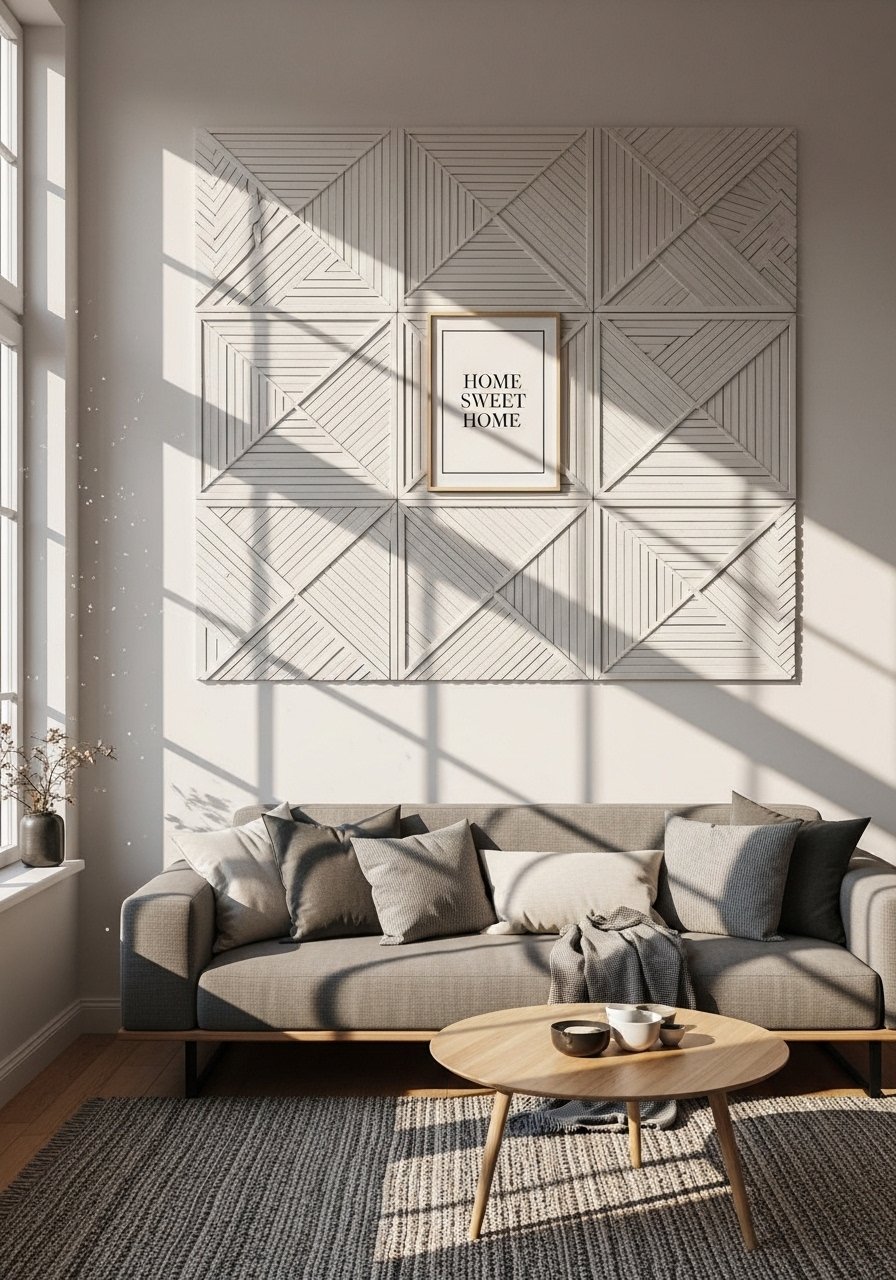
I used six large sticks plus two small cut for a bold wall panel that finally filled the giant wall behind my couch. Miter the corners for tight edges and paint the panel a soft white so it reads like real joinery. The trick most people miss is pre-painting sticks before assembly to avoid touch-ups on seams. For hanging, use two heavy-duty picture hooks or command strips rated for the weight if you are in a rental. A common pain point is warping over time, so seal the back and front to reduce moisture movement. This piece cost nearly nothing if you use free hardware store sticks, and it reads higher end than it is.
Boho Ladder Shelf Steps For Plants And Small Spaces
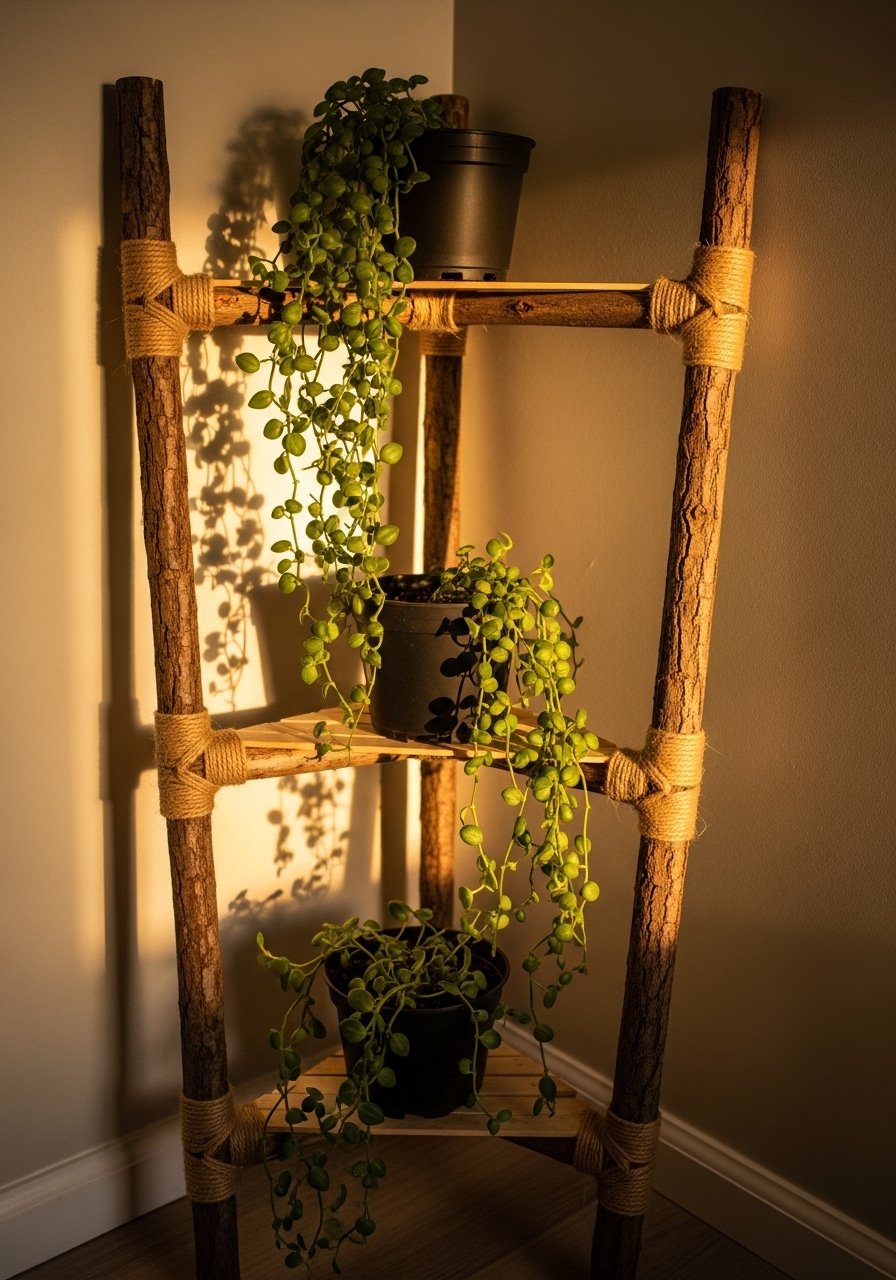
One afternoon I realized I needed more plant surfaces but not a big shelf. I glued leftover 5-gallon sticks as rungs between two longer sticks, then wrapped the joints in twine. It holds small pots and fits a narrow corner perfectly. The usual mistake is using glue only for rungs that support weight. Add small metal brackets or extra glue blocks on the underside of each rung for stability. This is perfect for apartments where you want vertical green without drilling. Pet owners note the wrapped twine can attract chewing, so bind the lower rung with clear epoxy or choose sealed wood. Pair this with the coastal bottle vases idea for a layered look.
Your Decor Shopping List
- Honestly the best $40 I have spent, Chunky knit throw in cream in 50×60 inches, perfect over a sofa arm
- For the lamp ring and small builds, Removable adhesive dots (pack of 100) are renter-friendly and cheap
- For staining or touch-ups, Minwax stain small can in walnut, use sparingly for consistent color
- For finishing outdoor boxes, Exterior clear waterproof sealer keeps wood from swelling after rain, similar options at HomeGoods
- For hobby cutting and cleaner corners, Miter shears for craft wood speed the job up and reduce splinters
- For seasonal bottle vases, Sea-glass spray paint gives that coastal finish without special glass treatments
- For hanging gallery frames without nails, Brass picture ledges (~$18-25) let you swap photos fast
- For kid-safe painting, Washable acrylic paints set keeps craft time low stress
Shopping Tips
White oak beats dark wood in 2026. Design feeds have shifted completely. These white oak floating shelves look current, not dated.
Grab removable adhesive dots for renter-friendly builds. Use them on lampshades or vase wraps so you can swap without damage.
For stain work, buy a small can like Minwax stain small can and test on scraps. It is cheaper than guessing and repainting later.
Curtains should puddle or kiss the floor, never hang halfway up. These 96-inch linen panels are right for standard 9-foot ceilings.
If you have pets, choose a wipe-on sealant like Exterior clear waterproof sealer for outdoor boxes and the underside of plant shelves.
Frequently Asked Questions
Q: How do I stop paint sticks from warping?
A: Seal them before and after assembly. Stain or paint individual sticks, let them dry flat, then glue and add a clear coat. That reduces movement and warping over time.
Q: Can these projects survive kids helping paint?
A: Yes, if you pick washable paints and simple builds. Use washable acrylic paints set and avoid thin brittle joints. Supervise gluing and clamp while drying.
Q: What is the easiest project for a small apartment?
A: The ladder shelf steps or the vase wrap. Both fit narrow footprints and use very few sticks. The ladder shelf can hide behind a sofa or in a corner and the vase sits on any table.
Q: Do I need power tools to cut sticks?
A: No. Miter shears for craft wood cut sticks cleanly and cheaply. For thicker sticks a small hand saw works too. The trick is measuring twice and test-fitting.
Q: How do I keep outdoor planters from swelling?
A: Line the interior with a plastic liner, pre-seal every surface, and recoat the sealer each season. If you live in a wet climate, raise the planter off the surface slightly so water does not pool beneath it.
Q: Can I make these projects pet-proof?
A: Yes. Sand every edge smooth, use a wipe-on sealant, and avoid exposed twine where pets might chew. For extra protection, coat lower edges in clear epoxy so nails and mouths do not create splinters.
