
My living room had nice furniture and decent lighting but it still felt like a waiting room. Took me embarrassingly long to figure out it was missing texture. Every surface was smooth, every color was flat, and nothing invited you to actually sit down. I started making small clay trays and little dishes and that quiet, handmade touch pulled the whole room together.
These ideas lean modern farmhouse with a touch of boho. Most projects are under $20 each, with a few up to $40 for nicer finishes. Works for kitchens, bedrooms, entryways, or any small corner that needs personality. Most folks stick to air dry since no oven hassle. You can knock out these for under 20 bucks easy.
Pressed Flowers Tray For Bedroom Dresser, Boho
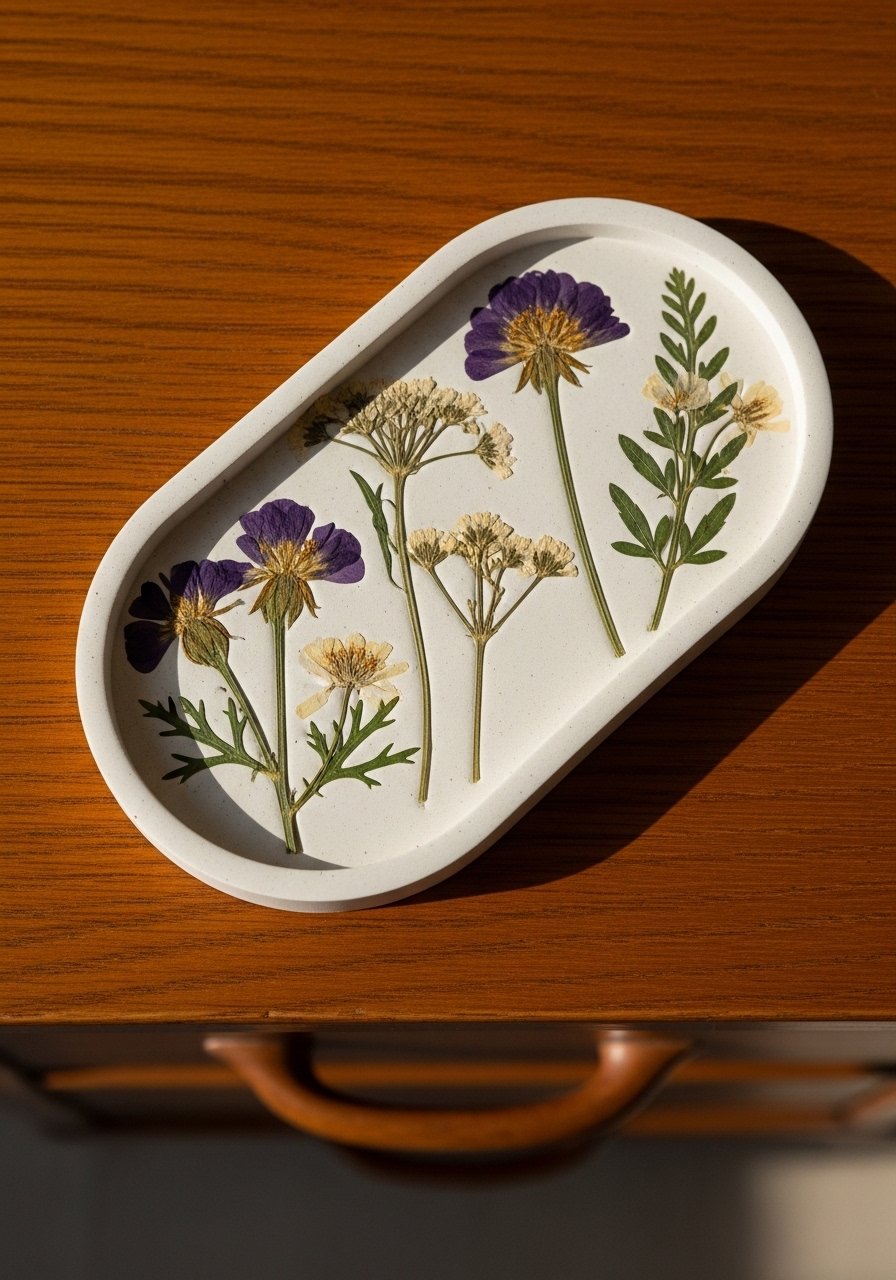
The first tray I made used blooms from my backyard and suddenly my dresser stopped being a catchall. Roll clay to about 1/4-inch thick, press flowers into the wet surface, then lift the edges with a bowl as a mold so it dries flat and slightly cupped. Let it dry 48 hours on a cool flat surface, and wait 24 hours after touch-dry before painting. I used Crayola air dry clay for predictable texture. Common mistake is pressing flowers after the clay skins over. Press while it is fully wet for crisp imprints and better color hold.
Rope Wrapped Clay Bowl For Shelf, Coastal Rustic
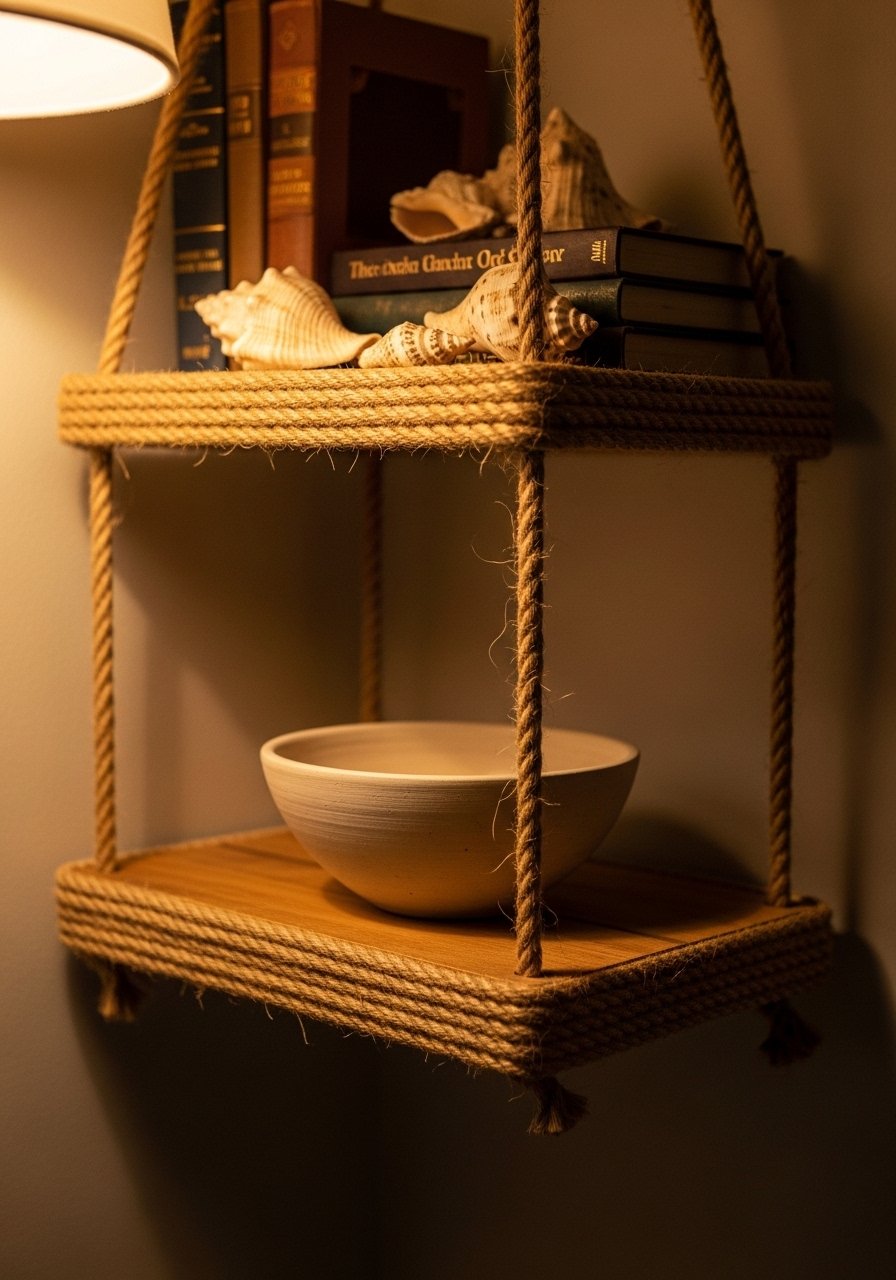
I wanted texture on a shelf without shelving a bunch of ceramic. Make a shallow clay bowl over a glass bowl mold, then wrap the outside with jute while the clay is still damp. The rope embeds, creating a two-tone look that reads expensive. Roll to 1/4-inch on the base, and support it in the bowl so it does not warp as it dries. I finished mine with a matte varnish after 48 hours to keep puppy noses from ruining the finish. Try natural jute rope for a quick update that looks high-end on a budget.
Citrus Slice Magnets For Kitchen Fridge, Playful
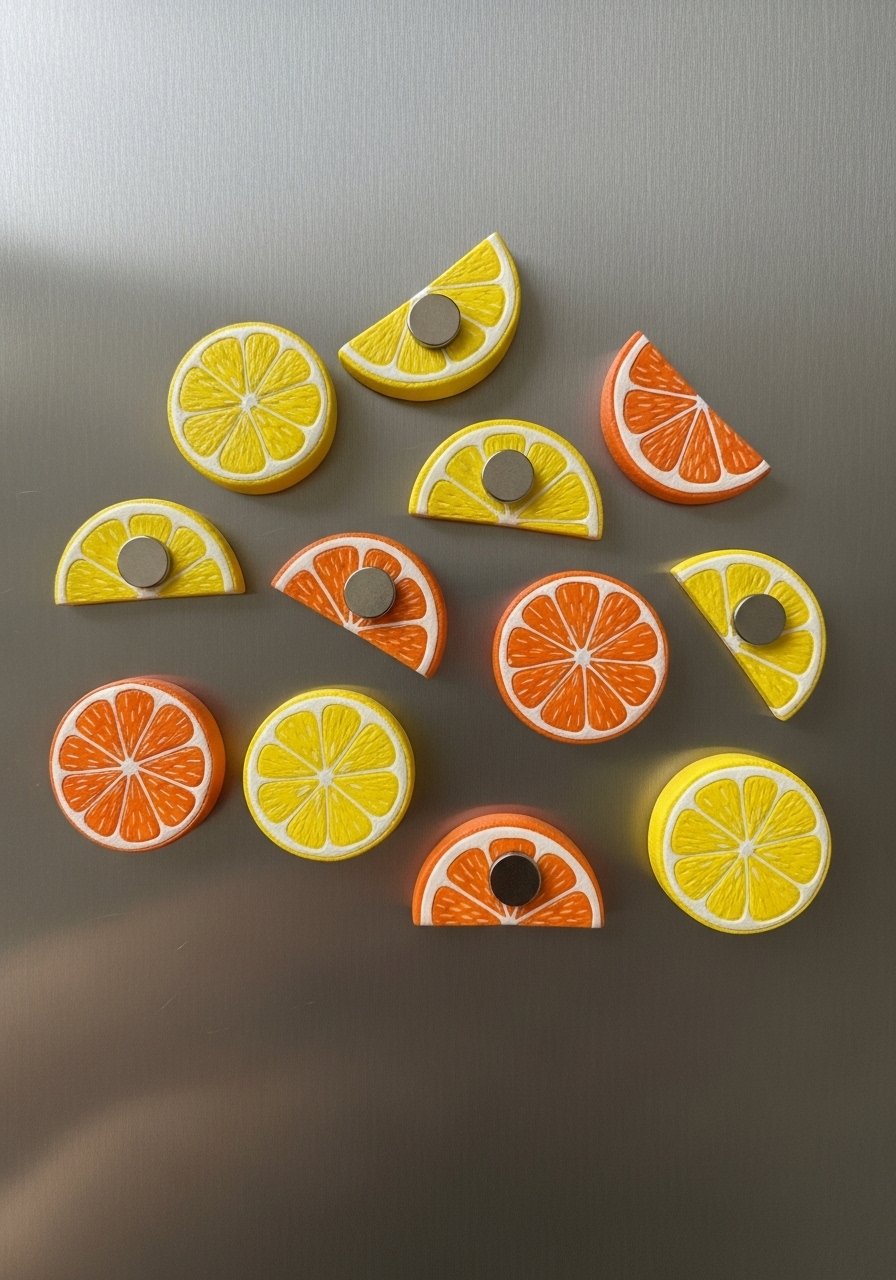
These are the weekend project my niece actually finished. Cut thin rounds, score the segments lightly, and poke a small hole for a tiny magnet or glue a magnet disk after the clay dries 48 hours. Paint with acrylics once it is fully dry and sealed. I used a kid-safe palette and clamped the piece down on a flat board while drying to avoid warping. If kids lose interest, make this a race: everyone paints two slices in 20 minutes. Grab small magnet disks so the pieces actually stick to the fridge.
Cactus Candle Holders For Dining Table, Modern Boho
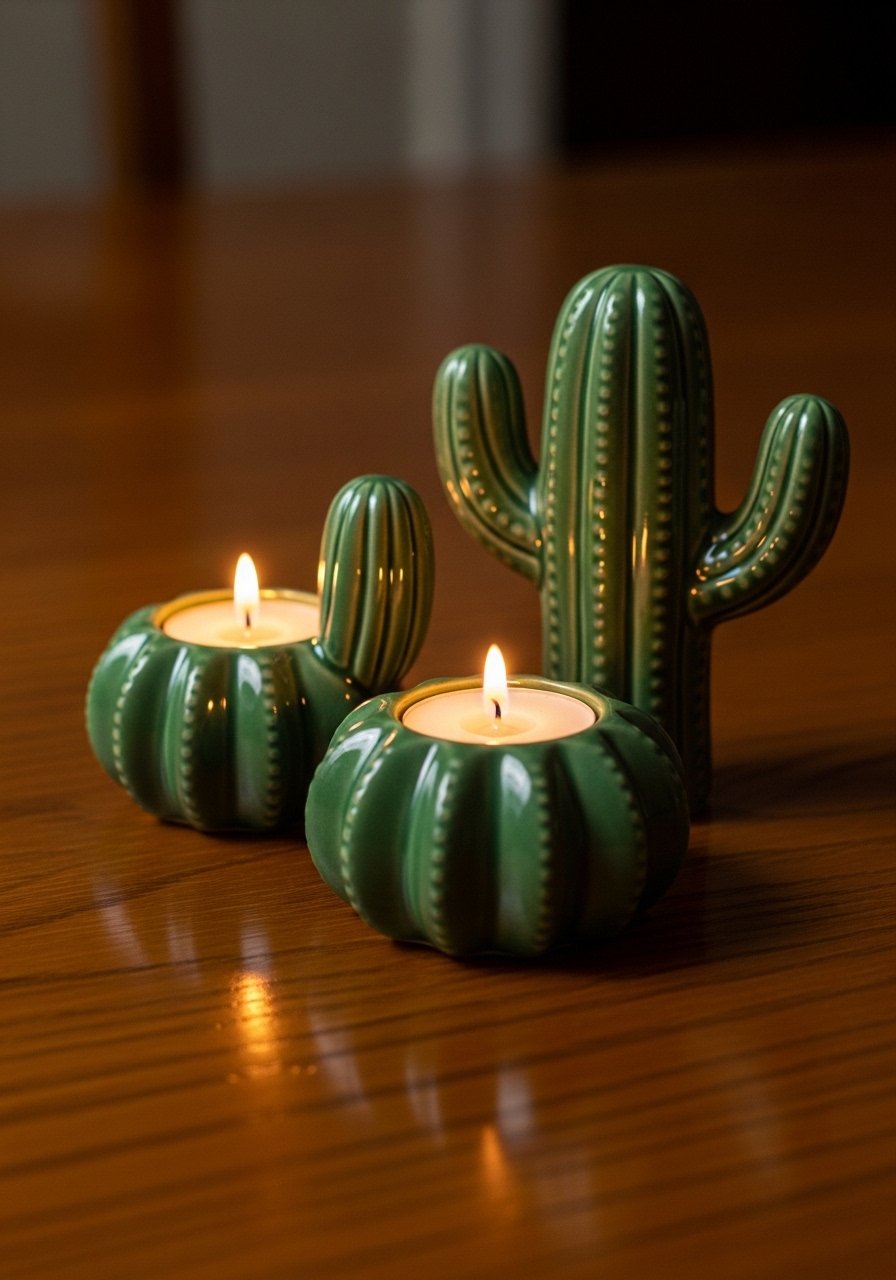
No watering required and they make a table feel lived-in. Sculpt small rounded forms and carve a shallow well for tea lights, or press a metal tealight cup into the wet clay. Keep bases at least 1/4-inch thick so they do not crack while drying. If paint flakes off the first day, you probably painted too soon. Wait 24 to 48 hours after drying before painting and then seal with clear varnish. I used tea light metal cups to make consistent wells and avoid hot wax contact with the clay.
Embossed Star Wall Pieces For Hall, Scandinavian Simple
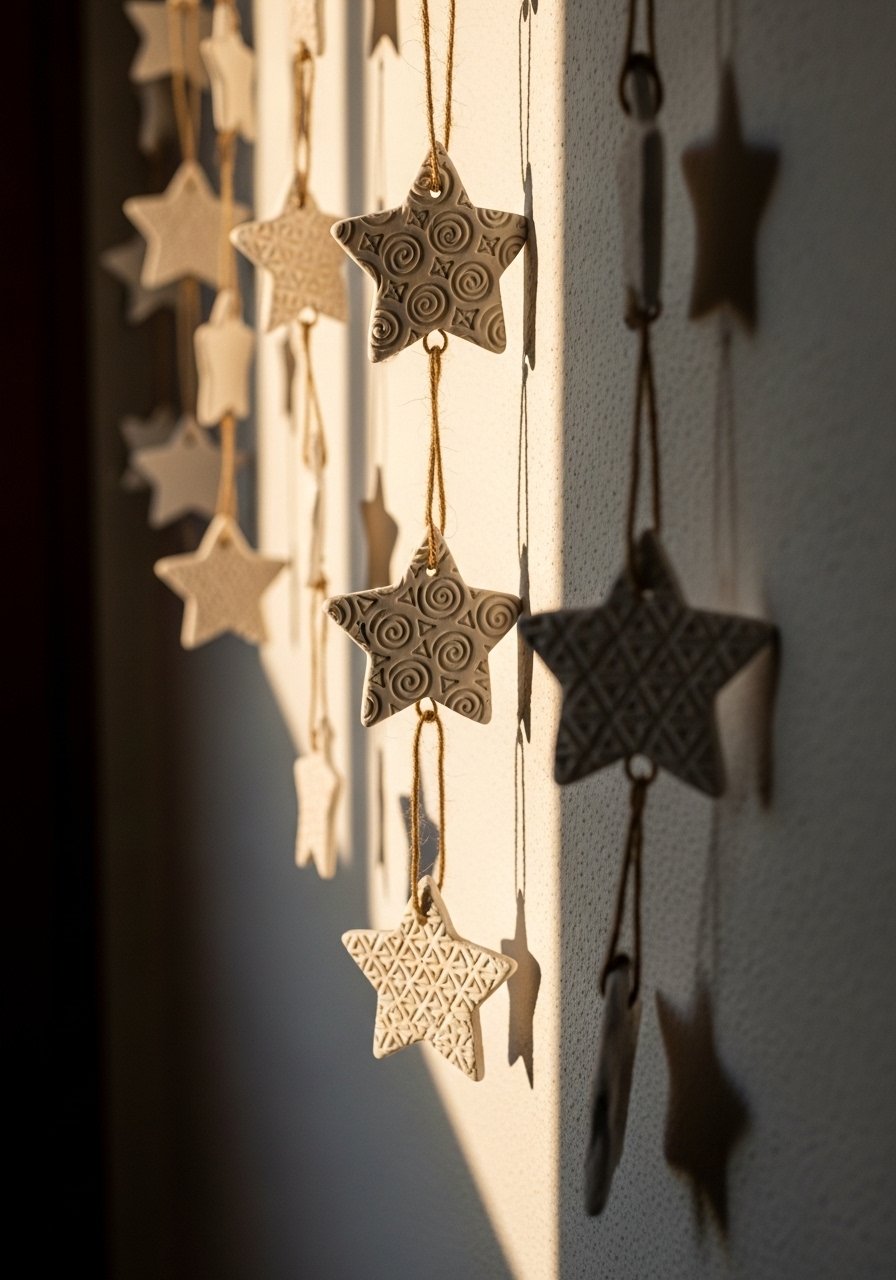
I stamped stars for my entryway because flat walls needed something small-scale. Roll even 1/4-inch slabs and press in rubber stamps or lace, then cut stars with a cookie cutter. Add a small loop for hanging before it hardens. Dry on a flat board for 48 hours so the shape does not cup or warp. A typical mistake is not smoothing edges; run a damp finger around the perimeter once the clay firms, then leave it to finish drying. Hang on Command hooks so renters can join in without drilling. I used small rubber stamps for crisp textures.
Stamped Pen Pots For Home Office, Minimalist
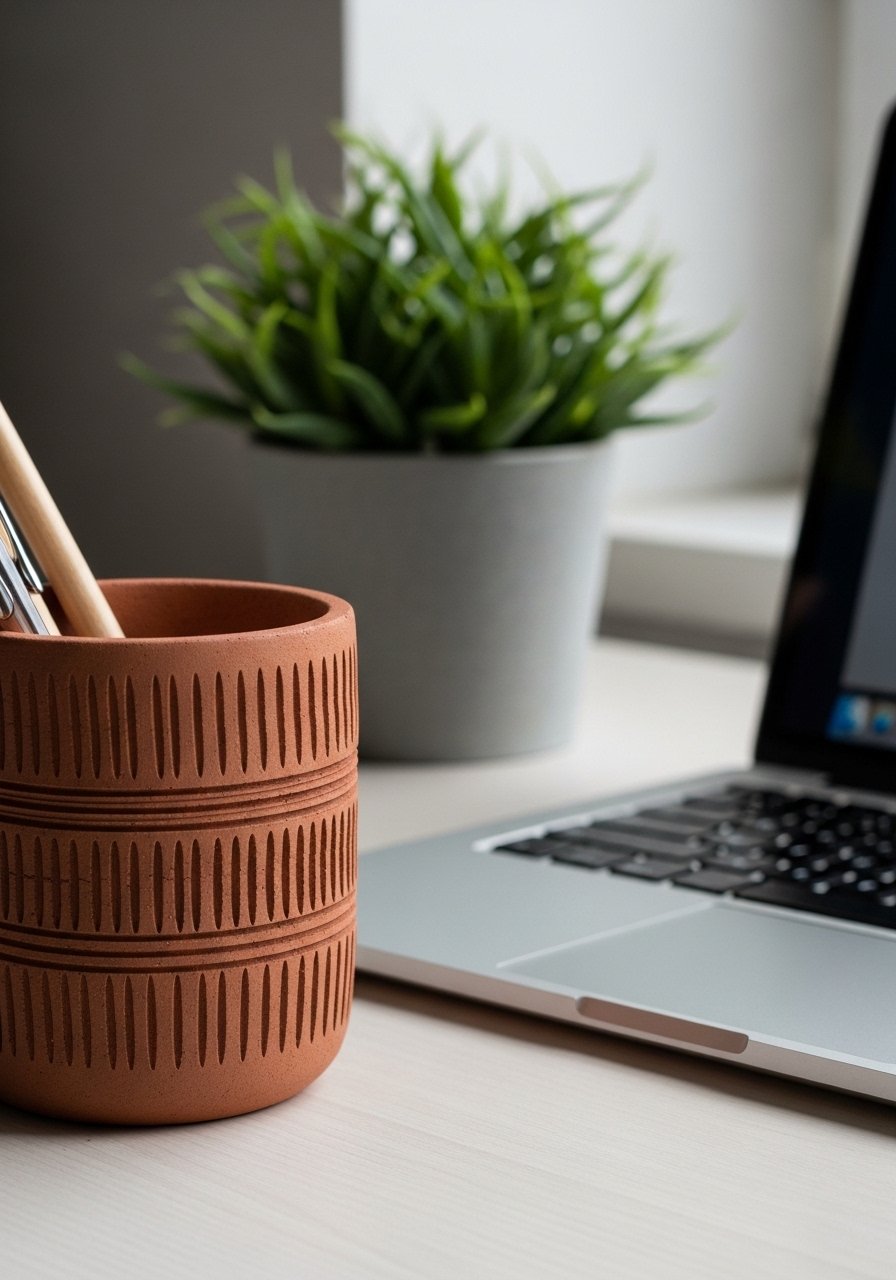
My desk felt anonymous until I made a few stamped pots for pens and brushes. Use a glass jar as a form, wrap clay around it, and stamp the surface while wet. Make the walls about 1/4-inch thick for durability. Let the piece dry fully for 48 hours, then paint the inside only to avoid flaking. One common mistake is pressing stamps too hard, which thins the wall. Press gently and keep a damp sponge handy to even seams before it sets. Pair this with the pebble planters below for a cohesive desktop group. Try small glass jars to shape consistent pots.
Beaded Trinket Dish For Vanity, Eclectic
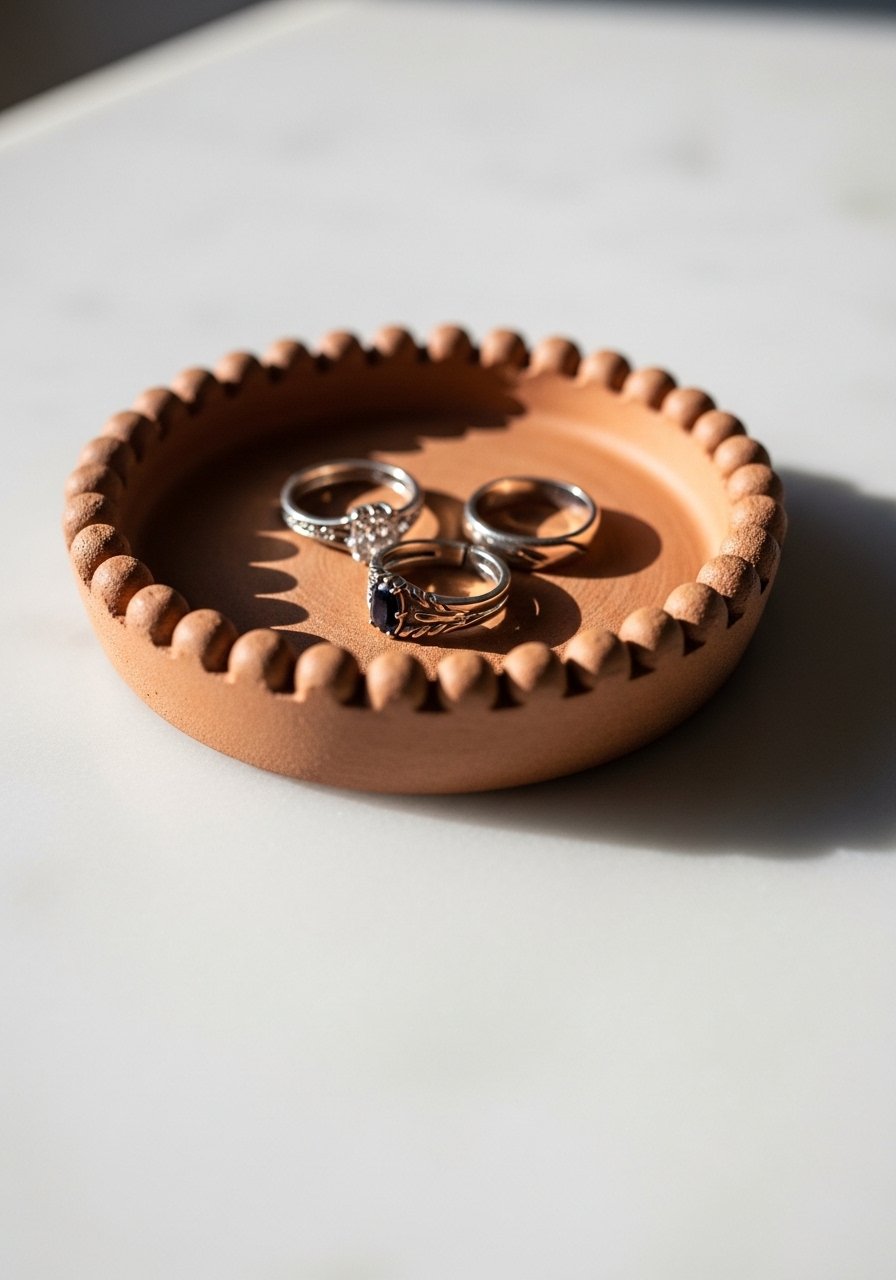
This is the tiny thing that changed my nightstand. Roll a 1/4-inch disc, press the beads or faux pearls into the edge while wet, then lift the rim slightly by setting over a small cup to create a shallow bowl. Let it dry flat for 48 hours and sand lightly if needed after fully dry. People pack too many beads too close and the rim weakens. Keep the decoration 1/8-inch from the edge and the base at least 1/4-inch thick. Seal with a satin varnish to stop paint from flaking. I used assorted craft beads for a playful rim.
Chunky Flower Coasters For Coffee Table, Farmhouse
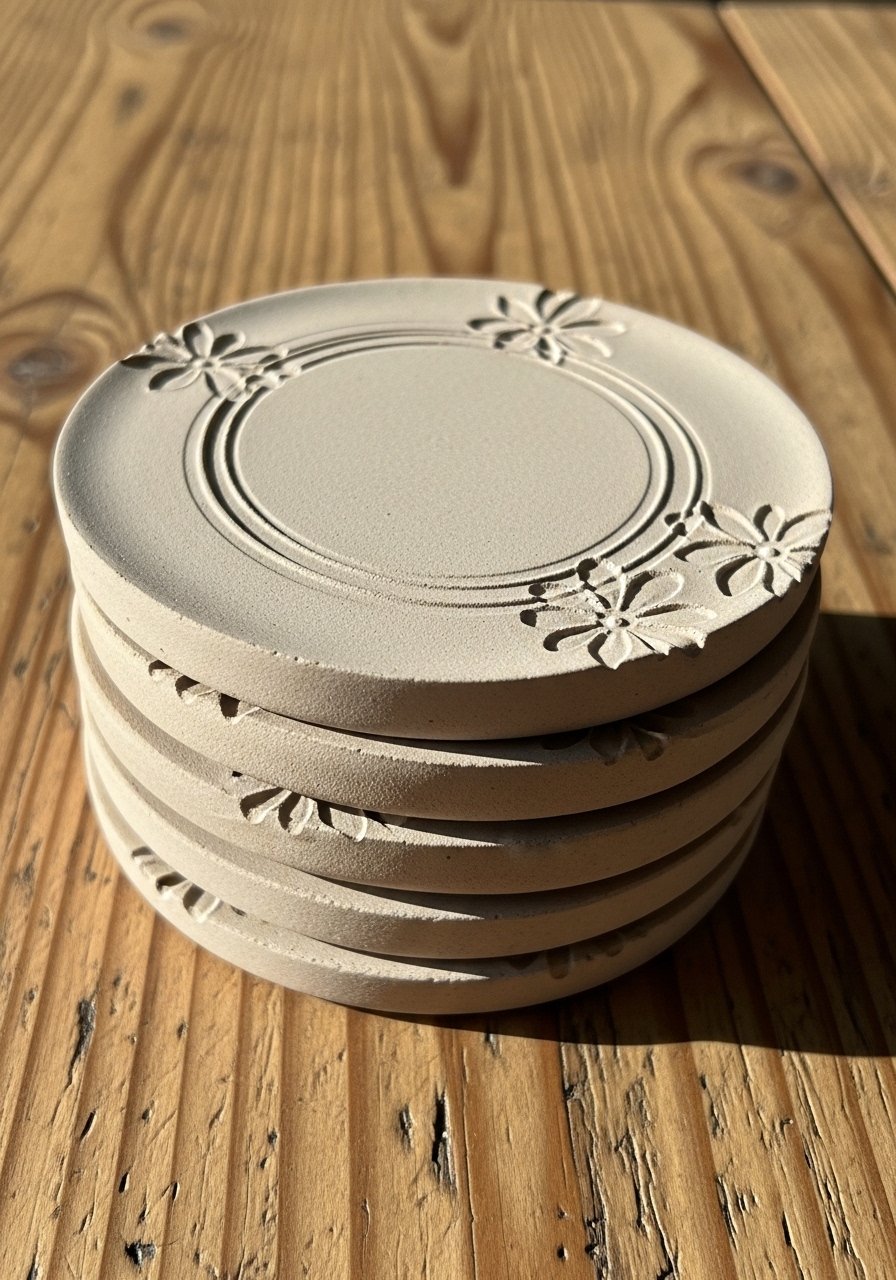
I made coasters after giving away too many water rings. Roll clay to a chunkier 1/4-inch thickness and carve shallow petals. Punch a felt backing on each once dry to protect your table. Dry slowly on a flat surface for 48 hours to avoid warping. A common pitfall is rolling too thin to save clay and then getting cracks. Thicker coasters survive daily use. I painted the petals with a thin acrylic wash and then varnished. For quick kits, try self-adhesive felt pads to finish the bottoms.
Color Pop Bookends For Shelves, Colorful Modern
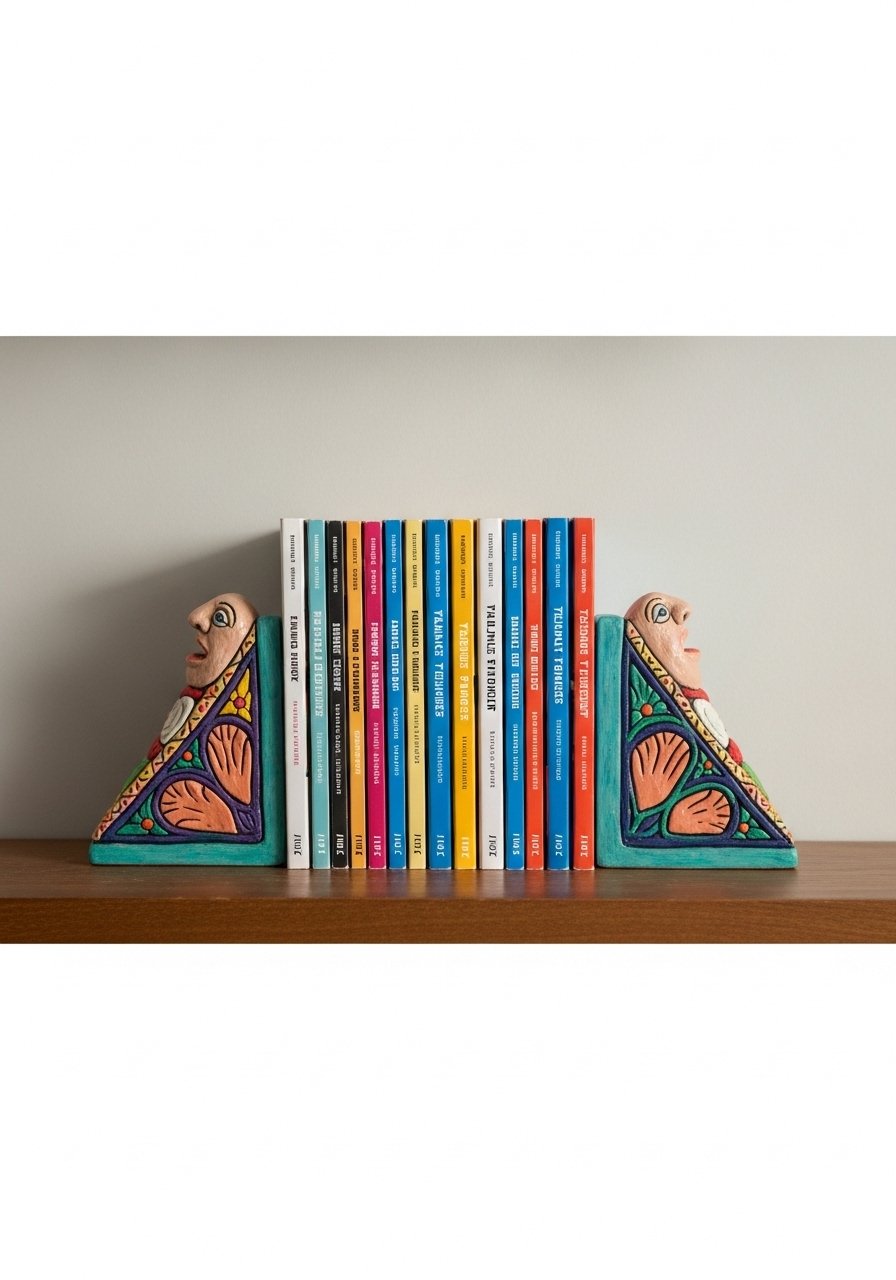
Bookends are where weight and color meet. Build a wedge that is about 3 inches thick at the back and taper to 1 inch at the front, then reinforce the base with a dried clay slab. Let these cure 48 hours flat. A lot of DIY bookend tutorials skip the reinforcement and the pieces crumble under heavy books. Paint only after the first 24 hours of hardness and then add a clear varnish so the paint does not flake. I like a glossy pop on one end of the shelf to balance textiles on the sofa. Use heavy-duty clay armature boards if you want extra heft inside.
Seashell Watercolor Palettes For Art Corner, Beachy Creative
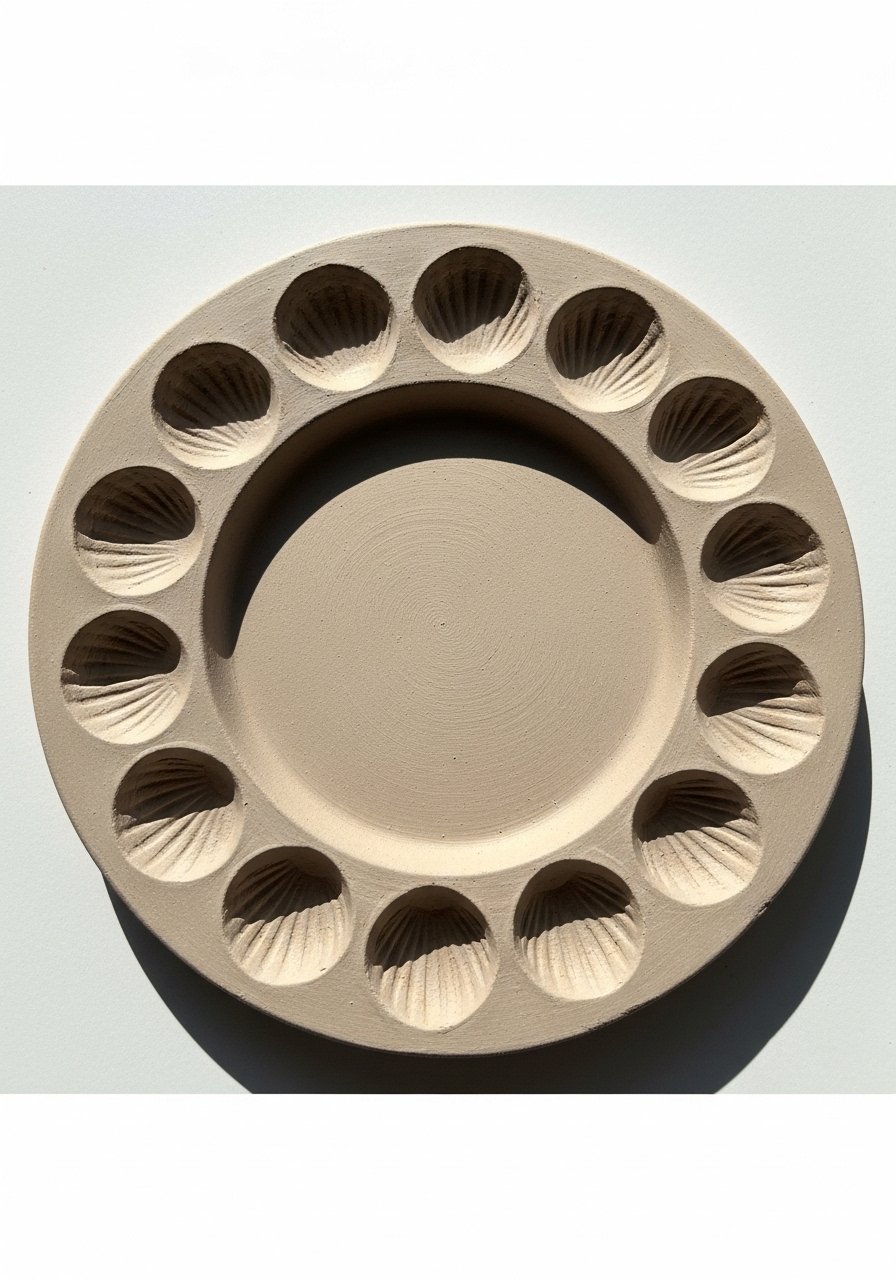
I made palettes that look like little tide pools. Press small shells into a clay disc to create wells for paint, keeping each well about 3/4-inch wide and the disc 1/4-inch thick. Dry flat for 48 hours and seal with a matte varnish where paint will sit. One snag is making wells too shallow; they should be deep enough to keep pigment separate. These are perfect for an art corner and also cute as soap dishes by the guest room sink. Grab a pack of shells like mixed-seashells to press in.
Bubbled Texture Coasters For Kids Table, Fun Textured
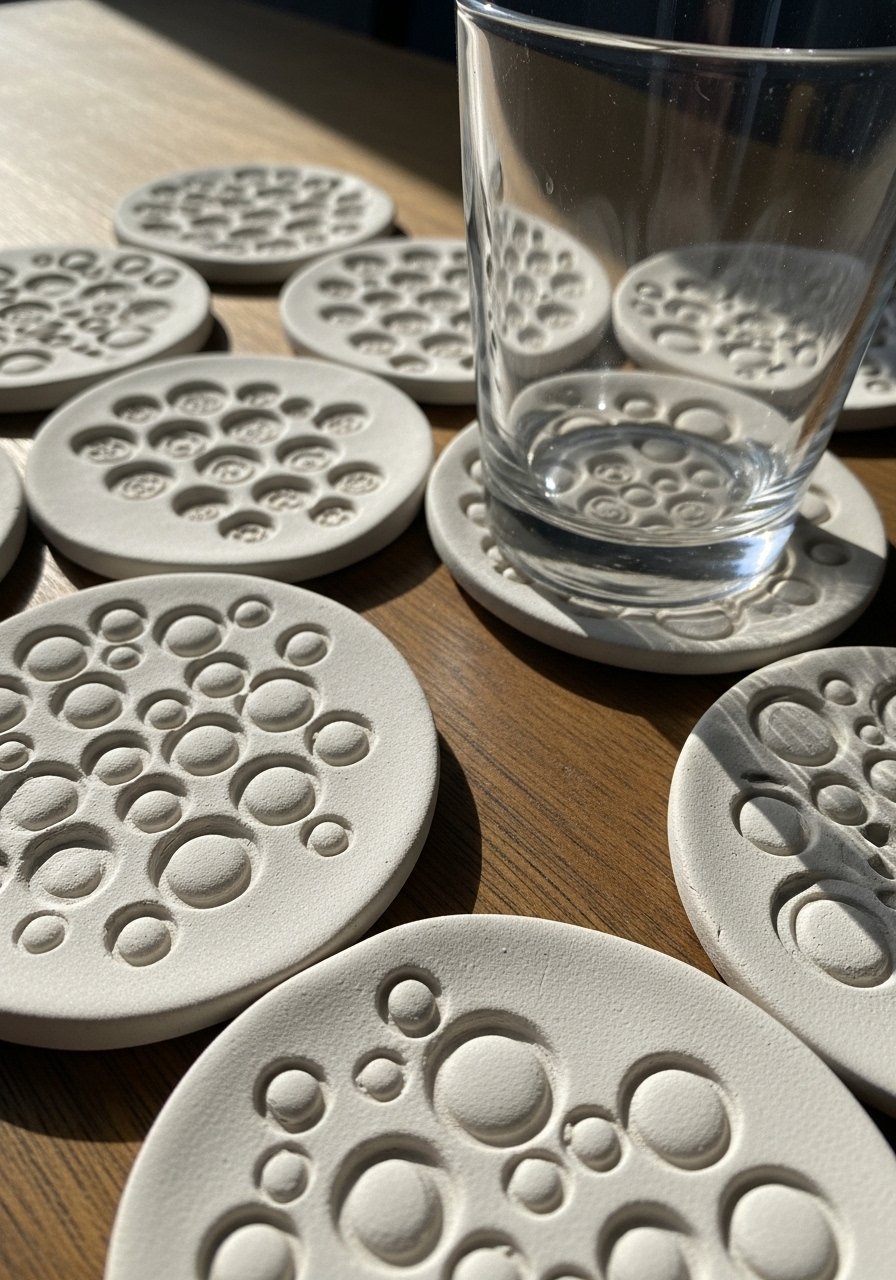
Bubble textures are an instant win with kids because they get a tactile finish they can squish at the end. Press bubble wrap into wet clay for a fun surface, then cut to 3.5-inch rounds and roll to a sturdy 1/4-inch thickness. Dry flat on a board so bubbles do not flatten. If kids lose interest quickly, keep these to 20 minutes for shaping and 10 minutes for the first paint stage. Seal with a wipeable varnish for real-life use. For supplies, I used a small rolling pin and kid-safe acrylics.
Flower Frog Disc For Vases, Vintage Floral
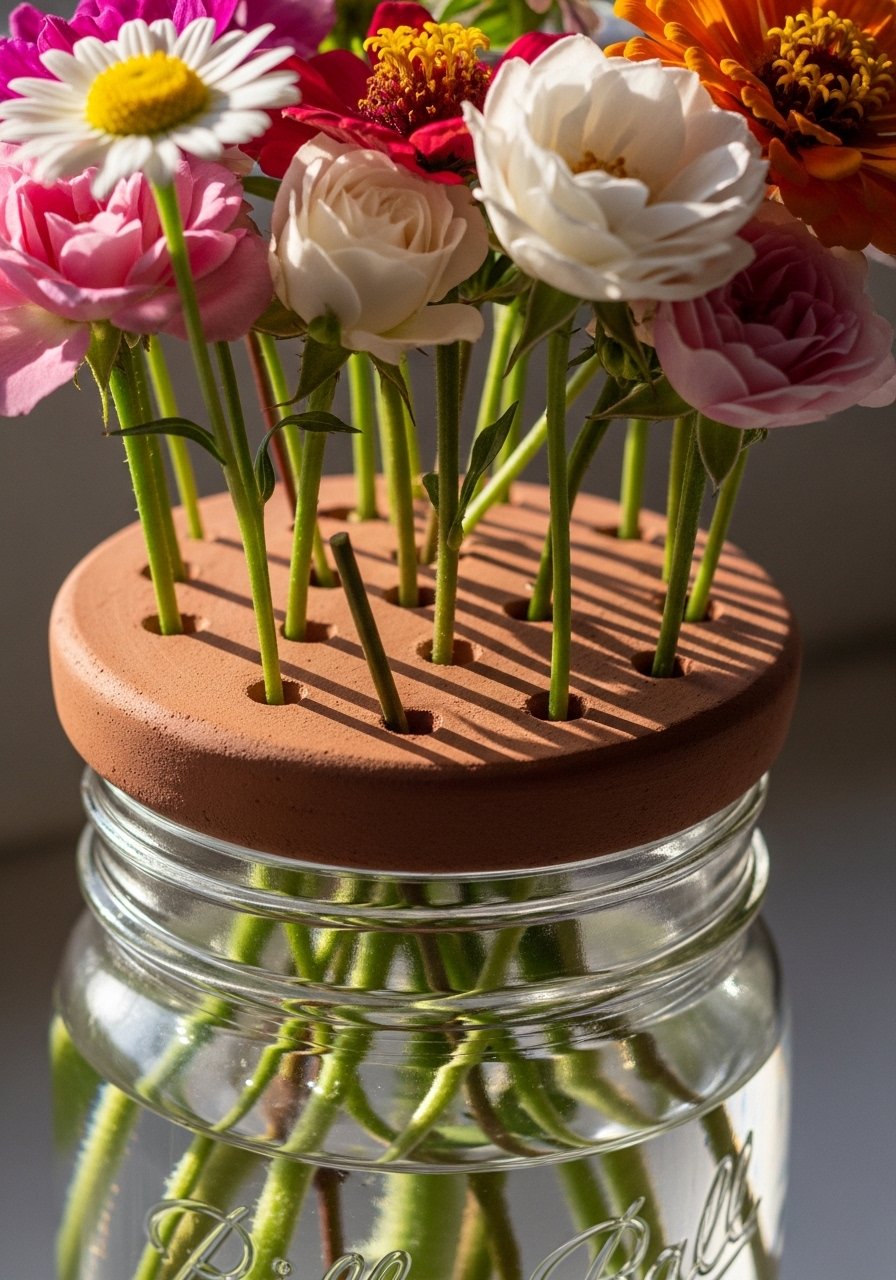
I made a flower frog to stop stems from slipping in narrow jars. Roll a disc to 1/4-inch, poke holes spaced about 1-inch apart, and lay it on the jar mouth. Dry it flat for 48 hours. People often try to make holes after drying and the clay crumbles. Make the holes before the clay firms. This keeps arrangements tidy without floral foam and works great in a grouping with the pressed flower tray idea above. Keep a pack of small-bamboo-skewers on hand to test stem spacing.
Layered Leaf Wall Tiles For Small Entry, Botanical
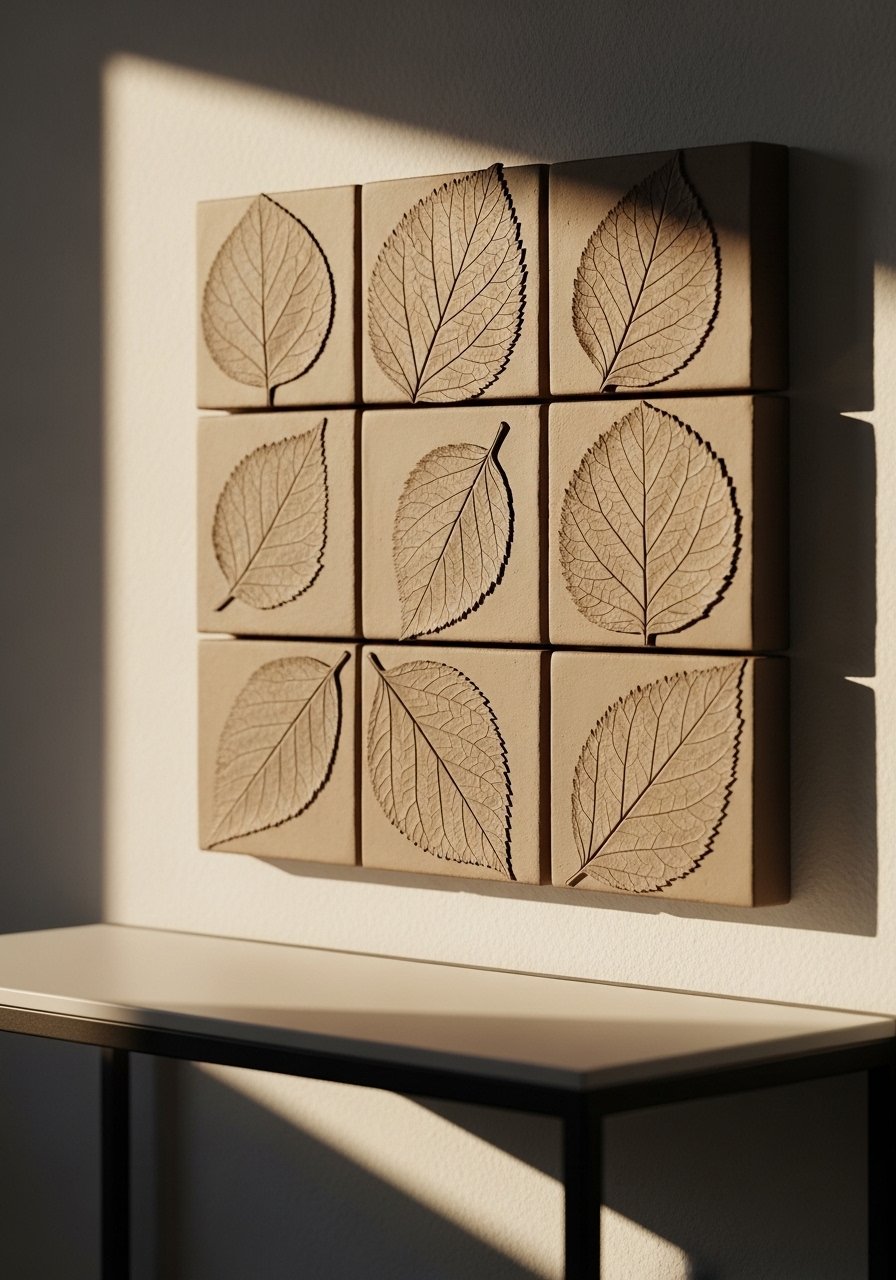
Tiny tiles added in a grid pulled my tiny entryway together. Cut 3-inch squares, press different leaf shapes into each, and stagger them on the wall with Command strips for renter-friendly hanging. Roll each tile to 1/4-inch so they are sturdy. One detail most tutorials skip is keeping grout-like gaps of 1/2-inch so the tiles read as a collection and not a crowded patch. Dry tiles flat for 48 hours and paint selective leaves for a layered feel. Use small-command-strips for damage-free hanging.
Minimalist Key Bowls For Entry Table, Scandinavian
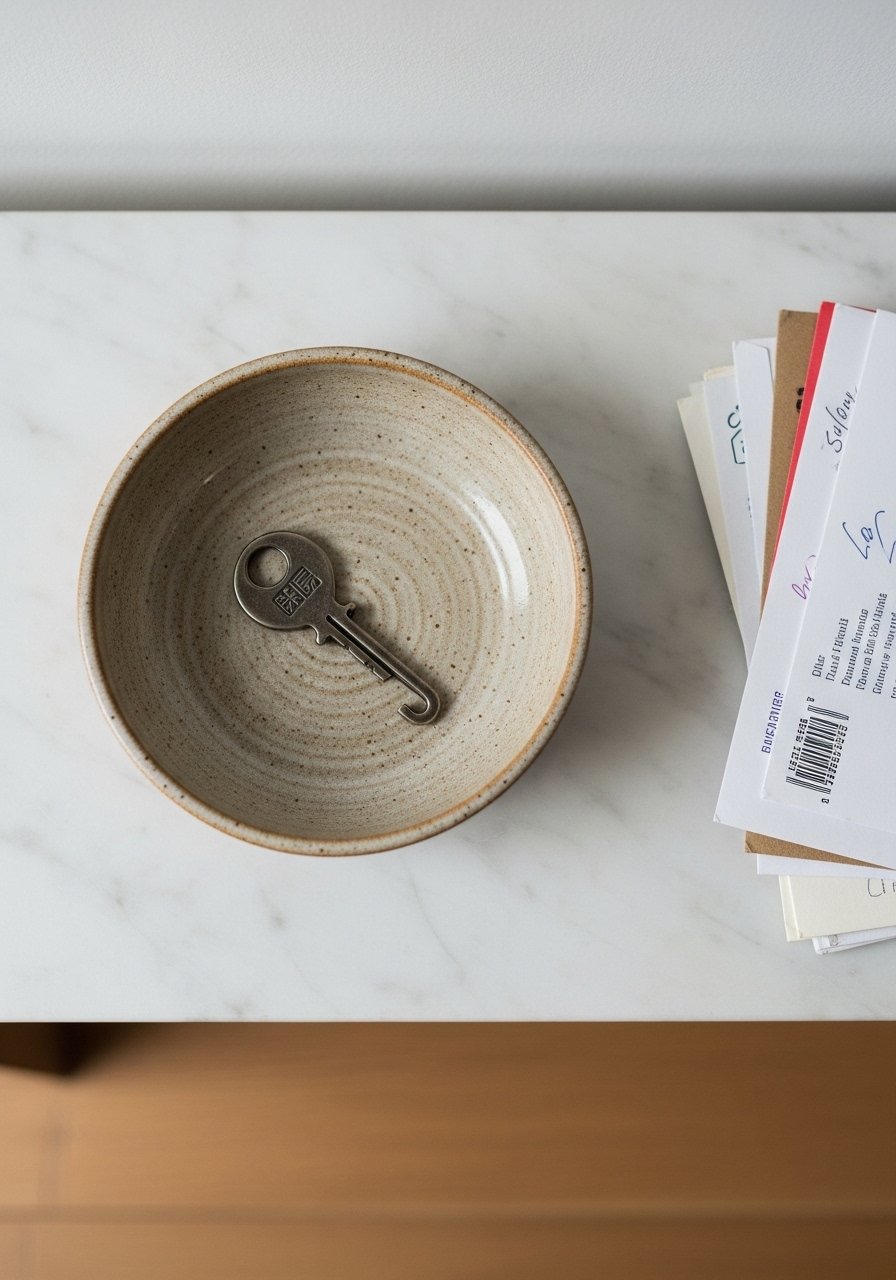
Keys were my problem until a minimalist bowl caught them. Create a shallow 1/4-inch dish and keep the rim smooth with a damp sponge. If you let the clay skin too much before smoothing, edges stay rough. Dry on a flat board for 48 hours. I keep one by the door and a second as a soap dish in the powder room, so I made a pair. For a cleaner finish, rub the interior once it firms but before it fully hardens. Try a neutral glaze and a small-dish-rack for drying multiple pieces.
Personalized Planter Name Tags For Balcony, Garden Friendly
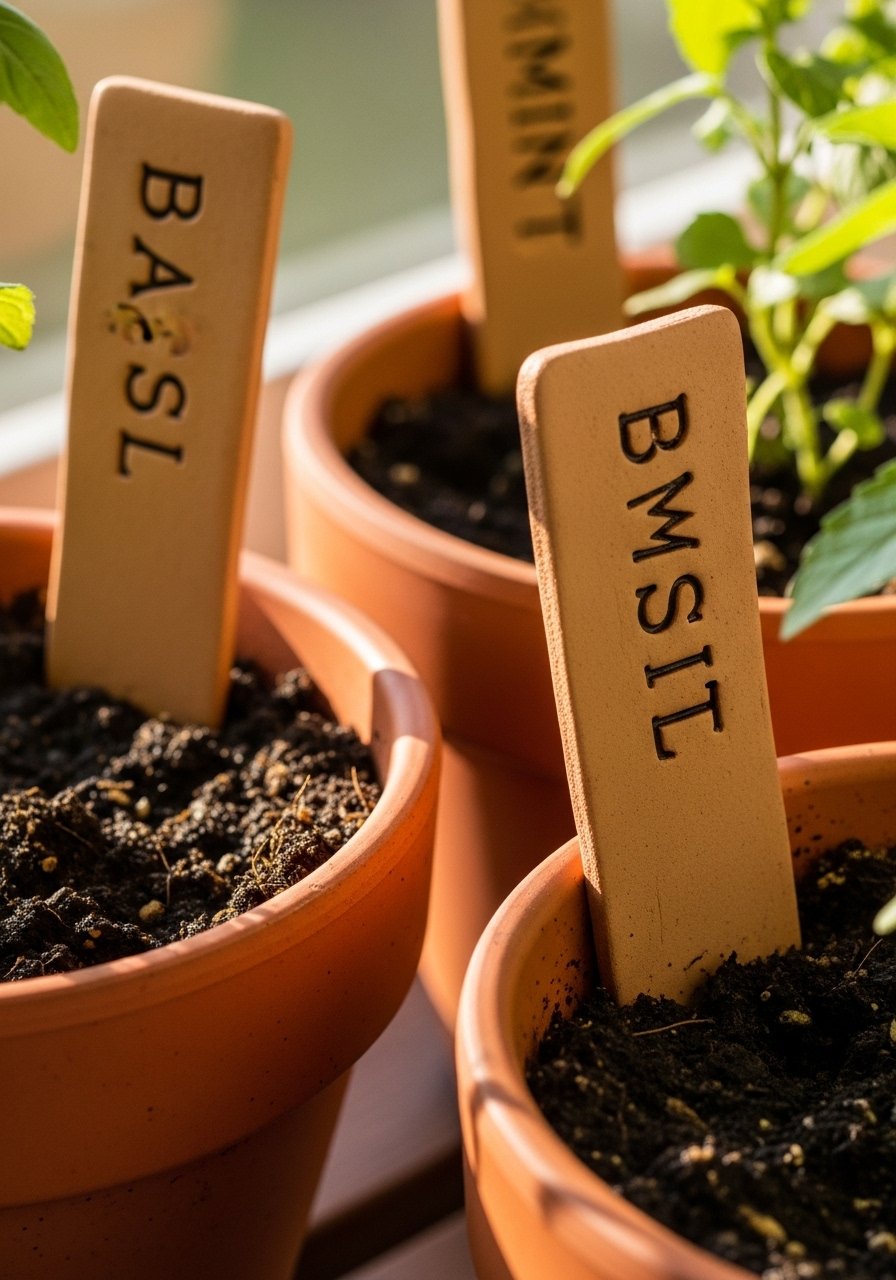
I got tired of mislabeling herbs. Roll thin strips and stamp names while wet, then tuck them into the soil. Make tags about 3 inches long so they do not tip tiny pots. Let them dry fully for 48 hours, paint the letters for readability, and seal so rain does not fade them. A common error is making tags too heavy with paint. Use a thin wash and seal. For apartment balconies, try mini stakes that fit small pots. I used letter-stamp-sets to get crisp names.
Geometric Hanging Mobile For Nursery, Modern
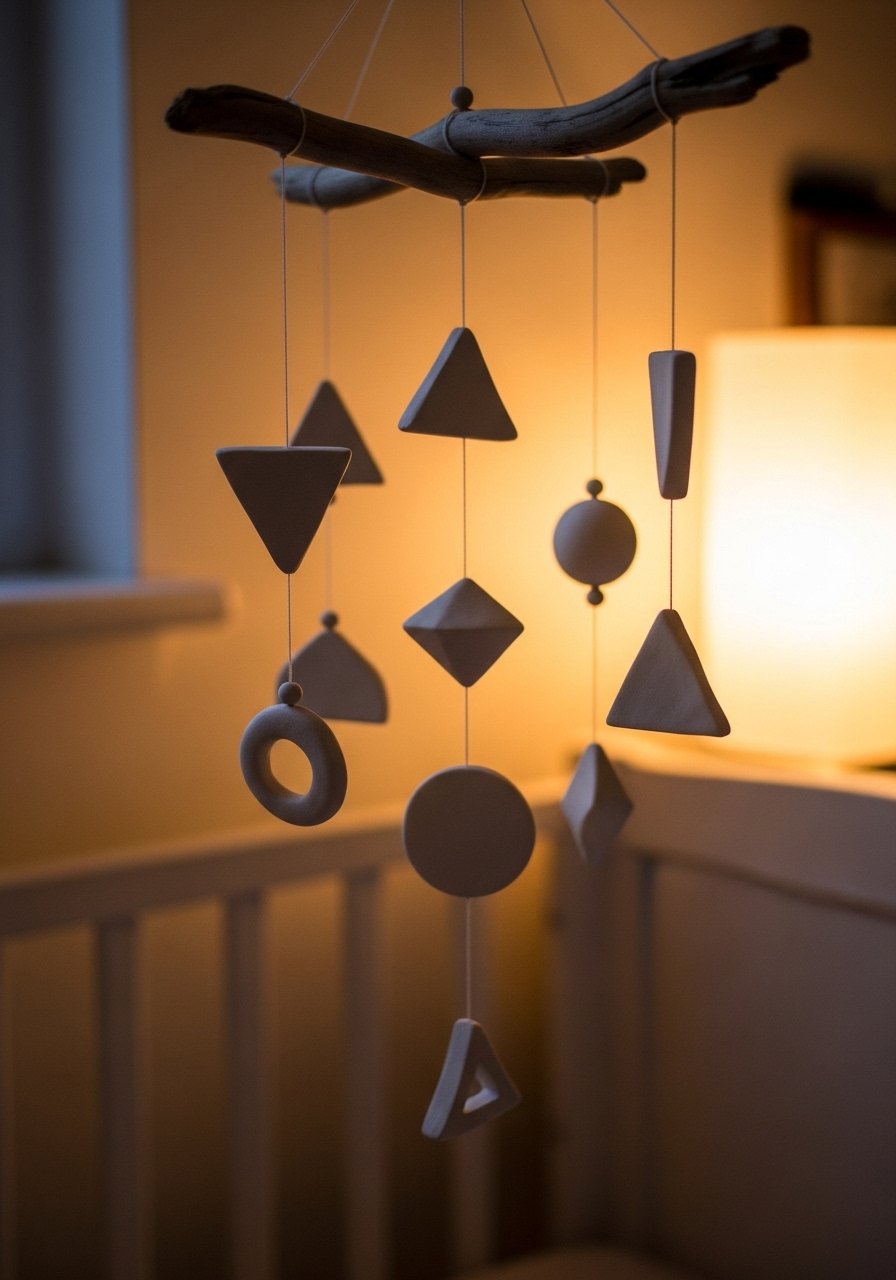
I made a mobile with little geometric forms to add visual interest without clutter. Cut shapes to about 2.5 inches, drill small holes while wet and thread with thin cotton. Keep shapes 1/4-inch thick so they do not crack. Dry them flat, and balance on a wooden dowel for a calming slow spin. Mistake people make is using heavy string that pulls pieces too close. Use lightweight cotton and space pieces at least 3 inches apart. Try thin-cotton-twine so the mobile floats.
Moon Phase Wall Pieces For Bedroom, Moody
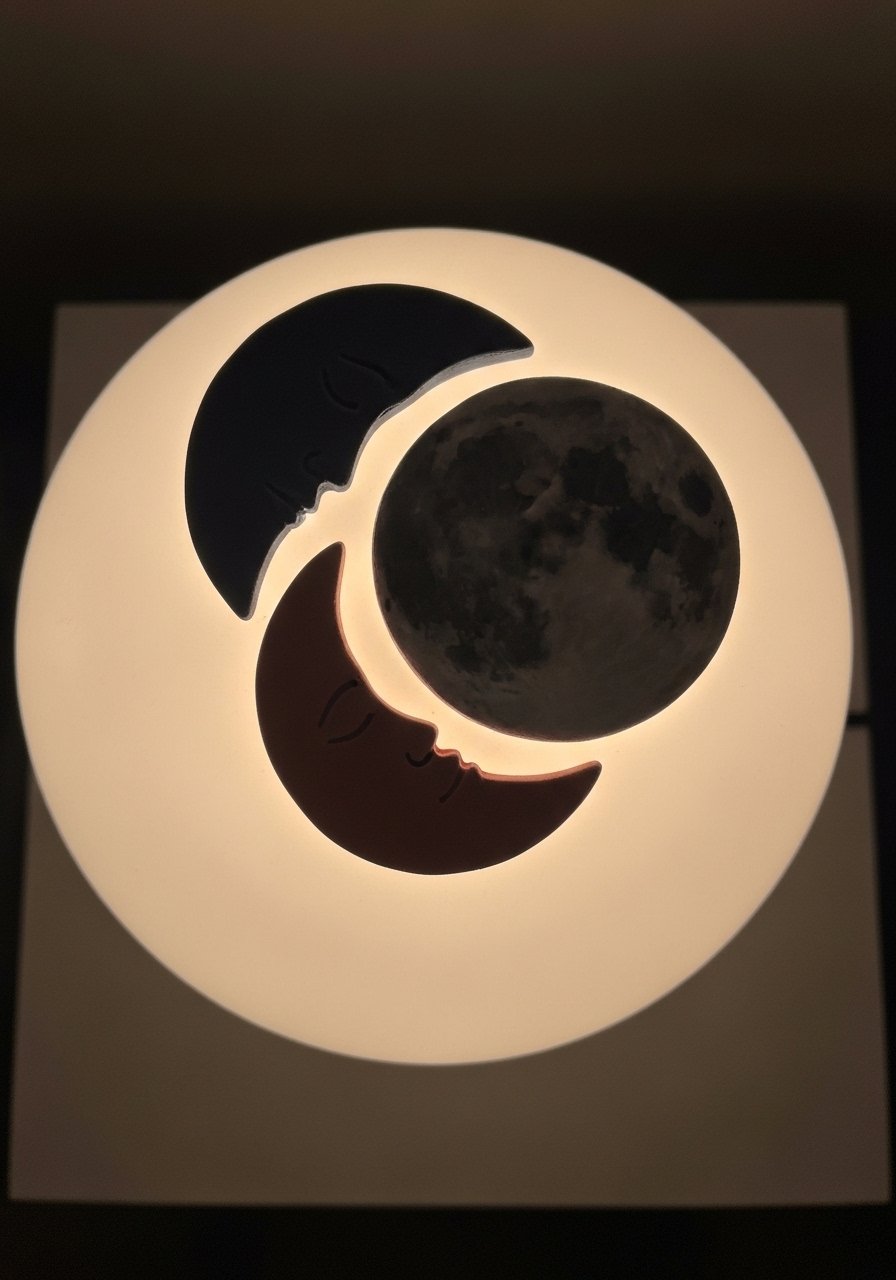
I painted moon phases to add a bit of personal mood to my bedroom wall. Make crescents and discs 3 to 4 inches wide, roll to 1/4-inch thick, and lightly sand after drying if you want edges ultra-smooth. The real trick is spacing them along a 12-inch arc to read correctly on a wall. If paint flakes, you probably painted too soon. Wait 24 hours of hardness before painting and use a satin seal. Pair these with the embossed stars idea for a small celestial corner. Use matte-acrylic-paint-set for moody finishes.
Clay Picture Ledges For Small Art, Gallery
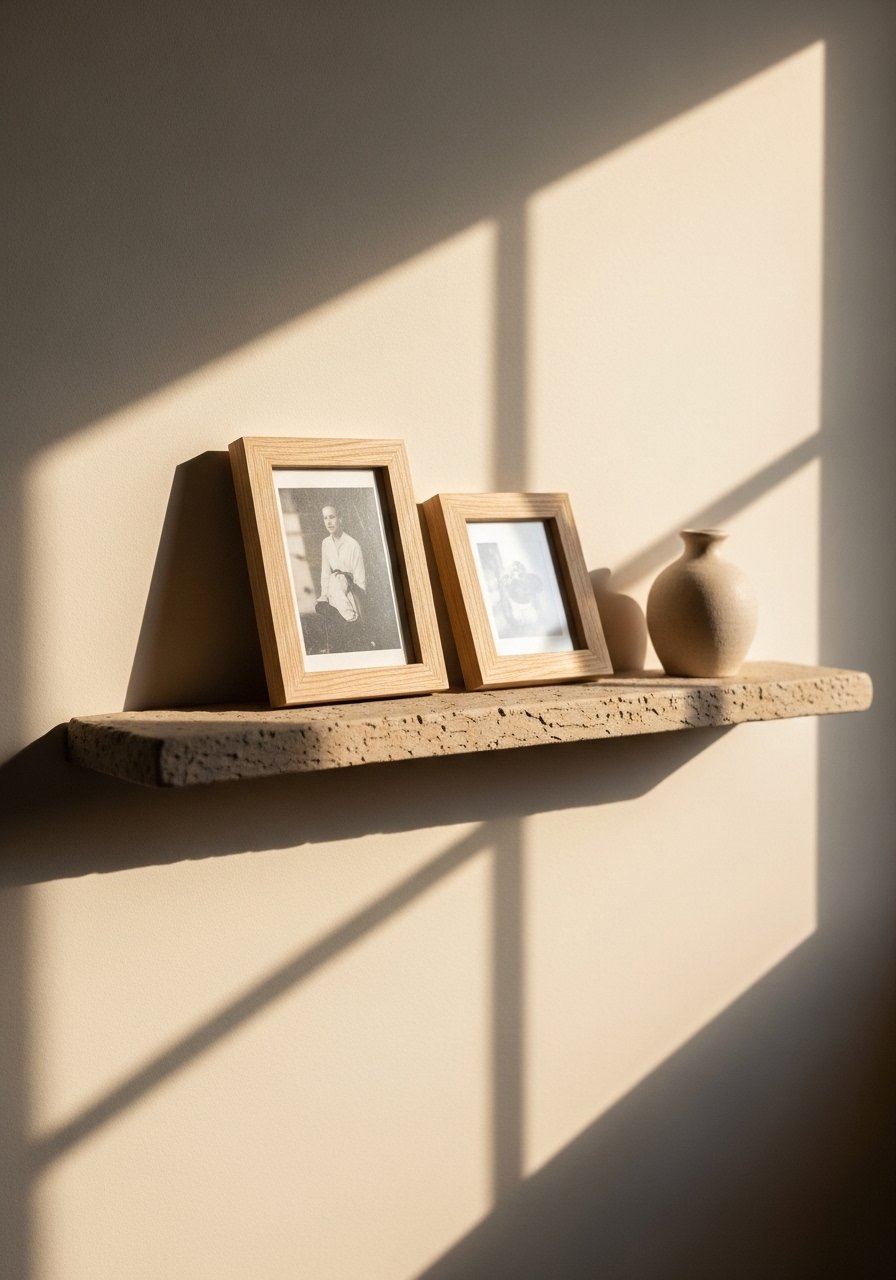
I made slim ledges when I did not want to nail too many holes. Form a shallow U-shape and let it dry over a straight edge to keep it true. Make the lip about 1 inch tall so frames sit securely. A common oversight is making the ledge too thin; aim for a 1/4-inch base thickness or it will sag. Mount on the wall with screws or strong adhesive for renters using Command picture strips for lighter pieces. These work great alongside the bookend idea above. For multipurpose shelves, check brass-picture-ledges.
Stacked Ring Dishes For Nightstand, Romantic
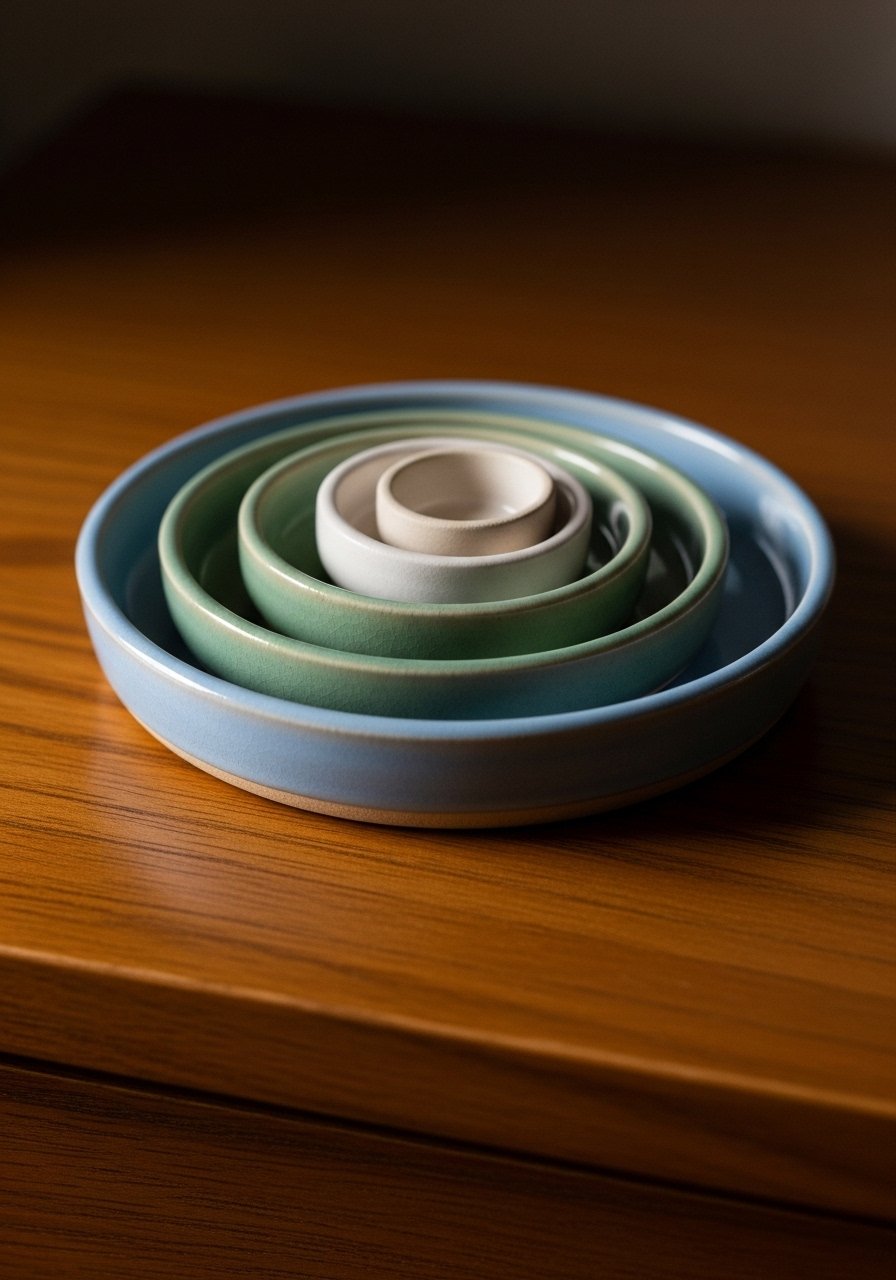
Nightstand clutter calmed down when I made a trio of nesting ring dishes. Make three discs, each 1/4-inch thick and slightly smaller than the one below. Dry flat for 48 hours so nests stack neatly. The tiny thing people miss is leaving a tiny lip of 1/8-inch so rings do not slide off when you grab them half awake. I painted the middle one a pop color and left the others neutral to anchor the bedside vignette. For finishing, try a satin-varnish-sealer to stop tiny paint chips.
Tiny Animal Planters For Windowsill, Playful
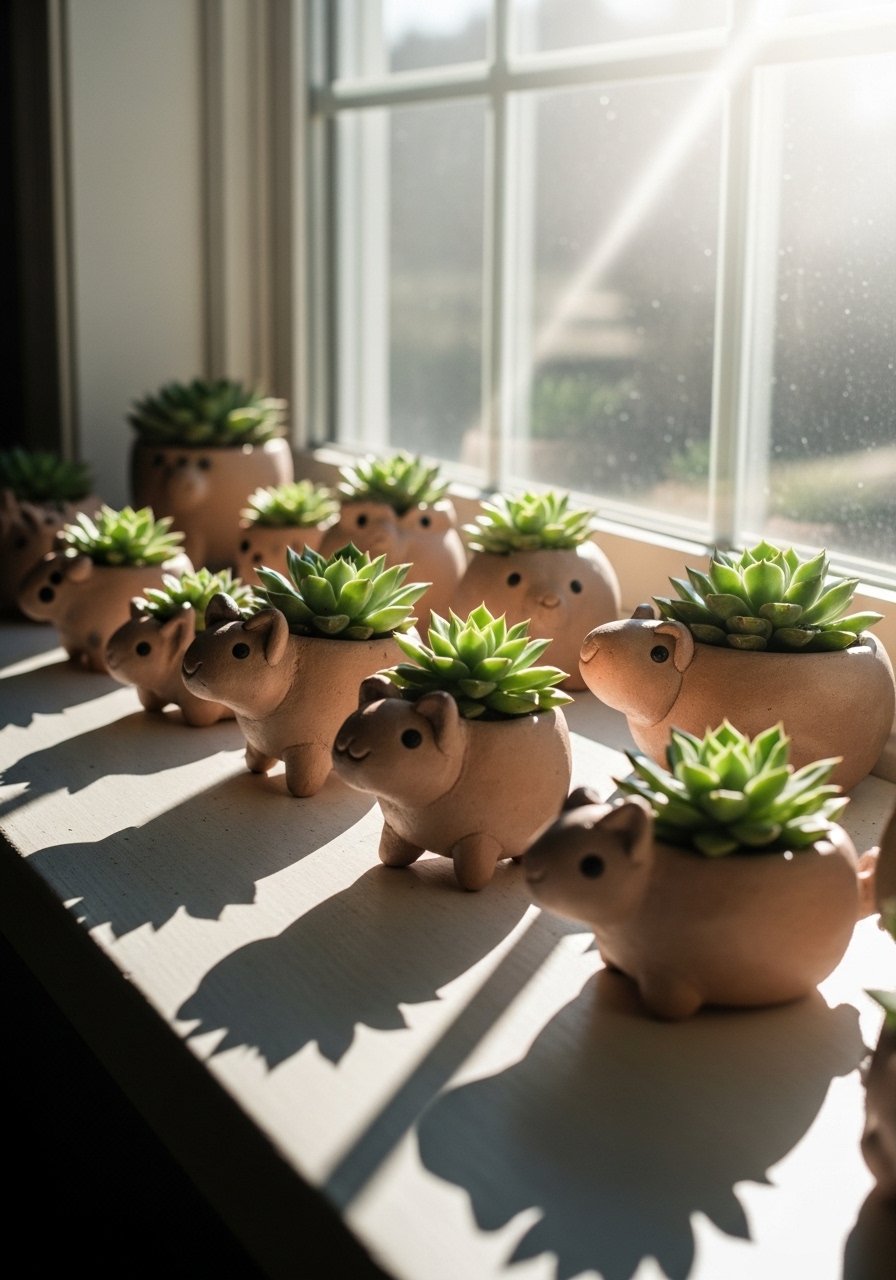
Making tiny animal planters was my way of sneaking color into a sunny kitchen. Build a hollowed form around a small glass mold, keep walls about 1/4-inch thick, and add drainage by poking a small hole before it sets. Dry flat for 48 hours. A common mistake is sealing them too soon and trapping moisture. Let them cure fully before adding soil. For small spaces, these are better than big pots because they fit windowsills. I like pairing them with real succulents and small saucers. Try mini-succulent-pots for planting supplies.
Your Decor Shopping List
Textiles
- Honestly the best $40 I have spent. Chunky knit throw in cream in a neutral tone for layering on any sofa
- 22-inch linen pillow covers for an extra soft couch touch, mix two colors
Tools & Clay
- For reliable results use Crayola air dry clay in white or neutral
- Small rolling pin for even 1/4-inch slabs
Finishing & Hardware
- Satin varnish sealer to protect painted pieces from flaking
- Small magnet disks for fridge projects
- Small Command strips for renter-friendly hanging
Styling Extras
- Assorted craft beads for trinket dish rims
- Mixed seashells for pressing into palettes or tiles
- Matte acrylic paint set for color pops and washes
Many of these items have similar options at Target or HomeGoods if you prefer to shop in person.
Shopping Tips
White oak beats dark wood in 2026. Design feeds have shifted completely. White oak floating shelves look current, not dated.
Grab Crayola air dry clay for predictable texture. Most folks stick to air dry since no oven hassle. You can knock out these for under 20 bucks easy.
Curtains should puddle or kiss the floor, never hang halfway up. 96-inch linen panels are right for standard 9-foot ceilings.
Lead with one big plant, not five small ones. A tall faux fiddle leaf fig 6ft holds visual weight where you need it.
If you have pets, seal clay trays with extra coats of varnish. Satin varnish sealer protects against noses and fingerprints.
Buy double what you think you need of small supplies like beads and magnets. Kids lose interest quickly and extras save a second trip. Assorted craft beads keep things moving.
Frequently Asked Questions
Q: How thick should I roll air dry clay for trays and coasters?
A: Roll to 1/4-inch thick for trays and coasters. That thickness keeps them sturdy but light, and helps prevent cracking as they dry.
Q: Why did my clay piece warp after drying?
A: Warping usually happens when a piece dries unevenly. Dry pieces 48 hours flat in a cool spot. Support curved shapes on a bowl or glass so they keep their form as they cure.
Q: When should I paint and seal my clay items?
A: Wait 24 to 48 hours after the clay is fully dry before painting. Paint can flake if applied too early. After paint, seal with a varnish to protect from dust and wear. Satin varnish sealer is a good go-to.
Q: My edges always look messy. What helps?
A: Smooth edges with a damp finger or sponge before the piece fully hardens. That small step removes rough spots so you do not need heavy sanding later.
Q: Can I make these in a small apartment without a kiln?
A: Yes. Most of these are renter-friendly and made for small spaces. Use small versions like mini planters and magnets so nothing needs much room to dry.
Q: Do I need special clay tools?
A: No. A small rolling pin, a butter knife, and a damp sponge cover most needs. For stamps and textures, small rubber stamps work well and are inexpensive.
Q: How do I keep kids engaged without projects dragging on?
A: Start with ideas under 30 minutes like magnets, coasters, or stamped discs. If you want a longer family project, split it into shaping, drying, and painting sessions over a few days so attention does not collapse.