
My living room had nice furniture and decent lighting but it still felt like a waiting room. Took me embarrassingly long to figure out it was missing texture. Every surface was smooth, every color was flat, and nothing invited you to actually sit down. Once I started playing with plaster and thrifted canvases, rooms finally felt lived in.
These ideas lean modern farmhouse and boho-transitional. Most projects run about 25 bucks if you thrift smart, with a few that push toward $75 if you want bigger scale. They work for living rooms, bedrooms, hallways, or any spot that feels like it needs a hand to stop being boring.
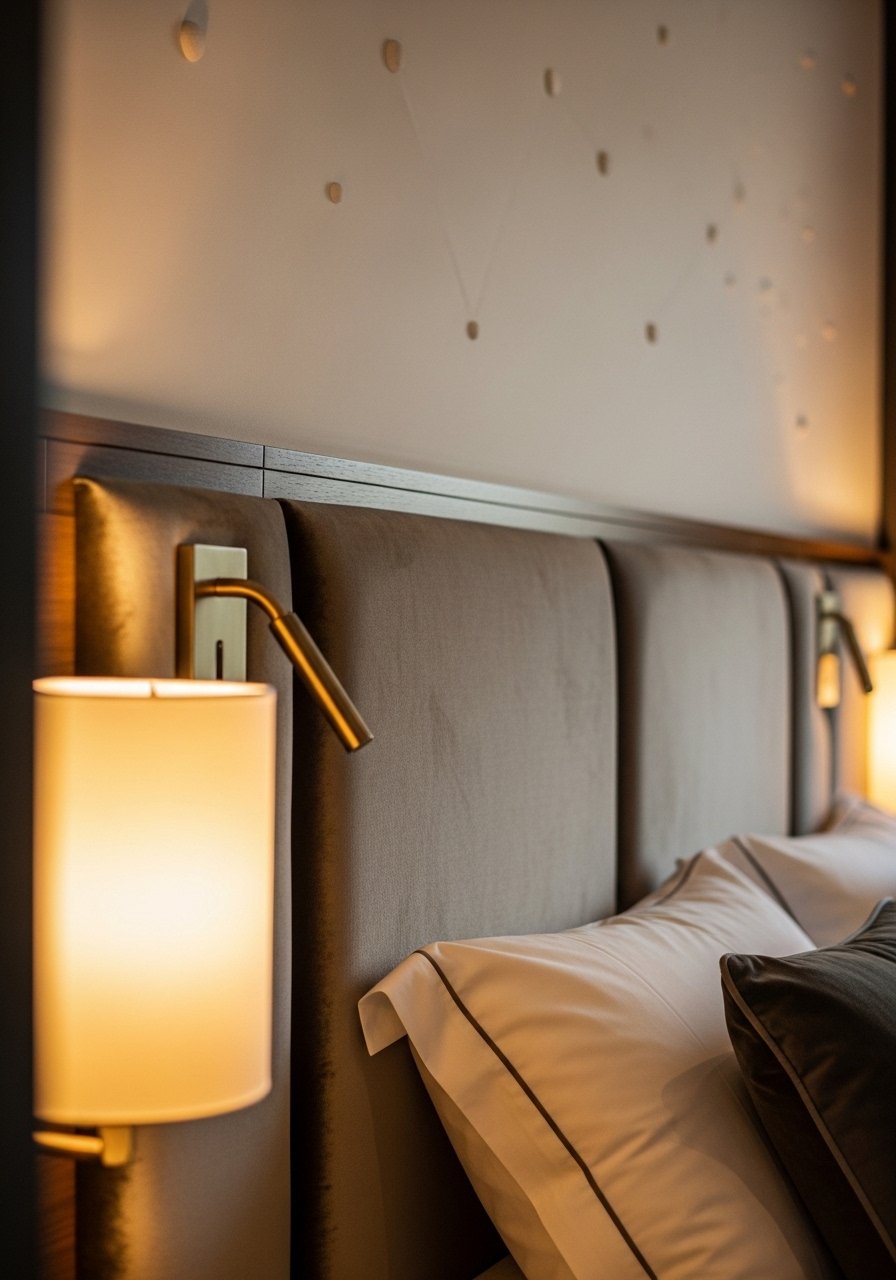
Frosted Plaster Swipe For a Minimalist Living Room
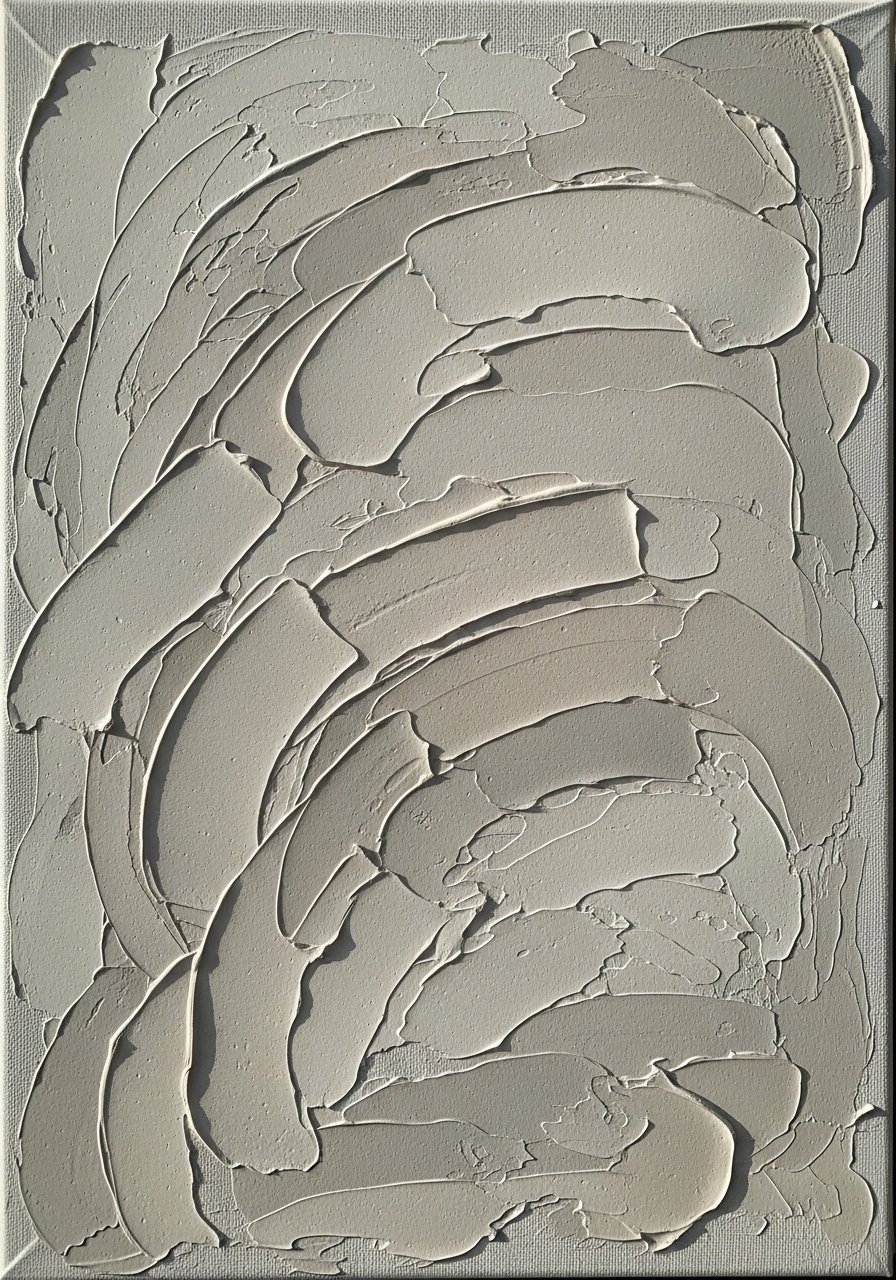
I fixed an ugly thrift painting with a 20×24 canvas and a quarter-inch base layer of joint compound, and it suddenly read like a gallery piece. Start with a 1/4-inch smooth base, then mix paint into spackle at a 1:5 ratio for that frosting consistency that spreads even. I like using a 20×24 stretched canvas for most sofas so the art fits without overpowering. For supplies I used DAP joint compound, which you can grab as a small tub on Amazon, and a cheap 3-inch putty knife. One common mistake is piling texture too thick. Keep layers under 1/4 inch and let each dry 24 hours. Most folks snag canvases from thrift stores instead of buying new, so check vintage shops first.
Ombre Fabric Wrap With Plaster Overlay For A Cozy Bedroom
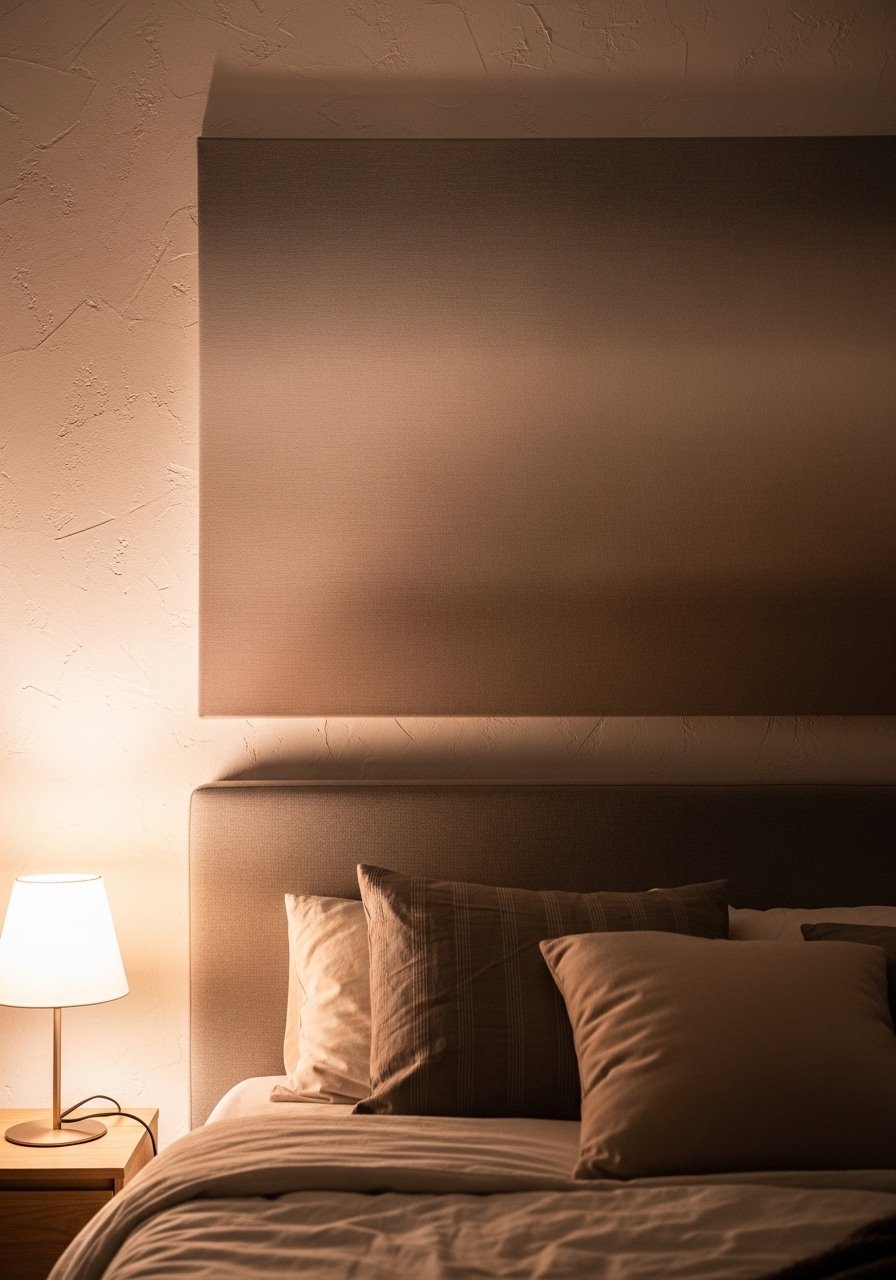
I wrapped a thrifted 16×20 canvas in cotton, glued it with craft adhesive, then feathered plaster over the top to soften the edges. Mixing paint into spackle at that 1:5 ratio saved me from having to paint later. The fabric keeps the plaster from looking like a hard slab and adds a tactile base for neutral bedrooms. I used a small bag of plaster of paris for the dots and then layered the ombre colors dark to light so the piece reads deep from across the room. A rookie move is rushing the overlays. Wait 24 hours before you add the next color and seal twice if you have pets, because texture holds hair. These projects run about 25 bucks if you thrift smart.
Notched Trowel Waves For A Coastal Entryway
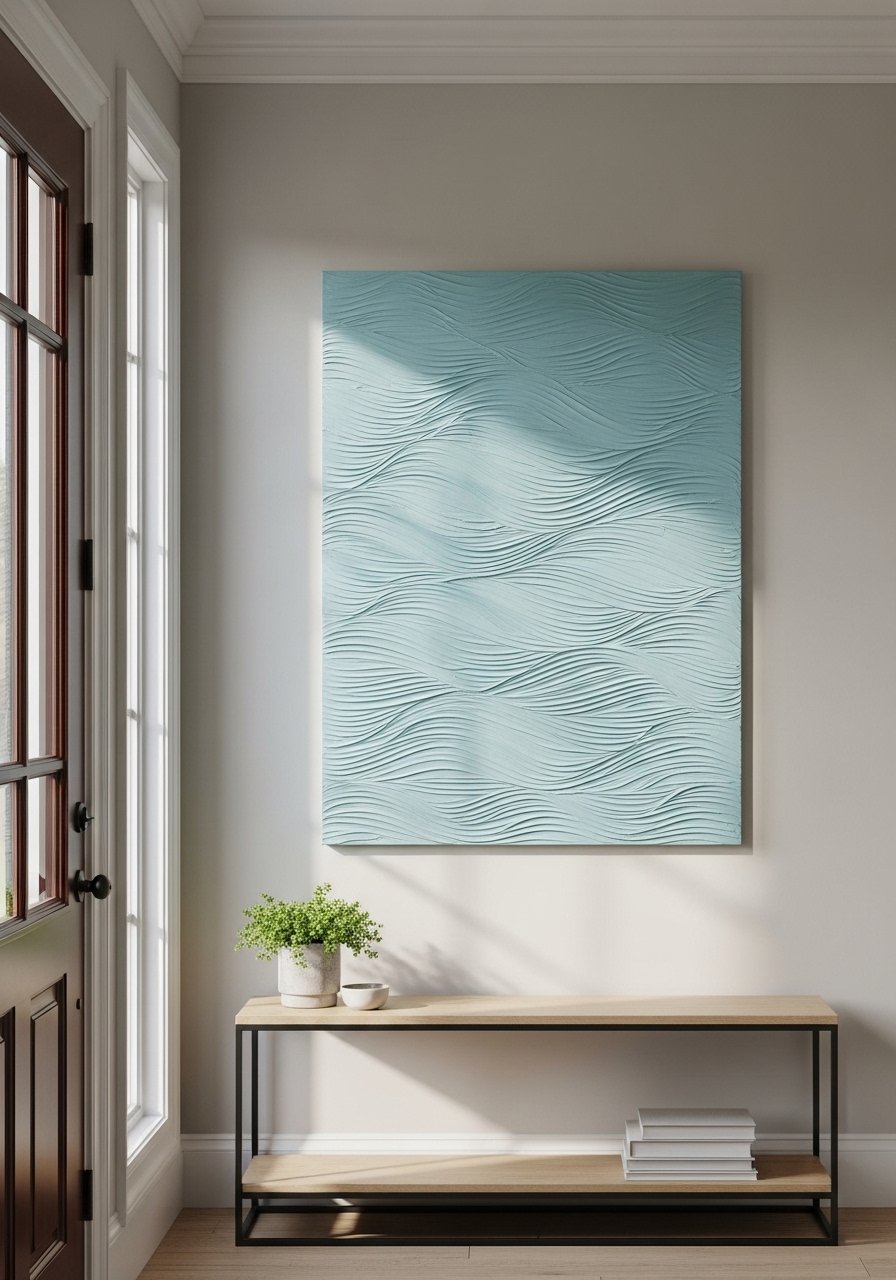
This is the trick I pull when I want surf vibes without literal shells. Spread a thin base of pre-mixed joint compound and use a plastic notched trowel to pull long waves. Dry brush in soft blues and off-white so the ridges catch light. Using a notched tool gives pro-looking ridges in minutes, which helps if you hate fussing with perfect patterns. One mistake is making the base too deep so the canvas sags on the wall. Keep it under a quarter inch total buildup and hang a 24×36 piece on a stud or use heavy-duty command strips rated for the weight. Pair this with the fork ridge idea later for contrast on a second wall.
Fork-Tine Ridges In Sage For A Transitional Hallway
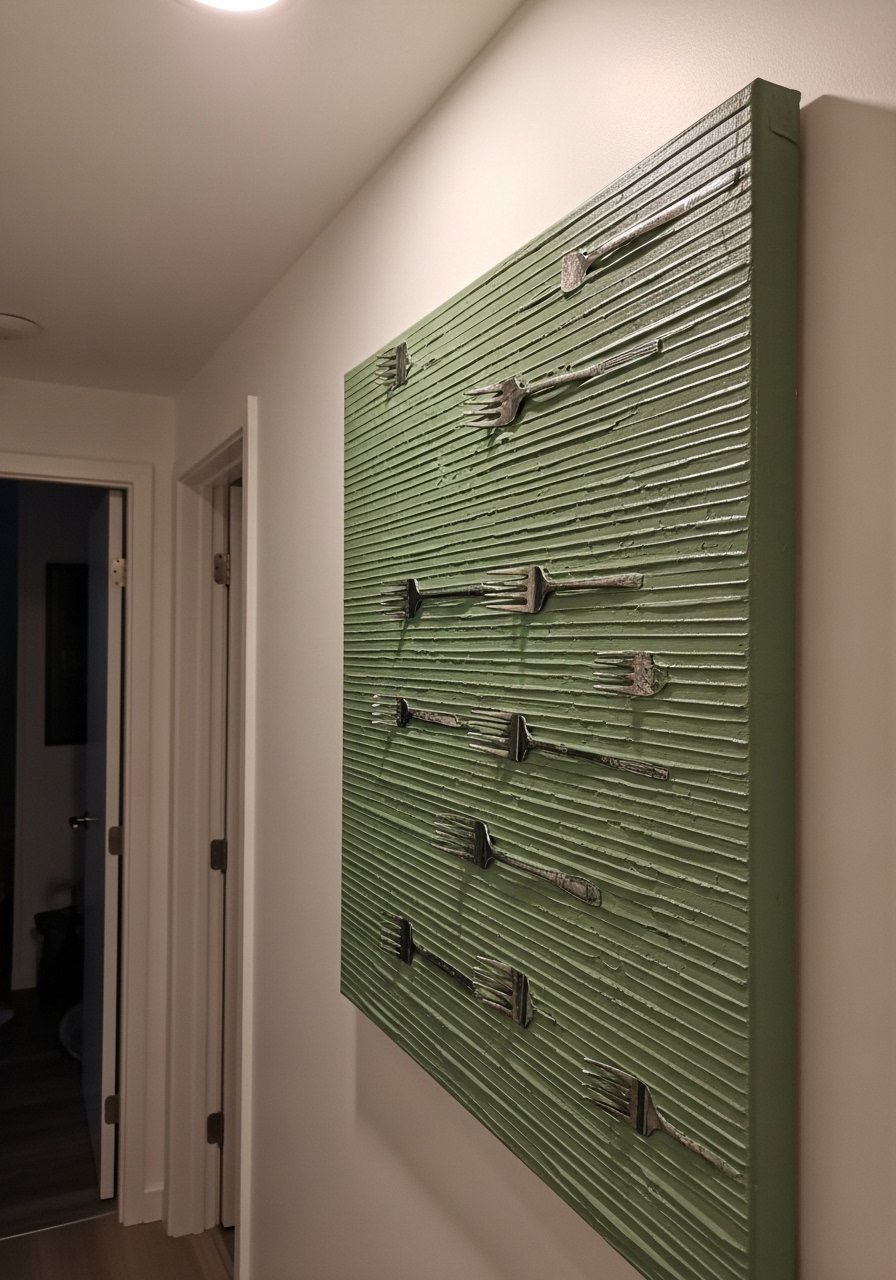
I used a dinner fork to scratch parallel ridges into a wet joint compound layer and painted over with sage acrylic. It sounds silly, but regular silverware creates consistent light-catching lines that read more intentional than they should. Try this on an 18×24 canvas so it fits hallways without feeling monumental. Tip: start with the darkest color in the compound, then layer lighter paints on top so the ridges show depth. Newbies often overwork the surface until it looks messy. Stop after a couple of passes and seal with matte acrylic. If you have pets, seal twice because texture traps fur.
Stenciled Moon Circles With Sponge Texture For A Calm Office
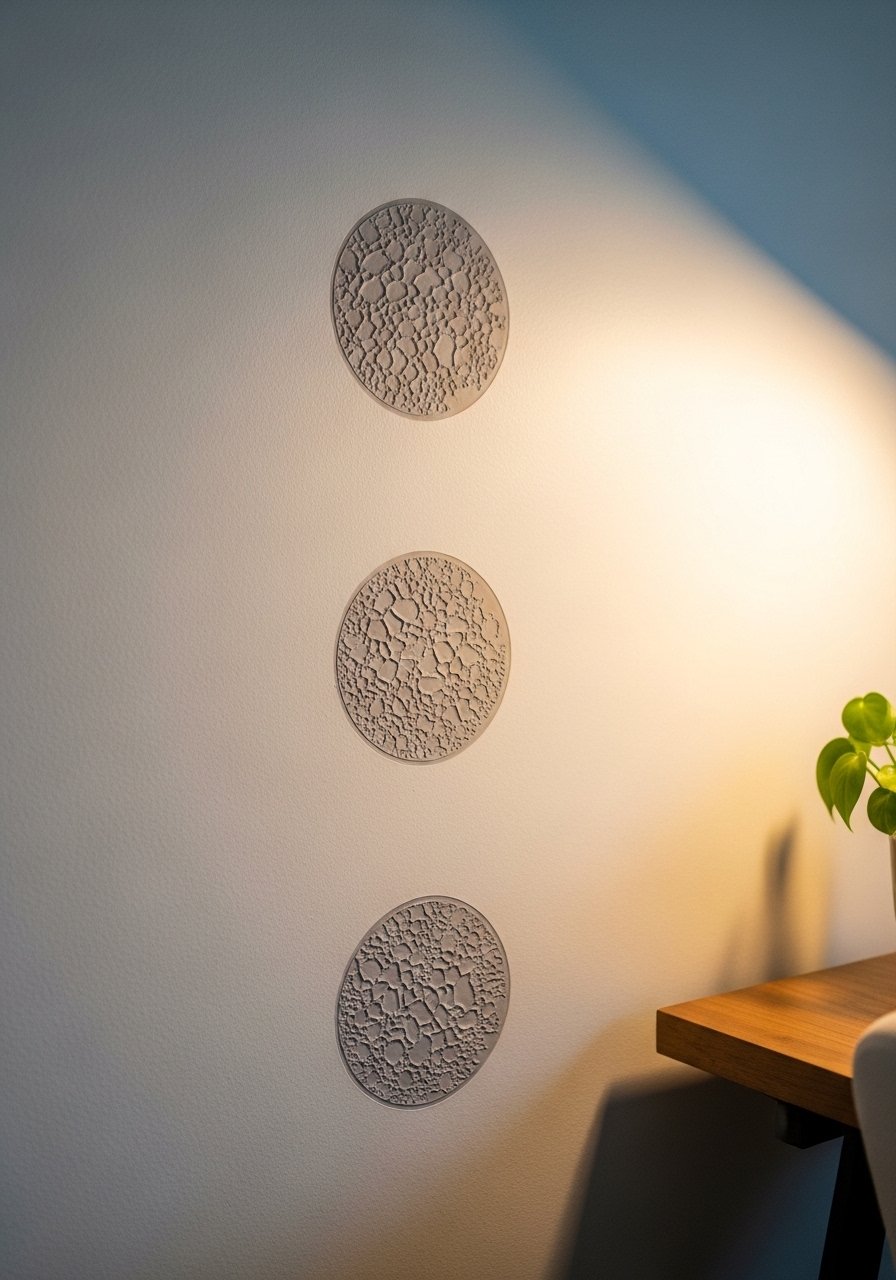
I used a circle stencil and texture paste, then pounced gently with a sea sponge to create small craters like moon surfaces. Stencils let you be precise when freehand terrifies you. For this, a medium stencil and texture paste spread thin works best so the piece stays light. One specific detail most tutorials skip, test your mixture on kraft paper first because paste thickness changes how sponge marks read. Start with a dark base, then highlight the top of each crater with a lighter tone so the texture reads from the doorway. Command strips make this renter-friendly if you keep the canvas under 24×36. Over half go neutral on textured stuff since it fits any room.
Multi-Tool Layered Waves For An Eclectic Sitting Area
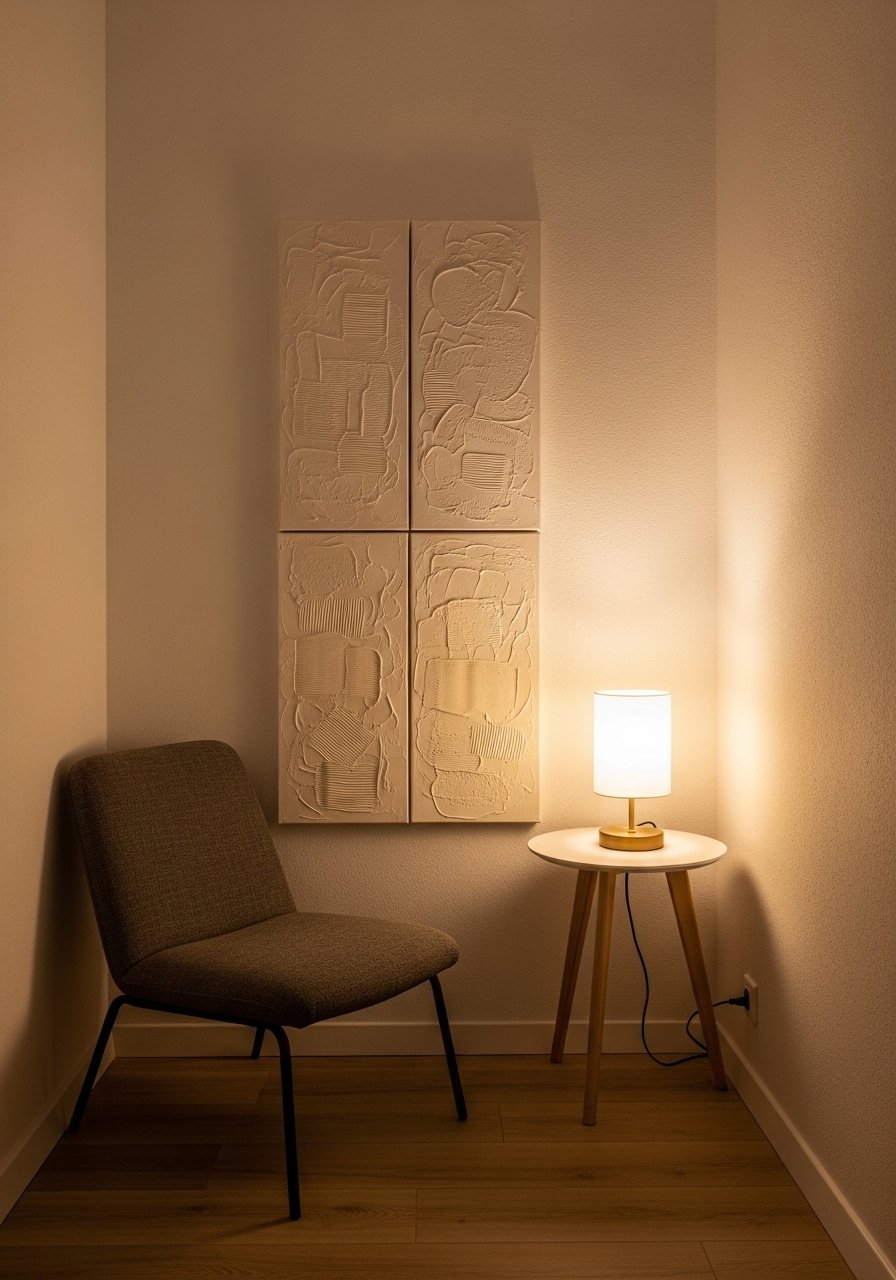
This idea is my favorite when I want drama without expensive sculpture. Spread a thin putty knife base, then drag a credit card for micro-edges and dab with a sponge for soft pits. That combination builds dimension that changes with light. Use a 1:5 paint to spackle mix for the colored top layers, and remember to dry 24 hours between coats. People assume one tool is enough. Mixing a fork, a card, and a sponge gets layers that look intentional and unpredictable. The result fits an eclectic living area and pairs well with the notched trowel or fork ideas earlier. If you plan to hang large panels, plan for weight and use proper anchors.
Finger-Poked Organic Bumps For A Boho Nook
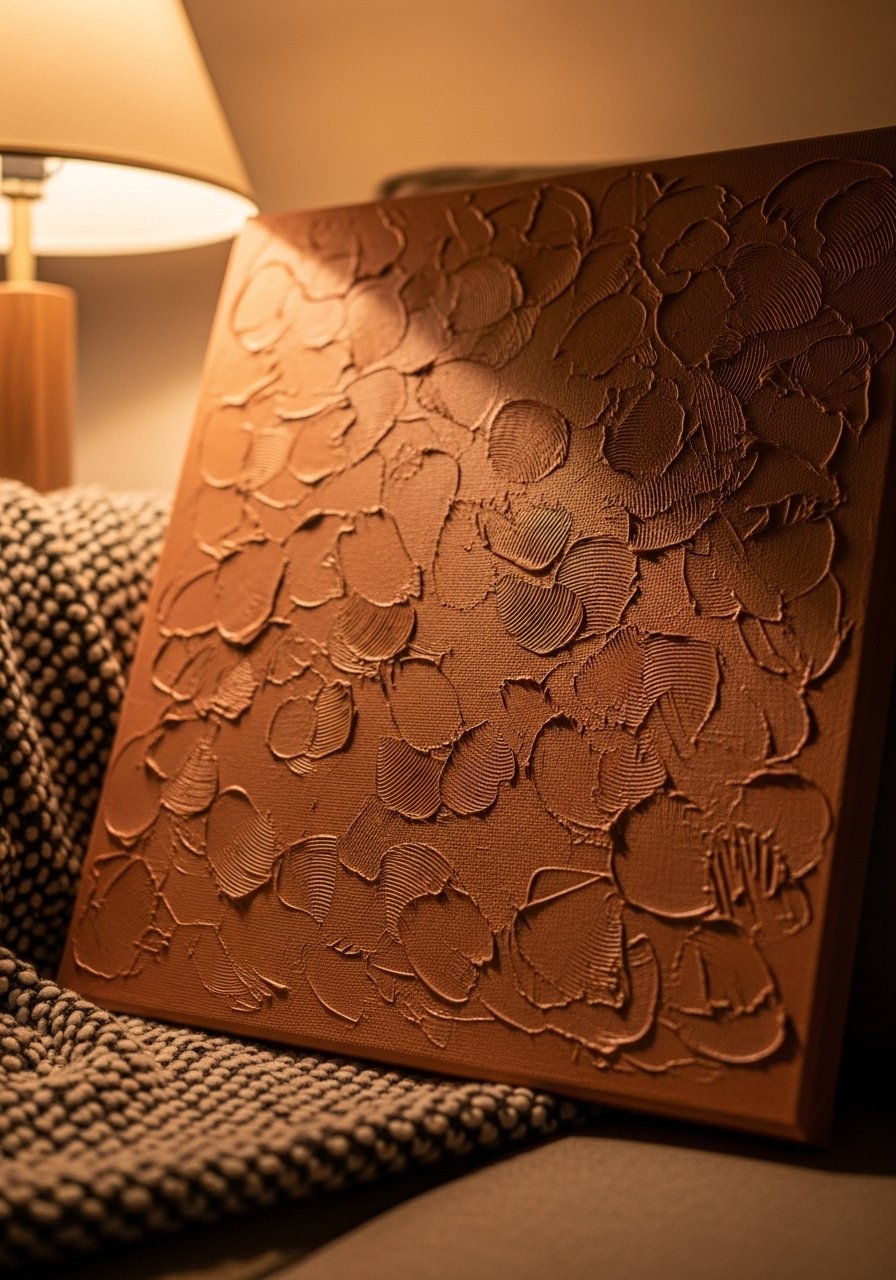
I poked small mounds into wet joint compound with my fingertips and then shaded each bump with a wash of burnt sienna. The irregularity makes the surface feel handmade and calm. This is a low-tool, high-impact technique that works beautifully on small canvases over nightstands or in reading nooks. Keep each bump under a quarter inch so the piece stays lightweight. Beginners often try to perfect symmetry. Stop yourself. The charm is the irregular bumps. Seal after painting or the compound can yellow in humid rooms, which is something most guides forget to warn about. For small spaces, 12×16 canvases are your friend.
Sculptural Plaster Peaks For A Grand Living Room Accent
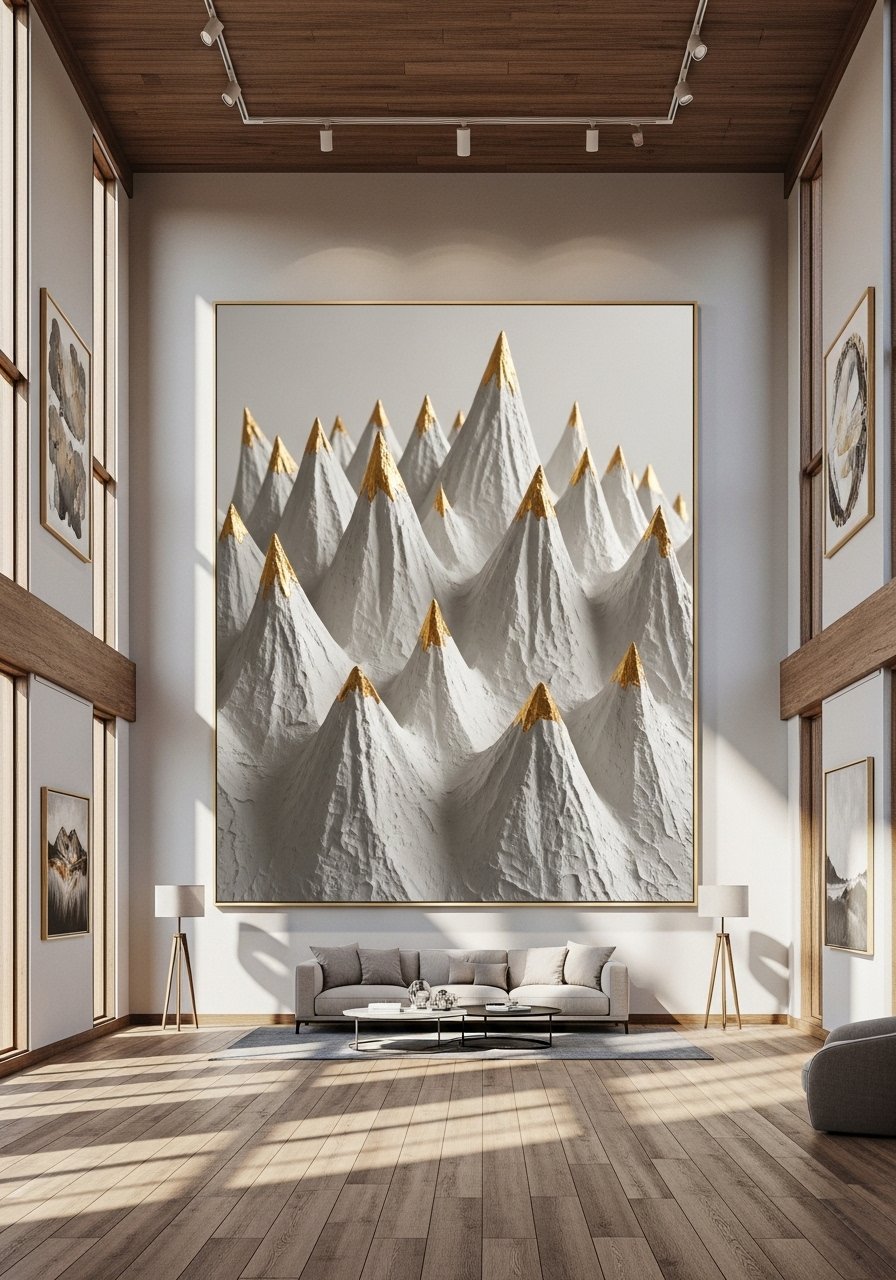
I did a bold piece using plaster of paris built up into peaks and then tipped the peaks with metallic paint. It reads sculptural and anchors an open living room, but it is heavy. If you try this, understand the trade-off. Build peaks no more than 1/2 inch high and keep the bulk off the wall by mounting on a wooden stretcher. Use plaster of paris in small batches and work fast, then wait 24 hours between embellishing layers. Wrong move is skipping the mounting reinforcement. Also, seal the entire surface. These larger pieces are not renter-friendly unless you make a lightweight version with pre-mixed spackle on thin plywood.
Template Brick Overlay For A Rustic Kitchen Nook

I wanted brick without redoing the wall, so I used a brick stencil and texture paste on an MDF panel, then dry-brushed metallics across the ridges. The template gives a consistent layout but the paste keeps it tactile. Use a thin layer of texture paste so the panel stays under 1/4 inch build-up. One detail I learned is to add an MDF trim border to frame the tile so it looks finished. This works great in a rustic kitchen or breakfast nook and can be swapped out seasonally. If you are a renter, make a lightweight version using foam board. Seal well because kitchen humidity can make texture yellow.
Velvet Base With Plaster Dots For A Maximalist Bedroom
I glued a velvet remnant to plywood before adding small plaster dots, and that mix of plush and rough is unexpectedly luxe. Velvet hides seams and gives a soft background that makes plaster accents read like jewelry. Use a lightweight plaster and practice a 1:5 paint to spackle mix for color consistency. One mistake people make is skipping sealing; velvet traps dust and unsealed plaster attracts it. This method costs more because of fabric, but for a headboard-size piece it is worth the splurge. For renters, make a removable panel using command-picture-hangers and keep the backing thin.
Your Decor Shopping List
- Honestly the best $20 I have spent. Pre-mixed joint compound tub for quick projects, less mess than powder
- For small canvases, grab 16×20 stretched artist canvases in packs of two, great for hallways and nooks
- Found these while looking for something else. Sea sponge texture puffs for cratered effects and soft blending
- 3-inch putty knife set for spreading bases and creating waves, cheap and useful
- Gold metallic acrylic paint for tip highlights on peaks
- Velvet remnant fabric, 1 yard. Similar at Target and HomeGoods if you want to touch first
- Heavy-duty command strips 20lb for renter-friendly hanging under 24×36
- Artist texture paste jar for stenciling and raised patterns
Shopping Tips
White oak beats dark wood in 2026. Design feeds have shifted completely. These white oak floating shelves look current, not dated.
Grab pre-mixed joint compound for faster dry times. Powder plaster is cheap but messy and slower. Using pre-mixed saves a day when you are impatient.
Curtains should puddle or kiss the floor, never hang halfway up. 96-inch linen curtain panels are the right call for standard 9-foot ceilings.
One big impact trick is scale. One single 6-foot faux fiddle leaf fig has more presence than five small succulents and anchors textured art.
Frequently Asked Questions
Q: Can textured wall art be renter-friendly?
A: Yes. Keep pieces under 24×36 and under a quarter inch of thickness, then use heavy-duty command strips rated for 20 pounds. For heavier sculptural pieces, make a removable lightweight version on foam board or thin plywood.
Q: Will plaster yellow over time in humid rooms?
A: It can. Seal textured pieces with a matte acrylic sealer twice. I learned this the hard way after a month in a humid bathroom, so sealing prevents yellowing and makes cleaning easier.
Q: How do I avoid lumpy, amateur-looking texture?
A: Start with a smooth putty knife base, keep total buildup under 1/4 inch, and add texture on top. Let each layer dry 24 hours. Test any tool moves on scrap first because working wet surfaces too long ruins the finish.
Q: What size canvas should I pick for a small hallway?
A: For narrow spaces, 12×16 or 16×20 canvases work best. They give texture without overpowering sightlines and are easy to hang with removable strips.
Q: Can I mix fabric with plaster without it falling apart?
A: Yes. Glue the fabric to a plywood or stretched canvas base, then apply thin layers of plaster or pre-mixed joint compound. Use the 1:5 paint-to-spackle ratio for smooth color and seal the finished piece to trap dust.
Q: Are fake plants OK next to textured art?
A: Absolutely. Real plants need light and maintenance. A faux plant like a 6-foot faux fiddle leaf fig gives height and balances large textured pieces without extra care.
